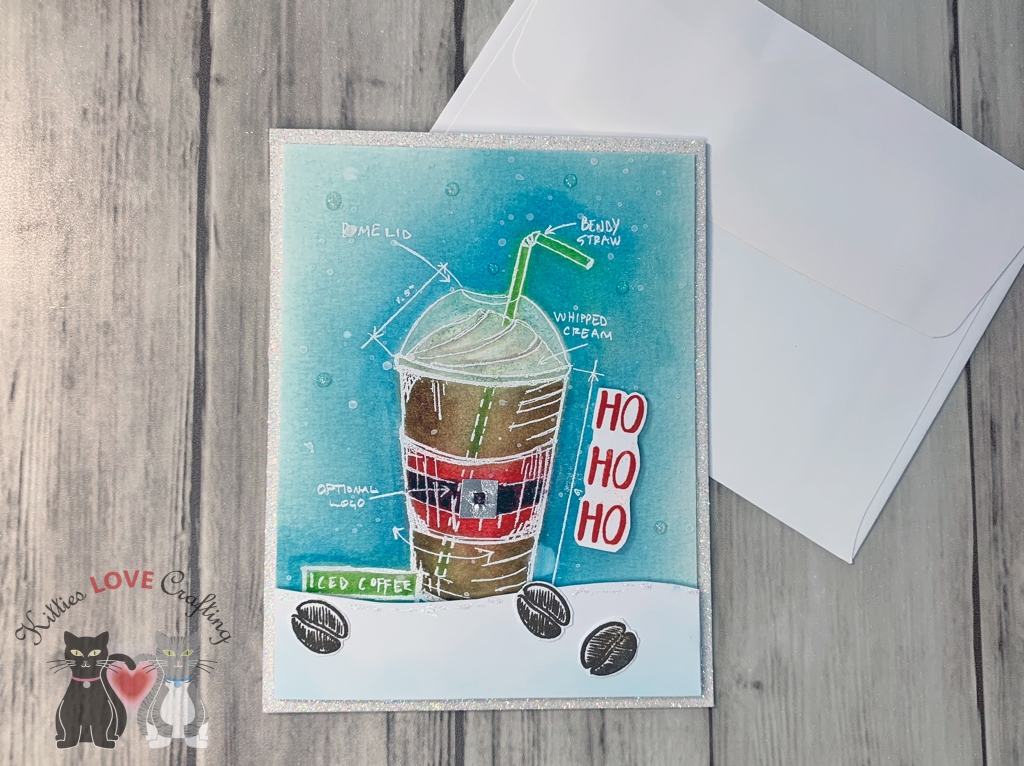
Hello friends. I think it’s time for a fun and cheerful card. In this uncertain and scary times, it’s nice to send others a little cheer in the form of a card. Also the creative outlet relieves stress; it’s a win win. So if you are finding yourself stressed and worried right now, do something fun, make something, draw something, or just talk to someone. Distractions and connections are super important right now.
This cute card features Simon Says Stamp Good Vibes Stampset which is unfortunately no longer available and was released during Simon Says Stamp’s Stamptember release.

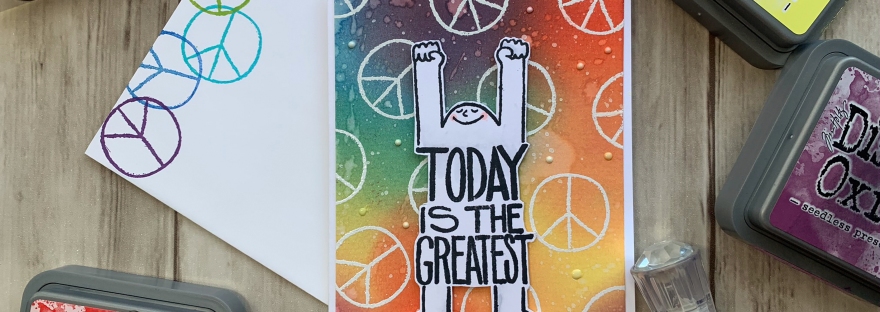
Good Vibes Stampset 
Card front closeup
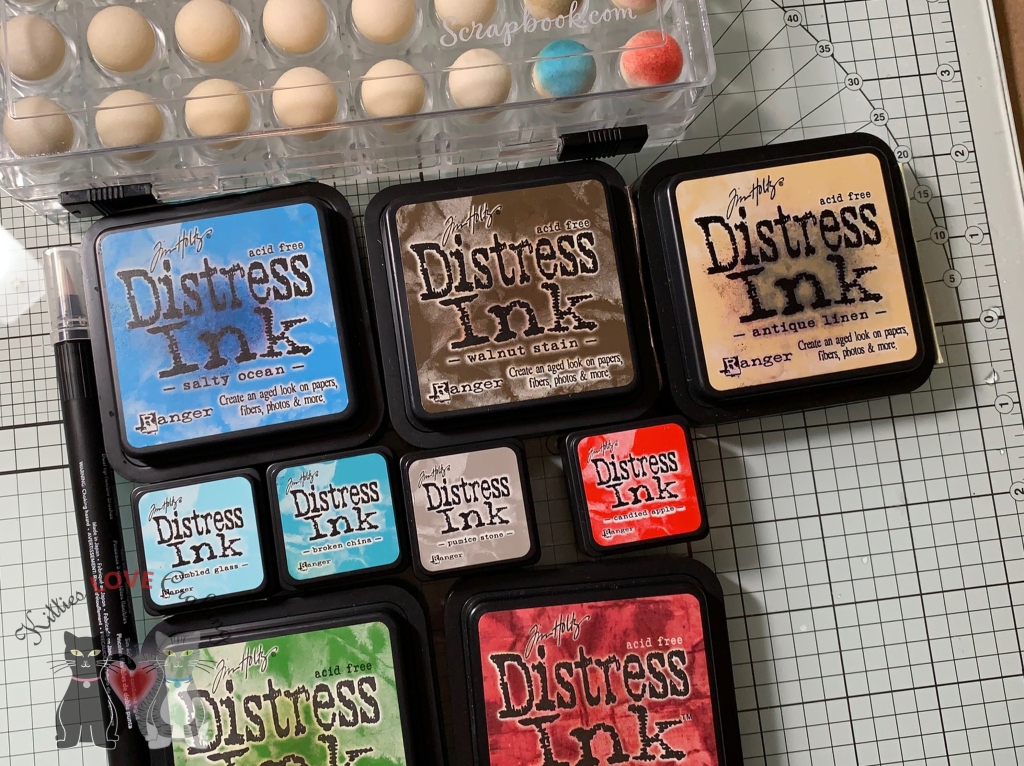
I started by cutting a piece of Neenah 110lb Classic Crest Cardstock 8.5 X 11″ to 5-1/2 x 8-1/2″ and scored at 4-1/4″ for the card base and a piece of Canson Montval Acid-Free Cold Press Watercolor Paper, 140 lb, 18 X 24 in, Natural White to 4 x 5-1/4″ for the card front. Then used Distress Oxide Inks to create a background. I used Candied Apple Tim Holtz Distress Oxides Ink, Squeezed Lemonade Tim Holtz Distress Oxide Ink, Salty Ocean Tim Holtz Distress Oxide Ink, and Seedless Preserves Tim Holtz Distress Oxide Ink. I sprayed some water with the Tim Holtz Distress Sprayer and dried it with some paper towel.
Next, I prepped my card panel with Ranger Ink – Anti-Static Pouch. I stamped the peace sign with all over the background with Versamark Ink and added WOW Opaque Bright White Super Fine Embossing Powder and heat set that with my heat gun. I rounded the bottom corners of the card base and card panel with my We R Memory Keepers – Crop-A-Dile – Corner Chomper Tool and adhered the panel to the card base.
I stamped the cute character with outstretched arms and the greeting “Today Is the Greatest” onto Neenah 110lb Classic Crest Cardstock 8.5 X 11″ with Memento Tuxedo Black Ink. I added a little bit of shadowing and some pink cheeks with copic markers. I fussycut it out and added it to the card panel with some Stampin’ Dimensionals. I finished it off with some Nuvo Crystal Drops in Gloss Simply White.

On the inside of the card, I stamped ” Be Happy” with Memento Tuxedo Black Ink as well as the peace sign with Catherine Pooler Designs Rockin Red Ink, Catherine Pooler Designs Tiara Ink, Catherine Pooler Designs Orange Twist Ink, Catherine Pooler Designs Lime Rickey Ink, Catherine Pooler Designs All That Jazz Ink, Catherine Pooler Designs Suede Shoes Ink, and Catherine Pooler Designs Royal Treatment Ink. And that completes this card.
Dimensions
- Card Base = 5-1/2 x 8-1/2″ and scored at 4-1/4″ Neenah 110lb Classic Crest Cardstock 8.5 X 11″
- Top Panel = 4 x 5-1/4” Montval Acid-Free Cold Press Watercolor Paper, 140 lb, 18 X 24 in, Natural White
 https://linkdeli.com/widget.js?1559654439292
Thanks for reading this post. I hope you enjoyed and I’ve inspired you to give this card a try for yourself. Leave comments or questions below or feel free to email.