Holiday Decor, Holidays 2023, Valentine's Day!

Dollar Store Crafts: Valentine’s Day Floral Arrangement

Hello friends. Valentine’s Day is next month and we all want to make cute decor and gifts, right? Times are tough right now, everything is ridiculously expensive so why not save some money on crafts?!? I made this cute floral decor piece using only Dollar Tree products.

Everything you see in this post except the Fabri-tac glue can be found at Dollar Tree. You can use hot glue in place of the Fabri-tac which can be found at the Dollar Tree for sure! I cannot be trusted with hot glue (second degree burns on fingers are not fun :)) so I won’t be using that!!!

Let me show you how quick and easy this was to make. The supplies you will need are: a candy bucket or tin pail (any small container will work here), 3 pink and 1 red bundle of artificial carnations, floral picks, floral foam, lace ribbon and green floral moss.

I cut the floral foam down with a knife to fit inside the pail. This foam is very soft and easy to trim down. You literally can just shave the edges with a knife. You can glue down the foam to the bottom of the pail if you like. I did not need to because once I added the moss it secured it in place.

Next, I figured out how tall I wanted my flowers and trimmed them using wire cutters. Don’t try to cut these with scissors; it will not work well and you may hurt your hands (ask me how I know?:) ) I seperated out the stems so I could arrange them better. It’s much harder if you leave them in the bundle. I place them into the foam and fluffled them out. You can easily bend the stems so you can spread your flowers out better to create a full arrangement.

Next I inserted the Valentine’s Wooden Glitter Heart Picks. I used 5 but add how many you would like. I find that odd numbered items just tend to be more visually appealing. To cover all the foam and also add more stability, I added some Floral Garden Reindeer Moss inside the pail.

Lastly I glued on some of the Heart Ribbon Lace around the pail.


Supplies

https://linkdeli.com/widget.js?id=f5e8378456858c916708

Thanks for reading this post. I hope I’ve inspired you to give this quick and easy Valentine’s Day floral arrangement a try for yourself. Leave comments or questions below or feel free to email.

Love & Friendship, Valentine's Day, Watercolor techniques

Stretching Your Stamps: Valentine’s Day Cards

Hello friends. I came across these two birthday gift stampsets I have from Lawn Fawn while organizing and thought they would be cute on some Valentine’s Day card. These stamp sets are meant for birthdays but why not try to make Valentine’s Day cards instead. It’s time to challenge myself.

I used the Lawn Fawn, Party Pig, which I received as my birthday gift from Lawn Fawn in 2021 but also decide to use the Party Panda stamp set I received in 2020 as well. I combined them with the Giant Be My Valentine sentiment die to create a lovely focal image. Combining this die and some pattern papers helped me create two very quick cards!

For the first card, I cut a piece of Neenah 110lb Classic Crest Cardstock 8.5 X 11″ to 5-1/2 x 8-1/2″ and scored at 4-1/4″ to create the card base. Then cut another panel of Simple Stories – Sweet Talk Collection – 6 x 8 Papers (had some left over from my SSS Feb 2021 Card Kit – Love You Beary) to 4 x 5-1/4″.

I diecut a piece of Stampin’ Up! Real Red 8-1/2 x 11″ Cardstock with the Lawn Fawn Lacy Heart Stackables which I embossed it using the Crafters Companion Embossalicious Grand Dots Embossing Folder (retired but I linked a similar one).

I diecut the sentiment from Neenah 110lb Classic Crest Cardstock 8.5 X 11″ (3x) using the Lawn Fawn Giant Be My Valentine Die and stacked them.

I stamped the panda image and cupcake from the Lawn Fawn Party Panda mini stampset (2020 birthday gift with purchase) onto Neenah 110lb Classic Crest Cardstock 8.5 X 11″ with Memento Tuxedo Black Ink.

I colored them with Copic markers. Then I used C1 & 0 to add shading to the panda; R81, 83, & 85 for the cupcake, E23 & E29 for the cupcake wrapper, and R17 for the cherry on top of the cupcake. I die cut all the images with the coordinating dies and added some Stampin Dimensionals to the panda before adhering to the card. And added some Pretty Pink Posh Sparkling Clear Mix Cupped Sequins to finish it.

On the inside of the card, I stamped a sentiment the Lawn Fawn Happy Happy Happy add-on Stamps with Stampin’ Up! Real Red Ink.

Dimensions


For the second card, I cut a piece of Neenah 110lb Classic Crest Cardstock 8.5 X 11″ to 5-1/2 x 8-1/2″ and scored at 4-1/4″ to create the card base. Then cut another panel of Simple Stories – Sweet Talk Collection – 6 x 8 Papers (had some left over from my SSS Feb 2021 Card Kit – Love You Beary) to 4 x 5-1/4″.

I diecut a piece of Vellum Cardstock with the Lawn Fawn Lacy Heart Stackables which I embossed it using the Crafters Companion Embossalicious Grand Dots Embossing Folder (retired but I linked a similar one).

I diecut the sentiment from Neenah 110lb Classic Crest Cardstock 8.5 X 11″ (2x) and one from Stampin’ Up! Red Foil 12 x 12 Cardstock (retired) using the Lawn Fawn Giant Be My Valentine Die and stacked them together.

I stamped the pig and gift images from the Lawn Fawn Party Pig mini stampset (2021 birthday gift with purchase) onto Neenah 110lb Classic Crest Cardstock 8.5 X 11″ with Memento Tuxedo Black Ink and colored them with Copic markers. I used RV52, RV55, RV66, C1, C3, C7 & 0 to for the pig; R17 & R27, E29 & E27 for the gift. I die cut all the images with the coordinating dies.

I added some Stampin Dimensionals to the pig before adhering to the card. And added some Pretty Pink Posh Sparkling Clear Mix Cupped Sequins to finish it.

On the inside of the card, I stamped a sentiment the Lawn Fawn Happy Happy Happy add-on Stamps with Stampin’ Up! Real Red Ink.

Dimensions


Supplies

https://linkdeli.com/widget.js?id=f5e8378456858c916708

Thanks for reading this post. I hope you enjoyed and I’ve inspired you to give these cards a try for yourself. Leave comments or questions below or feel free to email.

Love & Friendship, Slimline, Stenciled Background, Valentine's Day, Window Cards

Valentine’s Day Slimline Window Scene Cards

Hi friends. The Lawn Fawn Scent With Love Clear Stamps and Dies is great for scene cards so I decided to make a slimline card. But had so much fun making them I made four instead. 🙂

For these cards, I cut two pieces of Neenah 110lb Classic Crest Cardstock 8.5 X 11″, one piece of Simon Says Stamp Cardstock 100# COTTON CANDY and one of Stampin’ Up! Blushing Bride 8-1/2 x 11″ Cardstock to 7 x 8-1/2″ and scored at 3-1/2″ to create four card bases. I die cut the scallop slimline panel from two different pattern papers from my stash and two from Neenah 110lb Classic Crest Cardstock 8.5 X 11″, using the Catherine Pooler Essentials Slimline Die.

On the white panels, I stenciled hearts using the Simon Says Stamp Stencil Tumbling Hearts Stencil with Tim Holtz Distress Kitsch Flamingo Distress Oxide Ink and on the other panel, clouds using My Favorite Things Cloud Stencil and Mini Cloud Edges Mix-ables Stencil with Tim Holtz Broken China Distress Oxide Ink. I die cut out the windows using the Catherine Pooler Essentials Slimline Die. These dies make it so easy to make a 3 window slimline card.

I added a piece of Neenah 110lb Classic Crest Cardstock 8.5 X 11″ to the back of the pattern paper backgrounds and a piece of vellum behind the stenciled panels, cut to 3-1/2 x 8-1/8″. Before adhering stenciled backgrounds to the card, I added the negative pieces of the window to the card. I stenciled some tiny hearts onto the background of the white windows with Hero Arts Heart Confetti Fancy Die (I die cut acetate to create the stencil) and Catherine Pooler Be Mine Ink.

I stamped a bunch of images from the Lawn Fawn SCENT WITH LOVE Clear Stamps and Dies and the Lawn Fawn SCENT WITH LOVE ADD-ON Clear Stamps and Dies onto some Neenah 110lb Classic Crest Cardstock 8.5 X 11″ with Memento Tuxedo Black Ink.

The images were colored with Copic colors. I used R14, 27 & 46 for all the red items; R81, 83, & 85 for all the pink items; YG25 & 17 for all the greenery; C1, 5, & 7 and 0 for the skunks; and E74 & 79 for all the chocolate items. I die cut all the images with the coordinating dies.

I finished them all by adding some Tonic Fresh Snowfall Nuvo Glitter Accents.

On the inside of the pink cards, I cut a piece of Neenah 110lb Classic Crest Cardstock to 3 x 8″ and stamped a sentiment and the three hearts from the Lawn Fawn SCENT WITH LOVE ADD-ON Clear Stamps and Dies with Memento Tuxedo Black Ink. For the white cards, I just stamped the image directly inside the cards.

Dimensions


Supplies

https://linkdeli.com/widget.js?id=f5e8378456858c916708

Thanks for reading this post. I hope you enjoyed and I’ve inspired you to give these cards a try for yourself. Leave comments or questions below or feel free to email.

Love & Friendship, Valentine's Day, Watercolor techniques

Valentine’s Day Card featuring Lawn Fawn Scent With Love

Happy New Year friends. Hope you all had some quality safe time with family and friends and are ready for a new and hopefully better year!

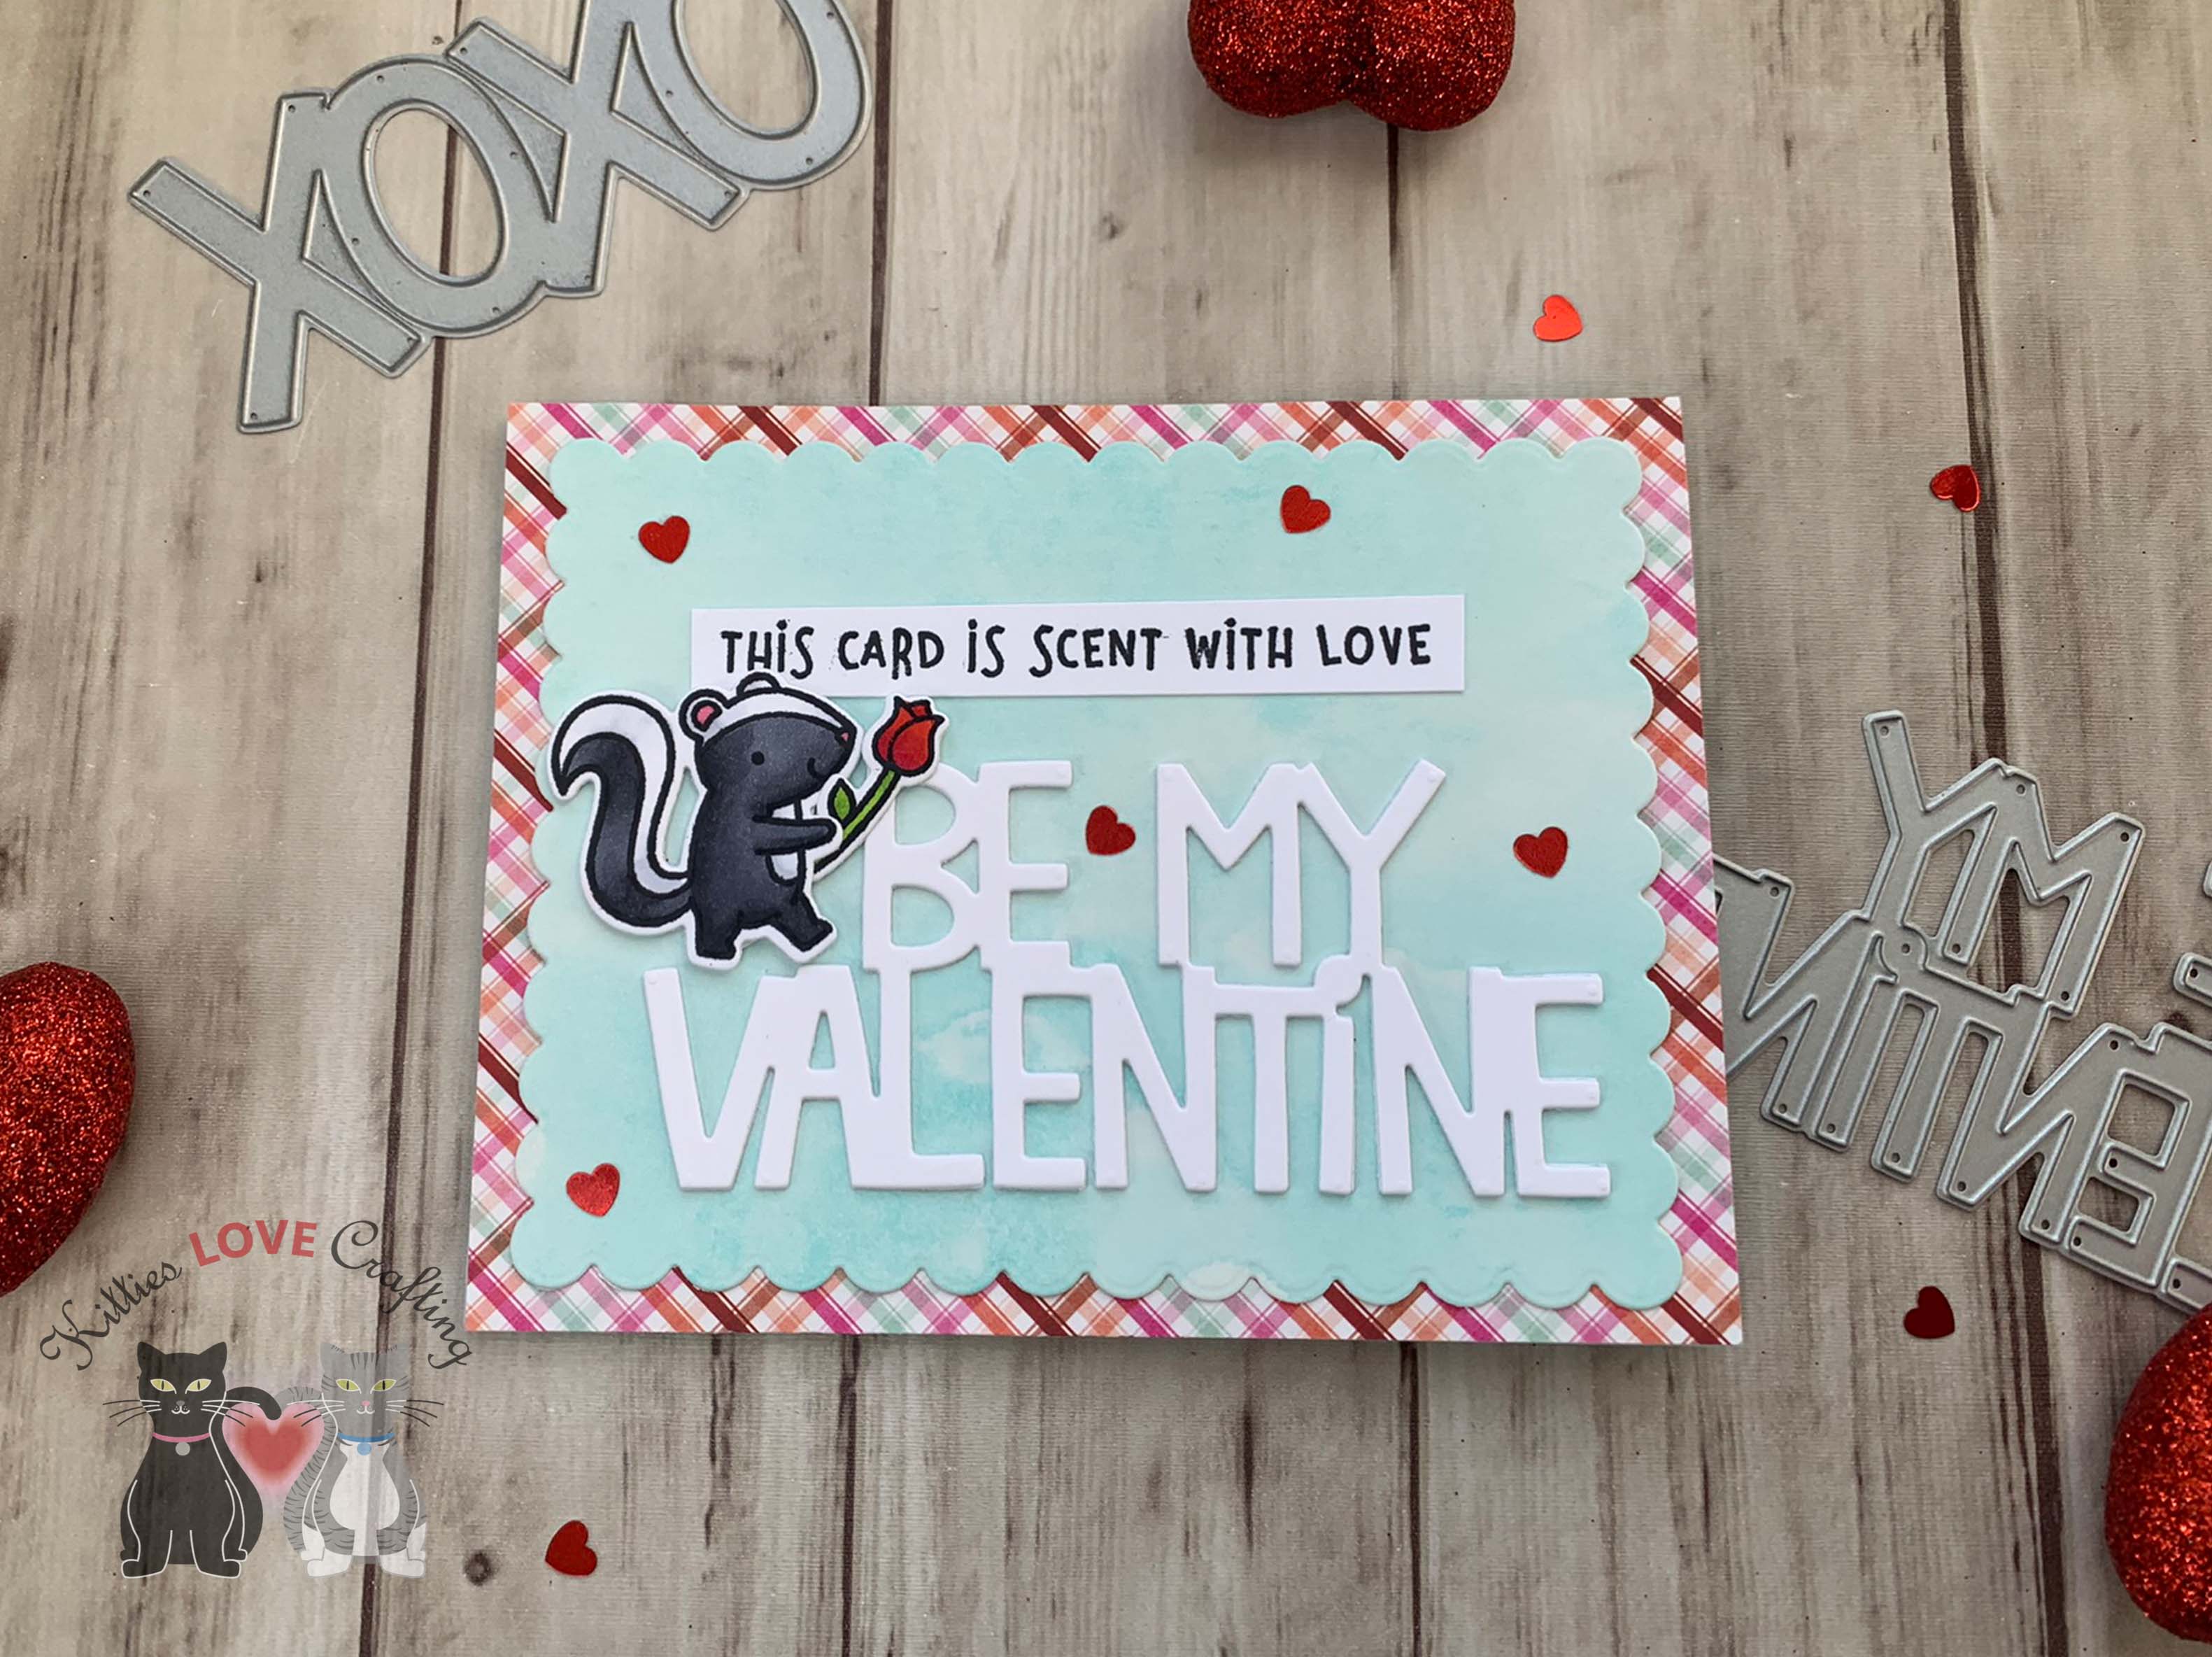
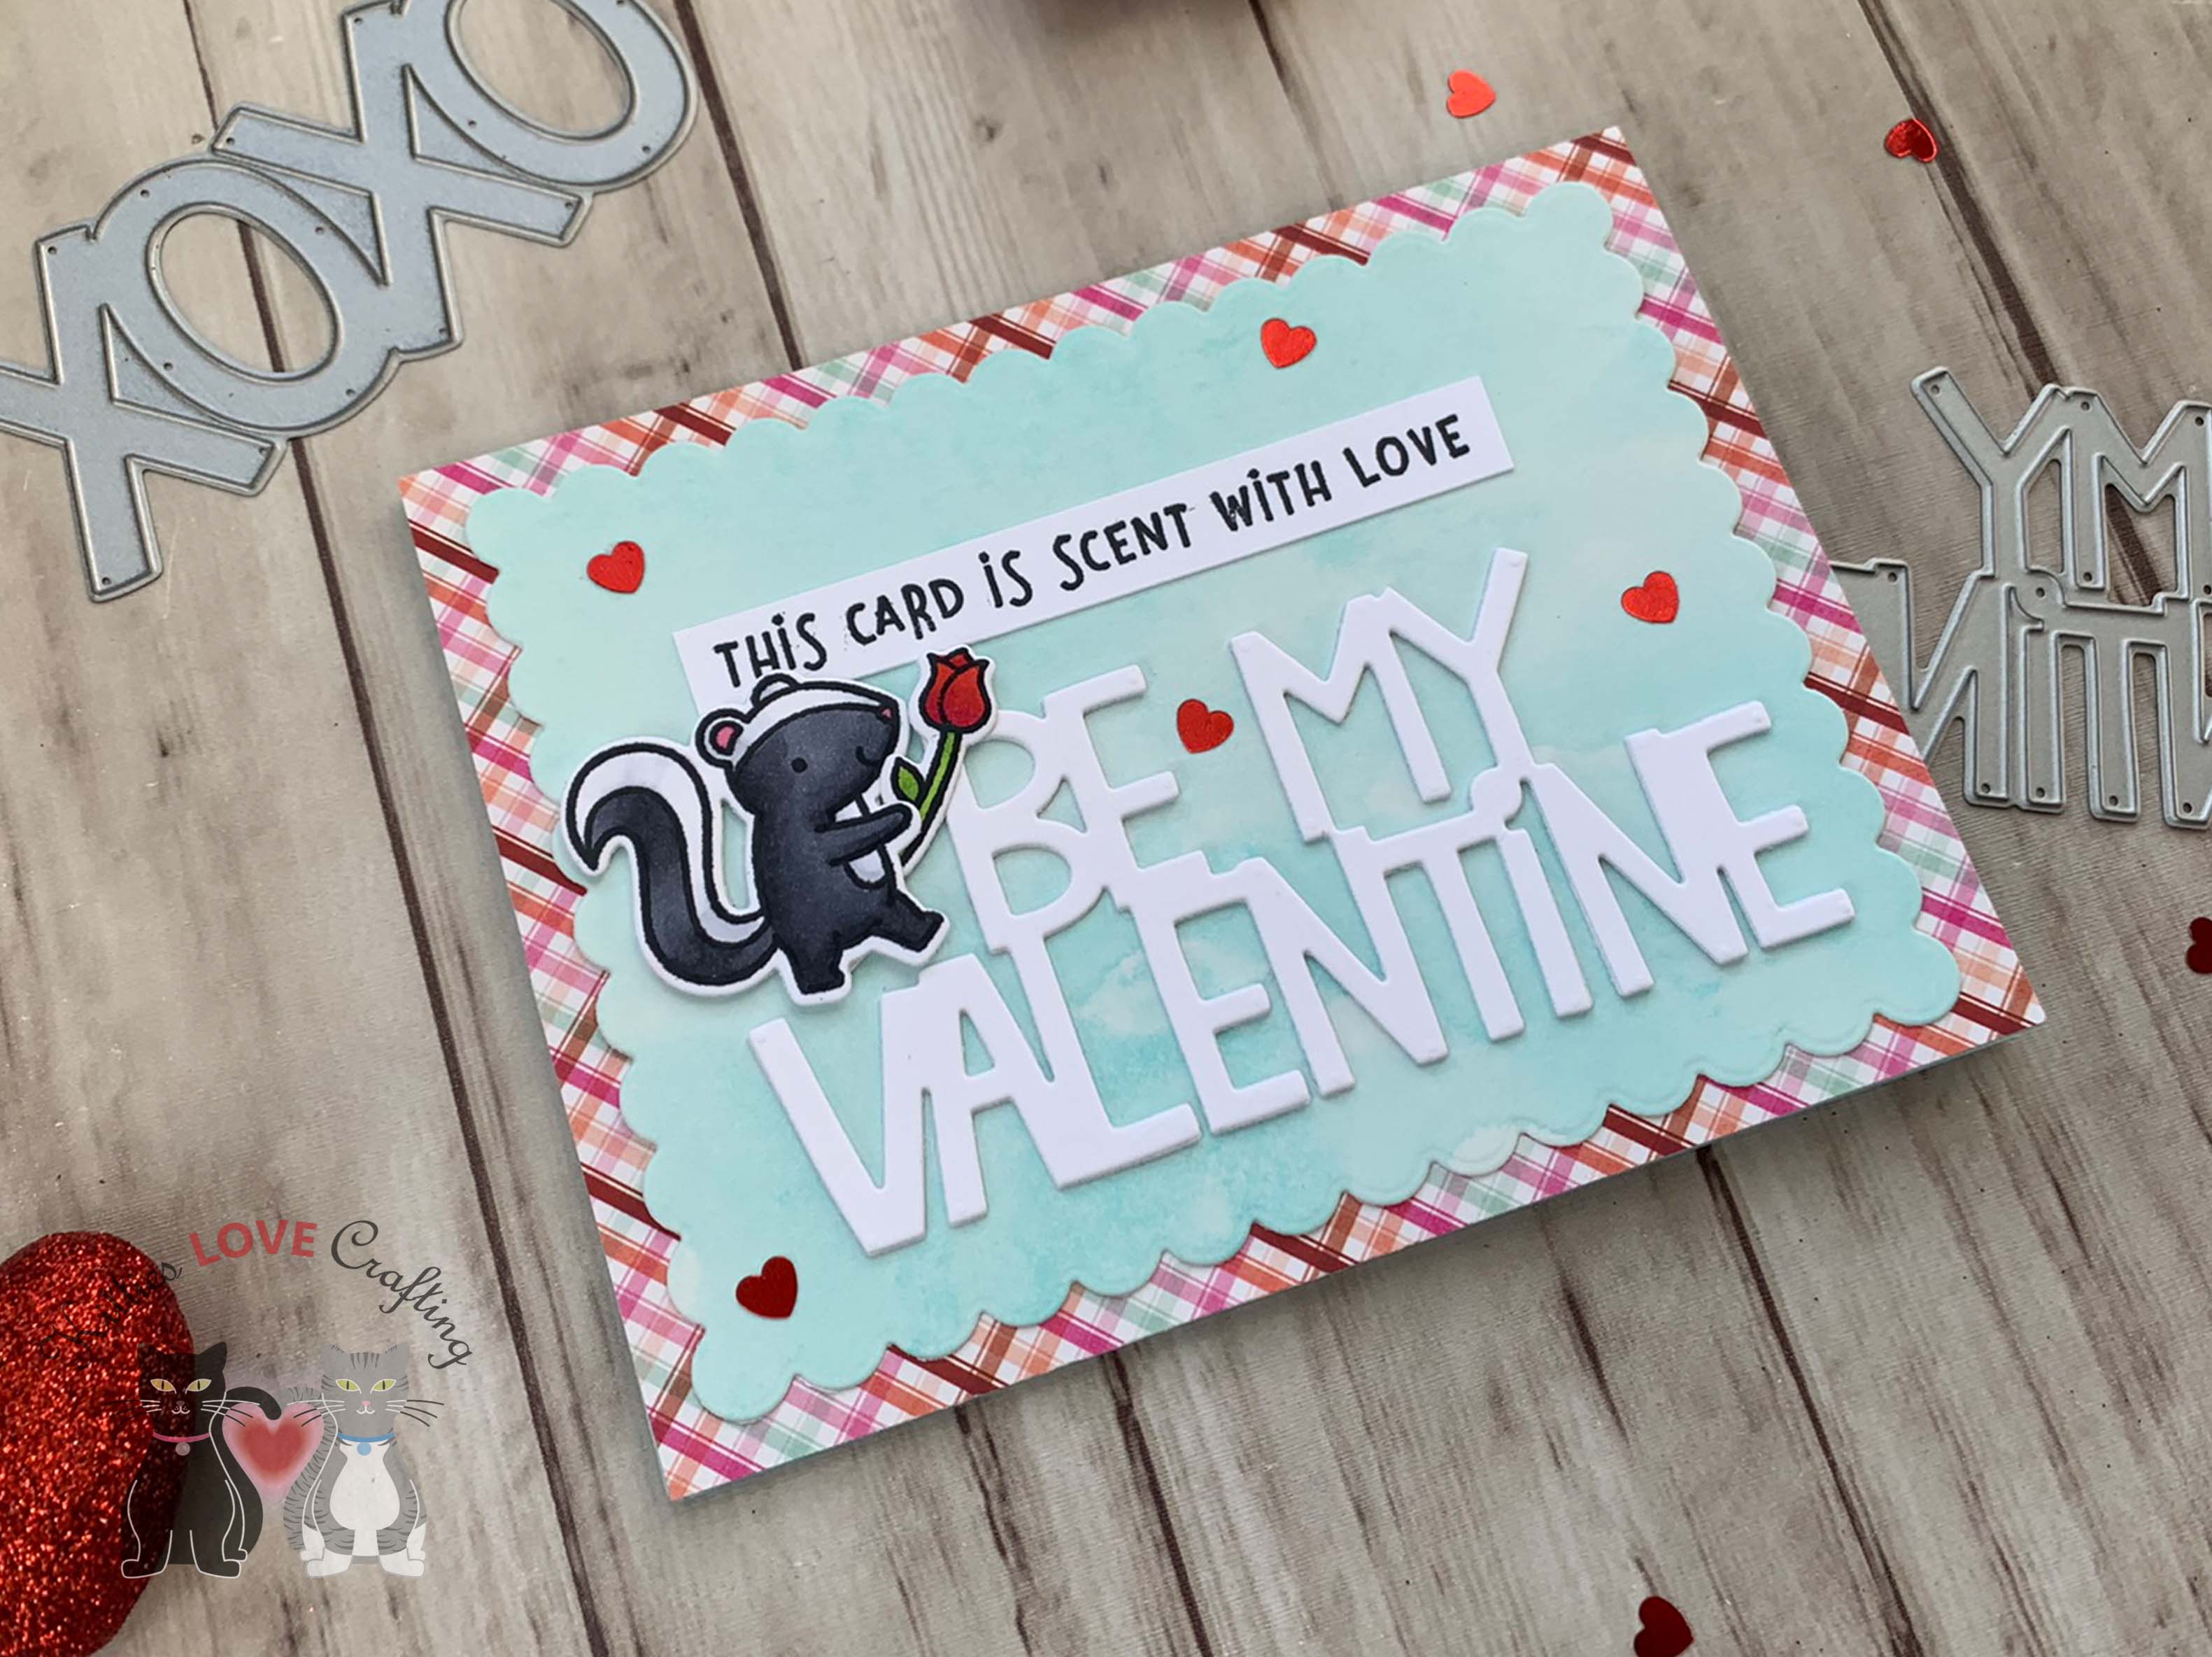
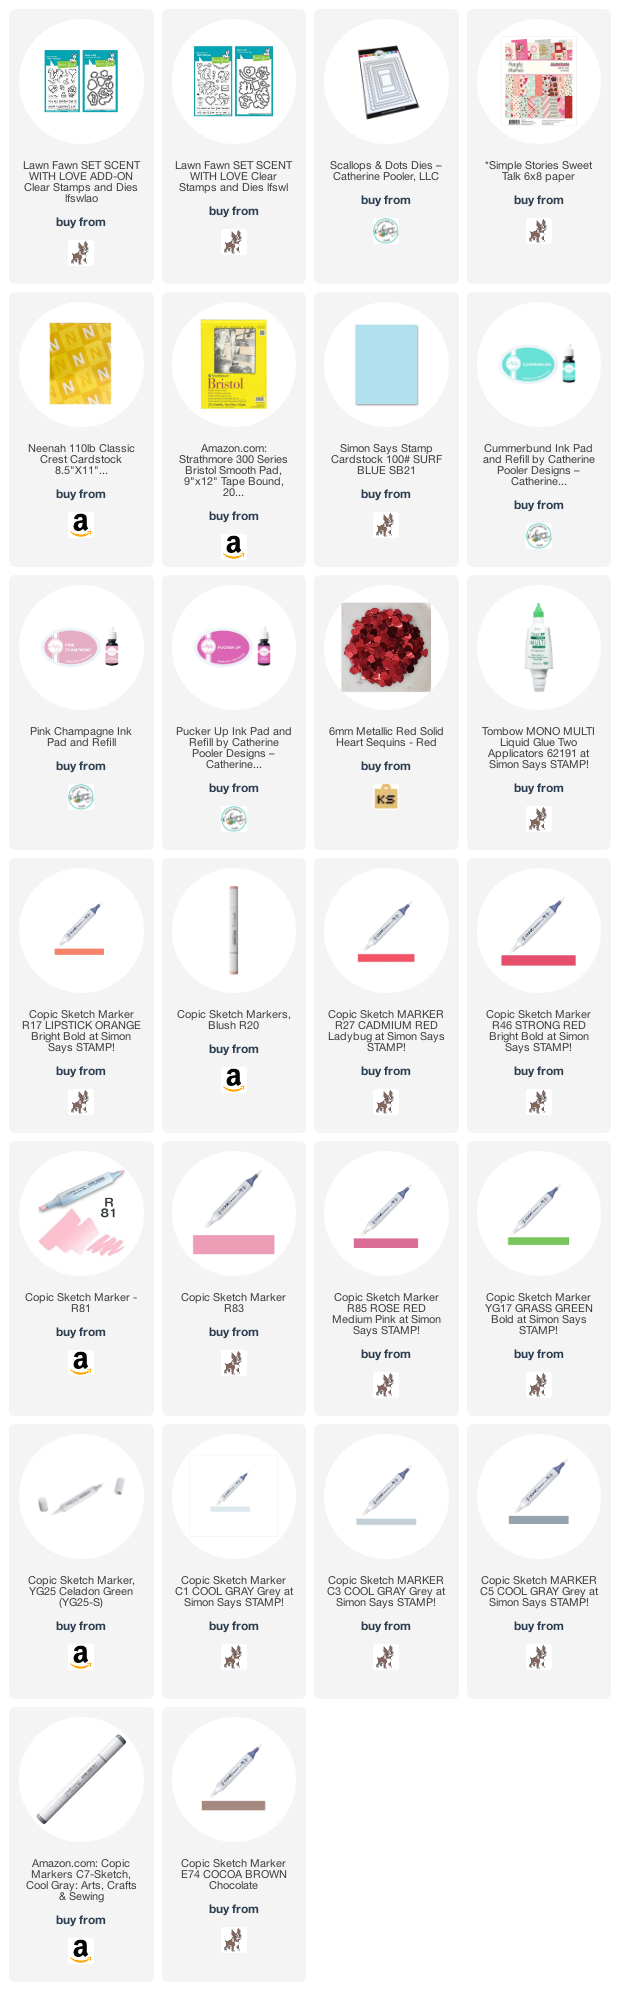
For my first cards of the new year I am making some cute Valentine’s cards using Lawn Fawn SCENT WITH LOVE Clear Stamps and Dies and Giant XOXO and Giant Be My Valentine combined with some simple watercolor/smooshed backgrounds. I haven’t done any watercoloring techniques in a while and wanted to play with this technique again. It’s great for quick backgrounds!

For the first card, I cut a piece of Simon Says Stamp 100lb Surf Blue 8-1/2 x 11″ Card Stock to 5-1/2 x 8-1/2″ and scored at 4-1/4″ to create the card base. Then cut another panel of Simple Stories – Sweet Talk Collection – 6 x 8 Papers (had some left over from my SSS Feb 2021 Card Kit – Love You Beary) to the same size as the card base (4-1/4 x 5-1/2″).

I took a piece of Strathmore 300 Series Bristol Smooth Paper, measuring 4-1/4 x 5-1/2″ and Catherine Pooler Cummerbund Ink to create the background. I used the smoosh technique (you put ink on an acrylic block or glass surface, add ink and lots of water and press your paper doen onto it) which is super easy and fun. Then I had to wait for it to dry….(always hard for me since I’m super impatient. LOL). Once dry, I used the Catherine Pooler Scallops & Dots Dies (I used the largest scallop) to cut it out. Always make sure the paper is completely dry before die cutting or it will tear the paper!

While waiting for the background to dry, I stamped a bunch of images from the Lawn Fawn SCENT WITH LOVE Clear Stamps and Dies and the Lawn Fawn SCENT WITH LOVE ADD-ON Clear Stamps and Dies onto some Neenah 110lb Classic Crest Cardstock 8.5 X 11″ with Memento Tuxedo Black Ink.

I colored the images with Copic colors. I used R17, 27 & 46 for all the red items; R81, 83, & 85 for all the pink items; YG25 & 17 for all the greenery; C1, 3, 5, & 7 for the skunks; and E74 & 79 for all the chocolate items. I die cut all the images with the coordinating dies.

I diecut the sentiment from Neenah 110lb Classic Crest Cardstock 8.5 X 11″ using the Lawn Fawn GIANT BE MY VALENTINE. I cut two of them and stacked them on top of each other. I stamped the rest of the sentiment from Lawn Fawn SCENT WITH LOVE Clear Stamps and Dies with Memento Tuxedo Black Ink and cut it to 1/2 x 3-1/2″. I chose a little skunk and the rose to add to the front of the card.

I finished it by adding some Kat Scrappiness 6mm Metallic Red Solid Heart Sequins.

On the inside of the card, I cut a piece of Neenah 110lb Classic Crest Cardstock 8.5 X 11″ to 4 x 5-1/4″ and adhered it to the inside of the card and stamped a sentiment and the heart balloon from the Lawn Fawn SCENT WITH LOVE ADD-ON Clear Stamps and Dies with Memento Tuxedo Black Ink.

Dimensions


For the second card, I cut a piece of Neenah 110lb Classic Crest Cardstock 8.5 X 11″ to 5-1/2 x 8-1/2″ and scored at 4-1/4″ to create the card base. Then again cut another panel of Simple Stories – Sweet Talk Collection – 6 x 8 Papers to 4-1/4 x 5-1/2″.

For the background again I used Strathmore 300 Series Bristol Smooth Paper, measuring 4-1/4 x 5-1/2″ and Catherine Pooler Pink Champagne and Pucker Up Inks to create the background, using the smoosh technique again. Once dry, I used the Catherine Pooler Scallops & Dots Dies (I used the largest scallop) to cut it out.

For this card, I diecut the sentiment from Neenah 110lb Classic Crest Cardstock 8.5 X 11″ using the Lawn Fawn Giant XOXO. Again cut two of them and stacked them. I stamped the rest of the sentiment from Lawn Fawn SCENT WITH LOVE Clear Stamps and Dies with Memento Tuxedo Black Ink and cut it to 1/2 x 3-1/2″. I chose a two little skunks, the envelope, and heart balloon images from the Lawn Fawn SCENT WITH LOVE Clear Stamps and Dies and Lawn Fawn SCENT WITH LOVE ADD-ON Clear Stamps and Dies.

I finished it by adding some Metallic Bright Gold Nuvo Crystal Drops.

On the inside of the card, I stamped a sentiment and the heart scent trail from the Lawn Fawn SCENT WITH LOVE Clear Stamps and Dies and the Lawn Fawn SCENT WITH LOVE ADD-ON Clear Stamps and Dies with Memento Tuxedo Black Ink.

Dimensions


Supplies

https://linkdeli.com/widget.js?id=f5e8378456858c916708

Thanks for reading this post. I hope you enjoyed and I’ve inspired you to give these cards a try for yourself. Leave comments or questions below or feel free to email.

Love & Friendship, Valentine's Day

Big Pickup Tailgate Valentine’s Day Card featuring Honey Bee Stamps Tailgate Alphabet Dies

Hi friends. Here’s another cute Valentine’s Day Card using the Honey Bee Stamps Big Pickup Tailgate Stampset and Honey Bee Stamps Tailgate Alphabet Dies.

I started by cutting a piece of Stampin’ Up! Real Red 8.5 X 11″ Cardstock to 6-1/2 x 10″ and scored at 5″ to create a card base and a piece of pattern paper from my stash to 5 x 6″ which I adhered to the card base. I stamped the truck from the Honey Bee Stamps Big Pickup Tailgate Stampset onto Neenah 110lb Classic Crest Cardstock 8.5 X 11″ with Memento Tuxedo Black Ink as well as two extra truck bed images.

I colored the images with Copic Markers and die cut it with the coordinating dies. I used N1, N2, N5, N7 and 0 (for the cab); N1, N2, and N5 (for the truck bed); N2, N5, and N7 (for the bumper and underside); Y11, and Y18 (for the headlights) and BG000 and 0 (for the windows); R81 and R83 (license plate); C7, C9 and 100 (for the wheels). I adhered the truck to the card, adding 3M Foam Tape to the extra pieces of the truck bed.

I diecut the sentiment from Stampin’ Up! Real Red 8.5 X 11″ Cardstock with the Honey Bee Stamps Tailgate Alphabet Dies and adhered it to the card. To finish off the card, I added 3 red hearts, White Pin Stripe Love From Lizi Peel-offs, White Nuvo Gloss Drops and Glossy Accents to the headlights.

On the inside of the card, I cut a piece of Neenah 110lb Classic Crest Cardstock 8.5 X 11″ to 4-3/4 x 6-3/8″ and adhered it to the card. I stamped a sentiment from Honey Bee Stamps Big Pickup Cab Stampset with Memento Tuxedo Black Ink and added another red heart.

Dimensions


Supplies

https://linkdeli.com/widget.js?id=f5e8378456858c916708

Thanks for reading this post. I hope you enjoyed and I’ve inspired you to give this card a try for yourself. Leave comments or questions below or feel free to email me.

Holidays 2021, Love & Friendship, Valentine's Day

Truck Shaped Valentine’s Day Card featuring Honey Bee Stamps

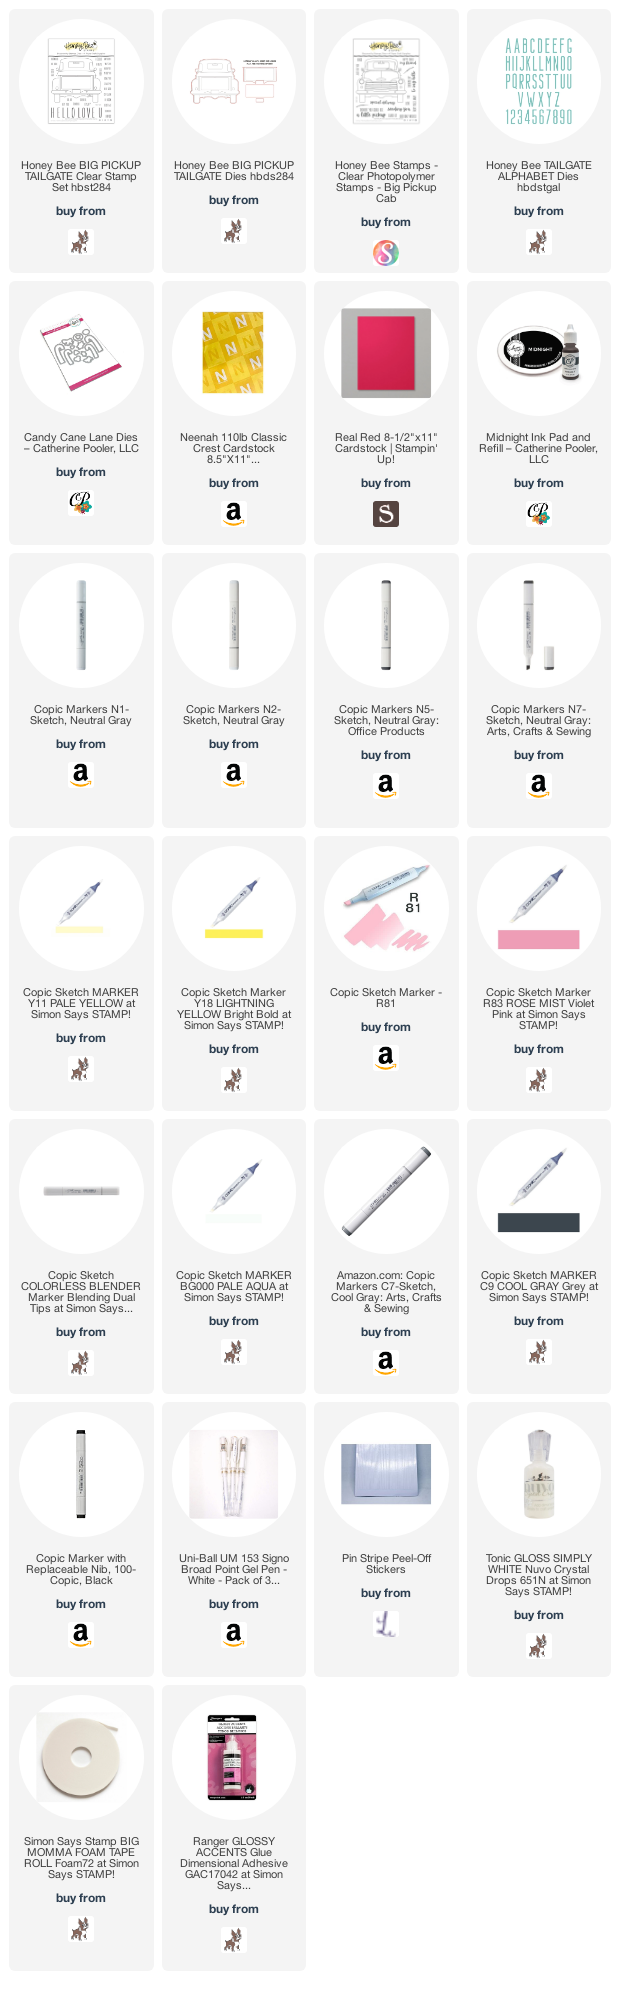
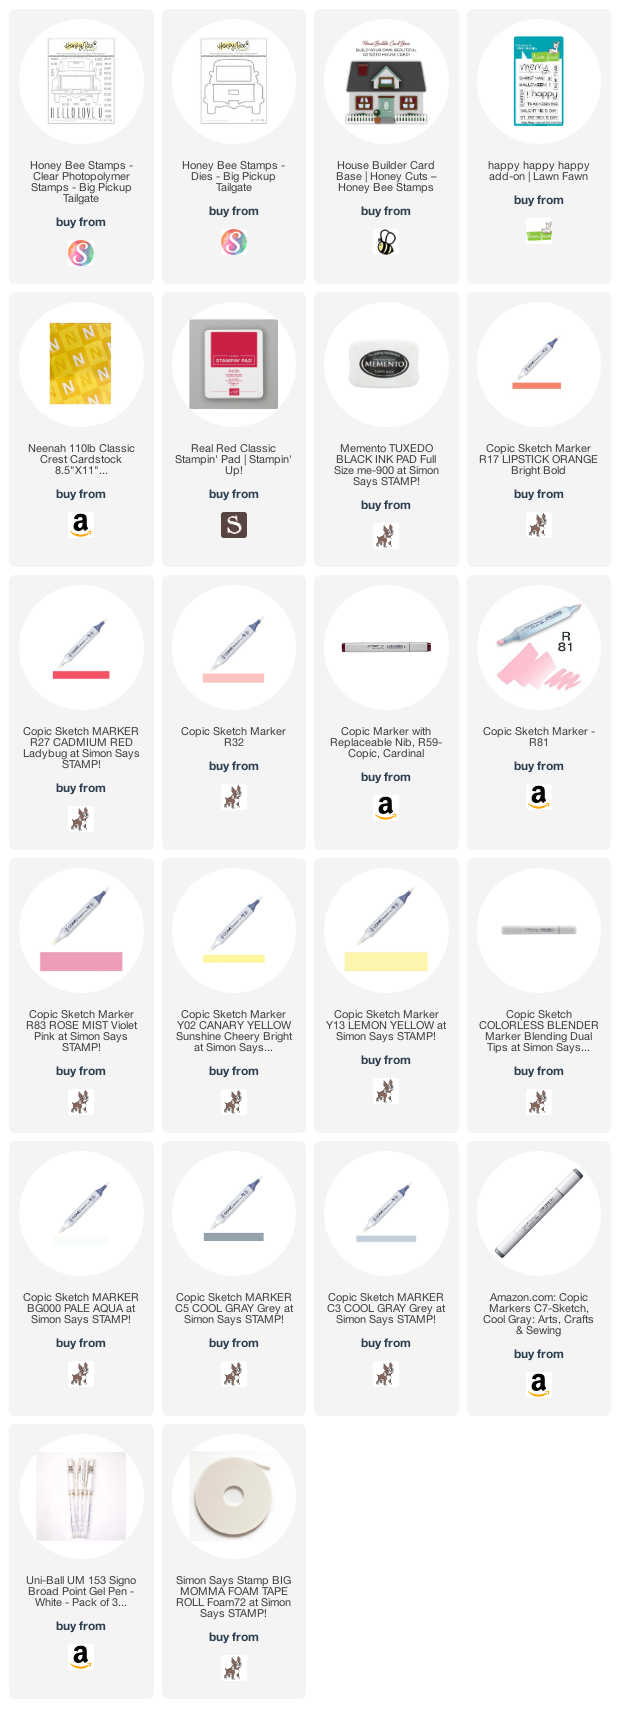
Hi friends. This cute little pickup truck is from Honey Bee Stamps Big Pickup Tailgate Stampset. And it is adorable! I love this stampset. I loved it so much I also purchased the Big Pickup Cab Stampset and Dies as well as the Tailgate Alphabet Dies!!! This stamp set alone gives you lots of options to make a variety of cards. I made mine into a truck shaped card which is so much fun!

I started by stamping the truck image from Honey Bee Stamps Big Tailgate Stampset with Memento Tuxedo Black Ink onto Neenah 110lb Classic Crest Cardstock 8.5 X 11″ and die cutting it with the coordinating die set. I also cut a second truck (no stamping) for the back of the card. I stamped ‘Hot Rod’ on the license plate and stamped a second version of the truck bed and a sentiment on it and used the die to cut just the back piece. This dieset allows you to cut three different components of the truck bed which allows for so many more fun options.

I colored the truck using Copic Markers. I used R17 + R27 + R59 (for the truck bed); R17 + R23 (for the back of the bed truck with sentiment); Y02 + Y13 (for the headlights); BG000 + 0 blender for the windows; C3 + C5 + C7 (for the metal components); and R81 + R83 (for the license plate). I adhered the sentiment piece using 3M Foam Tape. To finish it off, I added some highlights using a Uni-Ball Signo Broad Point White Gel Pen.

On the inside of the card, I stamped a sentiment from Lawn Fawn Happy Happy Happy Add-On Stampset with Stampin’ Up! Real Red Ink.


Supplies

https://linkdeli.com/widget.js?id=f5e8378456858c916708

Thanks for reading this post. I hope you enjoyed and I’ve inspired you to give this card a try for yourself. Leave comments or questions below or feel free to email me.

Love & Friendship, Slimline

Using Only Dies to Make A Slimline Valentine’s Day Card

Hi friends. Need a quick and easy card for Valentine’s Day??? This card uses only dies and paper and came together very quickly. Here’s how it came together.

I started by cutting a piece of Neenah 110lb Classic Crest Cardstock 8.5 X 11″ to 7 x 8-1/2″ and scored a at 3-1/2″. I used the Honey Bee Stamps Slimline Thin Frames Dies and Stampin’ Up!’s Poppy Parade 8-1/2 x 11″ Cardstock and a pink cardstock from Hunkydory Matt-tastic Adorable Scorable Core Colourways Collection to cut out the frames. This die is cool because it cuts all 14 frames at the same time so I just had to run it through two times. I adhered used the five largest frames to the card base, alternating colors. I cut a piece of the Neenah 110lb Classic Crest Cardstock 8.5 X 11″ to 2-1/4 x 7-1/4 and embossed it with the Craftwell Delicate Dots 8.5 X 11″ Embossing Folder, and adhered to the front of the card.

For my sentiment I diecut the word ‘LOVE’ from Simon Says Stamp 6 x 6 Red Glitter Cardstock using the Honey Bee Bee Bold Alphabet Dies as well as from Neenah 110lb Classic Crest Cardstock 8.5 X 11″ two times and adhered those stacked to the card. To finish it off, I added two small hearts which I cut out using a heart punch from Stampin’ Up!’s Poppy Parade 8-1/2 x 11″ Cardstock.

On the inside of the card, I stamped a sentiment from Lawn Fawn Happy Happy Happy Add-On Stampset with Stampin’ Up! Poppy Parade Ink and added another punched heart.

Dimensions


Supplies

https://linkdeli.com/widget.js?id=f5e8378456858c916708

Thanks for reading this post. I hope you enjoyed and I’ve inspired you to give this card a try for yourself. Leave comments or questions below or feel free to email me.

Love & Friendship, Valentine's Day

Quick & Easy Valentine’s Day Shaker Card featuring Simon Says Stamp February 2020 Card Kit

This Valentine’s Day shaker card came together quickly with the help of the Simon Says Stamp February Card Kit. This kit includes:

While the kit is no longer available the individual items are available for purchase separately. The stampset is great for all occasions; there are several sentiments for love, thank yous and birthdays.

Card Front

I began by cutting the 8.5×11 inch Simon Says Stamp Exclusive Schoolhouse Red Cardstock to 5-1/2 x 8-1/2″ and scored at 4-1/4″ to create the card base and a panel of the Polkadoodles Timeless Rose 6×6 Patterned Paper collection to 4 x 5-1/4”. I diecut the 3 windows using the Simon Says Stamp Exclusive Trio Window wafer die and adhered the Square Shaker Trio Pouch from My Favorite Things behind the panel using the 0.125 inch Scor-Tape that came in the kit.

I stamped the ‘big hugs’ sentiment from the Simon Says Stamp Exclusive 6×8 Inch Window Frames clear stamp set onto a piece of Neenah 110lb Classic Crest Cardstock 8.5 X 11″, using Catherine Pooler Designs Rockin Red Ink. I added some Buttons Galore and More SPRINKLETZ SWEETHEARTS Embellishments to the the top and bottom of the 3 shakers and adhered the sentiment panel and two other white panels behind the shaker windows. I then adhered the front panel onto the card base.

I chose a lighter pattern paper from the Polkadoodles Timeless Rose 6×6 Patterned Paper collection and stamped the hearts border using Versamark Ink and Wow Embossing Powder Bright White Super Fine. I fussycut the hearts border out and adhered it to the card around the windows. I finished it off by adding some of the confetti hearts from Buttons Galore and More SPRINKLETZ SWEETHEARTS Embellishments.

Card Inside

On the inside of the card, I cut a piece of Neenah 110lb Classic Crest Cardstock 8.5 X 11″ to 4 x 5-1/4” and adhered a strip of the same hearts pattern paper I used on the front of the card, measuring 3/4 x 4” to the bottom of the panel. Then adhered it inside the card. I stamped a few hearts from the Simon Says Stamp Exclusive 6×8 Inch Window Frames clear stamp set using Catherine Pooler Designs Rockin Red Ink. And that completes the card.

Dimensions

https://linkdeli.com/widget.js?1559654439292

Thanks for reading this post. I hope you enjoyed and I’ve inspired you to give this card a try for yourself. Leave comments or questions below or feel free to email.

Holidays 2020, Love & Friendship, Valentine's Day, Valentines Day

Cute Valentine’s Day Card Featuring Waffle Flower Stamps

Hello friends. This cute little card features musical bugs from the Waffle Flower Rock On Stampset as well as Simon Says Stamp Grid Play Alphas Set (no longer available) and cute Valentine’s Day pattern paper (Pebbles Forever My Always 6 x 6 Paper). If you haven’t tried the crafty parcel from Simon, you should give it a try once. I received lots of unexpected supplies I wouldn’t normally purchase for myself but was happy to try.

Front view

For this card I began by cutting a piece of Stampin’ Up! Real Red 8 1/2 x 11” Cardstock to 5-1/2 x 8-1/2″and scored at 4-1/4″. Then cut a piece of the hearts pattern paper (from Valentine’s Day paper included in the Crafty Parcel) to 3-5/8H x 4”W (left side) and 2”H x 4”W (right side), creating a diagonal cut and grid pattern paper (from the same paper pad) to 1-7/16 x 4” (left side) and 3-5/16 x 4” (right side) and adhered them to the card panel using Tombow Mono Multi Liquid Glue. Then added some Love From Lizi Red Glitter Peel-offs where the two pieces meet.

I stamped 3 of the musical bugs from the Waffle Flower Rock On Stampset onto Neenah 110lb Classic Crest Cardstock 8.5 X 11″ with Memento Tuxedo Black Ink. I colored them using COPIC markers. I used the following colors:

  • Bugs = C3 and C7
  • Accordian = E000 and E40; E37 and E29
  • Wings = BG000 and Blender 0
  • Horn = Y13 and Y18
  • Drum = R17 and R27; R81 and R85

I fussycut the images out and then moved onto the sentiment. I stamped the letters L-O-V-E from the Simon Says Stamp Grid Play Alphas Set (no longer available) onto Neenah 110lb Classic Crest Cardstock 8.5 X 11″ with Catherine Pooler Rockin’ Red Ink and fussycut the letters. Then I stamped “you are my #1 pick” from Waffle Flower Rock On Stampset onto a piece of Simon Says Stamp Card Stock 100# BLACK using Versamark Ink and White Embossing Powder. I cut it down to 1/2 x 2″.

Closeup

I adhered the little bugs onto the card using Tombow Mono Multi Liquid Glue for the middle one and Stampin’ Dimensionals for the two others. I adhered the LOVE sentiment towards the top of the card using 3M Foam Tape and the sentiment strip directly to the card using Tombow Mono Multi Liquid Glue. I finished it off by adding some of the musical notes from the Waffle Flower Rock On Stampset with Memento Tuxedo Black Ink.

On the inside of the card I cut a piece of Neenah 80lb Classic Crest Cardstock 8.5 X 11″ to 4 x 5-1/4” and added a strip of the hearts pattern paper, measuring 3/4 x 4-1/4″, to the bottom of the panel and adhered that panel to the inside of the card. I stamped the “Happy Valentine’s Day” sentiment from the How you bean? conversation heart add-on and some little hearts from the Waffle Flower Rock On Stampset using Catherine Pooler Rockin’ Red Ink as well as some music notes from the same stampset. And that completes the card.

Inside

Dimensions

https://linkdeli.com/widget.js?1559654439292

Thanks for reading this post, hope you enjoyed and I’ve inspired you to give this card a try. Leave comments or questions below or feel free to email.

Holidays 2020, Love & Friendship, Valentine's Day

Use What You Have: A Valentine’s Day Card

Hello friends. For 2020, I want to try to be aware of the supplies I have in my stash and use them. I find that I have a lot of stamps that I purchase for a season or holiday or that comes in a kit and I use it once. And that’s just wasteful! Give your craft supplies some extra love this year!

For this card I featured Simon Says Stamp I Chews You Stampset. It’s a 6 x 8 stampset with tons of cute images and sentiments. It was included in the Simon Says Stamp Stamptember 2018 I Chews You Limited Edition card kit (no longer available). I haven’t had too much opportunity to use it since I bought it, so it was time. And the food characters are friggin’ adorable so I just had to, you know what I mean?!? Food brings people joy and love so a card with cute food on it is just perfect for Valentine’s Day, don’t you think?

Ok, so I started by cutting a piece of Stampin’ Up! Real Red 8 1/2 x 11” Cardstock to 5-1/2 x 8-1/2″and scored at 4-1/4″ for the card base, a piece of Valentine’s Day pattern paper (this came in the Crafty Parcel I purchased from Simon Says Stamp) to 4 x 5-1/4”, and a piece of Montval Acid Free Coldpress Watercolor Paper to 3-3/4 x 5”. Then, I used Ranger Tim Holtz Picked Raspberry Distress Crayon and my waterbrush (any brush will do) and created a background. I applied a few layers, letting each layer dry (use a heat gun if you are inpatient like me), until I got the color I wanted. It was my first time using the Distress Crayons and I was not expecting to like them but they are actually pretty cool and work well.

While that panel dried, I stamped a bunch of the food characters from the Simon Says Stamp I Chews You Stampset onto Neenah 110lb Classic Crest Cardstock 8.5 X 11″ with Memento Tuxedo Black Ink. It was so hard to choose which ones too use. I love them all soo much!!! I colored them with COPIC markers. I used Y00 and Y13 for the pizza crust, E40, E53 and YR09 for the top of the pizza, and YR09 for the pepperoni and G99 for the peppers. I used E53 and E57 for the cinnabun and pretzel; R17 and R29 for the gumball machine, BG00 and 0 for the glass on it, C1, C5, and C7 for the metal parts, and R81, R83, R17, R29, C00 and 0 for the gumballs; G43 and G99 for the pickle; Y13, Y15, and Y18 for the taco shell, G42 and G99 for the lettuce and YR09 and R17 for the tomato. And BG000 and BG01 for the cupcake wrapper, R81, R83, and R85 for the cupcake and R29 and G43 for the sprinkles.

Once the watercolor panel was dry, I used Wendy Vecchi WHITE Embossing Paste and American Crafts Heidi Swapp Stencil 6 X6 Polka Dot and applied it in some places on the panel. Then I sprinkled Ruby Red Martha Stewart Glitter on top of it. Once the paste was all dry I shook off the excess glitter. Unfortunately, most of the glitter shook off so I rubbed some Ranger Tim Holtz Picked Raspberry Distress Crayon to the raised areas.

I adhered the hearts pattern paper to the card base and the watercolor panel to that paper. Then proceeded to fussycut the images and adhered them to the bottom of the card using Tombow Mono Multi Liquid Glue. I popped up a couple of the images with some Stampin’ Dimensionals. I also added a shadow under the images using COPIC markers C3, C5 and the blender.

I stamped “Hugs & Kisses” onto a piece of Simon Says Stamp Card Stock 100# BLACK with Versamark Ink and WOW Embossing Powder Opaque Bright White Super Fine. The sentiment is from an old stampset but I don’t where it came from because when I started crafting I didn’t save the backing or note the company 😦 I cut the piece down to 1 x 3-1/2″, cut the right side into a banner edge and adhered to the panel using. I finished it off by punching some tiny hearts from Stampin’ Up! Real Red 8 1/2 x 11” Cardstock using the Stampin’ Up! Owl Builder Punch (retired). You can use any tiny heart dies you may have.

For the inside for the card, I cut a piece of Neenah 110lb Classic Crest Cardstock 8.5 X 11″ to 4 x 5-1/4” and a piece of the pattern paper to 1 x 5-1/4”. I stamped Happy Valentine’s Day from the Lawn Fawn happy happy happy Add-on stampset with Black Memento Ink and added some more of the little hearts to complete the inside of this card.

Dimensions

https://linkdeli.com/widget.js?1559654439292

Thanks for reading this post and I hope I’ve inspired you to give this card a try or make some Valentine’s Day cards of your own. Leave comments or questions below or feel free to email.