
Hello friends. I finally got to play with this adorable bee-themed card kit from Simon Says Stamps. It’s the July Card Kit called Bee Yourself. Lots of fun products to play with and I just adore the stampset. Unfortunately the kit is no longer available but I will link all the available individual products. I almost strictly used only the card kit contents. I did bring in a few of my own products and I will link those below as well.

When I first saw the reveal video for this kit, I fell for the paper pad from Honeybee Stamps immediately. I knew I had to use the aqua watercolor pattern first. I kept it simple. I wanted to see if I could foil using a stamp and the glue pad and a stamp (didn’t have transfer gel. I do NOW though 🙂 ).
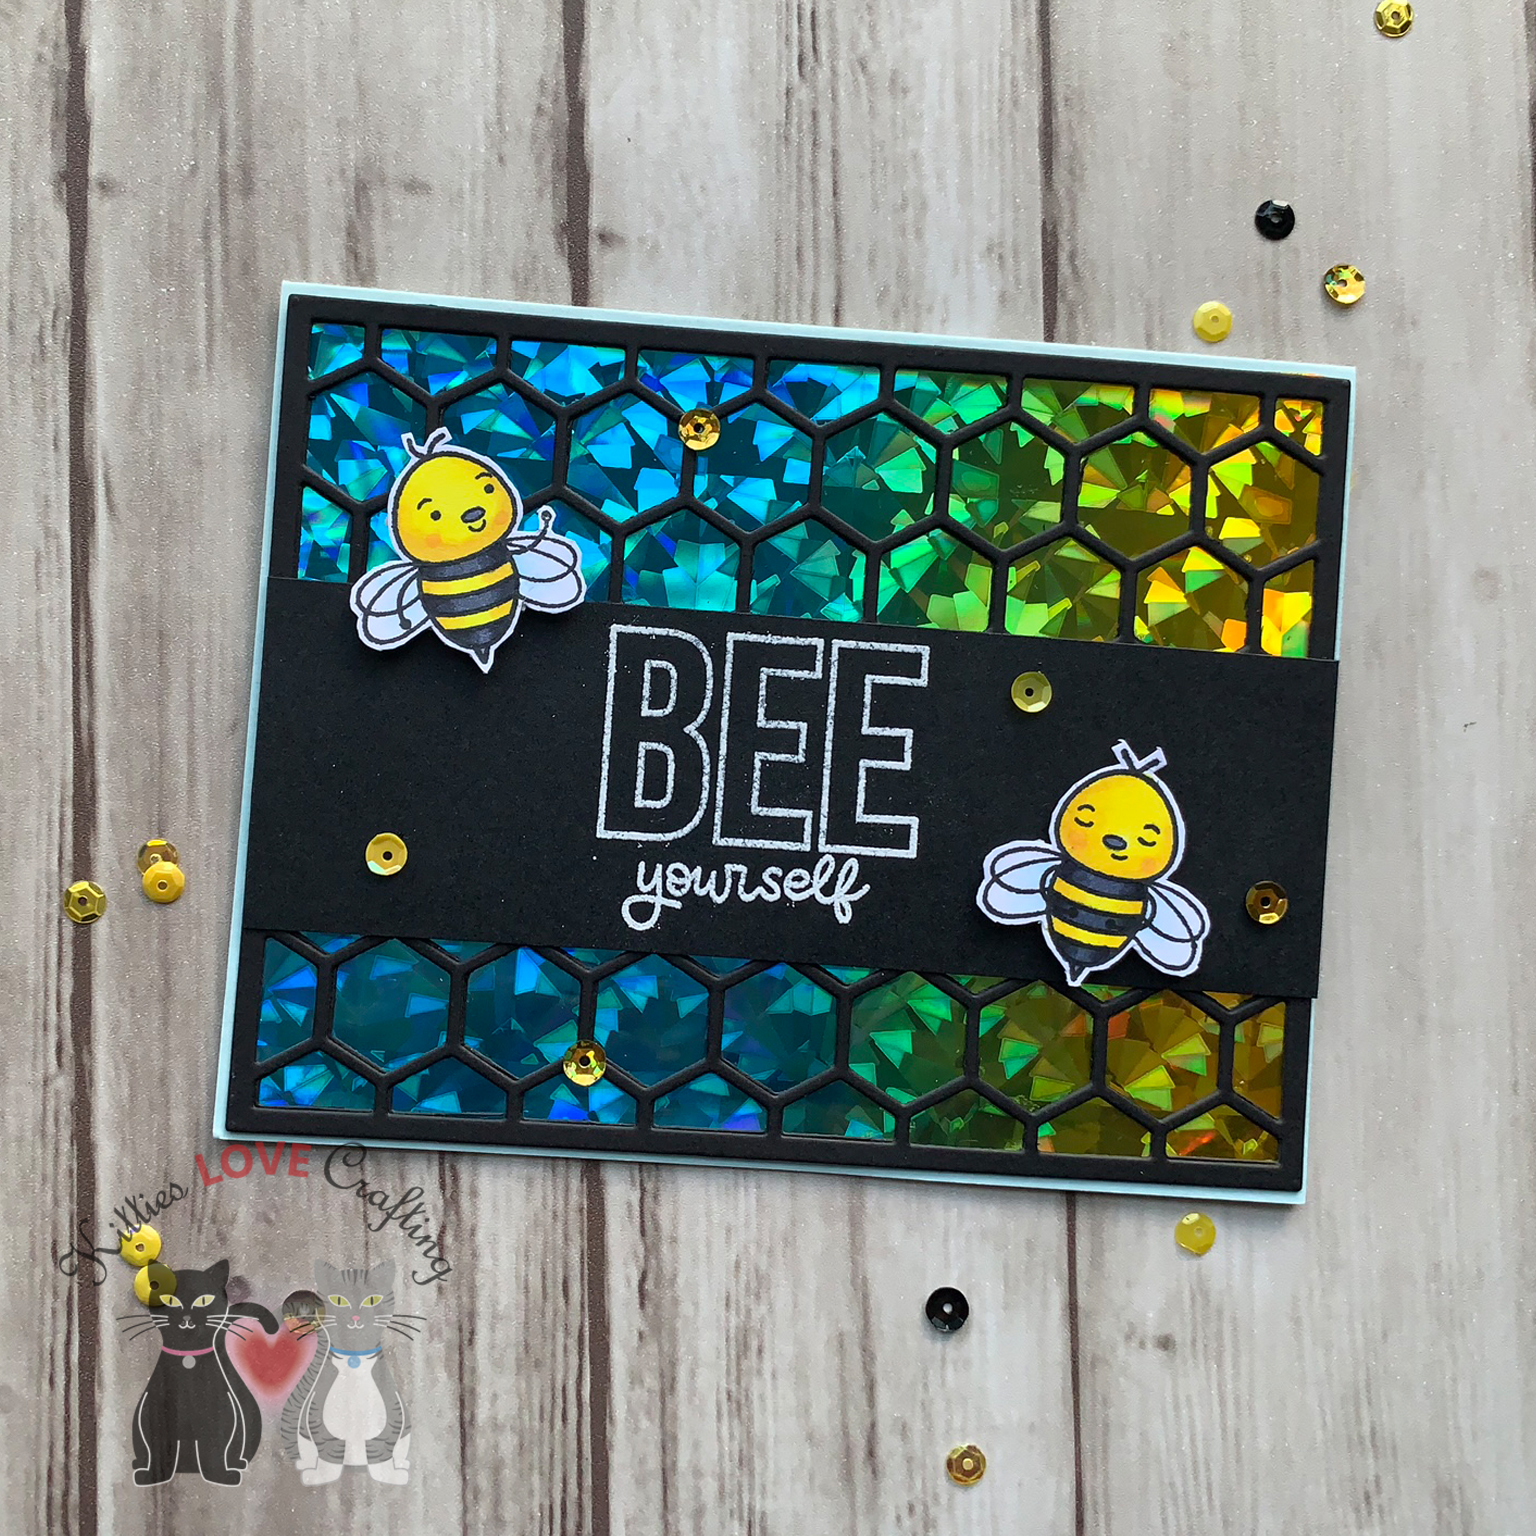
For the first card, I cut out the aqua watercolor pattern piece to 4 x 5 1/4” and glued it onto an A2 sized white card base (Simon Says Stamp White 120# cardstock). I then used the Glue Sponge like an ink pad with a stamp and then placed the Rainbow Shattered Glass Foil Transfer Sheet on top of the area and ran it through my laminator. It didn’t come out even but I decided to make it work. I added some strips of two other pattern papers from the Honey Bee The Bee’s Knees exclusive 6 x 6 paper pad.


I had previously stamped, colored and fussycut several bees from the Simon Says Stamp Bee Yourself 6 x 8 clear stamp set. I laid out my stamps on my card then using Ranger Black Archival Jet I stamped the bee trail and then using Versamark clear embossing ink I stamped the sentiment and heat embossed it with Wow white embossing powder. I colored the “BEE” with a yellow and white Prismacolor Pencils, and adhered my bee and added some of the sequins from the Black and Yellow custom sequin pack.
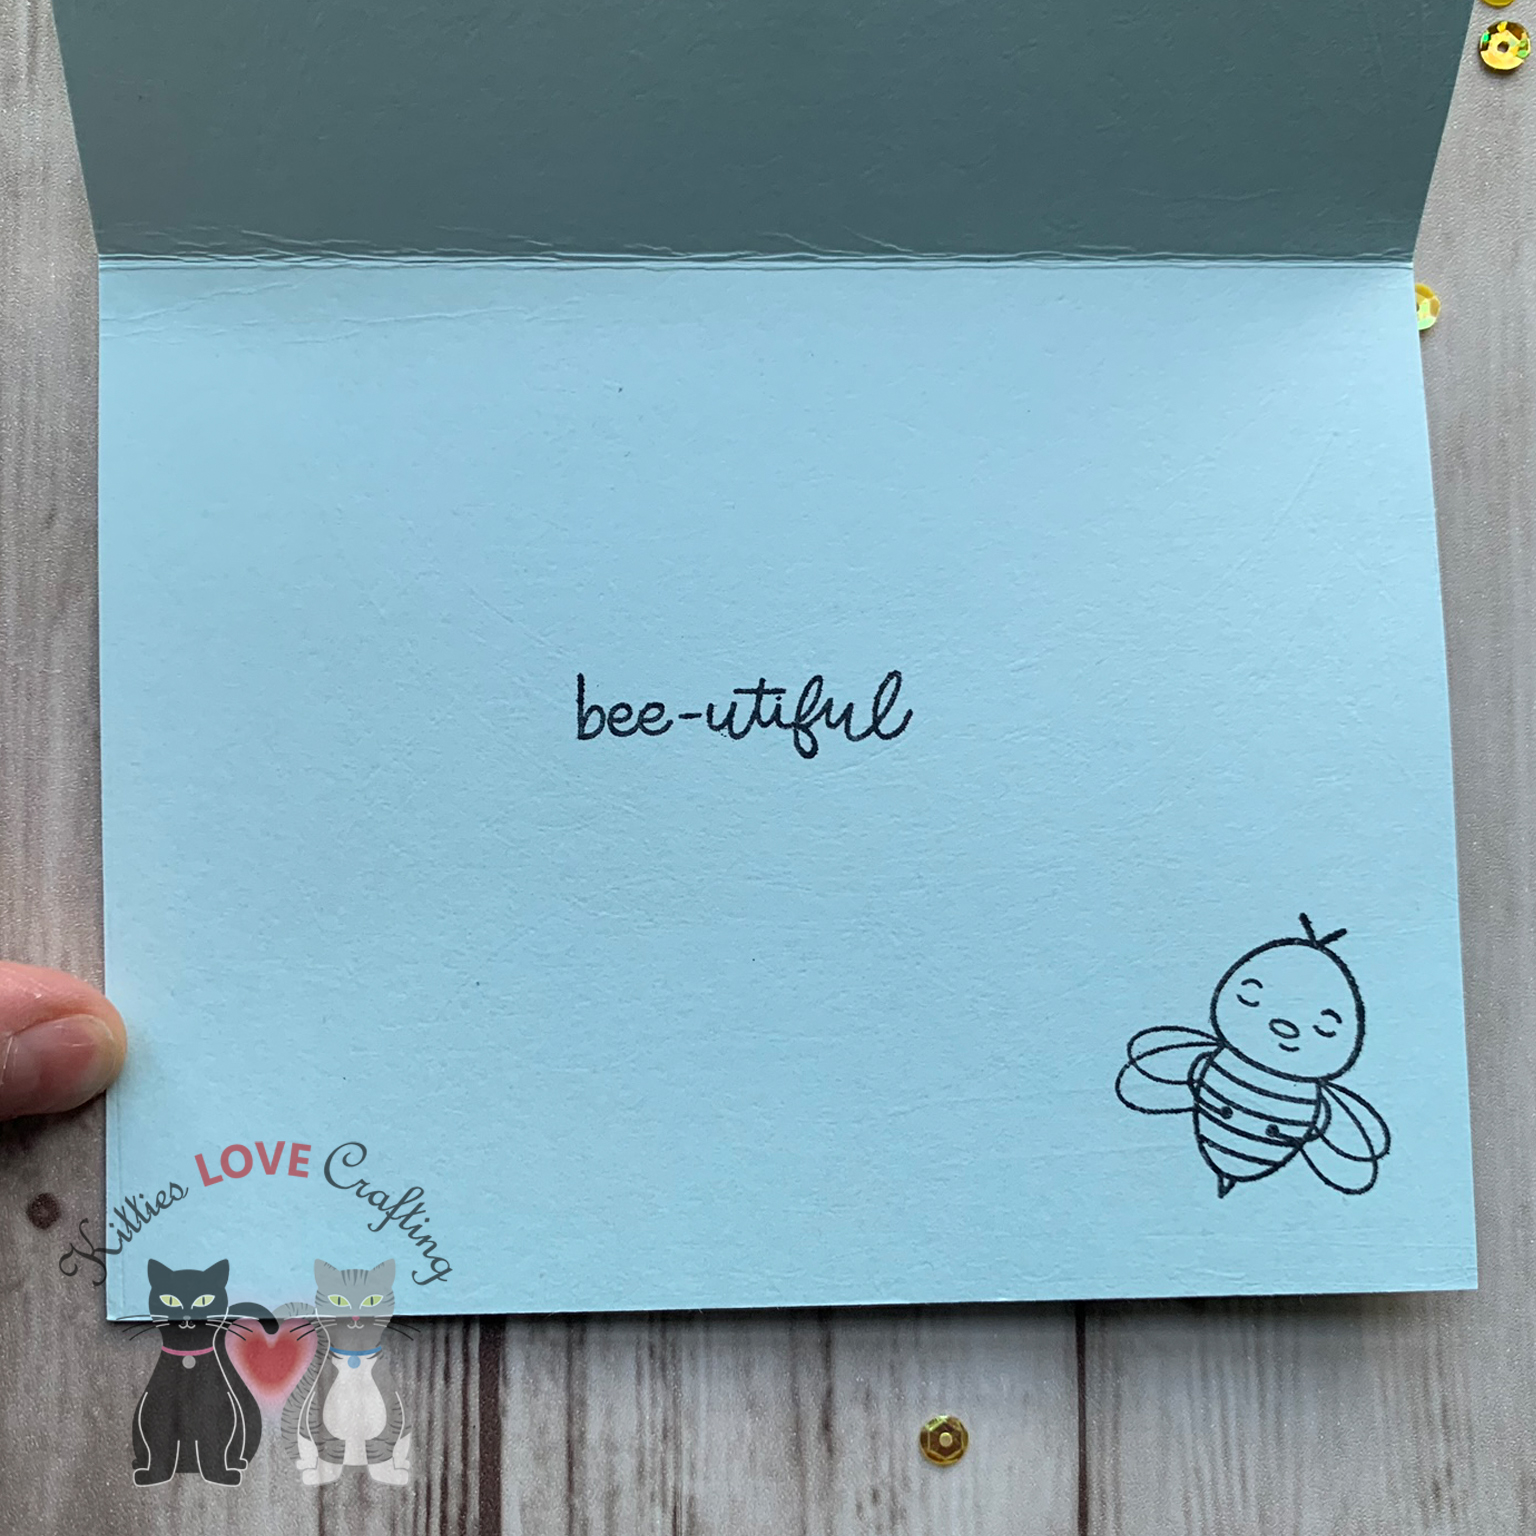
I stamped the bee and trail again on the inside of the card and added a second smaller sentiment.
The second card came together very quickly. I cut a piece of the yellow hexagon paper from the Honey Bee The Bee’s Knees exclusive 6 x 6 paper pad to 4 x 5 1/4” and adhered it to an A2 sized black card base (Simon Says Stamp Black cardstock). Next I used some of the rainbow foil on the preprinted foilable cards and fussycut out the flower and sentiment.
I diecut a few hexagons from Simon Says Stamp Black cardstock using the Simon Says Stamp Small Hexagon Cluster wafer thin die and a few from some black glitter paper. I added the black hexagon cluster to the card and then inlayed 3 glitter hexagons back into the clusters. I added a black mat behind the sentiment. Then I adhered the flower onto the right side of the card and the sentiment toward the bottom. I adhered the little bees and added some sequins to finish off the card.

For my next card I wanted to use the foil as if I didn’t have a laminating machine. I diecut a piece of Simon Says Stamp Black cardstock with the Honeybee Stamps Hexagon Coverplate Top Die. I cut a piece of the Rainbow Foil and adhered it to the back of the black panel and adhered that into an A2 sized card base (Simon Says Stamp Seaglass cardstock). I wanted to keep this one very simple so the sparkly background could be the star. I cut a strip of Simon Says Stamp Black cardstock to about 1 1/4 x 4” and heat embossed the BEE yourself sentiment from the Simon Says Stamp Bee Yourself 6 x 8 clear stamp set in Wow white embossing powder. I adhered that to the card front, added the bees and some sequins and the card is done. Or is it? Nope because I couldn’t stop there. I stamped the “bee-utiful” sentiment and a little bee with Ranger Black Archival Jet Black on the inside of the card. And now this card is done!
3 cards done, 2 to go…
Another paper that I really like for this collection was the black and white wonky (technical term :)) striped one. Another thing I wanted to use was the foilable cards. And the rainbow one of course calls for rainbow foil (duh). I only foiled the rainbow itself and the little bees so that they would stand out. I fussycut around the images and words, leaving a white border around them. I chose the yellow polka dotted pattern paper from the paper pad as my background. I cut a piece to 3 1/4 x 5 1/2”. I adhered a strip of the black and white wonky stripe paper onto and A2 sized card base (Simon Says Stamp Sunshine cardstock), leaving a 1/4 inch on each side, and adhered the yellow polka dot one in the center over that piece. I added some thin Love From Lizi Pin Stripe Black Glitter Peel Offs to separate the patterns a bit. I love the peel offs from Love From Lizi! They add interest to your card with little effort and she sells soooo many colors (glitter, metallic, transparent). Super fun.
Anyways back to my card…


I adhered the images down onto the card and added some sequins from the included pack. To finish off the inside I cut a piece of Simon Says Stamp White 120# cardstock to 4 x 5 1/4” and adhered inside the card. I added a 1 x 5 1/4” strip of the yellow polka dotted paper and a 1/2 x 5 1/4” strip of the black and white wonky striped paper to the right side of that panel. And stamped the “JUST bee-cause” sentiment in Ranger Black Archival Jet Black. And this completes card #4.
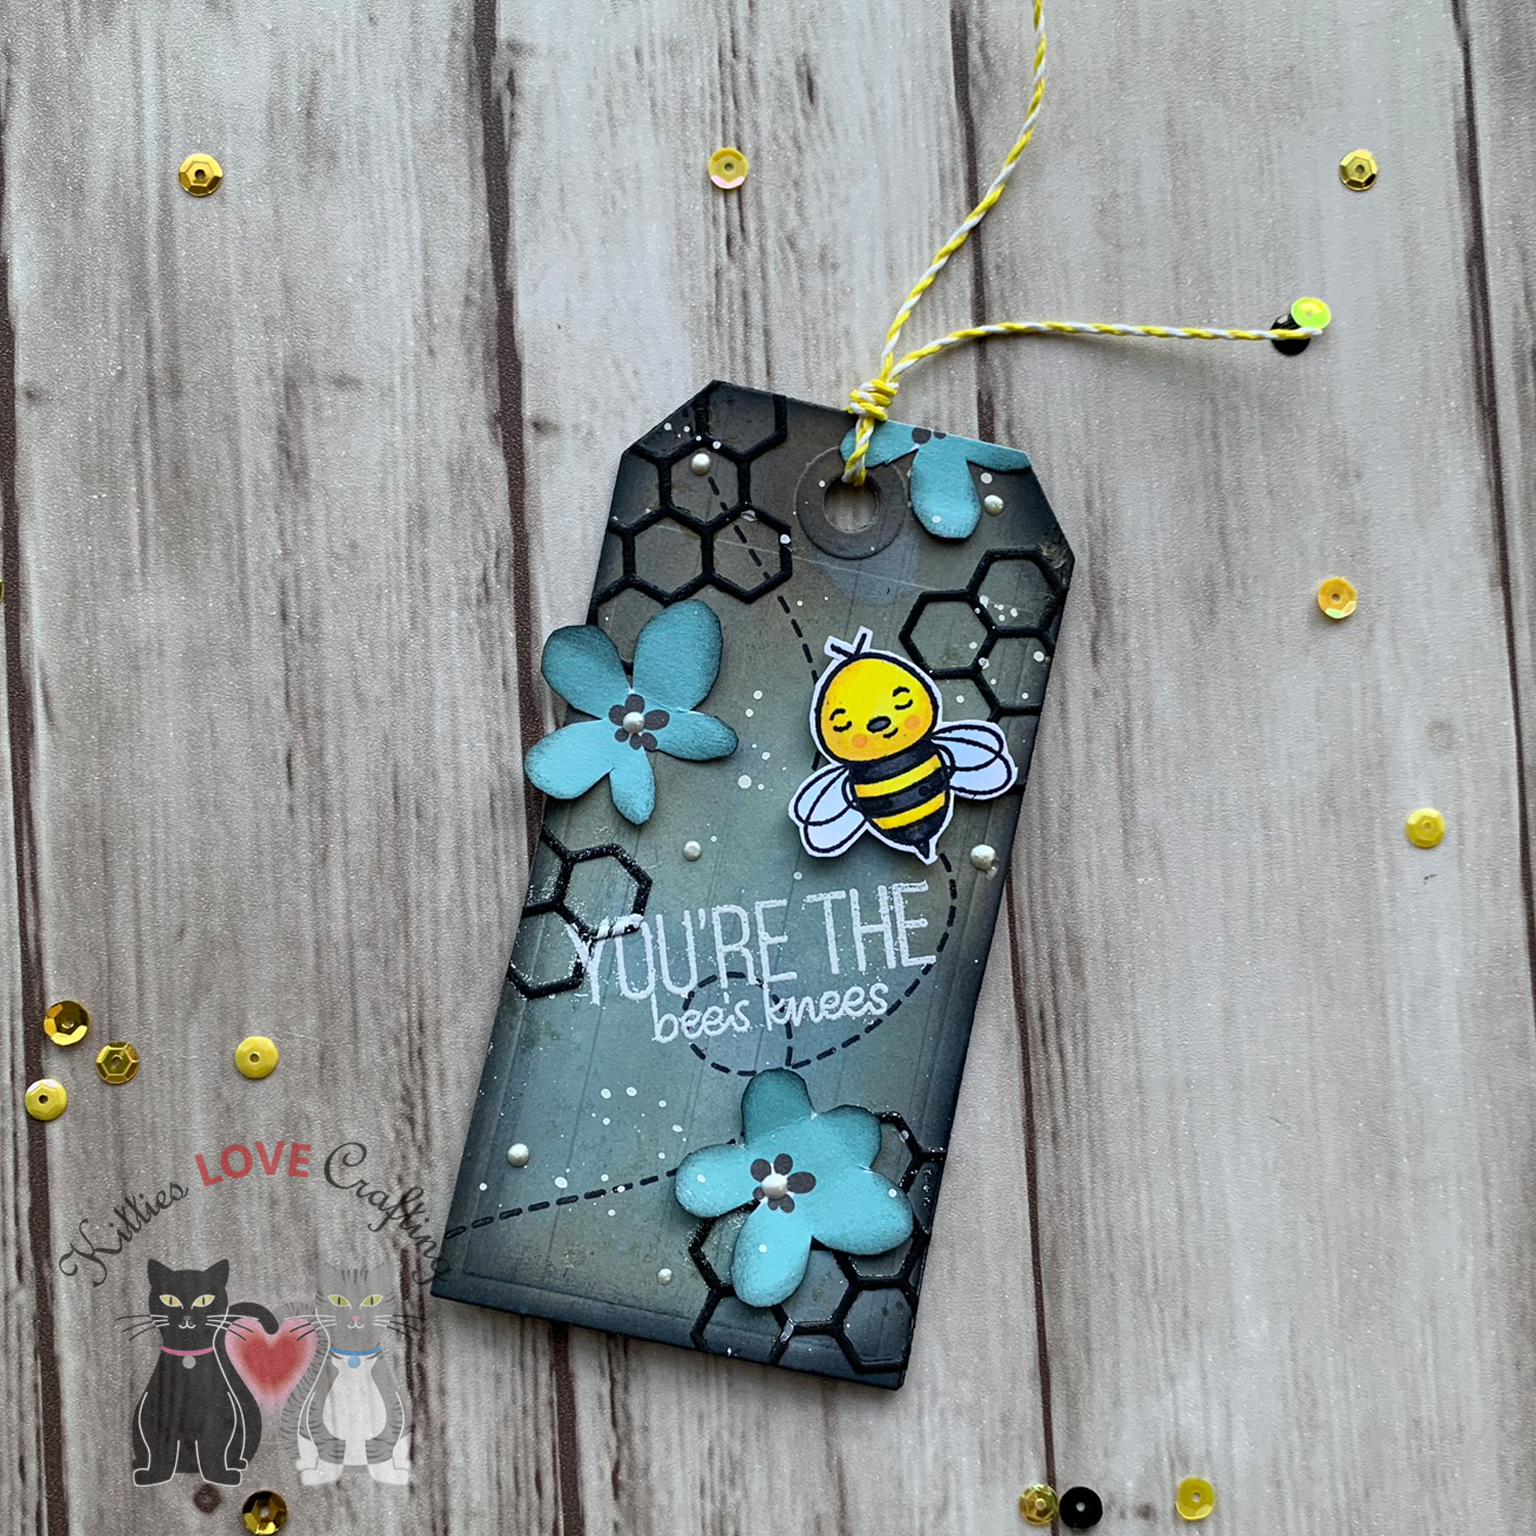
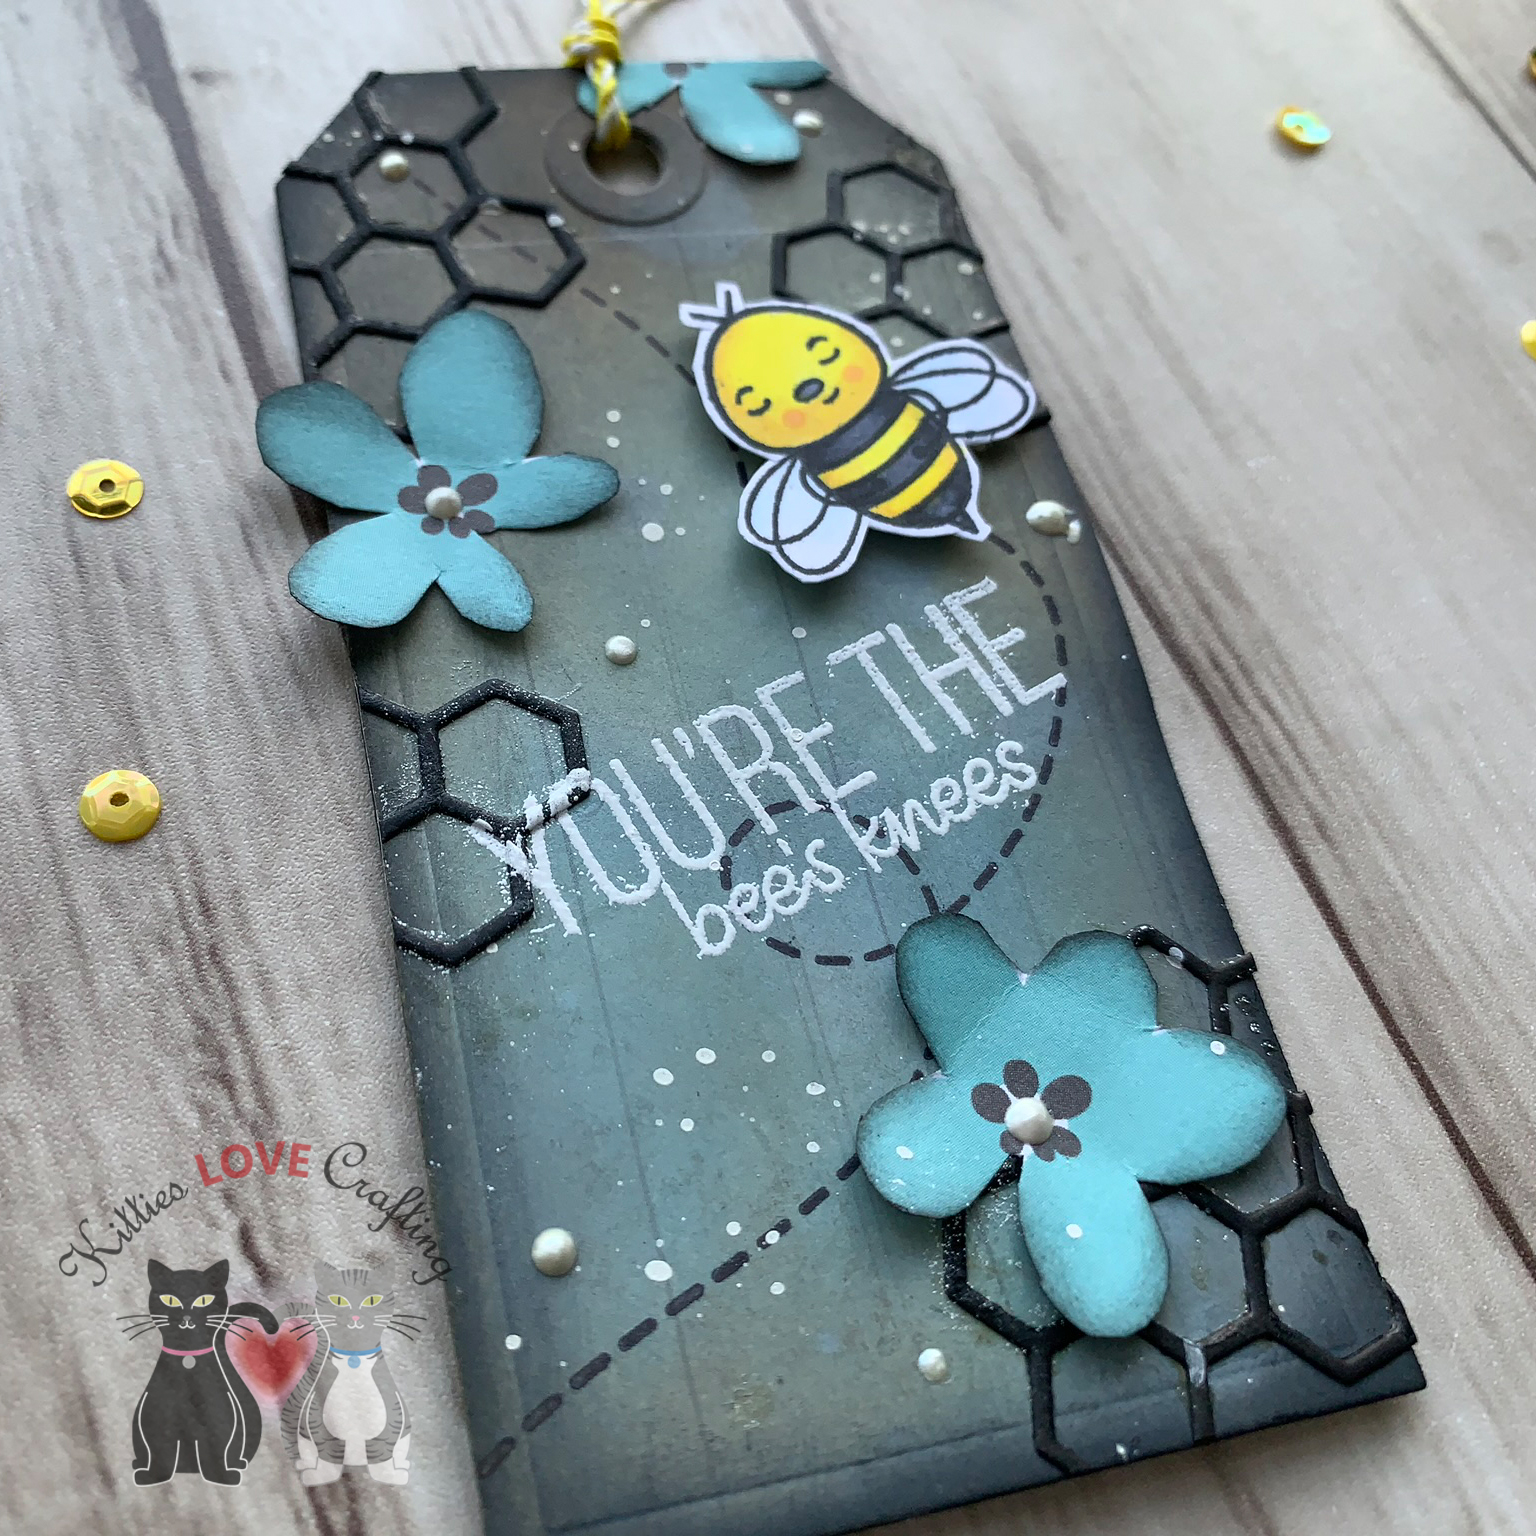
While I was making these cards, I had a thought…how cute would the bees look on a tag??? So I got out my trusty tag die from Tim Holtz (Sizzix Framelit Dies – Tag Collection by Tim Holtz) and diecut 2 tags using the second to largest die from Simon Says Stamp Black cardstock. I chose two pattern papers for my backgrounds, the light wood grain and the black and aqua hexagons, diecut 2 of each of those and glued them onto the front and back of the tag. Then I got to distressing.
For this first tag, I used Ranger Distress Ink – Tumbled Glass, Ranger Distress Ink – Walnut Stain, Ranger Distress Ink – Antique Linen, and Ranger Distress Ink – Black Soot. I kept layering them and drying in between til I got the desired color. Once everything dried, I added 4 pieces of the Simon Says Stamp Small Hexagon Cluster wafer thin die. Then I heat embossed a sentiment using Versamark clear embossing ink and Wow white embossing powder. I stamped a bee trail in black with in Ranger Black Archival Jet Black and added a bee which I had colored using COPIC markers and fussycut. Lastly I fussycut some blue flowers from the white pattern paper that featured them, applied some distress ink around edges and adhered those in place. I then added white splatters with some acrylic paint. To finish off the tag I added some Lawn Fawn Trimmings Lemon Single Cord and Nuvo Drops in Ivory Seashell.
For this second tag I used Ranger Distress Ink – Tumbled Glass, Ranger Distress Ink – Mustard Seed, Ranger Distress Ink – Walnut Stain, and Ranger Distress Ink – Black Soot. I then used some scraps of the pattern paper and adhered them diagonally to the bottom right of the tag, and added some distress ink to tone them down. I added some Love From Lizi Pin Stripe Black Glitter Peel Offs, stamped some hexagons in Ranger Black Archival Jet Black and heat embossed a sentiment using Versamark clear embossing ink and Wow white embossing powder. I colored the ‘BEE’ with Prismacolor Pencils, added some Lawn Fawn Aquamarine Single Cord and the tag is done.
I don’t want to leave this tag just as is though. I thought it might look cute as a card instead. So I cut a piece of the yellow hexagon paper to 1-1/4 x 5 1/2” and a piece of the yellow polka dot paper to -1 x 5 1/2” and adhere it to the.back of the hexagon paper and adhered both to an A2 sized card base (Simon Says Stamp Black cardstock).

I adhered the tag to the card base on a slight angle, placing it over the edges.i trimmed off the excess and proceeded to diecut some more hexagon clusters with black cardstock and adhered them to the card. I added one on the black. paper so it looks like it’s embossed. I added three little bees and some sequins to complete this card.
Supplies
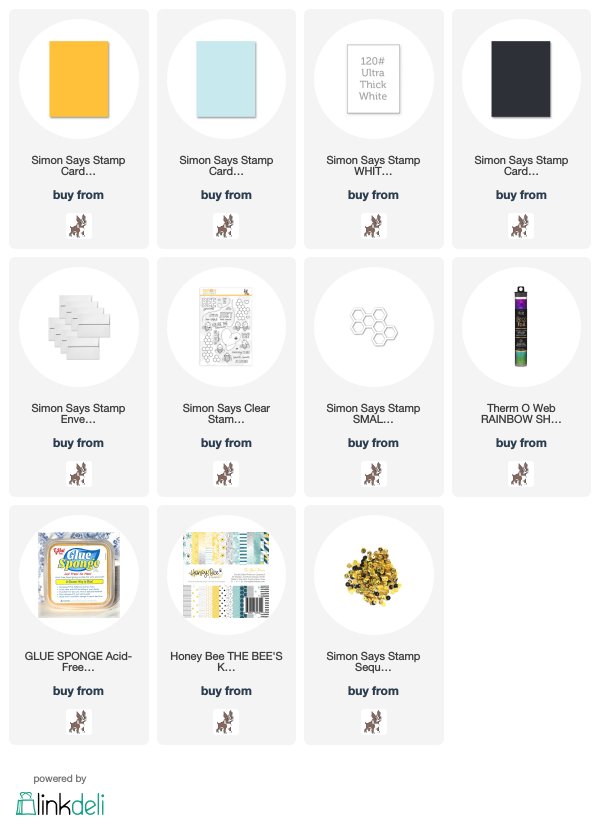
Card Kit Includes:
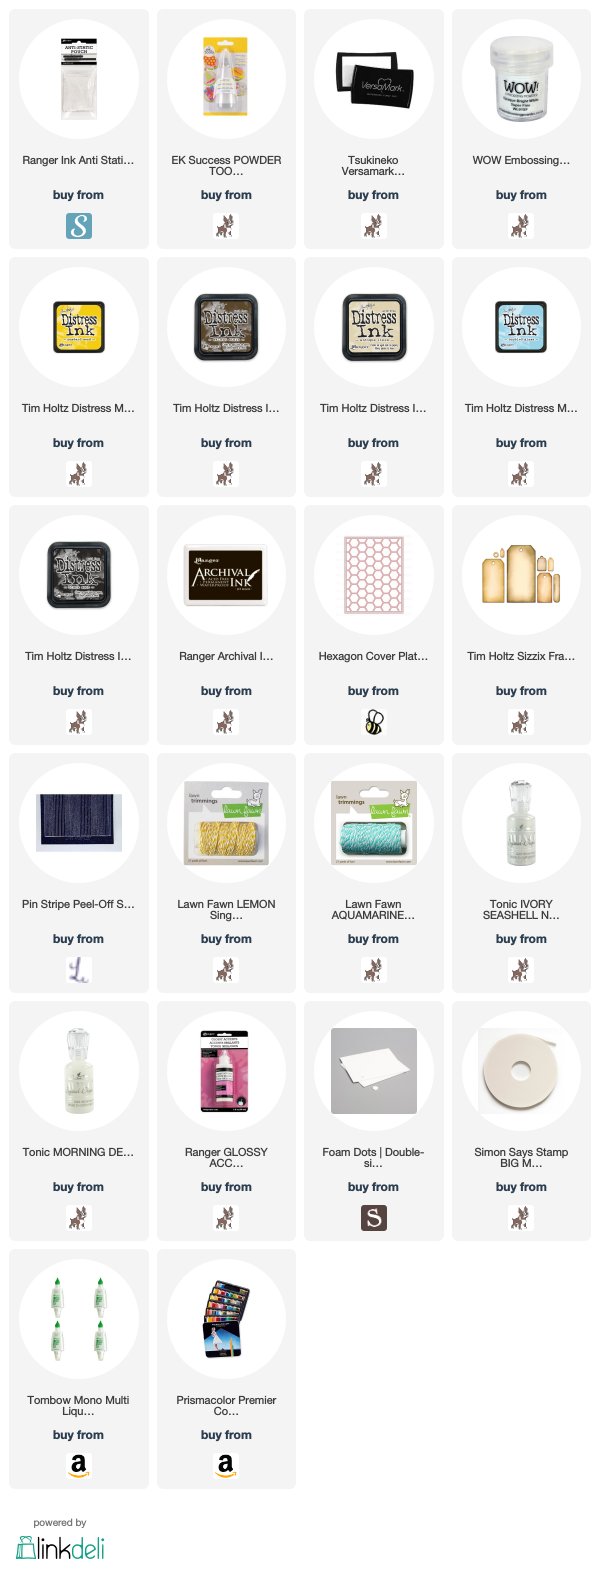
Other Supplies Used:
Hope you’ve enjoyed this post. Thanks for reading to the end; I know it was a long one. I hope I’ve inspired you to make some adorable bee cards of your own. Whether you have the kit or not you can make these cards. Leave comments or questions below or feel free to email me.
