Custom Planner Inserts, DIY Projects, Fourth of July, Tips and Tricks

How to Use Up Old 12 x 12 Paper Pads

Are you like me… You’ve been buying 12 x 12 paper pads for years and years and years and now have so many you don’t know what to do with it? Well here are just a few ways I like to use my paper pads up.

1. Use them in your junk journal.
My new obsession is creating junk journals. I started watching videos on them and quickly became hooked. What is a junk journal, you ask??? It’s a journal you create using old papers, cardboards, receipts, tickets, magazine pages, junk mail. Then you can decorate it with embellishments, tags, anything you want really. Then you write in, use it as a planner or for memory keeping. If you want to learn more about it, check out this link. There are tons of videos on junk journaling.


I like to coffee dye pattern papers to age them before using them in my junk journal. Then I use them for the main pages, tags, pockets, fold outs and many, many more. It’s super easy to coffee dye paper. Mix instant coffee with hot water and either spray it onto the paper or use a metal or plastic tub/pan and dip it into coffee. Check out this video for more info.


2. Organization. Another great use for pattern paper is for organization. I used pattern papers to make dividers for my 6 x 6 paper pads. I keep mine in clear fridge bins; this one measures 8W x 14.5L x 4”H and I got this it from Amazon. I created these using old white 3 ring binder dividers I had purchased ions ago and then adding the pattern paper to the front of it. I cut the white dividers to 6-1/2”w x 7”h and the paper to 6”w x 7”h. Glue them together, add a label and you have cute dividers.


3. Make sticker books. Since I am a planner girl, I have a descent amount of stickers. And before the Happy Planner came out with their sticker books, I created my own after watching several videos on how to do this. It’s easy. You need card stock, some discs, a Happy Planner Punch or any Arc Disc Punch and extra planner pages or other paper to adhere the sticker sheets to. You can laminate your covers or leave them as is and add a sheet of clear acetate over it as I did with these since at the time I didn’t have a laminator.

For this sticker book, I cut 2 pieces of paper to 6-1/4 x 9”. You can also make dividers to organize your sticker book.


4. Make custom cover, dividers, dashboards for your planners and notebooks. Another thing I love is my planner and customizing it for the holidays. I’m a planner girl who loves to make it pretty and I found that it was easier to make my own once I bought a laminator machine. The easiest way to customize your planner is to use a paper pad that has cut aparts, stickers or other things you can use to add to your planner but no worries if you don’t. You can easily use colors from different paper pads that coordinate.

I used a paper pad from Authentique called Liberty to make my Fourth of July theme. I made mine for a Classic Happy Planner so my measurements will fit that planner. For my cover I cut the paper to 7-1/2 x 9-1/2, rounded the corners (important so you don’t stab yourself later), then I laminated it and trimmed it, leaving a 1/8″ border around it so the sides do not open so the final measures 7-3/4 x 9-3/4. Once cut, I punched the mushroom holes with my Arc Disc Punch.

For the dividers, I used dividers from my original Classic Happy Planner as a template. I find this is the easiest way to do this because they already have tabs. This will work with any size planner. But you can also just cut the paper down to the same size of your cover and then add a shape (like a star-for July 4th) as your tab. Adhere it in place before you laminate your dividers. Again, I rounded the corners before laminating then again once I trimmed them down. These measure 7-1/2 x 9-1/4″ before lamination and 7-5/8 x 9-1/4″ once laminated and trimmed.

I also cut out some of the cut aparts and laminating them to add into the pockets of my planner cover. These make great diecuts. You can also cut out images that appear on these cut aparts for a more customized diecut (i.e, cut around the liberty bell in the diecut shown below),

Another thing you can make is a bookmark or dashboard. Choose a width (I usually do half the width of my page and then use the dividers to trace a tab at the top of your bookmark. Laminate and cut it and you have a cute bookmark to mark your week or month or whatever you need.

Thanks for reading this post. I hope you enjoyed and I’ve inspired you to give these find some uses for all that paper you have in your stash. Leave comments or questions below or feel free to email.

Celebrations, Thank Yous

2 Cards Featuring Stitched Triangles by Stampin’ Up!

I love stackable geometric dies, especially with stitched details. They are so versatile because you can create a whole card using only the shapes, or add a shape behind a sentiment or focal point to emphasize it. For this card I decided to keep it simple and bright. I combined a rainbow of Stampin’ Up!’s cardstocks, Stitched Triangles Dies and a simple sentiment. It is a very simple card to make and can easily be mass produced. This die set is available in the new 2020-2021 Annual Catalog! There is also a coordinating stamp set.

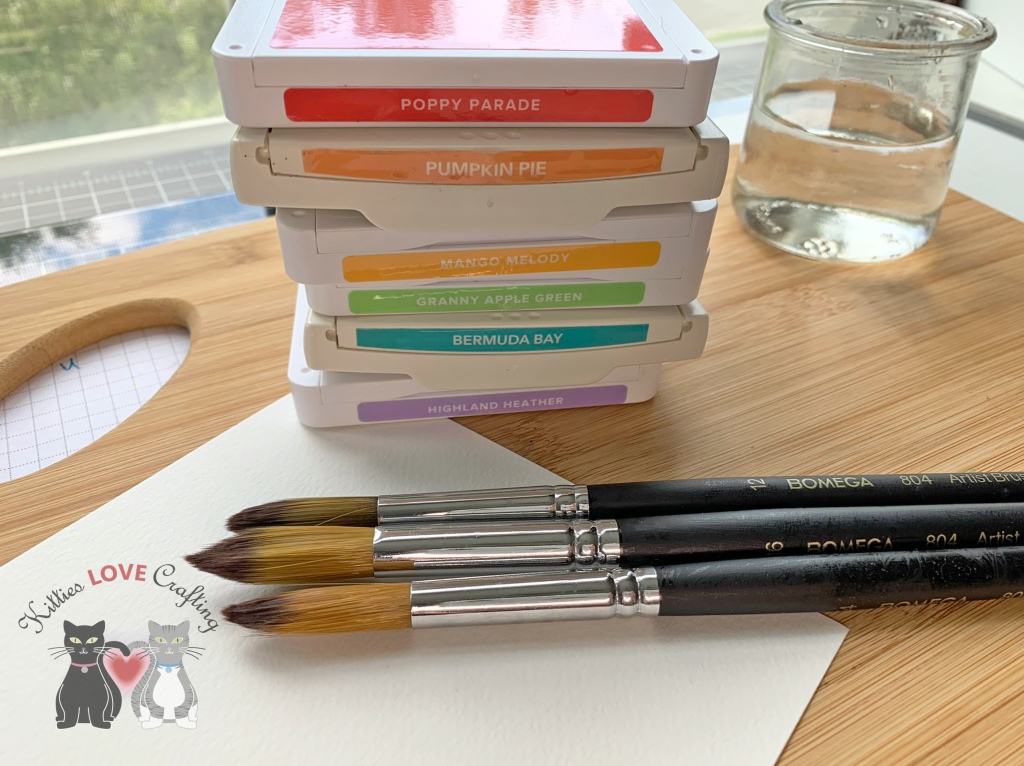
I started by cutting down a piece of Stampin’ Up! Whisper White 8-1/2″ X 11″ Thick Cardstock to 5-1/2 x 8-1/2″ and scored at 4-1/4″ to create a card base. Then I cut several triangles using the Stampin’ Up! Stitched Triangles Dies and Stampin’ Up!’s 8-1/2″ X 11″ Cardstock in Poppy Parade, Pumpkin Pie, Mango Melody, Granny Apple Green, Bermuda Bay, and Highland Heather.

I stacked sets of six triangles in rainbow order and adhered them together with Tombow Mono Multi Glue. And then adhered those to the card base, trimming the excess. I stamped a sentiment from the stamp set included in the Stampin’ Up!’s February 2020 Paper Pumpkin Kit – Lovely Day onto the card base with Memento Tuxedo Black Ink. I left the inside of the card blank and that completes this card. Super easy, right??

Dimensions


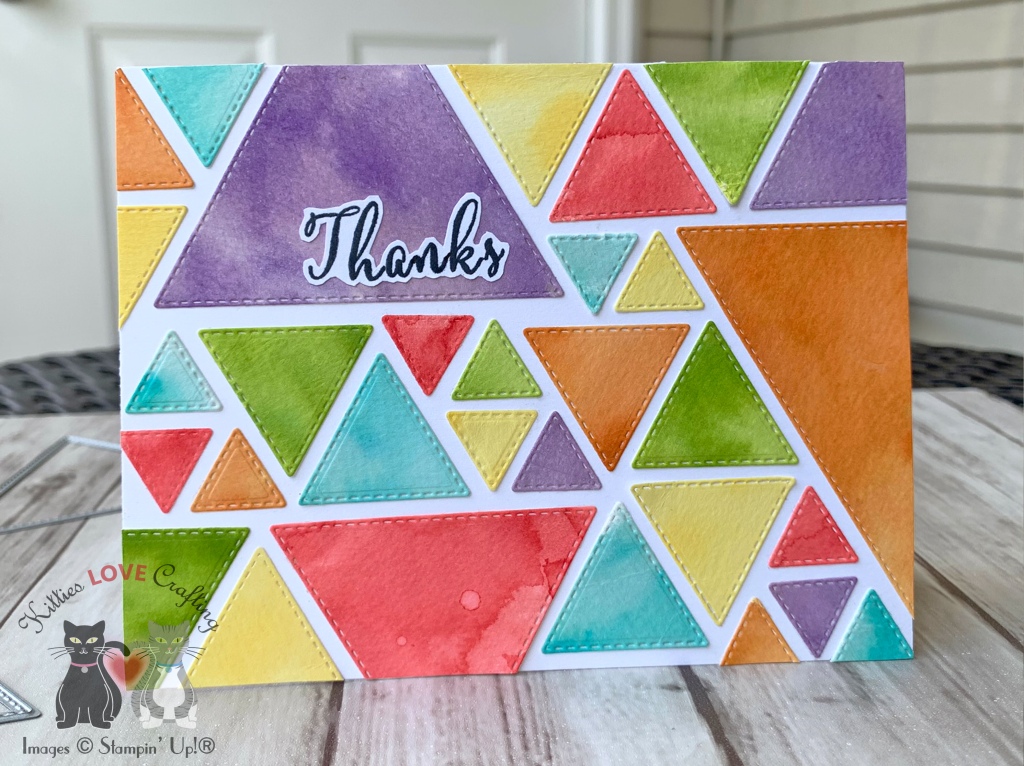
For the second card, I decided to create watercolor triangles. I used the ink refills to watercolor. I started by cutting down a piece of Stampin’ Up! Whisper White 8-1/2″ X 11″ Thick Cardstock to 5-1/2 x 8-1/2″ and scored at 4-1/4″ to create a card base. Then I cut down six panels of Stampin’ Up! Fluid 100 Watercolor Paper to 4-1/4 x 5-1/2″ and used ink refills for Poppy Parade, Pumpkin Pie, Mango Melody, Granny Apple Green, Bermuda Bay, and Highland Heather and a water brush to add color to each panel.

Then I cut several triangles from each panel using the Stampin’ Up! Stitched Triangles Dies. I laid all my triangles out on the card base and puzzle pieced them together basically. Once I was happy with the placement, I adhered them down with Tombow Mono Multi Glue.

I stamped a sentiment onto a scrap piece of Stampin’ Up! Whisper White 8-1/2″ X 11″ Thick Cardstock using Memento Tuxedo Black Ink and the alphabets in the Stampin’ Up! Make A Difference Photopolymer Stamp Set. On the inside I added a few extra triangles in the bottom right corner.

Dimensions


Supplies

https://linkdeli.com/widget.js?id=f5e8378456858c916708

Thanks for reading this post. I hope you enjoyed and I’ve inspired you to try these fun and quick cards for yourself! Leave comments or questions below or feel free to email me. Also if you would like a Stampin’ Up! catalog, please email me as well. All current catalogs can be found on the right side of this post and the Stampin’ Up! page. All news and fun stuff happening at Stampin’ Up! are listed there!

Birthdays, Summer

Shop Your Stash Day 4: Reveal Wheel Mason Jar Aquarium

When I was going through my die stash I remembered how much I loved my Reveal Wheel dies from Lawn Fawn as well as the Lawn Fawn How You Bean? Stamp sets so I decided to combine them and see what happens. After all fish fit in a mason jar right?? (I probably wouldn’t put real fish in the mason jar but it’s fine for fake fish!)

For this card I started by cutting a piece of Neenah 110lb Classic Crest Cardstock 8.5 X 11″ to 5-1/2 x 8-1/2″ and scored at 4-1/4″. Then I used the Lawn Fawn Reveal Wheel Die to diecut the 2 wheels and two panels of the reveal wheel base. I diecut the the window into one of the panels with the Lawn Fawn Reveal Wheel Semicircle Add-on Die Cut and then turned it 180 degrees and diecut it under the first window.

I inked up the panel using MFT’s Snow Drifts Coverup Die (not available) as a stencil ccombined with Salty Ocean and Mermaid Lagoon, Mowed Lawn and Tumbled Glass Distress Oxide Ink. I created a gradient using Salty Ocean and Mermaid Lagoon first, then turned the die 180 degrees and used Mowed Lawn to layer over it, and finally Tumbled Glass over all of it to mute it some. I used the same color combo on the large wheel, without the stencil. I sprayed some water on everything with my RANGER Tim Holtz DISTRESS SPRAYER and blotted it.

I set that aside to dry and stamped all the images from the Lawn Fawn FINTASTIC FRIENDS onto a piece of Neenah 110lb Classic Crest Cardstock 8.5 X 11″ with Memento Tuxedo Black Ink. I also stamped the large fishtank (I will use just the sand) and the mason jar from Lawn Fawn HOW YOU BEAN? (onto clear acetate) with Tsukineko Stazon Black Ink .

Once the inked panel was dry I added splashes of white acrylic paint and heat embossed bubbles and a sentiment from Lawn Fawn FINTASTIC FRIENDS. I prepped the surface with an anti-static tool first (make sure the acrylic paint has dried) then used Versamark Ink and WOW Embossing Powder Opaque Bright White Super Fine. I assembled the reveal wheel using 3M Foam Tape and adhered it to the card base. To see how to assemble the reveal wheel check out this video from Lawn Fawn.

I colored the images with COPIC markers. I used Y06, Y15 and YR04 for the goldfish, E53, E33, and E37 for the sandcastle, B95 and 97 for the shark, YG25 and YG03 for the plants, R05, R14, R17 and R27 for the crab, R05 and R12 for the coral, Y06, Y15, B24 and B26 for the striped fish and E53 and E33 for the sand in the jar tank.

I diecut all the images and adhered them to the card using Tombow Mono Multi Liquid Glue. I used Glossy Accents Glue Adhesive to adhere the mason jar. I stamped the arrow from Lawn Fawn’s Push Here stampset with Memento Tuxedo Black Ink onto the card base and finished it off by adding White Blizzard Nuvo Drops and a few Pretty Pink Posh 4MM ClearDroplets.

On the inside, I stamped a sentiment from the Lawn Fawn HOW YOU BEAN? with Memento Tuxedo Black Ink and an extra sandcastle I had colored.

Dimensions


Supplies

https://linkdeli.com/widget.js?id=f5e8378456858c916708

Thanks for reading this post. I hope you enjoyed and I’ve inspired you to Shop Your Stash and see what fun ideas you come up with and maybe rediscover supplies you forgot you had! Leave comments or questions below or feel free to email me.

Stampin' Up! News

July 2020 Paper Pumpkin Kit! Summer Nights

Celebrate the magic of summer nights with the Summer Nights Paper Pumpkin Kit! In this exclusive fun-filled kit, you’ll unbox enough supplies to create nine postcard-style cards, coordinating envelopes, and die-cut tealight bags. What’s even more spectacular about July’s kit is the add-on you can purchase along with it! The Summer Nights Add-On includes 24 card bases and envelopes in coordinating Summer Nights designs. This add-on is perfect for helping you and your customers expand the Summer Nights creative experience beyond the Paper Pumpkin kit. Between the add-on and the leftover supplies from your Summer Nights kit, you and your customers will be crafting a summer night worth celebrating all month long!

The Paper Pumpkin kit does not require the add-on to create completed projects. 

Summer Nights Add-on Ordering Information

Purchase the Summer Nights Add-On through a demonstrator order or online at stampinup.com starting July 1, while supplies last!

  • The Summer Nights Kit includes nine postcards and coordinating envelopes, plus nine die-cut tealight bags. To receive this kit, your customers must have an active subscription by 10 July.
  • The Summer Nights Add-On is a separate purchase for those who would like to expand the Summer Nights Kit with a traditional cardmaking experience.
  • The Summer Nights Add-On is $10.00 USD/$13.00 CAD and is only available to Paper Pumpkin subscribers. The add-on is available while supplies last, beginning 1 July!
  • You must have an active Paper Pumpkin subscriber email to purchase the add-on.

Subscription Information

  • Subscribe to the July 2020 Paper Pumpkin Kit from June 11 to July 10 at paperpumpkin.com.
  • Note: Supplies may be limited toward the end of each subscription period.

Stampin' Up! News

Last Day to Subscribe for the June 2020 Paper Pumpkin Kit!

Today is the last day to subscribe for the June 2020 Paper Pumpkin kit! Don’t miss this special kit inspired by Stampin’ Up! CEO Sara Douglass.

June 2020 Paper Pumpkin: Box of Sunshine

June Paper Pumpkin

This exclusive Sara-inspired Paper Pumpkin kit is here to help you #sharesunshine. It includes supplies for eight handmade cards and is specially designed to help you create a box full of cheer. Once you’ve made all the cards, use any leftover pieces to decorate the box. Fill it with yellow goodies, add the included adhesive label, address it to someone special, and brighten their life with a little sunshine!


Subscription Information

  • Subscribe for the June kit from 11 May–10 June at paperpumpkin.com.
  • Supplies may be limited toward the end of each subscription period.

Stampin' Up! News

New Adventures Await…

This month I have decided to embark on a new adventure! I have joined the Stampin’ Up! Demonstrator family! On my Stampin’ Up! you can shop, get inspiration and find out about the latest events, news, promotions and products (link in the menu above). Check back often to see what is new. You can also shop and view and request paper copies of the latest catalogs on the right side of every page (click the Stampin’ Up! logo to shop (I would love to be your demonstrator–full name on Contact Page).

Please contact me with any questions you may have about the latest events or if you would like to place an order through me. I would be happy to assist you!

Ok, let’s check out what’s new

2020–2021 Beginner Brochure

Getting into papercrafting can be overwhelming—and expensive—at times, and newcomers might not know where to start. That’s why we curated this brochure for people who are new to crafting. The Beginner Brochure features high-quality products with coordination, versatility, coloring, building relationships, easy to accomplish techniques, and card kits that are easy to get started. We combine these in a way that tells a story about card marking. This creates a clear path for new crafters to follow, which helps them decide where to start and where to go from there.

Available from June 3, 2020 – May 3, 2021 (Download (US | CA))

Simply Citrus All-Inclusive Card Kit

Hooray to You Cards & Envelopes

Cute Fruit Cards & Tags

Four Season Floral Cards


June 2020 Paper Pumpkin: Box of Sunshine

Only a few days left to sign up and get this month’s kit!

This exclusive Sara-inspired Paper Pumpkin kit is here to help you #sharesunshine. It includes supplies for eight handmade cards and is specially designed to help you create a box full of cheer. Once you’ve made all the cards, use any leftover pieces to decorate the box. Fill it with yellow goodies, add the included adhesive label, address it to someone special, and brighten their life with a little sunshine!

Subscription Information

  • Subscribe for the June kit from 11 May–10 June at paperpumpkin.com.
  • Supplies may be limited toward the end of each subscription period.

Available from June 3, 2020 – May 3, 2021

Encouragement, Fourth of July, Fourth of July, Summer

Shop Your Stash Day 3: Making Summer Cards Using Honeybee Stamps Frappe Shake Card Dies

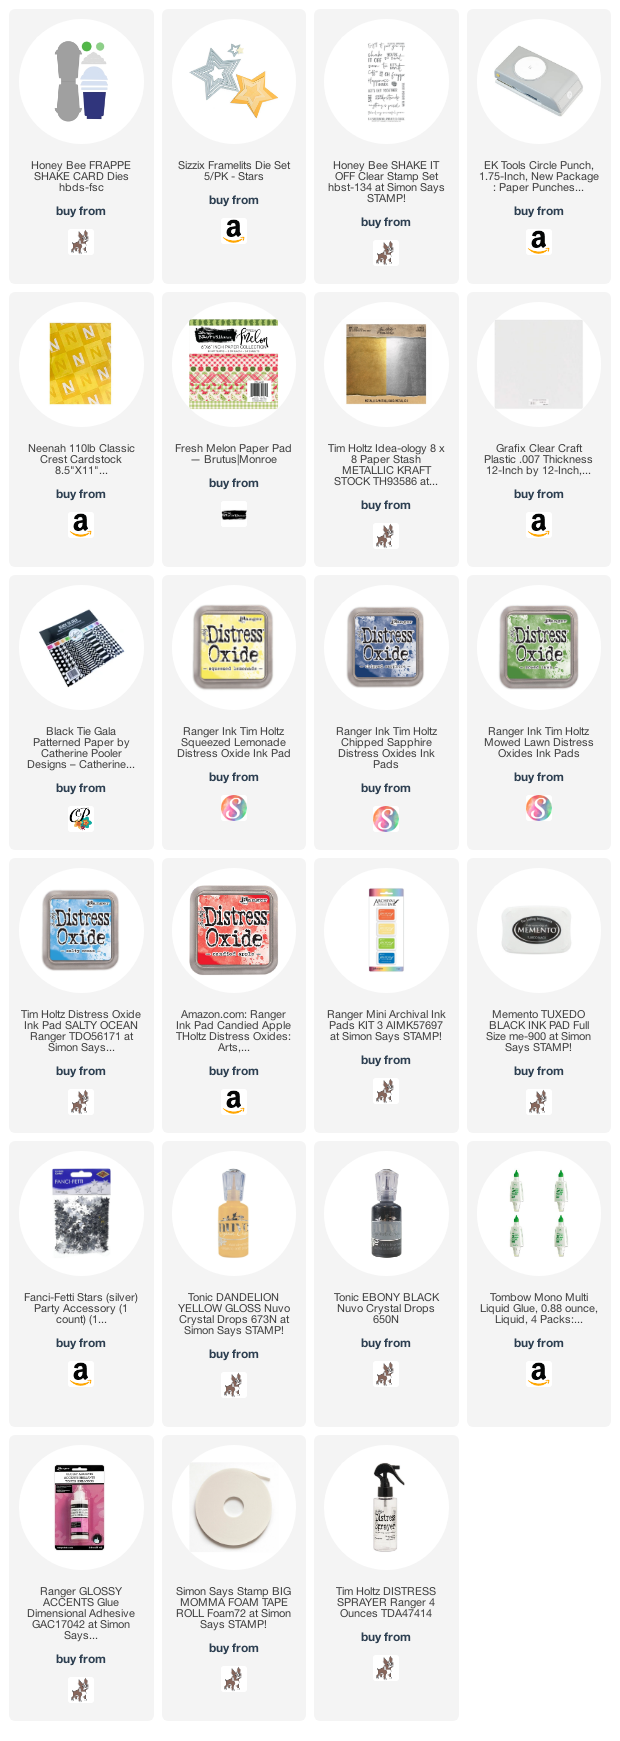
While it’s probably no surprise too many that I love coffee, I love coffee stamps and dies even more. This Honeybee Stamps Frappe Shake Card Dieset as well as their Honey Bee COFFEE CUP CARD Dies are my favorites! They have everything you need to make cute coffee cup and frappe cup shaped cards and shakers. And they fit in an A2 size envelope which is great!

I thought it would be fun to reuse this dieset to make some non-coffee cards, instead make brightly colored summer beverages. I don’t know if you all remember the rocket bomb popsicles that were red, white and blue. I remember many summers as a kid eating those popsicles (they were refreshing and turned my tongue red or blue, depending on which end I ate first—what could be better??). LOL That was the inspiration for my first card.

I started by diecutting card bases using the large card, coffee cup, and the whipped cream dies in the set from Neenah 110lb Classic Crest Cardstock 8.5 X 11″ 3 times. I also diecut 3 sets of the lid and its rim from Acetate.

I also went ahead and added Tim Holtz Salty Ocean Distress Oxide Ink to the lid section of the card base on all 3 cards to create a background for the lid. Then, used Tim Holtz Candied Apple Distress Oxide Ink, Tim Holtz Salty Ocean Distress Oxide Ink and Tim Holtz Chipped Sapphire Distress Oxide Ink to create an ombre effect on the coffee cup, leaving the middle area white. I sprayed some water onto it with my Tim Holtz DISTRESS SPRAYER and blotted it with a paper towel.

While the ink dried, I diecut the straw and the larger circle from the dieset from a piece of Doodlebug Designs Yankee Doodle 6 x 6 Pattern Paper (no longer available) and used the smallest star from the Sizzix Framelits Stars Die Set and Tim Holtz Idea-ology 8 x 8 Paper Stash METALLIC KRAFT STOCK to diecut a small star. I adhered the star to the circle, the coffee cup and whipped cream to the card base and then cut the straw in half and adhered it to the front of the card using Tombow Mono Multi Liquid Glue. I adhered the circle to the card front and added some silver confetti stars from Fanci-Fetti Stars (silver) Party Accessory to the whipped cream and then the clear lid on top of the stars (I used Ranger GLOSSY ACCENTS Glue Dimensional Adhesive to adhere the acetate and metallic stars).

On the inside of the card, I stamped “Happy 4th of July” with a very old stampset I had (sorry don’t know where it came from) using Tim Holtz Chipped Sapphire Distress Oxide Ink and added 3 silver stars.

Card Inside

For the second card, I decided to make a delicious watermelon smoothie. Who doesn’t like a tasty frozen watermelon beverage on a hot summer day?!? I’m now craving a smoothie while writing this post. LOL.

For this card, I started by using Tim Holtz Candied Apple Distress Oxide Ink, and Tim Holtz Mowed Lawn Distress Oxide Ink to create an ombre effect on the coffee cup. I cut a small triangle from some Neenah 110lb Classic Crest Cardstock 8.5 X 11″ and also inked it up with the distress oxide inks. I sprayed some water onto it with my Tim Holtz DISTRESS SPRAYER and blotted it with a paper towel.


While the ink dried, I diecut the straw from a piece of Brutus Monroe Fresh Melon 6 x 6 Paper Pad. I adhered the coffee cup and whipped cream to the card base and then cut the straw in half and adhered it to the front of the card using Tombow Mono Multi Liquid Glue. I added Nuvo EBONY BLACK Crystal Drops to the whipped cream and then adhered the clear lid on top of the stars (I used Ranger GLOSSY ACCENTS Glue Dimensional Adhesive to adhere the acetate). I cut a slit in the watermelon slice and adhered it to the card. I stamped a sentiment from Honey Bee Stamps SHAKE IT OFF Clear Stamp Set onto a piece of Neenah 110lb Classic Crest Cardstock 8.5 X 11″ using Memento Tuxedo Black Ink. I fussycut it and adhered it to the card front and added more Black Nuvo drops. I left the inside of the card blank.


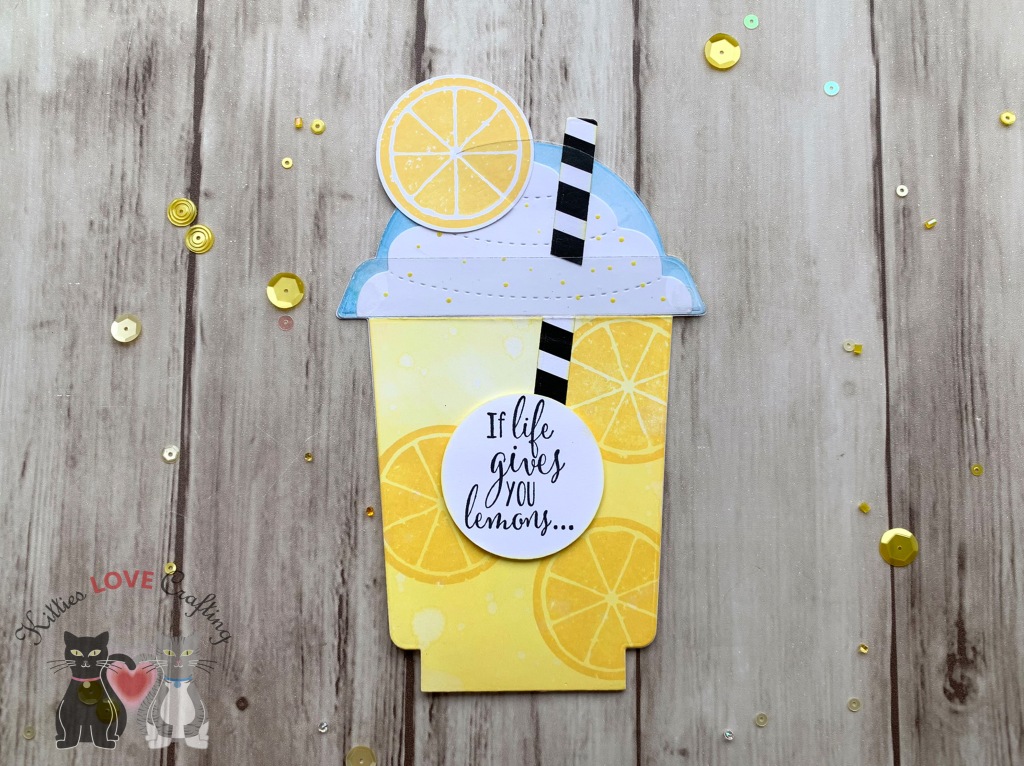
And if I’m making fruity drinks for the summer, I can’t forget about a refreshing frozen lemonade! Yum!

For this card, I started by using Tim Holtz Squeezed Lemonade Distress Oxide Ink to create an ombre effect on the coffee cup. I sprayed some water onto it with my Tim Holtz DISTRESS SPRAYER and blotted it with a paper towel. Then I stamped a couple of slices from the Stampin’ Up! Lemon Zest Clear-Mount Stamp Set (which was retired recently) and Ranger Archival Chrome Yellow Ink onto the cup and one onto some Neenah 110lb Classic Crest Cardstock 8.5 X 11″.

While the ink dried, I diecut the straw from a piece of Catherine Pooler Designs Black Tie Gala Patterned Paper. I adhered the coffee cup and whipped cream to the card base and then cut the straw in half and adhered it to the front of the card using Tombow Mono Multi Liquid Glue. I added Nuvo DANDELION YELLOW Glossy Drops to the whipped cream and then adhered the clear lid on top (I used Ranger GLOSSY ACCENTS Glue Dimensional Adhesive to adhere the acetate). I cut a slit in the lemon slice and adhered it to the card. I stamped a sentiment from Stampin’ Up! Lemon Zest Clear-Mount Stamp Set (which was retired recently) onto a piece of Neenah 110lb Classic Crest Cardstock 8.5 X 11″ using Memento Tuxedo Black Ink and cut it out with a 1-3/4 inch punch. I adhered to the card with 3M Foam Tape

On the inside of the card, I stamped a sentiment from the Stampin’ Up! Lemon Zest Clear-Mount Stamp Set (which was retired recently) with Memento Tuxedo Black Ink and lemon slices with Tim Holtz Squeezed Lemonade Distress Oxide Ink.

Card Inside

Supplies

https://linkdeli.com/widget.js?id=f5e8378456858c916708

Thanks for reading this post. I hope you enjoyed and I’ve inspired you to Shop Your Stash and see what fun ideas you come up with and maybe rediscover supplies you forgot you had! Leave comments or questions below or feel free to email me.