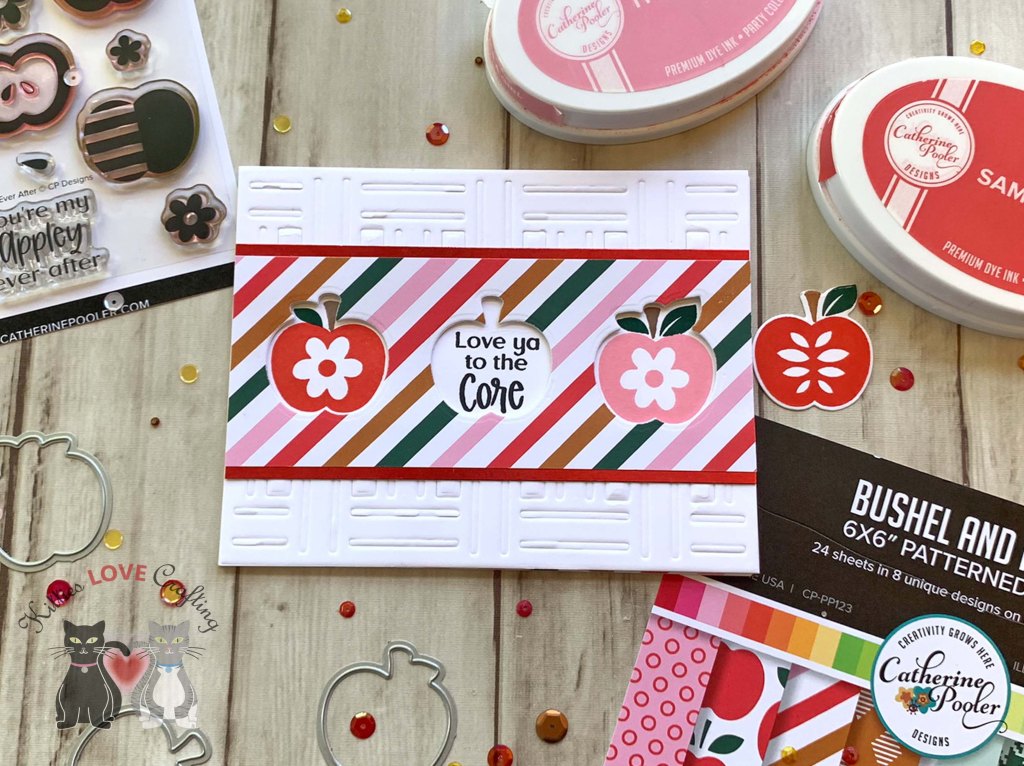
Hello friends. The next post in my Fall card series features a window card using the coordinating dies from the Catherine Pooler’s Appley Ever After stampset. This was a very easy card to make. To add texture to the background I added an embossed panel behind it (more on this later in the post).
Thanks for reading this post. I hope I’ve inspired you to give this cute Fall card a try for yourself. Leave comments or questions below or feel free to email.
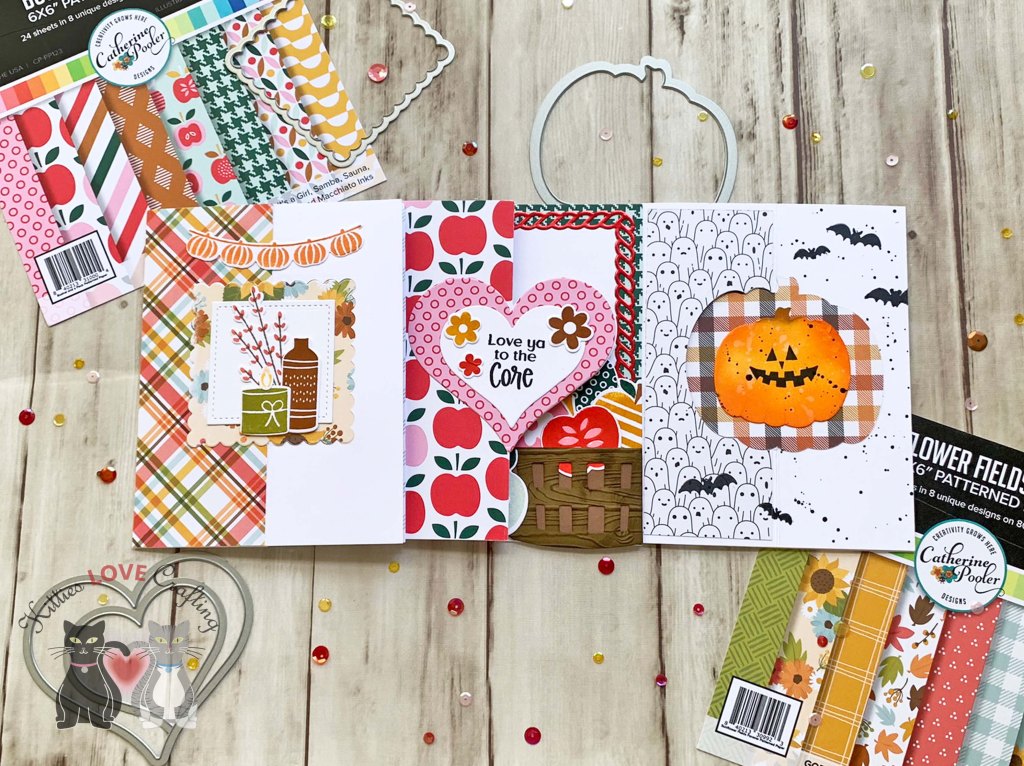
Hello friends. This post is all about adding fancy folds to your cards. I used different shaped dies and papers as well as a variety of stamps to create different themes. These were inspired by Catherine Pooler’s video on fancy folds over on Stampnation. Check it out here>>.
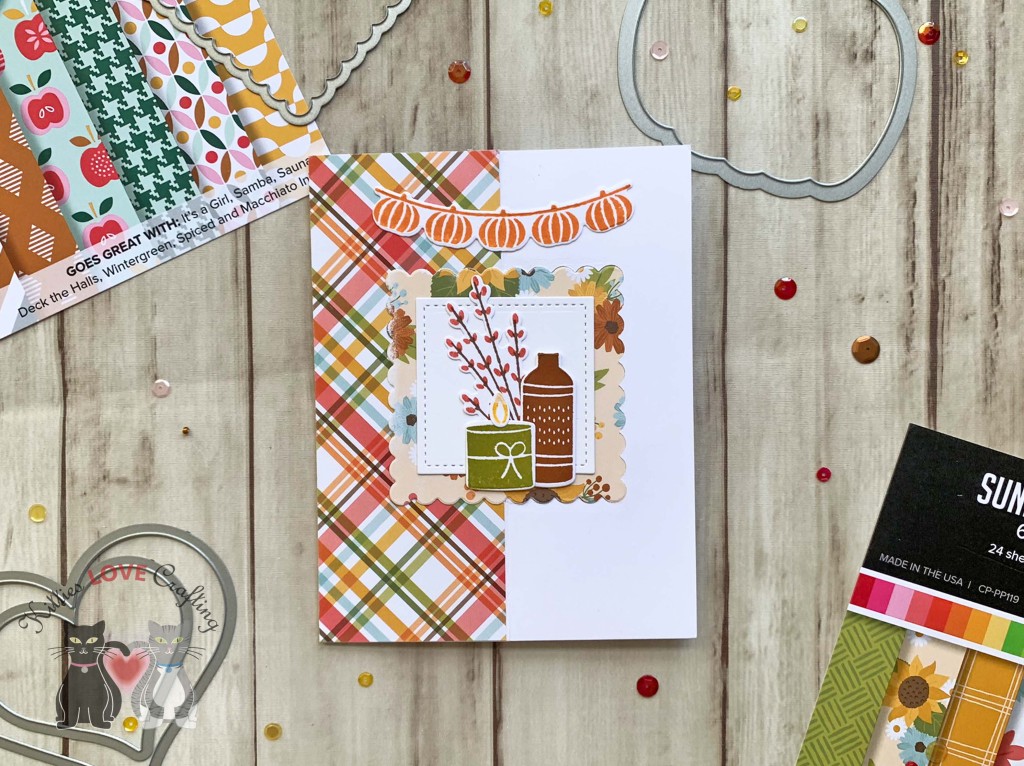
For the first card, I cut a piece of Neenah 100lb Classic Crest Cardstock 8.5 X 11″ to 5-1/2 x 8-1/2″ and scored at 4-1/4″ to create a card base and then I scored the front of the card at 2-1/8″. At this point you need to decide what shape you wll be die cutting out and which side you will be folding your panel. You will see that on my second and third cards the folds are in the opposite direction.
I chose a scallop square die from the Sizzix Framelits Squares Scallop Die Set. The way to achieve the flip window is to only die cut one half of the panel. To do this you just need to align your cutting plates along the score line covering only the side you will cut out.
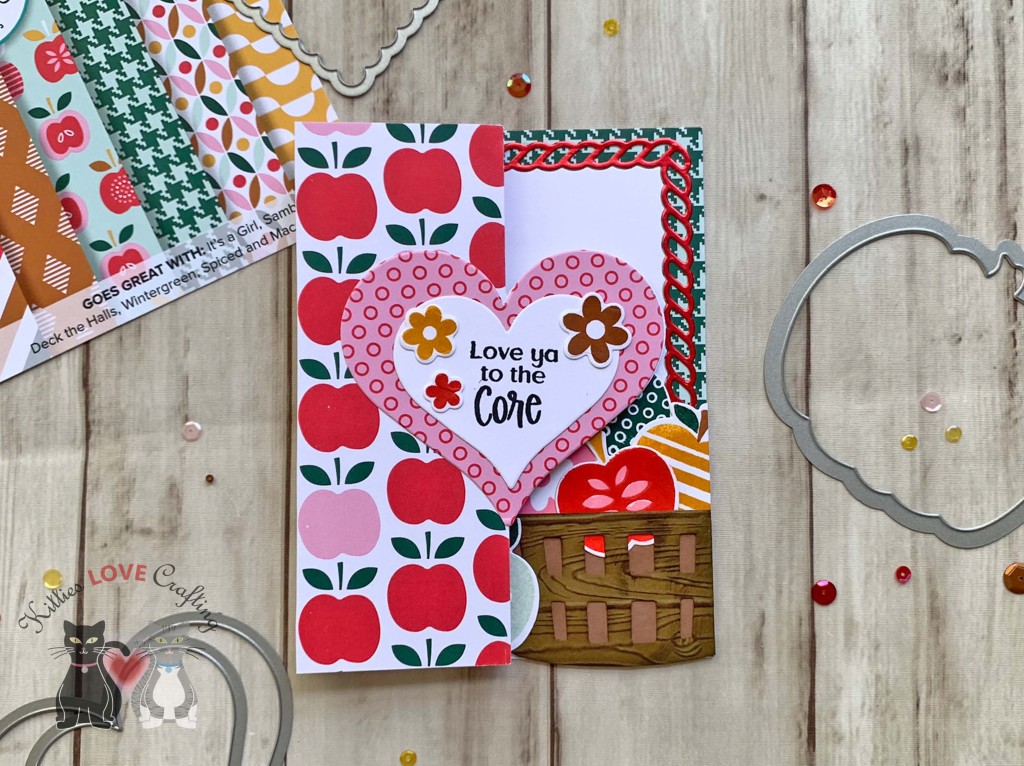
For the second card, I cut a piece of Neenah 100lb Classic Crest Cardstock 8.5 X 11″ to 5-1/2 x 8-1/2″ and scored at 4-1/4″ to create a card base and then I scored the front of the card at 2-1/8″.
For this card, I chose a heart die from the Stampin’ Up! Sweet and SassyDie Set (retired). Same step as before for cutting the flip window.
For the third card, I cut a piece of Neenah 100lb Classic Crest Cardstock 8.5 X 11″ to 5-1/2 x 8-1/2″ and scored at 4-1/4″ to create a card base and then I scored the front of the card at 2-1/8″.
For this card, I chose a pumpkin die from the Sizzix Pumpkin Framelits (no longer available). Follow the same steps as in the previous two cards for cutting the flip window.
Next, I cut 3 pieces of pattern paper from the Honey Bee Stamps Halloween Harvest 6 x 6 Patterned Paper (discontinued) to 2 x 5-1/4″ and one to 4 x 5-1/4. I also die cut 2 pumpkins (of the same size) from the same paper. Then die cut a smaller pumpkin from Neenah 100lb Classic Crest Cardstock 8.5 X 11″ using the same dies. I inked it with Tim Holtz Spiced Marmalade,Carved Pumpkin, and Peeled Paint Distress Inks. I stamped a Jack-O-Lantern face from the Papertrey Ink Pumpkin Expressions Mini Stamp Set with Midnight Ink. I also added splatters to it and the right side of the card front with Black Acrylic Paint and stamped bats from the Lawn Fawn Happy Haunting stampset.
Thanks for reading this post. I hope I’ve inspired you to give these fun fancy fold cards a try for yourself. Leave comments or questions below or feel free to email.
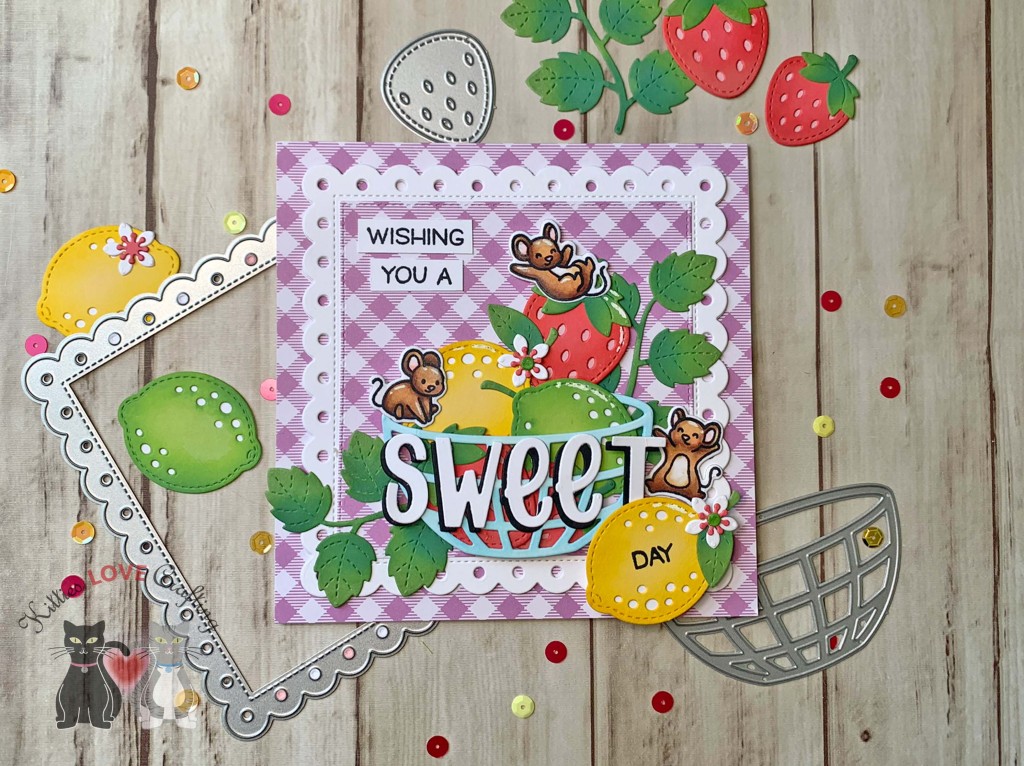
I colored them with Distress Oxide Inks. I used Tim Holtz Mustard Seed and Mowed Lawn for the lemons and limes, Festive Berries for the strawberries, Rustic Wilderness for the leaves, and Tumbled Glass for the fruit basket.
Thanks for reading this post! I hope you enjoyed and I’ve inspired you to make this sweet card yourself! If you want to share you creations with me tag me on instagram @kittieslovecrafting. Leave comments or questions below or feel free to email me.
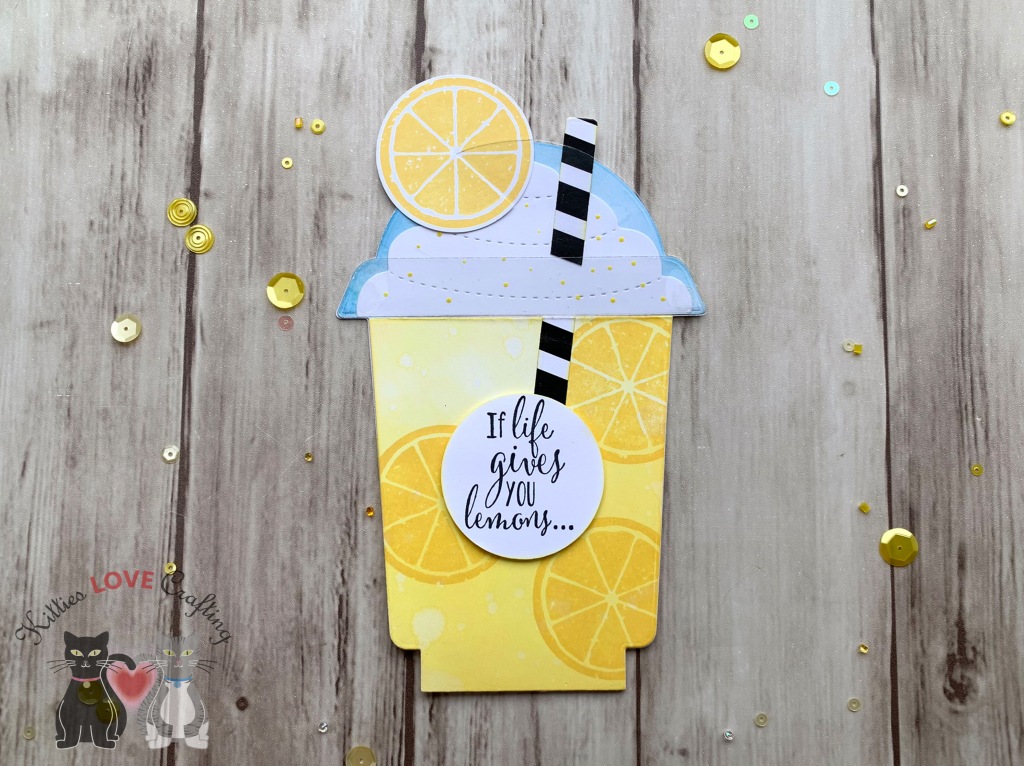
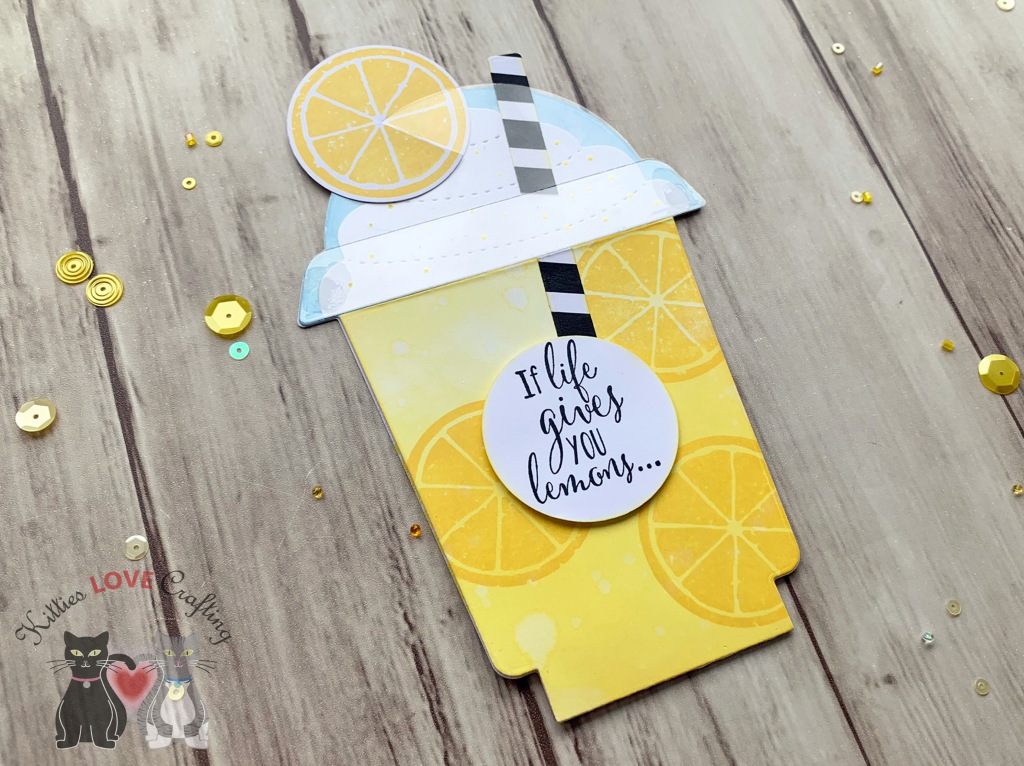
Hi friends. I couldn’t resist but CASE this card from Lawn Fawn Design Team member, Tammy Stark, featuring the cute Zesty Lemon Die. I used similar colors on the background but a different technique, changed the sentiment and a different border.
Thanks for reading this post! I hope you enjoyed and I’ve inspired you to make these cute cards yourself! If you want to share you creations with me tag me on instagram @kittieslovecrafting. Leave comments or questions below or feel free to email me.
Hi friends. I couldn’t resist getting the cute Zesty Lemon Die set from Lawn Fawn when I saw it! For my first cards I decided to make some embossed backgrounds and my distress sprays. These will also be available in my Etsy Shop.
For the both cards, I cut a piece of Neenah 110lb Classic Crest Cardstock to 7″ x 6″ and scored at 3-1/2″ to create the card bases. I diecut a piece of Neenah 110lb Classic Crest Cardstock with the stitched frame 3x to stack them and the scallop rectangle from the Queen & Company Foundation 17 dies. I also die cut one of the stitched smaller rectangles from the same set as well as a piece measuring 3 x 5-3/4″.
I embossed the two rectangles with the Darice 5 x 7 Plaid Embossing Folder then colored them using Distress Sprays. I used Broken China and Salty Ocean for the first card and Picked Raspberry and Carved Pumpkin for the second. In retrospect, I would water down the colors on the pink/orange background a bit more. Once all was dry, I added some splashed with White Acrylic Paint.
Thanks for reading this post! I hope you enjoyed and I’ve inspired you to make these cute cards yourself! If you want to share you creations with me tag me on instagram @kittieslovecrafting. Leave comments or questions below or feel free to email me.
Thanks for reading this post! I hope you enjoyed and I’ve inspired you to make this cute card yourself! If you want to share you creations with me tag me on instagram @kittieslovecrafting. Leave comments or questions below or feel free to email me.
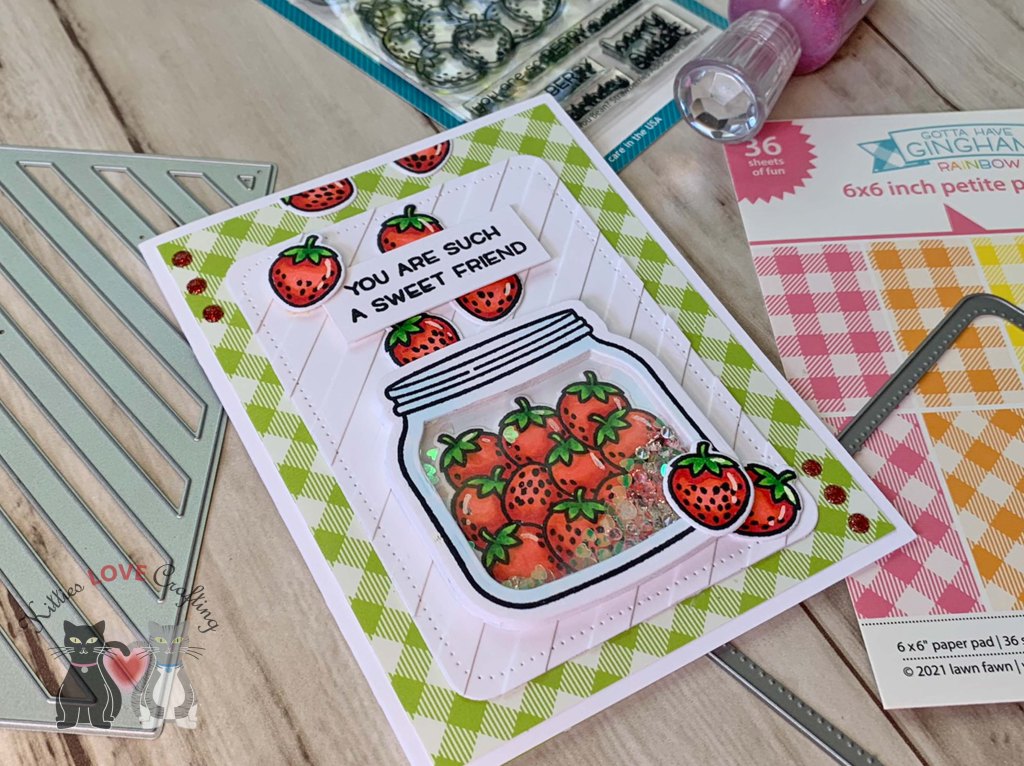
For the mason jar shaker, instead of using foam tape (which would be a slight pain to add due to the small size) I diecut about 7 mason jars from Neenah 110lb Classic Crest Cardstock using the Lawn Fawn How You Bean? Shaker Add-on and stacked them. I diecut the acetate piece with the same die set (using the background die included) as well as the backing piece for the shaker which I colored with the same copic markers (BG000 + 0).
For the shaker element, I used Queen & Co Toppings in Pink and Clear Diamonds and some older Martha Stewart Iridescent Hearts and Stars Glitter (no longer available).
Lastly, I finished it off by adding some highlights with a White Gel Pen. One note: I added the highlights to the strawberries on the inside before adhering it inside the shaker element. I also added some Ruby Slipper Nuvo Glitter Drops to the card.
On the inside of the card, I stamped a sentiment from the Lawn Fawn How You Bean? stampset with Stampin’ Up! Real Red Ink. I also added a strip of the same pattern paper from the front of the card measuring 1 x 4-1/4″ and adhered 1/2 a strawberry image I had left over.
Thanks for reading this post! I hope you enjoyed and I’ve inspired you to make this cute shaker card yourself! If you want to share you creations with me tag me on instagram @kittieslovecrafting. Leave comments or questions below or feel free to email me.
Thanks for reading this post! I hope you enjoyed and I’ve inspired you to make this cute shaker card yourself! If you want to share you creations with me tag me on instagram @kittieslovecrafting. Leave comments or questions below or feel free to email me.
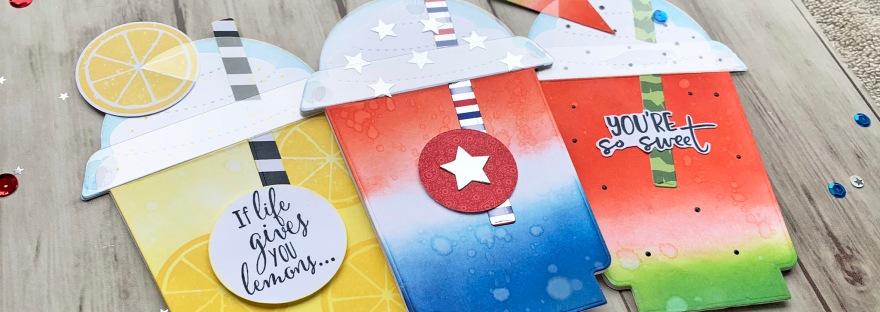
While it’s probably no surprise too many that I love coffee, I love coffee stamps and dies even more. This Honeybee Stamps Frappe Shake Card Dieset as well as their Honey Bee COFFEE CUP CARD Dies are my favorites! They have everything you need to make cute coffee cup and frappe cup shaped cards and shakers. And they fit in an A2 size envelope which is great!
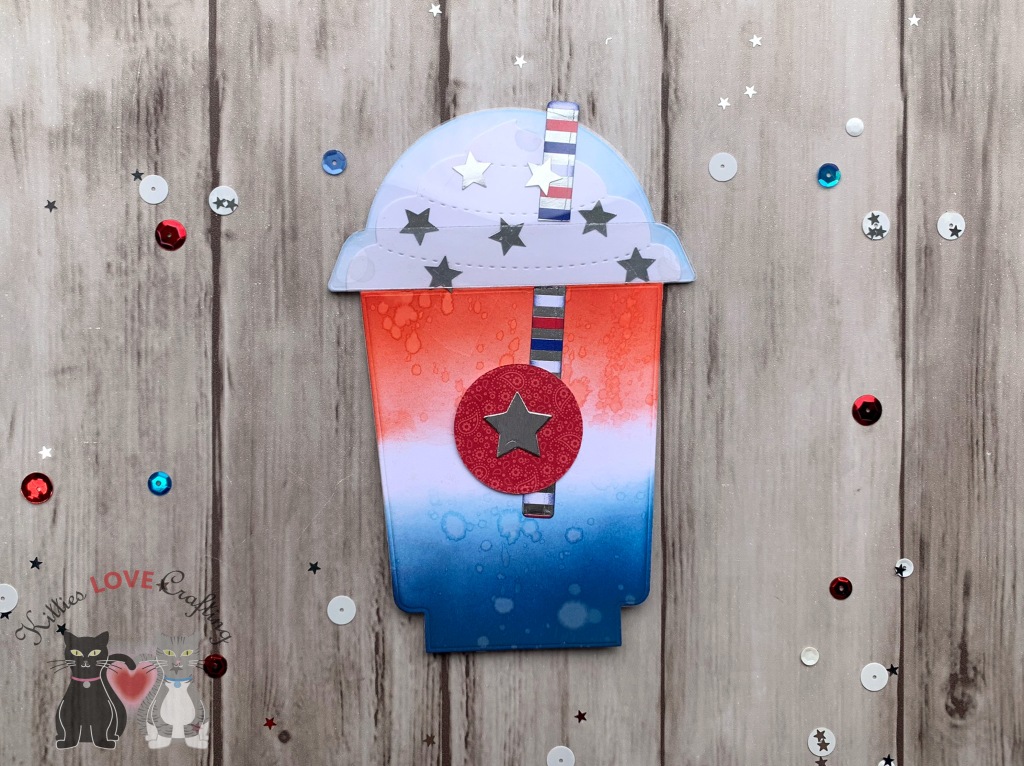
I thought it would be fun to reuse this dieset to make some non-coffee cards, instead make brightly colored summer beverages. I don’t know if you all remember the rocket bomb popsicles that were red, white and blue. I remember many summers as a kid eating those popsicles (they were refreshing and turned my tongue red or blue, depending on which end I ate first—what could be better??). LOL That was the inspiration for my first card.
I started by diecutting card bases using the large card, coffee cup, and the whipped cream dies in the set from Neenah 110lb Classic Crest Cardstock 8.5 X 11″ 3 times. I also diecut 3 sets of the lid and its rim from Acetate.
On the inside of the card, I stamped “Happy 4th of July” with a very old stampset I had (sorry don’t know where it came from) using Tim Holtz Chipped Sapphire Distress Oxide Ink and added 3 silver stars.
Card Inside
For the second card, I decided to make a delicious watermelon smoothie. Who doesn’t like a tasty frozen watermelon beverage on a hot summer day?!? I’m now craving a smoothie while writing this post. LOL.
Thanks for reading this post. I hope you enjoyed and I’ve inspired you to Shop Your Stash and see what fun ideas you come up with and maybe rediscover supplies you forgot you had! Leave comments or questions below or feel free to email me.


 https://linkdeli.com/widget.js?id=f5e8378456858c916708