Card kits, Just Because, Love & Friendship, Slimline

5 Cards 1 Kit (Simon Says Stamp July 2020 Card Kit)

Well this post is a little late but….better late than never I guess. This kit is very appropriate for the time we are currently in. What I really liked about the included stamp set, Simon Says Stamp Home Sweet Home 6×8 Stamp Set, is that the image of the houses fits across a landscape A2 card or a slimline card.

The Kit includes:

For the first card, I started by cutting a piece of Neenah 110lb Classic Crest Cardstock to 5-1/2 x 8-1/2″ and scored at 4-1/4″ to make a card base. Then cut a piece of the dark cloud paper from Waffle Flower Special Delivery Paper to 5-1/2 x 8-1/2″ and inked around the edges with the Tim Holtz Ranger Speckled Egg Mini Distress Ink included in the kit and adhered it to the card base.

I diecut 1 large and 2 medium postage pieces from Neenah Solar White 80lb Cardstock with the Simon Says Stamp CZ Design Postage Dies. I stamped the houses from Simon Says Stamp’s Home Sweet Home 6×8 Stamp Set onto those diecuts with Memento Tuxedo Black Ink. I also stamped additional images (the plane and banner with sentiment, paper plane, sun and wifi symbol) onto the same Neenah Solar White 80lb Cardstock.

I colored all the images with COPICS. I used R81 & R85, W1 & W3, Y13 & Y18, G07 & G28 for the first house (top); BG11 & BG53, W1, W3 & W7, G07 & G28, Y13 & Y18, R29 & R56 for the second house; R29 & R56, W3 & W7, Y13 & Y18 for the third house; R29 & R56, BG11 & BG53, W3 & W7 for the Airplane and banner; Y13 & Y18 for the sun and R81 & R85 for the paper plane. I fussycut all the images and adhered them to the card. I used 3M Foam Tape to pop up some of the images for added dimension.

To finish it off, I added a dashed line behind the paper plane with my Faber-Castell PITT Artist Pen Superfine Fineliner – Black (199) and some Nuvo Glitter Drops in Fresh Snowfall.

On the inside of the card I kept it simple, and just stamped the sentiment and the row of houses from Simon Says Stamp’s Home Sweet Home 6×8 Stamp Set with Tim Holtz’s Ranger Speckled Egg Mini Distress Ink.

Dimensions


For the second card, I started by cutting a piece of Neenah 110lb Classic Crest Cardstock to 7 x 8-1/2″ and scored at 3-1/2″ to make a card base. Then cut a piece of the light cloud paper from Waffle Flower Special Delivery Paper to 3-1/2 x 8-1/2″ using the Lawn Fawn Large Slimline with Sliders Die Cuts and adhered it to the card base.

I stamped the houses, the plane and banner with sentiment, the sun and some clouds from Simon Says Stamp’s Home Sweet Home 6×8 Stamp Set onto a piece of Neenah Solar White 80lb Cardstock with Memento Tuxedo Black Ink.

I colored all the images with COPICS. I used R14 & R27, N2 & N5 for the first house; G07 & G14 for the trees; B37 & B24, N5 & N7 for the second house, R81 & R85, N2 & N5 for the third house; R14, R81 & R85, N2 & N5 for the fourth house; and BG000 for the clouds. I stamped a sentiment from Simon Says Stamp’s Home Sweet Home 6×8 Stamp Set onto the card front with Memento Tuxedo Black Ink. Then I restamped it with Versamark Emboss Ink and added Clear Embossing Powder. I made sure to use an anti static powder tool before using the embossing ink.

I fussycut all the images and adhered them to the card. I used 3M Foam Tape to pop up the plane and banner for added dimension.

On the inside of the card I kept it simple, I added a leftover strip of the same cloud paper (about 1 x 8-1/2” and just stamped a sentiment and stars Simon Says Stamp’s Home Sweet Home 6×8 Stamp Set with Stampin’ Up!’s Night of Navy Ink.

Dimensions


For the third card, I started by cutting a piece of Simon Says Stamp Soft Navy Cardstock to 4-1/4 x 5-1/2″ and scored at 4-1/4″ to create the card base and another piece to 4 x 5-1/4″.

For this card I wanted to try using my prismacolors on the navy cardstock to see if it wouls work. To be honest it is a techinique I have never tried before but have seen Jennifer McGuire and others do it successfully so I figured why not. I also saw Kristina Werner white heat emboss onto the navy cardstock with this kit and looked stunning so I combined the two ideas and came up with this card.

I picked out a sentiment from Simon Says Stamp’s Home Sweet Home 6×8 Stamp Set and all the images I wanted to use (note: the stars had to be stamped multiple times). I used an anti static powder tool and coated the paper well (I still got strays-tell you later how I fixed it) and stamped the images with Versamark Emboss Ink, added Wow Opaque Bright White Super Fine Embossing Powder and heat set it. I used my Prismacolor Pencils to color the images. Tip: Color with white pencil first so that your colors will appear brighter and truer over dark cardstock.

Ok, so how did I fix the stray embossing powder. Well, I tried using a sand eraser and an exacto knife to gently scrape it off but it was starting to pill the paper so I decided to embrace it instead and add white dots (for stars) with my Uni-Ball Signo Broad Point Gel Pen.

I adhered the panel to the card base and then finished it off by adding a wonky stitched line around the edge.

On the inside of the card I adhered a piece of Neenah Solar White 80lb Cardstock, measuring 4 x 5-1/4″ and just stamped a sentiment from Simon Says Stamp’s Home Sweet Home 6×8 Stamp Set with Stampin’ Up!’s Night of Navy Ink and stars with Stampin’ Up!’s Daffodil Delight Ink.

Dimensions


For the fourth card, I started by cutting a piece of Simon Says Stamp Smoke Cardstock to 4-1/4 x 5-1/2″ and scored at 4-1/4″ to create a card base and cut down one of the papers from the Waffle Flower Special Delivery Paper to 4 x 5-1/4″. I used an exacto knife to cut out two of the postage stamp images. I took the large one I cut out and mounted it on a piece of Neenah Solar White 80lb Cardstock, measuring 2 x 2-1/2. I mounted both those pieces onto a piece of pattern paper from the Waffle Flower Special Delivery Paper included in the kit, measuring 2-1/2 x 3-7/16. I will add that inside a Simon Says Stamp Mini White Envelope.

I stamped houses and the paper airplane from Simon Says Stamp’s Home Sweet Home 6×8 Stamp Set onto Neenah Solar White 80lb Cardstock with Memento Tuxedo Black Ink. I colored them with COPIC markers. I used B000 & B01, W1 & W3 (roof), BG0000 & 0 (windows) for the first house; RV10, RV11 & RV14, W1 & W3 (roof), BG0000 & 0 (windows) for the second house; YG09 & YG25 for the trees; W1 & W3, Y06 & Y13 for the lamp post; B24 & B37 for the sky; Y06 & Y13 for the stars and B01 & B24 for the paper airplane and RV10 & RV11 for the background.

I added 3M Foam Tape to the top panel, adhered the images behind the panel and adhered it to the card base. I finished it off by adding three dots of Nuvo Gloss Drops in Midnight Blue at the top and bottom of the card.

On the inside of the card I adhered Simon Says Stamp Mini White Envelope with the card inside to the inside of the card and just stamped a sentiment and a row of houses from Simon Says Stamp’s Home Sweet Home 6×8 Stamp Set with Stampin’ Up!’s Night of Navy Ink.

Dimensions


For the fifth card, I was inspired by Cindy Norberg and Heather Ruwe‘s cards. I think this is my favorite card! It’s so bright and shiny!

I started by cutting a piece of Neenah 110lb Classic Crest Cardstock 8.5 X 11″ to 4-1/4 x 5-1/2″ and scored at 4-1/4″ to create the card base and cut down a piece of Simon Says Stamp Slate Gray Cardstock to 4-1/4 x 5-1/2″ and adhered it to the card base. I also cut a piece of Neenah Solar White 80lb Cardstock to 4 x 5-1/2″ and adhered it to the card base.

I used three pieces of Montval Acid-Free Cold Press 140 lb Watercolor Paper along with my Kuretake Gansai Tambi Watercolors and Watercolor Brushes to create three rainbow backgrounds. I used red, orange and yellow for the first piece. yellow, green and aqua for the second piece, and aqua, dark blue and purple for the third piece. I let those dry WELL (cannot stress this enough) and then I stamped the houses on each panel with Versamark Emboss Ink, added Silver Embossing Powder and heat set it with a heat gun. Also, it is very important to use an anti static powder tool before embossing.

I fussycut the images out and adhered them to the card front. I heat embossed a sentiment and some clouds to the top of the card with the same Silver Embossing Powder. To finish it off I added some splashes with Silver Acrylic Paint.

I left the inside of the card blank and just added a strip of the leftover watercolor, measuring 1 x 4-1/4″.

Dimensions


Supplies

https://linkdeli.com/widget.js?id=f5e8378456858c916708

Thanks for reading this post. I hope you enjoyed and I’ve inspired you to make some cards using this kit yourself! If you want to share you creations with me tag me on instagram @kittieslovecrafting. Leave comments or questions below or feel free to email me.

Just Because, Slimline, Summer

Slimline Rainbow Card Featuring Stampin’ Up’s Nothing’s Better Than Stampset

There’s nothing better than… a rainbow card, unless it’s a rainbow of treats! 🙂 I decided to try making a slimline card with this mostly out of curiosity. Lately, I like to challenge myself to use every stampset in a slimline fomat just to see if I can stretch my creativity.

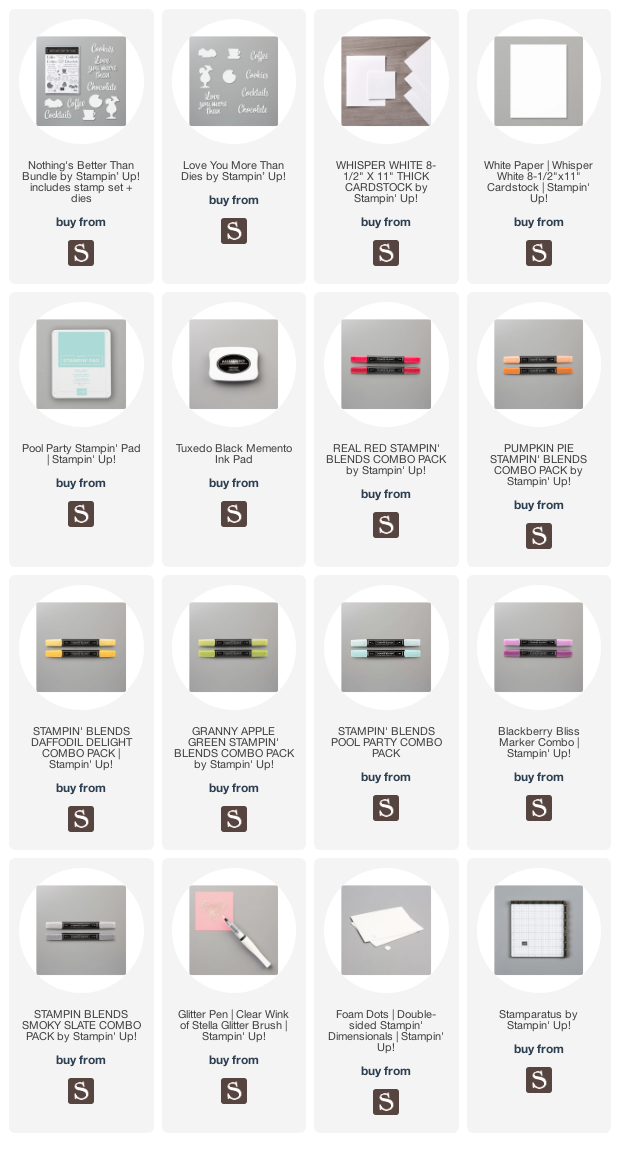
For this card, I started by cutting a piece of Whisper White 8-1/2″ X 11″ Thick Cardstock to 5-1/2 x 8-1/2″ and scored at 4-1/4″ to create a card base. I stamped all four of the outline images from the Nothing’s Better Than Stampset several times onto Whisper White 8-1/2″ X 11″ Cardstock with Tuxedo Black Memento Ink. I colored them with Stampin’ Blends in Real Red, Pumpkin Pie, Daffodil Delight, Granny Apple Green, Pool Party and Blackberry Bliss. Then diecut them with the coordinating dies from Love You More Than Dies.

I stamped the sentiment from the Nothing’s Better Than Stampset nto Whisper White 8-1/2″ X 11″ Cardstock with Tuxedo Black Memento Ink as well all the words (Coffee, Cocktails, Cookies and Chocolate) with Pool Party Classic Stampin’ Ink. I fussycut all the text out and then proceeded to lay out all the images and words on the card. Once I was happy with the layout, I adhered the sentiment and some images flat with Tombow Mono Multipurpose Liquid Glue and then some of the images I popped up with Stampin’ Dimensionals. I added a shadow underneath the images with Smoky Slate Stampin’ Blends. I finished it off by some shimmer with my Clear Wink of Stella Glitter Brush.

For the inside of the card, I stamped another sentiment from the Nothing’s Better Than Stampset, and added an extra coffee cup and steam outline imageI had previously colored and diecut.

Dimensions


Supplies

https://linkdeli.com/widget.js?id=f5e8378456858c916708

Thanks for reading this post. I hope you enjoyed and I’ve inspired you to try this fun summery rainbow card for yourself! Leave comments or questions below or feel free to email me. If you want to share you creations with me tag me on instagram @kittieslovecrafting. If you would like a Stampin’ Up! catalog, please email me as well. All current catalogs can be found on the right side of this post and the Stampin’ Up! page. All news and fun stuff happening at Stampin’ Up! are listed there!

Stampin' Up! News

August 2020 Paper Pumpkin Kit! World’s Greatest

Celebrate and appreciate the everyday heroes in your life with the August Paper Pumpkin Kit. The cards included in this kit are specifically designed for celebrating life’s champions! The colors and the masculine card designs in this kit are also perfect for the men in your life!

  • This Kit contains enough supplies to create nine A2 size cards and coordinating envelopes.
  • Coordinating Colors: Bumblebee, gold, Mint Macaron, Pacific Point, Soft Suede, white
  • The kit’s stamp set includes Distinktive stamps, which are photo-realistic stamps that create an impressive detailed image with a single stamp.

Subscription Information

  • Subscribe to the August 2020 Paper Pumpkin Kit from July 11 to August 10 at paperpumpkin.com.
  • Note: Supplies may be limited toward the end of each subscription period.

Encouragement, Faux Embossing, Just Because, Stampin' Up!, Summer, Techniques

Faux Embossed Background Using Dies

Hello friends. This faux embossed technique that I discovered a few years ago and is a great way to add dimension to your card without having to emboss. It can be done with most images and all text. I used the word dies from Nothing’s Better Than Bundle from Stampin’ Up! to create an embossed background. But to step it up I also decided to add a shaker element to the card.

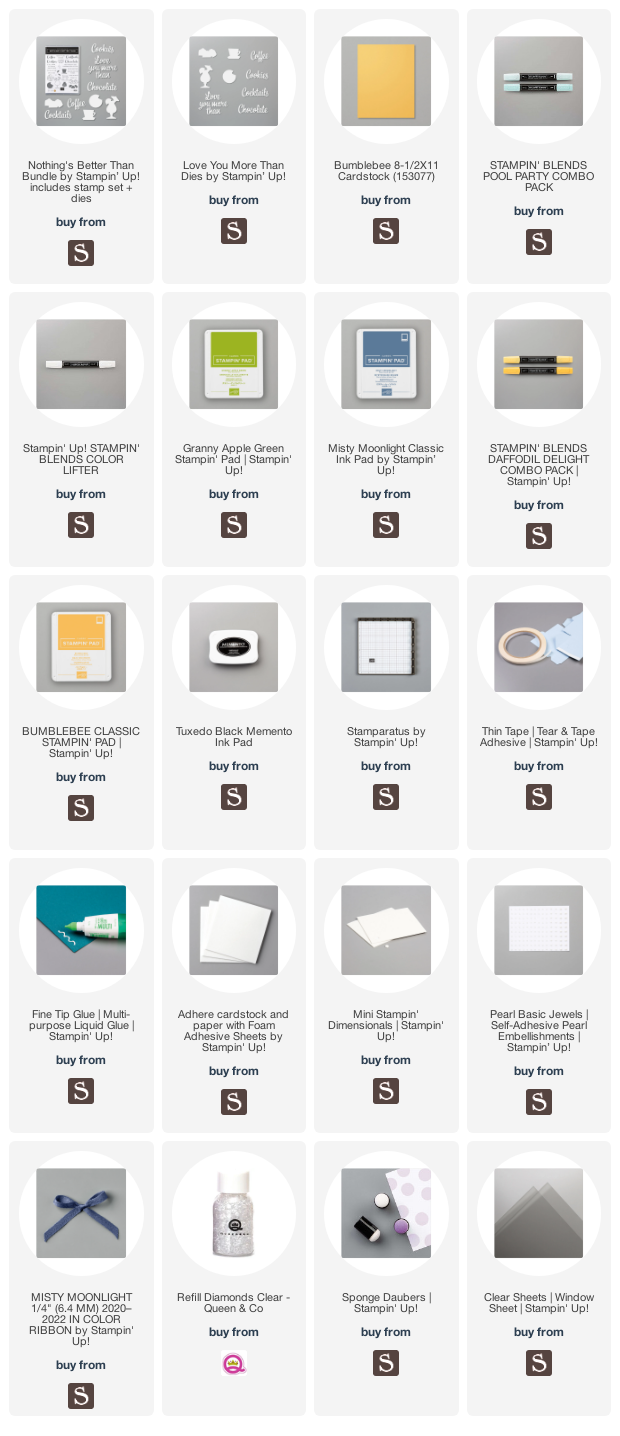
I started by cutting a piece of Bumblebee 8-1/2X11 Cardstock to 5-1/2 x 8-1/2″ and scored at 4-1/4″ to create a card base. I die cut the “Cocktails” word with the Love You More Than Dies from Bumblebee 8-1/2X11 Cardstock several times. I adhered them to the card using Tombow Mono Multipurpose Liquid Glue. I added some Bumblebee Classic Stampin’ Ink to the top of the text and edges of the card base with a Sponge Dauber. Adding ink gives it more of an embossed look because it highlights the raised edges.

I stamped the outline image of the cocktail again as well as the sentiment onto a scrap piece of Whisper White 8-1/2″ X 11″ Cardstock with Tuxedo Black Memento Ink. I used the solid stamps with Granny Apple Green Stampin’ Ink and Misty Moonlight Classic Stampin’ Ink to create an ombre effect for the drink. I used a Sponge Dauber to soften the line between the two colors on the stamp before stamping. I colored the glass with Light Pool Party Stampin’ Blends and the Stampin’ Blends Color Lifter.

I stamped a second version of the solid image. I used Bumblebee Classic Stampin’ Ink for the fruit and Misty Moonlight Classic Stampin’ Ink for the umbrella. I trimmed the image to a piece, measuring 1-1/2 x 2-1/4″ and left the second solid image without diecutting. I cut another piece of Whisper White 8-1/2″ X 11″ Cardstock to 2 x 6″ and used the Scalloped Tag Topper Punch to punch one end, creating a tag. I adhered the rectangle piece with the image to the tag and then cut out the center of the drink. I stamped a sentiment from Nothing’s Better Than Stampset with Granny Apple Green Stampin’ Ink onto the tag. Then added Acetate and Foam behind the tag, some Clear Diamond Shaker Toppings, adhered the extra stamped cocktail beverage behind and adhered the tag to the card. I finished it off by adding ribbon in Misty Moonlight. Since I don’t have any Misty Moonlight Ribbon I found some white grosgrain ribbon from my stash and colored it using Misty Moonlight Classic Stampin’ Ink and added some Pearls which I colored yellow with a Light Daffodil Delight Stampin’ Blends.

On the inside of the card, I stamped another sentiment from the Nothing’s Better Than Stampset with Tuxedo Black Memento Ink and the cocktail outline image with Bumblebee Classic Stampin’ Ink.

Dimensions


Supplies

https://linkdeli.com/widget.js?id=f5e8378456858c916708

Thanks for reading this post. I hope you enjoyed and I’ve inspired you to try this fun summery card for yourself! Leave comments or questions below or feel free to email me. If you want to share you creations with me tag me on instagram @kittieslovecrafting. If you would like a Stampin’ Up! catalog, please email me as well. All current catalogs can be found on the right side of this post and the Stampin’ Up! page. All news and fun stuff happening at Stampin’ Up! are listed there!

Hello, Just Because, Love & Friendship

Four Easy Cards Featuring Stampin’ Up’s Nothing’s Better Than Stampset

Hello Friends. Happy Monday! The Nothing’s Better Than Bundle from Stampin’ Up! is a great set to create a variety of cards for any season or occasion. It has an outline stamp as well as the solid stamp for each image so if you don’t like coloring this set will work well for you. I made four similar cards using this bundle and the Scalloped Tag Topper Punch and the Delightful Tag Topper Punch. I don’t often say this about punches but I love these tag dies. I think part of it is that I a few months ago I discovered junk journaling and have been making tags and pockets and things for it. So when I saw these punches I said (to myself) “YES PLEASE!”. LOL And now I am obsessed with making tags.

For the first card, I started by cutting a piece of Magenta Madness 8-1/2″ X 11″ Cardstock to 5-1/2 x 8-1/2″ and scored at 4-1/4″ to create a card base. I also cut a piece of Whisper White 8-1/2″ X 11″ Cardstock to 4 x 5-1/4″. I stamped the outline image of the cocktail from the Nothing’s Better Than Stampset with Magenta Madness Classic Stampin’ Ink onto the card base as well as the Whisper White panel I had previously cut. I added some ink splatters with Mango Melody Classic Stampin’ Ink and Coastal Cabana Classic Stampin’ Ink. You can also use the ink refills if you have them; I do not have them yet. I just smooshed some of the ink onto a stamp block, added some water and used a small brush to splatter it on. As an alternative, you can use a Water Painter. Once dried, I adhered the panel to the card base with Tombow Mono Multipurpose Liquid Glue.

I stamped the outline image of the cocktail again as well as the sentiment onto a scrap piece of Whisper White 8-1/2″ X 11″ Cardstock with Tuxedo Black Memento Ink. I used the solid stamps with Magenta Madness Classic Stampin’ Ink and Mango Melody Classic Stampin’ Ink to create an ombre effect for the drink. I used a Sponge Dauber to soften the line between the two colors on the stamp before stamping. I used Magenta Madness Classic Stampin’ Ink for the fruit and Coastal Cabana Classic Stampin’ Ink for the umbrella. I diecut the image using the coordinating Love You More Than Dies.

I diecut the word “Cocktails” from Mango Melody 8-1/2″ X 11″ Cardstock using the dies included in the Love You More Than Dies. Then I cut a piece of Coastal Cabana 8-1/2″ X 11″ Cardstock to 1-1/2 x 3-3/8″ and a piece of Basic Black 8-1/2″ X 11″ Cardstock to 1-1/2 x 3-3/4″ and used the Scalloped Tag Topper Punch to cut the ends of both. I stacked them on top of each other and the sentiment piece, which I cut to 1-1/4 x 2″. I adhered the cocktail image and the word “Cocktails” flat onto the sentiment piece and popped the whole piece up with Stampin’ Dimensionals.

For the inside of the card, I cut a piece of Whisper White 8-1/2″ X 11″ Cardstock to 4 x 5-1/4″ and adhered it with Tombow Mono Multipurpose Liquid Glue. I stamped another sentiment from the Nothing’s Better Than Stampset with Magenta Madness Classic Stampin’ Ink and the cocktail outline image with Mango Melody Classic Stampin’ Ink.

Dimensions


For the second card, I started by cutting a piece of Early Espresso 8-1/2″ X 11″ Cardstock to 5-1/2 x 8-1/2″ and scored at 4-1/4″ to create a card base. I stamped the outline image of the coffee cup and the little asterisk from the Nothing’s Better Than Stampset with Early Espresso Classic Stampin’ Ink onto the card base.

I stamped the outline image of the coffee cup and the steam onto a scrap piece of Whisper White 8-1/2″ X 11″ Cardstock with Tuxedo Black Memento Ink. I used the solid stamp with Mint Macaron Classic Stampin’ Ink and diecut the image using the coordinating Love You More Than Dies. I diecut the “Coffee” word from the same dieset from Mint Macaron 8-1/2″ X 11″ Cardstock and Early Espresso 8-1/2″ X 11″ Cardstock and adhered them together offset.

I stamped the sentiment onto a scrap of Whisper White 8-1/2″ X 11″ Cardstock and cut it down to 1-1/2 x 2-3/8″. I adhered it to a piece of Crumb Cake 8-1/2″ X 11″ Cardstock, measuring 2 x 3-3/4″ (I punched the sides with the Scalloped Tag Topper Punch). I adhered the coffee cup image and the “Coffee” word diecut to the sentiment piece and using Stampin’ Dimensionals added it to the card base.

To finish it off I added sparkle to the word “Coffee” with a Clear Wink Of Stella Glitter Brush and a bow made from colored white satin ribbon ( I used Mint Macaron Classic Stampin’ Ink). I just lay the ribbon down on some paper and swiped the ink pad over the ribbon. If you spray some water on the ribbon first it will help the ink sink into the ribbon better. Also, it takes a while to dry if you put a lot of ink on it. You can also use an ink refill and water to do the same.

For the inside of the card, I cut a piece of Whisper White 8-1/2″ X 11″ Cardstock to 4 x 5-1/4″ and adhered it with Tombow Mono Multipurpose Liquid Glue. I stamped another sentiment from the Nothing’s Better Than Stampset, as well as the coffee cup and steam outline images with Mint Macaron Classic Stampin’ Ink.

Dimensions


For the third card, I started by cutting a piece of Merry Merlot 8-1/2″ X 11″ Cardstock to 5-1/2 x 8-1/2″ and scored at 4-1/4″ to create a card base. I stamped the outline image of the chocolates from the Nothing’s Better Than Stampset with Merry Merlot Classic Stampin’ Ink onto the card base.

I stamped the outline image of the chocolates onto a scrap piece of Whisper White 8-1/2″ X 11″ Cardstock with Tuxedo Black Memento Ink. I used the solid stamp with Soft Suede Classic Stampin’ Ink and diecut the image using the coordinating Love You More Than Dies. I diecut the “Chocolate” word from the same dieset from Whisper White 8-1/2″ X 11″ Cardstock which I then used a direct-to-paper technique with Soft Suede Classic Stampin’ Ink to color it.

I stamped the sentiment from the Nothing’s Better Than Stampset onto a scrap of Whisper White 8-1/2″ X 11″ Cardstock with Soft Suede Classic Stampin’ Ink and cut it down to 1-1/8 x 3-1/8″. I adhered it to a piece of Pear Pizzazz 8-1/2″ X 11″ Cardstock, measuring 1-3/4 x 3-3/4″ (I punched one side with the Scalloped Tag Topper Punch). I adhered the chocolates image using Stampin’ Dimensionals and the “Chocolate” word diecut flat onto the sentiment piece and adhered it to the card base.

To finish it off I added a bow made from chocolate satin ribbon.

For the inside of the card, I cut a piece of Whisper White 8-1/2″ X 11″ Cardstock to 4 x 5-1/4″ and adhered it with Tombow Mono Multipurpose Liquid Glue. I stamped another sentiment from the Nothing’s Better Than Stampset, as well as the chocolates outline image with Mint Macaron Classic Stampin’ Ink.

Dimensions


For the last card, I started by cutting a piece of Crumb Cake 8-1/2″ X 11″ Cardstock to 5-1/2 x 8-1/2″ and scored at 4-1/4″ to create a card base. I stamped the outline image of the cookie from the Nothing’s Better Than Stampset with Crumb Cake Classic Stampin’ Ink onto the card base.

I stamped the outline image of the cookie onto a scrap piece of Whisper White 8-1/2″ X 11″ Cardstock with Tuxedo Black Memento Ink. I used the solid stamp with Crumb Cake Classic Stampin’ Ink and diecut the image using the coordinating Love You More Than Dies. I diecut the “Cookies” word from the same dieset 2x from Whisper White 8-1/2″ X 11″ Cardstock which I then used a direct-to-paper technique with Soft Suede Classic Stampin’ Ink to color one of them. I adhered them together offset (white on the bottom).

I stamped the sentiment from the Nothing’s Better Than Stampset onto a scrap of Whisper White 8-1/2″ X 11″ Cardstock with Blackberry Bliss Classic Stampin’ Ink and cut it down to 1 x 2-3/8″. I adhered it to a piece of Whisper White 8-1/2″ X 11″ Cardstock, measuring 1-1/2 x 3-3/8″, which I colored using a direct-to-paper technique with Blackberry Bliss Classic Stampin’ Ink (I don’t have the cardstock) and then punched both sides with the Delightful Tag Topper Punch. I adhered the cookie image (I used Stampin’ Dimensionals) and the “Cookies” word diecut to the sentiment piece and adhered the piece with Stampin’ Dimensionals to the card base.

To finish it off I added 3 Pearls which I colored using Blackberry Bliss Light Stampin’ Blend Marker.

For the inside of the card, I stamped another sentiment from the Nothing’s Better Than Stampset, as well as the chocolates outline image with Blackberry Bliss Classic Stampin’ Ink and the cookies with Crumb Cake Classic Stampin’ Ink.

Dimensions


Supplies

https://linkdeli.com/widget.js?id=f5e8378456858c916708

Thanks for reading this post. I hope you enjoyed and I’ve inspired you to try these easy and fun cards for yourself! Leave comments or questions below or feel free to email me. If you want to share you creations with me tag me on instagram @kittieslovecrafting. If you would like a Stampin’ Up! catalog, please email me as well. All current catalogs can be found on the right side of this post and the Stampin’ Up! page. All news and fun stuff happening at Stampin’ Up! are listed there!

Fourth of July, Halloween, Summer

Shop Your Stash Day 5: Halloween in July

Well I’m sure you have heard of Christmas in July, but have you heard of Halloween in July??? Quite frankly, I love making Halloween cards anytime of year! It’s my favorite holiday ever!!!

For this card, I started by cutting a piece of Simon Says Stamp 100# Black Card to 5-1/2 x 8-1/2″ and scored at 4-1/4″ and diecut a panel and the peekaboo panels with the Lawn Fawn Peekaboo Backdrop. I stamped the jack-o-lantern face from Papertrey Ink Pumpkin Expressions Mini Stamp Set onto a scrap of Stampin’ Up! Pumpkin Pie 8-1/2″ X 11″ Cardstock with Memento Tuxedo Black Ink, cut it to 2 x 2″ then inked up the edges with Spiced Marmalade Distress Ink. I stamped the sentiment from Stampin’ Up! (retired) Versamark Ink and WOW Embossing Powder Opaque Bright White Super Fine onto a piece of Stampin’ Up! Elegant Eggplant 8-1/2″ X 11″ Cardstock (retired), cut it to 2 x 2″ then inked up the edges with Dusty Concord Distress Oxide Ink. Then adhered both to the back of the top panel and the peekaboo windows to each respective area of the card.

I cut a piece of the aqua Lawn Fawn Perfectly Plaid Rainbow 6 x 6 Paper (not available) to 2 x 3-1/4″ and a piece of Stampin’ Up! Old Olive 8-1/2″ X 11″ Cardstock to 1-1/2 x 3-1/4″ and used the Lawn Fawn Simple Grassy Hillsides to diecut the edge. I inked the Perfectly Plaid Rainbow with Tim Holtz Distress PEACOCK FEATHERS Ink and the grass with Stampin’ Up! Old Olive Classic Stampin’ Ink and adhered the pieces together and to the back of the top panel. I cut a piece of Simon Says Stamp 100# Fog Gray Card to 2 x 3-1/4″ and created an ombre effect by using Black Soot Distress Ink.

I stamped images from Lawn Fawn’s Pick of the Patch and How You Bean Candy Corn stampset onto Neenah 110lb Classic Crest Cardstock 8.5 X 11″ with Memento Tuxedo Black Ink and colored them with COPIC markers.

I used 0 and C1, Y02 and Y06, YR12 and YR16 for the candy corn, YR16 and YR09, YG01 and YG25 for the pumpkins, Y02 and YR12 for the pumpkin guts, BV11 and BV17 for the scoop, C1 and C3, N5 and N7 for the knife and W1, W3, and W5, E15, E23, and E37 for the squirrels. I diecut the images and adhered them to their respective panels and adhered those to the back of the top panel. I used Stampin’ Dimesionals to adhere some of the images and then to the card base. Then I adhered the rest of the images around the panel.

I stamped sentiments from Lawn Fawn’s Push Here stampset with Versamark Ink and WOW Embossing Powder Opaque Bright White Super Fine to the peekaboo panels. I finished it off by adding highlights to the images with Uni-Ball Signo White Broad Point Gel Pen and VIOLET GALAXY Nuvo Drops.

On the inside of the card, I cut a piece of Neenah 110lb Classic Crest Cardstock 8.5 X 11″ to 4 x 5-1/4″ and stamped a sentiment from Lawn Fawn’s Pick of the Patch with Dusty Concord Distress Oxide Ink. I added a candy corn image and that completes this card.

Dimensions


Supplies

https://linkdeli.com/widget.js?id=f5e8378456858c916708

Thanks for reading this post. I hope you enjoyed and I’ve inspired you to Shop Your Stash and see what fun ideas you come up with and maybe rediscover supplies you forgot you had! Leave comments or questions below or feel free to email me.