Hi everyone. This card kit just makes me happy. It’s all about rainbows and what’s not to like about that?!? The Simon Says Stamp Rainbow Is My Favorite Color 6×8 inch clear stamp set has a ton of rainbow images and cute sentiments to go along with them. Lots of options with this one. You can also use the straight stripe in non rainbow cards or make no traditional rainbows. I was definitely inspired my several of the design team cards I’ve been seeing posted on instagram @ #sssck.
The Kit includes:
- 1 NEW Simon Says Stamp Rainbow Is My Favorite Color 6×8 inch clear stamp set
- 1 NEW Simon Says Stamp Build A Rainbow 6×9 inch stencil
- 1 NEW Simon Says Stamp Hello Rainbow die
- 1 NEW 8.5 x 11 inch sheet of Simon Says Stamp Holographic Rainbow cardstock
- 12 double-sided sheets of Doodlebug Custom Rainbow 2021 6×6 inch paper
- 4 Simon Says Stamp 1 inch cube ink pads in Jellybean, Sunshine, Hot Lips, and Audrey Blue
- 1 package of Doodlebug Chasing Rainbows Shape Sprinkles
- 1 package of Memory Box Fairy Jewels
- 1 package of Tim Holtz Ranger Mini Domed Ink Blending Foam
- 1 Darice 1.5 inch Yellow Pom Pom
- 1 sheet of 8.5 x 11 inch Neenah 110 lb. Solar White cardstock
- 1 Simon Says Stamp Holographic A2 envelope

For the first card, I started by cutting a piece of Neenah 110lb Solar White 8.5 x 11″ Cardstock to 5-1/2 x 8-1/2″ and scored at 4-1/4″ to make a card base. Then cut a piece of the aqua tiny cloud pattern paper from the Doodlebug Custom Rainbow 2021 6×6 inch paper to 4 x 5-1/4″ and a strip of the rainbow striped paper (also from the same paper pack) to 5/8 x 5-1/4″ and adhered them all to the card base. I added White Love from Lizi Pin Stripe Peel-Off Stickers on each side of the striped strip.
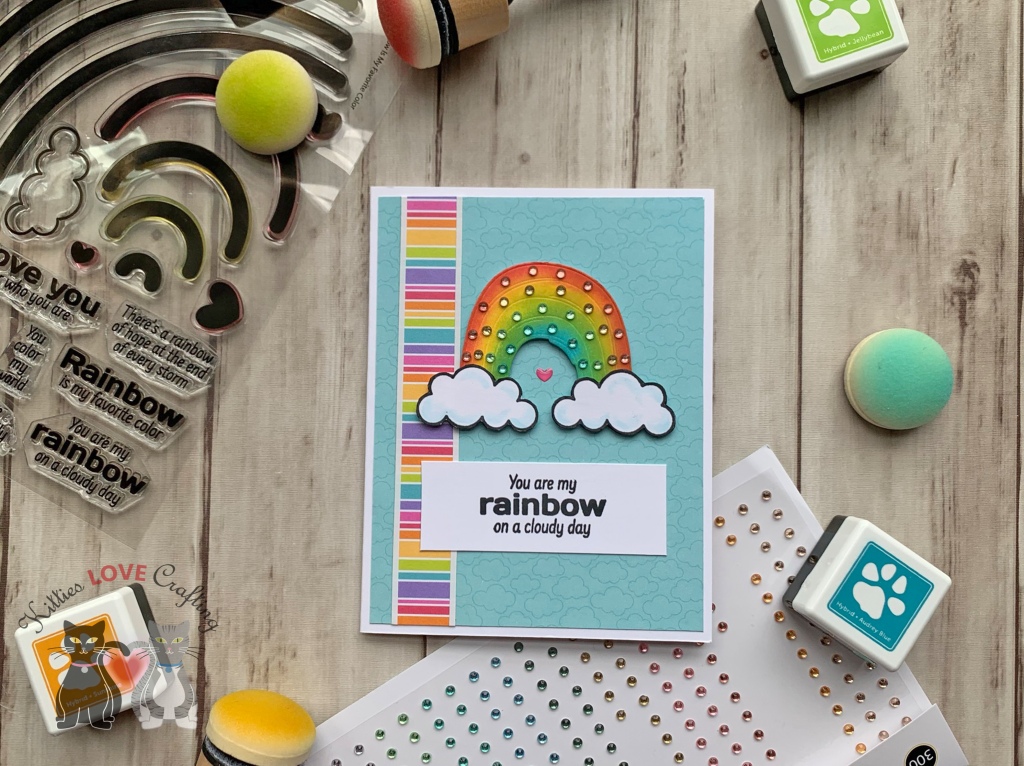
I diecut 1 rainbow from Neenah 110lb Solar White 8.5 Neenah 110lb Solar White 8.5 x 11″ Cardstock with the Simon Says Stamp Hello Rainbow die and used the Simon Says Stamp 1 inch cube ink pads in Jellybean, Sunshine, Hot Lips, and Audrey Blue and Mini Sponge Daubers to create a rainbow. I stamped and fussycut two clouds from the Simon Says Stamp Rainbow Is My Favorite Color 6×8 inch clear stamp set onto a piece of Neenah 110lb Solar White 8.5 x 11″ Cardstock with Memento Tuxedo Black Ink. I used Copic Marker BG000 + 0 (Blender) to color the clouds. I adhered them to the card using Stampin’ Dimensionals.

I stamped a sentiment from the Simon Says Stamp Rainbow Is My Favorite Color 6×8 inch clear stamp set onto a piece of Neenah 110lb Solar White 8.5 x 11″ Cardstock with Memento Tuxedo Black Ink, which I cut down to 1-1/16 x 2″.
To finish it off, I added a tiny pink heart from the Doodlebug Chasing Rainbows Shape Sprinkles and lots of the Memory Box Fairy Jewels.
On the inside of the card, I added a strip of the same paper Doodlebug Custom Rainbow 2021 6×6 inch paper I used on the front cut to 3/4 x 5-1/2″.
Dimensions
- Card Base = 5-1/2 x 8-1/2″ and scored at 4-1/4″ Neenah 110lb Solar White 8.5 x 11″ Cardstock
- Top Panel = 4 x 8-1/4″ and 5/8 x 5-1/4″ Doodlebug Custom Rainbow 2021 6×6 inch paper; 3/4 x 5-1/4″ Neenah 110lb Solar White 8.5 x 11″ Cardstock
For the second card, I started by cutting a piece of Neenah 110lb Solar White 8.5 x 11″ Cardstock to 7 x 8-1/2″ and scored at 3-1/2″ to make a card base. Then cut another piece to 3-1/4 x 8-1/4″.

I used the Simon Says Stamp Build A Rainbow 6×9 inch stencil with the Simon Says Stamp 1 inch cube ink pads in Jellybean, Sunshine, Hot Lips, and Audrey Blue and Broken China Distress Ink to create my scene. I stenciled the clouds first with Broken China Distress Ink, the rainbows next with the 4 colors included in the kit and lastly the sun. I traced the outer rainbow onto piece of post-it note paper to use as a mask before adding the sun. I adhered the panel to the card base and stamped a sentiment from the Simon Says Stamp Rainbow Is My Favorite Color 6×8 inch clear stamp set onto a piece of Neenah 110lb Solar White 8.5 x 11″ Cardstock with Memento Tuxedo Black Ink, which I fussy cut and added to the card.

I added some yellow jewels from the Memory Box Fairy Jewels to the sun and some clear ones to the card.
On the inside of the card I stenciled some clouds at the bottom edge of the card with the Simon Says Stamp Build A Rainbow 6×9 inch stencil and Broken China Distress Ink.
Dimensions
- Card Base = 7 x 8-1/2″ and scored at 3-1/2″ Neenah 110lb Solar White 8.5 x 11″ Cardstock
- Top Panel = 3-1/4 x 8-1/4″ Neenah 110lb Solar White 8.5 x 11″ Cardstock
For the third card, I started by cutting a piece of Neenah 110lb Solar White 8.5 x 11″ Cardstock to 7 x 8-1/2″ and scored at 3-1/2″ to make a card base. Then cut another piece to 3-1/4 x 8-1/4″.

I kept this card pretty simple and the rainbows didn’t take as long to stamp as I thought they might. Using my MISTI made the process faster. I stamped three rainbows from the Simon Says Stamp Rainbow Is My Favorite Color 6×8 inch clear stamp set onto Neenah 110lb Solar White 8.5 x 11″ Cardstock using the Simon Says Stamp 1 inch cube ink pads in Jellybean, Sunshine, Hot Lips, and Audrey Blue inks and fussy cut them. I stamped the clouds from the same stamp set with Memento Tuxedo Black Ink onto more Neenah card stock and fussycut those out as well.
I cut a piece of the pattern paper from the Doodlebug Custom Rainbow 2021 6×6 inch paper to 1-1/2 x 3-1/2” and stamped a sentiment from the same stamp set with Memento Tuxedo Black Ink onto it.
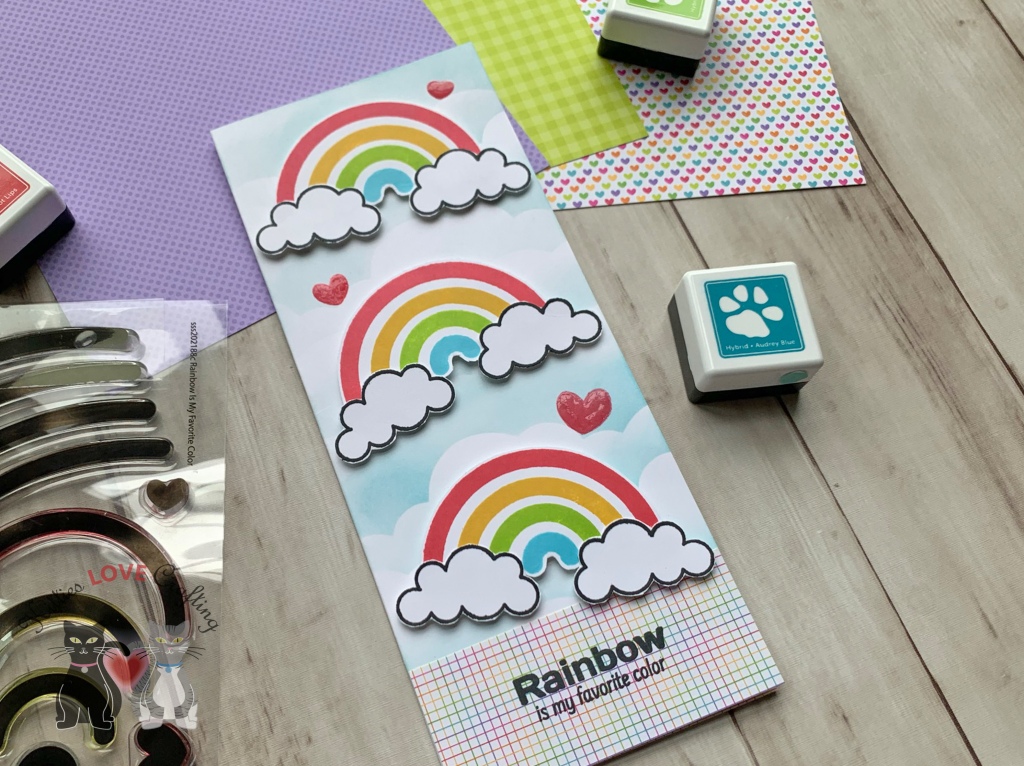
I adhered the pattern paper to the card and used 3M Foam Tape to adhere the rainbows and clouds to the card. I stamped the three hearts from the stamp set with Hot Lips Ink and added Glossy Accents over them.
On the inside of the card I cut a piece of the same pattern paper as the front of the card to 1-1/4 x 3-1/2″.
Dimensions
- Card Base = 7 x 8-1/2″ and scored at 3-1/2″ Neenah 110lb Solar White 8.5 x 11″ Cardstock
- Top Panel = 1-1/2 x 3-1/2” Doodlebug Custom Rainbow 2021 6×6 inch paper
For the fourth card, I started by cutting a piece of Neenah 110lb Solar White 8.5 x 11″ Cardstock to 7 x 8-1/2″ and scored at 3-1/2″ to create a card base. And a second piece of Neenah Cardstock which I diecut using the large die from the Lawn Fawn Large Slimline with Sliders Die. I Inked it with Audrey Blue Ink to create an ombre effect.

I diecut four rainbows from the 8.5 x 11 inch sheet of Simon Says Stamp Holographic Rainbow cardstock with the Simon Says Stamp Hello Rainbow die. And stamped several clouds from the Simon Says Stamp Rainbow Is My Favorite Color 6×8 inch clear stamp set onto Neenah 110lb Solar White 8.5 x 11″ Cardstock with Memento Tuxedo Black Ink, colored them with C1 and 0 Copic Markers and fussycut them out.
I adhered the clouds and rainbows to the card. Then stamped the sentiment from the Simon Says Stamp Rainbow Is My Favorite Color 6×8 inch clear stamp set onto the card with Memento Tuxedo Black Ink.I finsihed it off by adding puffy clouds and hearts from the Doodlebug Chasing Rainbows Shape Sprinkles. I also added some clear Memory Box Fairy Jewels.

On the inside of the card I adhered another rainbow diecut from the 8.5 x 11 inch sheet of Simon Says Stamp Holographic Rainbow cardstock.
Dimensions
- Card Base = 7 x 8-1/2″ and scored at 3-1/2″ Neenah 110lb Solar White 8.5 x 11″ Cardstock
- Top Panel = Card Base = 3-1/2 x 8-1/2″ Neenah 110lb Solar White 8.5 x 11″ Cardstock
For the fifth card, I started by cutting a piece of Neenah 110lb Solar White 8.5 x 11″ Cardstock to 5-1/2 x 8-1/2″ and scored at 4-1/4″ to make a card base and another piece to 4 x 5-1/4″. I stenciled the sune and clouds using the Simon Says Stamp Build A Rainbow 6×9 inch stencil and Sunshine and Audrey Blue Inks.

I also stenciled the cloud border on another piece of Neenah 110lb Solar White 8.5 x 11″ Cardstock which I cut to 1-3/4 x 4″, then fussycut the top edge of the clouds. I stamped a sentiment from the Simon Says Stamp Rainbow Is My Favorite Color 6×8 inch clear stamp set with Memento Tuxedo Black Ink onto the cloud border.
Next, I used Deco Foil – Transfer Gel, a palette knife and the Simon Says Stamp Build A Rainbow 6×9 inch stencil to add a rainbow onto the card. Once it dried, I added Therm O Web RAINBOW SHATTERED Deco Foil Transfer Sheets and ran it through my lamination machine.

I adhered the cloud border to the bottom of the card panel with 3M Foam Tape. I finished it off by adding some Memory Box Fairy Jewels.
I left the inside of the card blank .
Dimensions
- Card Base = 5-1/2 x 8-1/2″ and scored at 4-1/4″ Neenah 110lb Solar White 8.5 x 11″ Cardstock
- Top Panel = 4-1/4 x 5-1/2″ Neenah 110lb Solar White 8.5 x 11″ Cardstock
Supplies
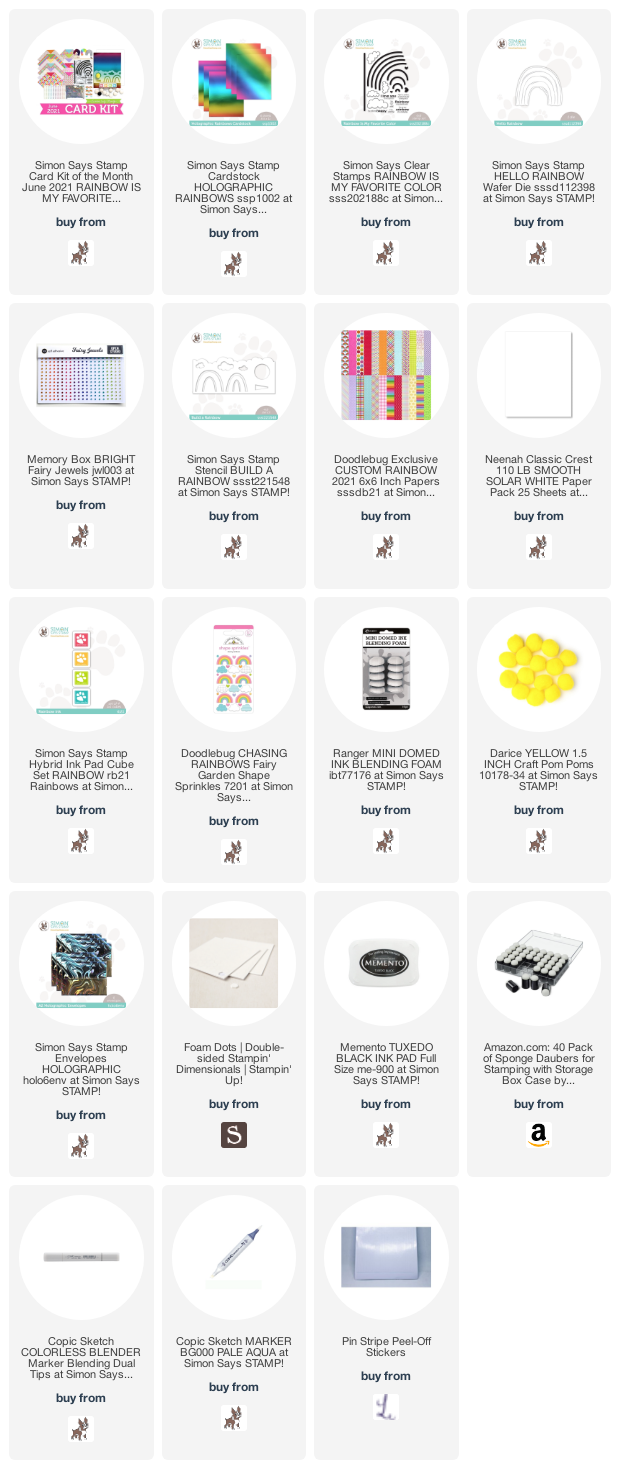 https://linkdeli.com/widget.js?id=f5e8378456858c916708
Thanks for reading this post. I hope you enjoyed and I’ve inspired you to make some cards using this kit yourself! If you want to share you creations with me tag me on instagram @kittieslovecrafting. Leave comments or questions below or feel free to email me.


