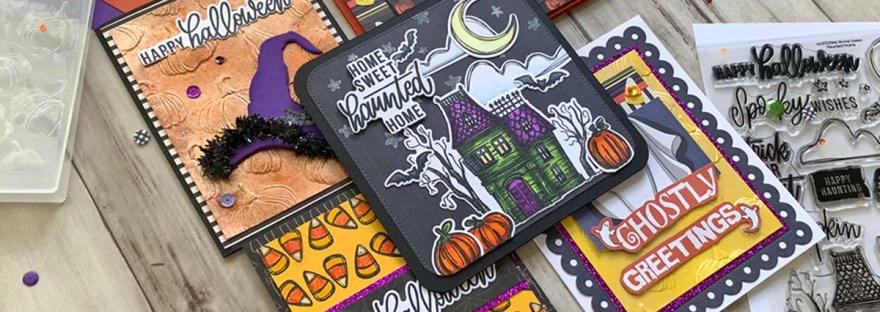
Limited Edition Simon Says Stamp Home Sweet Haunted Home Halloween Card Kit is full of tons of goodies to make cute Halloween cards and gift bags. While the kit is now sold out, you can buy most of the items in the kit seperately. The list below has all the links. Stay tuned for the next post featuring the gift bags!
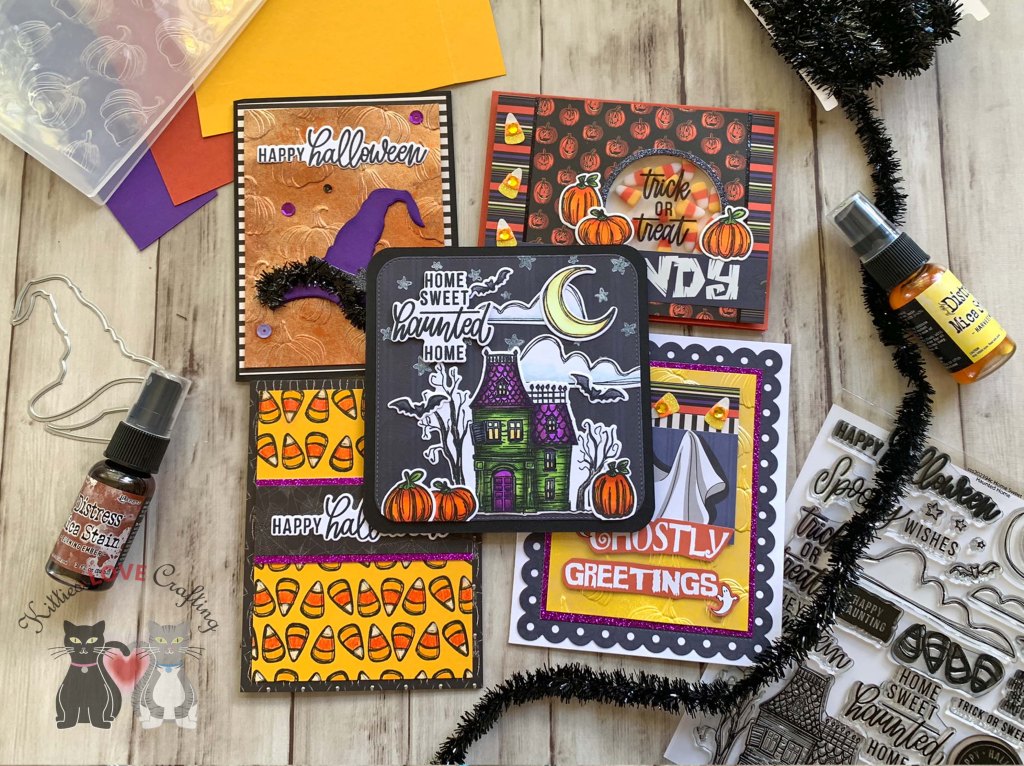
The Kit includes:
- One 6×8 inch NEW Exclusive Home Sweet Haunted Home clear stamp set
- 12 double sided sheets from the Carta Bella Hocus Pocus 6×6 inch paper pack
- One NEW and Exclusive Sassy Witch Hat die set
- One sheet 6×6 Simon Says Stamp Black Glitter Cardstock
- One sheet 6×6 Simon Says Stamp Plum Glitter Cardstock
- NEW Exclusive Halloween Candy set of 4 stencils
- NEW Exclusive Simon Says Stamp Pumpkin Patch Embossing Folder
- One Bottle of Tim Holtz Ranger Mica Stain in Harvest Moon
- One Bottle of Tim Holtz Ranger Mica Stain in Burnt Ember
- One sheet of Foam Squares
- One package of Tim Holtz Idea-ology Halloween Mini Flair
- One package of Tim Holtz Idea-ology Confections Candy Corn
- One package of Tim Holtz Idea-ology Black Tinsel
- 20 American Crafts 1.5 inch Kraft circle tags
- One package of Tim Holtz Idea-ology Fringe
- One Simon Says Stamp Ultra Smooth CRAFT GLUE STICK
- One sheet of Pumpkin Patch Stickers
- One sheet of Trick or Treat Stickers
- One sheet of Candy Corn Repeats Stickers
- One sheet each of Simon Says Stamp 100 LB cardstock in the following colors: Royal Purple, Sunshine, Burnt Orange, and Ivory.
- Three Kraft Handled Bags

For the first card, I cut a piece of Simon Says Stamp 100lb Black 8-1/2 x 11″ Cardstock to 8-1/2 x 5-1/2″ and scored at 4-1/4″ to create the card base. Then cut a piece of pattern paper from the Carta Bella Hocus Pocus 6×6 inch paper pack and a piece of Neenah 110lb Classic Crest Cardstock measuring 3-3/4 x 5″. I used Tim Holtz Distress Burnt Ember Mica Stain to color the background panel then used the Simon Says Stamp Pumpkin Patch Embossing Folder to emboss it.
I die cut the witch hat from Simon Says Stamp Cardstock 100# Royal Purple 8-1/2 x 11″ Cardstock using the Exclusive Sassy Witch Hat die set and added some dimension with Catherine Pooler Designs Grape Crush Ink. Then die cut the bow from Simon Says Stamp 6 x 6 Black Glitter Cardstock and added some Tim Holtz Idea-ology Black Tinsel to the hat brim.
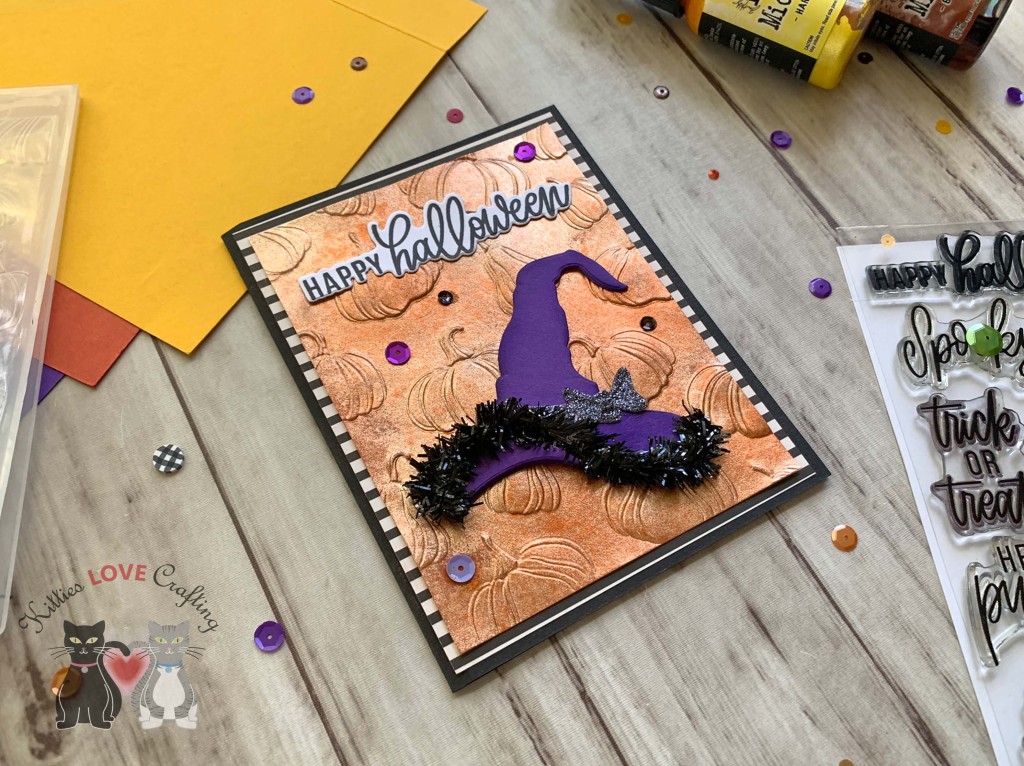
I stamped the sentiment from the NEW Exclusive Home Sweet Haunted Home stamp set onto Neenah 110lb Classic Crest Cardstock with Catherine Pooler Designs Midnight Ink and used the coordinating dies to cut it out.
I finished the card by adding some black and purple sequins from my stash.
On the inside of the card, I cut a piece of Neenah 110lb Classic Crest Cardstock to 4 x 5-1/4″ and a piece of the Carta Bella Hocus Pocus 6×6 inch paper pack to 1 x 4″.
Dimensions
- Card base = 8-1/2 x 5-1/2″ and scored at 4-1/4″ Simon Says Stamp 100lb Black 8-1/2 x 11″ Cardstock
- Top panel = 4 x 5-1/4″ Carta Bella Hocus Pocus 6×6 inch paper pack; 3-3/4 x 5″ Neenah 110lb Classic Crest Cardstock
- Inside panel = 4 x 5-1/4″ Neenah 110lb Classic Crest Cardstock; 1 x 4″ Carta Bella Hocus Pocus 6×6 inch paper pack
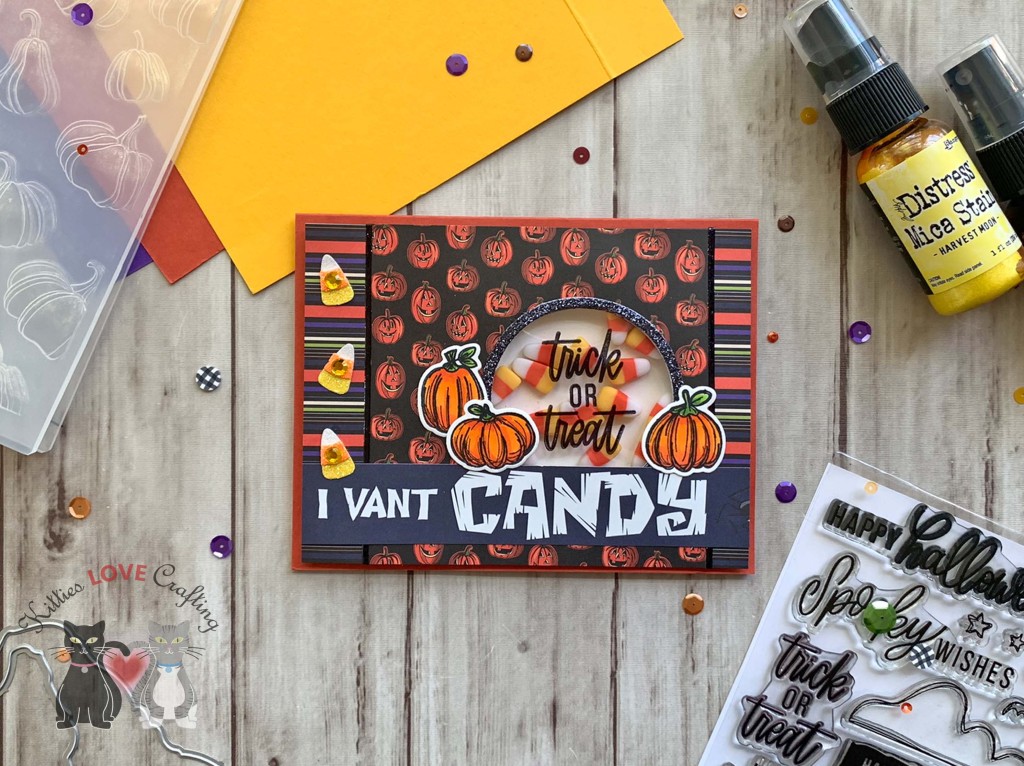
For the second card, I cut a piece of Simon Says Stamp 100lb Burnt Orange 8-1/2 x 11″ Cardstock to 8-1/2 x 5-1/2″ and scored at 4-1/4″ to create the card base. Then cut a piece of pattern paper from the Carta Bella Hocus Pocus 6×6 inch paper pack to 4 x 5-1/4″ and one to 4 x 4″.
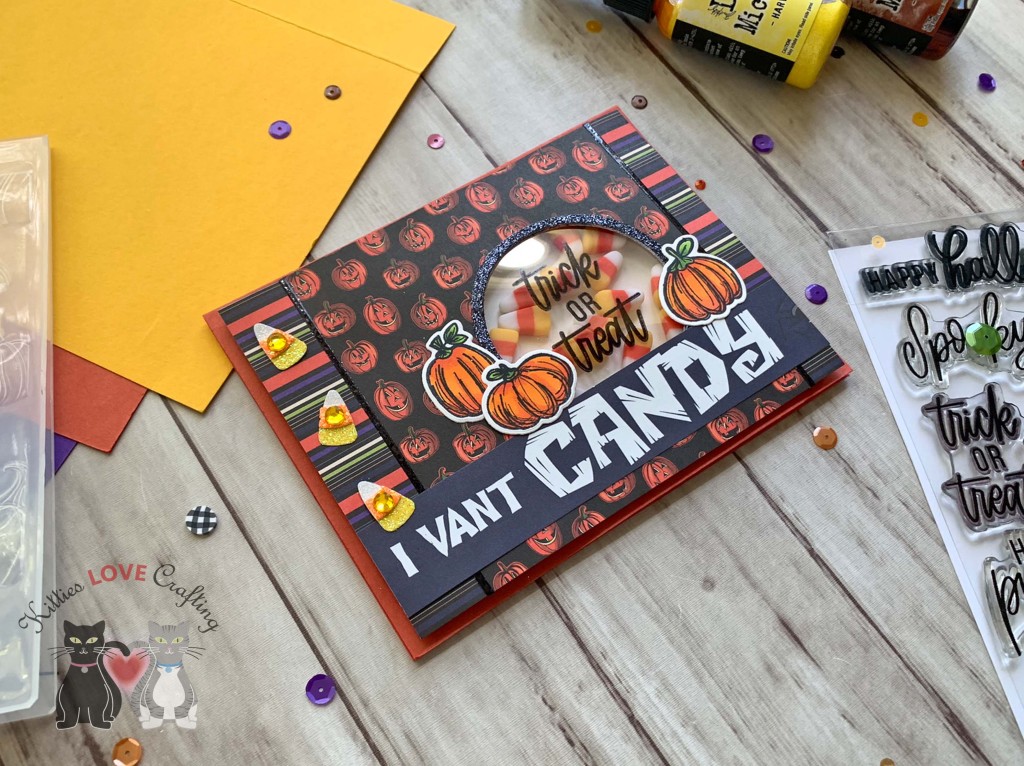
I glued those together then cut out a shaker window using the Stampin’ Up! LAYERING CIRCLES DIES. It measures 1-7/8″. I also cut a frame from Simon Says Stamp 6 x 6 Black Glitter Cardstock using a 2″ and 1-7/8″ circle die. I stamped the sentiment from the NEW Exclusive Home Sweet Haunted Home stamp set onto a piece of acetate with Tsukineko Stazon MIDI JET BLACK Ink before adhering it to the back of the panel. Then added foam tape to the panel, Tim Holtz Idea-ology Confections Candy Corn and a piece of white cardstock behind that to make the shaker.
I stamped the pumpkins from the NEW Exclusive Home Sweet Haunted Home stamp set onto a piece of Neenah 110lb Classic Crest Cardstock with Memento Tuxedo Black Ink and colored them with Copic Markers. I used YG25 and YG67 for the stem; and YR09 and YR16 for the pumpkins. I also added a sentiment strip from the 6 x 6 pattern paper pad.
I finished the card by adding some EK Success Jolee’s Boutique Candy Corn Repeats Stickers.
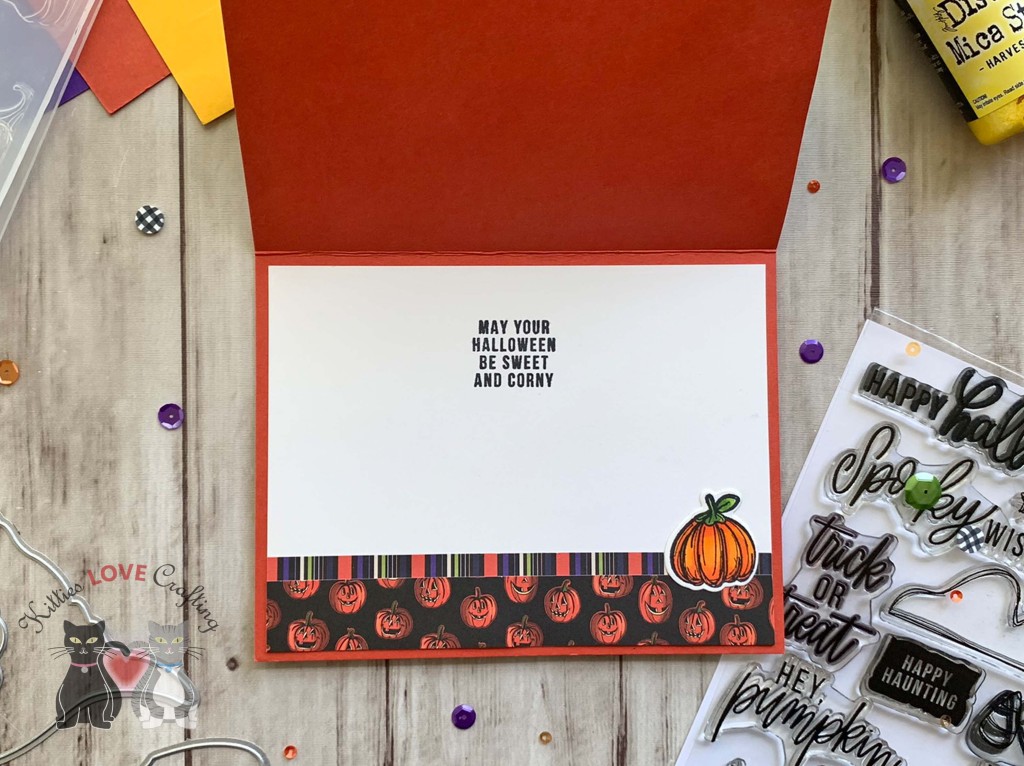
On the inside of the card, I cut a piece of Neenah 110lb Classic Crest Cardstock to 4 x 5-1/4″ and a piece of the Carta Bella Hocus Pocus 6×6 inch paper pack to 1 x 4″ and another to 3/4 x 4″. I stamped a sentiment from the NEW Exclusive Home Sweet Haunted Home stamp set with Catherine Pooler Designs Midnight Ink and added a pumpkin.
Dimensions
- Card base = 8-1/2 x 5-1/2″ and scored at 4-1/4″ Simon Says Stamp 100lb Burnt Orange 8-1/2 x 11″ Cardstock
- Top panel = 4 x 5-1/4″ and 4 x 4″ Carta Bella Hocus Pocus 6×6 inch paper pack
- Inside panel = 4 x 5-1/4″ Neenah 110lb Classic Crest Cardstock; 1 x 4″ and 3/4 x 4″Carta Bella Hocus Pocus 6×6 inch paper pack

For the third card, I cut a piece of Simon Says Stamp 100lb Black 8-1/2 x 11″ Cardstock to 8-1/2 x 5-1/2″ and scored at 4-1/4″ to create the card base. Then cut a piece of pattern paper from the Carta Bella Hocus Pocus 6×6 inch paper pack to 4-1/4 x 5-1/2″ and a piece of Simon Says Stamp 100lb Sunshine Cardstock to 4 x 5-1/4″.
I stamped the candy corn border from the NEW Exclusive Home Sweet Haunted Home stamp set onto the Sunshone panel with Memento Tuxedo Black Ink and colored them with Prismacolor Pencils.
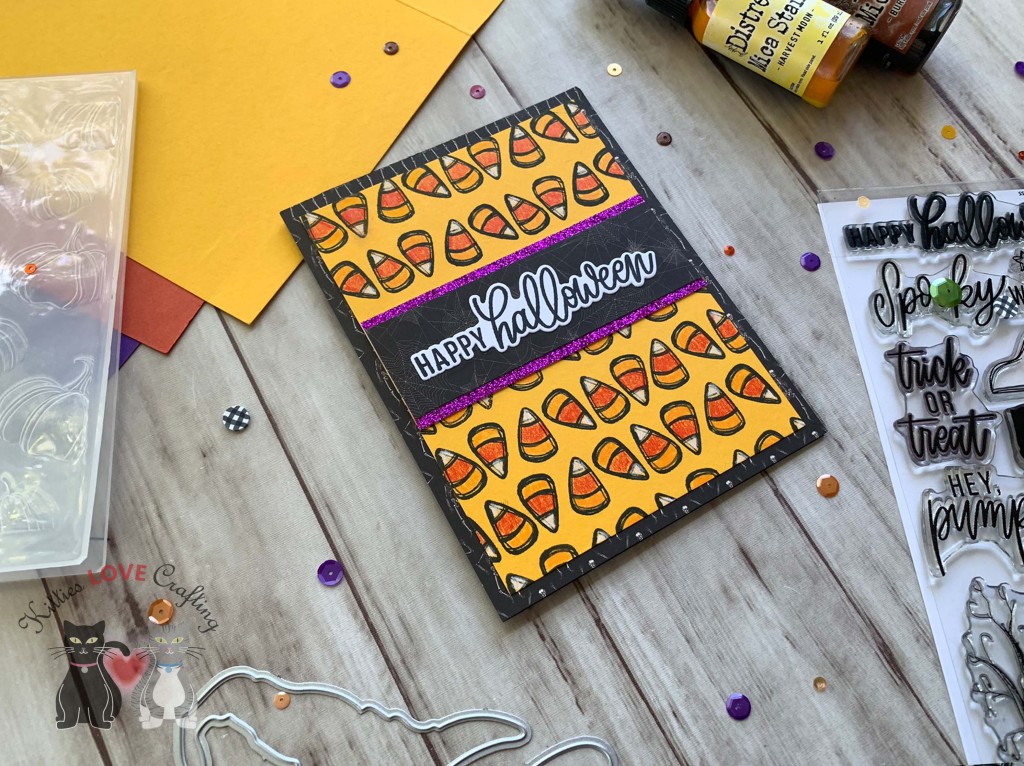
I cut a strip of pattern paper from the Carta Bella Hocus Pocus 6×6 inch paper pack to 1-1/4 x 4″ and another from Simon Says Stamp 6 x 6 Plum Glitter Cardstock to 1-1/2 x 4″.
I stamped the sentiment from the NEW Exclusive Home Sweet Haunted Home stamp set onto a piece of Neenah 110lb Classic Crest Cardstock with Catherine Pooler Designs Midnight Ink and die cut it with the coordinating dies.
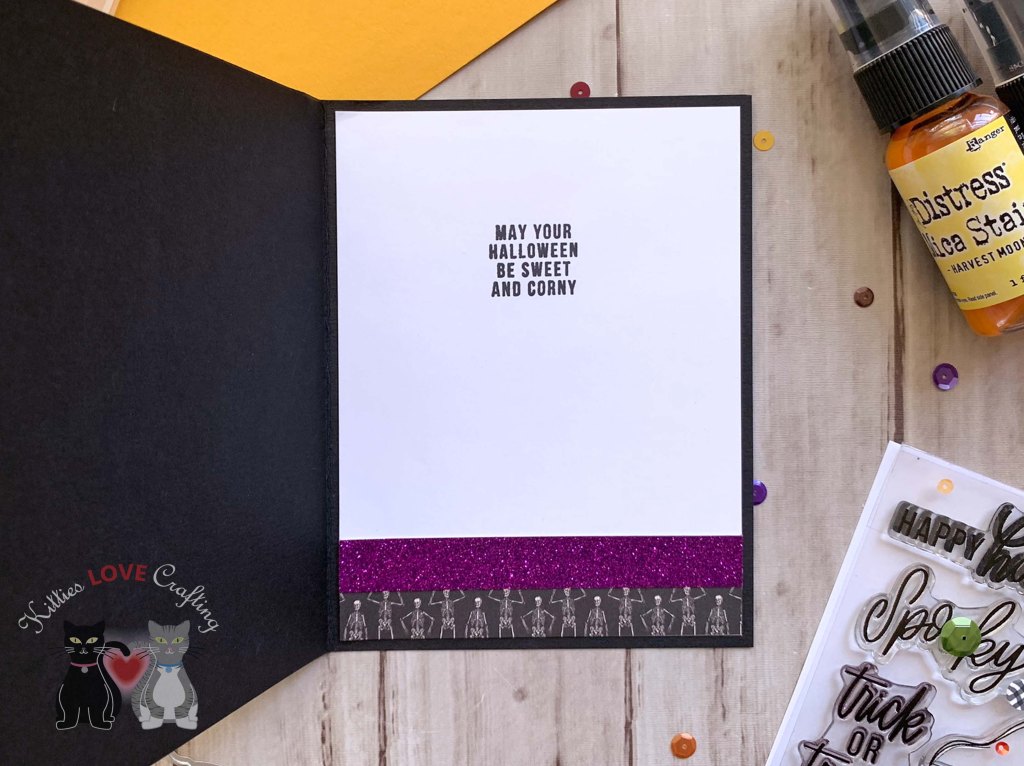
On the inside of the card, I cut a piece of Neenah 110lb Classic Crest Cardstock to 4 x 5-1/4″ and a piece of the Carta Bella Hocus Pocus 6×6 inch paper pack to 1 x 4″ and another from Simon Says Stamp 6 x 6 Plum Glitter Cardstock to 1/2 x 4″. I stamped a sentiment from the NEW Exclusive Home Sweet Haunted Home stamp set with Memento Tuxedo Black Ink.
Dimensions
- Card base = 8-1/2 x 5-1/2″ and scored at 4-1/4″ Simon Says Stamp 100lb Black 8-1/2 x 11″ Cardstock
- Top panel = 4-1/4 x 5-1/2″ Carta Bella Hocus Pocus 6×6 inch paper pack; 4 x 5-1/4″ Simon Says Stamp 100lb Sunshine Cardstock
- Inside panel = 4 x 5-1/4″ Neenah 110lb Classic Crest Cardstock; 1 x 4″ Carta Bella Hocus Pocus 6×6 inch paper pack; 1/2 x 4″ Simon Says Stamp 6 x 6 Plum Glitter Cardstock

For the fourth card, I cut a piece of Neenah 110lb Classic Crest Cardstock to 8-1/2 x 5-1/2″ and scored at 4-1/4″ to create the card base. Then die cut a piece of pattern paper from the Carta Bella Hocus Pocus 6×6 inch paper pack with Queen and Company’s Foundation 18 Dies. I also cut a piece of Simon Says Stamp 6 x 6 Plum Glitter Cardstock to 3-3/4 x 4-3/4″ and a piece of Neenah 110lb Classic Crest Cardstock to 3-1/2 x 4-1/2″.
I used Tim Holtz Distress Halloween Harvest Moon Mica Stain to color the top panel then used the Simon Says Stamp Pumpkin Patch Embossing Folder to emboss it.
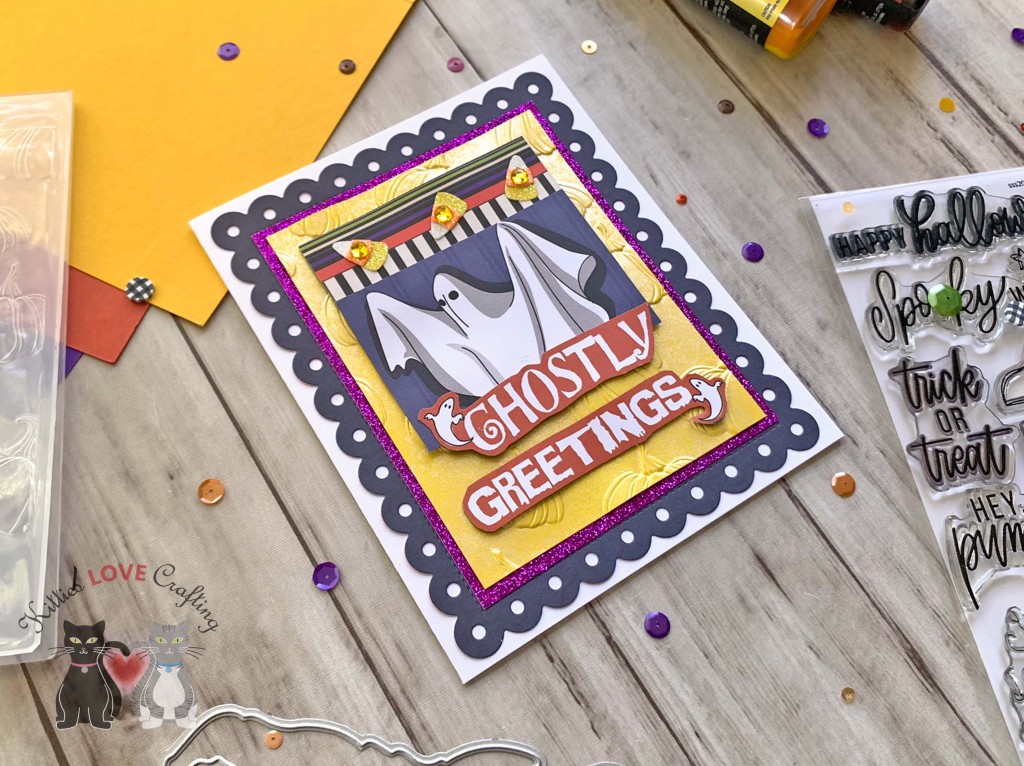
I cut a sentiment and image from the Carta Bella Hocus Pocus 6×6 inch paper pack cut apart pages as well as two strips measuring 1/2 x 3″ and 1 x 3″ to add to the top of the ghost panel.
I finished the card by adding some EK Success Jolee’s Boutique Candy Corn Repeats Stickers.

On the inside of the card, I cut a piece of the Carta Bella Hocus Pocus 6×6 inch paper pack to 1/4 x 4-1/4″ and another to 3/4 x 4-1/4″. I stamped a sentiment from the NEW Exclusive Home Sweet Haunted Home stamp set with Catherine Pooler Designs Midnight Ink.
Dimensions
- Card base = 8-1/2 x 5-1/2″ and scored at 4-1/4″ Neenah 110lb Classic Crest Cardstock
- Top panels = 3-3/4 x 4-3/4″ Simon Says Stamp 6 x 6 Plum Glitter Cardstock; 3-1/2 x 4-1/2″ Neenah 110lb Classic Crest Cardstock
- Inside strips = 1/4 x 4-1/4″ and 3/4 x 4-1/4″ Carta Bella Hocus Pocus 6×6 inch paper pack

For the fifth card, I cut a piece of Simon Says Stamp 100lb Black 8-1/2 x 11″ Cardstock to 5-1/4 x 10-1/2″ and scored at 5-1/4″ to create the card base then rounded the corners with a 1/2 inch corner punch. Then die cut a piece of pattern paper from the Carta Bella Hocus Pocus 6×6 inch paper pack with Queen and Company’s Foundation 16 Dies (3-3/4 x 3-3/4 stitched square).
I stamped the starts from the NEW Exclusive Home Sweet Haunted Home stamp set with Lawn Fawn YETI Pigment Ink. I stamped the images from the same stampset onto Neenah 110lb Classic Crest Cardstock with Memento Tuxedo Black Ink. I colored them with copic markers. I used YR09, YR16 & YR27, YG03 & YG67 for the pumpkins; C00 & 0 for the clouds; Y000, Y00, & Y21 for the moon; C5 & C7 for the bats; YG03, YG67, Y000, Y00, & Y21, C5 & C7, and V05, V06, & V09 for the house; and W3 & W7 for the trees.

On the inside of the card, I die cut a piece of the Neenah 110lb Classic Crest Cardstock with Queen and Company’s Foundation 16 Dies (3-3/4 x 3-3/4 stitched square). I stamped a sentiment from the NEW Exclusive Home Sweet Haunted Home stamp set with with Catherine Pooler Designs Midnight Ink and added a bat and pumpkin.

Dimensions
- Card base = 8-1/2 x 5-1/2″ and scored at 4-1/4″ Simon Says Stamp 100lb Black 8-1/2 x 11″ Cardstock
- Top panel = 4 x 5-1/4″ Neenah 110lb Classic Crest Cardstock
- Inside panel = 4 x 5-1/4″ Neenah 110lb Classic Crest Cardstock; 1 x 4″ Honey Bee HALLOWEEN HARVEST 6 x 6 Paper Pad
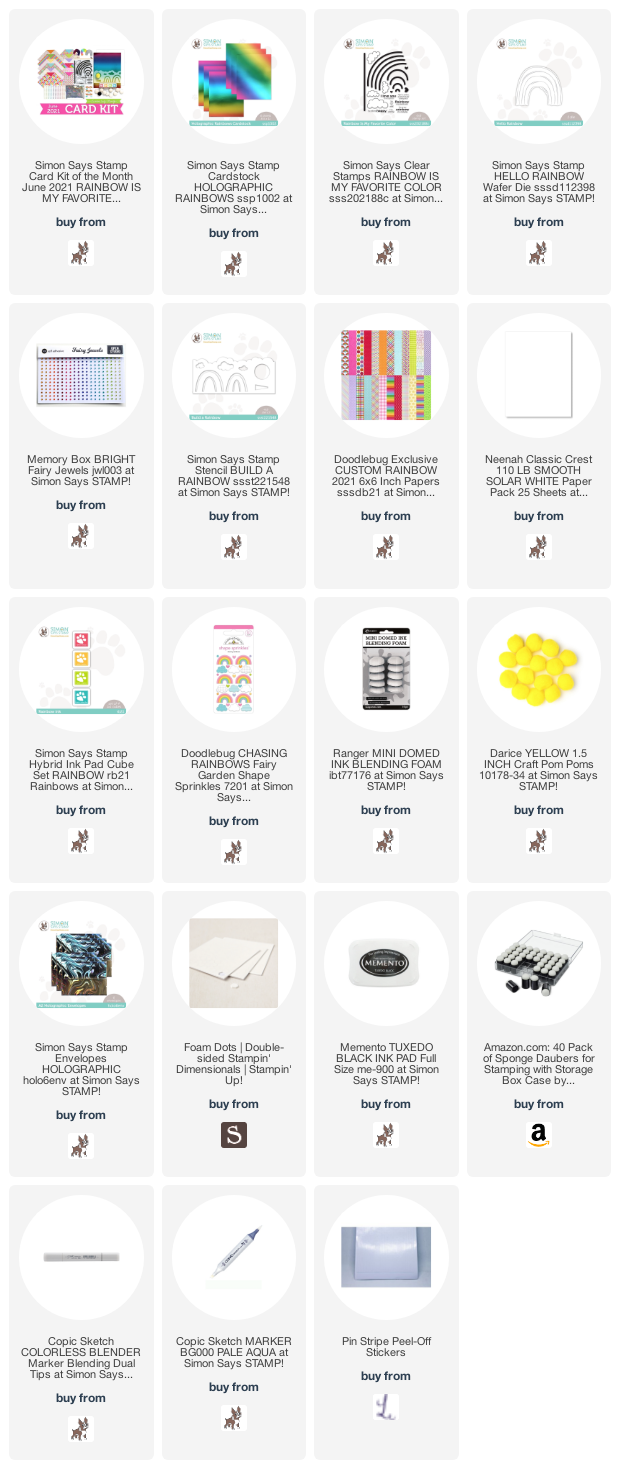
Supplies
 https://linkdeli.com/widget.js?id=f5e8378456858c916708
Thanks for reading this post! I hope you enjoyed and I’ve inspired you to make these Halloween cards yourself! If you want to share you creations with me tag me on instagram @kittieslovecrafting. Leave comments or questions below or feel free to email me.