Hello friends. If you like watercolor cards but think you have to be an artist to create them, I’m here to tell you that you don’t. The great thing about watercoloring is that it doesn’t have to be perfect. Also using the correct paper helps; I used both watercolor cardstock as well as multimedia paper to test them both out and see what I prefer.
I used heart shaped wafer dies as stencils for all of these cards. The only thing hand-drawn on these cards are the stems on the flowers and the bow. Let me show you how easy this can be!

For the first card, I cut a piece of Neenah 100lb Classic Crest Cardstock 8.5 X 11″ to 5-1/2 x 8-1/2″ and scored at 4-1/4″ to create an A2 card base. Then cut another piece of Strathmore 300 Series Smooth Bristol Paper to 4 x 5-1/4″.

Next, I used a heart die to trace the six hearts onto my paper. Don’t go too dark when drawing. It’ll be easier to erase the remaining pencil lines after you’ve colored everything. I used my Ken Oliver Color Burst Brights Powder for this card. I added splatters with the same colors as well as some gold splatters using the Zig Kuretake Gansai Tambi STARRY COLORS.
Once the paint was dry (make sure to let it dry fully), I erased any left over pencil marks and sketched lines around the hearts. Feel free to skip this step or use the dies again to trace around with a pen or marker.

I die cut the sentiment and the border from Tim Holtz Idea-ology 8 x 8 Metallic Gold & Silver Kraft Stock Paper using the Lawn Fawn’s Henry’s ABCs and Lawn Fawn Stitched Scalloped Rectangle Frames.
On the inside of the card, I cut a strip of gold cardstock (same as the front panel) to 1 x 4-1/4″ and stamped another sentiment from the Lawn Fawn Henry’s Build-A-Sentiment – Love Stamp Set with Catherine Pooler Designs It’s a Girl Ink.

Dimensions
- Card Base = 5-1/2 x 8-1/2″ and scored at 4-1/4″ Neenah 100lb Classic Crest Cardstock 8.5 X 11″
- Background Panel = 4 x 5-1/4″ Strathmore 300 Series Smooth Bristol Paper
- Inside Strip = 1 x 4-1/4″ Tim Holtz Idea-ology 8 x 8 Metallic Gold & Silver Kraft Stock Paper
For the second card, I cut a piece of Neenah 100lb Classic Crest Cardstock 8.5 X 11″ to 4-1/4 x 11″ and scored at 5-1/2″ to create an A2 card base. Then cut another piece of Watercolor Paper to 4 x 5-1/4″ and a piece of Tim Holtz Idea-ology 8 x 8 Metallic Gold & Silver Kraft Stock Paper to 4-1/4″ x 5-1/2″.
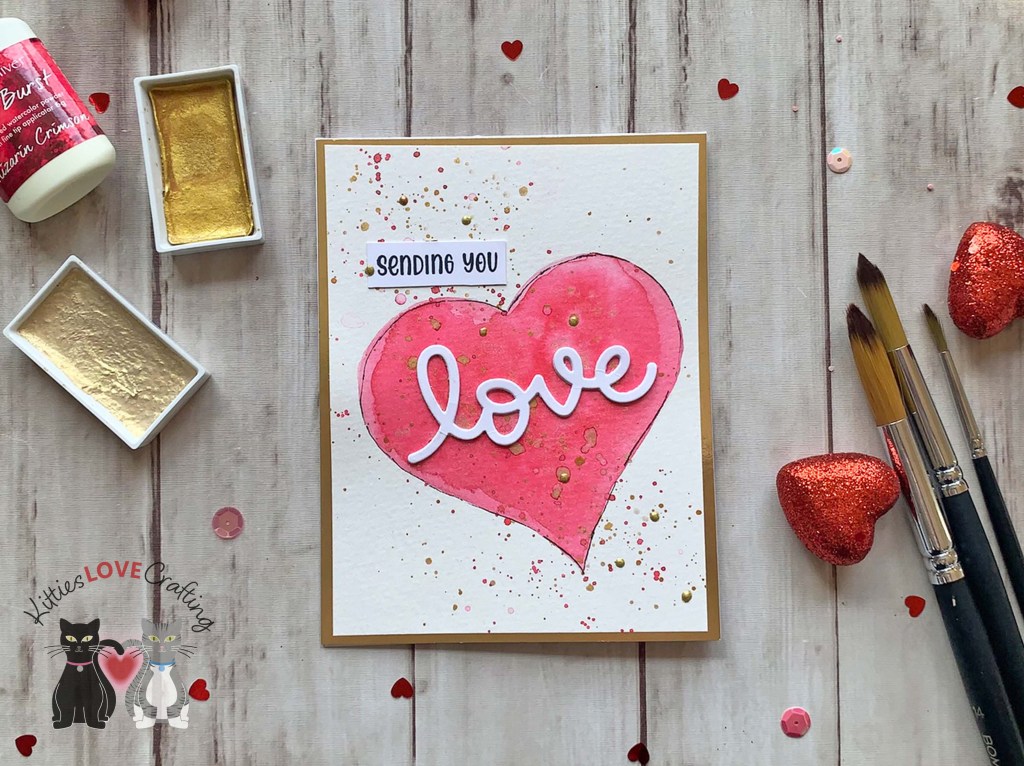
I used a large heart die to trace the heart onto my paper. I used my Kuretake Gansai Tambi Watercolor Paint Set for this card. I added splatters with the same colors as well as some gold splatters using the Zig Kuretake Gansai Tambi STARRY COLORS. Once dried, I erased any left over pencil marks and sketched lines around the hearts.
I die cut the sentiment 3x from Neenah 100lb Classic Crest Cardstock 8.5 X 11″ and stacked them. I also stamped the rest of the sentiment from Lawn Fawn Henry’s Build-A-Sentiment – Love Stamp Set onto Neenah 100lb Classic Crest Cardstock 8.5 X 11″ with Memento Tuxedo Black Ink.
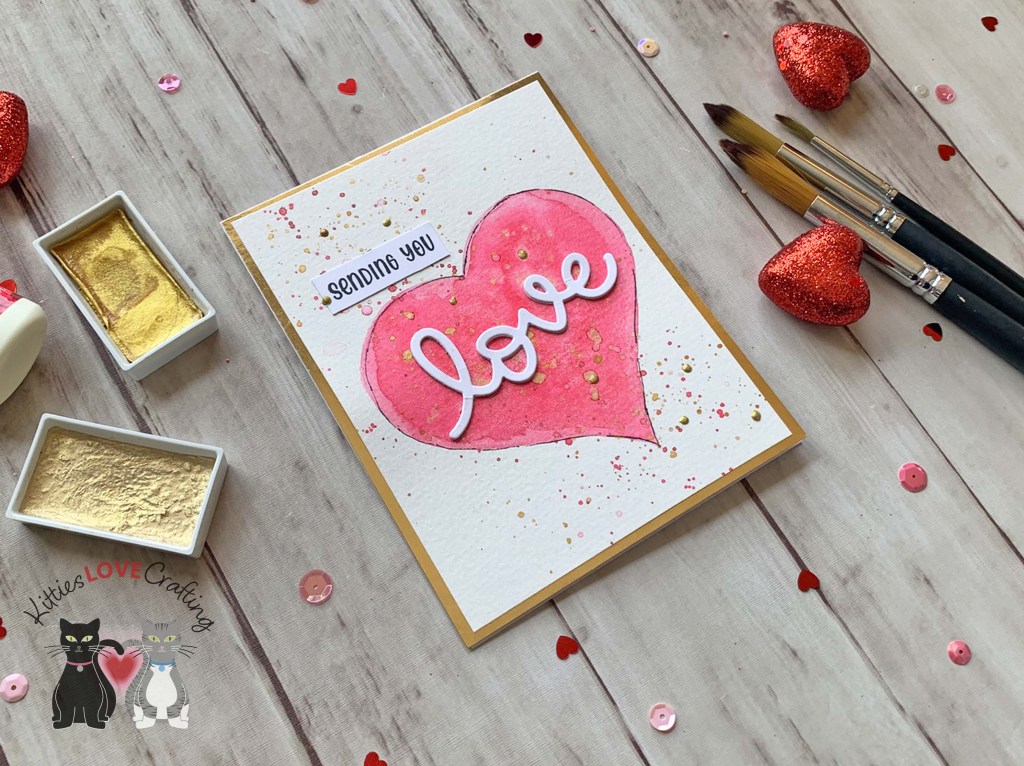
I finished the card by adding some Metallic Bright Gold Nuvo Drops.
On the inside of the card, I stamped a sentiment combining the Lawn Fawn Happy Happy Happy and Happy Happy Happy Add-on Stamp Sets with Catherine Pooler Designs Rockin’ Red Ink.

Dimensions
- Card Base = 4-1/4 x 11″ and scored at 5-1/2″ Neenah 100lb Classic Crest Cardstock 8.5 X 11″
- Background Panels = 4 x 5-1/4″ Watercolor Paper; 4-1/4″ x 5-1/2″ Tim Holtz Idea-ology 8 x 8 Metallic Gold & Silver Kraft Stock Paper
For the third card, I cut a piece of Neenah 100lb Classic Crest Cardstock 8.5 X 11″ to 5-1/5 x 8-1/2″ and scored at 4-1/4″ to create an A2 card base. Then cut another piece of Watercolor Paper to 4-1/4 x 5-1/2″.

Again I used some heart dies of various sizes to trace them. Then I used my Kuretake Gansai Tambi Watercolor Paint Set combined with the Kuretake Gansai Tambi STARRY COLORS. I mixed the pink color with the silvery watercolor. I added splatters with the same colors.
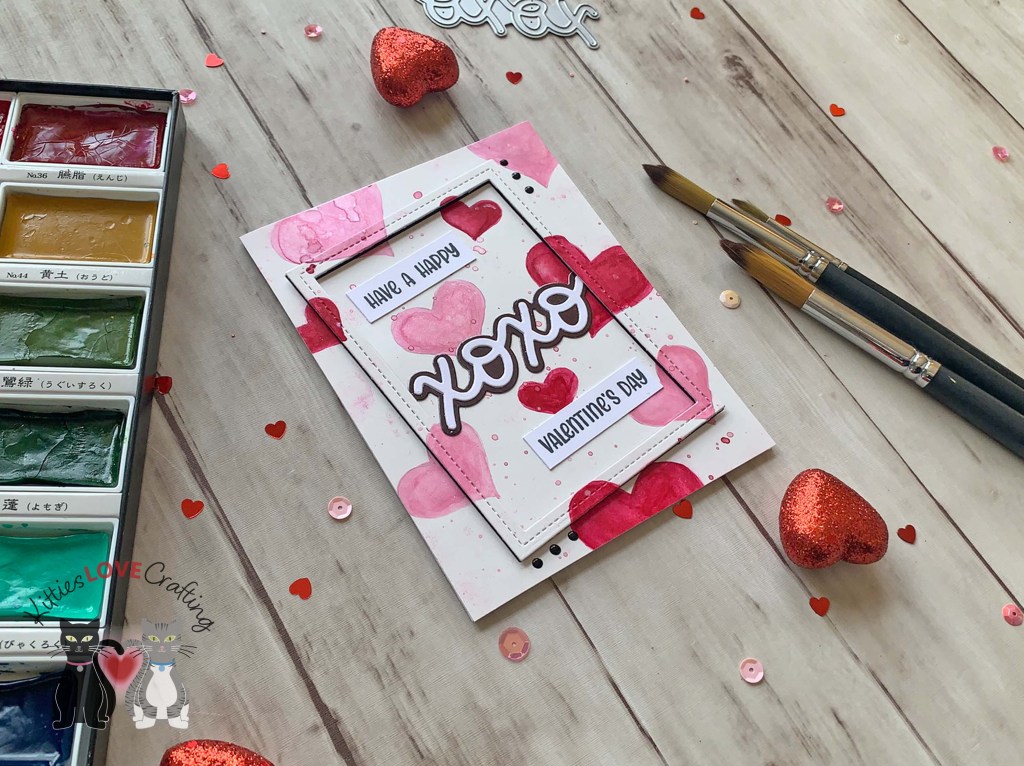
I used the Lawn Fawn Stitched Rectangle Frame to die cut the frame from the background panel. I added black cardstock behind the panel cut to 4 x 5-1/4″ and popped up the frame using Foam Strips.
I die cut the sentiment from Neenah 100lb Classic Crest Cardstock 8.5 X 11″ using the Lawn Fawn Scripty XOXO and the shadow from Tim Holtz idea-ology 8 x 8 Paper Stash Metallic Jewels Kraft Stock and the Lawn Fawn Scripty XOXO Outline Add-on Die. I also stamped a sentiment from Lawn Fawn Henry’s Build-A-Sentiment – Love onto Neenah 100lb Classic Crest Cardstock 8.5 X 11″ with Memento Tuxedo Black Ink.
I finished off the card by adding some Ebony Black Nuvo Crystal Drops.
I left the inside of the card blank.
Dimensions
- Card Base = 5-1/2 x 8-1/2″ and scored at 4-1/4″ Neenah 100lb Classic Crest Cardstock 8.5 X 11″
- Background Panel = 4-1/4 x 5-1/2″ Watercolor Paper
For the last card, I cut a piece of Neenah 100lb Classic Crest Cardstock 8.5 X 11″ to 4-1/4 x 11″ and scored at 5-1/2″ to create an A2 card base. Then cut another piece of Strathmore 300 Series Smooth Bristol Paper to 4-1/4 x 5-1/2″.

Again I used some heart dies of various sizes to trace them and create a bouquet. I drew sticks for the stems and a simple bow. Then used my Ken Oliver Color Burst Brights Powder and Kuretake Gansai Tambi Watercolor Paint Set to color the bouquet. And the Kuretake Gansai Tambi STARRY COLORS to color the bow.

I added some splatters with the pink and gold. I stamped a sentiment with Memento Tuxedo Black Ink directly onto the card. I die cut a frame from Tim Holtz Idea-ology 8 x 8 Metallic Gold & Silver Kraft Stock Paper using the Lawn Fawn Stitched Rectangle Frame.
I finished the card by adding some Metallic Bright Gold Nuvo Drops.
I left the inside of the card blank.
Dimensions
- Card Base = 5-1/2 x 8-1/2″ and scored at 4-1/4″ Neenah 100lb Classic Crest Cardstock 8.5 X 11″
- Background Panel = 4-1/4 x 5-1/2″4 x 5-1/4″ Strathmore 300 Series Smooth Bristol Paper
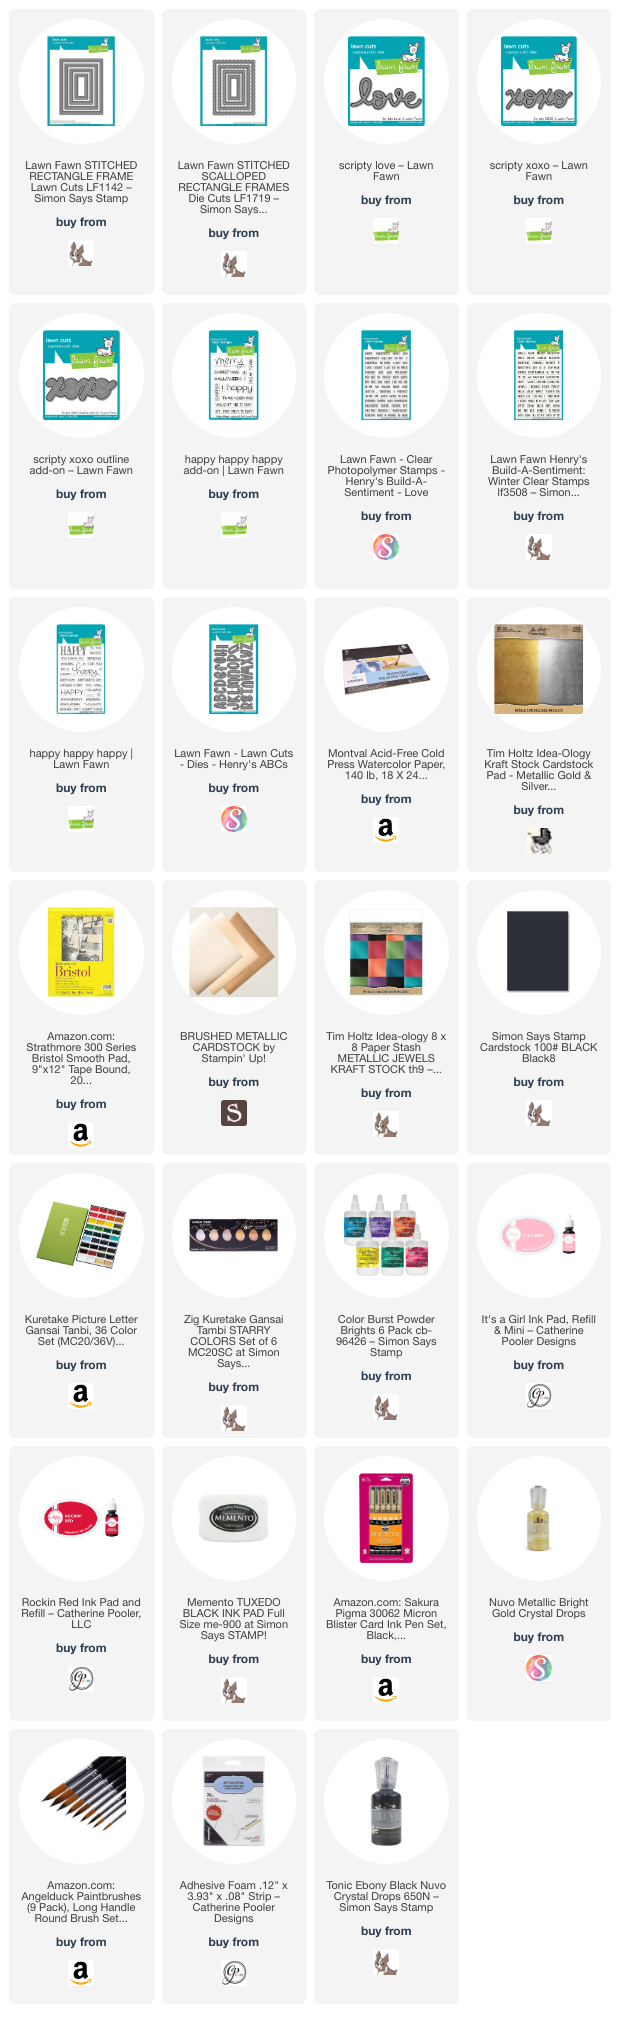
Supplies
 https://linkdeli.com/widget.js?id=f5e8378456858c916708
Thanks for reading this post. I hope I’ve inspired you to give these easy Valentine’s Day watercolor cards a try for yourself. Leave comments or questions below or feel free to email.