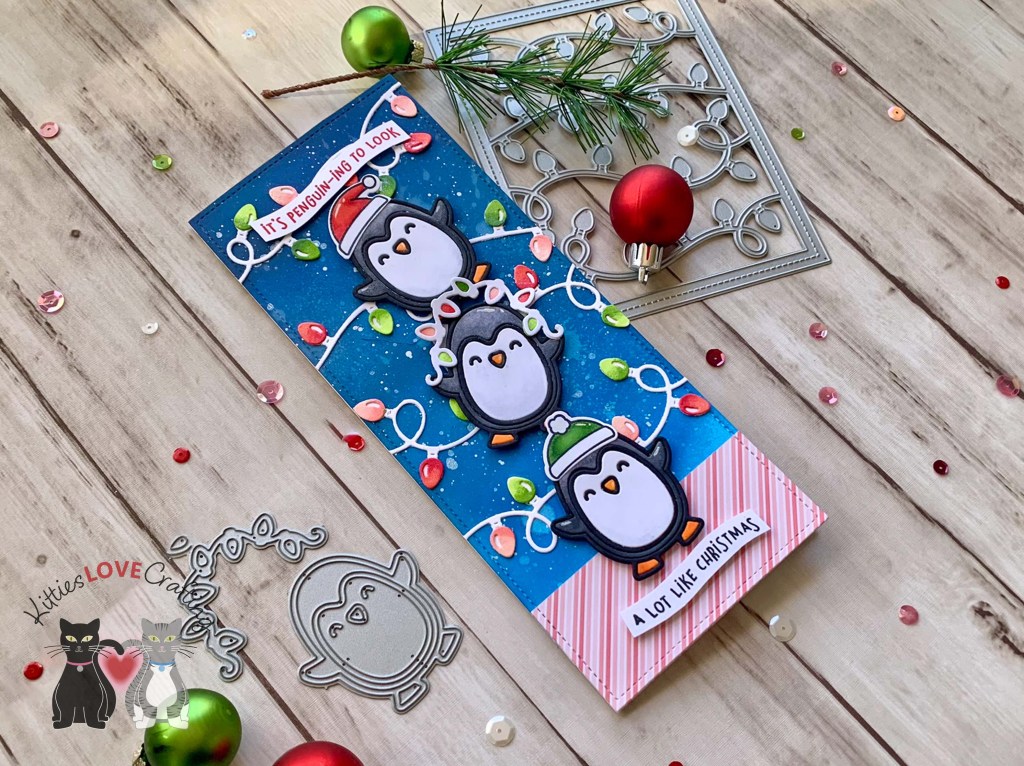
Hello friends. Once again, I cannot resist using this cute penguin die set from Lawn Fawn. I knew I had to have this little penguin when the release came out! He is very versatile and can be used for many occasions. On this card, I have three penguins precariously perched on top of each other. So very cute!!!
Thanks for reading this post. I hope I’ve inspired you to give this cute slimline penguin card a try for yourself. Leave comments or questions below or feel free to email.
Hello friends. Here’s a cute slimline Halloween card featuring the Catherine Pooler Designs Halloween Mug Shots Stampset which came in the Boo Box released last month. This stampset is so stinking cute! I’m in love.
For this card, I cut a piece of Neenah 100lb Classic Crest Cardstock 8.5 X 11″ to 7 x 8-1/2″ and scored at 3-1/2″ to create a slimline card base, a piece of pattern paper from Catherine Pooler Designs Eerie-sistible 6 x 6 Paper (included in the Boo Box) cut to 3-1/2 x 8-1/2″, and another piece of Neenah 100lb Classic Crest Cardstock 8.5 X 11″ to 3 x 8″. I also cut another piece of pattern paper to 1 x 8″ for the front panel.
I stamped the images from the Catherine Pooler Designs Fright Night and Halloween Mug Shots Stampsets (included in the Boo Box) onto Neenah 100lb Classic Crest Cardstock 8.5 X 11″ with Memento Tuxedo Black Ink. I used Copic Markers to color the images. I used C0, 0, Y06, Y17, YR04, & YR09 for the candy corn; C5, C7, YG25, Y06, V04 & V09 for the witch mug; YG17, YG25, YR04, YR09, E33, E25; C0, 0R20, YG17 & YG01 for the ghosts and ghost mug; V04, V06, V09, R20, YG25, YG17, Y17 & YR04 for the bat mug; V04, V06, V09, YG17, YG01 & YG25 for the bubbles; C0, 0, YG25, V22, V25, E25, E33 for the foam with broom; and C0, 0 & YG25 for the foam with straw.
I added some stars die cut from white card stock using the CP Haunted Tags & Charms Die Set (included in the Boo Box) which I colored with Melon Ice Ink.
I stamped the sentiment from Catherine Pooler Designs Halloween Mug Shots Stampset (included in the Boo Box) with CP Midnight Ink and fussycut it. I popped up some of the images and the sentiment using some 3M Foam Tape.
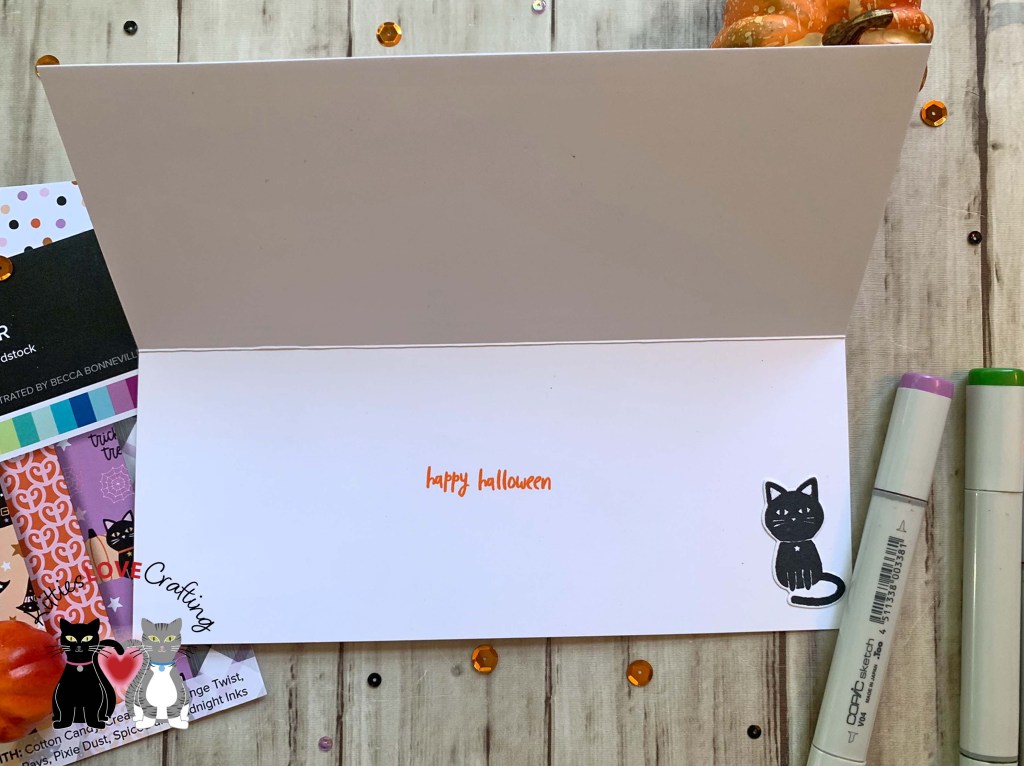
On the inside of the card, I stamped from the CP Boo Day Stampset (included in the Boo Box) with Orange Twist Ink and added a black cat from the Fright Night Stampset.
Background Panel = 3-1/2 x 8-1/2″ Catherine Pooler Designs Eerie-sistible 6 x 6 Paper (included in the Boo Box); 3 x 8″ Neenah 100lb Classic Crest Cardstock 8.5 X 11″; 1 x 8″ Catherine Pooler Designs Eerie-sistible 6 x 6 Paper
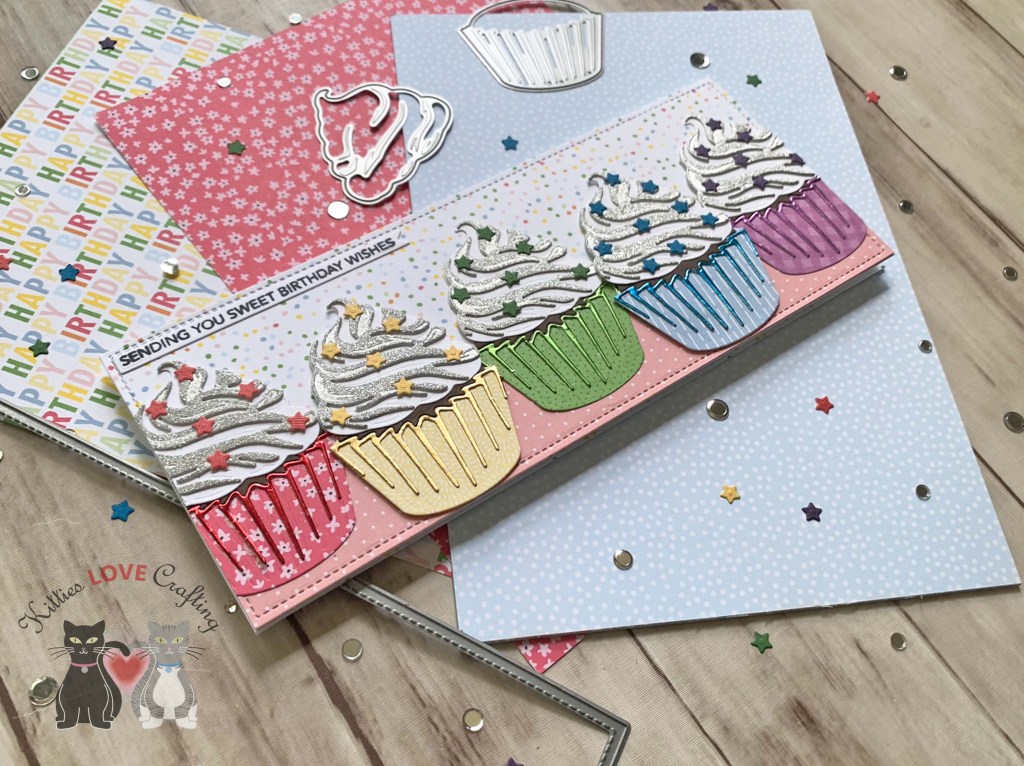
Hello friends. I couldn’t resist making a rainbow card using the Honey Bee Stamps Lovely Layers: Cupcakes & More set. The cupcakes look so cute in rainbow colors! And it was really easy to make as well!!! Let’s see how I made this card.
On the inside of the card I cut two strips of the same pattern paper from the front panel to 1 x 8-1/2″ and 7/8 x 8-1/2″. Then added some more of the star sprinkles.
Thanks for reading this post. I hope I’ve inspired you to give this sweet slimline birthday card a try for yourself. Leave comments or questions below or feel free to email.
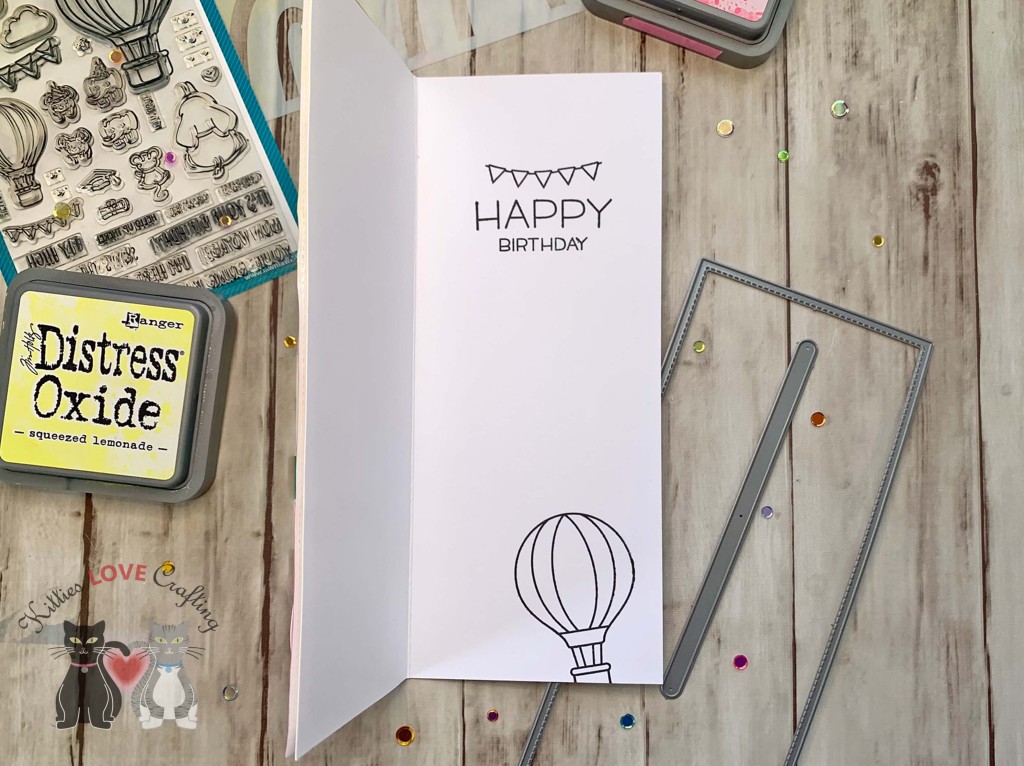
Hello friends. This card features the Lawn Fawn Fly High stampset. This is an example on how to create an interactive slimline card with this stampset. The hot air balloons can be used in a variety of ways. Check out the mini slimline Valentine’s Day card I made with it to see more ideas in my previous post.
Thanks for reading this post. I hope I’ve inspired you to give this cute slimline birthday card a try for yourself. Leave comments or questions below or feel free to email.
Hello friends. I could not pass up the opportunity to make a coffee themed card using the Lawn Fawn Build-A-Drink Dies. Iced coffee is one of my favorite summer beverages so I had to make this card! I love how it turned out too!
On the aqua pattern paper background I added coffee rings using Stampin’ Up!’s Early Espresso and Pool Party Inks. I used the lids of small bottle like a small squeeze bottle and other aorund my craft room.
Thanks for reading this post. I hope I’ve inspired you to give this cute coffee summer card a try for yourself. Leave comments or questions below or feel free to email.
Hi friends. I couldn’t resist but CASE this card from Lawn Fawn Design Team member, Tammy Stark, featuring the cute Zesty Lemon Die. I used similar colors on the background but a different technique, changed the sentiment and a different border.
Thanks for reading this post! I hope you enjoyed and I’ve inspired you to make these cute cards yourself! If you want to share you creations with me tag me on instagram @kittieslovecrafting. Leave comments or questions below or feel free to email me.
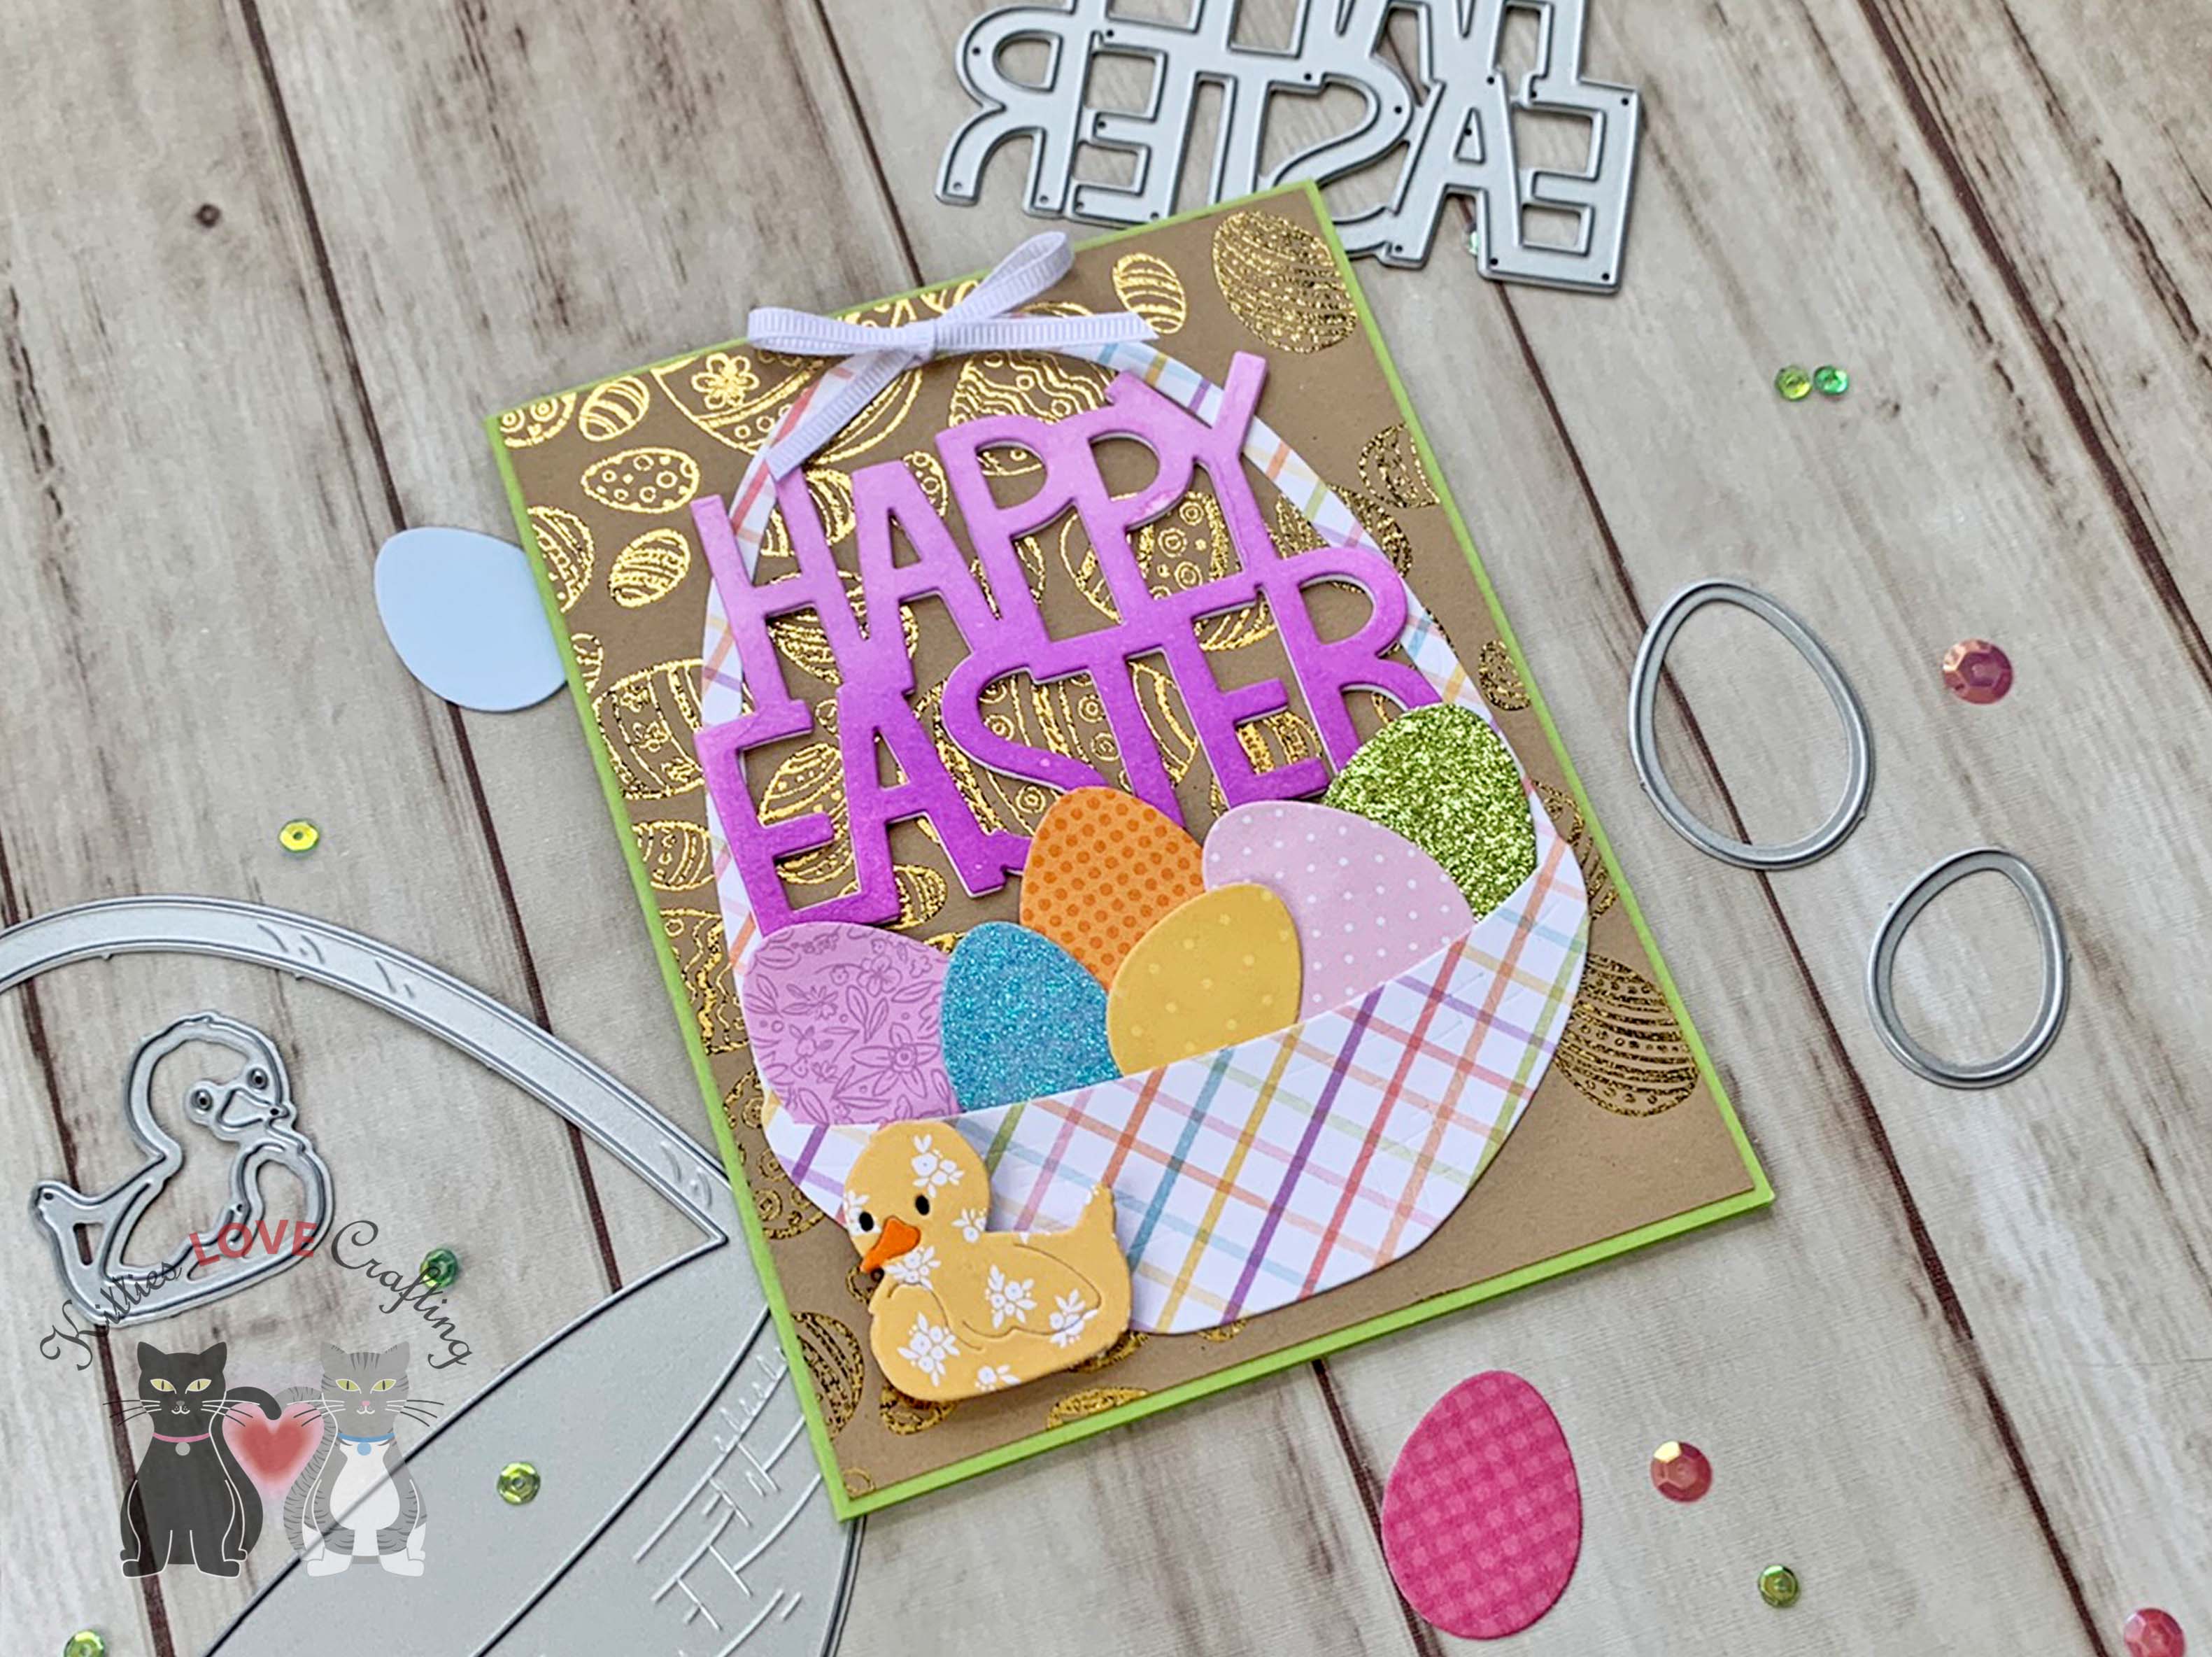
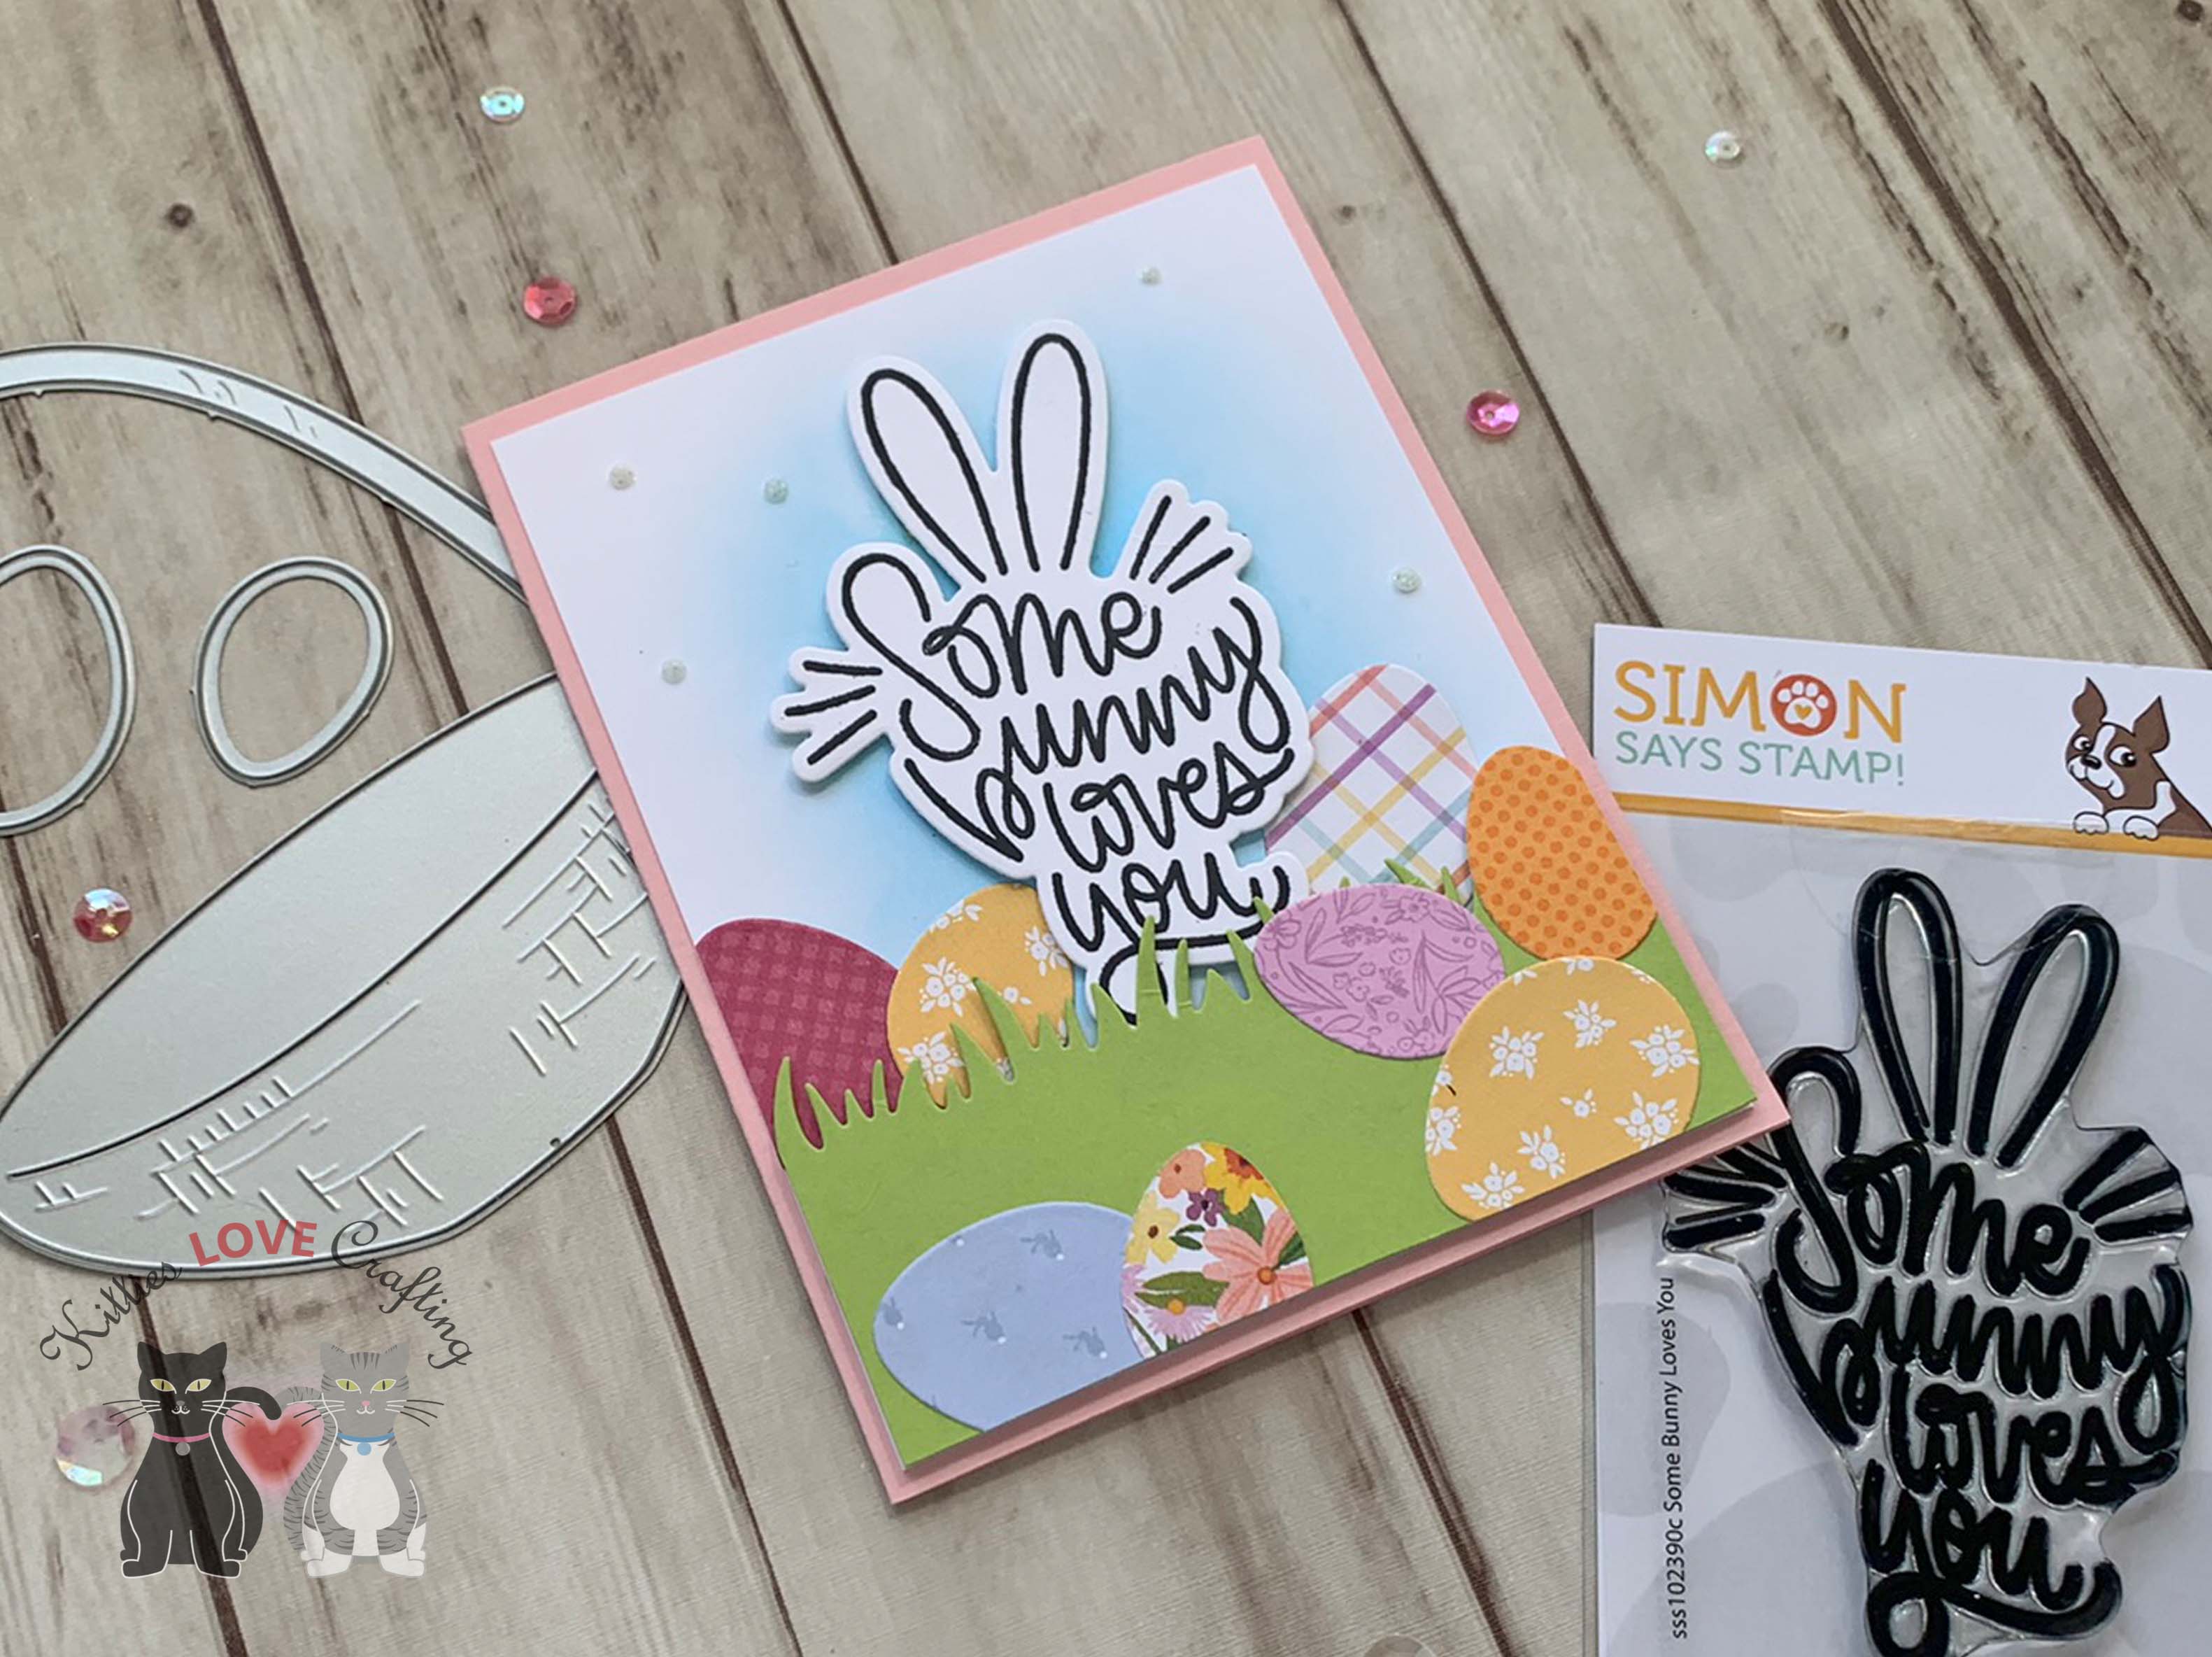
The Limited Edition Simon Says Stamp EASTER JOY 2022 Card Kit is full of tons of goodies to make cute Easter cards as well as for other occasions. I will be posting some Mother’s Day cards using some items from the kit in April. Stay tuned for that! While the kit is now sold out, you can buy most of the items in the kit seperately. The list below has all the links.
For the fifth card, I decided to do two versions of this just to see the different results I would achieve using acetate versus vellum with Copic Markers.
For the acetate piece, I used YG25 + G09 for the greenery; BV08 + V17 and RV19 + RV55 for the tulips; BG02 + BG05, YR04 + YR09 and Y17 for the flowers; BG02 + BG05 and RV19, BV08 + V17 and Y17 for the eggs.
For the vellum piece, I used YG25 + YG67 for the greenery; R32+ R37 for the tulips; BG02 + BG15, Y13 + Y18, BG01 + BG02 for the flowers; Y13 + Y18, R32+ R37, YR14 + YR16, BG01 + BG02 for the eggs.
Thanks for reading this post. I hope you enjoyed and I’ve inspired you to make some cards using this kit yourself! If you want to share you creations with me tag me on instagram @kittieslovecrafting. Leave comments or questions below or feel free to email me.
I added a piece of Neenah 110lb Classic Crest Cardstock 8.5 X 11″ to the back of the pattern paper backgrounds and a piece of vellum behind the stenciled panels, cut to 3-1/2 x 8-1/8″. Before adhering stenciled backgrounds to the card, I added the negative pieces of the window to the card. I stenciled some tiny hearts onto the background of the white windows with Hero Arts Heart Confetti Fancy Die (I die cut acetate to create the stencil) and Catherine Pooler Be Mine Ink.
The images were colored with Copic colors. I used R14, 27 & 46 for all the red items; R81, 83, & 85 for all the pink items; YG25 & 17 for all the greenery; C1, 5, & 7 and 0 for the skunks; and E74 & 79 for all the chocolate items. I die cut all the images with the coordinating dies.
Thanks for reading this post. I hope you enjoyed and I’ve inspired you to give these cards a try for yourself. Leave comments or questions below or feel free to email.
Hello friends. This festive holiday card features several of the Scrappy Tails Crafts add-on dies for the Slimline Bird House Pop Up Card Metal Die. These are tons of fun to play with and quickly becoming another favorite house builder set. These standalone dies are especially great for those of you who dislike or struggle with stamping.
Thanks for reading this post. I hope you enjoyed and I’ve inspired you to give this card a try for yourself. Leave comments or questions below or feel free to email.
Hi friends. When I saw Jennifer McGuire’s video featuring the Slimline Bird House Pop Up Card Dies and add-on dies from Scrappy Tails, I knew I had to have them. They remind me of the Honey Bee Stamps House Card Dies and Add-ons which as you may have figured out I love so much! These dies are just as versatile and allow you to make tons of different types of cards for all occasions.
I cut out the two windows using the circle from the birdhouse die set. I adhered the scallop bosrders on the window as well as the roof. Then diecut some grass using the Lawn Fawn Grassy Border from Stampin’ Up! Granny Apple Green 8-1/2 x 11″ Cardstock, trimmed it down to size and adhered it to the bottom of the card. I added the white base on top of the grass.
I colored the images with COPIC Markers. I c olored the peppermints and candy canes with R27, R46 and C1, YG17 and YG25 for the trees, E34, E37, R20, C1 and 0 for the gingerbread people, and R81 and R85 for the gumdrops.
Thanks for reading this post. I hope you enjoyed and I’ve inspired you to give these cute cards a try for yourself. Leave comments or questions below or feel free to email me.


 https://linkdeli.com/widget.js?id=f5e8378456858c916708