Card kits, Gift Bags, Halloween, Halloween, Stenciled Background, Tags

3 Halloween Gift Bags featuring Simon Says Stamp Limited Edition Halloween Card Kit

Hi friends. I made some cute gift bags with the Limited Edition Simon Says Stamp Home Sweet Haunted Home Halloween Card Kit. It comes with lots of goodies you can use to decorate the gift bags! These were all very easy to make. Here’s how I made them.

The Kit includes:

For the first bag, I stenciled the background with the NEW Exclusive Halloween Candy stencils set. I used Tim Holtz Crackling Campfire, Mowed Lawn, and Wild Honey Distress Oxide Inks and Lawn Fawn YETI Pigment Ink.

Then added a piece of pattern paper from the Carta Bella Hocus Pocus 6×6 inch paper pack measuring 2-1/2 tall x 7-1/2 wide” to the top of the bag. I added a trim with the Tim Holtz Idea-ology Black Tinsel.

I used one of the cut aparts from the Carta Bella Hocus Pocus 6×6 inch paper pack on the front as well as die cut the witch hat from using Simon Says Stamp 100lb Black 8-1/2 x 11″ Cardstock and Simon Says Stamp 6 x 6 Plum Glitter Cardstock. I added some stitching to the hat with a White Gel Pen. I added one of the Tim Holtz Idea-ology Halloween Mini Flair buttons.

I covered one of the American Crafts 1.5 inch Kraft circle tags with a piece of pattern paper from the Carta Bella Hocus Pocus 6×6 inch paper pack. I cut it using a 2-inch punch. Then stamped a sentiment from the NEW Exclusive Home Sweet Haunted Home clear stamp set onto Neenah 110lb Classic Crest Cardstock with Memento Tuxedo Black Ink.

I finished the bag by adding some shimmer to the hat with a Spectrum Noir Clear Overlay Sparkle Pen and orange and white twine.


For the second bag, I stamped the images from the NEW Exclusive Home Sweet Haunted Home clear stamp set with Memento Tuxedo Black Ink. Then colored them with Prismacolor Pencils.

Then added Tim Holtz Idea-ology Fringe and a piece of pattern paper from the Carta Bella Hocus Pocus 6×6 inch paper pack measuring 1/2 tall x 7-1/2 wide” to the top edge of the bag. I stamped a sentiment from NEW Exclusive Home Sweet Haunted Home clear stamp set with Memento Tuxedo Black Ink onto one of the round kraft tags and added some black twine.


For the third bag, I sprayed it with the Tim Holtz Ranger Mica Stain in Harvest Moon. Then added black splatters with Tim Holtz BLACK SOOT Distress Spray Stain. I cut out one of the cut aparts from the Carta Bella Hocus Pocus 6×6 inch paper pack then cut a mat for it from Simon Says Stamp Black Glitter Cardstock measuring 3-1/2 x 4-1/2″.

I added some Tim Holtz Idea-ology Fringe to the bottom edge of the bag. And then added Candy Corn Repeats Stickers all around the image.

I cut a 1.5 inch circle from the Simon Says Stamp 100lb Burnt Orange 8-1/2 x 11″ Cardstock and stamped a sentiment from the NEW Exclusive Home Sweet Haunted Home clear stamp set with Memento Tuxedo Black Ink. And adhered it to one of the kraft tags. Finally I added some natural twine.

For all the above bags, you can just decorate one side or do both sides if you like. I added the trim all the way around on some of the bags.


Supplies

https://linkdeli.com/widget.js?id=f5e8378456858c916708

Thanks for reading this post! I hope you enjoyed and I’ve inspired you to make these cute Halloween gift bags yourself! If you want to share you creations with me tag me on instagram @kittieslovecrafting. Leave comments or questions below or feel free to email me.

Emboss Resist Technique, Halloween, Halloween, Techniques

Emboss Resist Technique: Making a Spooky Background

Hi friends. Using the emboss resist technique to create a background is super easy and creates a very high contrast, impactful visual. Let me show you how easy this was to create.

For this card, I cut a piece of Simon Says Stamp 100# Black Cardstock to 8-1/2 x 5-1/2″ and scored at 4-1/4″ to create the card base. Then cut a piece of Neenah 110lb Classic Crest measuring 4 x 5-1/4″ and embossed it with Tim Holtz Cling Mount Stamps: Halloween Silhouettes. I used Versamark Ink to stamp the background, added WOW Opaque Bright White Super Fine Embossing Powder and heat set with my heat gun. Then colored it with Tim Holtz Peeled Paint and Black Soot Distress Oxide Inks. Remember to wipe off any excess ink with apaper towel or cloth to clean off the white embossed areas.

I stamped the truck and pumpkins from Honey Bee Stamps Big Pickup Tailgate 6×6 Stamp Set and Honey Bee Loads of Fall Stamp Set onto Neenah 110lb Classic Crest Cardstock with Memento Tuxedo Black Ink and colored with Copic markers.

I used YR16, YR18, & YR09, N2, N6 & N8 for the pumpkins; G94 & G99 for the leaves; BV11, BV08, V25 & V28 for the truck bed; Y13 & Y17 for the truck head lights; C1, C3, C5, C7, & C9 for the metal on the truck; YG05, YG17 & YG67 for the license plate; and BG000 & 0 for the truck windows.

I stamped the sentiment from Papertrey ink Pumpkin Expressions Stamp Set (retired) onto Neenah 110lb Classic Crest with Catherine Pooler Midnight Ink. I fussycut the sentiments since I don’t have dies for this stampset.

On the inside of the card, I cut a piece of Neenah 110lb Classic Crest to 4 x 5-1/4″ and stamped a sentiment from Queen and Company Halloween Hoopla! Stampset with Memento Tuxedo Black Ink and added additional pumpkin and leaf vine.

Dimensions


Supplies

https://linkdeli.com/widget.js?id=f5e8378456858c916708

Thanks for reading this post! I hope you enjoyed and I’ve inspired you to make this cute Halloween card yourself! If you want to share you creations with me tag me on instagram @kittieslovecrafting. Leave comments or questions below or feel free to email me.

Embossed Background, Halloween, Halloween

Creating a Dimensional Halloween Card featuring Honey Bee Stamps

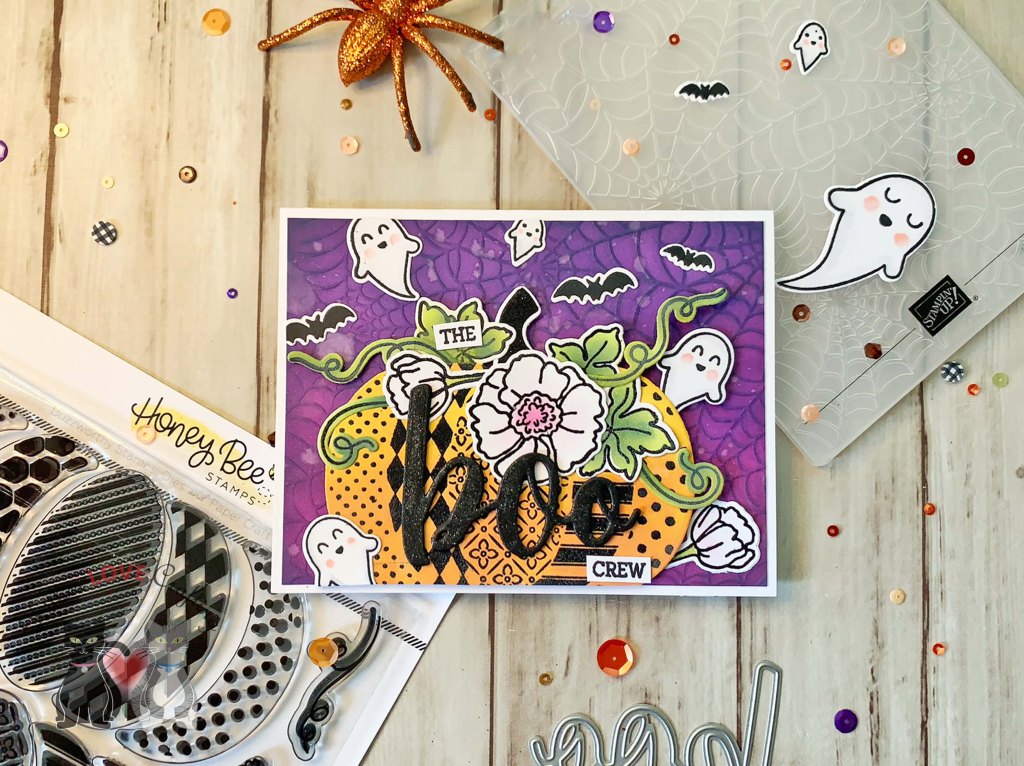
Hi friends. A quick way to create a dimensional background with little effort is to use an embossing folder. We all have a bunch of embossing folders we bought when it was all the rage to emboss everything and now they sit in a drawer or craft room shelf collecting dust. Am I right?!? Come on, you know it’s true??? LOL Well thankfully they are coming back in fashion and there are so many techniques you can do with them. Today we are keeping it simple — just some ink and a blender. No fancy tools needed either.

For this card, I cut a piece of Neenah 110lb Classic Crest Cardstock to 8-1/2 x 5-1/2″ and scored at 4-1/4″ to create the card base. Then cut a piece measuring 4 x 5-1/4″ and embossed with the Stampin’ Up! Cobwebs 3D Embossing Folder (retired); any spiderweb embossing folder will work here.

I used mostly Seedless Preserves and Villainous Poison Distress Oxide Inks to color the background. Then lightly went over the raised cobwebs with some Chipped Sapphire Distress Oxide Ink. I sprayed some water on the background to distress it further.

I stamped the all the images from the Honey Bee Stamps Pumpkin Patch Stampset onto Neenah 110lb Classic Crest Cardstock with Midnight Ink and heat set with Clear Embossing Powder. Then colored the pumpkin with Spiced Marmalade and Wild Honey Distress Oxide Inks. I colored the leaves with Twisted Citron, Rustic Wilderness, and Peeled Paint Distress Oxide Inks. I used Picked Raspberry Distress Oxide Ink for the flowers.

I stamped the ghost and bat images from Lawn Fawn Happy Haunting stampset and colored them with Copic Markers. I used C00, 0 and R20 for the ghosts. And then diecut them with the coordinating dies.

I stamped the sentiment from Honey Bee Stamps Boo 3×4 Stamp Set onto Neenah 110lb Classic Crest Cardstock with Midnight Ink and die cut the ‘boo’ from Simon Says Stamp Cardstock 100# Black 8-1/2 x 11″ Cardstock 3x with the Honey Bee Boo Dies. I finished it off by adding some glitter with a Spectrum Noir Clear Overlay Sparkle Pen.

On the inside of the card, I stamped a sentiment from Queen and Company Halloween Hoopla Kit with with Midnight Ink and added an extra ghost.

Dimensions


Supplies

https://linkdeli.com/widget.js?id=f5e8378456858c916708

Thanks for reading this post! I hope you enjoyed and I’ve inspired you to make this cute Halloween card yourself! If you want to share you creations with me tag me on instagram @kittieslovecrafting. Leave comments or questions below or feel free to email me.

Fall, Fall

Autumn Scene Card featuring Lawn Fawn’s Pumpkin House

Hi friends. I’m starting off my Fall card lineup with a cute scene card. This Pumpkin House Die from Lawn Fawn gives me very cinderella vibes, especially when paired with the cute mice from Lawn Fawn You Autumn Know Stampset.

For this card, I cut a piece of Neenah 110lb Classic Crest Cardstock to 10 x 7″ and scored at 5″ to create the card base. I diecut a piece of Neenah 110lb Classic Crest Cardstock with the scallop stitched rectangle (3-1/2 x 5-1/2″) and a piece of My Favorite Things Tranquil Textures 6 x 6 Paper (retired) with the stitched rectangle (4-1/2 x 6-1/2″) from the Queen & Company Foundation 18 dies.

I die cut all the necessary images from the Lawn Fawn Pumpkin House Die from Neenah 110lb Classic Crest Cardstock and colored with Copic Markers. I used YR04, YR27 & YR18 for the pumpkin, YG25, G07 & G09 for the stems and leaves; RV55 & RV66 for the door; W5 & W7 for the door and window frame; Y13, Y18 & Y17 for the window, door and lantern backgrounds; W3, W5 & W7 for the stone steps; W5 & W7 for the lantern; W3 & W5 for the window boxes, R17 & R46,Y02 & Y18, RV63 & RV19 & YG25 for the flowers.

I die cut the grass with the Lawn Fawn Grassy Border and colored with Twisted Citron and Mowed Lawn Distress Oxide Inks.

I stamped the mice and leaves from Lawn Fawn You Autumn Know Stampset onto Neenah 110lb Classic Crest Cardstock with Memento Tuxedo Ink and colored them with Copic Markers. I used R20, E40 & blender, E53, E34 & E37 for the mice; and R17, R46, Y02, Y18, YR04, YR18, YG25, & G09 for the leaves and die cut with the coordinating dies.

I stamped the sentiment from Lawn Fawn Scripty Autumn Sentiments onto Neenah 110lb Classic Crest Cardstock with Memento Tuxedo Ink. This stampset has a coordinating die set which cuts out the larger sentiments and leaves.

I finished the card by adding some highlights with a White Signo Gel Pen.

On the inside of the card, I stamped a sentiment from Lawn Fawn HAPPY HAPPY HAPPY Stamps with Memento Tuxedo Ink and Catherine Pooler Designs Orange Twist Ink and I added some extra leaves from Lawn Fawn You Autumn Know Stampset.

Dimensions


Supplies

https://linkdeli.com/widget.js?id=f5e8378456858c916708

Thanks for reading this post! I hope you enjoyed and I’ve inspired you to make this Autumn scene card yourself! If you want to share you creations with me tag me on instagram @kittieslovecrafting. Leave comments or questions below or feel free to email me.

Fourth of July, Stenciled Background, Summer

Creating a Very Dimensional, But Quick and Easy Background feat. Scrapbook.com and Lawn Fawn

Hi friends. Here’s another cute card for Independence Day. This one is a little more involved than my previous card but was lots of fun to make. I haven’t used this Lawn Fawn Build-A-House Die in a while and it was time!

For this card, I cut a piece of Neenah 110lb Classic Crest Cardstock to 5-1/2 x 8-1/2″ and scored at 4-1/4″ to create the card base. I also cut another piece to 4-1/4 x 5-1/2″ for the background.

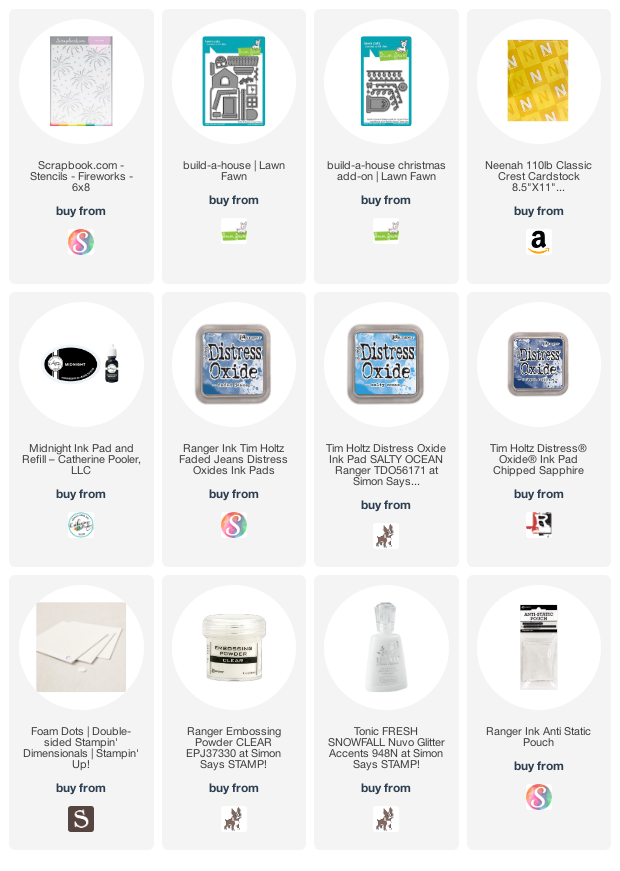
I used Tim Holtz Salty Ocean, Faded Jeans, and Chipped Sapphire Distress Oxides Inks to create a gradient background. Then used a mixture of Modelling Paste and Nuvo Glimmer Paste Moonstone with Scrapbook.com Fireworks 6×8 Stencil.

While that dried, I cut a piece of Neenah 110lb Classic Crest Cardstock to 2 x 5-1/4″ and diecut it with Lawn Fawn Grassy Border and colored it with Copic Markers. I used YG25, and G07. I die cut all the pieces for the house from Neenah 110lb Classic Crest Cardstock bwith the Lawn Fawn Build-A-House, Build-A-House Christmas Add-on Dies as well as the fence from the Honey Bee Stamps House Builder Card Base.

I colored all the pieces with Copic Markers as well. I used C00 for the house; C5, C7 & C9 for the roof; C3 & C5, Y13 & Y18 for the windows; R14, R17 & R29 for the door; C5, C7 & C9 for the stairs; B34, B37 & B39 for the awning; R29, Y18 & B37 for the window box flowers; C3 & 0 for the window box; R29 & B37 for the wreath and bow; and C00 & 0 for the fence.

I stamped the sentiment onto Neenah 110lb Classic Crest Cardstock with Catherine Pooler Designs Midnight Ink, added some Clear Embossing Powder and heat set it. I fussycut it and added it to the card with Stampin’ Dimensionals.

I finished off the card by adding Tonic Fresh Snowfall Nuvo Glitter Drops to the door knob and the wreath bow.

I left the inside of the card blank.

Dimensions


Supplies

https://linkdeli.com/widget.js?id=f5e8378456858c916708

Thanks for reading this post! I hope you enjoyed and I’ve inspired you to make this cute card yourself! If you want to share you creations with me tag me on instagram @kittieslovecrafting. Leave comments or questions below or feel free to email me.

Fourth of July, Fourth of July, Stenciled Background, Summer

Partial Stenciling Technique: Patriotic Card

Hi friends. Independence Day is approaching and if you like making cards to send to friends and family like I do, here’s a simple one to get started. I saw a video from Gina K Designs on partial stenciling so I decided to give it a try.

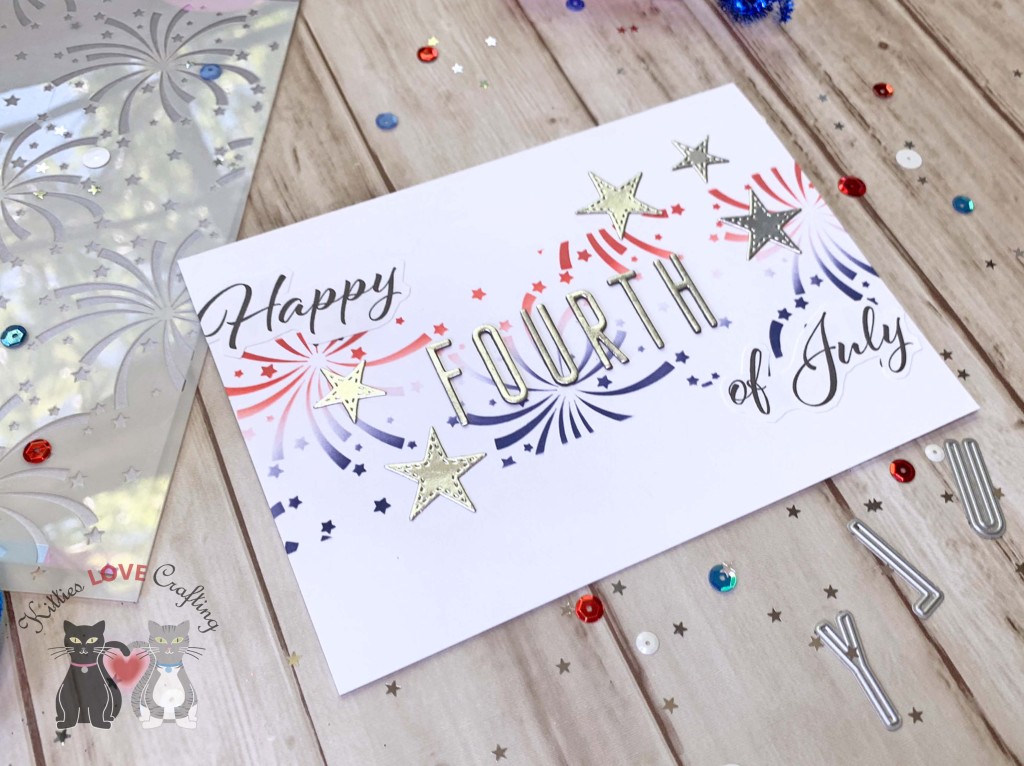
For this card, I cut a piece of Neenah 110lb Classic Crest Cardstock to 7 x 10″ and scored at 5″ to create the card base. I taped off the area I wanted to stencil with Low Tack Tape and made sure to cover the rest of the areas so as not to add unwanted ink in those areas. I used Tim Holtz Candied Apple and Chipped Sapphire Distress Oxide Inks to create a gradient.

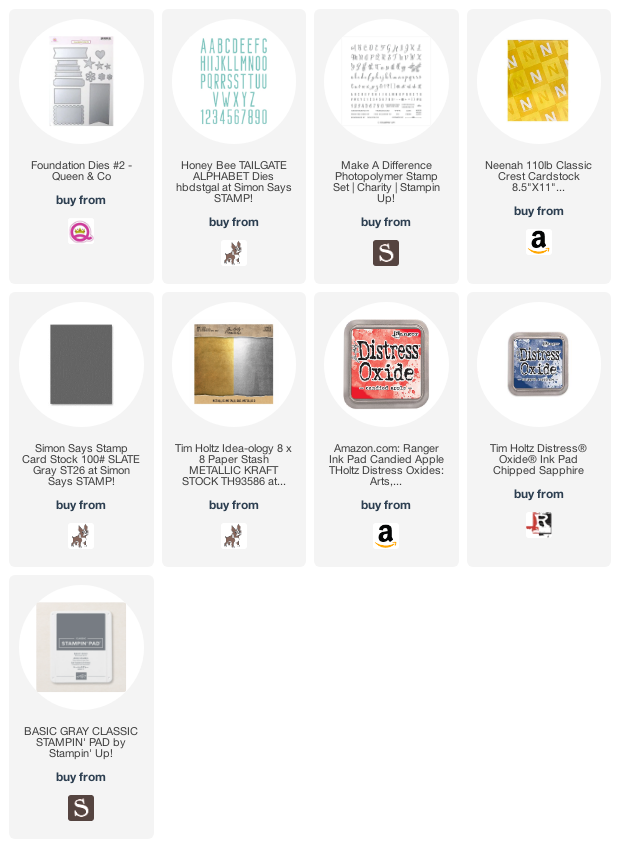
For the sentiment I diecut the letters for “fourth” from Tim Holtz Idea-ology 8 x 8 Paper Stash Metallic Kraft Stock and two from Simon Says Stamp Cardstock 100# Slate Gray using Honey Bee Tailgate Alphabet Dies. I also die cut silver stars using Queen & Company Foundation Dies #2.

I didn’t have any suitable stamps for the “Happy” and “of July” part of the sentiment so I printed some out from my computer. YOu can use a program like Microsoft Powerpoint or Word or Adobe Illustrator or any other program that allows you to create text and print it.

I left the inside of the card blank.

Dimensions


Supplies

https://linkdeli.com/widget.js?id=f5e8378456858c916708

Thanks for reading this post! I hope you enjoyed and I’ve inspired you to make this cute card yourself! If you want to share you creations with me tag me on instagram @kittieslovecrafting. Leave comments or questions below or feel free to email me.

Card kits, Holidays 2022, Mother's Day, Mother’s Day

I Cut Apart Stamped Images to Make Them Fit My Cards! OMG!

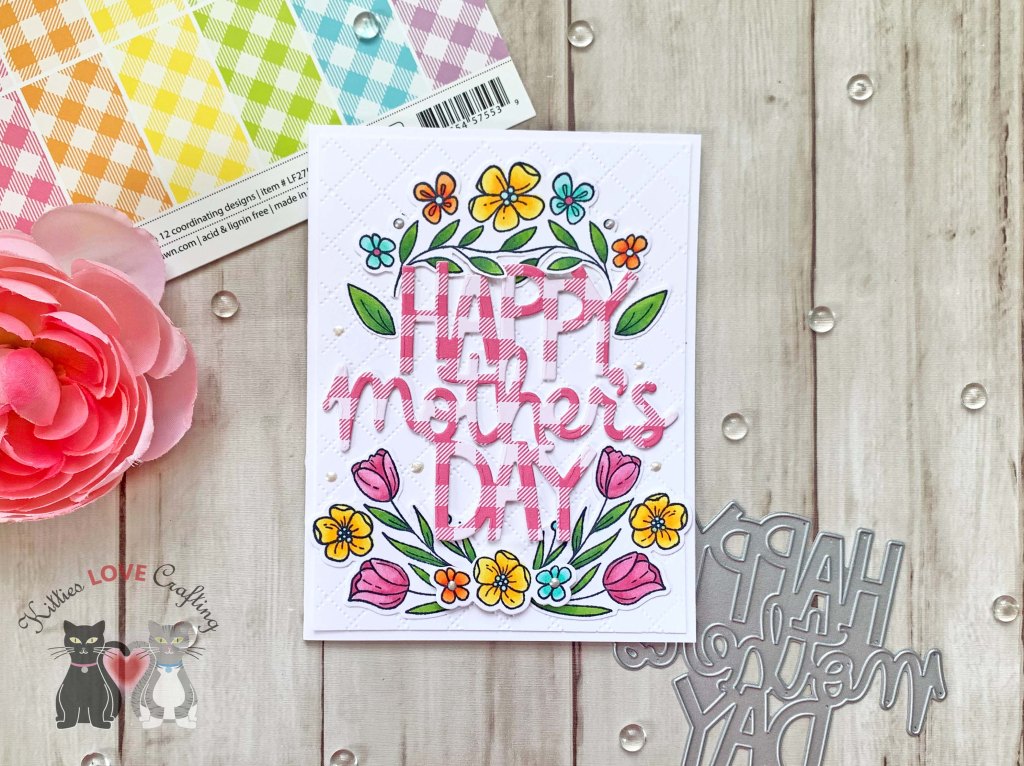
Mother’s Day Cards featuring the Simon Says Stamp Easter Joy Stampset and Lawn Fawn Giant Sentiments

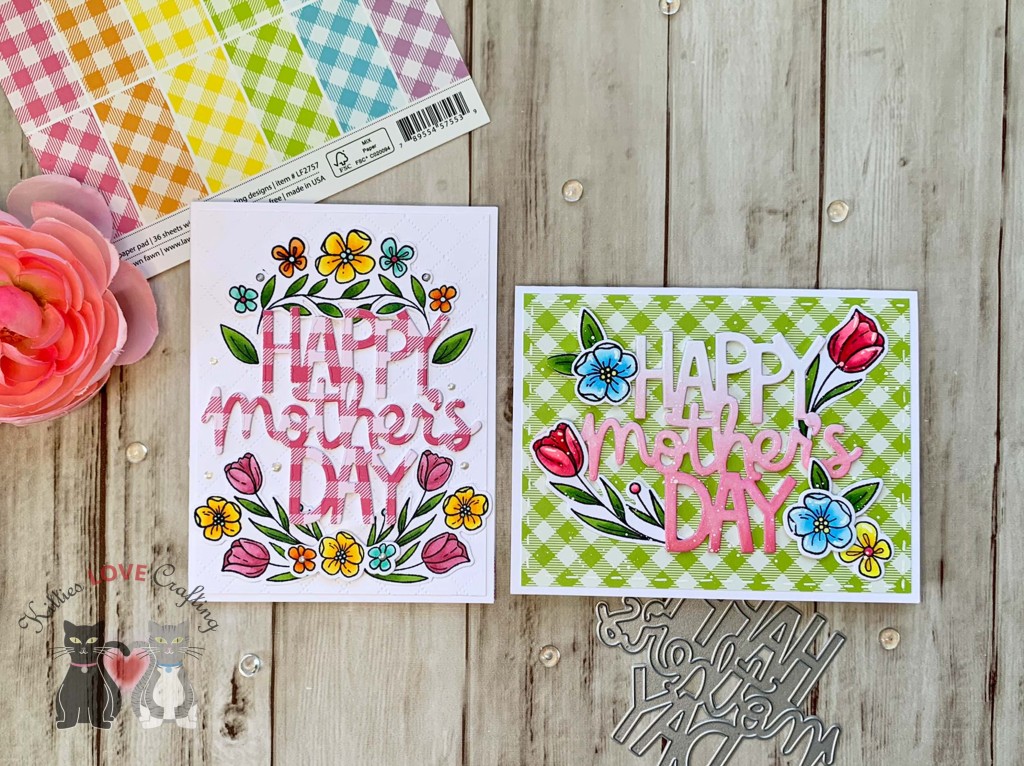
Hi friends. If you want to combine a large sentiment like the Lawn Fawn Giant Happy Mother’s Day Die and a stamped image like floral wreath from the Simon Says Stamp Easter Joy stampset but they don’t necessarily fit on the card together? Well, you can make a larger card right?!? Yes, but if you don’t want to do that you can also cut apart your stamped images. What? OMG No! If this sounds horrifying to you, you’re not alone. But I really like this wreath and obsessed with the Lawn Fawn Giant sentiment dies lately and wanted to combine them. The only solution is to cut the wreath apart. And I’m glad I did.

For the first card, I cut a piece of Neenah 110lb Classic Crest Cardstock to 5-1/2 x 8-1/2″ and scored at 4-1/4″ to create the card base. I cut another piece to 4 x 5-1/4″ and embossed it with the Darice Wire Fence Embossing Folder.

I stamped the wreath from Simon Says Stamp Easter Joy stampset onto Neenah 110lb Classic Crest Cardstock with Memento Tuxedo Black Ink. I colored the images with Copic Markers. I used YG17, YG25 and YG67 for the leaves and stems; R81, R83, & R85, Y17, Y18,BG11 & BG32, YR12, YR16, & YR09 for the flowers. I diecut it using the coordinating dies. Then cut the wreath in half and eventually further cut it apart.

I diecut the sentiment from the Lawn Fawn GOTTA HAVE GINGHAM RAINBOW 6 x 6 Collection Pack as well as two more times from Neenah 110lb Classic Crest Cardstock with the Lawn Fawn Giant Happy Mother’s Day Die. I stacked and adhered them together before adding to my card.

I stamped the wreath from Simon Says Stamp Easter Joy stampset onto Neenah 110lb Classic Crest Cardstock with Memento Tuxedo Black Ink. I colored the images with Copic Markers. I used YG17, YG25 and YG67 for the leaves and stems; R81, R83, & R85, Y17, Y18,BG11 & BG32, YR12, YR16, & YR09 for the flowers. I diecut it using the coordinating dies. Then cut the wreath in half and eventually further cut it apart.

I adhered the parts of the wreath around the sentiment using some Stampin Dimensionals to pop some of it up. I finished off the card by adding some Nuvo Drops in Ivory Shell.

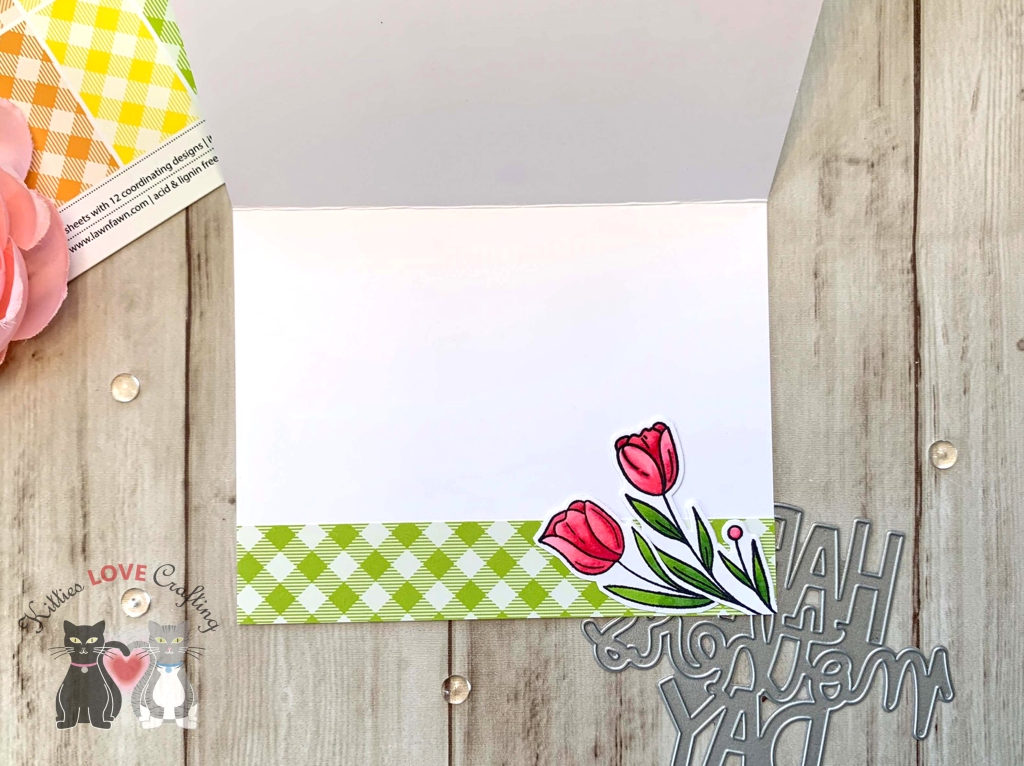
On the inside of the card, I adhered a piece of the same pattern paper from the Lawn Fawn GOTTA HAVE GINGHAM RAINBOW 6 x 6 Collection Pack cut to 1 x 4-1/4″.

Dimensions


For the second card, I cut a piece of Neenah 110lb Classic Crest Cardstock to 5-1/2 x 8-1/2″ and scored at 4-1/4″ to create the card base. I also cut a piece of Lawn Fawn GOTTA HAVE GINGHAM RAINBOW 6 x 6 Collection Pack cut to 4 x 5-1/4″ for the top panel.

I diecut the sentiment 3x from Neenah 110lb Classic Crest Cardstock with the Lawn Fawn Giant Happy Mother’s Day Die. for the top one I used Catherine Pooler It’s A Girl Ink to create a gradient then adhered all 3 diecuts together, creating a very dimensional sentiment.

I stamped the individual flowers from Simon Says Stamp Easter Joy stampset onto Neenah 110lb Classic Crest Cardstock with Memento Tuxedo Black Ink. I colored the images with Copic Markers. I used YG17, YG25 and YG67 for the leaves and stems; RV21, RV14, & RV29 for the tulips; B0000, B01, B02 & Y13, Y06, Y13 & Y18 for the flowers. I diecut it using the coordinating dies. I popped up some of the flowers with some Stampin Dimensionals.

I finished off the card by splatters with White Acrylic Paint and some faux stitching with a White Gel Pen. I also added some shimmer to the sentiment diecut with a Spectrum Noir Sparkle Pen.

On the inside of the card, I adhered a piece of the same pattern paper from the Lawn Fawn GOTTA HAVE GINGHAM RAINBOW 6 x 6 Collection Pack cut to 1 x 4-1/4″ and some of the extra tulips I had stamped and colored.

Dimensions


Supplies

https://linkdeli.com/widget.js?id=f5e8378456858c916708

Thanks for reading this post and Happy Easter! I hope you enjoyed and I’ve inspired you to make some cards using this kit yourself! If you want to share you creations with me tag me on instagram @kittieslovecrafting. Leave comments or questions below or feel free to email me.
Holidays 2022, Mother's Day, Mother’s Day

Mother’s Day Card featuring Lawn Fawn Magic Iris Floral Wreath Add-on

Hi friends. Mother’s Day is fast approaching and if you need a card and don’t love to stamp and color images, this one is for you! I only used dies and inks to create this card.

For this card, I cut a piece of Neenah 110lb Classic Crest Cardstock to 5 x10″ and scored at 5″ to create the card base. I also cut a piece of Echo Park My Favorite Easter 6 x 6 Paper Pad cut to 4-1/2 x 4-1/2″ for the top panel.

I stamped the wreath and many flowers from Lawn Fawn Magic Iris Floral Wreath Add-on Die Cuts twice from Neenah 110lb Classic Crest Cardstock. I colored the wreath and flowers with Distress Oxide Inks. I used Tim Holtz Twisted Citron and Mowed Lawn Distress Oxide Inks for the leaves and stems and Picked Raspberry, Squeezed Lemonade, Broken China, Milled Lavender and Wilted Violet for the flowers.

I adhered the wreath to the card. Next, I die cut a sentiment from the Queen & Co Sentiment Stacker Dies #1 from Neenah 110lb Classic Crest Cardstock and the shadow from Vellum Paper. I cut three of the”Mom” word to create a more dimensional sentiment.

Lastly, I finished it off by adding Nuvo Drops in Ivory Seashell.

On the inside of the card, I adhered a piece of Echo Park My Favorite Easter 6 x 6 Paper Pad cut to 1 x 4-1/4″ and stamped a sentiment from the Lawn Fawn Happy Happy Happy Stampset with Mowed Lawn Distress Oxide Ink. I also added a flower to the bottom.

Dimensions


Supplies

https://linkdeli.com/widget.js?id=f5e8378456858c916708

Thanks for reading this post! I hope you enjoyed and I’ve inspired you to make this Mother’s Day Card yourself! If you want to share you creations with me tag me on instagram @kittieslovecrafting. Leave comments or questions below or feel free to email me.
Card kits, Easter, Holidays 2022

Bonus Easter Card featuring Simon Says Stamp Limited Edition Easter Joy 2022 Card Kit

Hi friends. Easter is almost upon us! Here’s another quick card using the Limited Edition Simon Says Stamp EASTER JOY 2022 Card Kit, which is full of tons of goodies to make cute Easter cards as well as for other occasions.

For this card, I cut a piece of Neenah 110lb Classic Crest Cardstock to 5-1/2 x 8-1/2″ and scored at 4-1/4″ to create the card base. I also cut a piece of Echo Park My Favorite Easter 6 x 6 Paper Pad cut to 4 x 5-1/4″ and another to 1-3/4 x 4″ for the top panel.

I stamped the wreath from Simon Says Clear Stamps Easter Joy stampset 2x onto Neenah 110lb Classic Crest Cardstock with Memento Tuxedo Black Ink. I colored the image with Copic Markers. I used YG25 and G07 for the leaves; V06 and V09 for the tulips; Y13, Y17 and RV66, BG01, BG02, and V09, RV52 and RV55, YR09, YR04 and YR12 for the other flowers. I diecut it using the coordinating dies. I fussycut the four flowers for the second wreath image and adhered them with 3M Foam Tape on to the original wreath. I also used 3M Foam Tape behind the wreath.

Lastly, I stamped a sentiment from the Simon Says Clear Stamps Easter Joy stampset onto Neenah 110lb Classic Crest Cardstock with Memento Tuxedo Black Ink. I cut it down to 9/16 x 3-3/8″ before adhering to the card. I finsihed it off by adding Nuvo Drops in Pale Gold.

On the inside of the card, I adhered a piece of Echo Park My Favorite Easter 6 x 6 Paper Pad cut to 1 x 4″ and another to 1-1/8 x 4″.

Dimensions


Supplies

https://linkdeli.com/widget.js?id=f5e8378456858c916708

Thanks for reading this post and Happy Easter! I hope you enjoyed and I’ve inspired you to make some cards using this kit yourself! If you want to share you creations with me tag me on instagram @kittieslovecrafting. Leave comments or questions below or feel free to email me.

Card kits, Easter, Foiling, Holidays 2022, Techniques

Create a Foiled Background Using Stencils

Simon Says Stamp Limited Edition Easter Joy 2022 Card Kit

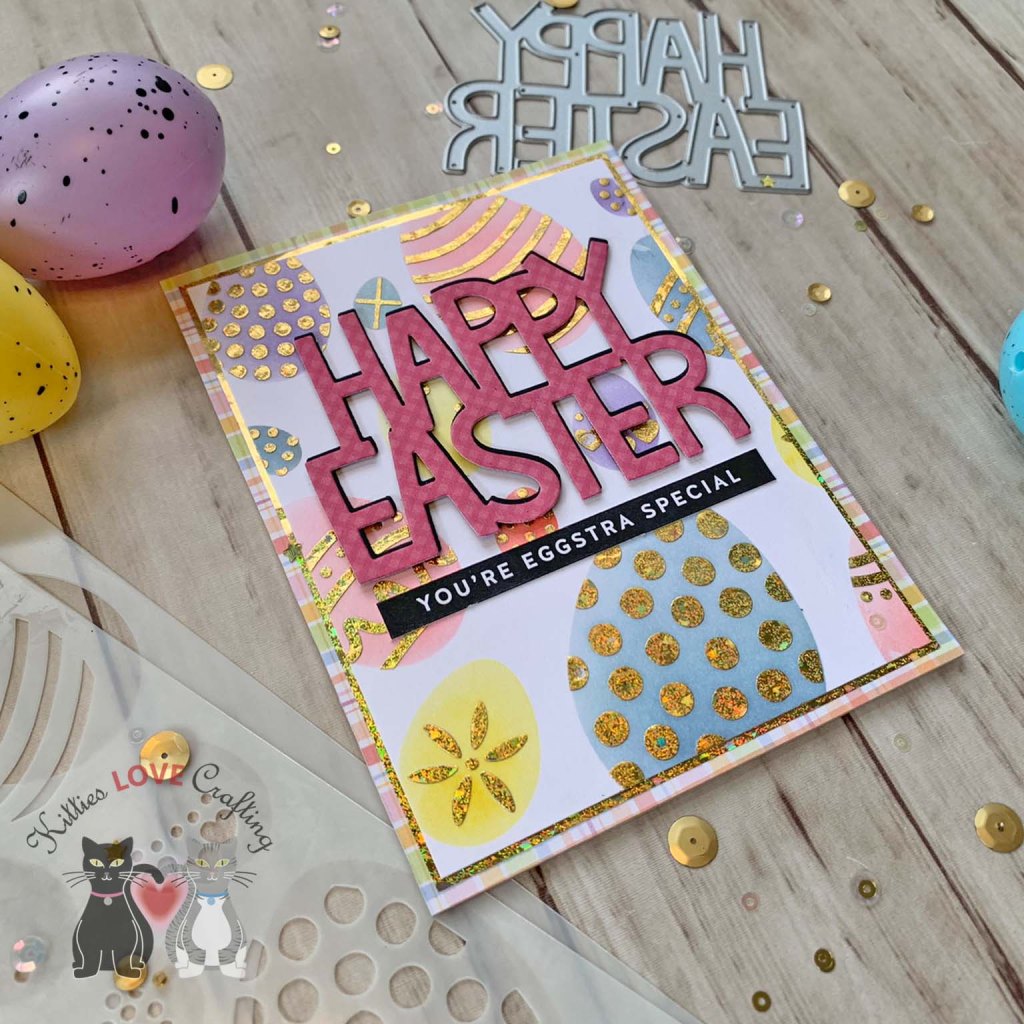
Hi friends. Here’s a cute and easy card featuring the Limited Edition Simon Says Stamp EASTER JOY 2022 Card Kit. I created the background using a foiling technique. Really quick and easy.

For this card, I cut a piece of Neenah Environment Smooth Desert Storm 80lb Cardstock to 5-1/2 x 8-1/2″ and scored at 4-1/4″ to create the card base. I also cut a piece of Neenah 110lb Classic Crest Cardstock to 3-7/8 x 5-1/8″ for the top panel.

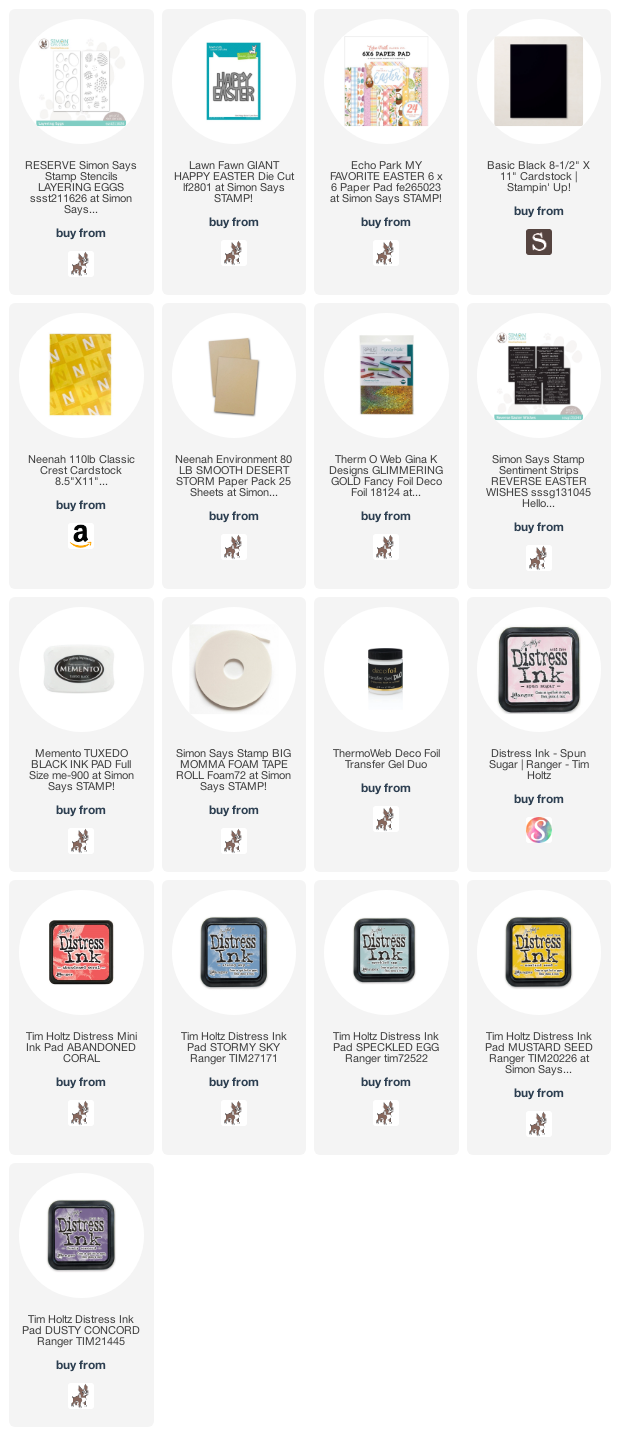
I used the Simon Says Stamp Layering Eggs Stencil set (the patterns layer) and applied Therm O Web Transfer Gel Duo DecoFoil with a spatula to the top panel. I let it dry completely for a few hours then ran the panel through my laminator with Therm O Web Gina K Designs Glimmering Gold Fancy Foil Deco Foil. Once completely cooled I used distress inks to color the eggs using the solid stencil layer.

I used Tim Holtz Spun Sugar, Abandoned Coral, Mustard Seed, Speckled Egg, Stormy Sky, Dusty Concord Distress Inks. I adhered the panel to a piece of Therm O Web Gina K Designs Glimmering Gold Fancy Foil Deco Foil cut to 4 x 5-1/4″ and then onto a piece of Echo Park My Favorite Easter 6 x 6 Paper Pad cut to 4-1/4 x 5-1/2″.

For the sentiment I cut it out from a Lawn Fawn pattern paper scrap I had in my stash with the Lawn Fawn Giant Happy Easter Die Cut. I also die cut three from Stampin’ Up! Basic Black 8-1/2″ X 11″ Cardstock which I stacked and adhered behind the pink sentiment.

Lastly, I added a strip from the Simon Says Stamp Sentiment Strips Reverse Easter Wishes to complete the sentiment.

On the inside of the card, I cut a piece of Neenah 110lb Classic Crest Cardstock to 4 x 5-1/4″ and strip of the pattern paper from the front, cut to 7/8 x 4″.

Dimensions


Supplies

https://linkdeli.com/widget.js?id=f5e8378456858c916708

Thanks for reading this post. I hope you enjoyed and I’ve inspired you to make some cards using this kit yourself! If you want to share you creations with me tag me on instagram @kittieslovecrafting. Leave comments or questions below or feel free to email me.