Autumn, Embossed Background, Fall, Fancy Folds, Faux Embossing, interactive, Shaker, Thank Yous

Fall Card Series #4: Using Catherine Pooler Fall Frames Two Ways and A Fancy Fold

Hello friends. The next post in my Fall Card series features two cards using the same Frame die in two very different ways. And I also stepped up one of the cards by adding a fancy fold inside the card. The first one is a shaker but it turned out to be difficult to see the shaker bits inside because of the word die I used, so really this one ‘doesn’t ‘need to be a shaker; it could easily be a floating sentiment like the second card.

For the first card, I cut a piece of Neenah 100lb Classic Crest Cardstock 8.5 X 11″ to 5-1/2 x 8-1/2″ and scored at 4-1/4″ to create a card base and a piece of Catherine Pooler Designs Sunflower Fields Forever Patterned Paper to 4-1/4 x 5-1/2″.

I die cut the shadow from the Honey Bee Stamps Large Thanks Dies (retired) and backed it with Acetate to create a window. I die cut the word “thanks” from Neenah 100lb Classic Crest Cardstock 8.5 X 11″using the same dies. I added Foam Tape behind the panel, added some Appolonia Sequin Mix and backed it with a piece of Neenah 100lb Classic Crest Cardstock 8.5 X 11″ which I colored with CP Green Tea Ink.

Then I die cut the frame 2x from some Neenah 100lb Classic Crest Cardstock 8.5 X 11″ using the Catherine Pooler Fall Frames. I stamped a sentiment from the Lawn Fawn Thanks Thanks Thanks Stamp Set onto Neenah 100lb Classic Crest Cardstock 8.5 X 11″ with CP Over Coffee Ink and cut it to 3/8 x 2-1/2″.

I finished off the card by adding some Nuvo Drops in Gloss White.

I left the inside of the card of the card blank and added a piece of Catherine Pooler Designs Sunflower Fields Forever Patterned Paper measuring 1 x 5-1/2″.

Dimensions


For this card, I cut a piece of Neenah 100lb Classic Crest Cardstock 8.5 X 11″ to 5-1/2 x 8-1/2″ and scored at 4-1/4″ to create a card base and another piece to 4-1/4 x 5-1/2″. I die cut the shadow from the Honey Bee Stamps Large Thanks Dies (retired) and backed it with Acetate to create a window. I used the Catherine Pooler Fall Frames to emboss the border on the top panel. Check your embossing machines for the proper sandwich to do this properly.

I die cut the word “thanks” from Catherine Pooler Designs Sunflower Fields Forever Patterned Paper using the same dies. I added Foam Tape behind the panel and backed it with a piece of green pattern paper from Catherine Pooler Designs Sunflower Fields Forever Patterned Paper.

I stamped leaves from the Catherine Pooler Designs Leaf Motifs Stamp Set (retired) onto Neenah 100lb Classic Crest Cardstock 8.5 X 11″ with CP Orange Peel, Sauna, Polished, Spiced, Green Tea, and Eucalyptus inks. I don’t have dies for these stamps so I fussycut them all.

I finished off the card by adding some Nuvo Drops in Dark Walnut.

For the inside of the card I decided to step it up and add a fancy fold! I started by cutting a piece of Neenah 100lb Classic Crest Cardstock 8.5 X 11″ to 4-1/2 x 8-1/2″ and scored it at 2-1/8″, 4-1/4″, and 6-7/8″. Basically scoring it into quarters. Then I adhered I inside the card. I cut 4 pieces of pattern paper from Catherine Pooler Designs Sunflower Fields Forever Patterned Paper to 2-1/4″ (2) and 2-1/8″ (2). I shaved off about 1/16″ from all the panels so it didn’t interfere with the folds.

I added a border on one of the panels using the Catherine Pooler Fall Frames cut from Neenah 100lb Classic Crest Cardstock 8.5 X 11″. As well as a stitched rectangle and square to the other panels cut with the Lawn Fawn Small Stitched RECTANGLE Stackables and Lawn Fawn Small Stitched Square Stackables. I stamped the sentiment from Lawn Fawn Thanks Thanks Thanks Stamp Set onto Neenah 100lb Classic Crest Cardstock 8.5 X 11″ with Green Tea Ink and cut to 1-3/4 x 4-1/8″. I also added some more leaves from the Catherine Pooler Designs Leaf Motifs Stamp Set (retired).

Dimensions


Supplies

https://linkdeli.com/widget.js?id=f5e8378456858c916708

Thanks for reading this post. I hope I’ve inspired you to give this cute Fall card a try for yourself. Leave comments or questions below or feel free to email.

Christmas, Distress Ink Techniques, Embossed Background, Mini Slimline, Stampin' Up!, Techniques, Window Cards

Embossed Resist Mini Slimline Card: More Holiday Cards

Hello friends. Want to make an impactful background with little effort. Try using an emboss resist technique. You can stamp or stencil the embossing. Either way the results are impressive!

For this card, I cut a piece of Neenah 110lb Classic Crest Cardstock 8.5 X 11″ to 6 x 6″ and scored at 3″ to create a card base. I cut a piece of Neenah 80lb Classic Crest Cardstock 8.5 X 11″ to 2-1/8 x 5-1/8″ and die cut a scalloped border using Queen & Co Foundation 17 Dies.

I used Tim Holtz Chipped Sapphire, Salty Ocean and Uncharted Mariner Distress Oxide Inks to color the background. I sprayed some water on it before adding the snowflakes. Next I used Simon Says Stamp’s Falling Snow Stencil with Versamark Ink and White Embossing Powder to create the snow in the background.

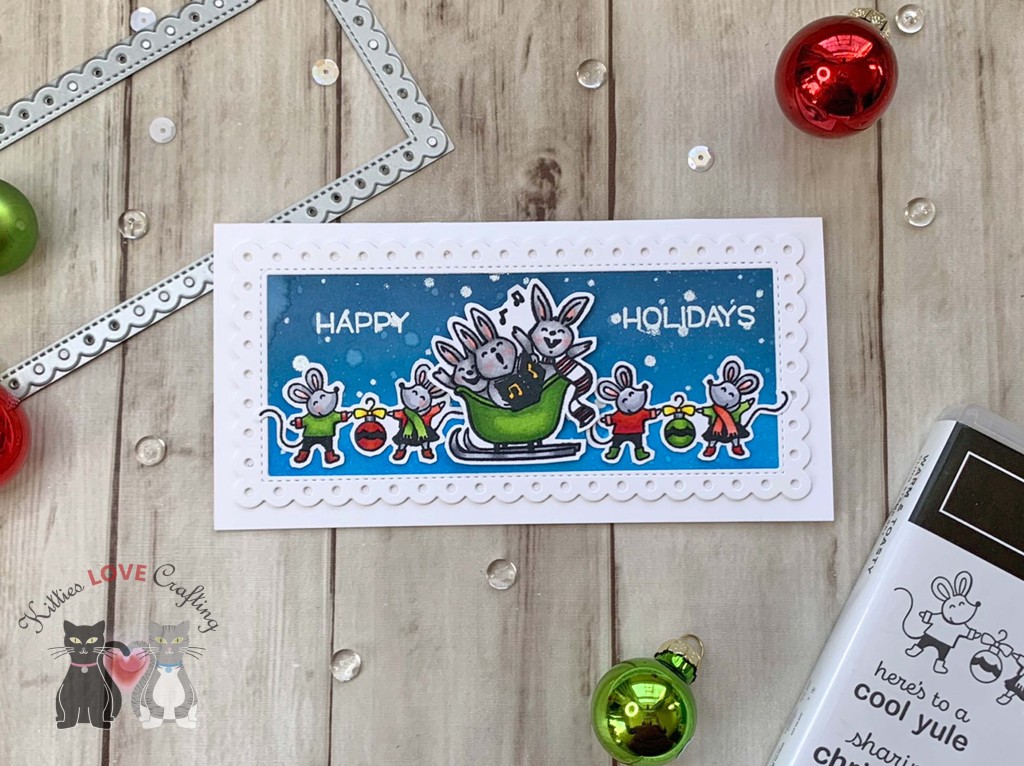
I stamped the images from Stampin’ Up!’s Warm & Toasty Stamp Set (retired) onto Neenah 110lb Classic Crest Cardstock 8.5 X 11″ with Memento Tuxedo Black Ink. I colored them with Copic Markers. I used YG03, YG17 & YG67, C1, C3 & C5 for the sleigh; N1, N2 & N4, R20 & R46 for the bunnies; R46 & R32, C1 & C3, YG03 & YG17, R20 for the mice; and R17 & R46, Y06 & Y17 for the ornaments.

I stamped the sentiment from the Lawn Fawn Happy Happy Happy Stampset onto the card with Versamark Ink and White Embossing Powder.

On the inside of the card, I stamped a sentiment from Lawn Fawn’s Merry Messages Stamp Set with Stampin’ Up! Real Red Ink and the mice from Stampin’ Up!’s Warm & Toasty Stamp Set (retired) with Memento Tuxedo Black Ink.

Dimensions


Supplies

https://linkdeli.com/widget.js?id=f5e8378456858c916708

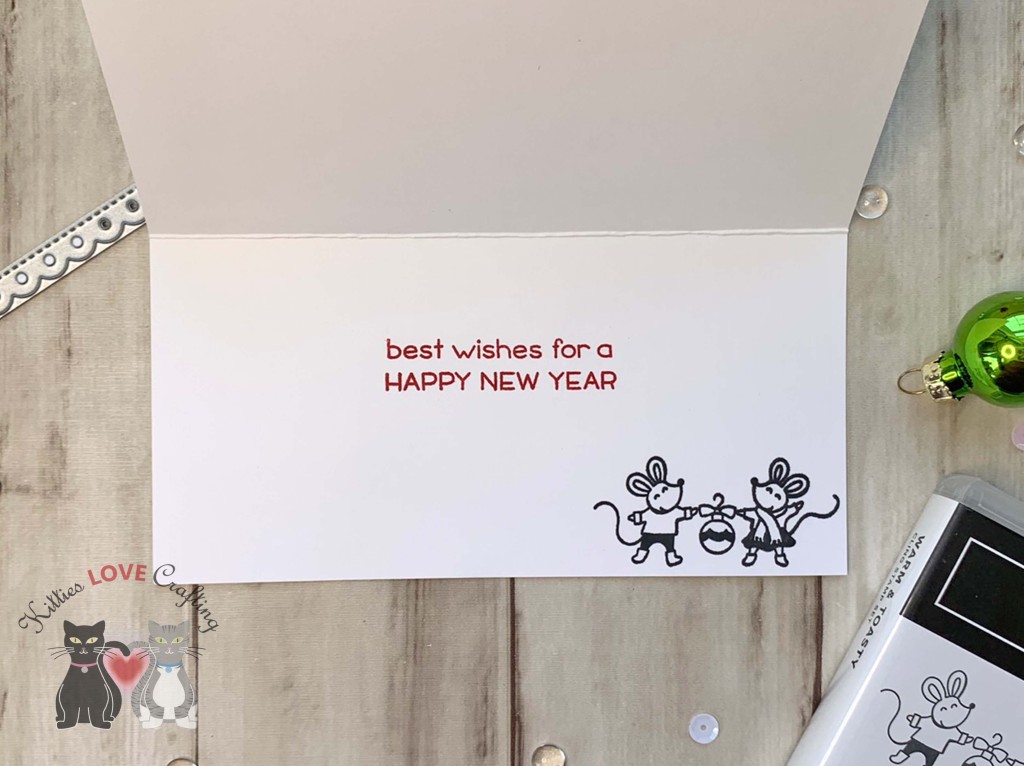
Thanks for reading this post. I hope you enjoyed and I’ve inspired you to give this card a try for yourself. Leave comments or questions below or feel free to email.

Christmas, Embossed Background, Faux Embossing, Shaker, Uncategorized, Window Cards

Stretch Your Dies: One Die Three Ways

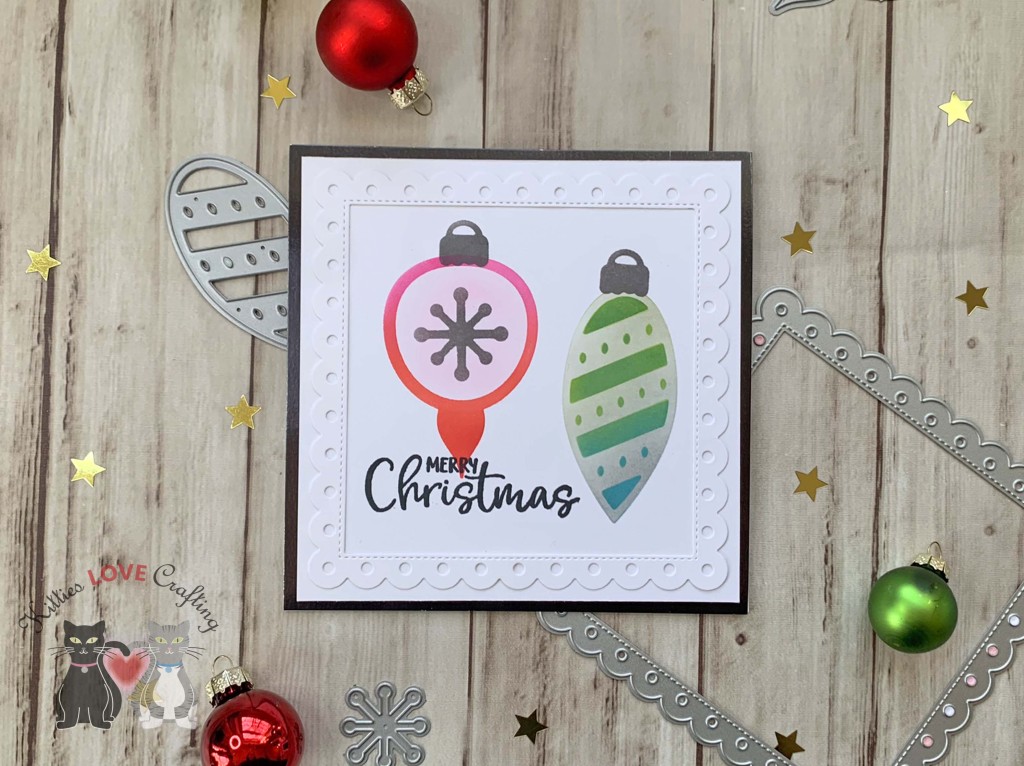
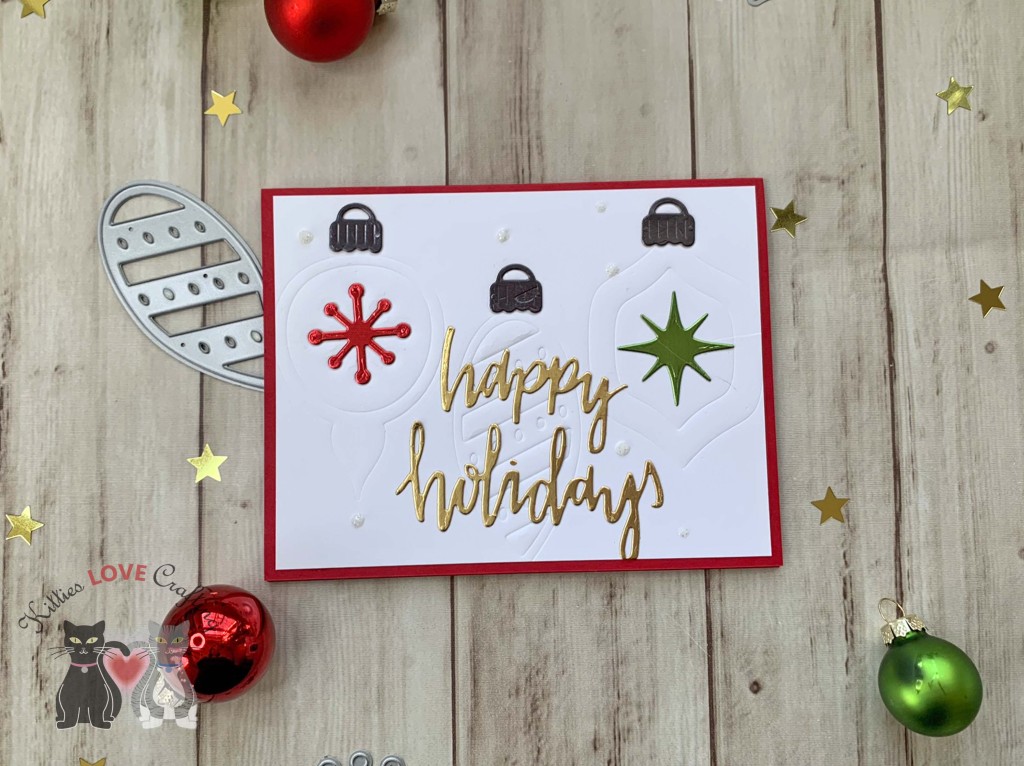
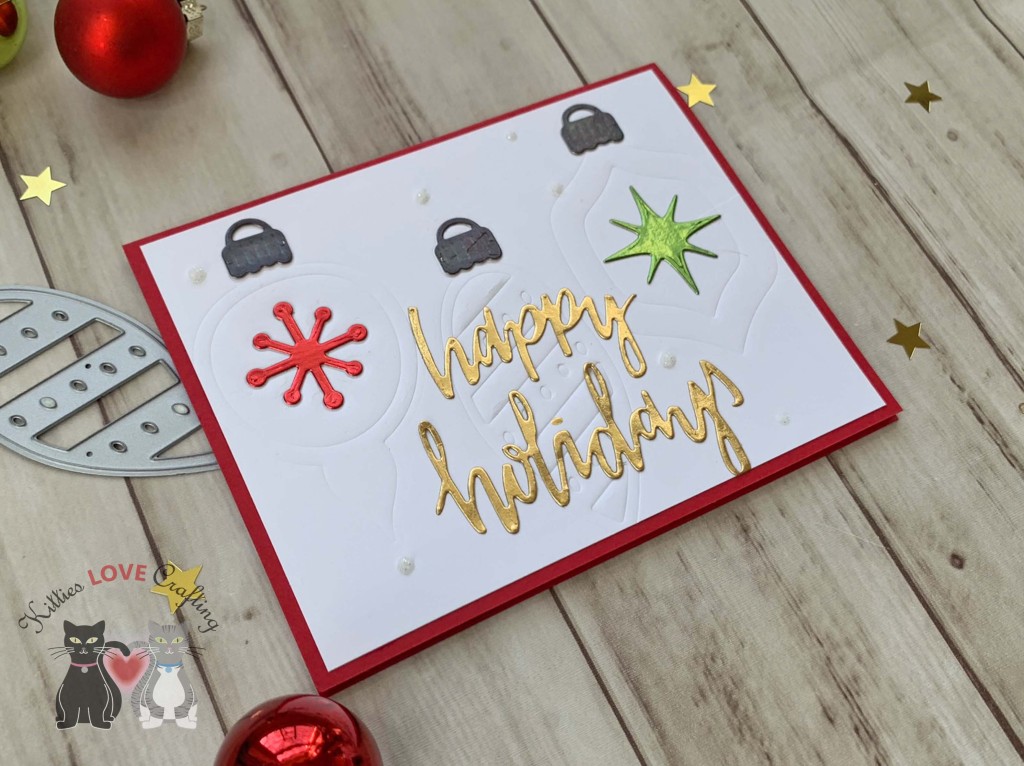
Hello friends. Have you ever tried using your dies to emboss or stencil your backgrounds?!? It’s super easy and you can make quick cards using these techniques. I created three cards demonstrating these techniques using the Catherine Pooler Retro Ornament Dies. Let me show you how easy they are to make. For more stenciled backgrounds using dies check out my previous post.

For this first card, I created a tone-on-tone background with a little shimmer. I cut a piece of Neenah 110lb Classic Crest Cardstock 8.5 X 11″ to 5-1/2 x 11″ and scored at 5-1/2″ to create a card base, piece of Tim Holtz Idea-ology 8 x 8 Paper Stash Metallic Jewels Kraft Stock to 5-1/2 x 5-1/2″, a piece of Neenah 110lb Classic Crest Cardstock 8.5 X 11″ to 5-1/4 x 5-1/4″ for the top panels. I also diecut a piece of Neenah 110lb Classic Crest Cardstock 8.5 X 11″ with the Queen and Company Foundation 18 Dies.

I die cut the ornaments from scrap cardstock with the Catherine Pooler Designs Retro Ornament Dies. You can also use post it paper or masking paper. I pieced the negative and positive pieces to stencil the ornaments. I used Tim Holtz Candied Apple and Picked Raspberry Distress Oxide Inks for the left ornament. And Mowed Lawn and Broken China Distress Oxide Inks for the right one. I used Hickory Smoke Distress Ink for the ornament cap and stars.

I stamped a sentiment from Stampin’ Up!’s Paper Pumpkin Joy to the World directly onto the card with Catherine Pooler Designs Black Jack Ink.

On the inside of the card, I stamped a sentiment from Queen & Company’s North Pole Kit Stamp Set with Stampin’ Up!’s Real Red Ink.

Dimensions


For this second card, I decided to try embossing with my dies. I cut a piece of Stampin’ Up! Real Red 8-1/2″ X 11″ Cardstock 5-1/2 x 8-1/2″ and scored at 4-1/4″ to create a card base and piece of Neenah 110lb Classic Crest Cardstock 8.5 X 11″ to 4 x 5-1/4” for the top panel.

I took the ornament dies from the Catherine Pooler Designs Retro Ornament Dies and embossed the background panel. For my Sizzix Big Shot machine I used the following sandwich from the bottom up: 1.) Multipurpose Platform, 2.) Cutting Plate, 3.) Emboss mat, 4.) Paper. 5.) Die face down, and 6.) Cutting Plate. Check your machines guide for the proper snadwich. I also added additonal paper to deepen the embossing a bit.

I die cut the ornament cap from dark gray metallic cardstock from Tim Holtz Idea-ology 8 x 8 Paper Stash Metallic Jewels Kraft Stock and the ornament centers from green and red metallic cardstock from the same collection.

Then die cut a sentiment from gold cardstock from the Tim Holtz Idea-ology 8 x 8 Paper Stash Metallic Kraft Stock using the Neat & Tangled Happy Holidays die. I finished off the card by adding some Nuvo Fresh Snowfall Glitter Drops.

On the inside of the card, I cut a piece of Neenah 110lb Classic Crest Cardstock 8.5 X 11″ to 4 x 5-1/4” and stamped a sentiment from Catherine Pooler Designs Bright Baubles Stamp Set (discontinued) with Stampin’ Up!’s Real Red Ink.

Dimensions


For this third card, I made a fun shaker pocket card. I cut a piece of Stampin’ Up! Melon Mambo 8-1/2 x 11″ Cardstock (retired) to 5-1/2 x 8-1/2″ and scored at 4-1/4″ to create a card base and piece of patter paper from my stash to 4-1/4 x 5-1/2” for the inside of the shaker panel.

I cut a piece Acetate slightly larger than my back panel. then used double sided tape to adhere three sides of the acetate to the back of the panel, creasing the edges. I filled the pocket with a variety of flat sequins and stars and sealed the last side of the pocket. I adhered the panel to the card and then die cut a frame from Neenah 110lb Classic Crest Cardstock 8.5 X 11″ using the Spellbinders Nestabilities A2 Card Creator Dies Matting Basics A 4-1/4 x 5-1/2″ and 4-5/8 x 4-7/8″.

For the ornaments I used Altenew Glitter Gradient Cardstock Set in Pink Brilliance, Ocean Reflection, and Forest Canopy and the Catherine Pooler Designs Retro Ornament Dies. I also used the Tim Holtz Idea-ology 8 x 8 Paper Stash Metallic Kraft Stock for the the ornament caps.

I stamped a sentiment from the Catherine Pooler Bright and Baubles Stamp Set (retired) onto a piece of Neenah 110lb Classic Crest Cardstock 8.5 X 11″ with Memento Tuxedo Ink, trimmed sentiment to 3/4 x 2″ thebefore adhering it flat.

On the inside of the card, I cut a piece of Neenah 110lb Classic Crest Cardstock 8.5 X 11″ to 4 x 5-1/4” and the same pattern paper from the front panel to 1 x 4″. Then stamped a sentiment from Lawn Fawn’s Merry Messages Stamp Set with Catherine Pooler Designs Black Jack Ink.

Dimensions


Supplies

https://linkdeli.com/widget.js?id=f5e8378456858c916708

Thanks for reading this post. I hope you enjoyed and I’ve inspired you to give these cards a try for yourself. Leave comments or questions below or feel free to email.

Christmas, Distress Ink Techniques, Embossed Background, Faux Embossing, Stampin' Up!, Window Cards

Create Embossed Backgrounds Using Your Dies

Hello friends. It’s time to make some holiday cards. Starting things off with some super easy cards using dies to emboss backgrounds. It’s a super easy technique and produces some really cool results. You can use the embossed or debossed side as well.

For the first card, I cut a piece of Neenah 110lb Classic Crest Cardstock 8.5 X 11″ to 5-1/2 x 8-1/2″ and scored at 4-1/4″ to create a card base and piece of Neenah 80lb Classic Crest Cardstock 8.5 X 11″ to 4 x 5-1/4” for the top panel. I used the Stampin’ Up! So Many Snowflakes dies (retired) to emboss the background. I followed the sandwich for wafer dies on my diecut machine (Sizzix Big Shot) and added another piece of cardstock to get a deeper impression. Play around with your sandwich and add a shim if necessary to get the desired raised effect.

I used Tim Holtz Tumbled Glass and Uncharted Mariner Distress Oxide Inks as well as Catherine Pooler Designs Black Jack Ink to color the background. Then I cut out the window using the die in the Stampin’ Up! So Many Snowflakes die set.

I stamped the sentiment from the Stampin’ Up! Snowflake Wishes Stamp set (retired) onto some Neenah 80lb Classic Crest Cardstock 8.5 X 11″ with Catherine Pooler Designs Black Jack Ink and adhered behind the panel.

I die cut snowflakes from Neenah 110lb Classic Crest Cardstock 8.5 X 11″, Simon Says Stamp 6×6 Silver Glitter Cardstock and Stampin; Up! 12 x 12 Balmy Blue Glimmer Paper (retired) using the Catherine Pooler Designs Delicate Snowflake Die (discontinued), Stampin’ Up! So Many Snowflakes (retired) and Stampin’ Up! Colorful Seasons.

I finished off the card by adding some Tonic Gloss Simply White Nuvo Crystal Drops and Silver Moondust Nuvo Glitter Drops.

On the inside of the card, I stamped a sentiment from Lawn Fawn’s Merry Messages Stamp Set with Tim Holtz Uncharted Mariner Distress Oxide Ink and added some silver snowflakes.

Dimensions


For the second card, I cut a piece of Neenah 110lb Classic Crest Cardstock 8.5 X 11″ to 5-1/2 x 8-1/2″ and scored at 4-1/4″ to create a card base and piece of Strathmore Bristol Smooth Paper to 4 x 5-1/4” for the top panel. I used the Stampin’ Up! Colorful Seasons dies (retired) to emboss the background.

I used Tim Holtz Tumbled Glass, Uncharted Mariner, Kitsch Flamingo, and Picked Raspberry Distress Oxide Inks to color the background. I used the ink smooshing technique this time instead of ink blending. It created a nice watercolor effect.

I die cut snowflakes from Neenah 110lb Classic Crest Cardstock 8.5 X 11″, Simon Says Stamp 6×6 Silver Glitter Cardstock and Stampin; Up! 12 x 12 Balmy Blue Glimmer Paper (retired) as well as some bright pink glitter paper from my stash. I used the Hero Arts Fancy Snowflake Die (discontinued), Stampin’ Up! So Many Snowflakes (retired) and Stampin’ Up! Colorful Seasons.

I stamped the sentiment from the Stampin’ Up! Snowflake Wishes Stamp set (retired) onto some Neenah 80lb Classic Crest Cardstock 8.5 X 11″ with Catherine Pooler Designs Black Jack Ink, fussycut it, and adhered to the panel.

I finished off the card by adding some Tonic IVORY SEASHELL Nuvo Crystal Drops.

On the inside of the card, I stamped a sentiment from Lawn Fawn’s Merry Messages Stamp Set with Catherine Pooler Designs Black Jack Ink and added a Balmy Blue Glitter snowflake .

Dimensions


For the third card, I cut a piece of Neenah 110lb Classic Crest Cardstock 8.5 X 11″ to 5-1/2 x 8-1/2″ and scored at 4-1/4″ to create a card base and piece of Neenah 80lb Classic Crest Cardstock 8.5 X 11″ to 3-3/4 x 5” for the top panel. I also cut a piece of Simon Says Stamp 8-1/2 x 11″ Slate 100lb Cardstock, measuring 4 x 5-1/4″ to mat the top panel.

I die cut snowflakes from Neenah 110lb Classic Crest Cardstock 8.5 X 11″, Stampin; Up! 12 x 12 Balmy Blue Glimmer Paper (retired) as well as some pale and bright pink glitter paper from my stash. I used the Hero Arts Fancy Snowflake Die (discontinued), Stampin’ Up! So Many Snowflakes (retired) and Stampin’ Up! Colorful Seasons.

I stamped the sentiment from the Stampin’ Up! Snowflake Wishes Stamp set (retired) onto some Neenah 80lb Classic Crest Cardstock 8.5 X 11″ with Catherine Pooler Designs Black Jack Ink and adhered to the panel.

I finished off the card by adding some Tonic LIQUID MERCURY Nuvo Crystal Drops.

On the inside of the card, I stamped a sentiment from Lawn Fawn’s Merry Messages Stamp Set Tim Holtz Picked Raspberry Distress Oxide Ink and added a light pink and balmy blue snowflake.

Dimensions


For the fourth card, I cut a piece of Neenah 110lb Classic Crest Cardstock 8.5 X 11″ to 5-1/2 x 8-1/2″ and scored at 4-1/4″ to create a card base and piece of Neenah 80lb Classic Crest Cardstock 8.5 X 11″ to 4 x 5-1/4” for the top panel. I used the Stampin’ Up! So Many Snowflakes dies (retired) to emboss the background.

I ink blended the background using Tim Holtz Kitsch Flamingo and Picked Raspberry Distress Oxide Inks.

I die cut snowflakes from Neenah 110lb Classic Crest Cardstock 8.5 X 11″ as well as some bright pink glitter paper from my stash. I used the Catherine Pooler Designs Delicate Snowflake Die (discontinued), Stampin’ Up! So Many Snowflakes (retired) and Stampin’ Up! Colorful Seasons.

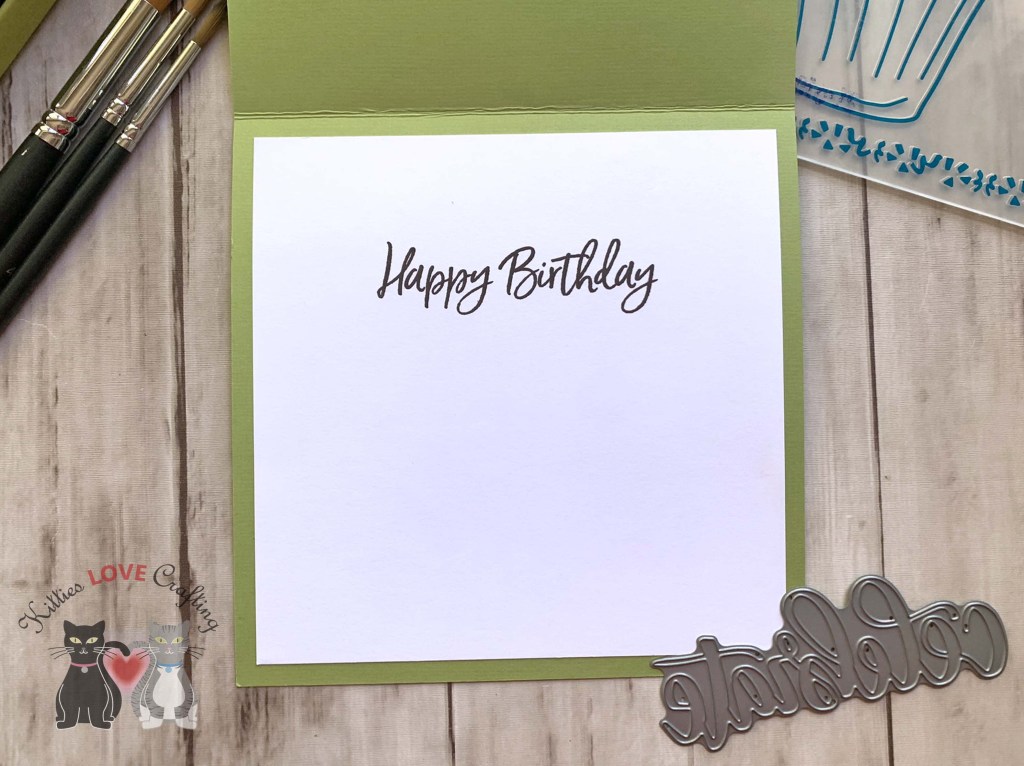
I stamped the sentiment from the Stampin’ Up! Joy to the World Paper Pumpkin Stampset (retired) directly onto the card with Catherine Pooler Designs Black Jack Ink.

I finished off the card by adding some Tonic IVORY SEASHELL and Carnation Pink Nuvo Crystal Drops.

On the inside of the card, I stamped a sentiment from Lawn Fawn’s Merry Messages Stamp Set Tim Holtz Picked Raspberry Distress Oxide Ink and added bright pink snowflakes.

Dimensions


Supplies

https://linkdeli.com/widget.js?id=f5e8378456858c916708

Thanks for reading this post. I hope you enjoyed and I’ve inspired you to give these cards a try for yourself. Leave comments or questions below or feel free to email.

Embossed Background, Halloween, Halloween

Creating a Dimensional Halloween Card featuring Honey Bee Stamps

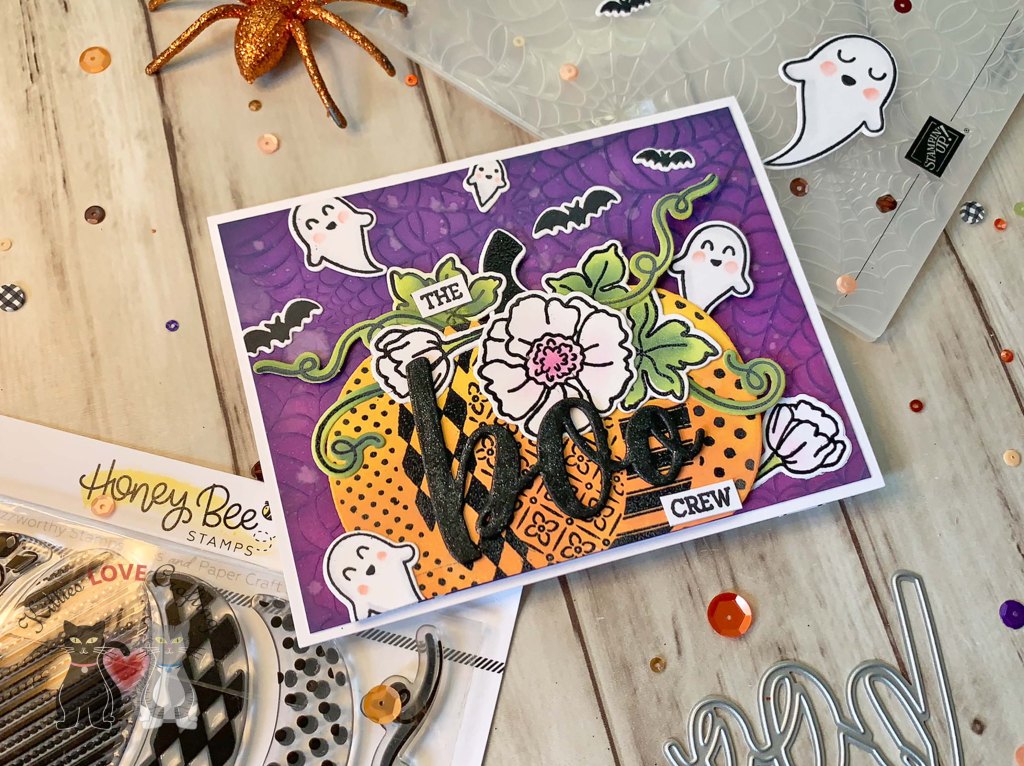
Hi friends. A quick way to create a dimensional background with little effort is to use an embossing folder. We all have a bunch of embossing folders we bought when it was all the rage to emboss everything and now they sit in a drawer or craft room shelf collecting dust. Am I right?!? Come on, you know it’s true??? LOL Well thankfully they are coming back in fashion and there are so many techniques you can do with them. Today we are keeping it simple — just some ink and a blender. No fancy tools needed either.

For this card, I cut a piece of Neenah 110lb Classic Crest Cardstock to 8-1/2 x 5-1/2″ and scored at 4-1/4″ to create the card base. Then cut a piece measuring 4 x 5-1/4″ and embossed with the Stampin’ Up! Cobwebs 3D Embossing Folder (retired); any spiderweb embossing folder will work here.

I used mostly Seedless Preserves and Villainous Poison Distress Oxide Inks to color the background. Then lightly went over the raised cobwebs with some Chipped Sapphire Distress Oxide Ink. I sprayed some water on the background to distress it further.

I stamped the all the images from the Honey Bee Stamps Pumpkin Patch Stampset onto Neenah 110lb Classic Crest Cardstock with Midnight Ink and heat set with Clear Embossing Powder. Then colored the pumpkin with Spiced Marmalade and Wild Honey Distress Oxide Inks. I colored the leaves with Twisted Citron, Rustic Wilderness, and Peeled Paint Distress Oxide Inks. I used Picked Raspberry Distress Oxide Ink for the flowers.

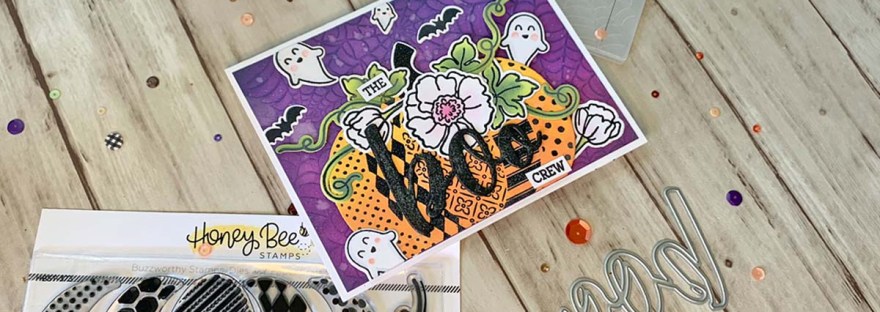
I stamped the ghost and bat images from Lawn Fawn Happy Haunting stampset and colored them with Copic Markers. I used C00, 0 and R20 for the ghosts. And then diecut them with the coordinating dies.

I stamped the sentiment from Honey Bee Stamps Boo 3×4 Stamp Set onto Neenah 110lb Classic Crest Cardstock with Midnight Ink and die cut the ‘boo’ from Simon Says Stamp Cardstock 100# Black 8-1/2 x 11″ Cardstock 3x with the Honey Bee Boo Dies. I finished it off by adding some glitter with a Spectrum Noir Clear Overlay Sparkle Pen.

On the inside of the card, I stamped a sentiment from Queen and Company Halloween Hoopla Kit with with Midnight Ink and added an extra ghost.

Dimensions


Supplies

https://linkdeli.com/widget.js?id=f5e8378456858c916708

Thanks for reading this post! I hope you enjoyed and I’ve inspired you to make this cute Halloween card yourself! If you want to share you creations with me tag me on instagram @kittieslovecrafting. Leave comments or questions below or feel free to email me.

Christmas, Holidays 2019, Inlay diecutting technique

Stretching Your Dies: How to Make an Embossed Background

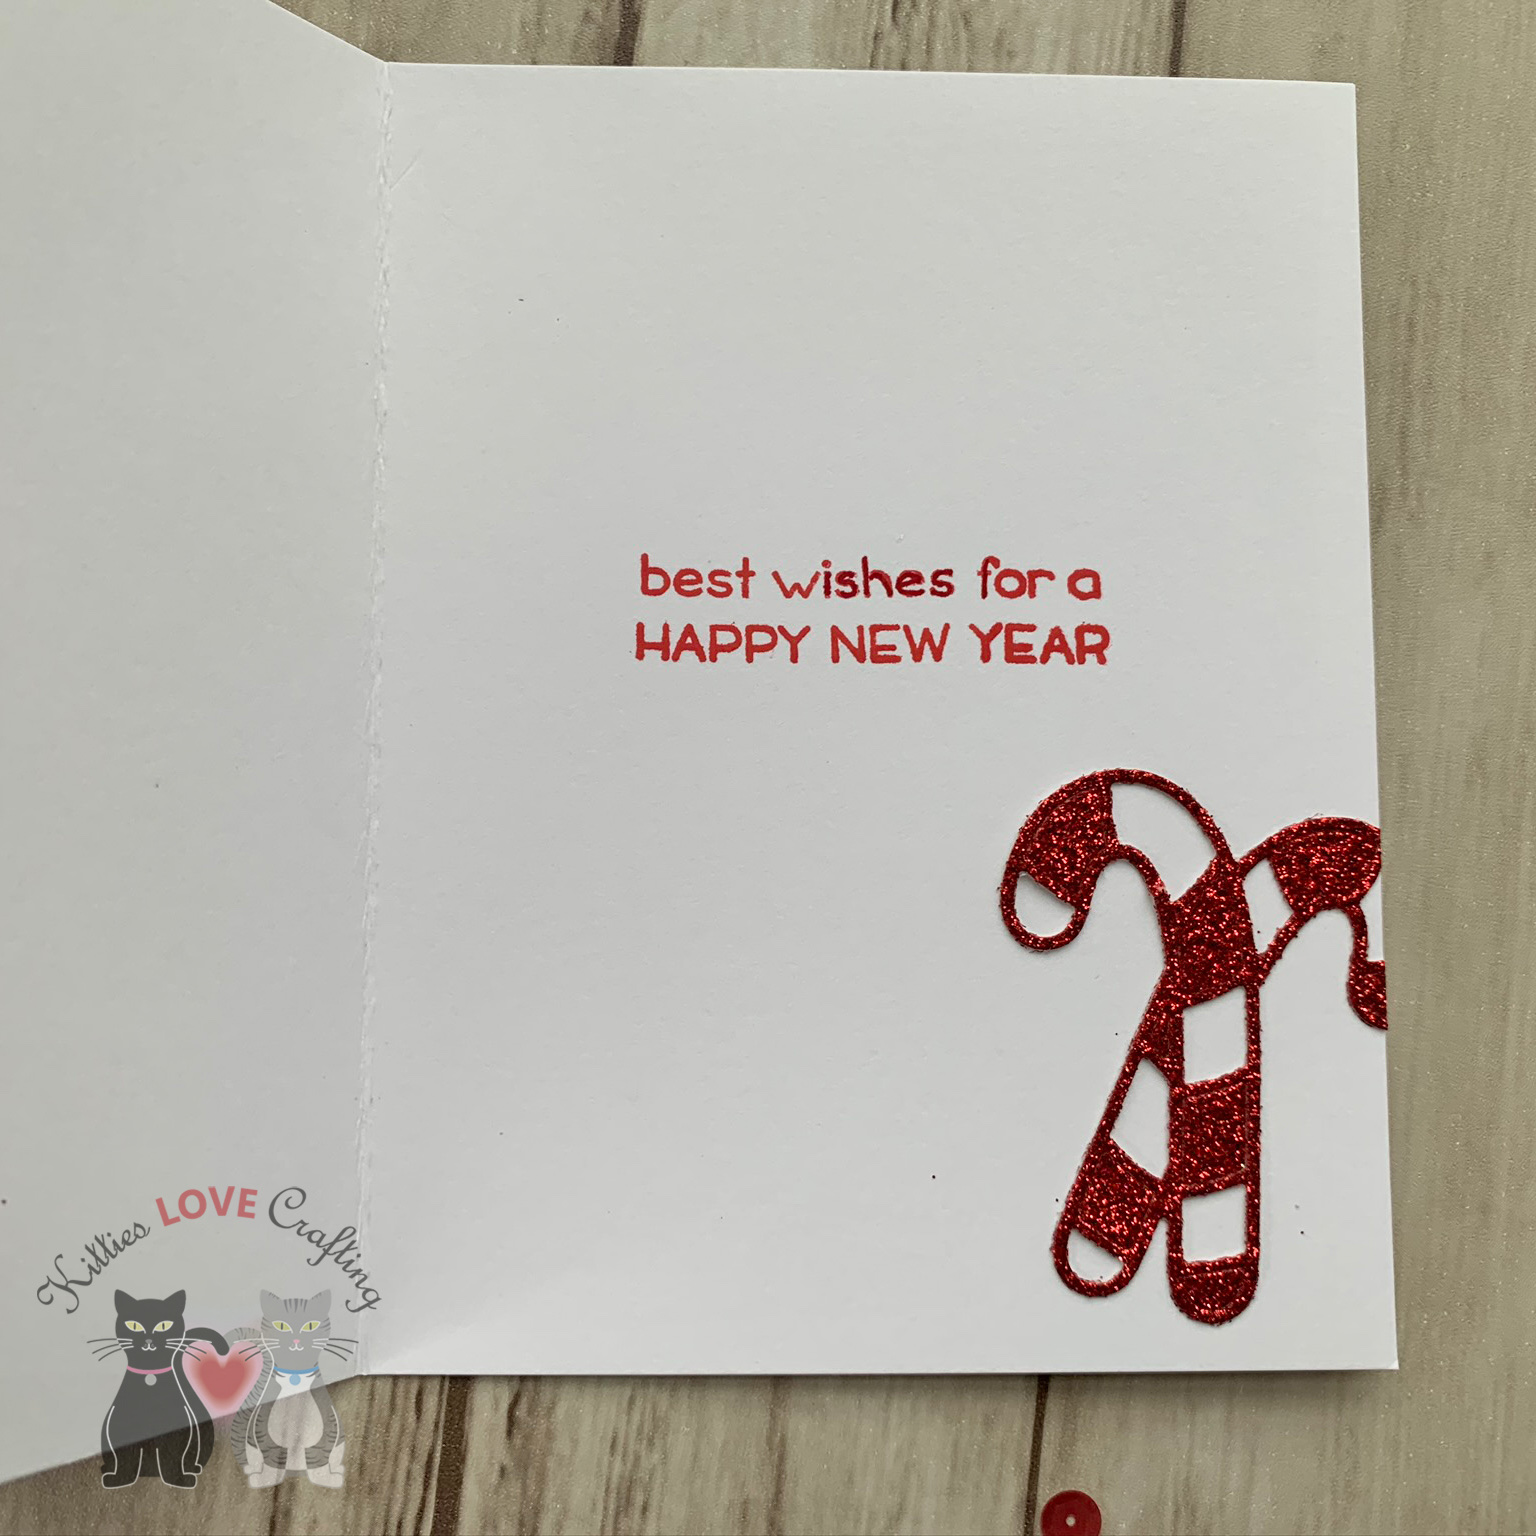
It’s always fun to find new ways to use your dies and this is one of my favorite techniques to stretch my dies. It’s a faux embossing technique; no embossing folder needed.

I started this card by cutting a piece of Neenah 110lb Classic Crest Cardstock 8.5″X11″ to 4 x 5-1/4″ and a card base measuring 5-1/2 x 8-1/2″and scored at 4 1/4″. Then diecut several pieces with the Simon Says Stamp Candy Canes Wafer Die and one from Stampin’ Up! Sparkle Glimmer Paper and Real Red Glimmer Paper. This die was included in the Simon Says Stamp December 2018 Card Kit but is available seperately. I diecut the bow using the same die with Stampin’ Up! Real Red 8-1/2″ X 11″ Cardstock.

I adhered the white candy cane diecuts randomly around the card, creating a pattern and a faux embossed look. This is a quick way to add dimension to your backgrounds. I made one of the candy canes the focal point by inlaying the red and white glitter paper pieces inside the candy cane outlines. Then added the bow from the same die. Don’t get rid of the leftover glitter diecut candy cane pieces, you can use them on the inside of the card.

I adhered the front panel to the card base and then stamped a sentiment from Merry Messages Stampset by Lawn Fawn onto a piece of Neenah 110lb Classic Crest Cardstock 8.5″X11″ using Festive Berries Distress Oxide Ink. I cut down the sentiment piece to 7/8 x 3-1/8” and then adhered it to a piece of Stampin’ Up! Real Red 8-1/2″ X 11″ Cardstock and cut that down to 1-1/8 x 3-1/4”. I added the sentiment strip to the card using 3M Foam Tape.

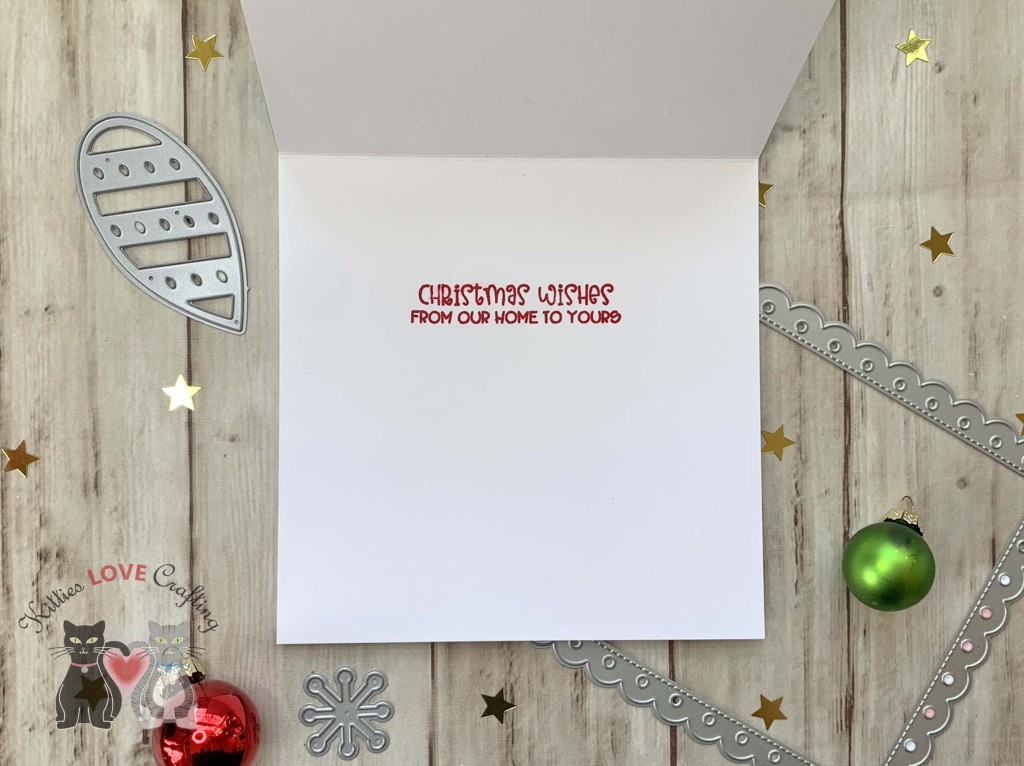
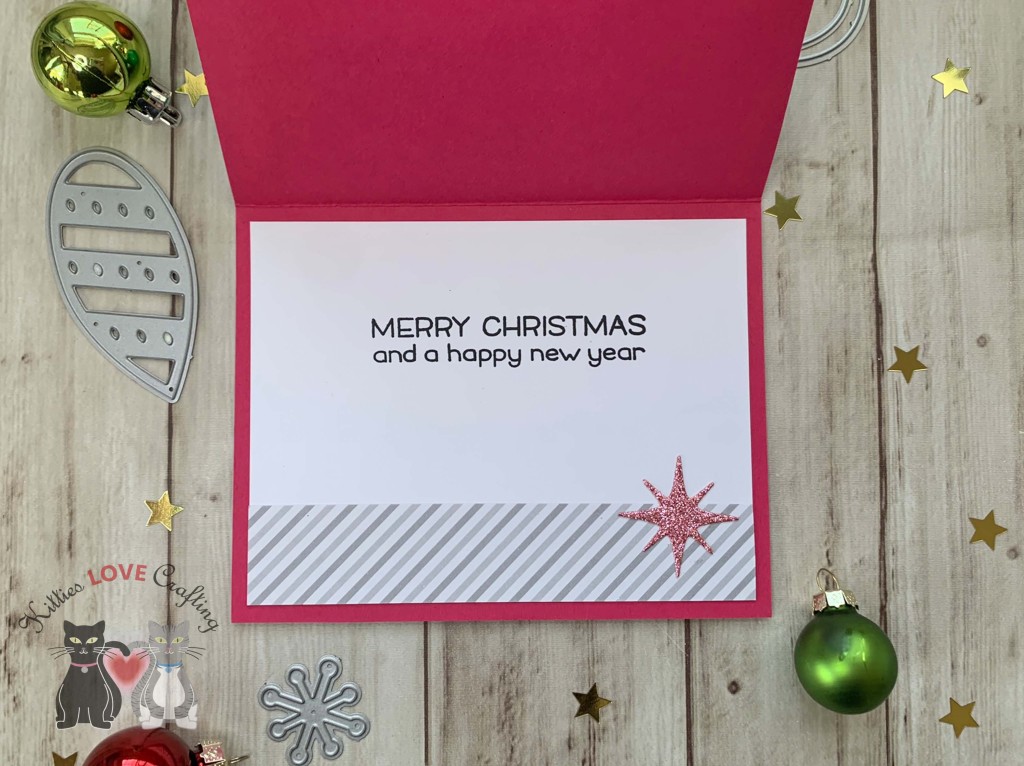
On the inside of the card,I stamped another sentiment from the Merry Messages Stampset by Lawn Fawn with Festive Berries Distress Oxide and adhered the leftover red glitter candy cane diecut and Inlayed some of the interior stripe pieces. And that completes this card. Pretty easy and quick to make.

Dimensions

https://linkdeli.com/widget.js?1559654439292

Thanks for reading this post and I hope I’ve inspired you to give this card a try on your own. Leave comments or questions below or feel free to email me.