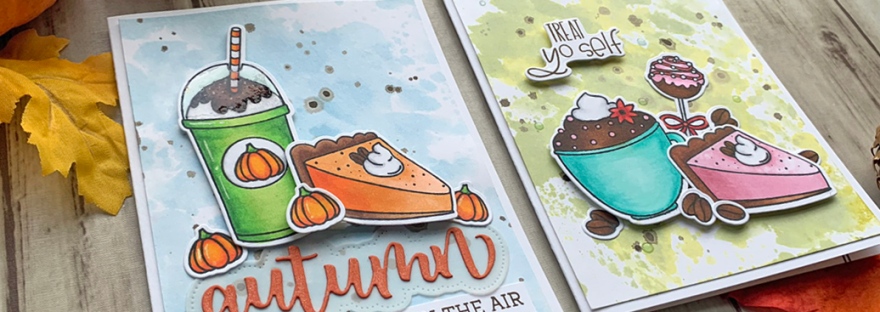
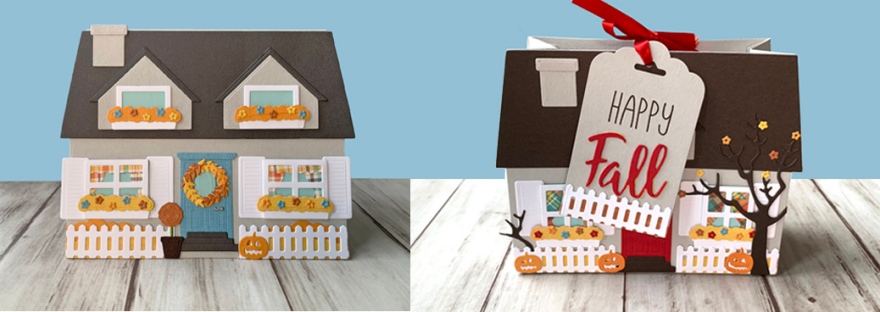
Hello friends. The next post in my Fall Card series features two cards using the same Frame die in two very different ways. And I also stepped up one of the cards by adding a fancy fold inside the card. The first one is a shaker but it turned out to be difficult to see the shaker bits inside because of the word die I used, so really this one ‘doesn’t ‘need to be a shaker; it could easily be a floating sentiment like the second card.

For the first card, I cut a piece of Neenah 100lb Classic Crest Cardstock 8.5 X 11″ to 5-1/2 x 8-1/2″ and scored at 4-1/4″ to create a card base and a piece of Catherine Pooler Designs Sunflower Fields Forever Patterned Paper to 4-1/4 x 5-1/2″.

I die cut the shadow from the Honey Bee Stamps Large Thanks Dies (retired) and backed it with Acetate to create a window. I die cut the word “thanks” from Neenah 100lb Classic Crest Cardstock 8.5 X 11″using the same dies. I added Foam Tape behind the panel, added some Appolonia Sequin Mix and backed it with a piece of Neenah 100lb Classic Crest Cardstock 8.5 X 11″ which I colored with CP Green Tea Ink.
Then I die cut the frame 2x from some Neenah 100lb Classic Crest Cardstock 8.5 X 11″ using the Catherine Pooler Fall Frames. I stamped a sentiment from the Lawn Fawn Thanks Thanks Thanks Stamp Set onto Neenah 100lb Classic Crest Cardstock 8.5 X 11″ with CP Over Coffee Ink and cut it to 3/8 x 2-1/2″.

I finished off the card by adding some Nuvo Drops in Gloss White.

I left the inside of the card of the card blank and added a piece of Catherine Pooler Designs Sunflower Fields Forever Patterned Paper measuring 1 x 5-1/2″.
Dimensions
- Card Base = 5-1/2 x 8-1/2″ and scored at 4-1/4″ Neenah 100lb Classic Crest Cardstock 8.5 X 11″
- Top Panel = 4-1/4 x 5-1/2″ Catherine Pooler Designs Sunflower Fields Forever Patterned Paper
- Inside Strip = 1 x 5-1/2″ Catherine Pooler Designs Sunflower Fields Forever Patterned Paper
For this card, I cut a piece of Neenah 100lb Classic Crest Cardstock 8.5 X 11″ to 5-1/2 x 8-1/2″ and scored at 4-1/4″ to create a card base and another piece to 4-1/4 x 5-1/2″. I die cut the shadow from the Honey Bee Stamps Large Thanks Dies (retired) and backed it with Acetate to create a window. I used the Catherine Pooler Fall Frames to emboss the border on the top panel. Check your embossing machines for the proper sandwich to do this properly.

I die cut the word “thanks” from Catherine Pooler Designs Sunflower Fields Forever Patterned Paper using the same dies. I added Foam Tape behind the panel and backed it with a piece of green pattern paper from Catherine Pooler Designs Sunflower Fields Forever Patterned Paper.
I stamped leaves from the Catherine Pooler Designs Leaf Motifs Stamp Set (retired) onto Neenah 100lb Classic Crest Cardstock 8.5 X 11″ with CP Orange Peel, Sauna, Polished, Spiced, Green Tea, and Eucalyptus inks. I don’t have dies for these stamps so I fussycut them all.
I finished off the card by adding some Nuvo Drops in Dark Walnut.
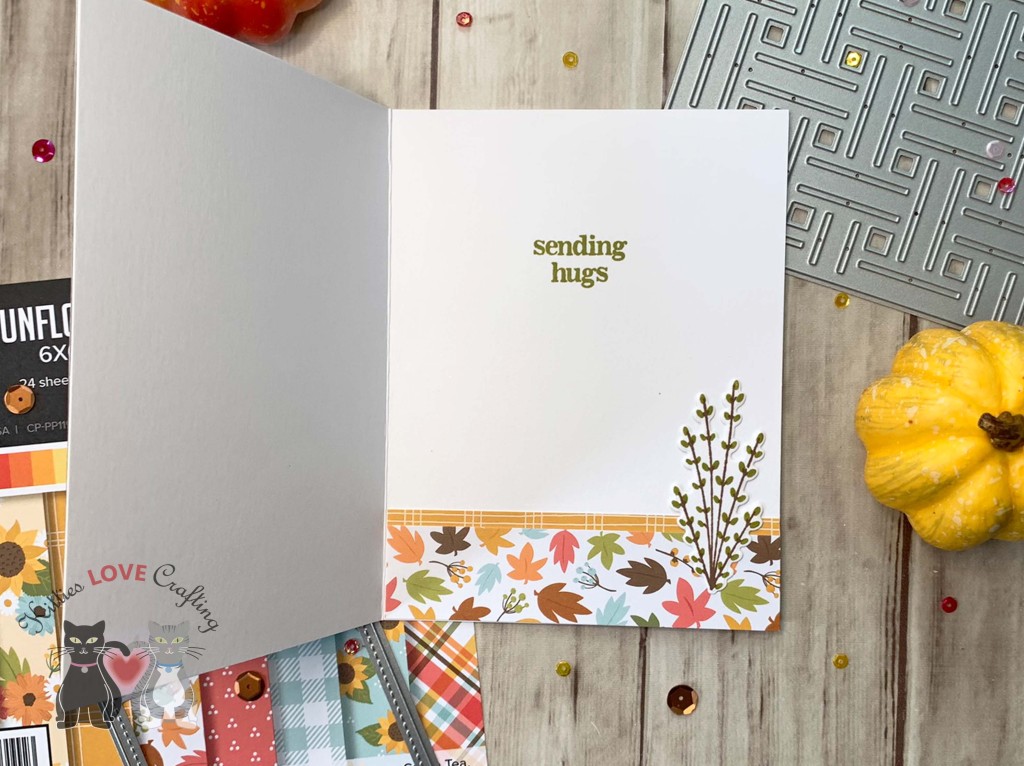
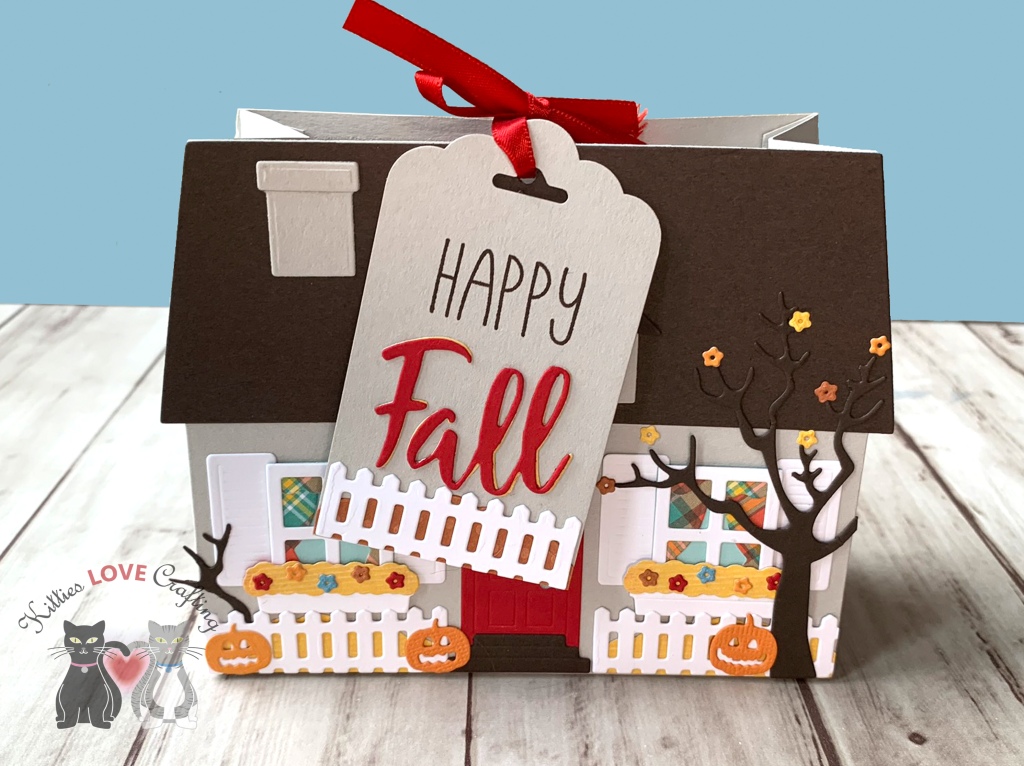
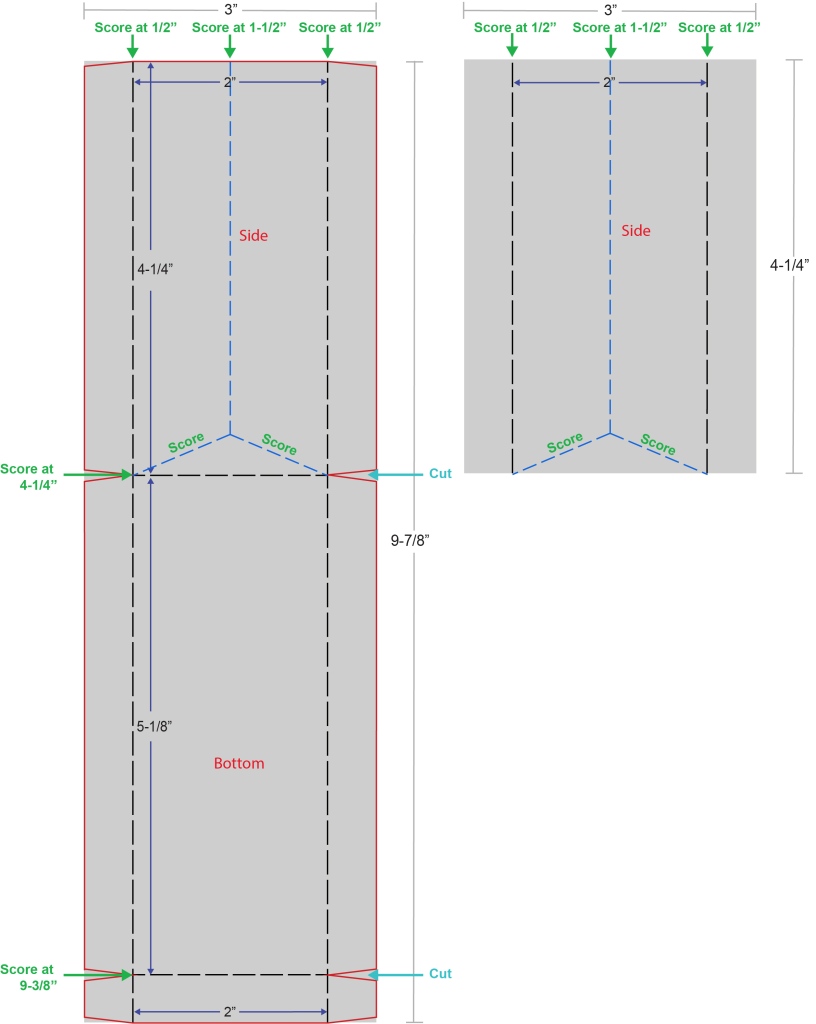
For the inside of the card I decided to step it up and add a fancy fold! I started by cutting a piece of Neenah 100lb Classic Crest Cardstock 8.5 X 11″ to 4-1/2 x 8-1/2″ and scored it at 2-1/8″, 4-1/4″, and 6-7/8″. Basically scoring it into quarters. Then I adhered I inside the card. I cut 4 pieces of pattern paper from Catherine Pooler Designs Sunflower Fields Forever Patterned Paper to 2-1/4″ (2) and 2-1/8″ (2). I shaved off about 1/16″ from all the panels so it didn’t interfere with the folds.


I added a border on one of the panels using the Catherine Pooler Fall Frames cut from Neenah 100lb Classic Crest Cardstock 8.5 X 11″. As well as a stitched rectangle and square to the other panels cut with the Lawn Fawn Small Stitched RECTANGLE Stackables and Lawn Fawn Small Stitched Square Stackables. I stamped the sentiment from Lawn Fawn Thanks Thanks Thanks Stamp Set onto Neenah 100lb Classic Crest Cardstock 8.5 X 11″ with Green Tea Ink and cut to 1-3/4 x 4-1/8″. I also added some more leaves from the Catherine Pooler Designs Leaf Motifs Stamp Set (retired).
Dimensions
- Card Base = 5-1/2 x 8-1/2″ and scored at 4-1/4″ Neenah 100lb Classic Crest Cardstock 8.5 X 11″
- Top Panel = 4-1/4 x 5-1/2″ Neenah 100lb Classic Crest Cardstock
- Fancy Folds Panel = 4-1/2 x 8-1/2″ and scored it at 2-1/8″, 4-1/4″, and 6-7/8″ Neenah 100lb Classic Crest Cardstock 8.5 X 11″
Supplies
 https://linkdeli.com/widget.js?id=f5e8378456858c916708
Thanks for reading this post. I hope I’ve inspired you to give this cute Fall card a try for yourself. Leave comments or questions below or feel free to email.