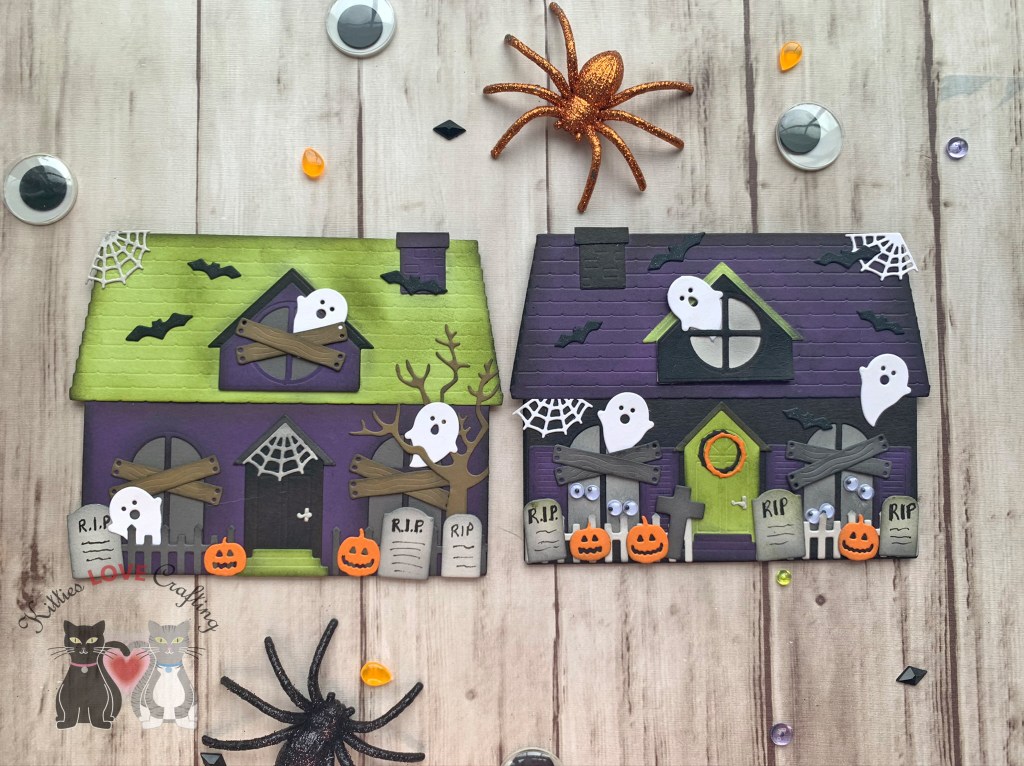
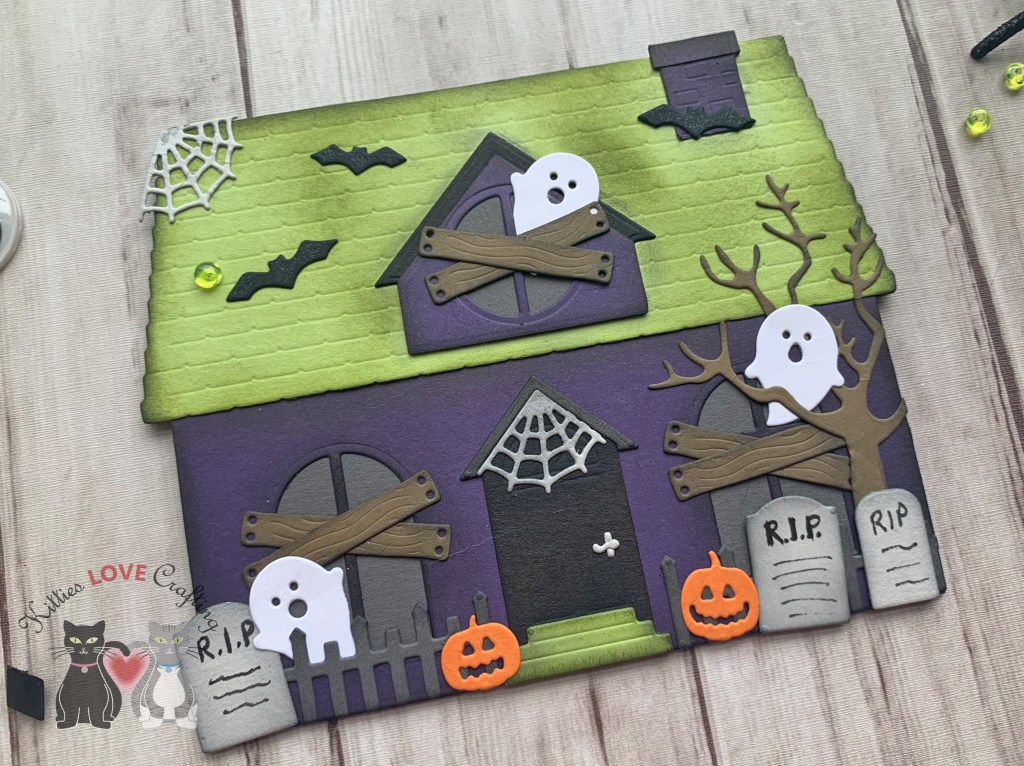
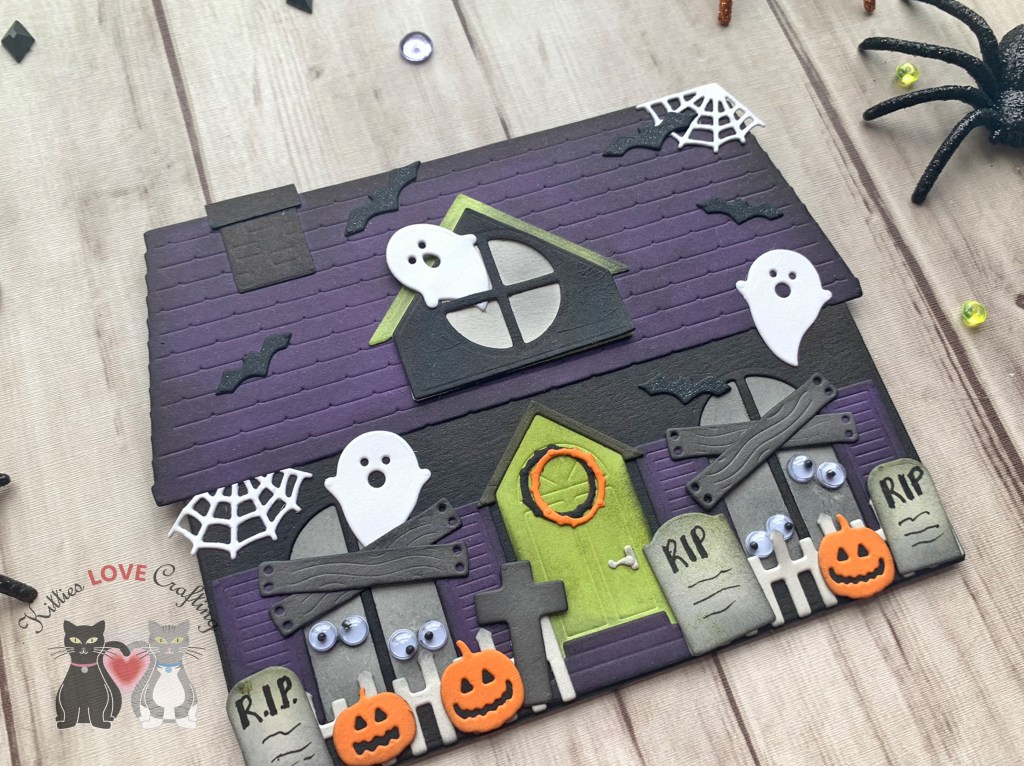
Do you love decorating gingerbread houses but don’t like the mess? Fear not I have the perfect craft for you! This gingerbread house features Honey Bee Stamps Gingerbread House Add-On Stamps and Dieset. Combine it with the House Builder Card Dieset to make tons of cute house cards for all occasions.
For this card, I started by diecutting the house card base 2x with the House Builder Card Dies, chimney (from Honey Cuts Gingerbread House Add-on), and one gable from Lawn Fawn Paper Bag 8-1/2 x 11″ Cardstock, the roof, 2 scalloped windows, the scallop door frame, the round gable window and snow for roof and chimney from Neenah 110lb Classic Crest Cardstock 8.5 X 11″, the door from Simon Says Stamp Surf Blue 8-1/2 x 11″ Cardstock. I inked around the edges of all those pieces with Gathered Twigs Distress Ink. I wanted to make the gingerbread and frosting look more like real so using the ink especially around the “cookie” pieces helps give it dimension.
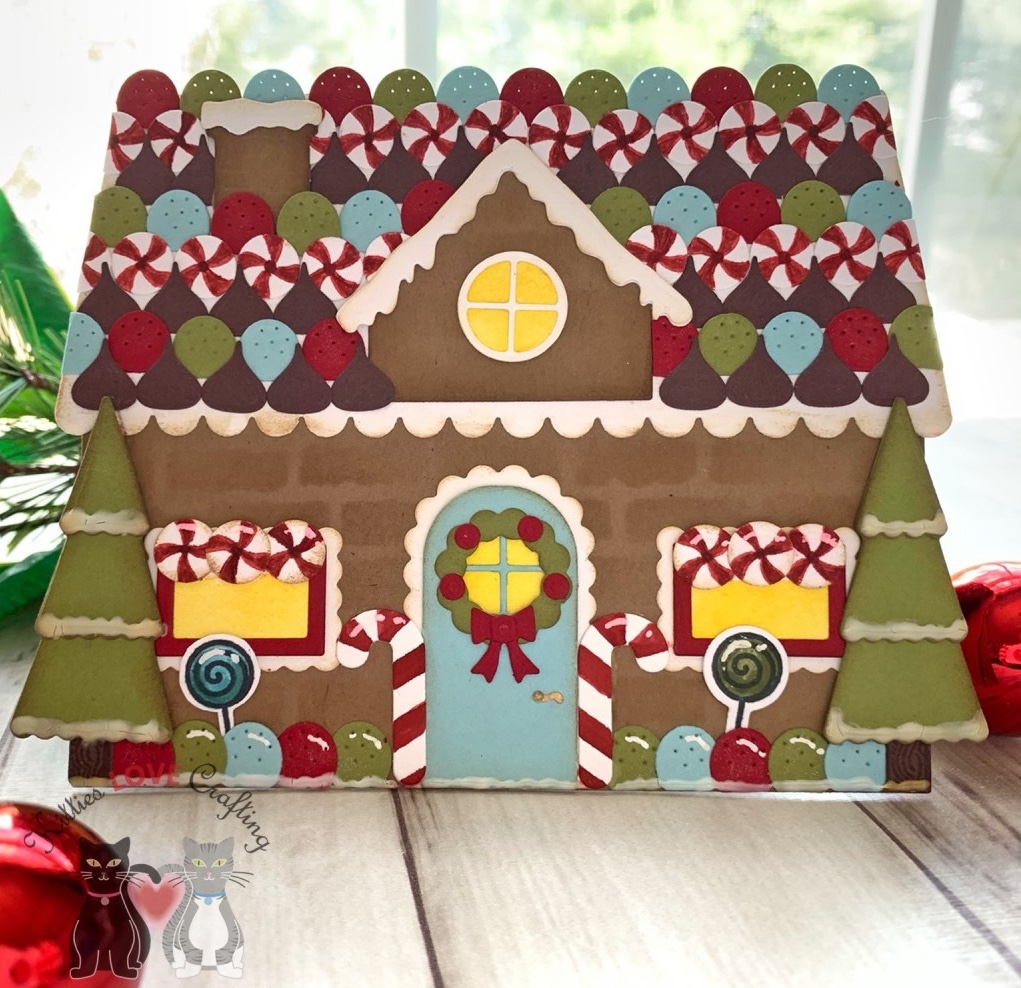
I adhered the two houses with the pre-scored strip that comes in the House Builder Card Base Dies to create the card base. Be sure to use double-sided tape or something very strong so they don’t come apart. Then stenciled a brick pattern on the front of the card using Gathered Twigs Distress Ink and Tim Holtz Bricked Layering Stencil. I diecut small rectangle window frame from the House Builder Card Dieset with Simon Says Stamp Schoolhouse Red 110lb 8-1/2 x 11″ Cardstock and the window and door inside pieces from Neenah 110lb Classic Crest Cardstock 8.5 X 11″ using the circle and rectangle dies from Honey Cuts Gingerbread House Add-on and the House Builder Card Base Dies and inked with Tim Holtz Mustard Seed Distress Ink Pads.


I adhered the roof, windows, gable the scallop door frame, the round gable window and snow and door to the card.
I used Stampin’ Up! Old Olive 8-1/2″ X 11″ Cardstock for trees, wreath and some gumdrops, Simon Says Stamp Schoolhouse Red 110lb 8-1/2 x 11″ Cardstock for some gumdrops, the wreath bow, and berries on wreath, Simon Says Stamp Surf Blue 8-1/2 x 11″ Cardstock for gumdrops, Neenah Classic Crest, 80lb Solar White for all the peppermints and two candy canes (which I colored with Tim Holtz Festive Berries Distress Marker), Stampin’ Up Chocolate Chip 8-1/2″ X 11″ Cardstock (discontinued) for the chocolate kisses and the tree trunks (which I stamped with the tree trunk stamp from Gingerbread House Add-On Stamps and Gathered Twigs Distress Ink), and a gold metallic paper for the door knob, diecut with the House Builder Card Base Dies. I also stamped two lollipops from the Gingerbread House Add-On Stamps and Memento Tuxedo Black Ink onto Neenah Classic Crest, 80lb Solar White and colored them with Tumbled Glass and Peeled Paint Distress Markers.
Once adhered to the card, I added sparkle to the snow on the roof, chimney and gumdrops with a Spectrum Noir CLEAR OVERLAY Sparkle Pen, some “snow” with Nuvo Crystal Drops in Gloss White and white higlights with Uni-Ball Signo Broad Point White Gel Pen.
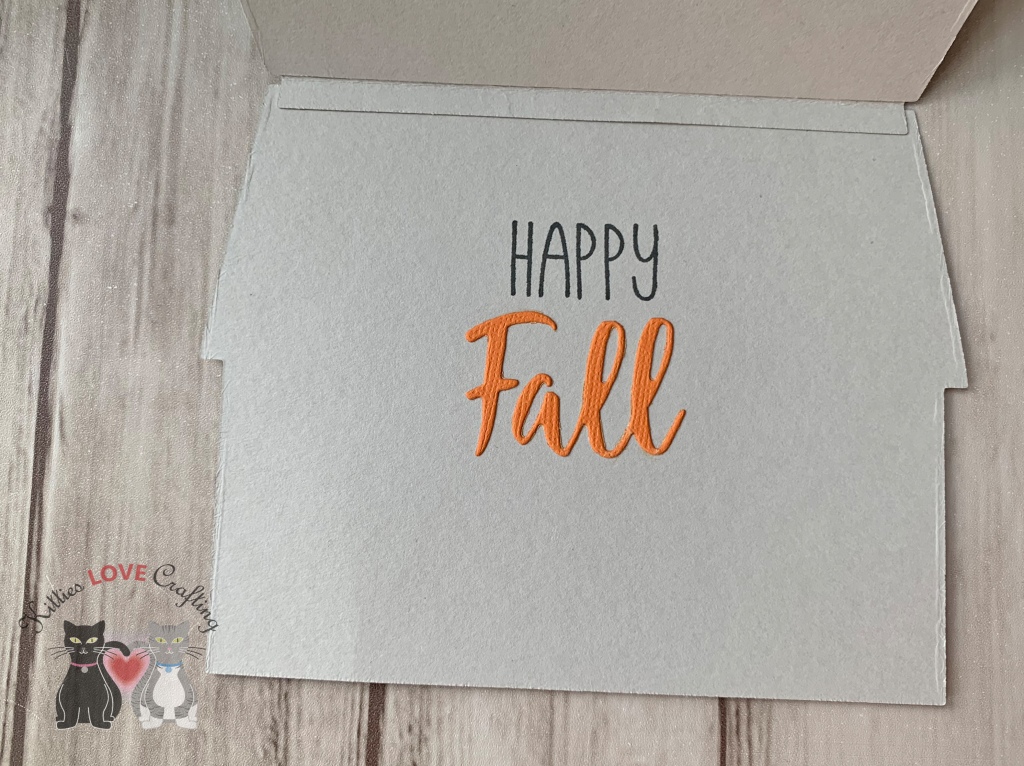
On the inside of the card, I stamped a sentiment from the Lawn Fawn Happy Happy Happy Add-On Stamps.

Dimensions
- Card Base = 5-1/2 x 8-1/2″ and scored at 4-1/4 Lawn Fawn Paper Bag 8-1/2 x 11″ Cardstock
Supplies
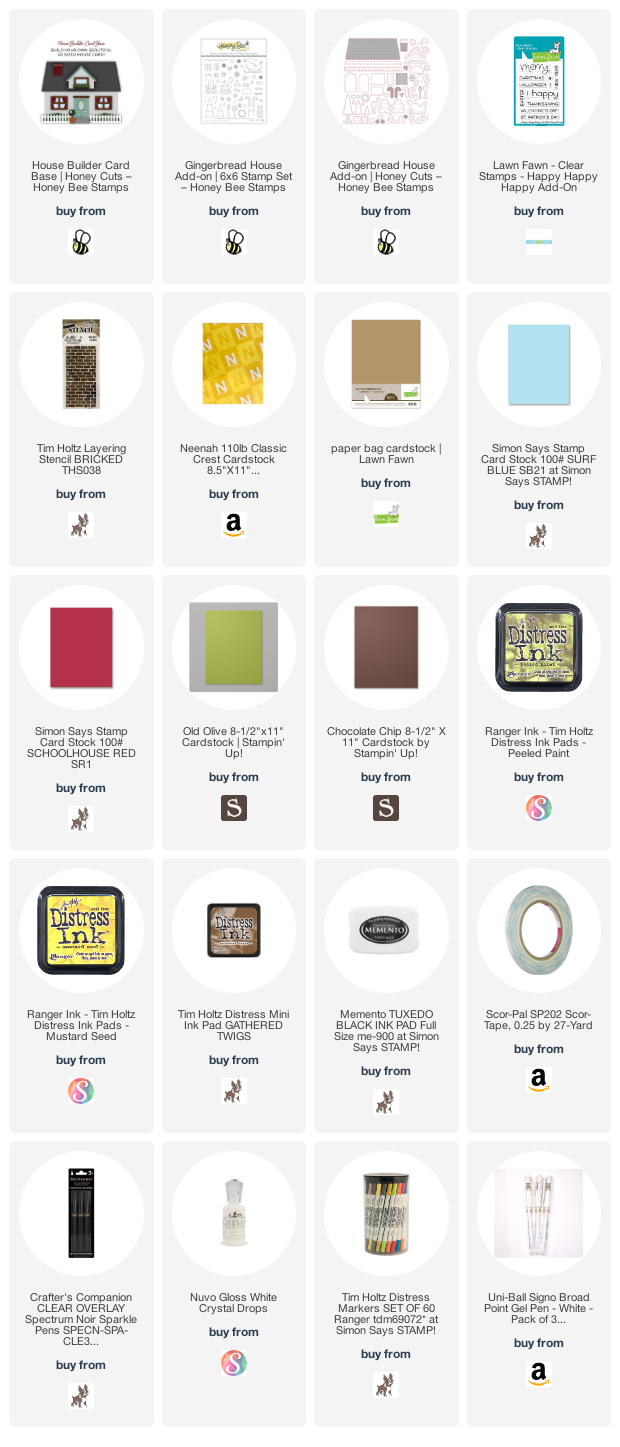 https://linkdeli.com/widget.js?id=f5e8378456858c916708
Thanks for reading this post. I hope you enjoyed and I’ve inspired you to give these watercolored cards a try for yourself. Leave comments or questions below or feel free to email me.