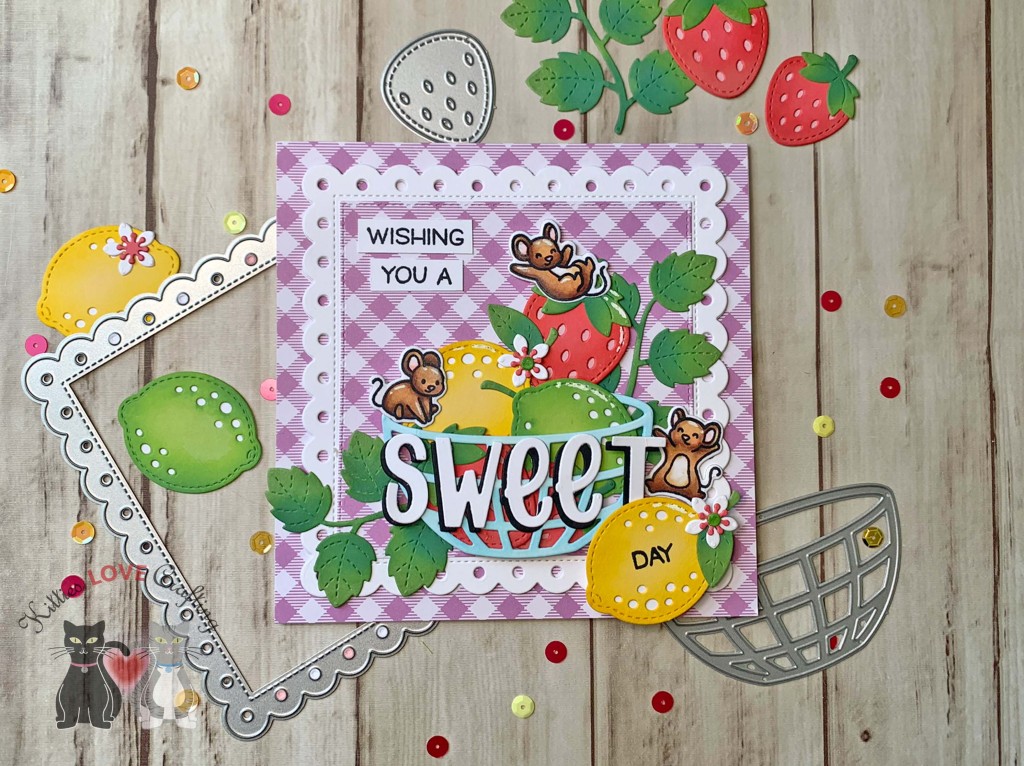
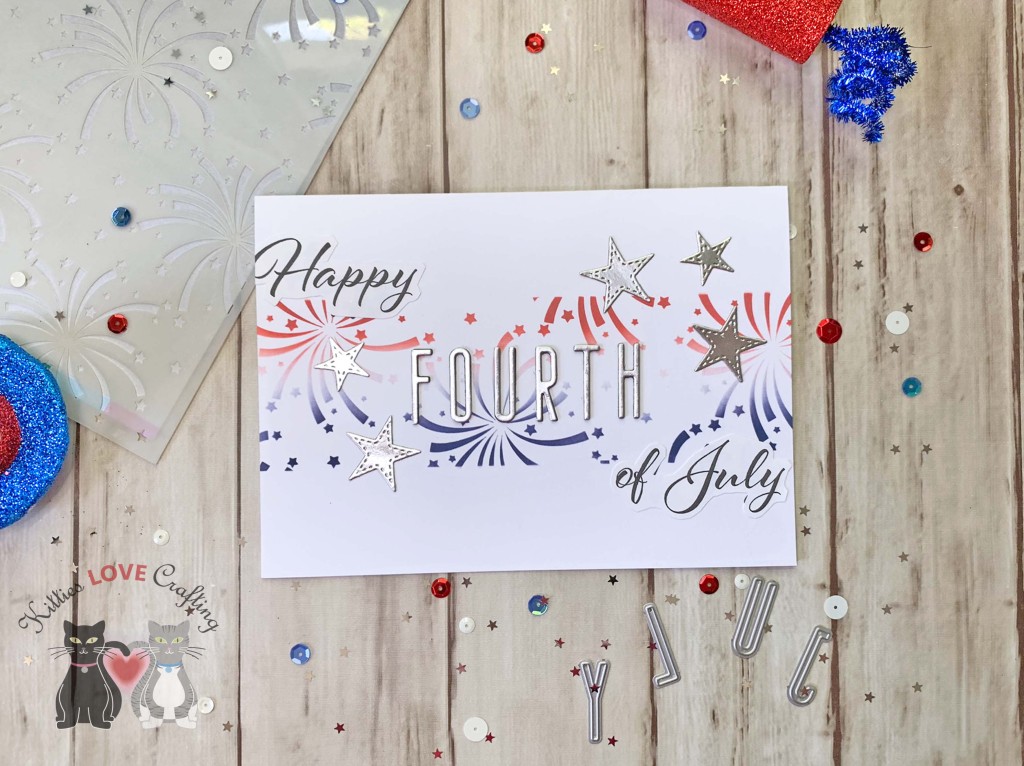
Hello friends. Here’s another fun summer card using the Lawn Fawn Build-A-Drink Dies. This requires minimal stamping. I used all dies except for the sentiment strip and added texture to the background using a Tim Holtz stencil. I love how bright this card turned out. Definitely some summer vibes happening here!

For this card, I cut a piece of Neenah 100lb Classic Crest Cardstock 8.5 X 11″ to 5-1/2 x 8-1/2″ and scored at 4-1/4″ to create a card base and another piece die cut using the Catherine Pooler Scallops & Dots Dies.
I inked the background with the Tim Holtz Rays Layering Stencil (THS003) and Catherine Pooler Designs Cummerbund and Fiesta Blue Inks.
I die cut the glass from Neenah 100lb Classic Crest Cardstock 8.5 X 11″, it’s background from Stampin’ Up! So Saffron 8-1/2″ X 11″ Cardstock (retired), using the Lawn Fawn Build-A-Drink. I die cut the lemons, limes and all greenery from Stampin’ Up! So Saffron 8-1/2″ X 11″ Cardstock (retired), Simon Says Stamp 100lb Green Apple and 100lb Green Leaf Cardstocks using Lawn Fawn Zesty Lemon and Lawn Fawn Build-A-Drink Dies. I die cut the ice cubes from Crafter’s Companion Shimmering 6 x 6″, White Pearl Cardstock and the straw from Lawn Fawn GOTTA HAVE GINGHAM RAINBOW 6×6 Inch Petite Paper Pack using the Lawn Fawn Build-A-Drink Dies and the fruit basket from Lawn Fawn Fruit Salad 6×6 Inch Petite Paper Pack using the Lawn Fawn Fruit Basket die.
I added dimension to the images by inking them. I used Tim Holtz Mowed Lawn Distress Oxide Ink for the lighter leaves and limes; Rustic Wilderness Distress Oxide Ink for the darker leaves and stems; Squeezed Lemonade Distress Oxide Ink for the lemons and the drink and Stampin’ Up! Sahara Sand Ink (retired) for the fruit basket.

I die cut one of the banners from from Neenah 100lb Classic Crest Cardstock 8.5 X 11″ using the Lawn Fawn Fancy Wavy Banners Dies and stamped a sentiment from Lawn Fawn Summertime Charm Stampset with Midnight Ink.
I finished off the card by adding Morning Dew Nuvo Crystal Drops.
I left inside of the card blank and just added a small lime wedge.
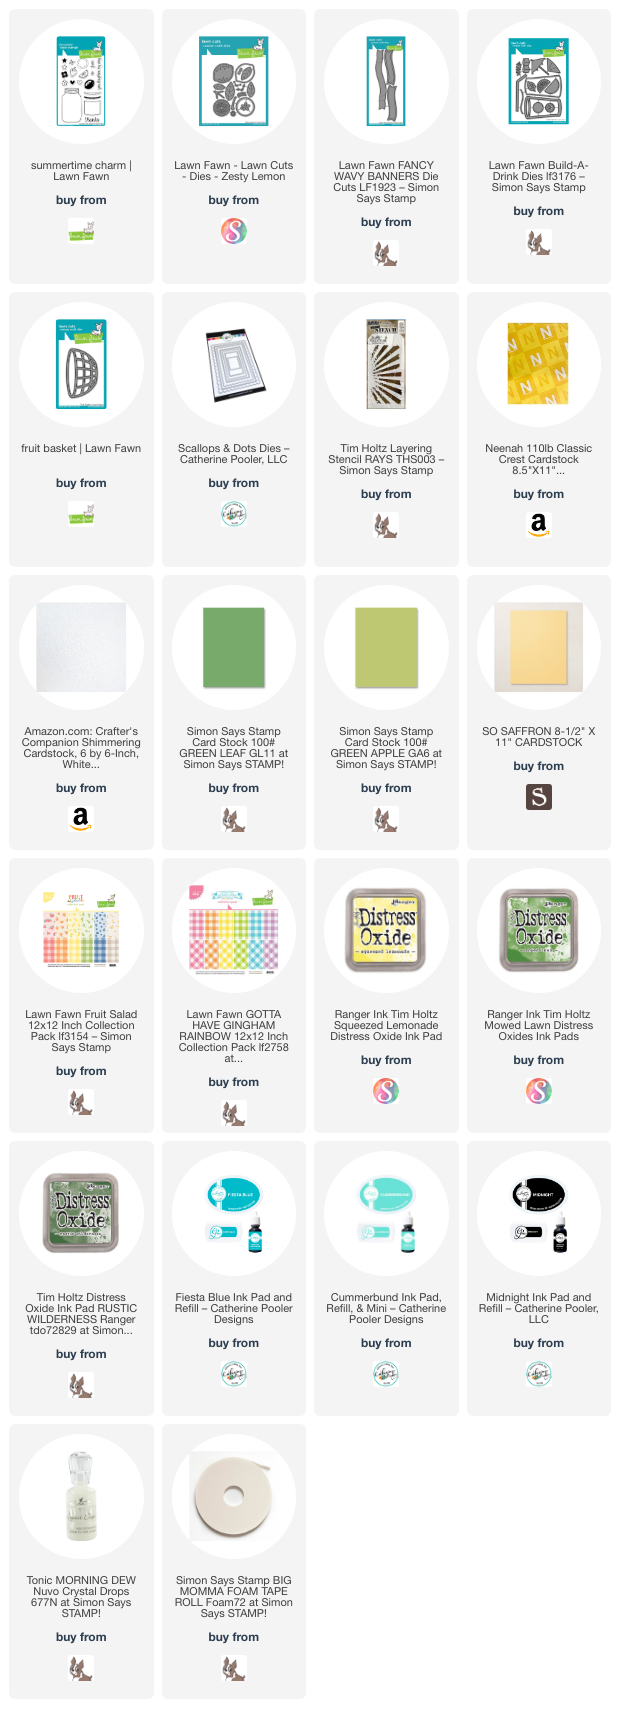
Supplies
 https://linkdeli.com/widget.js?id=f5e8378456858c916708
Thanks for reading this post. I hope I’ve inspired you to give this cute summer card a try for yourself. Leave comments or questions below or feel free to email.