
Halloween is just 7 weeks away but who’s counting?!? Umm. Me! I love Halloween even if I don’t get to dressed up anymore. It’s still sooo much fun!!!!
So I’m kicking off my Halloween series with an easy card. Black cardstock, stamps, embossing powder and some colored pencils is all you really need. So grab your favorite Halloween stamps and let’s begin!

I started with a panel of Simon Says Stamp Black Cardstock cut to 5 1/2 x 4 1/4″. When your whole image is going to be heat embossed, it’s a good idea to start with a piece of paper/cardstock that is slightly larger than you will need. This gives room for errors. God knows I need it! LOL.
I pulled out one my new favorite Halloween stampsets, the Spooky Hollow by Catherine Pooler Designs then using my MISTI, I laid out the stamps I needed and mapped out my scene.

I prepped the surface with an anti-static bag (especially important on dark cardstocks) and stamped the house, the tree, one bat and the moon first, using Versamark clear embossing ink and Wow white embossing powder. Next, I reapplied some more anti-static powder and stamped and heat embossed the second bat and the fence which I had to stamp 3-4 times to get a continuous fence. Then stamped and white heat embossed the sentiment onto a scrap of Simon Says Stamp Black Cardstock. Before I diecut this panel out, I added some white dots with my Uni-Ball Signo Broad Point White Gel Pen to the sky. This can also be done with paint splatters. I just wasn’t in the mood for the mess that day.
Once all the stamping was done, I diecut the panel using the largest die from Lawn Fawn’s Small Stitched Rectangle Dies which measures 3-3/4 x 5″.
Time to color the house… You can certainty leave it uncolored but I wanted it to stand out and I was curious to see how my Prismacolor Pencils looked on the black cardstock.

I used two greens for the roof and door, two purples for the house, two greys for the porch floor, a yellow for the window shutters and a yellow orange for the inside of the window, and finally two reddish browns for the wood boards. Prismacolor Pencils have a rich pigment so they show up on dark cardstock nicely. Then I fussycut the sentiment and adhered it using Stampin’ Dimensionals.
I diecut a panel of some very old Halloween pattern paper from my stash using the largest die from Lawn Fawn’s Large Stitched Rectangles which measures to 5-1/2 x 4-1/4″. I distressed it a bit using Ranger Black Soot Distress Ink. Then adhered the black panel onto it and that to a card base (Simon Says Stamp Blue Violet 100lb Cardstock) measuring 5-1/2 x 8-1/2″and scored at 4 1/4″.


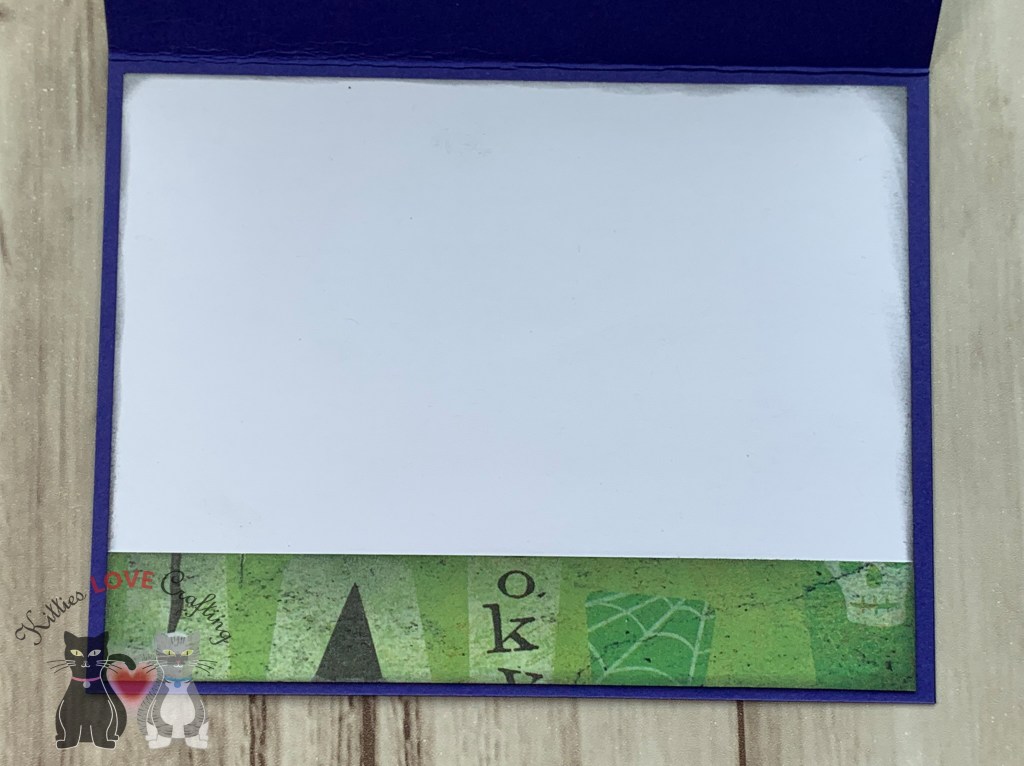
Lastly I finished off the card with some Nuvo Glitter Drops in White Blizzard. But I couldn’t leave the inside empty so cut a panel of Neenah 110lb Classic Crest Cardstock 8.5″X11″ to 8 1/2 x 5 1/2″ and adhered a piece of the same Halloween pattern paper, measuring 3/4 x 5-1/4″ to the bottom edge, which I also distressed with Black Soot Distress Ink.
But I didn’t stop there. I was having too much fun with this card so I used the fence stamps from Spooky Hollow by Catherine Pooler Designs and white heat embossed it along the bottom edge of a black Euroflap Envelope.

Dimensions
- Card Base = 5-1/2 x 8-1/2″and scored at 4 1/4″Simon Says Stamp Blue Violet 100lb Cardstock
- Back Panel = 5-1/2 x 4-1/4″ Halloween pattern paper
- Top Panel = 3-3/4 x 5″ Simon Says Stamp Black Cardstock
- Inside Panel = 8 1/2 x 5 1/2″ Neenah 110lb Classic Crest Cardstock 8.5″X11″
- Inside Strip = 3/4 x 5-1/4″ Halloween pattern paper
Supplies
Thanks for stopping by and I hope I’ve inspired you to start making your Halloween cards. Leave comments or questions below or feel free to email me.
