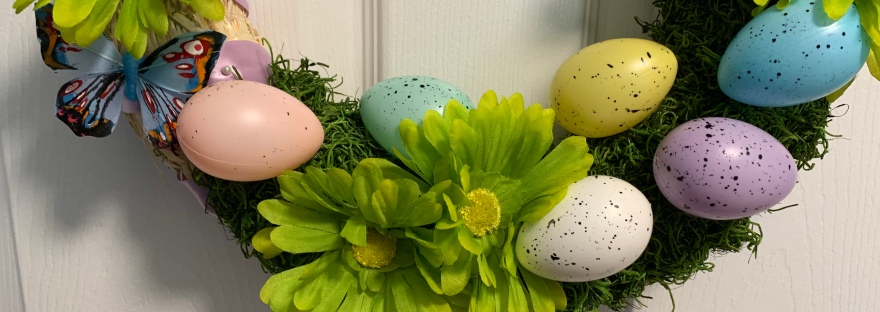
Easter is around the corner and I finally got around to making my Easter Wreath. Yay! I made this wreath using mostly Dollar Tree supplies. My store didn’t have much so I ordered from their online store and had it shipped to my house. They offer a ship-to-store option too.
A word of caution…if you order flowers online they can arrive crushed as mine did. I ordered 6 stems and only got 5 usable flower heads out of it and those were not that great as you will see in the photos. Keep that in mind.
Anyways, it was super easy and quick to make. I started off with a 10-inch straw wreath form. I got mine from Hobby Lobby, but they are readily available at other craft stores and online. Check Amazon, Michaels, Joann Fabrics, Walmart and Dollar Tree. My local store did not carry it but I’m guessing others might. I carefully removed the clear plastic wrap around it as it tends to shed. Nor,ally I would normally leave the plastic wrap on it but since I wanted this to look natural and .organic, I removed it.
After cleaning the straw debris from my desk, i wrapped some 5/8 inch wide lavender satin ribbon around the wreath, creating a stripe pattern. I get most of my ribbon from the Ribbon Retreat. This color is called purple haze. A tiny dab of hot glue on each of the ribbon ends secure it to the wreath.
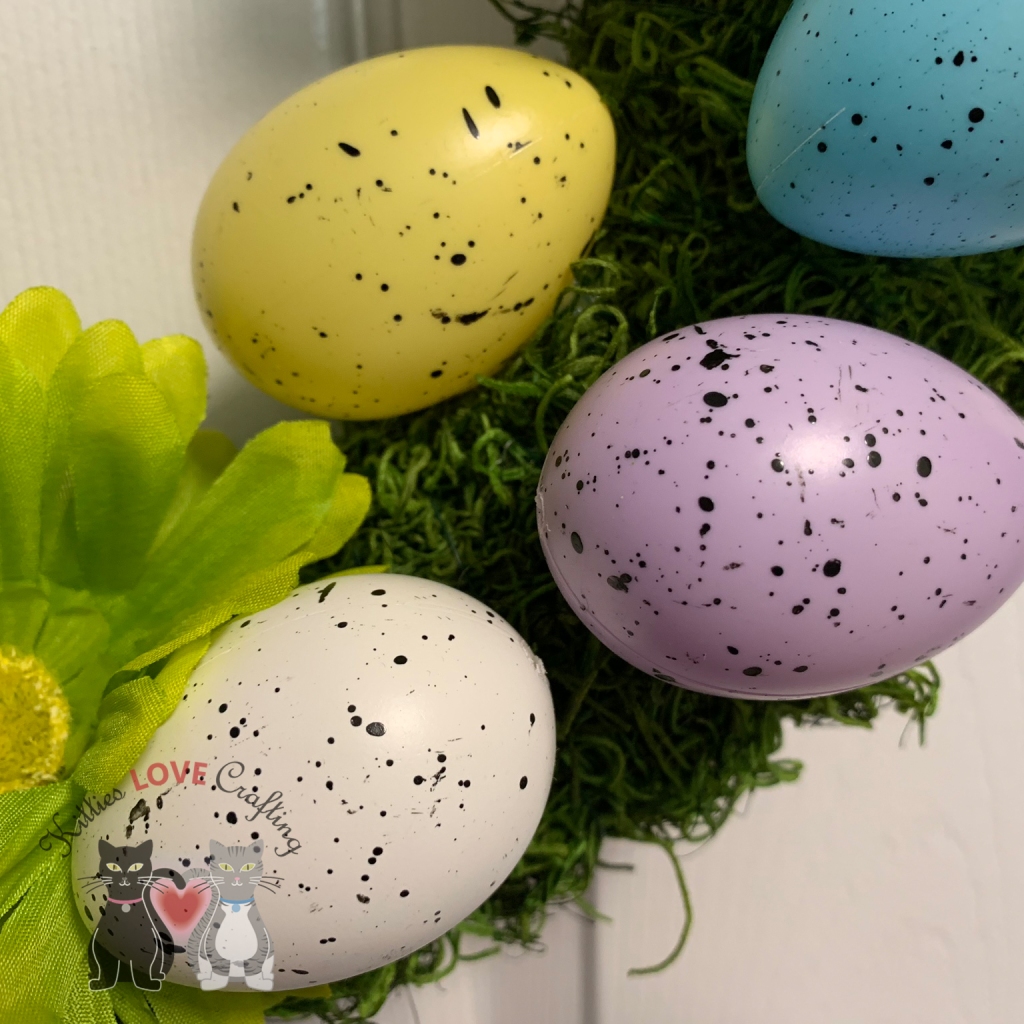
I added the moss next. I used Green Spanish Moss I hot glued it onto the bottom half of the wreath. Once I had enough of the area covered, I wrapped Green Floral Wire, 22 Gauge around the moss to secure it further. Ok the hard part is done. Time to decorate.
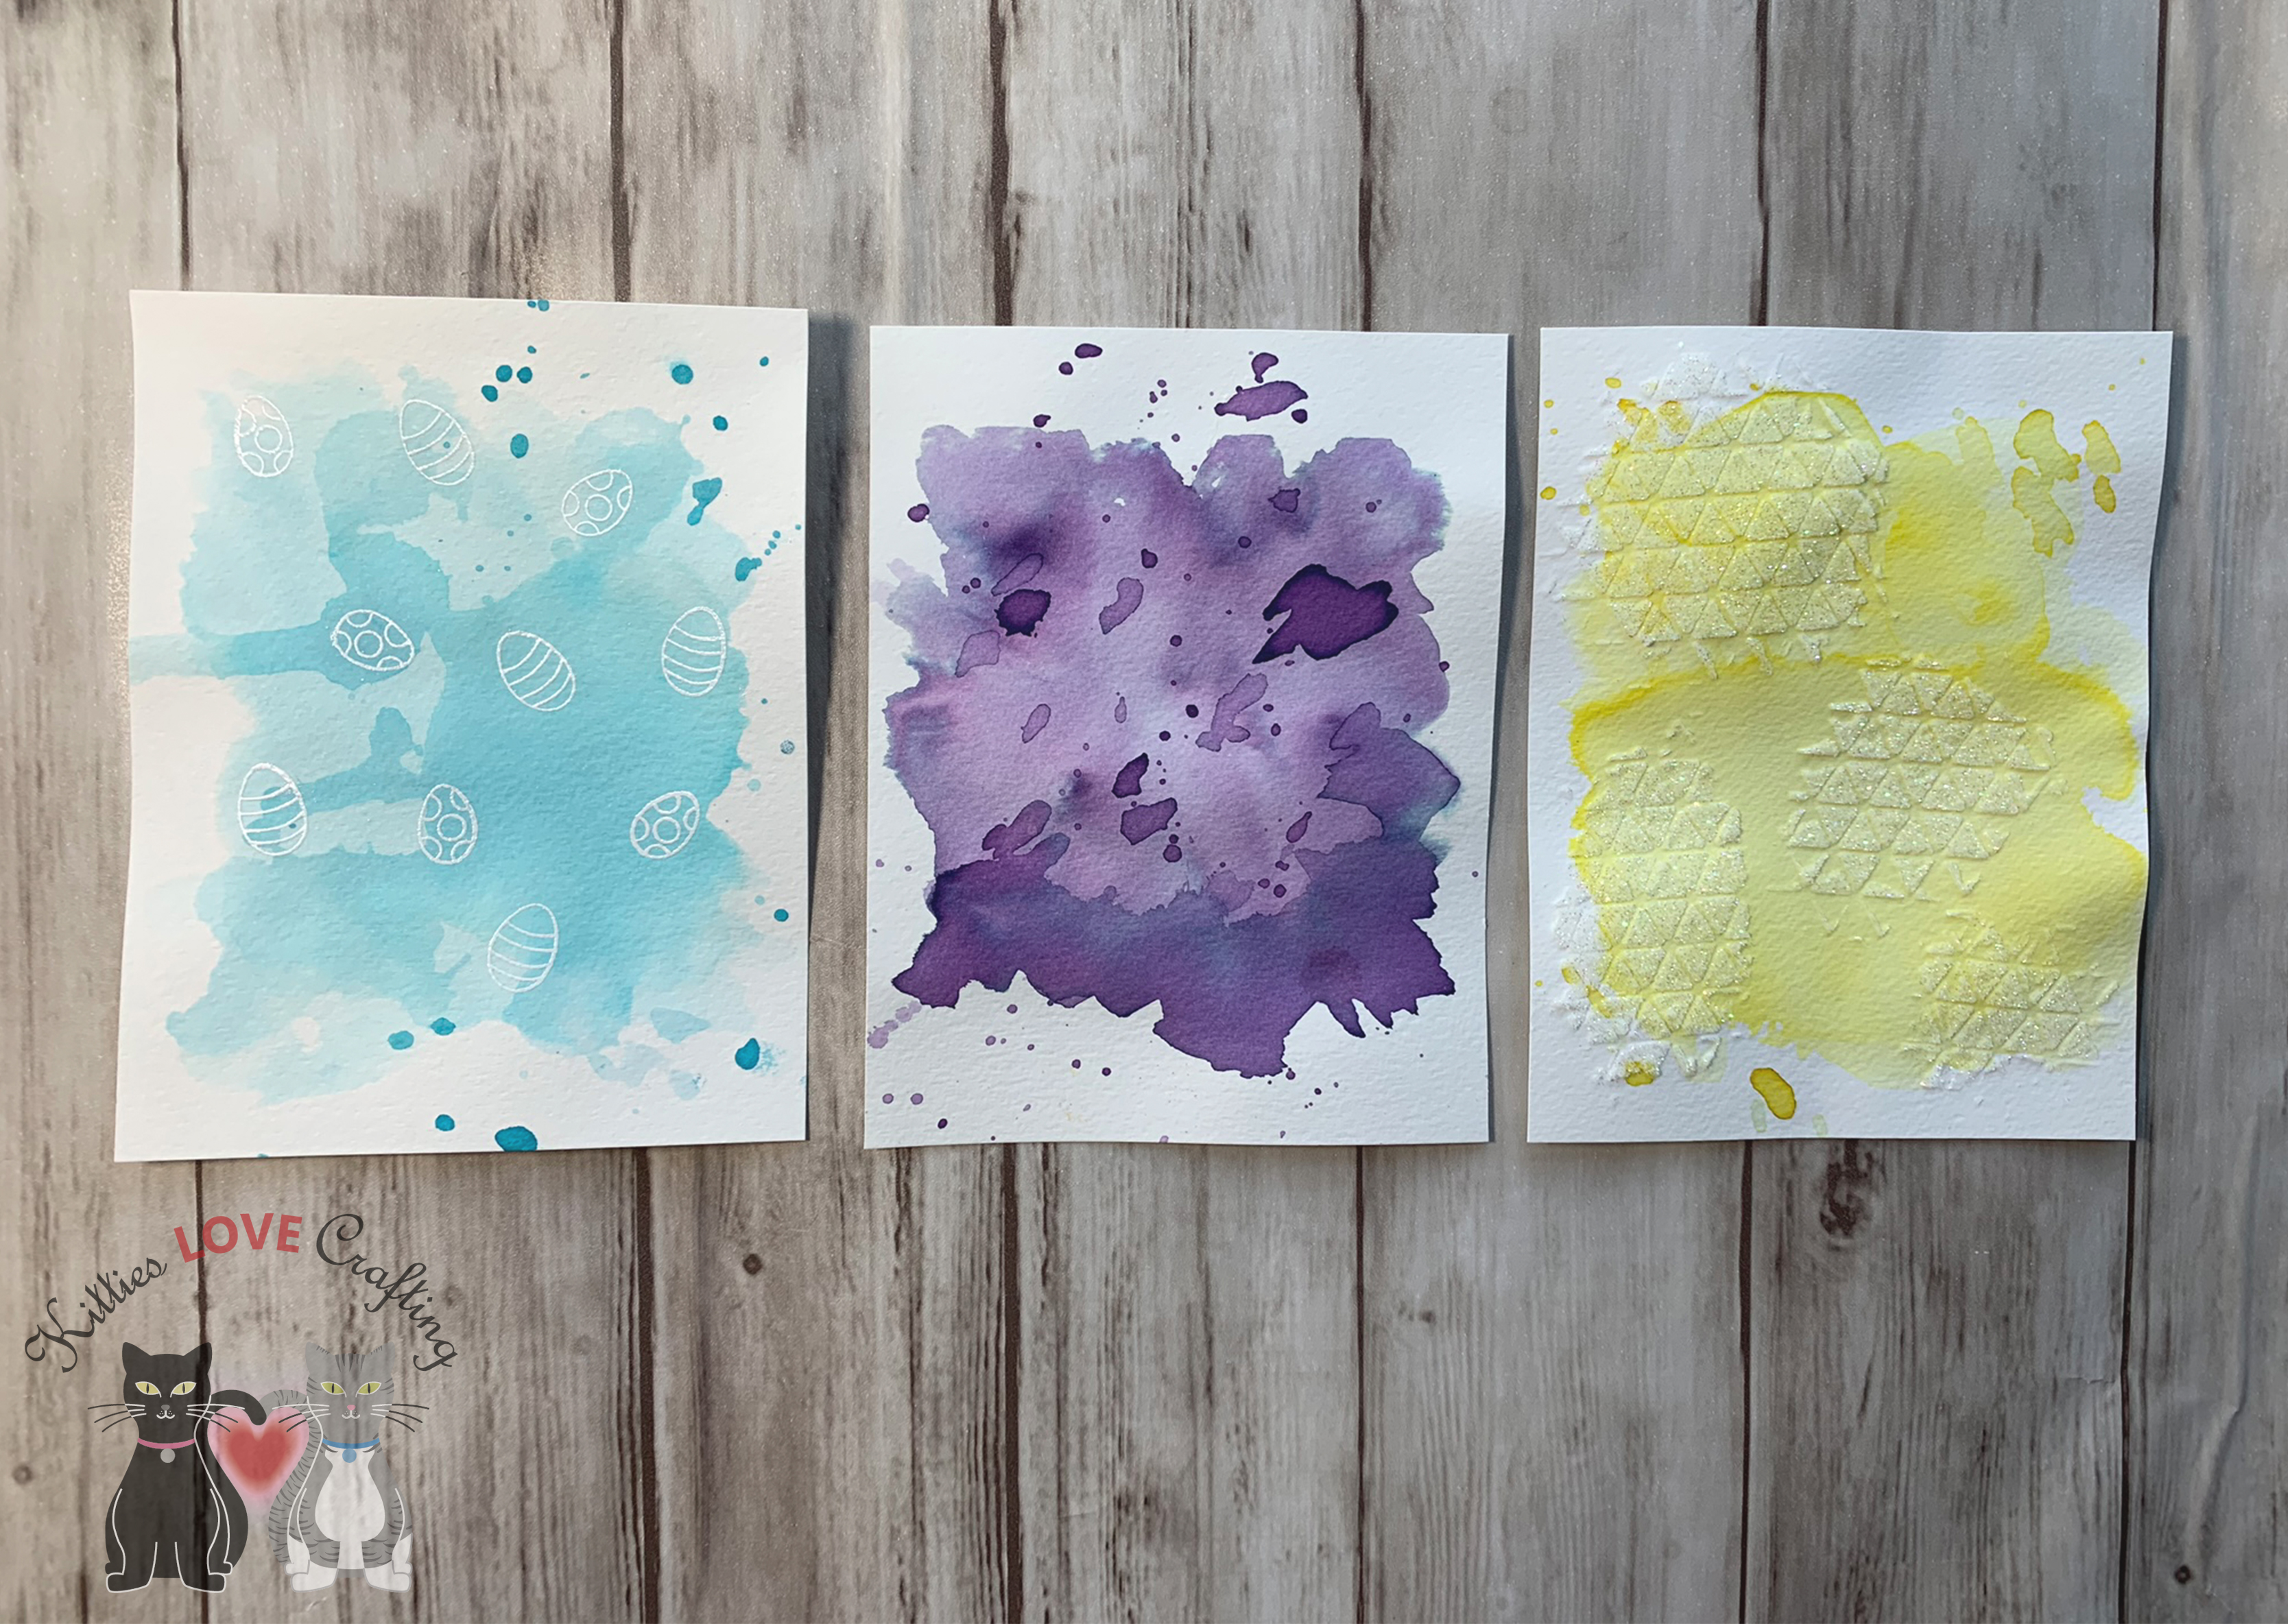
Today’s topic is watercolor backgrounds. Whenever I want a quick and easy background for a card, I go with a watercolor background. You don’t need to know how to watercolor like a pro, you just need some good watercolor paper. The paper makes the difference in the results you get. I used Canson XL Series Watercolor Paper Pad (140 Pound, 9 x 12 Inch). The great thing is, that this technique can be achieved with dye inks, stains, sprays, or watercolors (high end or inexpensive). I used Distress Ink Stains for my backgrounds. I originally pulled out my Distress Ink Pads but then decided that my Distress Ink Stains haven’t been getting enough love so I decided to use those instead. These can be dabbed on or sprayed. These now are sold in spray bottles but if you’re like me and have the original bottles, Ranger sells a spray bottle lid. I used mine straight out of the bottle like watercolor though.
Watercolor Background Supplies
Ok, so let’s get started. First, I taped down my watercolor paper piece (4 1/4 x 5 1/2″) with some ScotchBlue Painters Tape to a hard surface. Protect your surface before you begin because this will be messy. With a clean brush, add some water to your surface, covering the whole area. Then dispense some of ink onto a clear block, craft mat, etc. (I used my glass mat) and then dab/pounce it your paper. If the surface is too dry, add some more water. You can add more ink to certain areas to get darker areas. Alternatively, you can add more water and blot certain areas to subtract color. Stick to one color if you are not comfortable mixing multiple colors together. Keep playing with adding color until you are satisfied.
Let your piece dry in between layers. This will yield a better result, in the end. You can let it air dry or use a heat tool (if you are not patient like me. :)) Once the piece was almost dry I added some splashes using the same ink color for each. I usually do this inside a box since I don’t want my desk and surrounding areas to stained. Let it dry completely before moving onto the next step. And if you want to stop here, you totally can; they look great as is. I wanted to enhance mine by adding another level of texture.
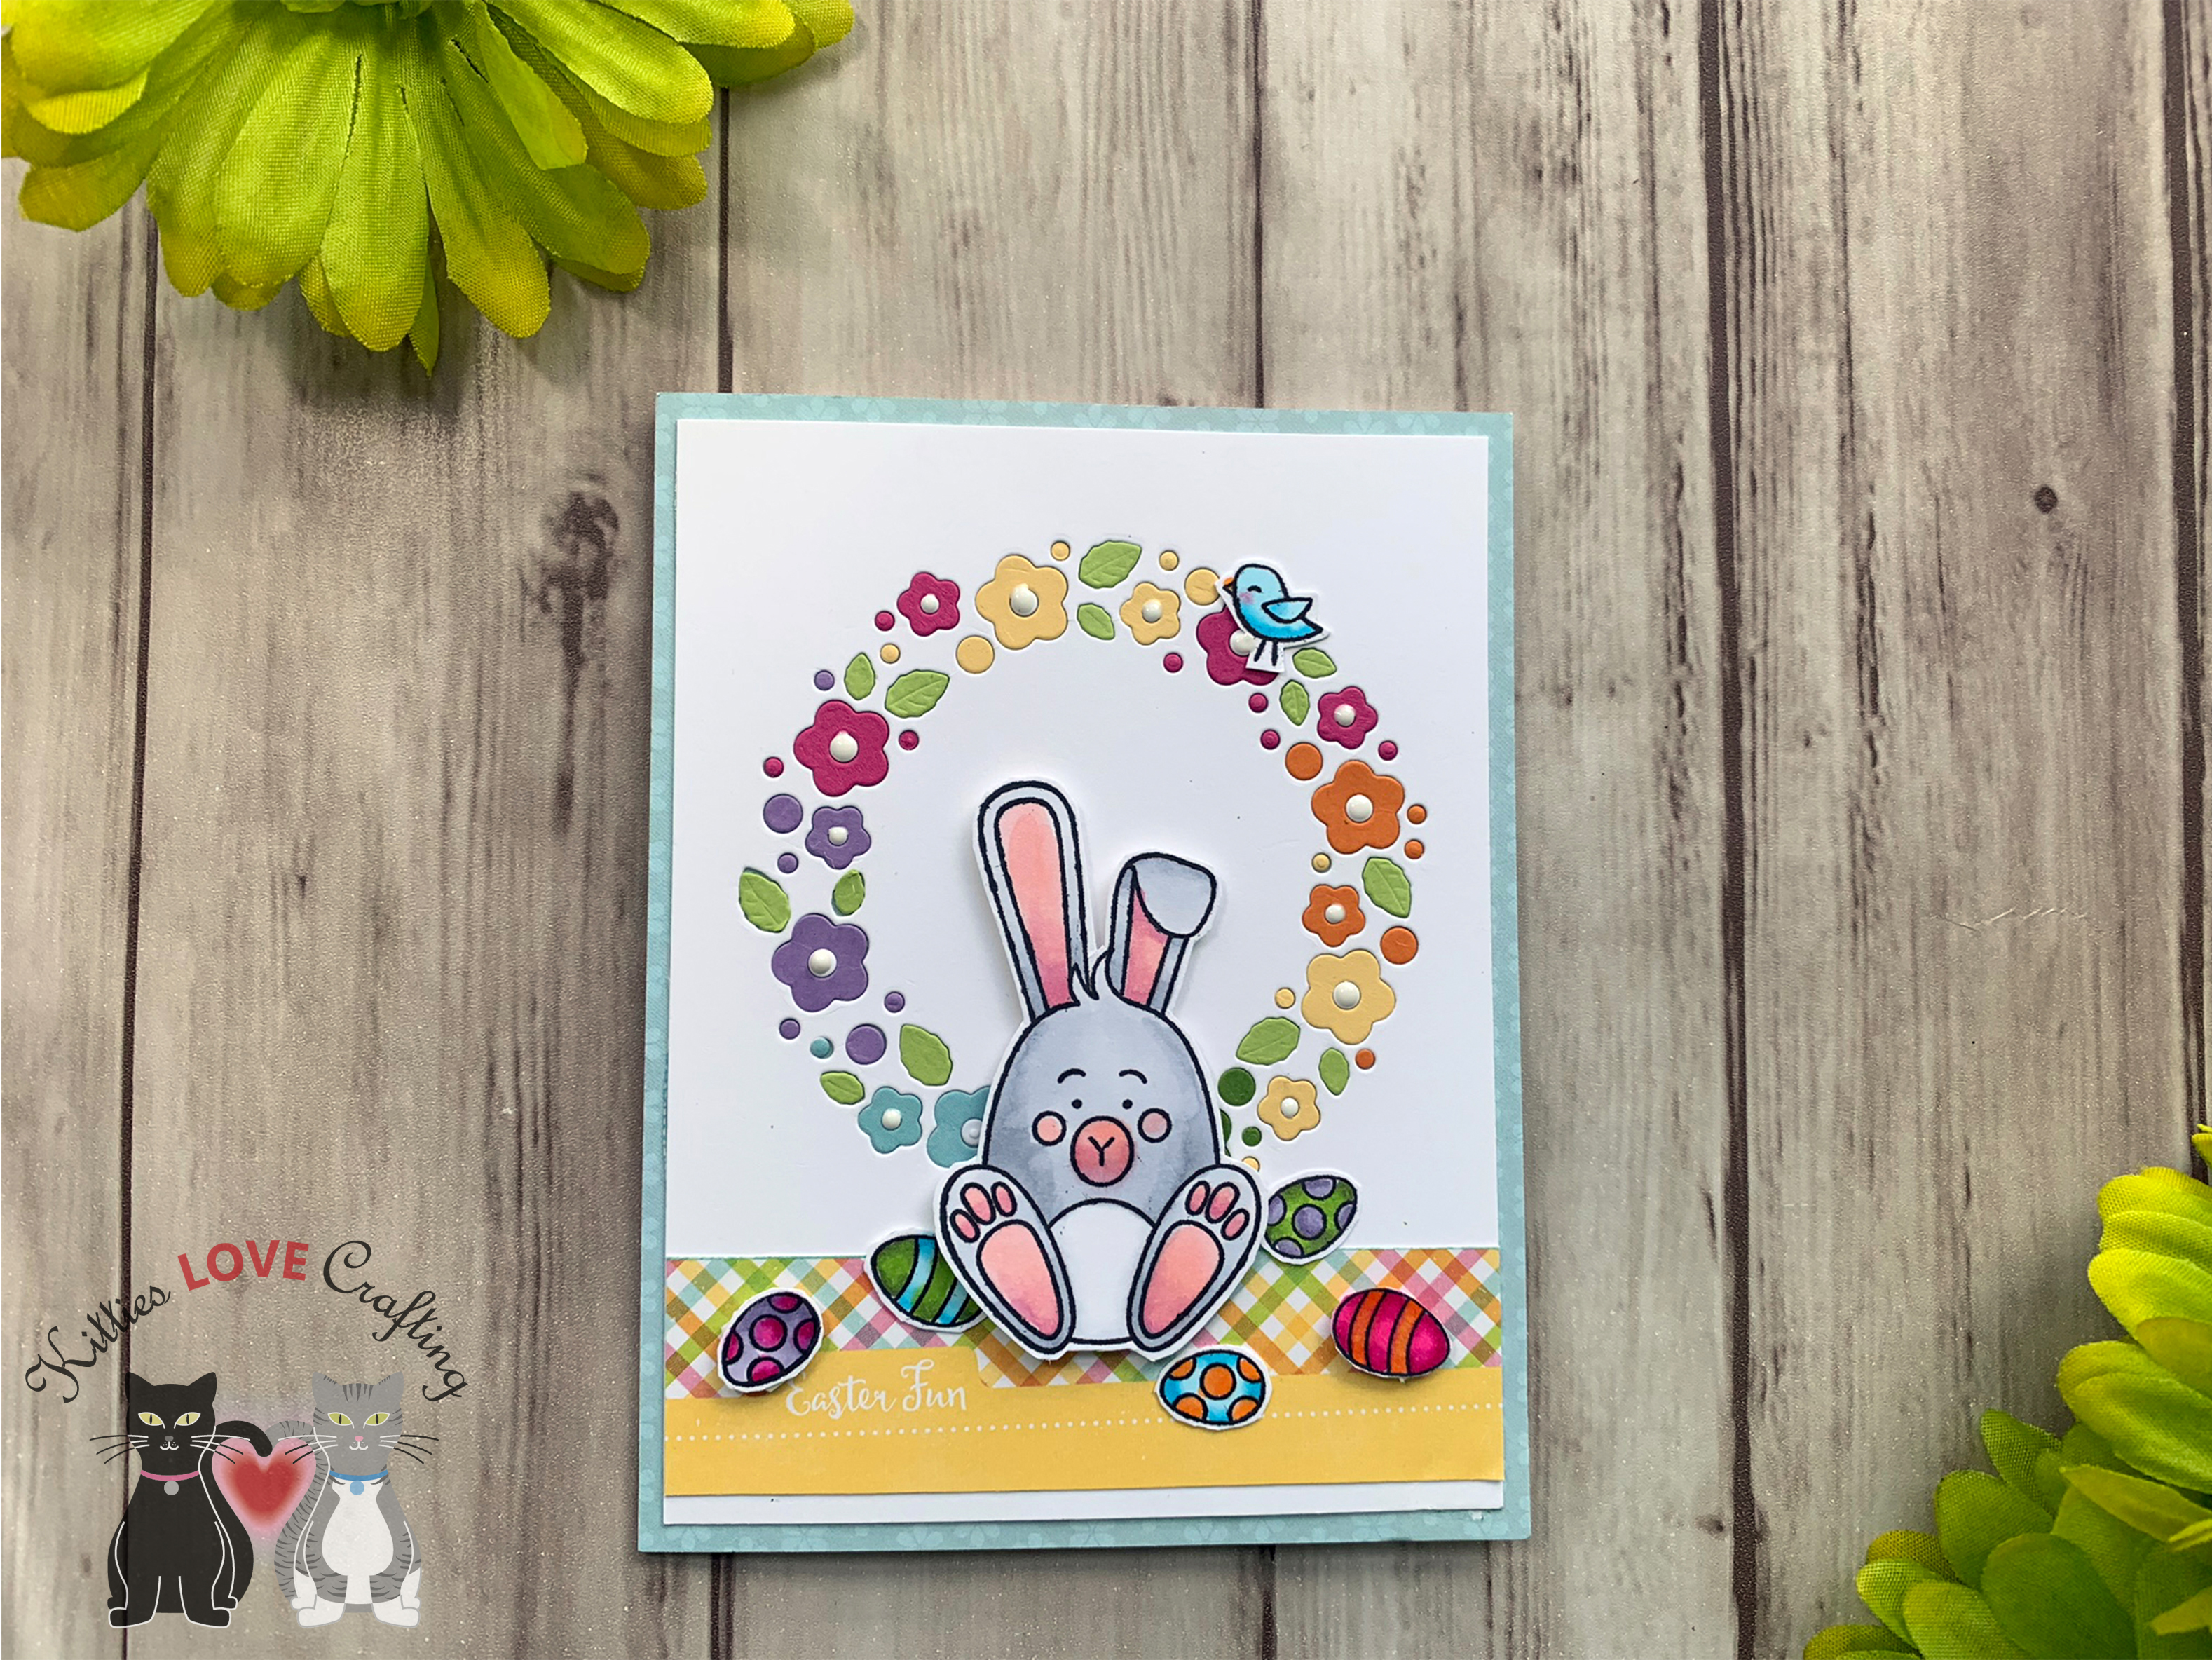
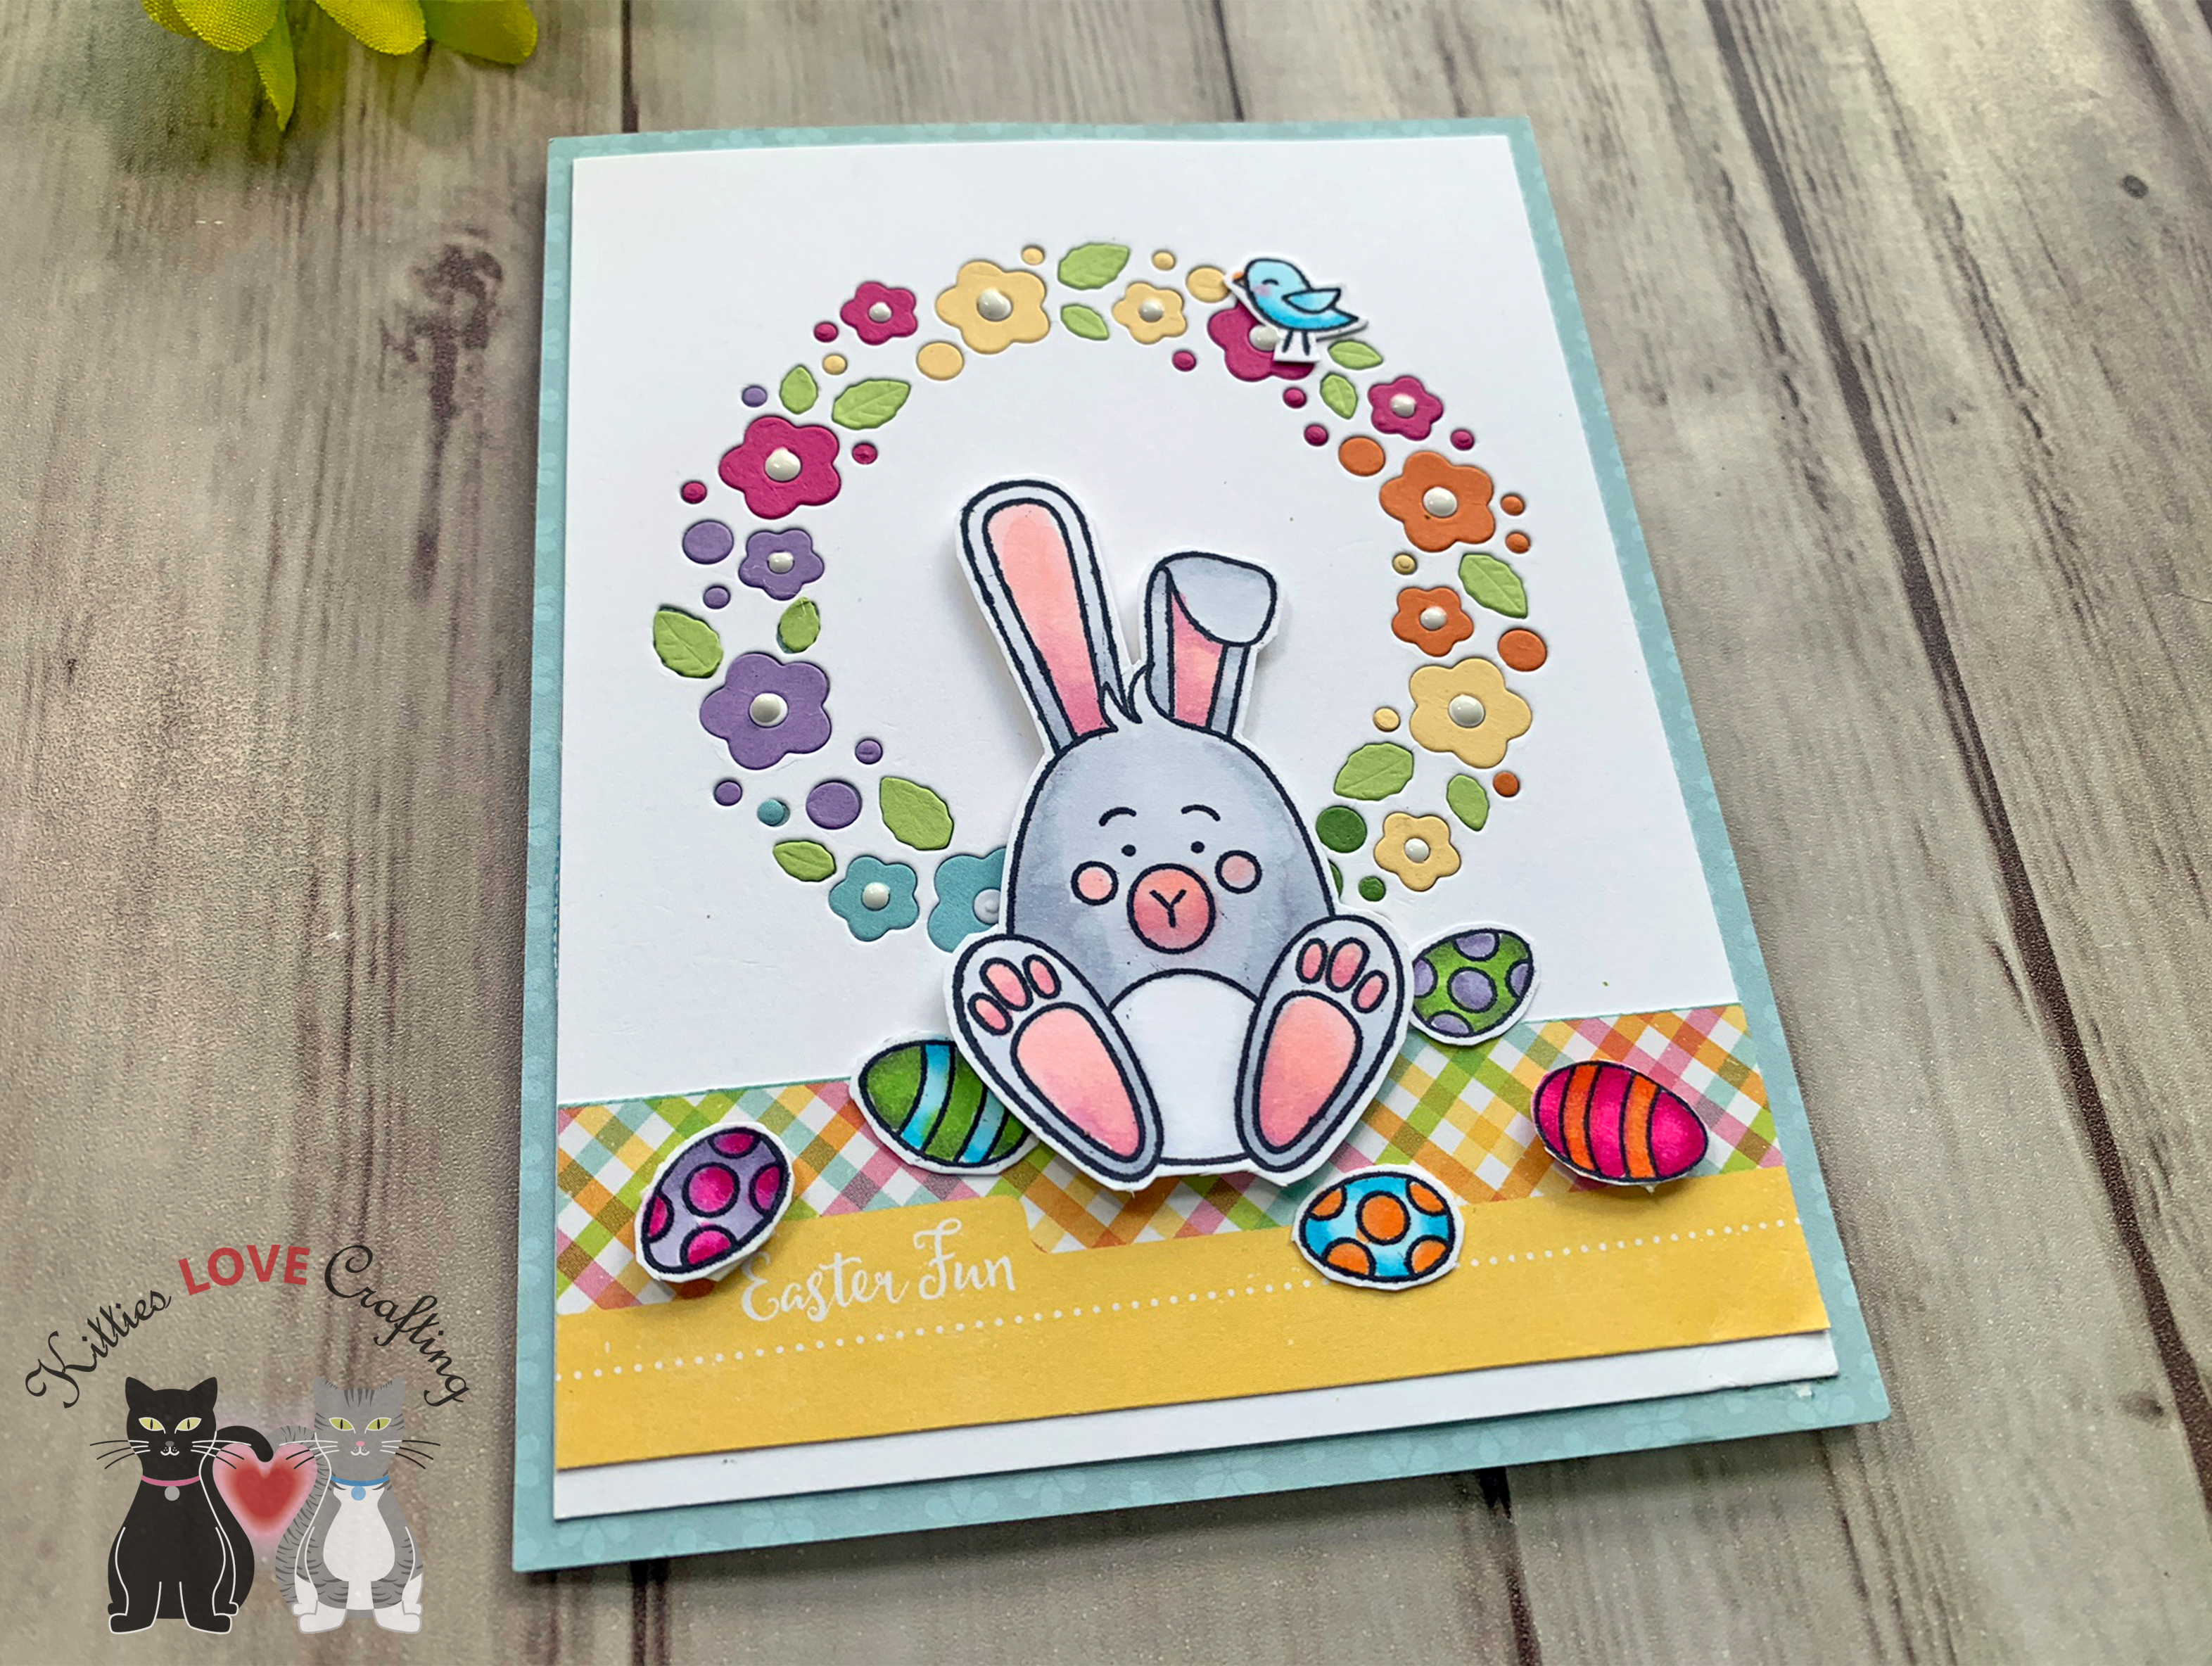
I made Easter cards with these backgrounds. I used Newton’s Nook Designs Newton’s Easter Basket Stamp on all 3 cards for the images.
I used Simon Says Stamp Some Bunny for the sentiment on the first card and the Lawn Fawn Straight Flower Border Die Cut to build the scene. And finished it with Nuvo drops in different colors. The second card features the Pretty Pink Posh Happy Easter Script Die cut out of 4 layers of cardstock (3 black and one white), stacked up to create the sentiment. The third card showcases the Easter egg kitty by putting him in ovals diecut using Stampin’ Up! Layering Ovals Framelits Dies. I added a sentiment from Newton’s Nook Designs Newton’s Easter Basket Stamp. I created card bases from Stampin’ Up! Tempting Turquoise (retired), Stampin’ Up! Elegant Eggplant (retired), and Stampin’ Up! Crushed Curry 8-1/2″ X 11″ Cardstock, respectively. And finally, on the inside I added a piece of white 80lb cardstock so I can later write a message inside my cards.
Thanks for stopping by. I hope this was helpful and I’ve inspired you to create some fun watercolor backgrounds of your own. Feel free to email me with questions or leave a comments below.
Card 2 turned into a Mother’s Day Card. When I started working on these cards I had no idea what the theme would be so I didn’t pick sentiments. But after adding the daisy pattern paper (from Doodlebug 6 x 6 Double-sided Paper Pad-Easter Express (discontinued)), I decided to make into a Mother’s Day card. I used the Simon Says Stamp Blooming Wave Wafer, to create a border then inlaid the flowers after diecutting several pieces of scrap yellow and green cardstock. I used Lawn Fawn Happy Happy Happy Sentiments and the Lawn Cuts Happy Happy Happy to creqte this dimensional sentiment. Finished it off by adding Nuvo Crystal Drops in Ivory Seashell.
Hope you’ve enjoyed this process post and I hope I’ve inspired you to create some cards of your own. Thanks for stopping by and once again please leave questions in the comments or feel free to email me if you prefer.
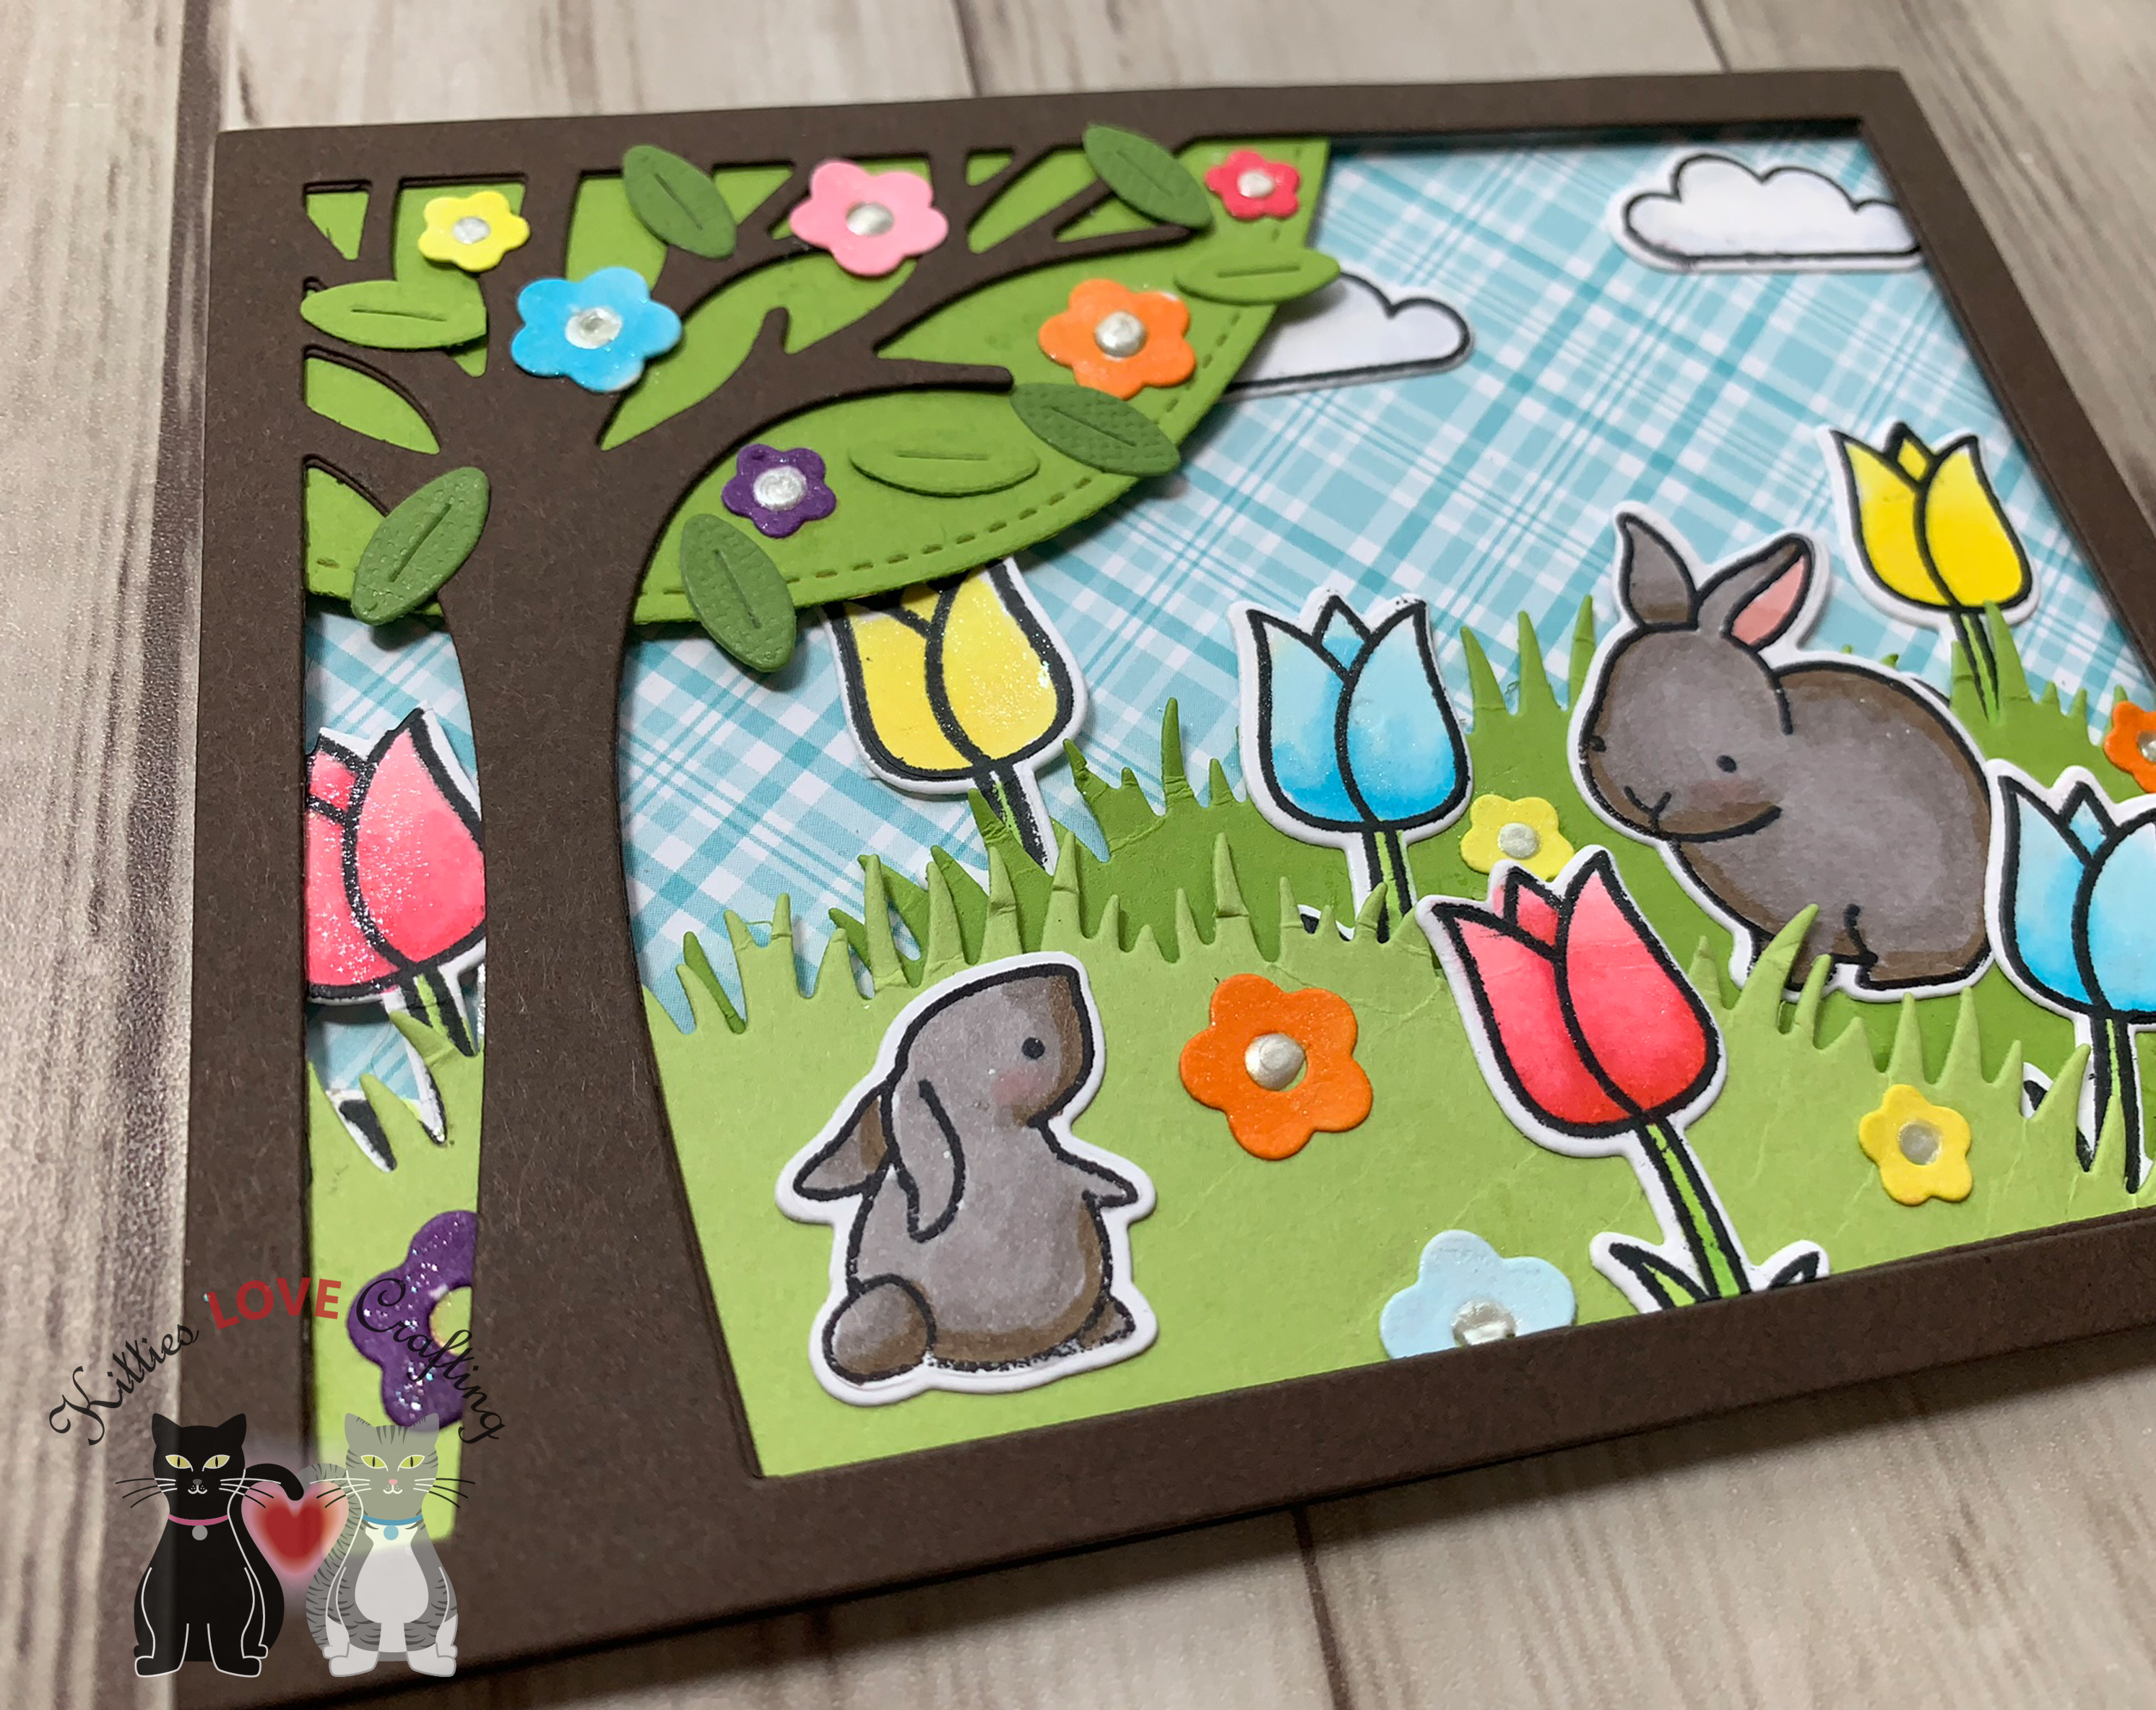
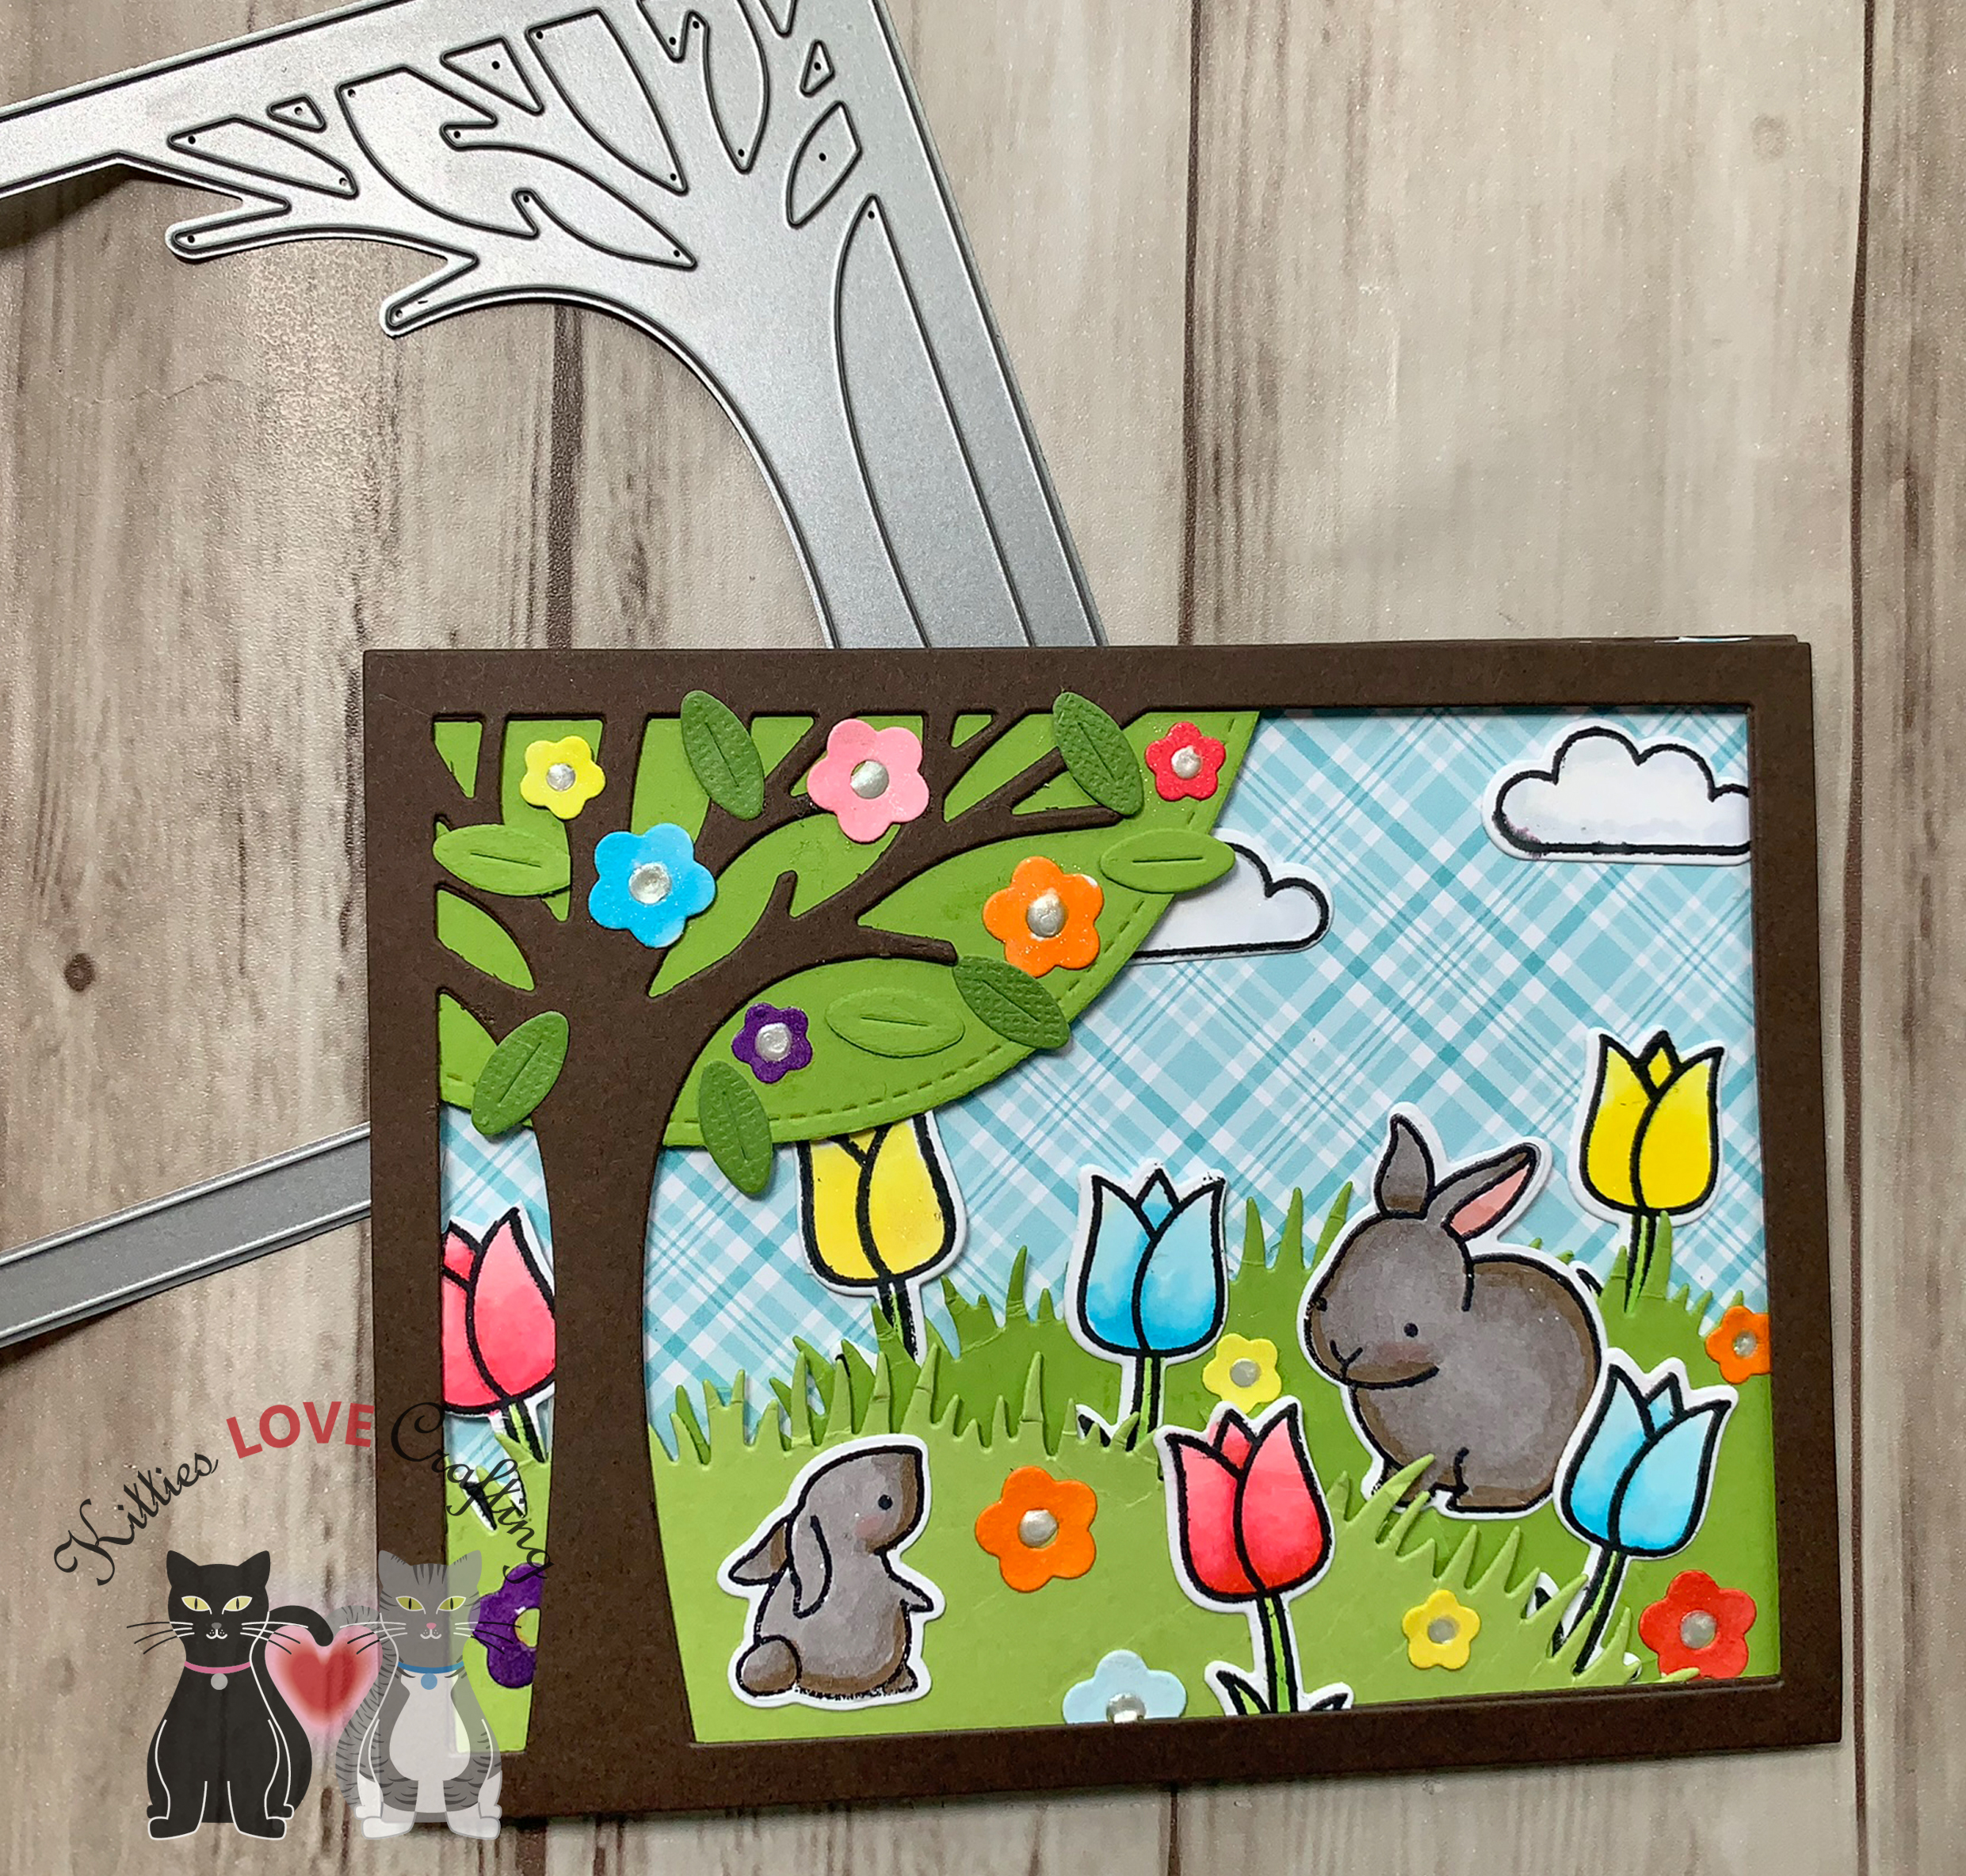
Happy Friday!!! It’s time to celebrate the arrival of Spring with this cute card featuring bunnies hopping through the tulips. Can also be used as an Easter card. This card is available for purchase in my Etsy shop.
Ok it may be winter still but I wanted to show how you all that you can use stamps meant for a specific event or holiday and use it for other type of cards. This allows us to stretch our stamps and dies.
Celebrate Spring
I used an older Lawn Fawn stampset, Hello Baby, which is meant for baby cards and used it for a Spring scene instead. Lawn Fawn stamps are great because you can combine different stampsets and they look like they belong together.
The inside of the card is decorated with matching pattern paper and diecut tiny flowers. Then stamped with “Happy Spring” using Lawn Fawn How You Bean?
Hope you’ve enjoyed this process post and I hope I’ve inspired you to create some cards of your own. Thanks for stopping by and once again please leave questions in the comments or feel free to email me if you prefer.