DIY Projects

Paper Mache Jewelry Box

Hello friends and Happy New Year! My first post of 2020 is this cute distressed jewelry box. I made something similar from paper years ago but it was time for a new sturdier box since the original is falling apart from so much use. This jewelry box will just hold some watches and rings and I wear daily but like to remove before bed. This way they can be safely tucked away out of reach of the kitties. Sometimes the kitties are naughty an play with things they should not so it’s my responsibility to make sure they don’t have access to those things.

Anyway let me show you how easy it was to make this box. I kept my box simple by just using some paper, paint, ribbon but you can add all kinds of embellishments. You can add fabric, flowers, jewels, brads, etc.

Supplies

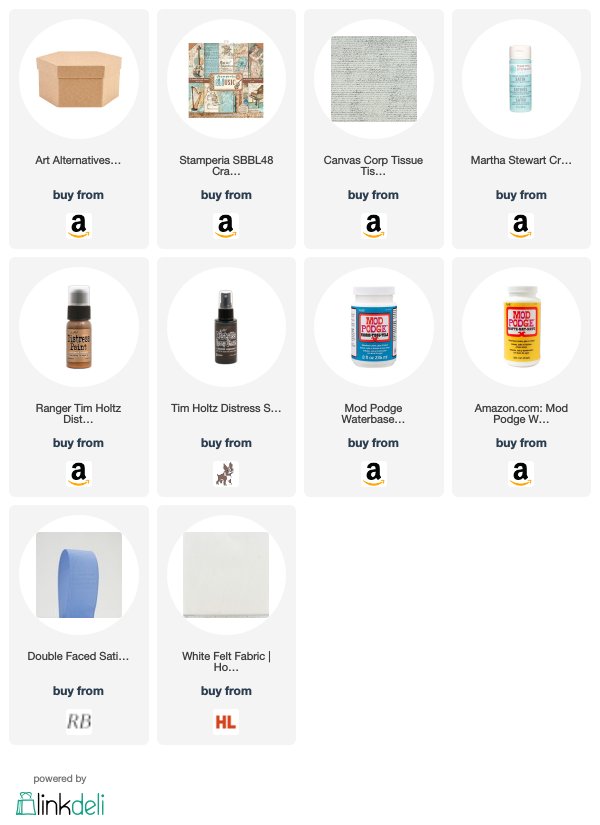
I began by choosing a paper mache box. I bought a pack of 5 hexagon-shaped boxes from Amazon (Art Alternatives MVPM06224 Paper-Mache Hexagon Box Set 5/Pkg). I chose the largest box in the set.

Art Alternatives MVPM06224 Paper-Mache Hexagon Box Set 5/Pkg

Next, I used Martha Stewart Crafts Multi Surface Satin Acrylic Paint in Sea Lavender (I think this color is discontinued) to paint the box inside and out. I applied 2-3 thin coats. I cannot stress this enough…when painting paper mache products, even smooth surfaces, it is best to apply thin layers, letting each layer dry between applications. I let each layer dry about 10-15 minutes.

While the last layer was drying, I chose some pattern papers from the Stamperia Double-Sided 12 X 12″ Paper Pad – Music and some Canvas Tissuestock Printed French Script, 12-Inch by 12-Inch, Ivory, 10-Pack. Since these papers are 12 x 12, I adhered the paper as one piece, making slits along the sides as I glued each side down. I started by gluing the bottom of the box first, using Mod Podge Waterbase Sealer, Glue (16-Ounce) CS11302 Matte Finish, 16 oz. I did the same for the lid and the box.

Stamperia Double-Sided 12 X 12″ Paper Pad – Music and
Canvas Tissuestock Printed French Script, 12-Inch by 12-Inch, Ivory, 10-Pack

Tip: When using Modge Podge to glue down paper work in small areas so you can smooth out the surface and hold it down for a few seconds so it holds properly. otherwise you can get bubbles or areas that just are not glued down.

I added ripped strips of the tissue paper to both parts of the box, adhering each time with the Modge Podge. With thin papers like tissue paper you need to add glue to both the underside and over top.

Once everything was dry, I decided it was too plain and added some acrylic paint and distress stains to age it a bit. First, I applied Martha Stewart Crafts Multi Surface Satin Acrylic Paint in Sea Lavender and Surf, mostly around the edges of the box. I let that and added some Ranger Tim Holtz Distress Paint, 1-Ounce, Antique Bronze and Ranger Tim Holtz Distress Spray Stains, 1.9oz Bottles-Walnut Stain.

Once I was happy with the aged look, I let it dry completely and then added a coat of Modge Podge to seal in all the paint and papers. Let that all dry a good while and then I added the 5/8″ Brown Double Satin Ribbon around the lid edge and some white felt inside the box. I used Mod Podge Waterbase Sealer, Glue and Finish for Fabric (8-Ounce) to adhere both.

Thanks for reading this post and I hope I’ve inspired you to give this project a try. Leave comments or questions below or feel free to email.

DIY Projects, Easter, Wreaths

Quick and Easy Easter Wreath

Easter is around the corner and I finally got around to making my Easter Wreath. Yay! I made this wreath using mostly Dollar Tree supplies. My store didn’t have much so I ordered from their online store and had it shipped to my house. They offer a ship-to-store option too.

A word of caution…if you order flowers online they can arrive crushed as mine did. I ordered 6 stems and only got 5 usable flower heads out of it and those were not that great as you will see in the photos. Keep that in mind.

Anyways,  it was super easy and quick to make. I started off with a 10-inch straw wreath form. I got mine from Hobby Lobby, but they are readily available at other craft stores and online. Check Amazon, Michaels, Joann Fabrics, Walmart and Dollar Tree. My local store did not carry it but I’m guessing others might. I carefully removed the clear plastic wrap around it as it tends to shed. Nor,ally I would normally leave the plastic wrap on it but since I wanted this to look natural and .organic, I removed it.

After cleaning the straw debris from my desk, i wrapped some 5/8 inch wide lavender satin ribbon around the wreath, creating a stripe pattern. I get most of my ribbon from the Ribbon Retreat. This color is called purple haze. A tiny dab of hot glue on each of the ribbon ends secure it to the wreath.

I added the moss next. I used Green Spanish Moss I hot glued it onto the bottom half of the wreath. Once I had enough of the area covered, I wrapped Green Floral Wire, 22 Gauge around the moss to secure it further. Ok the hard part is done. Time to decorate.

I added 5 Green Gerbera Daisies. 6 Speckled Easter Eggs, and 3 3 inch Salisbury Butterflies.To finish it off , i added 3 Pearl Corsage Pins to each ribbon stripe. That’s it. Add a ribbon to hang it and your wreath is complete. Easy peasy. Quickest wreath I’ve ever made.IMG_0526_watermarked

Supplies:

Thanks for stopping by and I hope I’ve inspired you to make your own wreath. Leave comments or questions below or feel free to email me.

DIY Projects, Holidays 2019, Wreaths

St. Patrick’s Day Wreath

Happy Friday everyone. I don’t know about you but we are starting to get ready for spring in my house. And with Spring comes green…and lots of it. So let’s start it off by celebrating St. Patrick’s Day! My husband is Irish and so I like to put up decorations for the holiday. Since I don’t have one yet, I made a wreath for the front door. My neighbors must think I’m crazy about holidays or just plain crazy because I’ve had a different wreath and welcome mat for every holiday since we moved in last September. LOL

St. Patrick’s Day Wreath
St. Patrick’s Day Wreath_Hat Detail
St. Patrick’s Day Wreath_closeup
St. Patrick’s Day Wreath_ closeup 2
St. Patrick’s Day Wreath_closeup 3
St. Patrick’s Day Wreath_closeup 4

Supplies:

Thanks for stopping by to check out my post. Please feel free to leave questions or comments about any of the products listed above or feel free to email me if you prefer.

DIY Projects, Holidays 2019, Valentines Day, Wreaths

Valentine’s Day Mesh Wreath

Hello everyone. I’ve always loved been making wreaths. I started making them when I lived in my small NY apartment and could not keep alot of decorations. A wreath has the ability to capture a holiday, a season, a theme or occasion in a small space. I had to put my passion on hold for awhile due to lack of space (apartment living, arrgh). Now that I have space to store and make them, it’s reignited my love of wreath-making. Look for more wreaths to come in the future!

I have never made one before so, of course, I turned to Youtube. Where else do you learn how to do everything in life, right? You can learn to change a tire, put on makeup and make a wreath all in one day. LOL. I came across this very funny Youtuber, This Southern Girl Can who makes them. She’s pretty much got it down to a science at this point. She uses dollar store supplies to make budget friendly wreaths. Check her out her Youtube channel.

Check her out her Youtube channel.

Step 1. Gather supplies.

Step 2. A) Cut mesh pieces that are approximately 6 inches in length. This will give you 6 x 6 squares. Alternatively, just roll each piece of mesh over itself so it makes one full loop. Cut ribbon 9 inches long (this is 1.5 times the length of the mesh pieces). B) Also cut your chenille stems (pipe cleaners) in half and then fold those pieces in half again.

Step 3. Take 3 pieces of mesh and 1 piece of ribbon. Roll mesh into coils (rolls). Hold each between your Index and 3rd fingers while you roll the other 2 pieces and pinch all together. Add ribbon with pattern side out away from your finger, then tie with a chenille stem piece. Twist once or twice to secure.

Step 4. A) Now add this bundle to your wreath form by feeding the chenille stem ends through the middle two wires on the wreath form. (see picture Step 4A). B) Continue adding bundles until you fill the whole form. I used 10 bundles per section. A section consists of the space between the 2 vertical wire pieces There are 6 sections so you will use 60 bundles when complete (you can see the sections in picture 4A).

Valentine’s Day Mesh Wreath_Final
Valentine’s Day Mesh Wreath_Closeup

Supplies:

Hope you’ve enjoyed this post. Thanks for stopping by and once again please leave questions in the comments or feel free to email me if you prefer.