Hello friends. St. Patrick’s Day is just around the corner. Here is a fun way to make a shaker card. I used the Lawn Fawn Lucky Clovers dies to create windows for this fun shaker card background. This card also uses NO stamping. I know some folks out there don’t like stamping. It’s just not there thing so using dies will eliminate stamping.
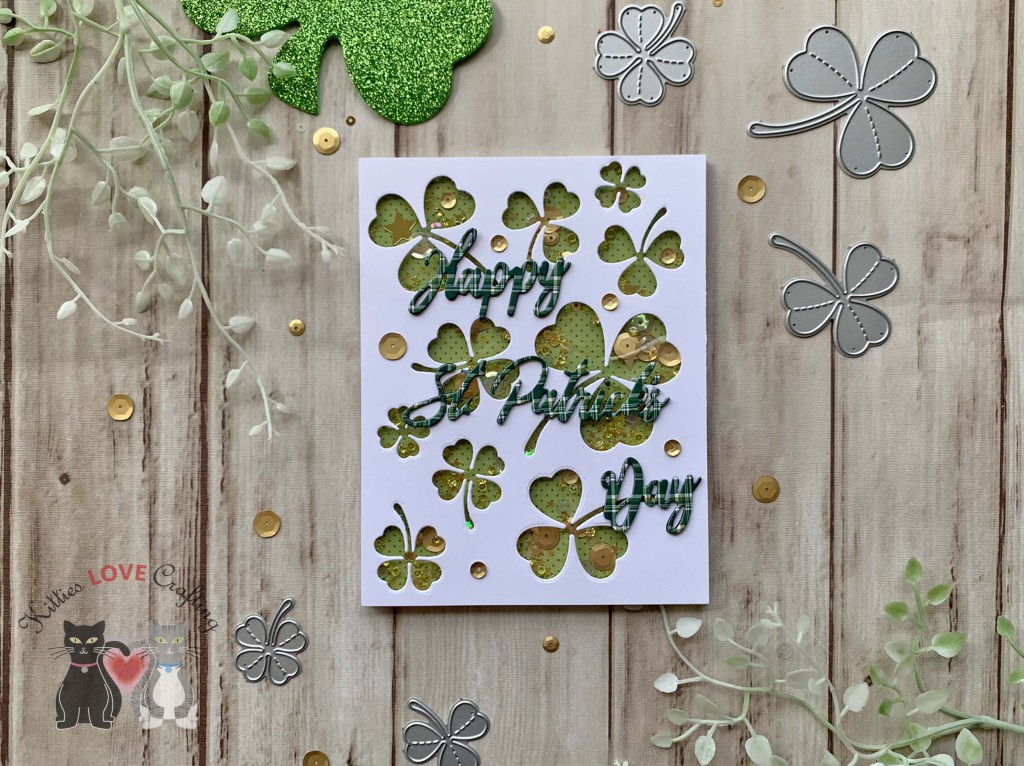
For this card, I cut a piece of Neenah 100lb Classic Crest Cardstock 8.5 X 11″ to 5-1/2 x 8-1/2″ and scored at 4-1/4″ to create a card base. And second piece cut to 4-1/4 x 5-1/2″ which I then die cut out windows using the Lawn Fawn Lucky Clovers dies. I backed the panel with Acetate cut to the same size and added 3M Foam Tape around all the clovers. I added gold sequins, Martha Stewart Yellow Iridiscent Star Glitter and Queen and Company Yellow Diamond Toppings and backed the panel with a piece of patter paper from Authentique 6 x 6 Emerald Paper (discontinued) cut to 4-1/4 x 5-1/2″.
I die cut the sentiment from Authentique 6 x 6 Emerald Paper (discontinued) and 2x from Simon Says Stamp Cardstock 100# 8-1/2 x 11″ Black Cardstock using Stampin’ Up! Word Wished Dies (retired) and stacked them to give the sentiment dimension.
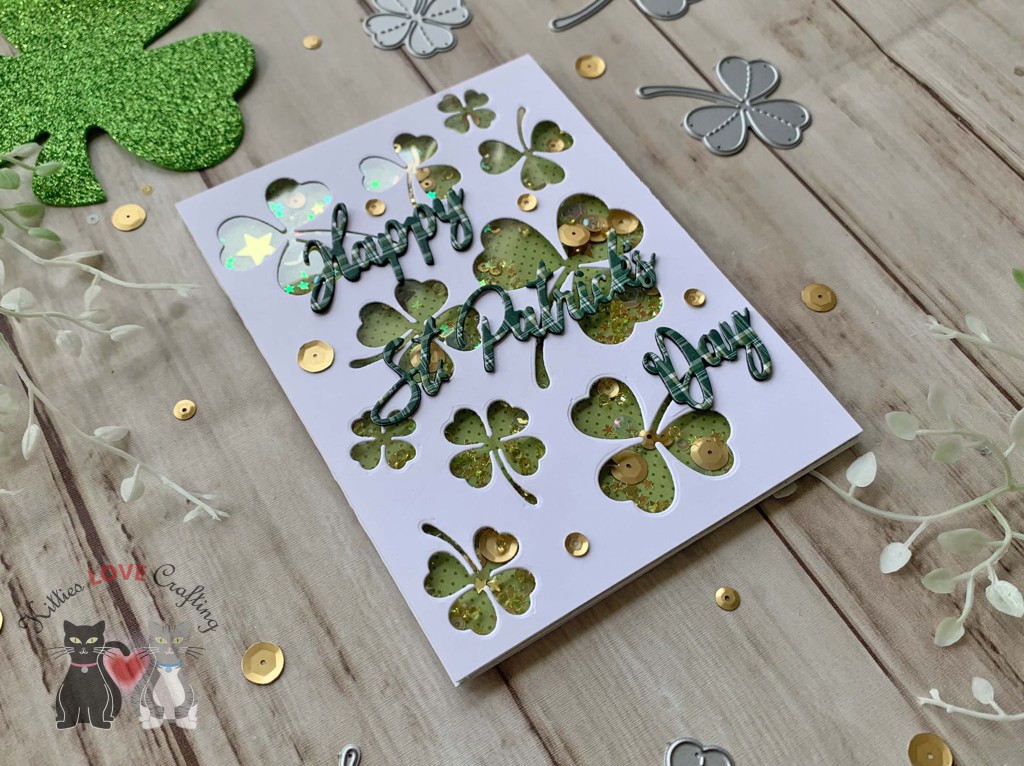
I finished off the card by adding some gold sequins from my stash.
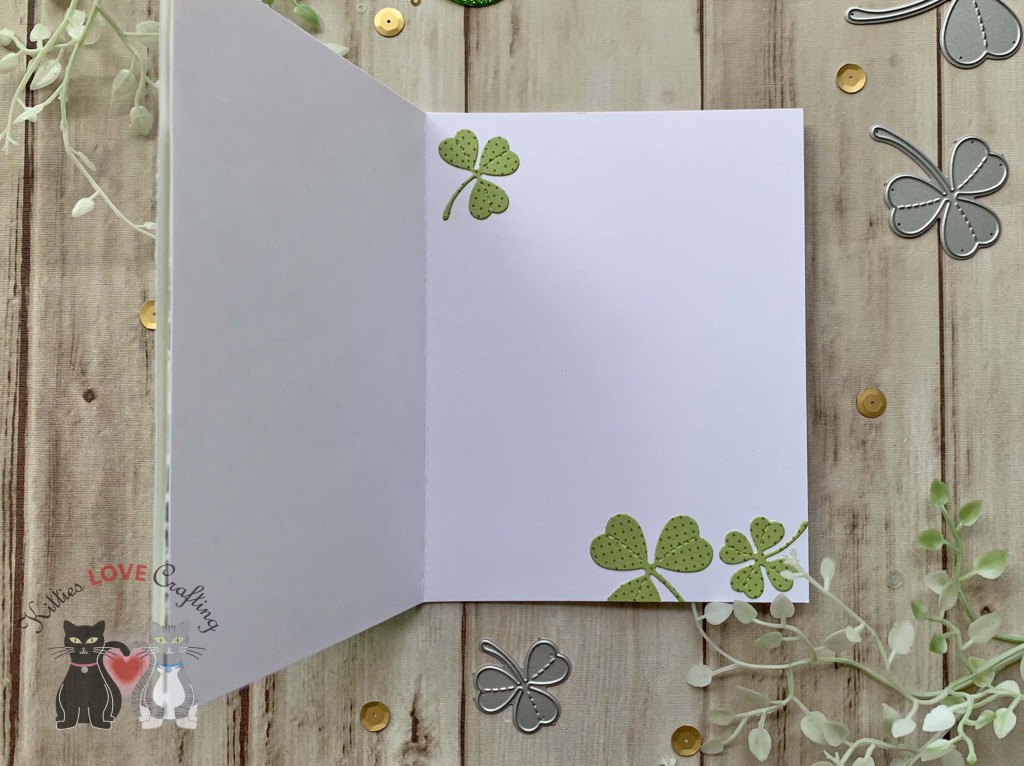
On the inside of the card, I added clovers die cut from Authentique 6 x 6 Emerald Paper (discontinued) using the Lawn Fawn Lucky Clovers dies.
Dimensions
- Card Base = 5-1/2 x 8-1/2″ and scored at 4-1/4″ Neenah 100lb Classic Crest Cardstock 8.5 X 11″; 4-1/4 x 5-1/2″ Authentique 6 x 6 Emerald Paper (discontinued)
- Top Panel = 4-1/4 x 5-1/2″ Neenah 100lb Classic Crest Cardstock 8.5 X 11″
Supplies
 https://linkdeli.com/widget.js?id=f5e8378456858c916708
Thanks for reading this post. I hope I’ve inspired you to give this fun and easy St. Patrick’s Day shaker card a try for yourself. Leave comments or questions below or feel free to email.