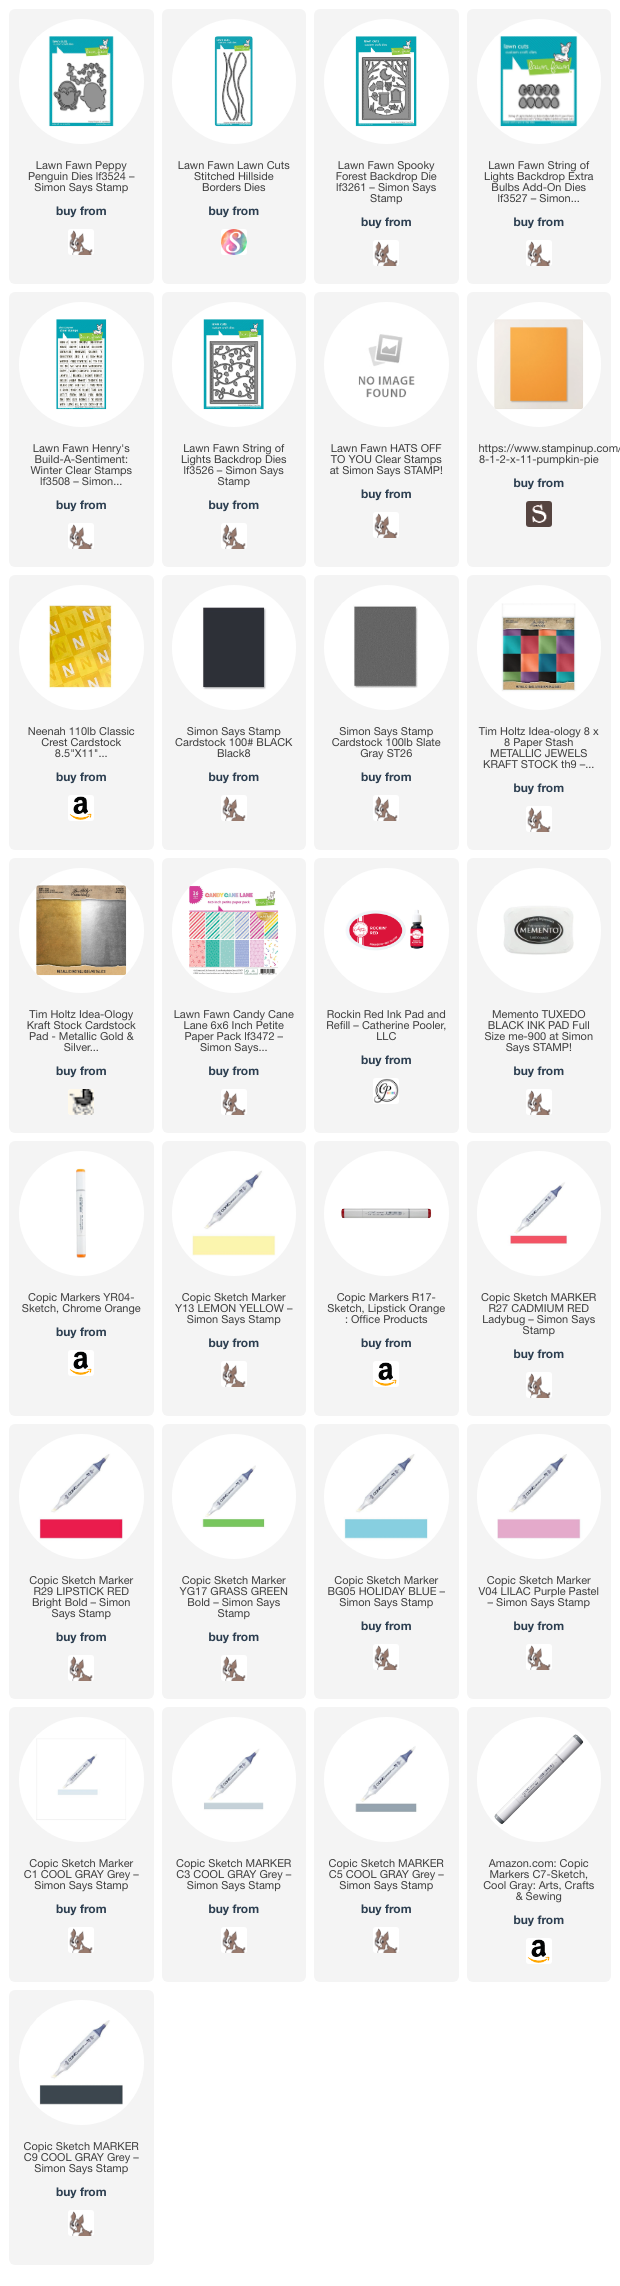
Christmas, Distress Ink Techniques, Stenciled Background, Winter

Cute Penguin Christmas Scene Card featuring Lawn Fawn and Catherine Pooler Designs

Hello friends. Here’s another card featuring these adorable penguins from the Lawn Fawn HERE WE GO A-WADDLING stamps. I paired it with an old die set from Catherine Pooler Designs. It was featured in the Winterhaven Stamp of Approval several years ago!

For this card, I cut a piece of Neenah 100lb Classic Crest Cardstock 8.5 X 11″ to 5-1/2 x 8-1/2″ and scored at 4-1/4″ to create a card base and another piece to 4 x 5-1/4″ for the background. I used the Tim Holtz Salty Ocean, Uncharted Mariner, and Chipped Sapphire Distress Oxide Inks to color the background. Then used a snowflake embossing folder (Stampin’ Up! Winter Snow) to give it some dimension. Then I lightly ran a white pigment ink pad (Lawn Fawn Yeti Pigment Ink) over the raised areas; This enhanced the snowflakes a bit more. (TIP: Make sure to let this dry for several hours before touching the panel or use a heat tool to set it). Lastly, I added some splatters using White Acrylic paint.

Next I die cut the the snowy hills from Neenah 100lb Classic Crest Cardstock 8.5 X 11″ with the Lawn Fawn Stitched Hillside Borders and inked it with Tumbled Glass Distress Oxide Ink. I also added some Nuvo Fresh Snowfall Glitter Drops to the snowy hills. I used 3M Foam Tape to adhere the front hillside.

I stamped the images from the Lawn Fawn HERE WE GO A-WADDLING stamps onto Neenah 100lb Classic Crest Cardstock 8.5 X 11″ with Memento Tuxedo Black Ink and colored them with Copic Markers. I used R17, R27 & R59, BG10, BG11 & BG32, R20, N1 & 0, N4, N5 & N8, YR04 & YR07 for the penguins; Y13, Y15 & Y17 for the bell and lantern.

I stamped sentiment from the Lawn Fawn HERE WE GO A-WADDLING stamps onto Neenah 100lb Classic Crest Cardstock 8.5 X 11″ with Memento Tuxedo Black Ink and then cut them down to strips.

On the inside of the card, I stamped a sentiment from the Lawn Fawn Simply Winter Sentiments with Catherine Pooler Designs Rockin’ Red Ink and added a penguin.

Dimensions


Supplies

https://linkdeli.com/widget.js?id=f5e8378456858c916708

Thanks for reading this post. I hope I’ve inspired you to give this cute penguin Christmas card a try for yourself. Leave comments or questions below or feel free to email.

Christmas, Distress Ink Techniques, Stenciled Background, Winter

Winter Village Christmas Scene Card featuring a Stenciled Pattern Paper Background

Hello friends. For this cute holiday card, I uses a technique I had forgotten about but recently reminded of while watching a Youtube video. The technique is stenciling on pattern paper. It’s an easy way to add depth and interest to a background without adding extra bulk. This card features the Lawn Fawn Spooky Forest Backdrop die and the Lawn Fawn Winter Village Stamps.

For this card, I cut a piece of Neenah 100lb Classic Crest Cardstock 8.5 X 11″ to 5-1/2 x 8-1/2″ and scored at 4-1/4″ to create a card base and a piece of Lawn Fawn Spiffier Speckles 6×6 Paper to ~4 x 5-1/4″ for the background. I used the Tim Holtz Stormy Sky and Faded Jeans Distress Ink along with the Honey Bee Stamps Birch A2 Cover Plate to give some dimension to the background.

Next I die cut the forest from Neenah 100lb Classic Crest Cardstock 8.5 X 11″ with the Lawn Fawn Spooky Forest Backdrop, the snowy hills from more Neenah 100lb Classic Crest Cardstock 8.5 X 11″ with the Lawn Fawn Stitched Hillside Borders and inked it with Tumbled Glass Distress Ink. I also added some Nuvo Fresh Snowfall Glitter Drops to the snowy hills. I used 3M Foam Tape to adhere the forest panel as well as some behind the snowy hills for more dimension.

I stamped the images from the Lawn Fawn Winter Village Stamps onto Neenah 100lb Classic Crest Cardstock 8.5 X 11″ with Memento Tuxedo Black Ink and colored them with Copic Markers. I used Y13 & Y18 for the lantern, windows and star; R81, R83, & R85, YG25, YG17 & YG67, C0, C1, C3 & C5 for the houses; YG25, YG17 & YG67 and E25 & E29 for the trees; BG000 and 0 for the snow.

I decided to do a radical thing on this card and have NO sentiment on the outside. What?!? Unheard of, right? LOL. Sometimes it’s ok to leave the outside of your card with just a pretty scenes. Let the recipient be surprised when they open the card.

On the inside of the card, I cut a piece of Lawn Fawn Spiffier Speckles 6×6 Paper to 1 x 4-1/4″ and stamped a sentiment from the Lawn Fawn Winter Village Stamps with Catherine Pooler Rose Petals Ink.

Dimensions


Supplies

https://linkdeli.com/widget.js?id=f5e8378456858c916708

Thanks for reading this post. I hope I’ve inspired you to give this cute penguin Christmas card a try for yourself. Leave comments or questions below or feel free to email.

Autumn, Christmas, Fall, Holidays 2020, Stampin' Up!, Winter

Life Is Beautiful by Stampin’ Up! (from the new Aug-Dec Mini Catalog)

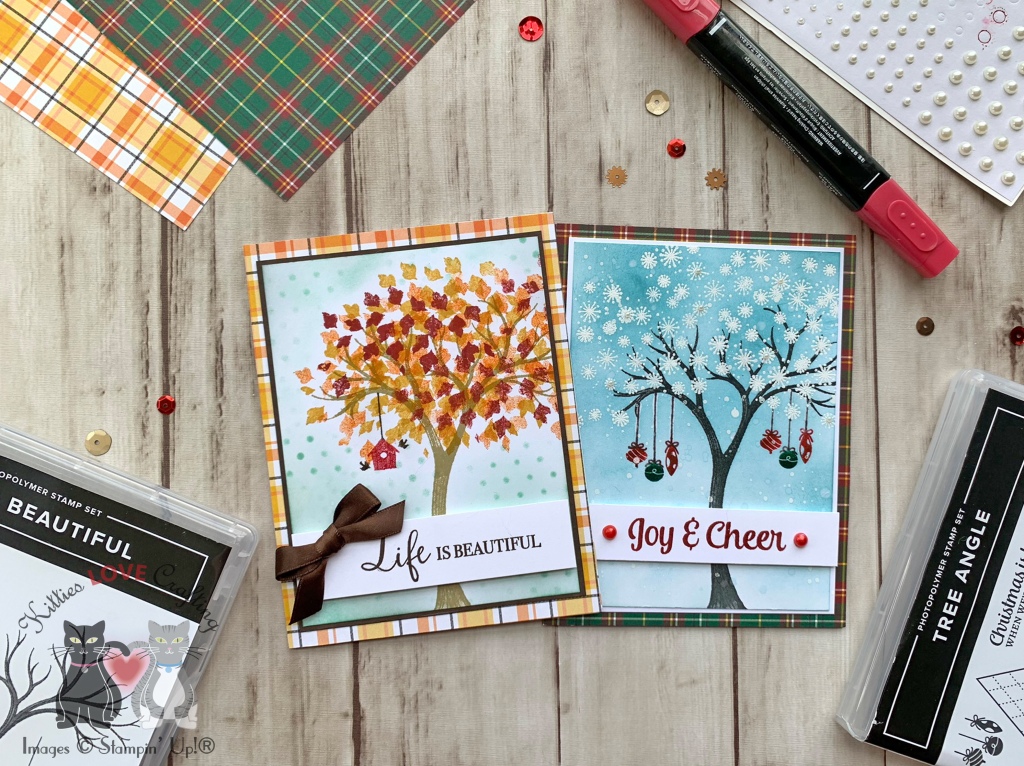
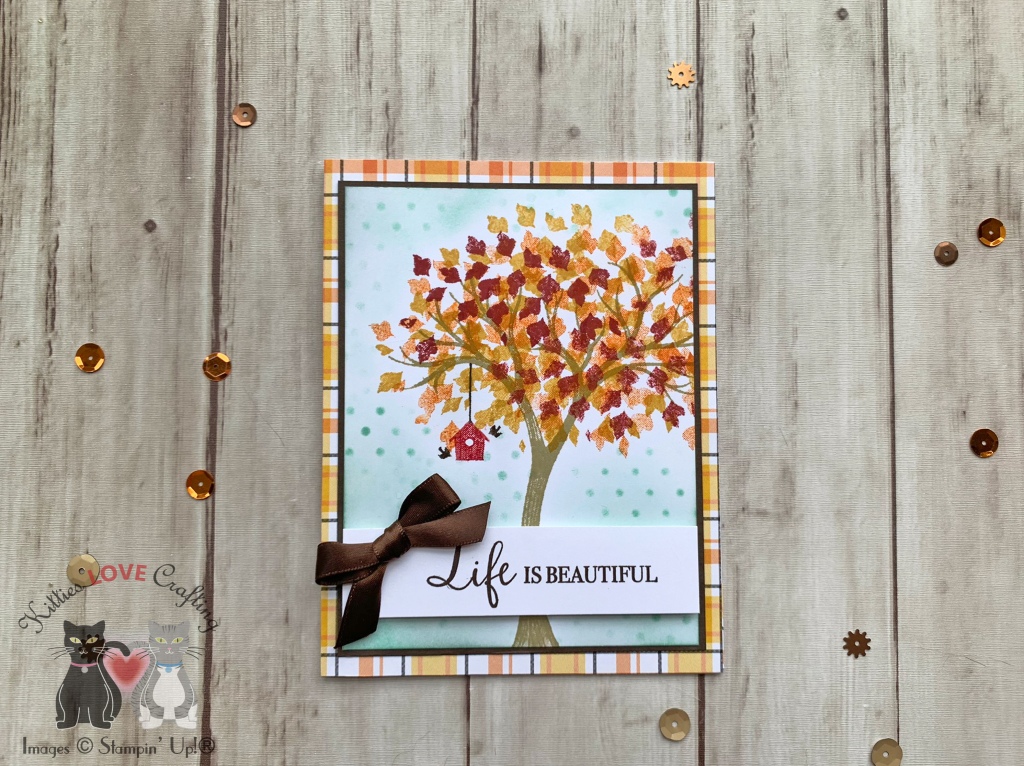
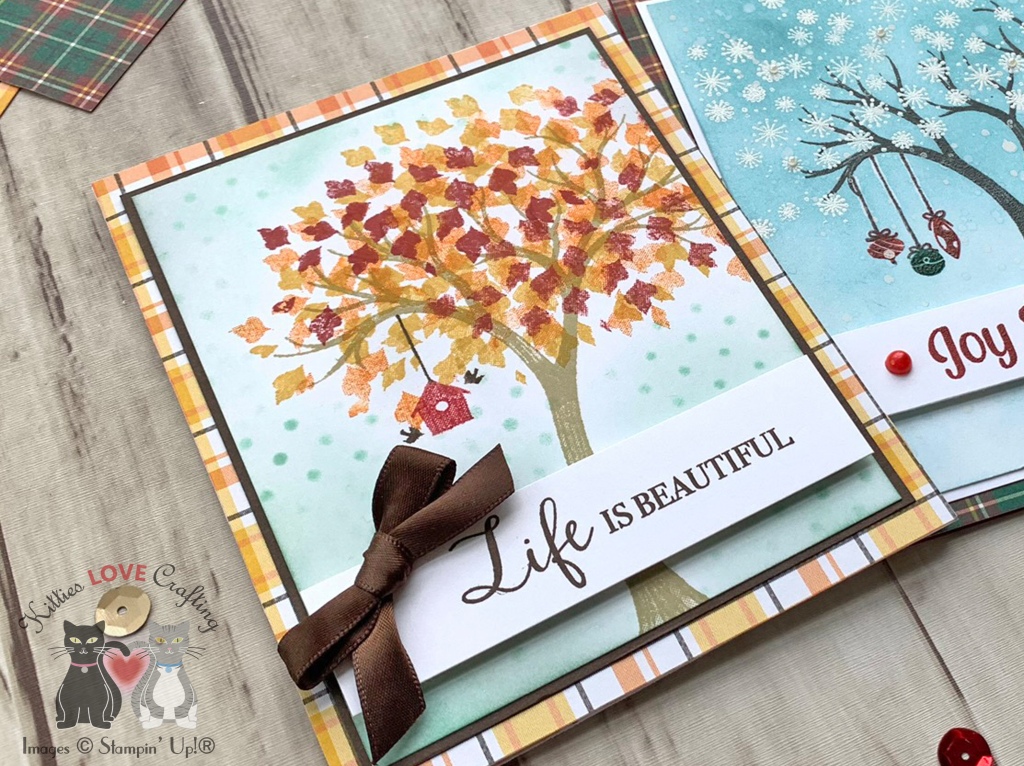
The Life Is Beautiful stampset by Stampin’ Up! at first glance looks like a very simple stampset but once you stamp the images you will notice the details in the images which give them dimension. It reminds me of another Stampin’ Up! (retired) stampset, Sheltering Tree, which I have loved for many years. Anyone else remember that stampset? I love this one sooo much more though–and I think it’s because of all the details. This lovely stampset can be found in the new Aug-Dec Mini Catalog which has a ton of awesome goodies for the holidays. I will definitely be making more cards with this stampset!

I started the first card by cutting a piece of Whisper White 8-1/2″ X 11″ Thick Cardstock to 5-1/2 x 8-1/2″ and scored at 4-1/4″ to make a card base. Then cut a piece of Plaid Tidings 6 x 6 Designer Series Paper to 4-1/4 x 5-1/2″ for the top panel, a piece of Early Espresso 8-1/2 x 11″ Cardstock to 3-7/8 x 5 1/16″, and a piece of Whisper White 8-1/2″ X 11″ Cardstock to 3-3/4 x 4-7/8″. I adhered the plaid paper to the card base and the Early Espresso 8-1/2 x 11″ Cardstock panel to the plaid paper.

I stamped the tree trunk from the Life Is Beautiful stampset to the white panel with Crumb Cake Ink, I layered the leaves by stamping them several times with Bumblebee, Pumpkin Pie and Cherry Cobbler inks, and used Early Espresso and Real Red Stampin’ Write Markers to stamp the little bird house.

For the background I used a American Crafts Heidi Swapp Stencil 6 X6 Polka Dot with Pool Party Ink then inked around the background to give it some more color. I adhered that to the Early Espresso 8-1/2 x 11″ Cardstock and then stamped a sentiment from the same stampset onto Whisper White 8-1/2″ X 11″ Cardstock with Early Espresso Ink. I cut it down to 1 x 3-3/4″, added Stampin’ Dimensionals behind it and added it to the card. I finished it off by adding a piece of 3/8″ chocolate brown satin ribbon.

I left the inside of the card blank and just added cut a piece of Plaid Tidings 6 x 6 Designer Series Paper, measuring 1 x 4-1/4″.

Dimensions


I went with a winter/Christmas theme for the second card; I just really wanted to heat emboss the snowflakes from the Life Is Beautiful stampset. This card features the Tree Angle stampset as well.

I started the second card by cutting a piece of Cherry Cobbler 8-1/2″ X 11″ Cardstock to 5-1/2 x 8-1/2″ and scored at 4-1/4″ to make a card base. Then cut a piece of Plaid Tidings 6 x 6 Designer Series Paper to 4-1/4 x 5-1/2″ for the top panel, a piece of Whisper White 8-1/2″ X 11″ Cardstock to 3-7/8 x 5 1/16″, and another piece of Whisper White 8-1/2″ X 11″ Cardstock to 3-3/4 x 4-7/8″. I adhered the plaid paper to the card base and the Whisper White 8-1/2″ X 11″ Cardstock panel to the plaid paper.

I stamped the tree trunk from the Life Is Beautiful stampset to the white panel with Basic Gray Ink, then stamped the whole image with Versamark Ink and heat embossed with Clear Stampin’ Emboss Powder. I stamped the ornaments from the Tree Angle stampset with Cherry Cobbler and Shaded Spruce inks, and Smoky Slate Stampin’ Write Markers to stamp the string on the ornaments. I used an Sponge Dauber to apply the ink to each of the ornaments since there were two coors involved. I then stamped the whole image with Versamark Ink and heat embossed with Clear Stampin’ Emboss Powder. Tip: Use a stamping platform such as the Stamparatus to do this so it’s in the same spot.

I used the snowflakes stamp from the Life Is Beautiful stampset with Versamark Ink and stamped it several times over the tree, then added White Stampin’ Emboss Powder. I did some ink blending in the background with Balmy Blue Ink, and adhered the panel to the card.

I stamped a sentiment from the Tree Angle stampset onto Whisper White 8-1/2″ X 11″ Cardstock with Cherry Cobbler Ink and cut it down to 3/4 x 4” and adhered with Stampin’ Dimensionals. To finish it off I added tiny Stampin’ Up! Pearls (retired) to the snowflakes and colored two large ones with Real Red Stampin’ Blends.

On the inside of the card, I added a piece of Plaid Tidings 6 x 6 Designer Series Paper, measuring 1 x 4-1/4″ and stamped the sentiment and ornaments from the Tree Angle stampset with Shaded Spruce Ink.

Dimensions


Supplies

https://linkdeli.com/widget.js?id=f5e8378456858c916708

Thanks for reading this post. I hope you enjoyed and I’ve inspired you to try these cards using this beautiful stampset for yourself! Leave comments or questions below or feel free to email me. If you want to share you creations with me tag me on instagram @kittieslovecrafting. If you would like a Stampin’ Up! catalog, please email me as well. All current catalogs can be found on the right side of this post and the Stampin’ Up! page. All news and fun stuff happening at Stampin’ Up! are listed there!

Autumn, Celebrations, Christmas, Fall, Just Because, Love & Friendship, Stampin' Up!, Winter

Lots to Celebrate by Stampin’ Up! (from the new Aug-Dec Mini Catalog)

I finally got to play with the new Lots to Celebrate Stampset by Stampin’ Up which is available in the new Aug-Dec Mini Catalog. I love mason jars and mason jar stamps so it only made sense to buy this one. :). It’s really cute and has stamps for different occasions. It aso coordinates with the Jar of Flowers stampset. But wait there’s more…there’s a coordinating punch. No need to fussy cut it when there’s a punch! You also save 10% when you purchase the Jar of Flowers Bundle.

I started this card by cutting a piece of Soft Suede 8-1/2″ X 11″ Cardstock to 5-1/2 x 8-1/2″ and scored at 4-1/4″ to make a card base. Then cut a piece of Crumb Cake 8-1/2″ X 11″ Cardstock to 4 x 5-1/42 x 4-1/4″” for the top panel and a piece of the Guilded Autumn Specialty Paper Pack to 2 x 4-1/4″. I stamped the background by using the leaf stamps from the Beautiful Autumn stampset and Crumb Cake Ink and adhered it to the card base. I also adhered the pattern paper strip to the card.

I stamped the mason jar from the Lots to Celebrate Stampset onto Whisper White 8-1/2″ X 11″ Cardstock with Memento Tuxedo Black Ink. I stamped the trail inside the jar with Crumb Cake Ink and the leaves with Cajun Craze Ink, Mint Macaron Ink, Soft Suede Ink and Cherry Cobbler Ink. I stamped the lid with Versamark Ink and heat embossed with Gold Emboss Powder and the doily with Soft Suede Ink. I used the Jar Punch to cut out the Mason Jar and fussycut the lid and doily and adhered them together. I added some Linen Thread and Acorn Trinket (from the Guilded Autumn Suite).

I punched a 2-1/4″ circle from Mint Macaron 8-1/2″ X 11″ Cardstock and a 2’1/2″ circle from Gold Foil and adhered them together. I stamped a sentiment from the Lots to Celebrate Stampset with Soft Suede Ink onto Whisper White 8-1/2″ X 11″ Cardstock and cut it down to 3/4 x 1-1/2″. I adhered the circles, mason jar and sentiment to the card.

On the inside of the card, I cut a piece of Whisper White 8-1/2″ X 11″ Cardstock to 4 x 5-1/4″and a strip of Guilded Autumn Specialty Paper Pack to 5/8 x 4-1/4″ and adhered them to the card. Lastly, I stamped a sentiment from the Lots to Celebrate Stampset with Mint Macaron Ink.

Dimensions


I made a second version of this card with a winter theme and simplified it a bit. I started card by cutting a piece of Night Of Navy 8-1/2″ X 11″ Cardstock to 5-1/2 x 8-1/2″ and scored at 4-1/4″ to make a card base. Then cut a piece of Plaid Tidings 6 x 6 Designer Series Paper to 2 x 5-1/4″. I stamped the background by using the the snowflakes from the Lots to Celebrate Stampset and Night Of Navy Ink. I adhered the pattern paper strip to the card.

I stamped the mason jar from the Lots to Celebrate Stampset onto Whisper White 8-1/2″ X 11″ Cardstock with Memento Tuxedo Black Ink. I stamped the trail inside the jar with Smoky Slate Ink and the snowflakes with Misty Moonlight Ink and Rich Razzleberry Ink. I stamped the lid with Versamark Ink and heat embossed with Silver Emboss Powder and the doily with Cherry Cobbler Ink. I used the Jar Punch to cut out the Mason Jar and fussycut the lid and doily and adhered them together. I added some white embroidery floss from my stash to the jar as well.

I punched a 2-1/4″ circle from Misty Moonlight 8-1/2″ X 11″ Cardstock and a 2’1/2″ circle from Silver Foil and adhered them together. I stamped a sentiment from the Lots to Celebrate Stampset with Rich Razzleberry Ink onto Whisper White 8-1/2″ X 11″ Cardstock and cut it down to 7/8 x 1-5/8. I adhered the circles, mason jar and sentiment to the card.

On the inside of the card, I cut a piece of Whisper White 8-1/2″ X 11″ Cardstock to 4 x 5-1/4″and a strip of Plaid Tidings 6 x 6 Designer Series Paper to 5/8 x 4-1/4″ and adhered them to the card.

Dimensions


Supplies

https://linkdeli.com/widget.js?id=f5e8378456858c916708

Thanks for reading this post. I hope you enjoyed and I’ve inspired you to try these cards using this adorable stampset for yourself! Leave comments or questions below or feel free to email me. If you want to share you creations with me tag me on instagram @kittieslovecrafting. If you would like a Stampin’ Up! catalog, please email me as well. All current catalogs can be found on the right side of this post and the Stampin’ Up! page. All news and fun stuff happening at Stampin’ Up! are listed there!

Christmas, Christmas, Seasons, Winter

Using Sketches and Ephemera to Create Quick Christmas / Winter Cards

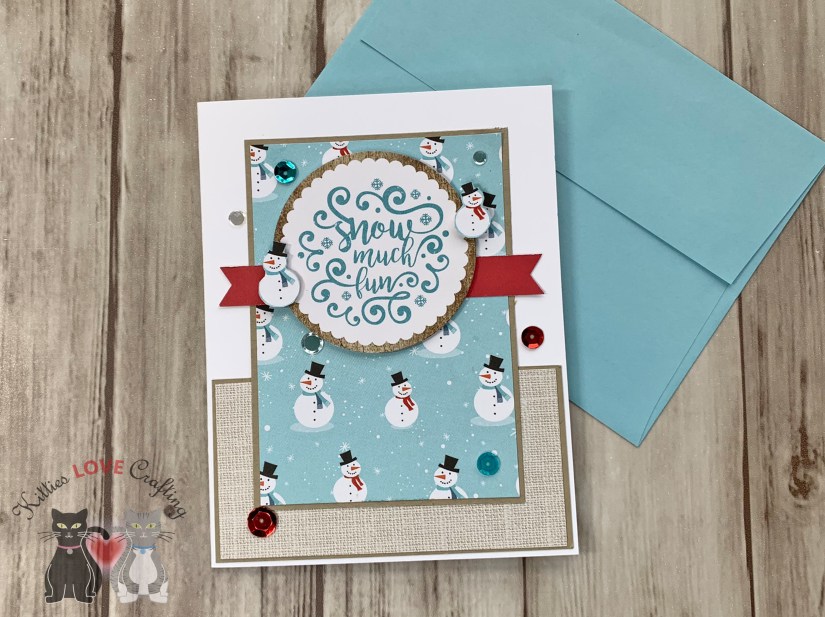
While I don’t often use sketches, I had these two packs of winter ephemera from Echo Park laying around for months and decided to finally make some cards with them. I also bought coordinating 6 x 6 and 12 x 12 paper pads. I used some pre-designed card sketches to take some guesswork out of the process. These cards will also be available in my shop on November 10th.

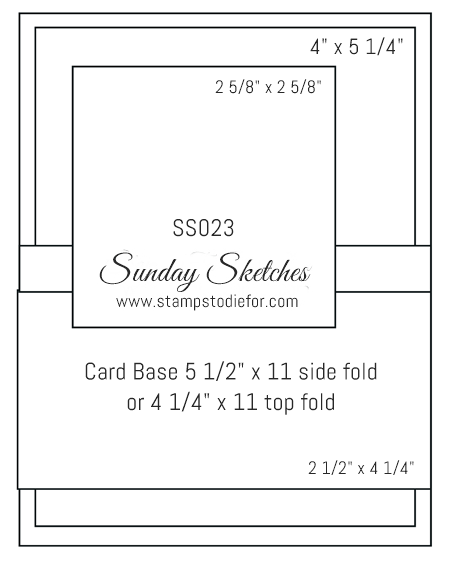
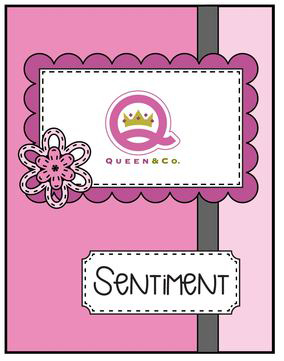
For the first card, I used Sunday Sketches SS023. For the card base, I cut a piece of Stampin’ Up! Night Of Navy 8-1/2″ X 11″ Cardstock to 5-1/2 x 8-1/2″and scored at 4 1/4″. Then cut all the pieces of pattern paper for the background from the Echo Park – Celebrate Winter Collection 6 x 6 Paper Pad as per the sketch measurements. I matted all the pattern layers with Night Of Navy 8-1/2″ X 11″ Cardstock; I made those layers 1/8-inch larger.

I adhered the largest panel (4 x 5-1/4″) to the card base and then the other two pieces of pattern paper. I trimmed those with some Love From Lizi Pin Stripe Peel-Off Stickers in Red Mirror. I used a large snowman gift tag from the Echo Park’s A Perfect Winter Frames & Tags Ephemera. I matted that with the same Stampin’ Up! Night Of Navy 8-1/2″ X 11″ Cardstock. I added a Lawn Fawn’s Peppermint Twine to the tag and added it to the card with 3M Foam Tape to pop it up. I finished it off with some Nuvo Crystal Drops in Autumn Red.

On the inside of the card, I cut a piece of Neenah 110lb Classic Crest Cardstock 8.5″X11″ to 4 x 5-1/4″ and added a strip of the blue plaid pattern paper measuring 1-1/2 x 5-1/4″. I stamped a greeting from Lawn Fawn’s Merry Messages in Stampin’ Up! Real Red Ink.

Dimensions


For the second card, I used Queen & Company’s sketch for inspiration. I did a portrait version and altered it a bit. For the card base, I cut a piece of Neenah 110lb Classic Crest Cardstock 8.5″X11″ to 5-1/2 x 8-1/2″and scored at 4 1/4″. Then cut the two pieces of pattern paper for the background from the Echo Park – Celebrate Winter Collection 6 x 6 Paper Pad as per the sketch measurements. I added Love From Lizi Pin Stripe Peel-Off Stickers in Red Mirror to the strip in the background. I rounded the corners on all the pieces and adhered them to the card.

I matted the tag with the little girl with some Stampin’ Up!’s Real Red 8-1/2″ X 11″ Cardstock and the sentiment block from Echo Park’s I Love Winter Ephemera Die Cuts with a plaid pattern paper from the Echo Park – Celebrate Winter Collection 6 x 6 Paper Pad. I adhered both to the card flat and added a bow with 1/4″ satin red ribbon. I finished it off with some WHITE BLIZZARD Nuvo Glitter Drops.

On the inside of the card, I added a strip of the mitten pattern paper measuring 1 x 5-1/2″ to the right side of the card. I stamped a greeting from Lawn Fawn’s Merry Messages in Stampin’ Up! Real Red Ink.

Dimensions


For the third card, I used paper Play Sketch 53. For the card base, I cut a piece of Neenah 110lb Classic Crest Cardstock 8.5″X11″ to 5-1/2 x 8-1/2″and scored at 4 1/4″. I cut a piece of Crafter’s Companion Shimmering Cardstock, 6 by 6-Inch, White Pearl to 4 x 5-1/4″. Then cut two pieces of pattern paper from the Echo Park – Celebrate Winter Collection 6 x 6 Paper Pad to 3/4 x 4″ and 1/2 x 4″. I adhered the two pattern pieces together, leaving about 1/4″ of the blue plaid paper exposed. I trimmed those off with Love From Lizi Pin Stripe Peel-Off Stickers in Red Glitter.

I adhered the Snow banner from Echo Park’s I Love Winter Ephemera Die Cuts to the card towards the bottom and then adhered the two strips above that. I trimmed down the sentiment block from one of the cut-apart pages of the Echo Park – Celebrate Winter Collection 6 x 6 Paper Pad and adhered it on an angle to the right side of the card. Trimmed the excess off the edge. I fussycut the snowman from one of the tags from Echo Park’s A Perfect Winter Frames & Tags Ephemera and popped him onto the card using Stampin’ Dimensionals. I finished off the card by adding some WHITE BLIZZARD Nuvo Glitter Drops.

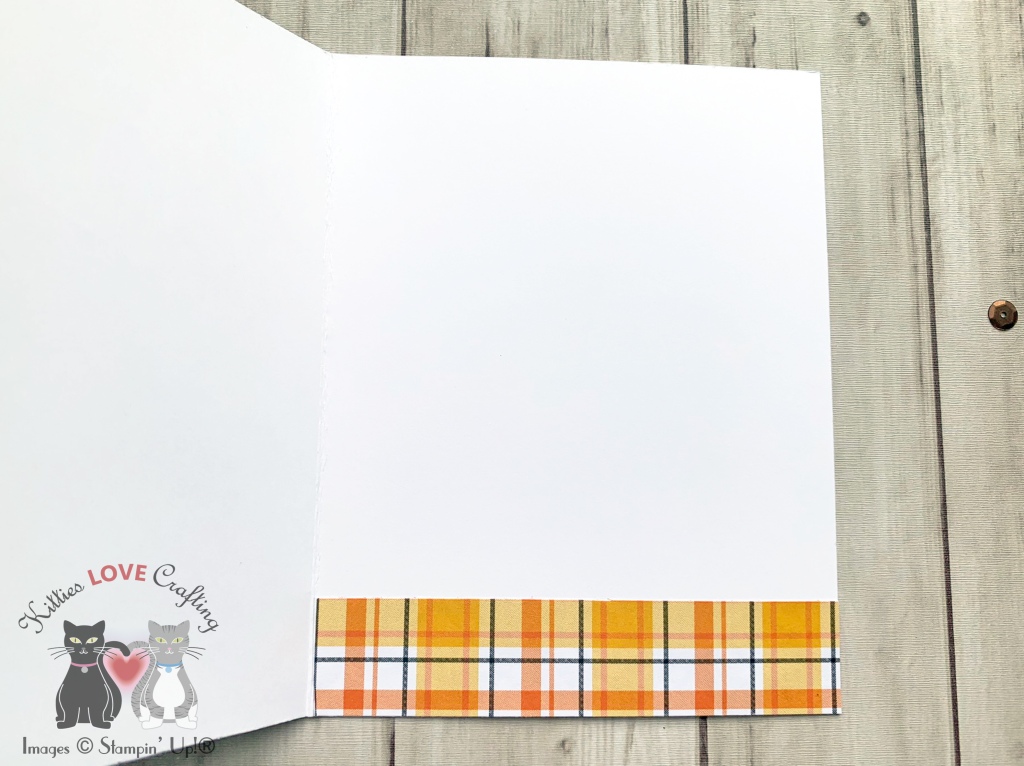
On the inside of the card, I added a strip of the striped pattern paper measuring 3/4 x 4-1/4″ to the right side of the card. I stamped a greeting from Lawn Fawn’s Merry Messages in Stampin’ Up! Real Red Ink.

Dimensions


For the fourth card, I used Queen & Company’s sketch for inspiration. For the card base, I cut a piece of Neenah 110lb Classic Crest Cardstock 8.5″X11″ to 5-1/2 x 8-1/2″and scored at 4 1/4″. I cut a piece of Echo Park – Celebrate Winter Collection 6 x 6 Paper Pad to 4 x 5-1/4″ and a strip in another pattern to to 1 x 5-1/4″. I adhered the two pattern pieces to the card and added some Love From Lizi Sway Peel-Off Stickers in Silver Mirror.

I took the little white bear tag from Echo Park’s A Perfect Winter Frames & Tags Ephemera and adhered him to a piece of Stampin’ Up!’s Real Red 8-1/2″ X 11″ Cardstock which I diecut using a scallop rectangle from the Queen & Company’s Foundation Dies #2. I adhered that to the card and matted the sentiment strip from the same ephemera pack with Neenah 110lb Classic Crest Cardstock 8.5″X11″. I popped up the sentiment using some 3M Foam Tape.

I stamped and diecut 4 snowflakes from the Catherine Pooler Joyful Flakes Stamp Set , 2 using Stampin’ Up!’s Night Of Navy Classic Ink and 2 using Versamark Ink and Simon Says Stamp Silver Embossing Ink onto Neenah 110lb Classic Crest Cardstock 8.5″X11″. I layered two of them together and adhered all the snowflakes to the card, popping up two of them using Stampin’ Dimensionals. I finished off the card with some Nuvo Glitter Drops in Silver Moondust.

On the inside of the card, I stamped 3 snowflakes from Catherine Pooler Joyful Flakes Stamp Set with Stampin’ Up!’s Night Of Navy Classic Ink and a greeting from Lawn Fawn’s Merry Messages in Stampin’ Up! Real Red Ink.

Dimensions


For the fifth card, I used Sunday Sketches SS022. For the card base, I cut a piece of Neenah 110lb Classic Crest Cardstock 8.5″X11″ to 5-1/2 x 8-1/2″and scored at 4 1/4″. I cut a piece of snowman paper from Echo Park – Celebrate Winter Collection 6 x 6 Paper Pad to 3 x 5-1/4″ and matted it with Stampin’ Up! Crumb Cake 8-1/2″ X 11″ Cardstock and another piece of beige fabric weave texture pattern paper to 2 x 4″, matted it with Stampin’ Up! Crumb Cake 8-1/2″ X 11″ Cardstock and adhered both to the card front.

I cut a banner from Stampin’ Up! Real Red 8-1/2″ X 11″ Cardstock to 1/2 x 3-1/2″. I added the banner and circle sentiment diecut from the Echo Park’s A Perfect Winter Frames & Tags Ephemera to the card. I popped up the circle using Stampin’ Dimensionals and fussycut two of the little snowman from the pattern paper and pooped them up as well. I finished off the card with some clear, red and aqua sequins.

On the inside of the card, I cut a strip of the beige fabric weave texture pattern paper to 1″ x 4-1/4″ and the snowman paper 3/4 x 4-1/4″ and adhered them to the bottom of the inside of the card. I stamped a greeting from Lawn Fawn’s Merry Messages in Stampin’ Up! Real Red Ink.

Dimensions


For the sixth card, I cut a piece of Neenah 110lb Classic Crest Cardstock 8.5″X11″ to 5-1/2 x 8-1/2″and scored at 4 1/4″. I cut a piece of blue plaid paper from Echo Park – Celebrate Winter Collection 6 x 6 Paper Pad to 3 x 5-1/4″, a piece of the red tree pattern paper to 2-1/4 x 4″, and a piece of the stripe paper to 3/4 x 4″ and matted that strip with Neenah 110lb Classic Crest Cardstock 8.5″X11″. I added some Love From Lizi Pin Stripe Peel-Off Stickers in Red Glitter to the striped paper and adhered all the pattern paper to the front of the card.

I chose a snowman tag from Echo Park’s A Perfect Winter Frames & Tags Ephemera and Echo Park – I Love Winter Ephemera Die Cuts, matted them with Neenah 110lb Classic Crest Cardstock 8.5″X11″ and adhered them to the card. I found some chipboard snowflakes in my stash and heat embossed them with Versamark Ink and Wow Opaque Bright White Embossing Powder and adhered them to the card. I finished off the card by adding Nuvo – Jewel Drops – Sea Breeze and Nuvo Crystal Drops in Autumn Red

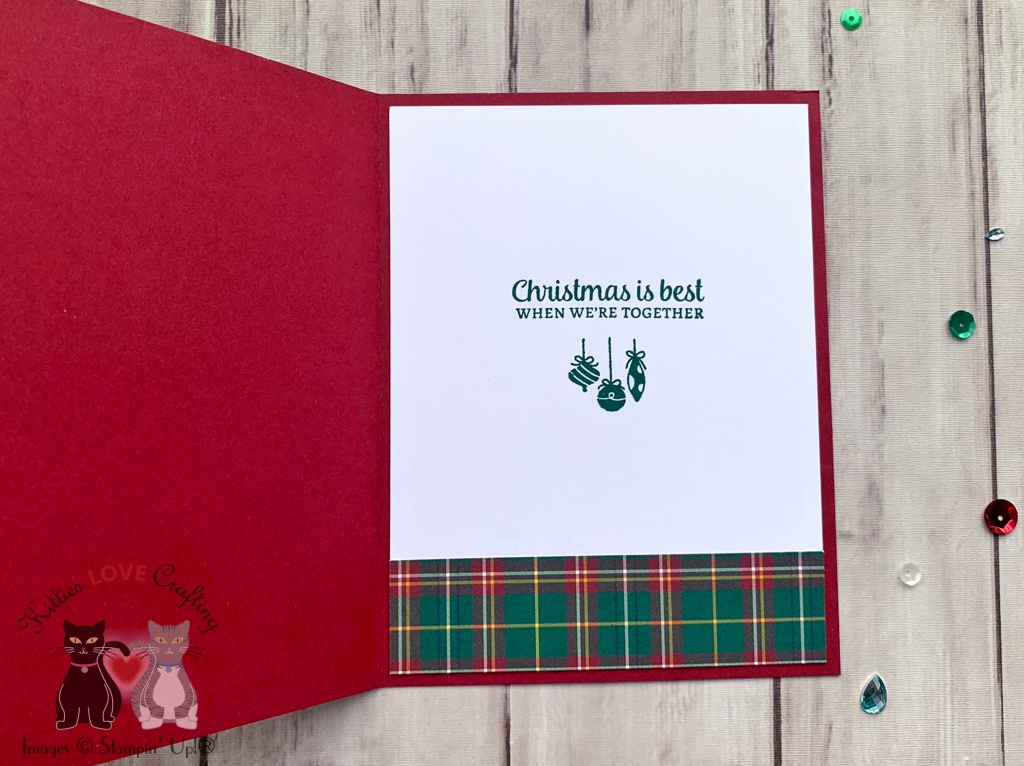
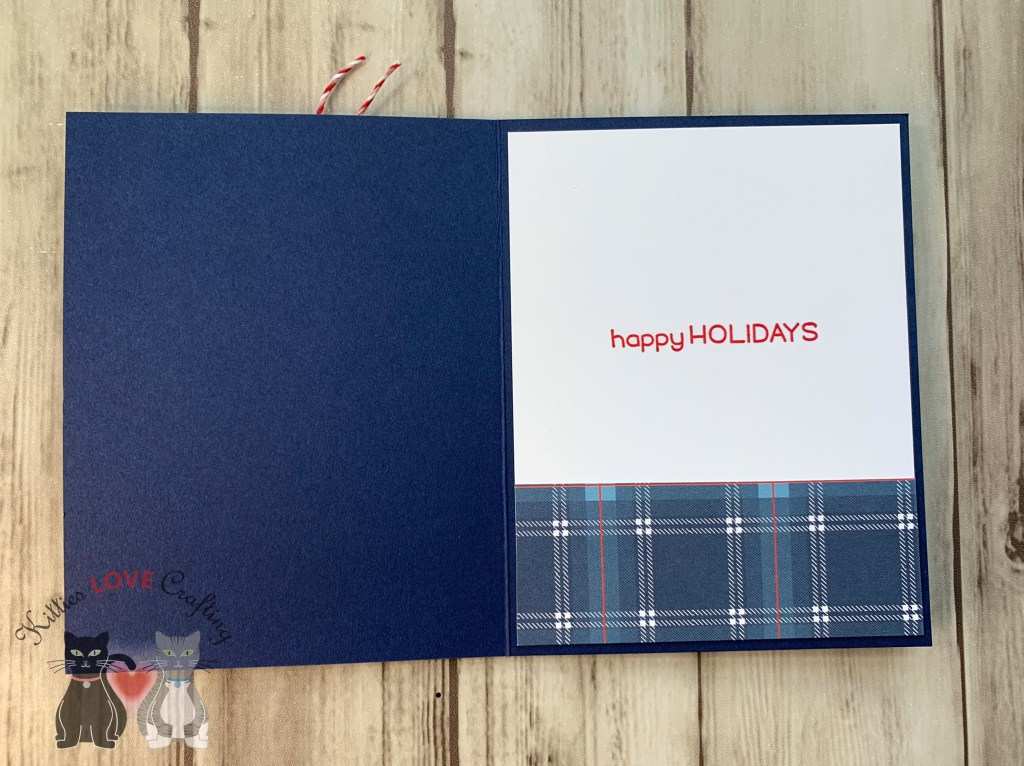
On the inside of the card, I cut a strip of the blue plaid pattern paper to 1″ x 4-1/4″ and adhered them to the bottom of the inside of the card. I stamped a greeting from Lawn Fawn’s Merry Messages in Stampin’ Up! Real Red Ink.

Dimensions


https://linkdeli.com/widget.js?1559654439292

Thanks for reading this post and I hope I’ve inspired you to give these cards a try on your own. Leave comments or questions below or feel free to email me.