Emboss Resist Technique, Halloween, Holidays 2021, Shaker

Boo Shaker Card featuring Honey Bee Stamps Buzzword Dies

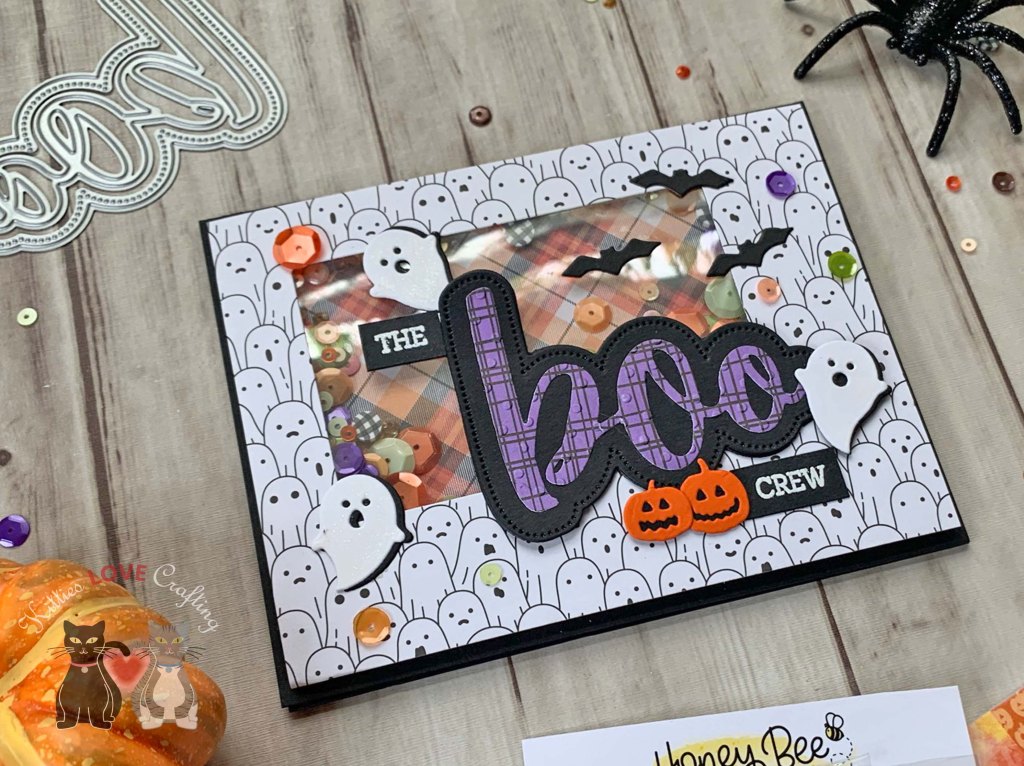
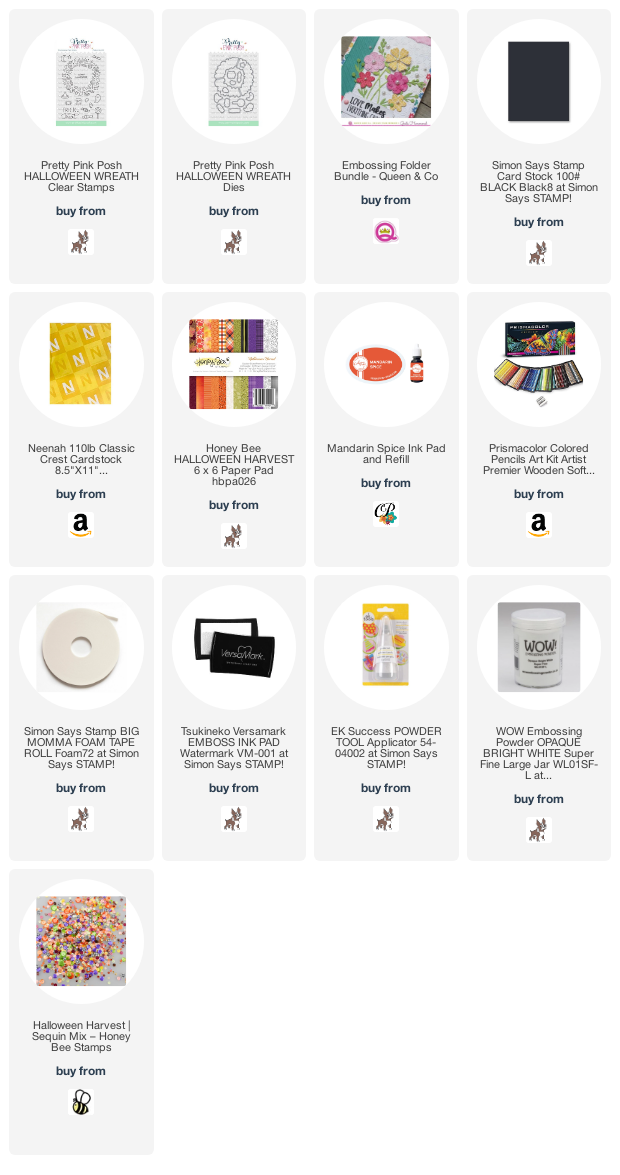
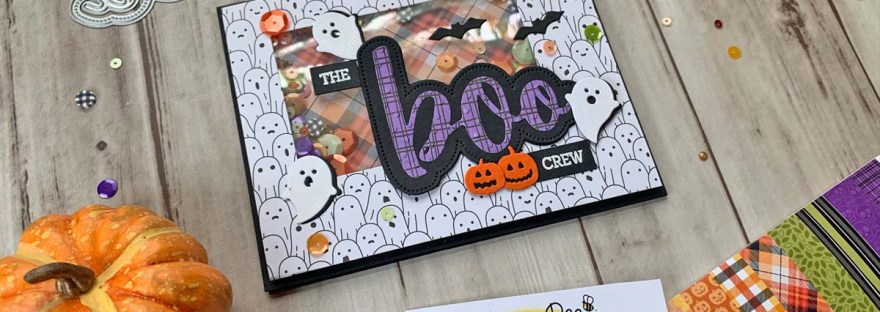
Hello friends. I’ve got another cute Halloween card to share with you all. This is a very simple shaker card using the Honey Bee Stamps Boo Buzzword dies and the Honey Bee Stamps Halloween Harvest 6×6 Paper Pad. Very little stamping and absolutely no coloring involved. I love making these kinds of cards!

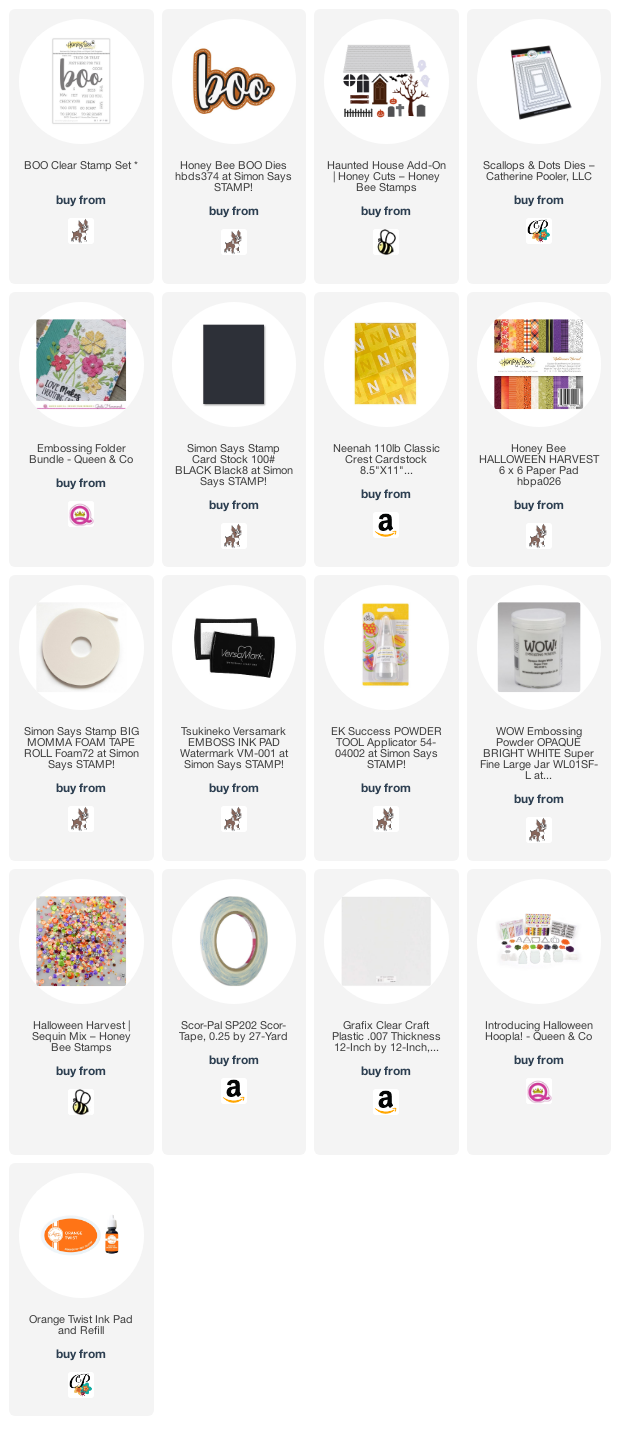
I started by cutting a piece of Simon Says Stamp 100lb Black 8-1/2 x 11″ Cardstock to 5-1/2 x 8-1/2″ and scored at 4-1/4″ to make the card base. I also cut a piece of the Honey Bee Stamps Halloween Harvest 6×6 Paper Pad to 4 x 5-1/4″. I diecut a window from it with the Catherine Pooler Designs Scallops & Dots Dies, added a piece of acetate with double-side tape and added some 3M Foam Tape to make the shaker element. I added sequins from the Honey Bee Stamps Halloween Harvest Sequin Mix and backed it with another piece of pattern paper from the Honey Bee Stamps Halloween Harvest 6×6 Paper Pad.

I diecut the sentiment with the Honey Bee Stamps BOO Dies from the Honey Bee Stamps Halloween Harvest 6×6 Paper Pad and Simon Says Stamp 100lb Black 8-1/2 x 11″ Cardstock (for the shadow). I stamped the rest of the sentiment from the Honey Bee Stamps BOO Stamp Set onto some more black card stock with Versamark Ink and and heat embossed with WOW Embossing Powder in Super Fine Opaque Bright White.

I diecut ghosts, bats and pumpkins from the Honey Bee Stamps Haunted House Add-On (this die works with the House Builder Card Base Dieset) from Neenah 110lb Classic Crest Cardstock 8.5 X 11″, Simon Says Stamp 100lb Black 8-1/2 x 11″ Cardstock, and orange cardstock from my scrap stash.

I finished it off by adding some Honey Bee Stamps Halloween Harvest Sequin Mix.
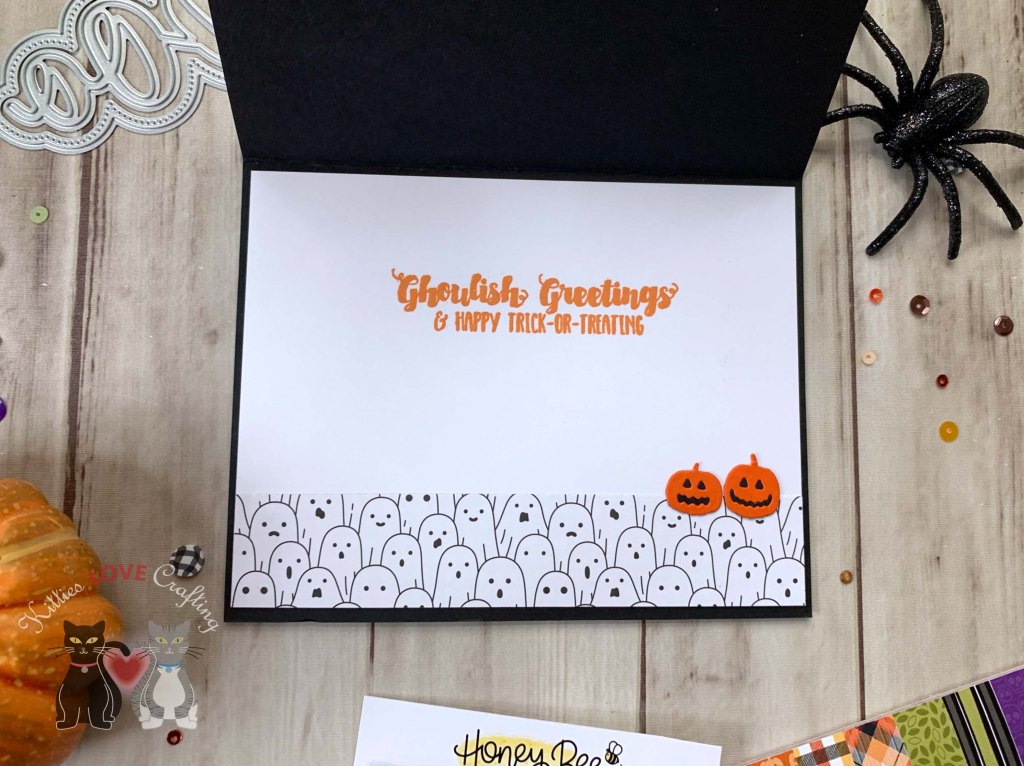
On the inside of the card, I cut a piece of Neenah 110lb Classic Crest Cardstock 8.5 X 11″ to 4 x 5-1/4” and a piece of pattern paper from Honey Bee Stamps Halloween Harvest 6×6 Paper Pad to 1 x 5-1/4″ and stamped a sentiment from the Queen and Co Halloween Hoopla Kit with Catherine Pooler Designs Orange Twist Ink.

Dimensions


Supplies

https://linkdeli.com/widget.js?id=f5e8378456858c916708

Thanks for reading this post. I hope you enjoyed and I’ve inspired you to give this cute Halloween shaker card a try for yourself. Leave comments or questions below or feel free to email me.

Halloween, Holidays 2021, Stenciled Background, Techniques

Easy Stenciled Halloween Background featuring Pretty Pink Posh and Lawn Fawn

Background stencils are a great option to make quick backgrounds! This cute Pretty Pink Posh CANDY BACKGROUND Stencil is a fun one to use for Halloween. This card came together very quickly with minimal stamping and coloring. I combined this background stencil and a couple of background and sentiment dies to create this quick and simple card.

I started by cutting a piece of Stampin’ Up! Elegant Eggplant 8-1/2 x 11″ Cardstock (retired) to 5-1/2 x 8-1/2″ and scored at 4-1/4″ to make the card base and a piece of Neenah 110lb Classic Crest Cards cut to 4-1/4 x 5-1/2″ which I stenciled with the Pretty Pink Posh CANDY BACKGROUND Stencil and Tim Holtz Carved Pumpkin, Peeled Paint, Crushed Olive and Wilted Violet Distress Inks. Then diecut it with Catherine Pooler Designs Scallops & Dots Dies and adhered it to the card base.

I diecut a sentiment one from Stampin’ Up! Black 12″ X 12″ Glitter Paper and two fromC1 + 0 Simon Says Stamp 100lb Black 8-1/2 x 11″ Cardstock with the Lawn Fawn Giant Happy Halloween Die Cut. Using three layers of the sentiment is a great way to add dimension to an image that is not easy to add foam tape.

I stamped the images from the Pretty Pink Posh Halloween Wreath Stampset with Memento Tuxedo Black Ink and colored them with Copic Markers. I used R20, C1 + 0 blender for the ghost; C1 + 0 blender, Y02 + Y13, YR04 + YR07 for the candy corn; C7 + C9 for the bat and spider; V06 + V09, YG17 + YG25 for the witch hat; YR04 + YR07 and YG17 + YG25, YG17 + YG25 and V06 + V09 for the candy; C1 + C7, YR04 + YR07 for the lollipop. I added white highlights with my Uni-Ball UM 153 Signo Broad Point Gel Pen and die cut with the coordinating dies.

I added some Glossy Accents to the candy and some shimmer with a Spectrum Noir Clear Overlay Sparkle Pen. I also added some Ebony Black Nuvo Drops.

On the inside of the card, I cut a piece of Neenah 110lb Classic Crest Cardstock 8.5 X 11″ to 4 x 5-1/4″ and stamped a sentiment and the witch hat from the Pretty Pink Posh Halloween Wreath Stampset with Memento Tuxedo Black Ink and colored the hat with copics.

Dimensions


Supplies

https://linkdeli.com/widget.js?id=f5e8378456858c916708

Thanks for reading this post. I hope you enjoyed and I’ve inspired you to give this sweet and easy Halloween card a try for yourself. Leave comments or questions below or feel free to email me.
Emboss Resist Technique, Halloween, Halloween, Holidays 2021

Easy Halloween Wreath Card Featuring Pretty Pink Posh

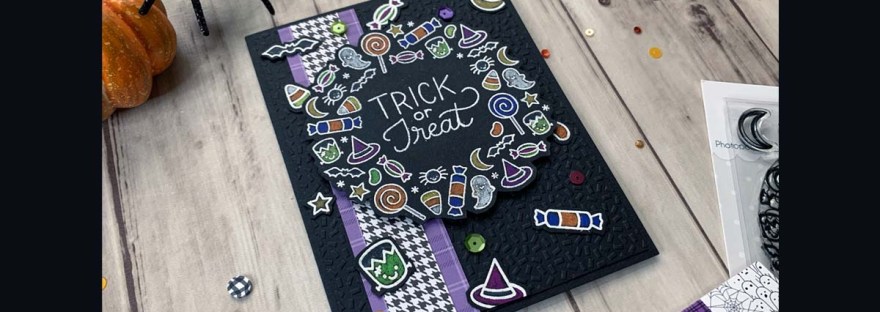
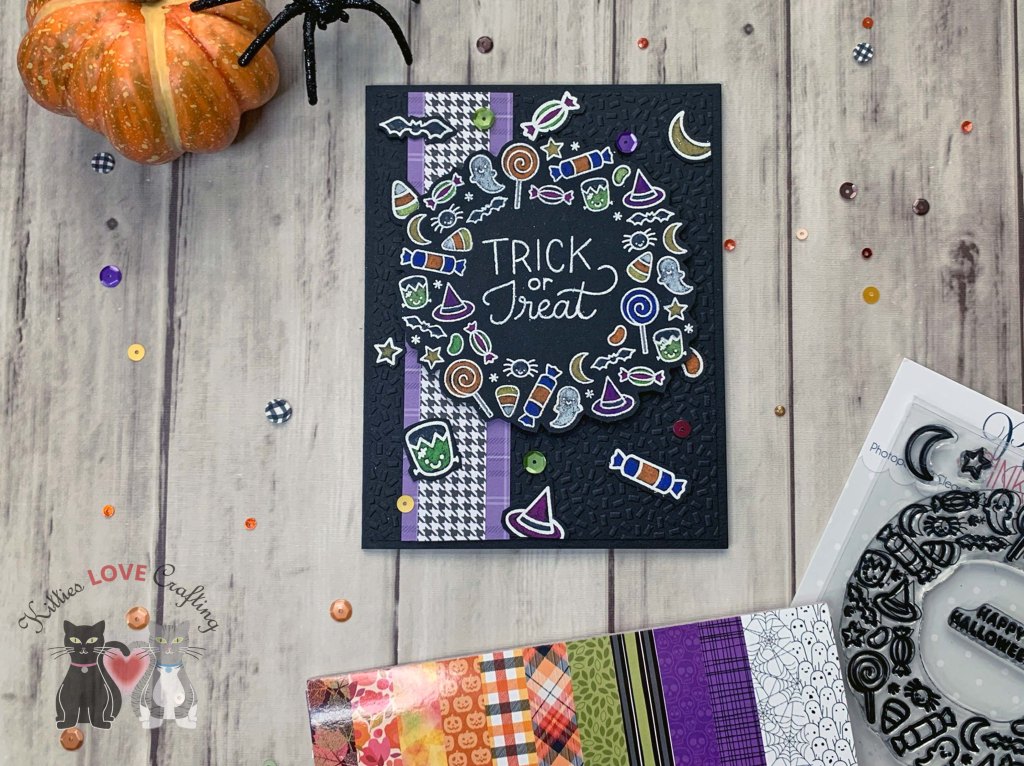
Hi friends. I’m back after some unplanned time off!It’s great to be creating again. I’m cutting it close but let’s start with a cute Halloween card. This stampset from Pretty Pink Posh, Halloween Wreath is so cute! I love all the fun images. They are easy to color with markers, pencils etc or leave them uncolored. You can also make a wreath from the singular images instead of using the wreath image.

I started by cutting a piece of Simon Says Stamp 100lb Black 8-1/2 x 11″ Cardstock to 5-1/2 x 8-1/2″ and scored at 4-1/4″ to make the card base and a second piece cut to 4 x 5-1/4″ which I embossed with an embossing folders from the Queen & Co’s Embossing Folder Bundle. I added a strip of pattern paper from the Honey Bee Stamps Halloween Harvest 6×6 Paper Pad measuring 3/4 x 5-1/4″ and another measuring 1-1/4 x 5-1/4″.

I stamped the wreath and all the images as well as a sentiment in the center from the Pretty Pink Posh Halloween Wreath Stampset with Versamark Ink and heat embossed with WOW Embossing Powder in Super Fine Opaque Bright White. I colored them with Prismacolor Pencils and diecut the images with the coordinating dies. Tip: Make sure to use a good amount of anti-static powder when using embossing powder on dark cardstock or it will stick where you don’t want. I used 3M Foam Tape to pop up the wreath.

I finished it off by adding some sequins from the Honey Bee Stamps Halloween Harvest Sequin Mix.

On the inside of the card, I cut a piece of Neenah 110lb Classic Crest Cardstock 8.5 X 11″ to 4 x 5-1/4″ and the same purple paper I used on the front of the card from Honey Bee Stamps Halloween Harvest 6×6 Paper Pad to 1 x 5-1/4″ and stamped a sentiment from the Pretty Pink Posh Halloween Wreath Stampset with Catherine Pooler Designs Mandarin Spice Ink. I also added some extra images I had stamped.

Dimensions


Supplies

https://linkdeli.com/widget.js?id=f5e8378456858c916708

Thanks for reading this post. I hope you enjoyed and I’ve inspired you to give this sweet and easy Halloween card a try for yourself. Leave comments or questions below or feel free to email me.