Hi friends. I saw a video by Nicol Spohr comparing these two techniques with Easter Cards and I thought it would be cute to try it with the strawberry dies from Lawn Fawn.

For the first card, I cut a piece of Neenah 110lb Classic Crest Cardstock to 7 x10″ and scored at 5″ to create the card base. I also cut a piece of Lawn Fawn GOTTA HAVE GINGHAM RAINBOW 6 x 6 Collection Pack cut to 4-3/4″ x 6″ and a piece of Doodlebug CUTE AND CRAFTY 12×12 Inch Petite Print Assortment Paper Pack cut to 4-3/4 x 6-3/4″ for the top panel. To seperate the two papers I added Love From Lizi Pin Stripe Peel-Off Stickers in Lilac Mirror.

I diecut the bowl, strawberries, and leaves from Neenah 110lb Classic Crest Cardstock with the Lawn Fawn Strawberry Patch Die Cuts and Lawn Fawn Outside In Stitched Strawberry Die Cuts. Then used distress oxide inks to color all the pieces. I used Tim Holtz Worn Lipstick and Candied Apple Distress Oxide Inks for the strawberry fronts and sprayed some water on them with a Distress Sprayer bottle, Fossilized Amber Distress Oxide Ink for the strawberry backs, Black Soot Distress Ink for the eyes and mouth, Spun Sugar Distress Oxide Ink for the cheeks, Peeled Paint and Mowed Lawn Distress Oxide Inks for the leaves, Broken China Distress Oxide Ink for the bowl, Squeezed Lemonade, Worn Lipstick and Tumbled Glass for the flowers.
After I adhered all the images to the card, I stamped a bee and a bee trail onto a piece of Neenah 110lb Classic Crest Cardstock from the Simon Says Clear Stamps BEE YOURSELF Stampset with Memento Tuxedo Ink and colored it with Copic Markers. I used Y13, Y17 & Y18, N5 & N8, R20, BG000 & 0. I popped him up with Stampin’ Dimensionals.

I stamped a sentiment from Lawn Fawn HOW YOU BEAN STRAWBERRIES ADD-ON Clear Stamps and Dies onto a piece of Neenah 110lb Classic Crest Cardstock with Memento Tuxedo Ink and cut it to 3/8 x 2-7/8″.
I finished it off by adding some highlights to the strawberries with a White Gel Pen and Tonic Ruby Slipper Nuvo Glitter Drops to the white flowers and Morning Dew Nuvo Crystal Drops to the eyes.
On the inside of the card, I adhered a piece of Lawn Fawn GOTTA HAVE GINGHAM RAINBOW 6 x 6 Collection Pack cut to 1 x 5″ and a piece of 1-3/16 x 5″ of Doodlebug CUTE AND CRAFTY 12×12 Inch Petite Print Assortment Paper Pack. Then diecut the word ‘happy’ from Neenah 110lb Classic Crest Cardstock with Honey Bee Stamps Donut Worry Dies (retired) and colored it with Mowed Lawn Distress Oxide Ink to create an ombre effect. I stamped a sentiment from the Lawn Fawn How You Bean? Stampset with Memento Tuxedo Ink. I also added a small strawberry to the bottom.

Dimensions
- Card Base = 7 x 10″ and scored at 5″ Neenah 110lb Classic Crest Cardstock
- Top Panel = 4-3/4″ x 6″ Lawn Fawn GOTTA HAVE GINGHAM RAINBOW 6 x 6 Collection Pack; 4-3/4 x 6-3/4″ Doodlebug CUTE AND CRAFTY 12×12 Inch Petite Print Assortment Paper Pack
- Inside Panel = 1 x 5″ Lawn Fawn GOTTA HAVE GINGHAM RAINBOW 6 x 6 Collection Pack; 1-3/16 x 5″ Doodlebug CUTE AND CRAFTY 12×12 Inch Petite Print Assortment Paper Pack
For the second card, I cut a piece of Neenah 110lb Classic Crest Cardstock to 7 x10″ and scored at 5″ to create the card base and another cut to 4-3/4 x 6″, which I inked with Tim Holtz Worn Lipstick Distress Oxide Ink and sprayed some water on them with a Distress Sprayer bottle. I also cut a piece of Lawn Fawn GOTTA HAVE GINGHAM RAINBOW 6 x 6 Collection Pack to 4-3/4 x 6-3/4″ for the top panel. To seperate the two papers I added Love From Lizi Pin Stripe Peel-Off Stickers – Gold Mirror Moondust.
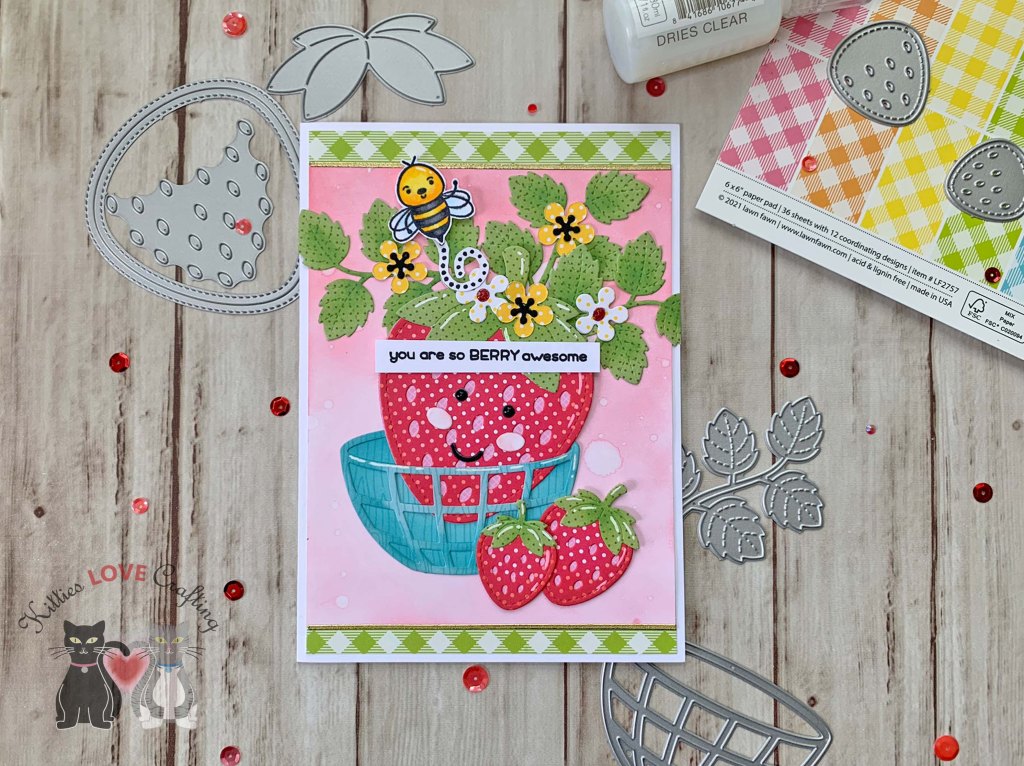
I diecut the bowl, strawberries, and flowers from Doodlebug CUTE AND CRAFTY 12×12 Inch Petite Print Assortment Paper Pack, the eyes, mouth and flower centers from Simon Says Stamp 100# Black Cardstock, the leaves from Authentique 6 x 6 Emerald Papers (retired) and the cheeks from Neenah 110lb Classic Crest Cardstock.
Then I used distress oxide inks to color the strawberry fronts, the bowl and the leaves to add some dimension. I used Tim Holtz Candied Apple Distress Oxide Ink for the strawberry fronts, Spun Sugar Distress Oxide Ink for the cheeks, Mowed Lawn Distress Oxide Ink for the leaves, Broken China Distress Oxide Ink for the bowl.

After I adhered all the images to the card, again I stamped a bee and a bee trail onto a piece of Neenah 110lb Classic Crest Cardstock from the Simon Says Clear Stamps BEE YOURSELF Stampset with Memento Tuxedo Ink and colored it with Copic Markers. I used Y13, Y17 & Y18, N5 & N8, R20, BG000 & 0. I popped him up with Stampin’ Dimensionals.
I used the same sentiment as the previous card and cut it to 3/8 x 2-7/8″. I finished off the card by adding some highlights to the strawberries with a White Gel Pen and Tonic Ruby Slipper Nuvo Glitter Drops to the white flowers and Morning Dew Nuvo Crystal Drops to the eyes.

On the inside of the card, I adhered a piece of Lawn Fawn GOTTA HAVE GINGHAM RAINBOW 6 x 6 Collection Pack cut to 1 x 5″ and diecut the word ‘happy’ from Neenah 110lb Classic Crest Cardstock with Honey Bee Stamps Donut Worry Dies (retired) and colored it with Worn Lipstick and Candied Apple Distress Oxide Inks to create an ombre effect. I stamped a sentiment from the Lawn Fawn How You Bean? Stampset with Memento Tuxedo Ink. I also added a small strawberry to the bottom.
Dimensions
- Card Base = 7 x 10″ and scored at 5″ Neenah 110lb Classic Crest Cardstock
- Top Panel = 4-3/4″ x 6″ Neenah 110lb Classic Crest Cardstock; 4-3/4 x 6-3/4″ Lawn Fawn GOTTA HAVE GINGHAM RAINBOW 6 x 6 Collection Pack
- Inside Panel = 1 x 5″ Lawn Fawn GOTTA HAVE GINGHAM RAINBOW 6 x 6 Collection Pack
Supplies
 https://linkdeli.com/widget.js?id=f5e8378456858c916708
Thanks for reading this post! I hope you enjoyed and I’ve inspired you to make these cute cards yourself! If you want to share you creations with me tag me on instagram @kittieslovecrafting. Leave comments or questions below or feel free to email me.