Hello friends. This Lovely Layers: Cupcakes & More die set from Honeybee Stamps is so much fun to play with. Lots of options to create cupcakes, sundaes, ice cream cones and more! So many options…
Thanks for reading this post. I hope I’ve inspired you to give this cute mini slimline birthday card a try for yourself. Leave comments or questions below or feel free to email.
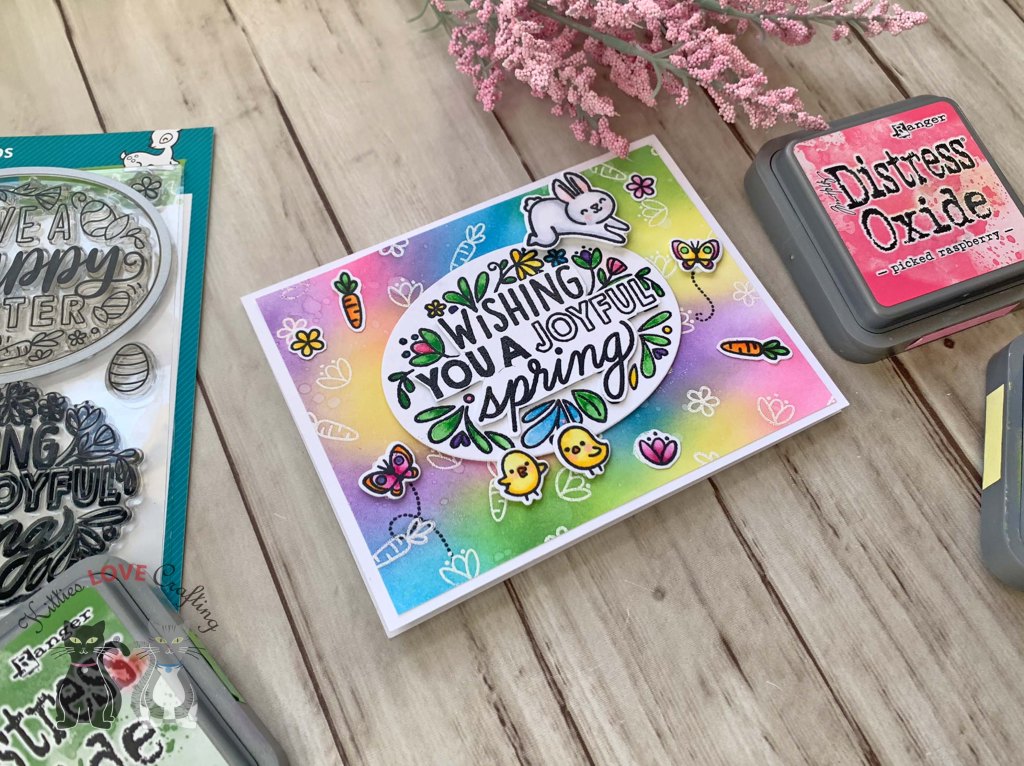
Hello friends. Here’s another cute card featuring the Lawn Fawn Giant Easter Messages. For this one I created a bright background using the emboss resist technique with Distress Oxides. I also watercolored the center panel for a softer look.
I colored the panel with my Kuretake GANSAI TAMBI Watercolors. Heat embossing the image first makes it easier for the watercolors to stay in place and not bleed. Then I die cut the sentiment with Stampin’ Up! Layering Ovals Dies (retired). As previously mentioned I also fussycut the second sentiment panel that I had stamped and heat embossed and popped it up with 3M Foam Tape.
I colored them with Copic Markers. I used C0, C1, R20 & 0 for the bunnies; Y11, Y13 & Y18, R20, YR07 for the chics; RV52, RV19 & RV55, Y13 & Y18, V22, V25 & BV17 for the flowers; YG06 & YG67, and YR07 & YR04 for the carrots; RV52, RV19 & RV55, Y13 & Y18, V22, V25 & BV17, and YR07 & YR04 for the butterflies.
Thanks for reading this post. I hope I’ve inspired you to give this cute and bright Spring card a try for yourself. Leave comments or questions below or feel free to email.
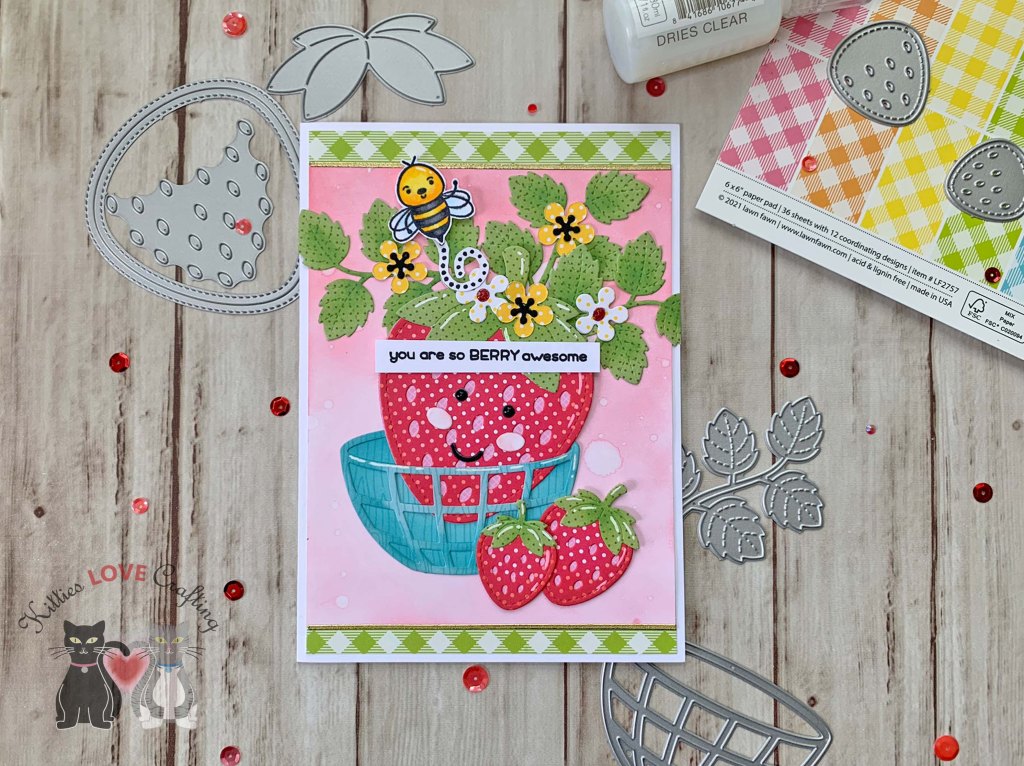
Hi friends. I saw a video by Nicol Spohr comparing these two techniques with Easter Cards and I thought it would be cute to try it with the strawberry dies from Lawn Fawn.
I finished it off by adding some highlights to the strawberries with a White Gel Pen and Tonic Ruby Slipper Nuvo Glitter Drops to the white flowers and Morning Dew Nuvo Crystal Drops to the eyes.
Thanks for reading this post! I hope you enjoyed and I’ve inspired you to make these cute cards yourself! If you want to share you creations with me tag me on instagram @kittieslovecrafting. Leave comments or questions below or feel free to email me.
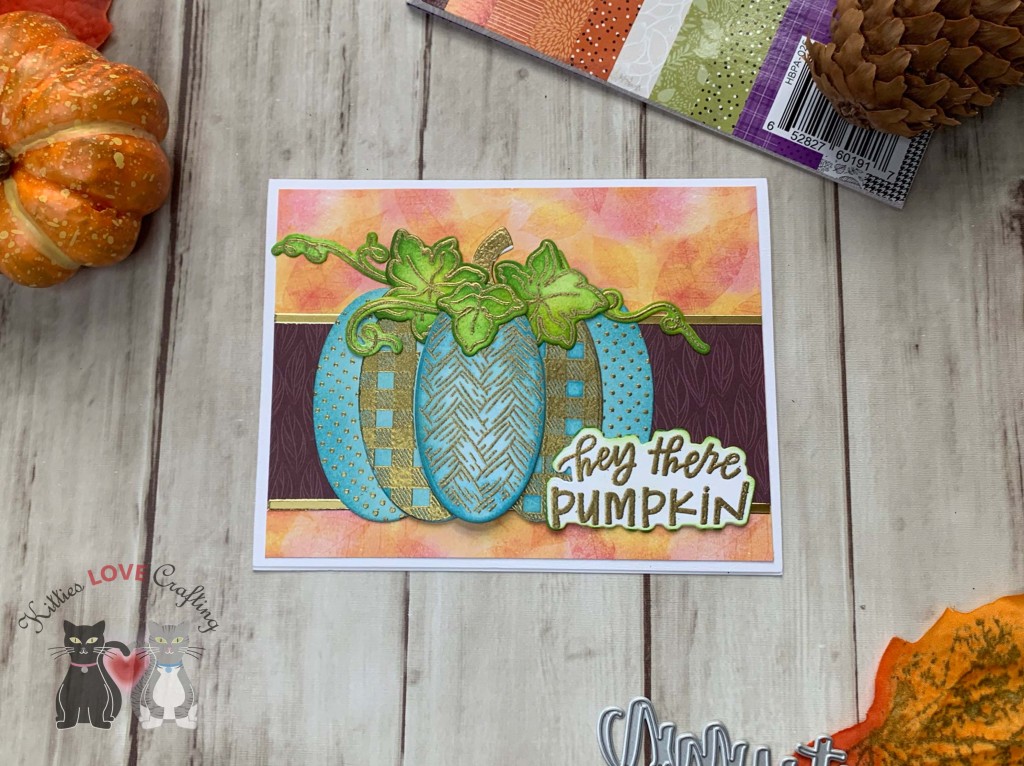
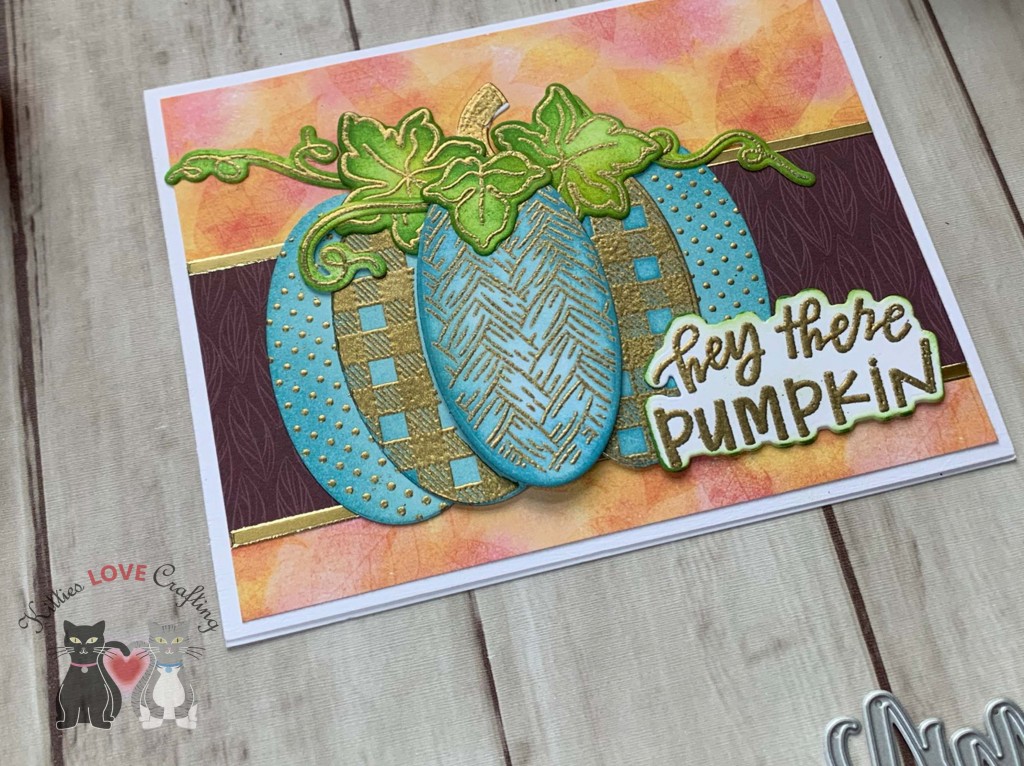
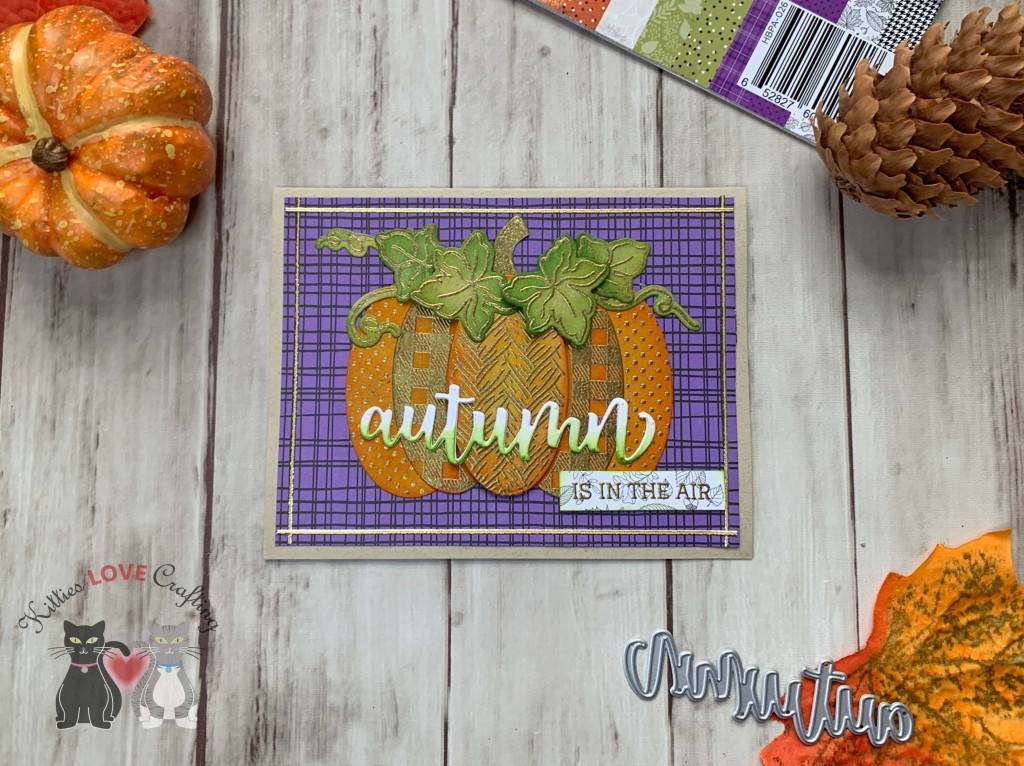
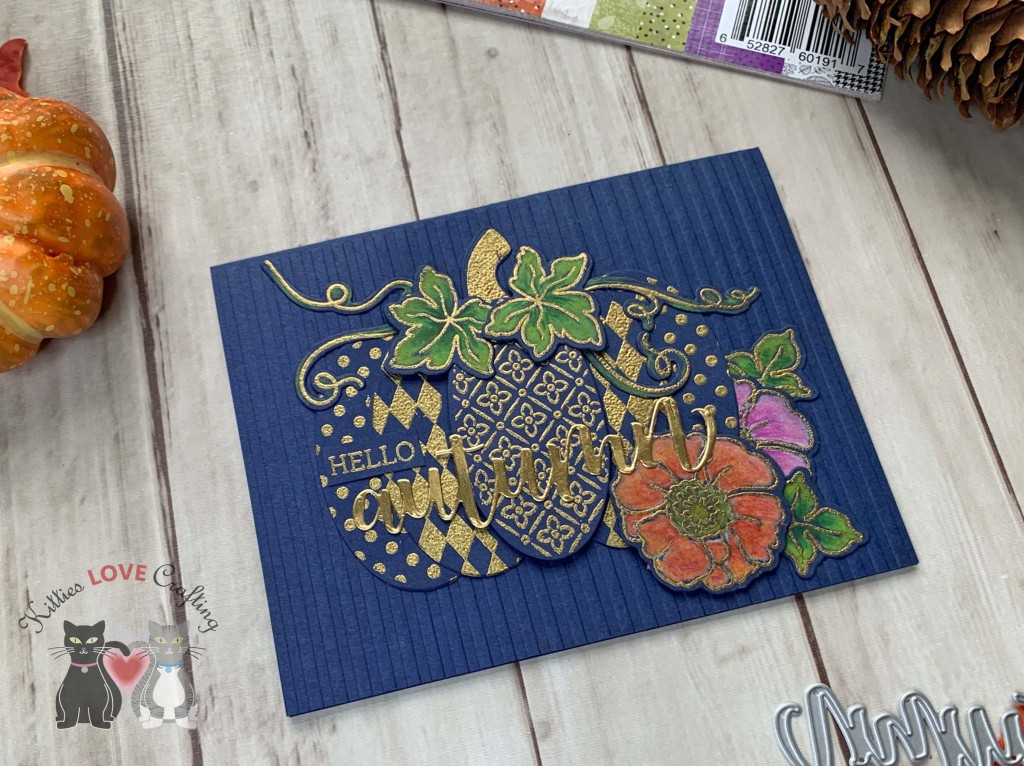
I love this new Patchwork Pumpkin Stampset from Honey Bee Stamps! You can create all kinds of cute pumpkins. You can also add flowers and the coordinating dies makes it easy to cut everything out. I made three cards using different color papers and coloring methods but with the same embossing powder. I wanted to see how to create different cards by just making subtle changes. Using pattern papers and embossing folders is also an easy way to add interest.
For the second card, I started by cutting a piece of Catherine Pooler Sand Dunes 8-1/2 x 11″ Cardstock (discontinued-any kraft cardstock will work) to 5-1/2 x 8-1/2″ and scored at 4-1/4″ to make the card base and cut a piece of the purple paper from the Honey Bee Stamps Halloween Harvest 6×6 Paper Pad to 4 x 5-1/4″.
I used Versamark Ink to stamp several of the pattern pumpkins, leaves, curly vines and the stem from the Honey Bee Stamps Patchwork Pumpkin Stampset onto some Catherine Pooler Sand Dunes 8-1/2 x 11″ Cardstock (retired) and heat embossed with Gold Embossing Powder. Then diecut all the pieces with the oval die included in the coordinating dieset. I used Tim Holtz Mustard Seed and Carved Pumpkin Distress Inks to color the pumpkin and Crushed Olive and Mowed Lawn to color the leaves and vines. I used 3M Foam Tape to pop up the center piece of the pumpkin and some of the leaves.
Thanks for reading this post. I hope you enjoyed and I’ve inspired you to give these cute Fall cards a try for yourself. Leave comments or questions below or feel free to email me.


 https://linkdeli.com/widget.js?id=f5e8378456858c916708