Hi friends. Using the emboss resist technique to create a background is super easy and creates a very high contrast, impactful visual. Let me show you how easy this was to create.

For this card, I cut a piece of Simon Says Stamp 100# Black Cardstock to 8-1/2 x 5-1/2″ and scored at 4-1/4″ to create the card base. Then cut a piece of Neenah 110lb Classic Crest measuring 4 x 5-1/4″ and embossed it with Tim Holtz Cling Mount Stamps: Halloween Silhouettes. I used Versamark Ink to stamp the background, added WOW Opaque Bright White Super Fine Embossing Powder and heat set with my heat gun. Then colored it with Tim Holtz Peeled Paint and Black Soot Distress Oxide Inks. Remember to wipe off any excess ink with apaper towel or cloth to clean off the white embossed areas.
I stamped the truck and pumpkins from Honey Bee Stamps Big Pickup Tailgate 6×6 Stamp Set and Honey Bee Loads of Fall Stamp Set onto Neenah 110lb Classic Crest Cardstock with Memento Tuxedo Black Ink and colored with Copic markers.

I used YR16, YR18, & YR09, N2, N6 & N8 for the pumpkins; G94 & G99 for the leaves; BV11, BV08, V25 & V28 for the truck bed; Y13 & Y17 for the truck head lights; C1, C3, C5, C7, & C9 for the metal on the truck; YG05, YG17 & YG67 for the license plate; and BG000 & 0 for the truck windows.
I stamped the sentiment from Papertrey ink Pumpkin Expressions Stamp Set (retired) onto Neenah 110lb Classic Crest with Catherine Pooler Midnight Ink. I fussycut the sentiments since I don’t have dies for this stampset.
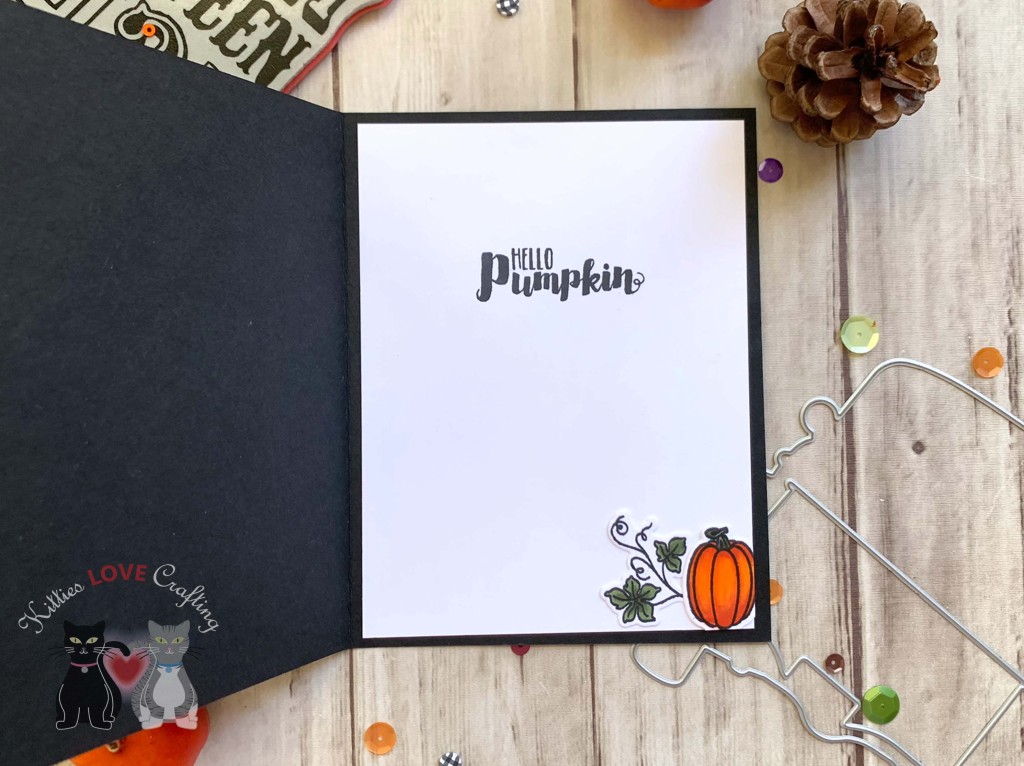
On the inside of the card, I cut a piece of Neenah 110lb Classic Crest to 4 x 5-1/4″ and stamped a sentiment from Queen and Company Halloween Hoopla! Stampset with Memento Tuxedo Black Ink and added additional pumpkin and leaf vine.
Dimensions
- Card base = 5-1/2 x 8-1/2″ and scored at 4-1/4″ Simon Says Stamp 100# Black Cardstock
- Top panel = 4 x 5-1/4″ Neenah 110lb Classic Crest
- Inside panel = 4 x 5-1/4″ Neenah 110lb Classic Crest
Supplies
 https://linkdeli.com/widget.js?id=f5e8378456858c916708
Thanks for reading this post! I hope you enjoyed and I’ve inspired you to make this cute Halloween card yourself! If you want to share you creations with me tag me on instagram @kittieslovecrafting. Leave comments or questions below or feel free to email me.