Birthdays, Christmas

3 Techniques Using 1 Stamp

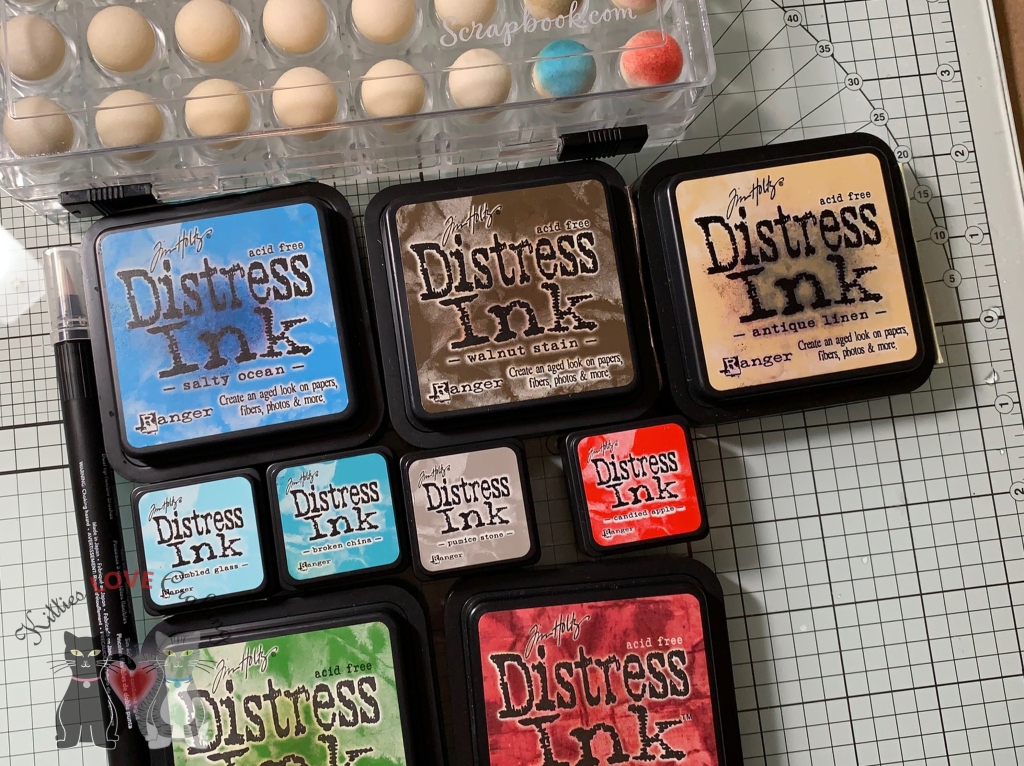
Hello friends. Today I’m focusing on using distress markers, ink and watercolors to create different looks using one stamp. I bought this Tim Holtz Wood Mount Iced Coffee Sketch Stamp several months ago and was saving it for the holidays because I don’t know about you but I’m all about specialty coffees during the holidays. These are available in my shop for purchase If you’re interested.

For the first card, I stamped the coffee cup image onto a piece of Montval Acid Free Coldpress Watercolor Paper, measuring 3-3/4 x 5” with Ranger Archival Jet Black Ink and colored the image with Distress Markers. I love distress markers and don’t use them enough! I used Pumice Stone and Picket Fence for the whipped cream, Shabby Shutters and Peeled Paint for the straw, Antique Linen and Ground Espresso for the coffee cup, Candied Apple and Fired Brick for the sleeve and Tumbled Glass for the background.

I cut a piece of Stampin’ Up! Real Red 8 1/2 x 11” Cardstock to 5-1/2 x 8-1/2″and scored at 4-1/4″ to make a card base. I cut a piece of red and white striped pattern paper from my stash to 4 x 5-1/4” and adhered it to the card base. I stamped a sentiment from the Lawn Fawn Simply Winter Sentiments with Peeled Paint Distress Oxide Ink to the top and adhered it to the card. I finished it off by adding some Nuvo Crystal Drops in Bottle Green.

On the inside of the card, I added a strip of the same red and white striped pattern paper, measuring 1 x 5-1/4” and stamped another greeting in Peeled Paint Distress Oxide Ink from the same stampset.

Dimensions


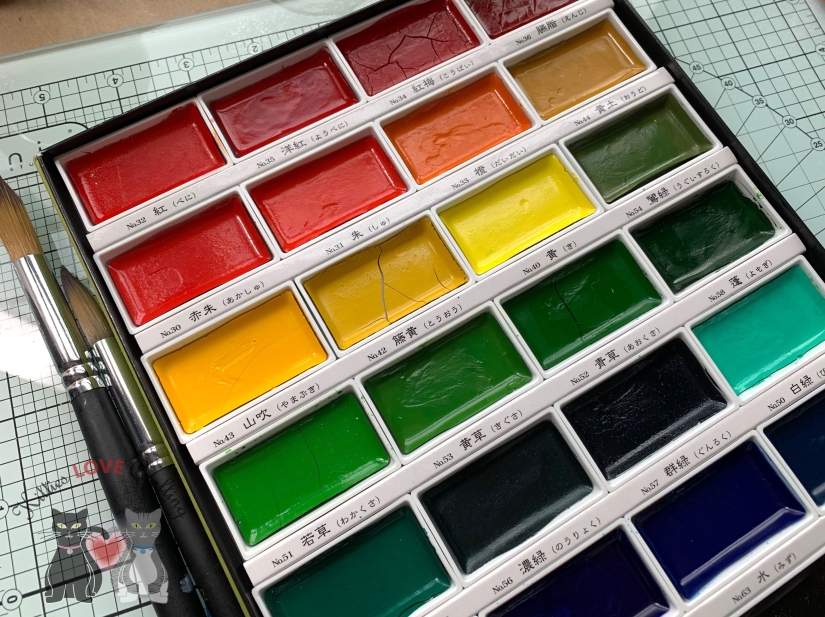
For the second card, I stamped the coffee cup image onto a piece of Montval Acid Free Coldpress Watercolor Paper, measuring 3-3/4 x 5” with Ranger Archival Jet Black Ink and colored the image with my Kuretake Gansai Tanbi 36 Watercolor Set. I taped the image panel down to my glass mat with some Blue Painters Tape and I used 20, 10, 64 and 95 for the whipped cream, 63 and 10 for the lid, 30 and 36 for the straw, 43, 47 and 10 for the coffee cup, 51 and 54 for the sleeve, and 50, 64, and 10 for the background. I added splashes with some of the gold watercolor from the set.

I cut a piece of Neenah 110lb Classic Crest Cardstock 8.5 X 11″ to 5-1/2 x 8-1/2″and scored at 4-1/4″ to make a card base. I cut a piece of Tim Holtz Idea-ology 8 x 8 Paper Stash METALLIC KRAFT STOCK to 4-1/4 x 5-1/2” and adhered it to the card base. While the watercolor panel dried, I stamped a sentiment from the Honeybee Stamps Shake-It Off Stampset, fussycut it and adhered it to the panel, then adhered it to the card base. I stamped the coffee bean from the Honeybee Stamps Shake-It Off Stampset with Ground Espresso Distress Oxide Ink, fussycut it and adhered to the card with Stampin’ Dimensionals. I finished it off by adding some Nuvo Crystal Drops in Metallic Bright Gold.

On the inside of the card, I stamped a birthday greeting in from Lawn Fawn’s Happy Happy Happy stampset with Candied Apple Distress Oxide Ink.

Dimensions


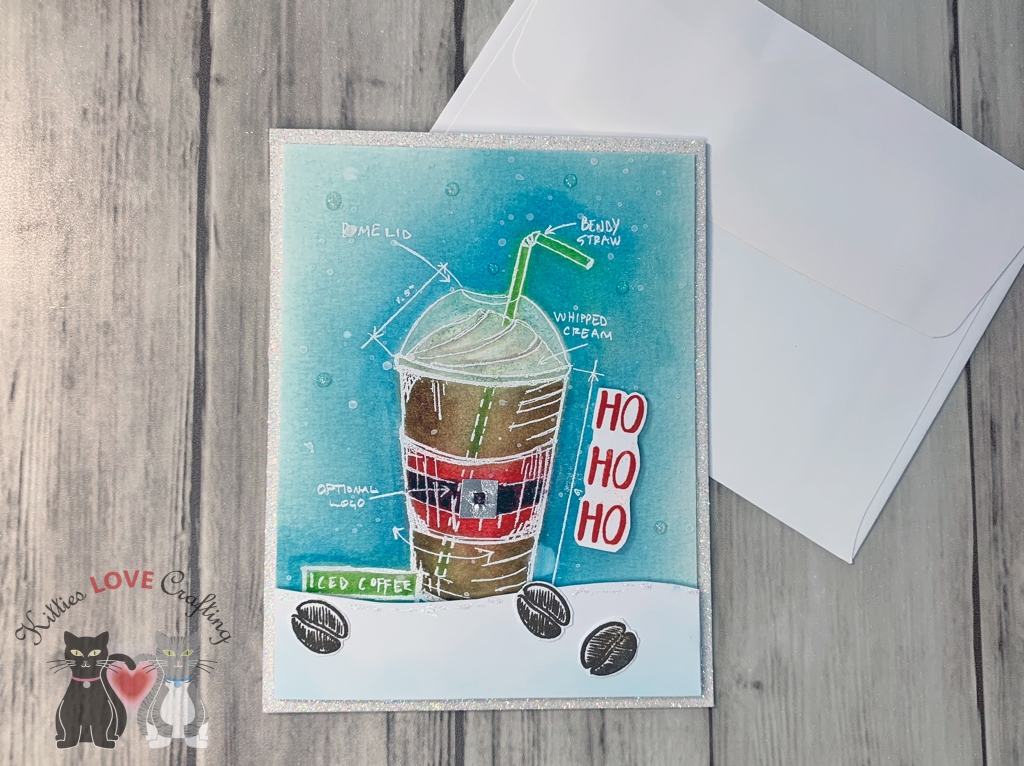
For the third card, I stamped the coffee cup image onto a piece of Montval Acid Free Coldpress Watercolor Paper, measuring 4 x 5-1/4” with WOW Opaque Bright White Embossing Powder and Versamark Clear Embossing Ink. I used distress Inks and daubers to color the image. I used Pumice Stone for the whipped cream, Tumbled Glass for the lid, Mowed Lawn for the straw and Iced Coffee sign, Antique Linen and Walnut Stain for the coffee cup, and 4-1/4 x 5-1/2 Apple, Fired Brick for the sleeve, and Tumbled Glass, Broken China, and Salty Ocean for the background. I sprayed water on the background to create spots.

With a black permanent marker, I colored in the middle section of the sleeve and added tiny square I fussycut from Tim Holtz Idea-ology 8 x 8 Paper Stash METALLIC KRAFT STOCK and adhered it to the sleeve.

I then created a snowy hill from Neenah 110lb Classic Crest Cardstock 8.5 X 11″ by cutting a curve by hand along one edge, then used Tumbled Glass to color the snow. I adhered it to the panel with some 3M Foam Tape.

I cut a piece of Neenah 110lb Classic Crest Cardstock 8.5 X 11″ to 5-1/2 x 8-1/2″and scored at 4-1/4″ to make a card base. I cut a piece of Simon Says Stamp Cardstock WHITE GLITTER Paper to 4-1/4 x 5-1/2” and adhered it to the card base. I adhered the card panel and hillside to the glitter paper with Tombow Mono adhesive. I stamped OH from Honeybee Stamps Shake-It Off Stampset upside down to create HO HO HO with Candied Apple Distress Oxide Ink, fussycut it out and adhered it with Stampin’ Dimensionals. I stamped 3 coffee beans from the Honeybee Stamps Shake-It Off Stampset with Ground Espresso Distress Oxide Ink, fussycut them and adhered them to the snow. I finished it off by adding some Nuvo Glitter Drops in White Blizzard.

On the inside of the card, I stamped a holiday greeting in from Lawn Fawn Simply Winter Sentiments with Candied Apple Distress Oxide Ink.

Dimensions

https://linkdeli.com/widget.js?1559654439292

Thanks for reading this post and I hope I’ve inspired you to give these cards a try on your own. Leave comments or questions below or feel free to email.

Uncategorized

Imagine the Possibilities Art Journal Page

Hello friends. Today’s post is a little different. Coming to you with a with an art journal layout. I haven’t done one of these in quite a while but it’s time to start it up again. An art journal is just a fun place to play with your products and experiment. Sometimes it comes out great and sometimes not so much but it’s about having fun. If you haven’t tried art journaling yet I highly recommend it. You don’t need a ton of supplies to do this either. I like to keep some printed tissue papers and some Acrylic paints on hand. I use stamps and pattern papers from my stash. God knows I have plenty of those!!! LOL I recently purchased the Stamperia paper after seeing Umut Radios use them in her videos. They are beautiful papers. Check out her videos for more inspiration. She inspired me to get started; she makes beautiful layouts using printed napkins!

Ok so let take you through my process. First I gathered some supplies.

Supplies

I stamped the Tim Holtz Rubber Stamp BOOKS SKETCH Stampers Anonymous several times onto scraps of Neenah Solar White 110lb Cardstock with Ranger Black Archival Jet Black Ink. At this point I only had a slight idea of what I was doing on these pages but I kind of knew I wanted stacks of books. I will continue while those dry.

I added Canvas Tissuestock Printed French Script, 12-Inch by 12-Inch, Ivory, 10-Pack to the pages. I used Matte gel medium to adhere. I added some to the back and then some over top once down on the page. This seals it and allows you to add other mediums on top without saturating the paper. Next I tore up some of the pattern paper from the Stamperia Scrapbooking Paper – Clockwise collection and randomly adhered them onto the pages. No need for perfection here because I want it to look organic. I sealed everything with Matte gel medium. And now I wait…and wait…and wait for it to dry. A couple of hours later….

Step 1 – Adding Paper

Time to add ink some. I spritzed the pages with water and again very randomly sprayed distress sprays in Tumbled Glass and Walnut Stain. I spread it around with a brush and used my heat tool to dry it some but I still had to wait for it to dry a few hours before continuing with other colors. Once it dried, I added some Broken China Distress Stain, Ground Espresso Distress Stain, and Tarnished Brass Distress Stain and kept layering color until I was happy with the results.

Step 2 – Adding Ink

While that dried, I cut out and colored all my images. i distressed the tag edges and added distress ink at the edges. I added Walnut Stain Distress Stain and Ground Espresso Distress Stain around the edges of all the cut outs, except the books. Set those aside to dry and got my Stencils out. I used some brown and aqua acrylic paint with the Catherine Pooler Harleen Creative Screenings to some texture. The pattern is similar to the one on the paper I added in the background. Then I used the Tim Holtz Layering Stencil BURLAP with gold acrylic paint and added some small areas of gold.

Final page

Next I laid out the images on my spread and adhered them down with Matte gel medium. Let that dry and completely and added shading with my Faber Castell Stamper’s Big Brush Pens and highlights with a Uni-Ball Signo Broad Point White Gel Pen. Lastly I added splatters with gold and white acrylic paint.

Here are some closeups.

Supplies

Thanks for stopping by and I hope I’ve inspired you to make some adorable critter cards of your own. Leave comments or questions below or feel free to email me.

Easter, Easter, Watercolor

Easy Watercolor Backgrounds Using Distress Inks

Today’s topic is watercolor backgrounds. Whenever I want a quick and easy background for a card, I go with a watercolor background. You don’t need to know how to watercolor like a pro, you just need some good watercolor paper. The paper makes the difference in the results you get. I used Canson XL Series Watercolor Paper Pad (140 Pound, 9 x 12 Inch). The great thing is, that this technique can be achieved with dye inks, stains, sprays, or watercolors (high end or inexpensive). I used Distress Ink Stains for my backgrounds. I originally pulled out my Distress Ink Pads but then decided that my Distress Ink Stains haven’t been getting enough love so I decided to use those instead. These can be dabbed on or sprayed. These now are sold in spray bottles but if you’re like me and have the original bottles, Ranger sells a spray bottle lid. I used mine straight out of the bottle like watercolor though.

Watercolor Background Supplies

Ok, so let’s get started. First, I taped down my watercolor paper piece (4 1/4 x 5 1/2″) with some ScotchBlue Painters Tape to a hard surface. Protect your surface before you begin because this will be messy. With a clean brush, add some water to your surface, covering the whole area. Then dispense some of ink onto a clear block, craft mat, etc. (I used my glass mat) and then dab/pounce it your paper. If the surface is too dry, add some more water. You can add more ink to certain areas to get darker areas. Alternatively, you can add more water and blot certain areas to subtract color. Stick to one color if you are not comfortable mixing multiple colors together. Keep playing with adding color until you are satisfied.

Let your piece dry in between layers. This will yield a better result, in the end. You can let it air dry or use a heat tool (if you are not patient like me. :)) Once the piece was almost dry I added some splashes using the same ink color for each. I usually do this inside a box since I don’t want my desk and surrounding areas to stained. Let it dry completely before moving onto the next step. And if you want to stop here, you totally can; they look great as is. I wanted to enhance mine by adding another level of texture.

Watercolor Panels

I added texture to only two of the panels by embossing them. On the first panel (blue one), I stamped the Easter eggs from the Newton’s Nook Designs Newton’s Easter Basket Stamp (no longer available) with Versamark clear embossing ink and added Wow white embossing powder. On the third panel (yellow one), I used a the Tim Holtz MINI STENCIL SET 27 MST027 with Ranger Texture Paste Transparent Gloss to add texture. I used only portions of the stencil around the page. Then before it dried, I sprinkled on some Dazzling Diamonds Stampin’ Glitter. Any white glitter will do however. These are now ready to become cards!

Watercolor Panels With Embossing

I made Easter cards with these backgrounds. I used Newton’s Nook Designs Newton’s Easter Basket Stamp on all 3 cards for the images.

I used Simon Says Stamp Some Bunny for the sentiment on the first card and the Lawn Fawn Straight Flower Border Die Cut to build the scene. And finished it with Nuvo drops in different colors. The second card features the Pretty Pink Posh Happy Easter Script Die cut out of 4 layers of cardstock (3 black and one white), stacked up to create the sentiment. The third card showcases the Easter egg kitty by putting him in ovals diecut using Stampin’ Up! Layering Ovals Framelits Dies. I added a sentiment from Newton’s Nook Designs Newton’s Easter Basket Stamp. I created card bases from Stampin’ Up! Tempting Turquoise (retired), Stampin’ Up! Elegant Eggplant (retired), and Stampin’ Up! Crushed Curry 8-1/2″ X 11″ Cardstock, respectively. And finally, on the inside I added a piece of white 80lb cardstock so I can later write a message inside my cards.

Supplies

Thanks for stopping by. I hope this was helpful and I’ve inspired you to create some fun watercolor backgrounds of your own. Feel free to email me with questions or leave a comments below.