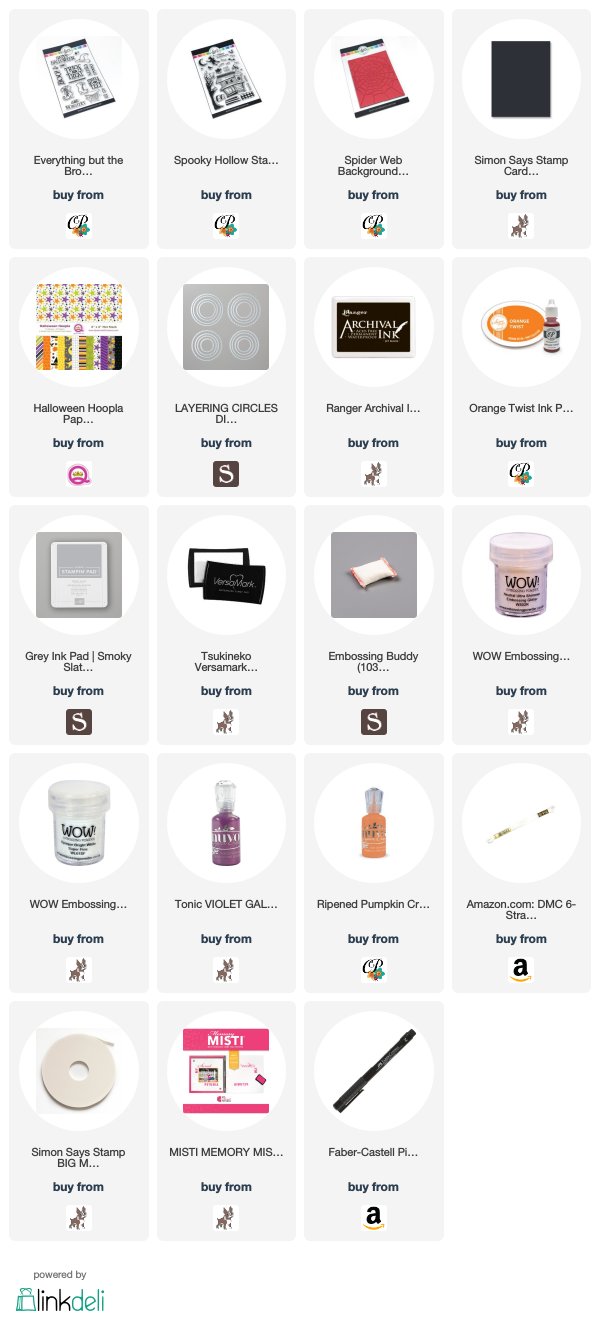
Happy Friday friends! Coming to you today with a fun and easy Halloween card featuring the Spooky Hollow by Catherine Pooler Designs and Everything but the Broom by Catherine Pooler Designs Stamp Sets. I love, love, love these two stampsets! The whole Halloween collection which was released last year is great fun but these two stampsets are my fave! If you don’t like to color images this is the card for you! Let’s get started…
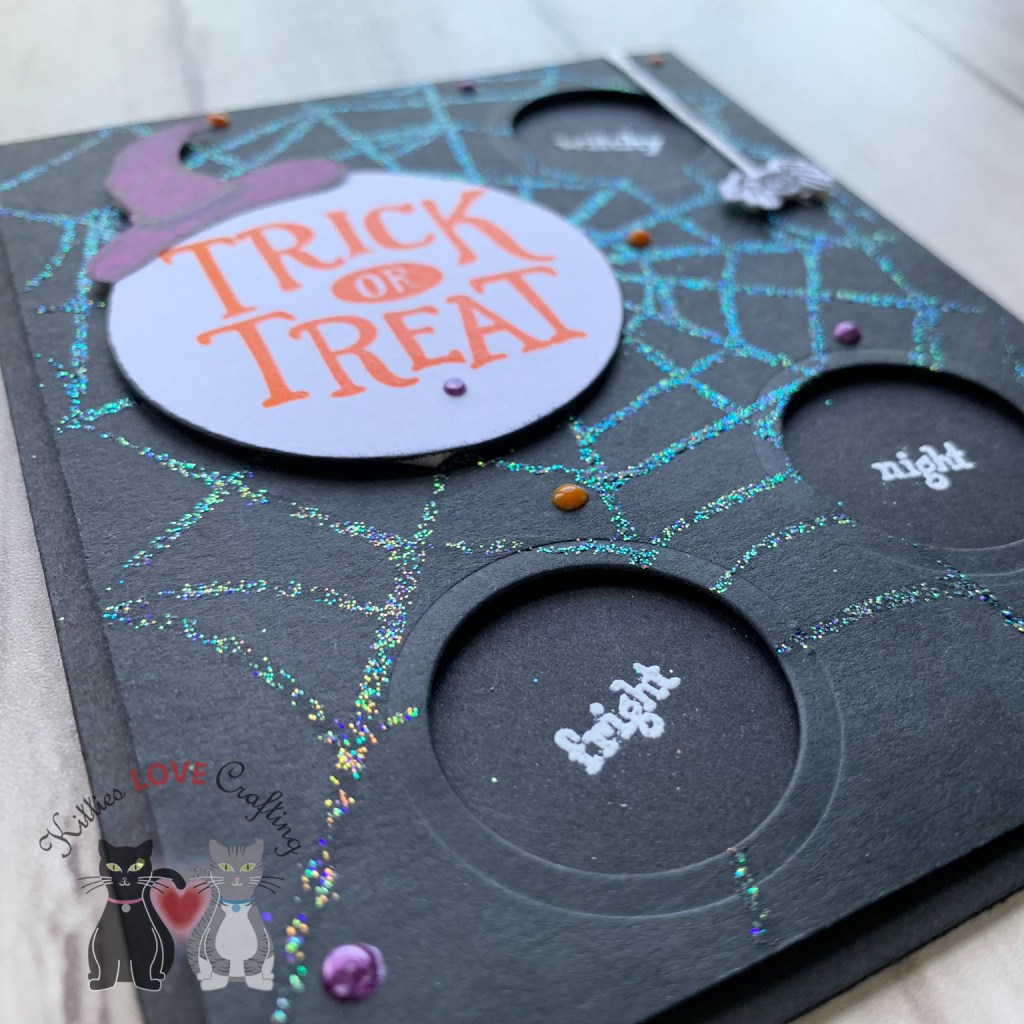
I began with a card base made from Simon Says Stamp Black Cardstock, measuring 5-1/2 x 8-1/2″and scored at 4 1/4″ and a piece cut to 4 x 5-1/4″. Using the Spider Web Background Stamp by Catherine Pooler Designs and my MISTI, I stamped spider web with Versamark Clear Emboss Ink and heat embossed with Wow Neutral Ultra Shimmer Embossing Glitter. Then with the Stampin’ Up! Layering Circles Dies, I diecut three 1″ circles windows out of the card panel and a 2-1/8″ circle from Neenah 110lb Classic Crest Cardstock 8.5″X11″ for the sentiment.
I added some Foam Tape to the back of the panel and adhered the three words behind each window, then adhered it to the card base. For the three words that go inside the windows I just cut them into squares before adhering them.

Next I did some stamping. I stamped the sentiment from Everything but the Broom by Catherine Pooler Designs Stamp Set in Orange Twist Ink by Catherine Pooler Designs and three tiny words from the Spooky Hollow by Catherine Pooler Designs onto scraps of Simon Says Stamp Black Cardstock, using Versamark Clear Emboss Ink and heat embossed with Wow white embossing powder. I also stamped the little spider from Everything but the Broom by Catherine Pooler Designs Stamp Set 2x onto Neenah 110lb Classic Crest Cardstock 8.5″X11″ and the witch hat onto a piece of purple pattern paper the Queen & Co Halloween Hooplah 6 x 6 mat Stack with Ranger Archival Ink – Jet Black. I colored the band on the witch hat with two purple COPIC markers to give it some interest and diecut all three images with their coordinating dies.

I adhered the sentiment circle and the hat with some Stampin’ Dimensionals to the card as well as the spider. I added some White Cotton Embroidery Floss (which I’ve had in my stash for ages BTW) for the spider’s string. I finished it off with some Nuvo Crystal Drops in Violet Galaxy and Ripened Pumpkin.
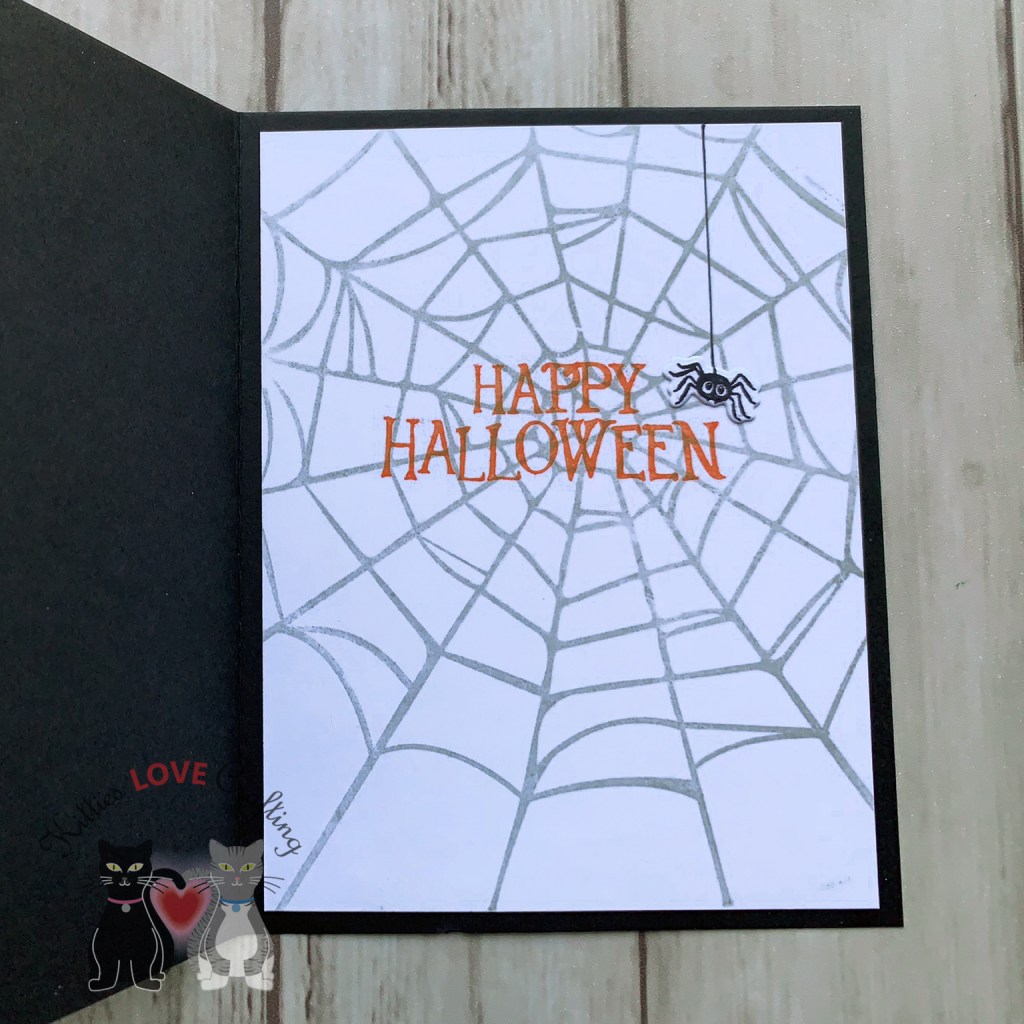
For the inside of the card I cut a piece of Neenah 110lb Classic Crest Cardstock 8.5″X11″ to 4 x 5-1/4″and stamped the spiderweb with Spider Web Background Stamp by Catherine Pooler Designs and some Stampin’ Up! Smoky Slate Ink. I stamped a HAPPY HALLOWEEN sentiment from Everything but the Broom by Catherine Pooler Designs with Orange Twist Ink by Catherine Pooler Designs over the spiderweb and adhered the second spider I stamped and added a “string” above it with my Faber-Castell Pitt Artist Pen: Black, 0.7 millimeters.
Dimensions
- Card Base = 5-1/2 x 8-1/2″and scored at 4 1/4″ Simon Says Stamp Black Cardstock
- Top Panel = 4 x 5-1/4″ Simon Says Stamp Black Cardstock
- Inside Panel = 4 x 5-1/4″ Neenah 110lb Classic Crest Cardstock 8.5″X11″
- Sentiment Circle = 2-1/8″ Neenah 110lb Classic Crest Cardstock 8.5″X11″
Thanks for reading this post and I hope I’ve inspired you to go make some Halloween cards of your own. Leave comments or questions below or feel free to email me.