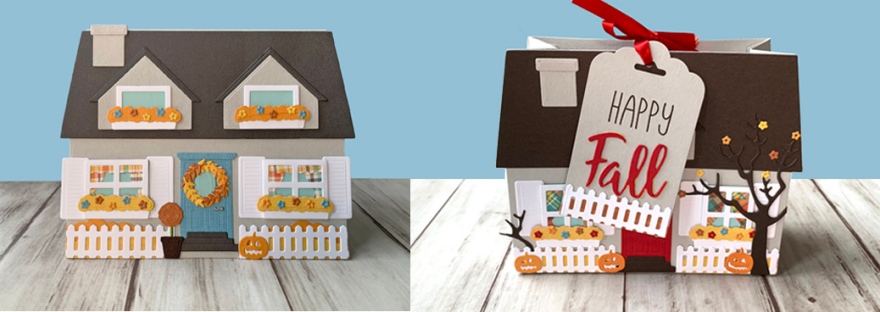
I’m back with another adorable card featuring the House Builder Card Base Dies from Honey Bee Stamps!!! This time I created Halloween houses which was so much fun! I love Halloween (always been my favorite holiday since I was a kid) so I have to make as many cards as possible! And yes I DO send out Halloween cards to family and friends, whether they have kids or not. Adults are entitled to some Halloween magic too, am I right?!? But this year especially I am making a point of sending out as many holiday cards as possible.
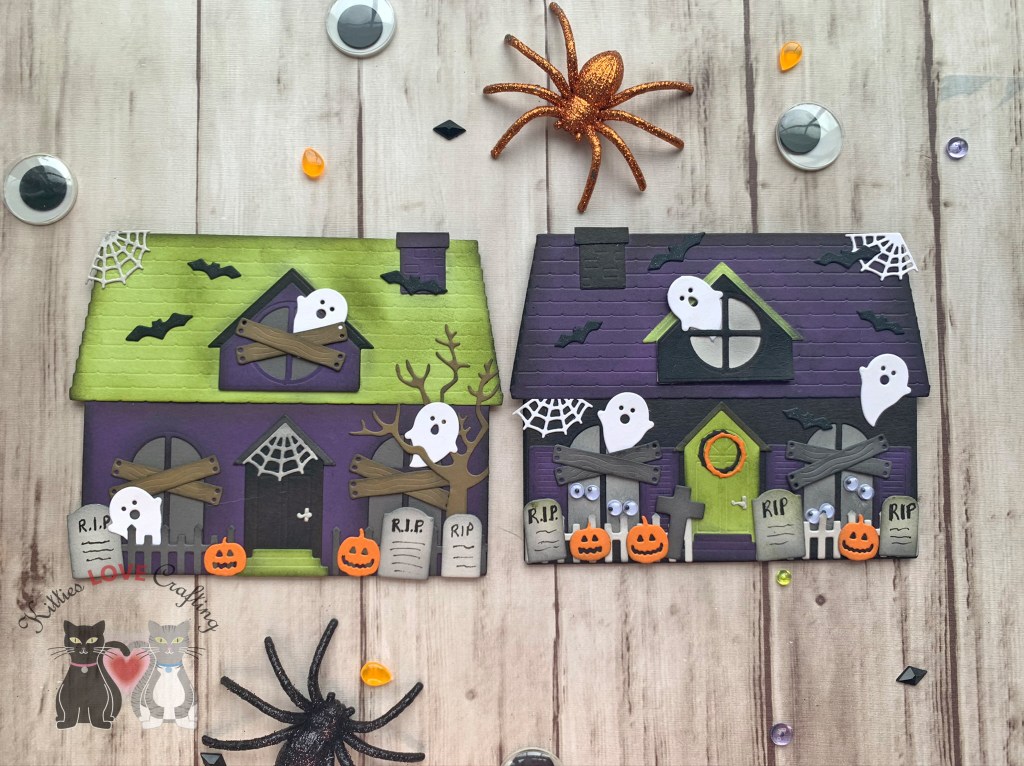
For the first card, I started by diecutting the house card base 2x from the House Builder Card Dies, chimney (from Honey Cuts Gingerbread House Add-on), and one gable from Stampin’ Up! Elegant Eggplant 8-1/2 x 11″ Cardstock (retired), the roof and stairs from Simon Says Stamp Card Stock 100# Green Apple, and the gable roof from Simon Says Stamp 100# Black Card with the House Builder Card Base Dies and Honey Cuts Haunted House Add-on.

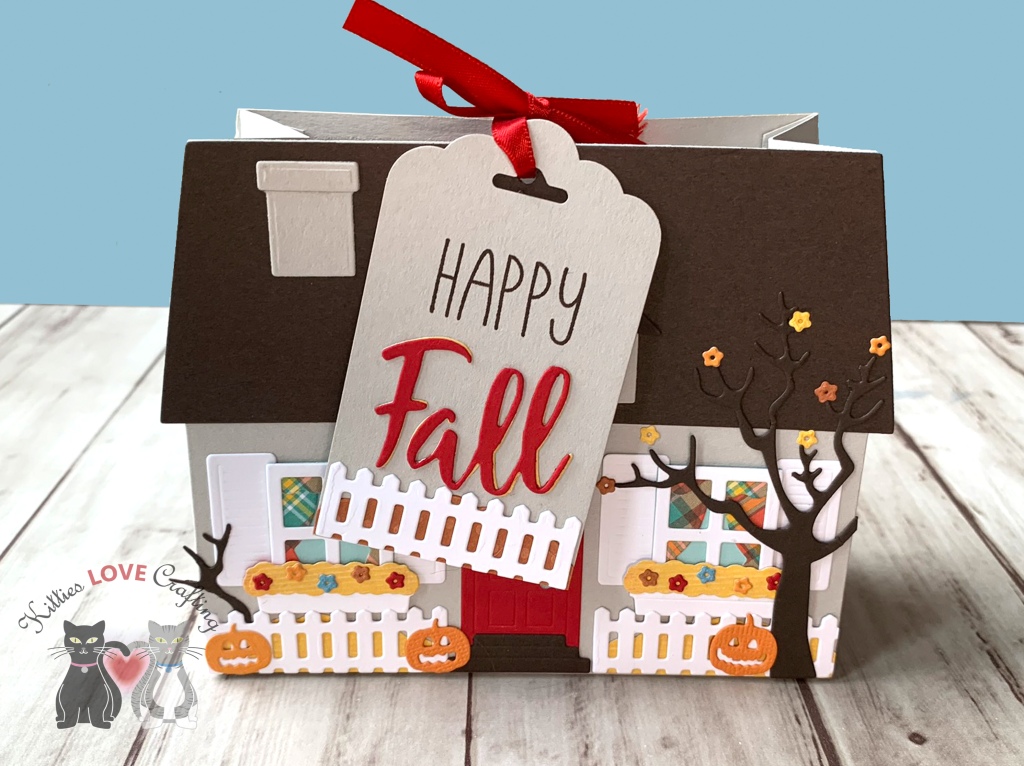
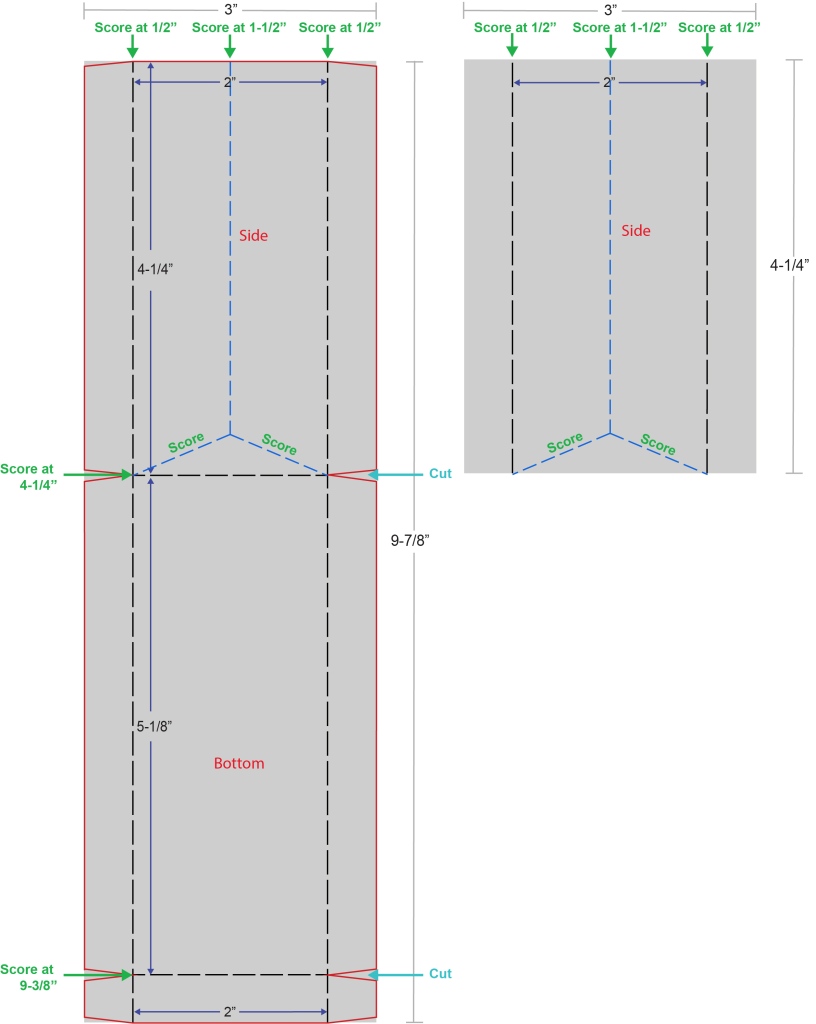
I adhered the two houses with the pre-scored strip that comes in the House Builder Card Base Dies to create the card base. Be sure to use double-sided tape or something very strong so they don’t come apart. I adhered the roof and diecut out the windows from the front piece then added Tim Holtz Ranger Black Soot Distress Ink to everything. I also added Tim Holtz Ranger Peeled Paint Distress Ink. In fact everything except the ghosts and pumpkins had Tim Holtz Ranger Black Soot Distress Ink added to them to age them.
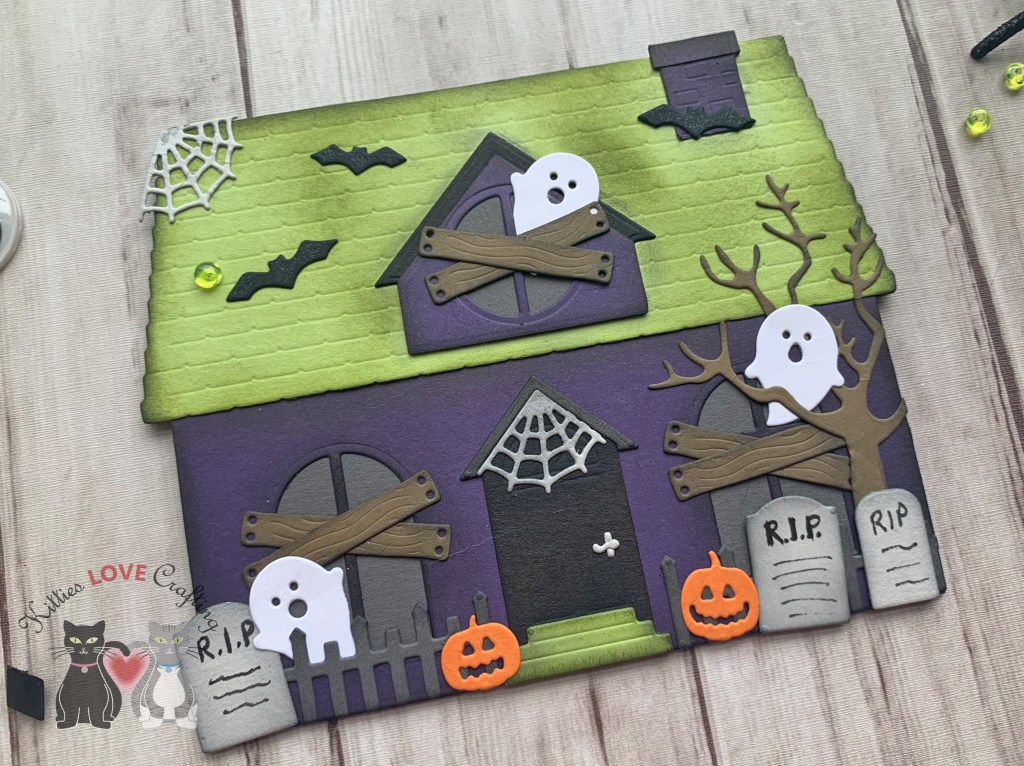
I used Simon Says Stamp 100# Black Card for the door and the bats, Simon Says Stamp Slate 8-1/2″ X 11″ Cardstock for the door gable, and fence, Simon Says Stamp Fog 8-1/2″ X 11″ Cardstock for the door handle, grave stones and webs (from Papertrey Ink – Tiny Town: Spookville Die), Neenah Classic Crest, 80lb Solar White for the ghosts, Stampin’ Up! Soft Suede 8-1/2″ X 11″ Cardstock for the wood and tree, and Stampin Up! Pumpkin Pie 8-1/2 x 11″ Cardstock for the pumpkins. I backed all the windows with Simon Says Stamp Slate 8-1/2″ X 11″ Cardstock. TIP: To hide the cardstock pieces behind the windows, I diecut another house from Stampin’ Up! Elegant Eggplant 8-1/2 x 11″ Cardstock (retired) and adhered it to back of the card front. I added some shimmer to the bats and the ghosts with a Spectrum Noir CLEAR OVERLAY Sparkle Pens.

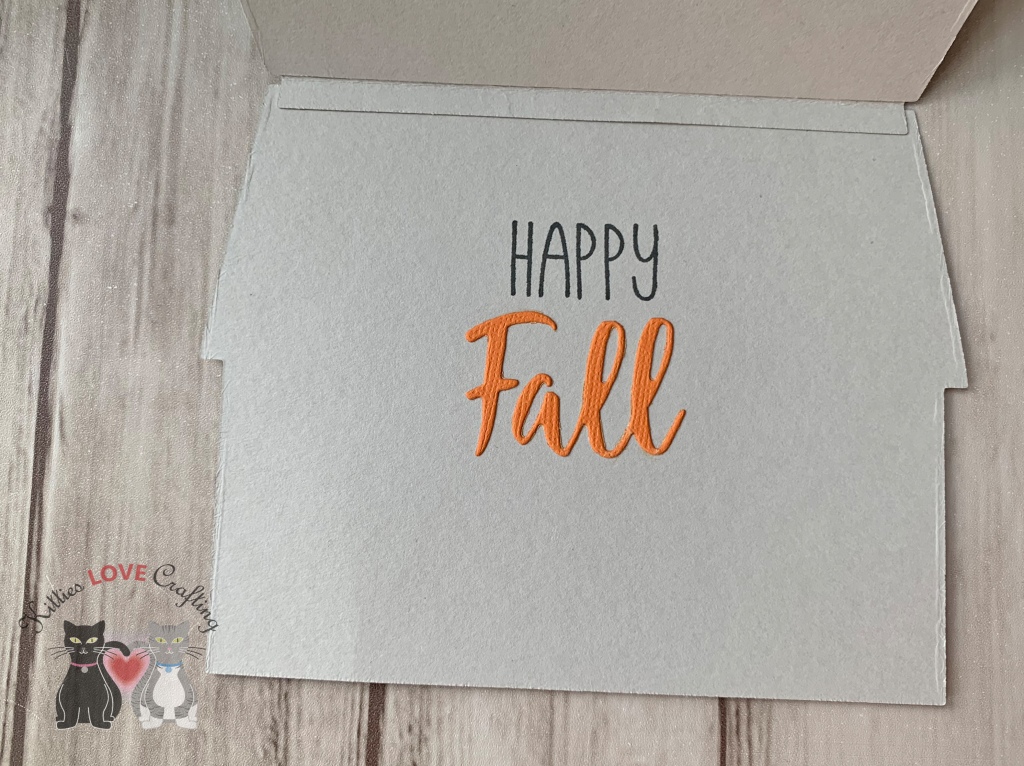
On the inside of the card, I diecut another house from Neenah Classic Crest, 80lb Solar White, trimmed it down and adhered it to the card base. Then stamped the sentiment from the Queen and Company Halloween Hoopla stampset with Simon Says Stamp GREEN APPLE Ink. I added a web, diecut from Simon Says Stamp Slate 8-1/2″ X 11″ Cardstock and a pumpkin.
For the second card, I started by diecutting the house card base 2x, chimney (from Honey Cuts Gingerbread House Add-on), and one gable from Simon Says Stamp 100# Black Card, the roof, window shutters and stairs from Stampin’ Up! Elegant Eggplant 8-1/2 x 11″ Cardstock (retired) and the gable roof from Simon Says Stamp Card Stock 100# Green Apple with the House Builder Card Base Dies and Honey Cuts Haunted House Add-on.

I adhered the two houses with the pre-scored strip that comes in the House Builder Card Base Dies to create the card base. Be sure to use double-sided tape or something very strong so they don’t come apart. I adhered the roof and diecut out the windows from the front piece then added Tim Holtz Ranger Black Soot Distress Ink to everything. In fact everything except the ghosts and webs had Tim Holtz Ranger Black Soot Distress Ink added to them to age them.
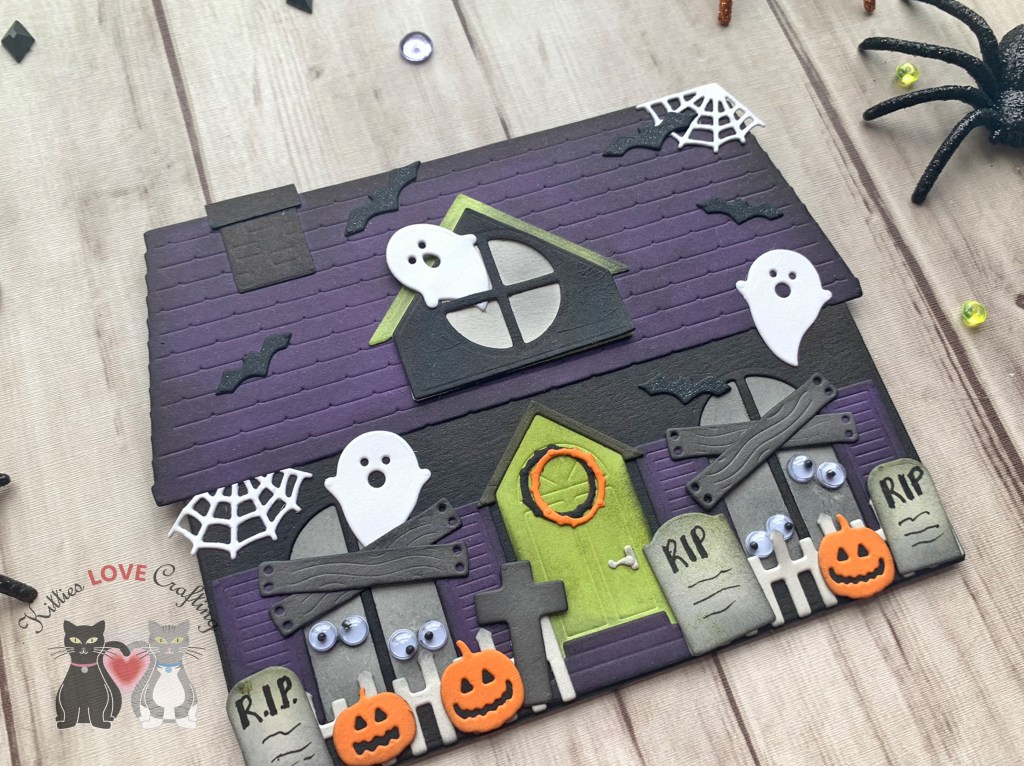
I used Simon Says Stamp Card Stock 100# Green Apple for the door, Simon Says Stamp Slate 8-1/2″ X 11″ Cardstock for the door gable, the wood planks and the cross gravestone, Simon Says Stamp Fog 8-1/2″ X 11″ Cardstock for the door handle, grave stones, and fence, Neenah Classic Crest, 80lb Solar White for the ghosts and webs (from Papertrey Ink – Tiny Town: Spookville Die), Simon Says Stamp 100# Black Card for the bats and Stampin Up! Pumpkin Pie 8-1/2 x 11″ Cardstock for the pumpkins. I backed all the windows with Simon Says Stamp Fog 8-1/2″ X 11″ Cardstock and the pumpkins with Simon Says Stamp 100# Black Card. I added some shimmer to the bats and the ghosts with a Spectrum Noir CLEAR OVERLAY Sparkle Pens and some Wiggly Eyes inside the windows.
I diecut another house from Simon Says Stamp 100# Black Card and adhered it to back of the card front.

On the inside of the card, I diecut another house from Neenah Classic Crest, 80lb Solar White, trimmed it down and adhered it to the card base. Then stamped the sentiment from the Queen and Company Halloween Hoopla stampset with Memento Black Ink. I added a web, diecut from Neenah Classic Crest, 80lb Solar White,and three grave stones die cut from Simon Says Stamp Slate 8-1/2″ X 11″ Cardstock.
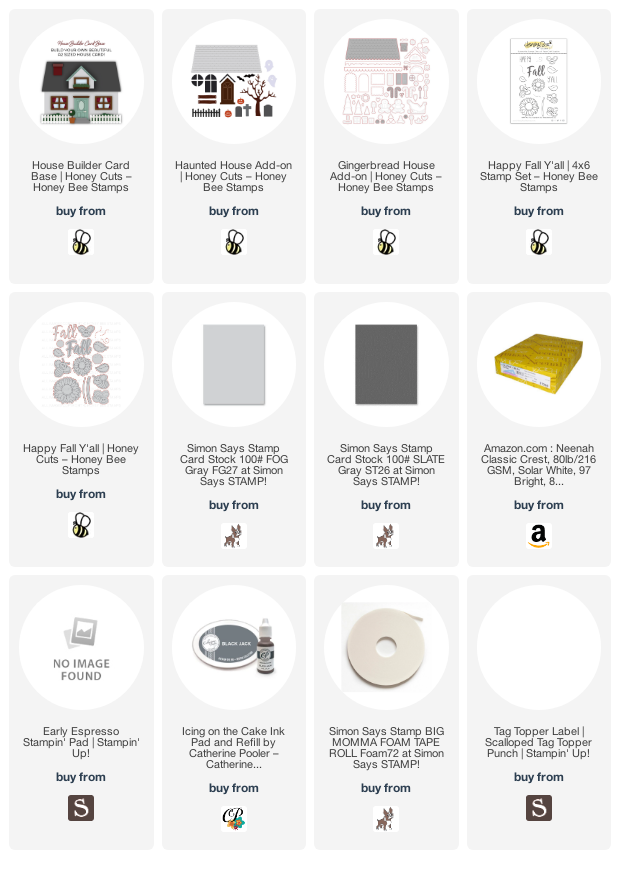
Supplies
 https://linkdeli.com/widget.js?id=f5e8378456858c916708
Thanks for reading this post. I hope you enjoyed and I’ve inspired you to try out these adorable House Builder dies and make some fun cards and gift boxes! Leave comments or questions below or feel free to email me.