Thanks for reading this post. I hope I’ve inspired you to give this cute Fall card a try for yourself. Leave comments or questions below or feel free to email.
Hello friends. This little llama found his luck at the end of the rainbow! With this card I created some layers with stencils and stamps. It’s easy to do this by masking off areas. Keep reading to see how I did this…
I colored the images with Copic colors. I used W0, W1 & 0, R20, & C7 for the llama; G07 & G09, C7 & C9, Y15 & Y17 for the hat and bow; YG03 for the shamrocks; YG03, YG17, G07, Y15 & Y17 for the blanket; and BG000 & 0 for the clouds. I fussy cut all the images and adhered them to the card.
Thanks for reading this post. I hope you enjoyed and I’ve inspired you to give this card a try for yourself. Leave comments or questions below or feel free to email.
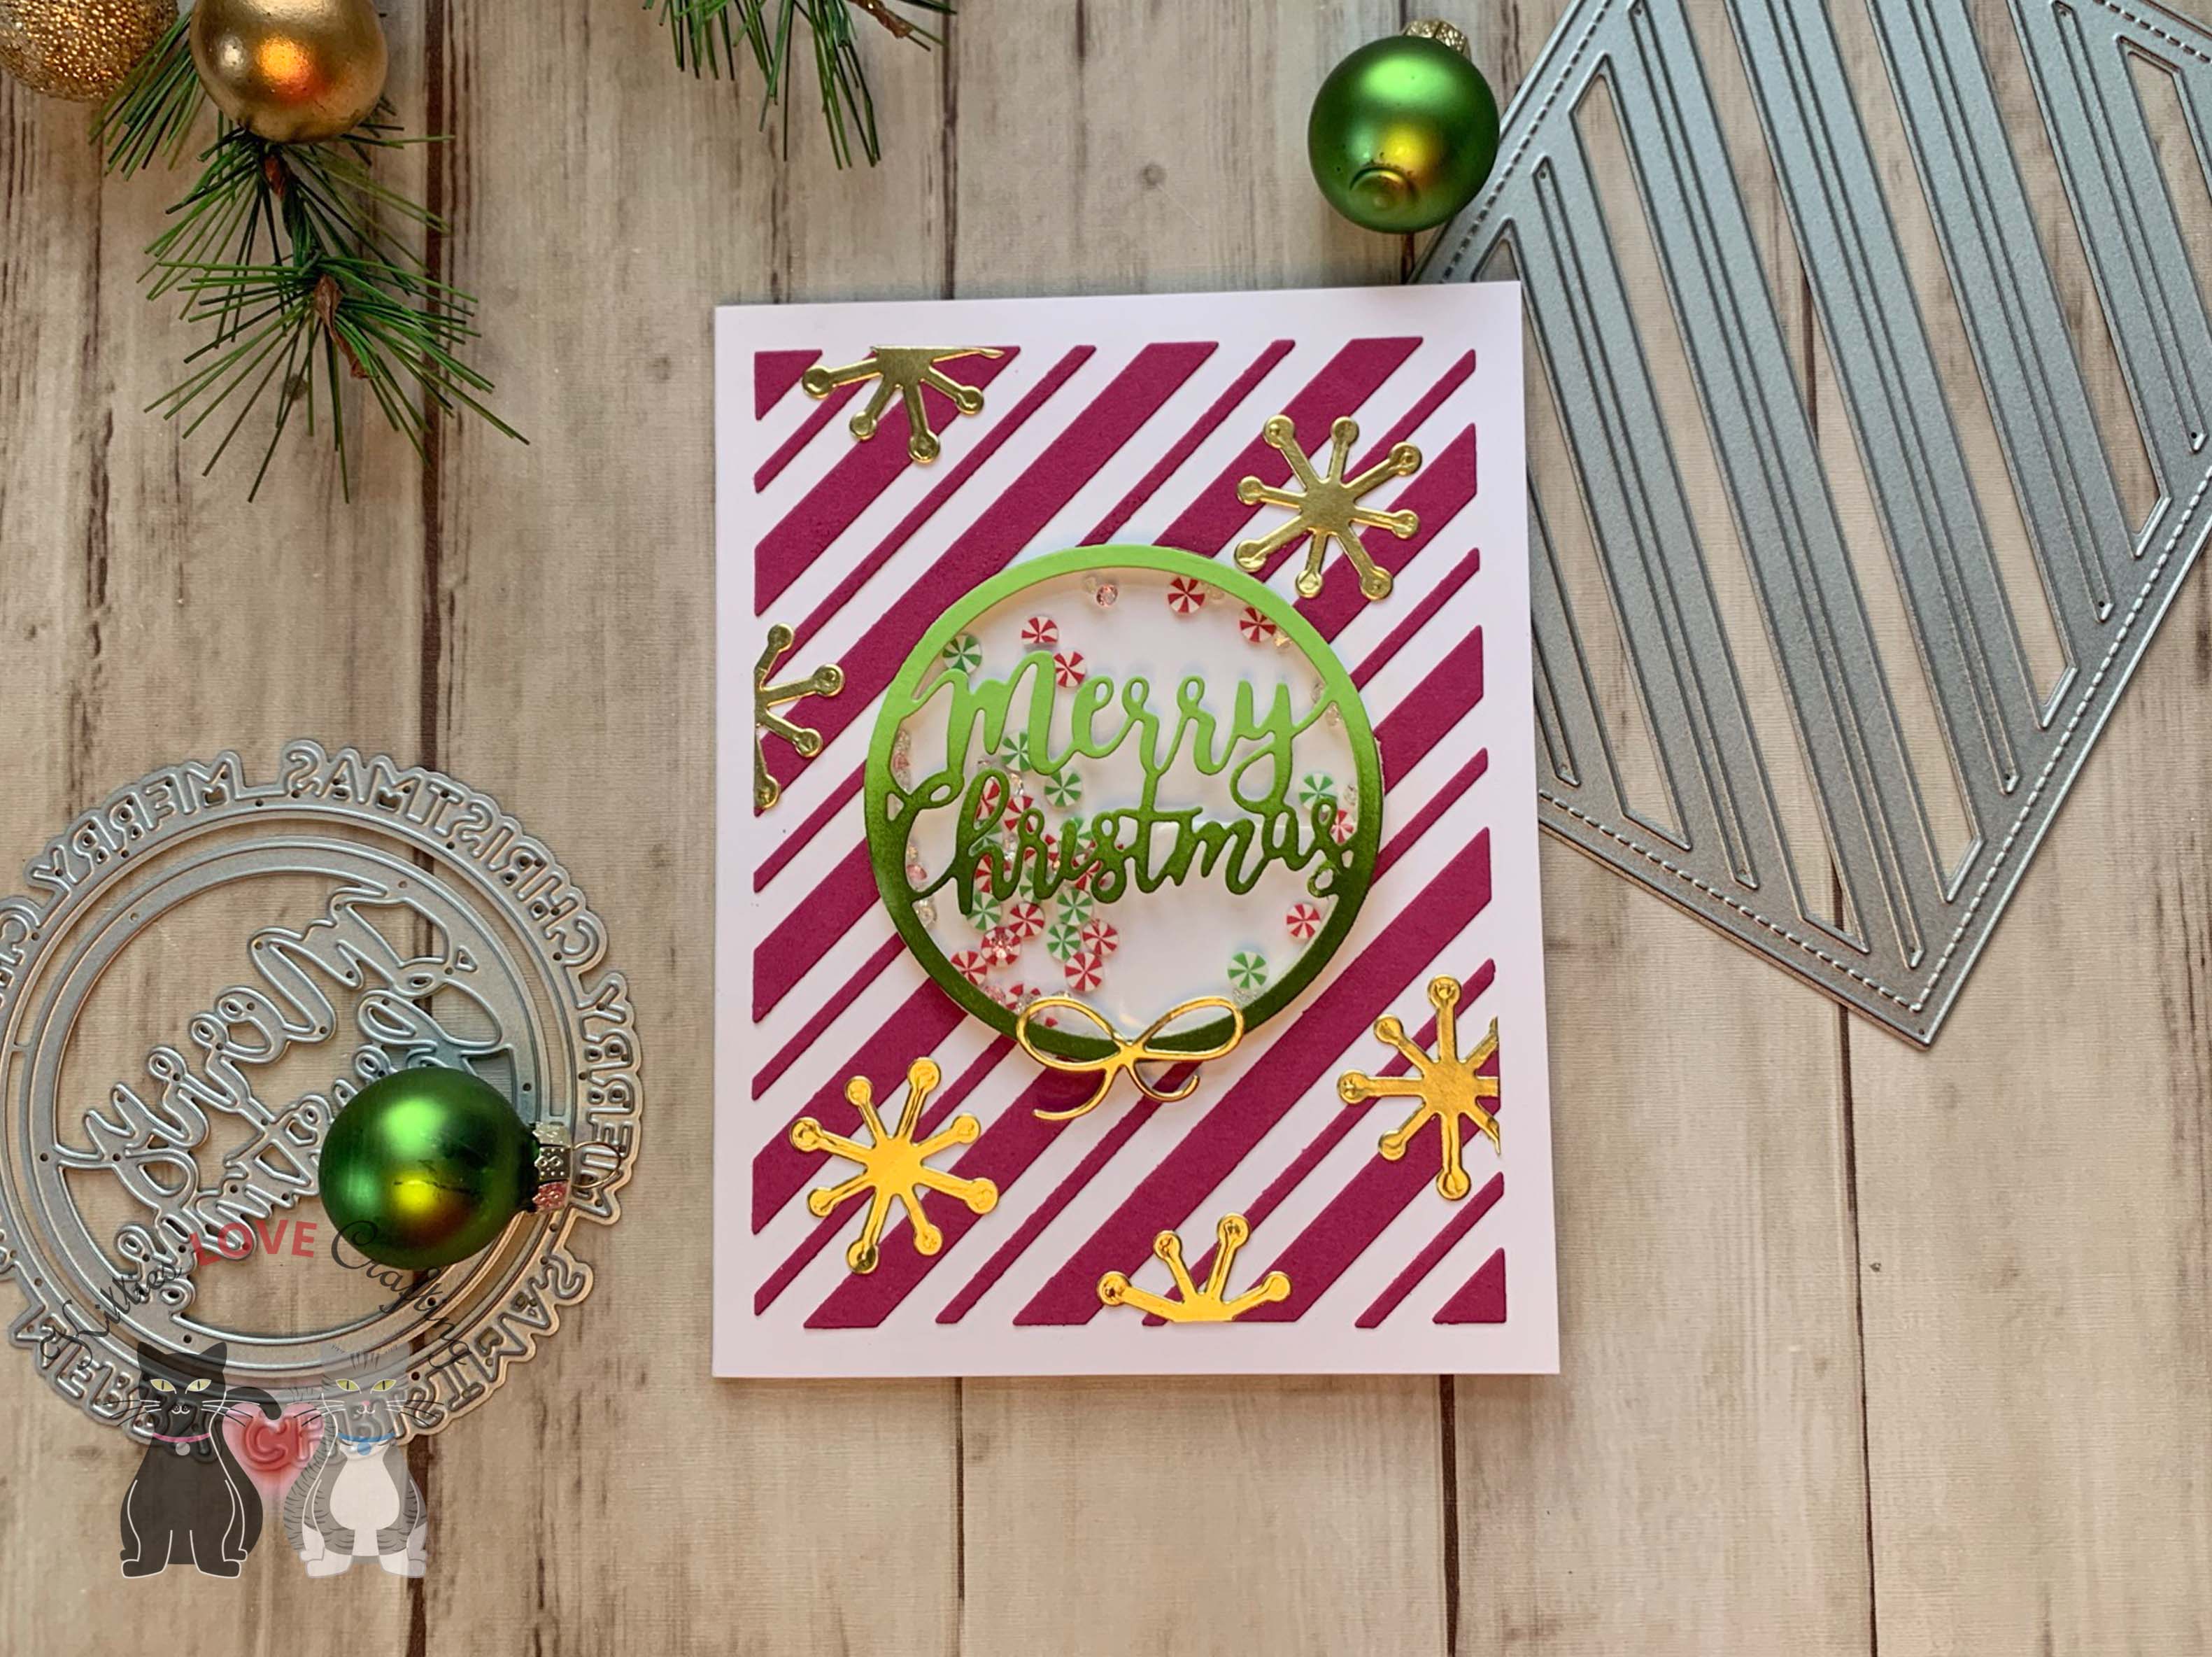
Hello friends. Love making holiday cards but hate stamping?!? Here are two quick and easy holiday cards that require no stamping — only dies. I used the same background die from Lawn Fawn to create both, utilizing the negative and positive pieces that were cut. This is a great way to make multiple cards without waste.
I worked on the backgrounds simultaneously because it’s easier. First, I cut two pieces of Neenah 110lb Classic Crest Cardstock 8.5 X 11″ to 5-1/2 x 8-1/2″ and scored at 4-1/4″ to create card bases. Then I die cut Stampin’ Up! Berry Burst 8-1/2″ x 11″ Cardstock (retired) with the Lawn Fawn PEPPERMINT STRIPES BACKDROP Die Cut. I adhered the negative pieces to one card base first by using the positive one as a guide to place the pieces. Then adhered the positive background piece to the other card base.
I die cut a piece of Acetate with a 2-1/2″ circle punch and adhered it to the back of the sentiment and added a very thin piece of 3M Foam Tape around the edges. I used Queen and Company Clear and Pink Diamond toppings (these are currently out of stock but I think will be back once Q and Co moves) and Candy Toppings to fill the shaker. I added another 2.5 inch circle behind the shaker from white cardstock.
On the inside of the card, I stamped a sentiment from the Stampin’ Up! ‘Joy to the World’ Paper Pumpkin stampset (Paper Pumpkin is a subscription box so this stampset is not available for purchase) and Eucalyptus Ink.
Thanks for reading this post. I hope you enjoyed and I’ve inspired you to give these cards a try for yourself. Leave comments or questions below or feel free to email.
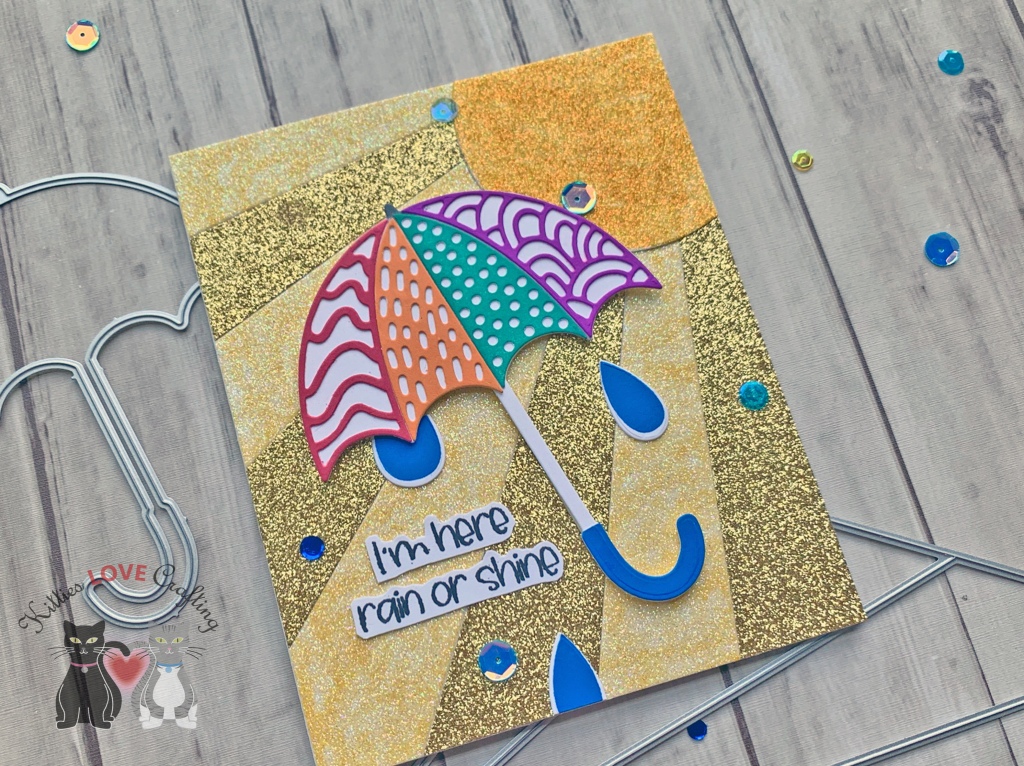
Hi friends. When I purchased the Sunburst Strips Cover Plate Die from Catherine Pooler Designs I knew that I had to try rainbow colors but also glitter paper because your sun rays need to sparkle! Rainbow sunshine rays to come for sure! Stay tuned. I decided to alternate the colors of the rays but also cut off the top of the rays with a circle and add another circle for the sun. I ended up with extra pieces of rays which I then used on a second card. No waste here!
For the first card, I started by cutting a piece of Neenah 110lb Classic Crest Cardstock 8.5 X 11″ to 6-1/4 x 10″ and scored at 5″ to create a card base and to make it easier to adhere the sun, I also cut a top panel to 4-3/4 x 6″.
I diecut the Sunburst Strips Cover Plate Die from Gold and White Glitter Cardstock. I didn’t have any light yellow glitter paper so I used the white and colored with some old alcohol markers. WARNING: Coloring glitter cardstock with markers will ruin the tip of the marker so if you use a good alcohol marker like a copic make sure you have extra nibs. I taped the back of each diecut piece of cardstock and then used a 3″ circle die to cut off the narrow end. You can use whatever size you want here. Then cut a 2-1/2″ circle from the White Glitter Cardstock. I adhered all the sun pieces to the 4-3/4 x 6″ panel I previously cut and that to the card base.
For the second card, I did the exact same things with a few exceptions. I cutting a piece of Neenah 110lb Classic Crest Cardstock 8.5 X 11″ to 9-1/2 x 5-3/4″ and scored at 4-3/4” to create a card base and thIs time I adhered the sun directly to the card base and didn’t leave any border around it.
Thanks for reading this post. I hope you enjoyed and I’ve inspired you to make this cute glittery umbrella cards yourself! If you want to share you creations with me tag me on instagram @kittieslovecrafting. Leave comments or questions below or feel free to email me.


 https://linkdeli.com/widget.js?id=f5e8378456858c916708