Hello friends. Love making holiday cards but hate stamping?!? Here are two quick and easy holiday cards that require no stamping — only dies. I used the same background die from Lawn Fawn to create both, utilizing the negative and positive pieces that were cut. This is a great way to make multiple cards without waste.

I worked on the backgrounds simultaneously because it’s easier. First, I cut two pieces of Neenah 110lb Classic Crest Cardstock 8.5 X 11″ to 5-1/2 x 8-1/2″ and scored at 4-1/4″ to create card bases. Then I die cut Stampin’ Up! Berry Burst 8-1/2″ x 11″ Cardstock (retired) with the Lawn Fawn PEPPERMINT STRIPES BACKDROP Die Cut. I adhered the negative pieces to one card base first by using the positive one as a guide to place the pieces. Then adhered the positive background piece to the other card base.

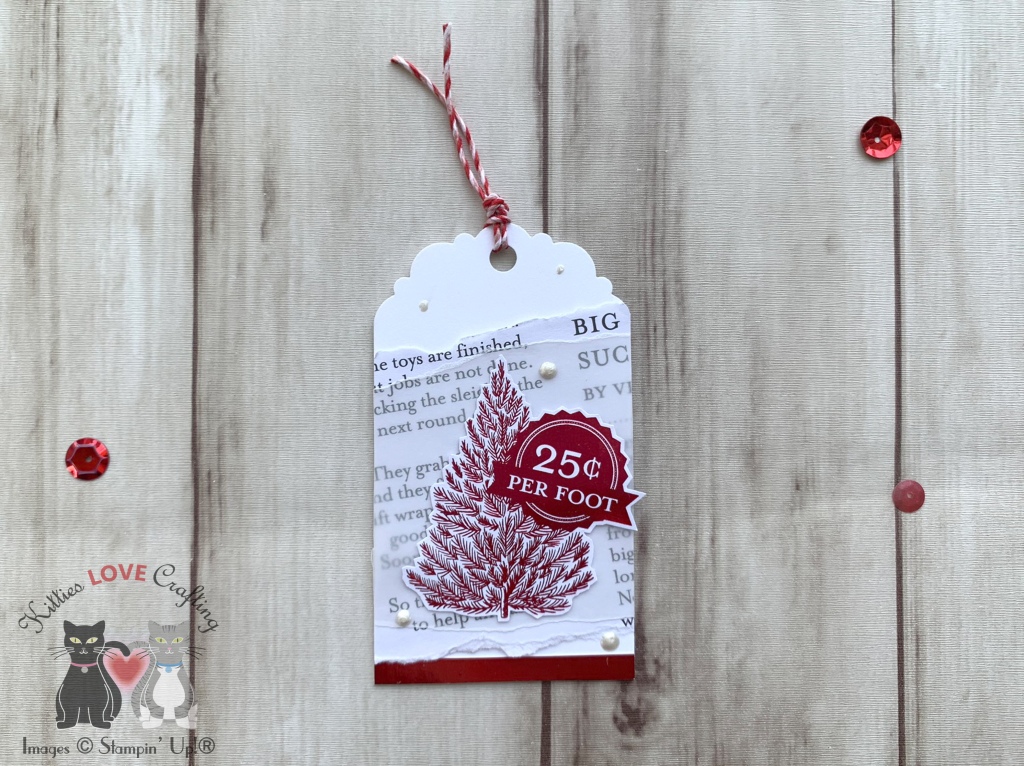
I die cut two wreaths from Neenah 110lb Classic Crest Cardstock 8.5 X 11″ with the Catherine Pooler Joy Wreath Dies. Then colored them with Garden Party and Lime Rickey Inks from Catherine Pooler using direct-to-paper technique. To help keep them together and make it easier to adhere the sentiment I added a piece of Acetate which I cut with a 2-5/8″ circle die. I used the Stampin’ Up! Layering Circle Dies (retired).

I die cut the sentiment from a piece of Neenah 110lb Classic Crest Cardstock 8.5 X 11″ and Stampin’ Up! Basic Black 8-1/2″ X 11″ Cardstock with the Catherine Pooler Round of Merry Dies. I finished it by adding some Nuvo Crystal Drops in Ivory Seashell.
On the inside of the card, I stamped a sentiment from Lawn Fawn’s Merry Messages Stamp Set with Stampin’ Up! Berry Burst Ink (retired).

Dimensions
- Card Base = 5-1/2 x 8-1/2″ and scored at 4-1/4″ Neenah 110lb Classic Crest Cardstock 8.5 X 11″
I created a simple shaker for the second card. I die cut the sentiment from Neenah 110lb Classic Crest Cardstock 8.5 X 11″ with the Catherine Pooler Round of Merry Dies and colored it with Garden Party and Eucalyptus Inks from Catherine Pooler. I used blender brushes to create a gradient.
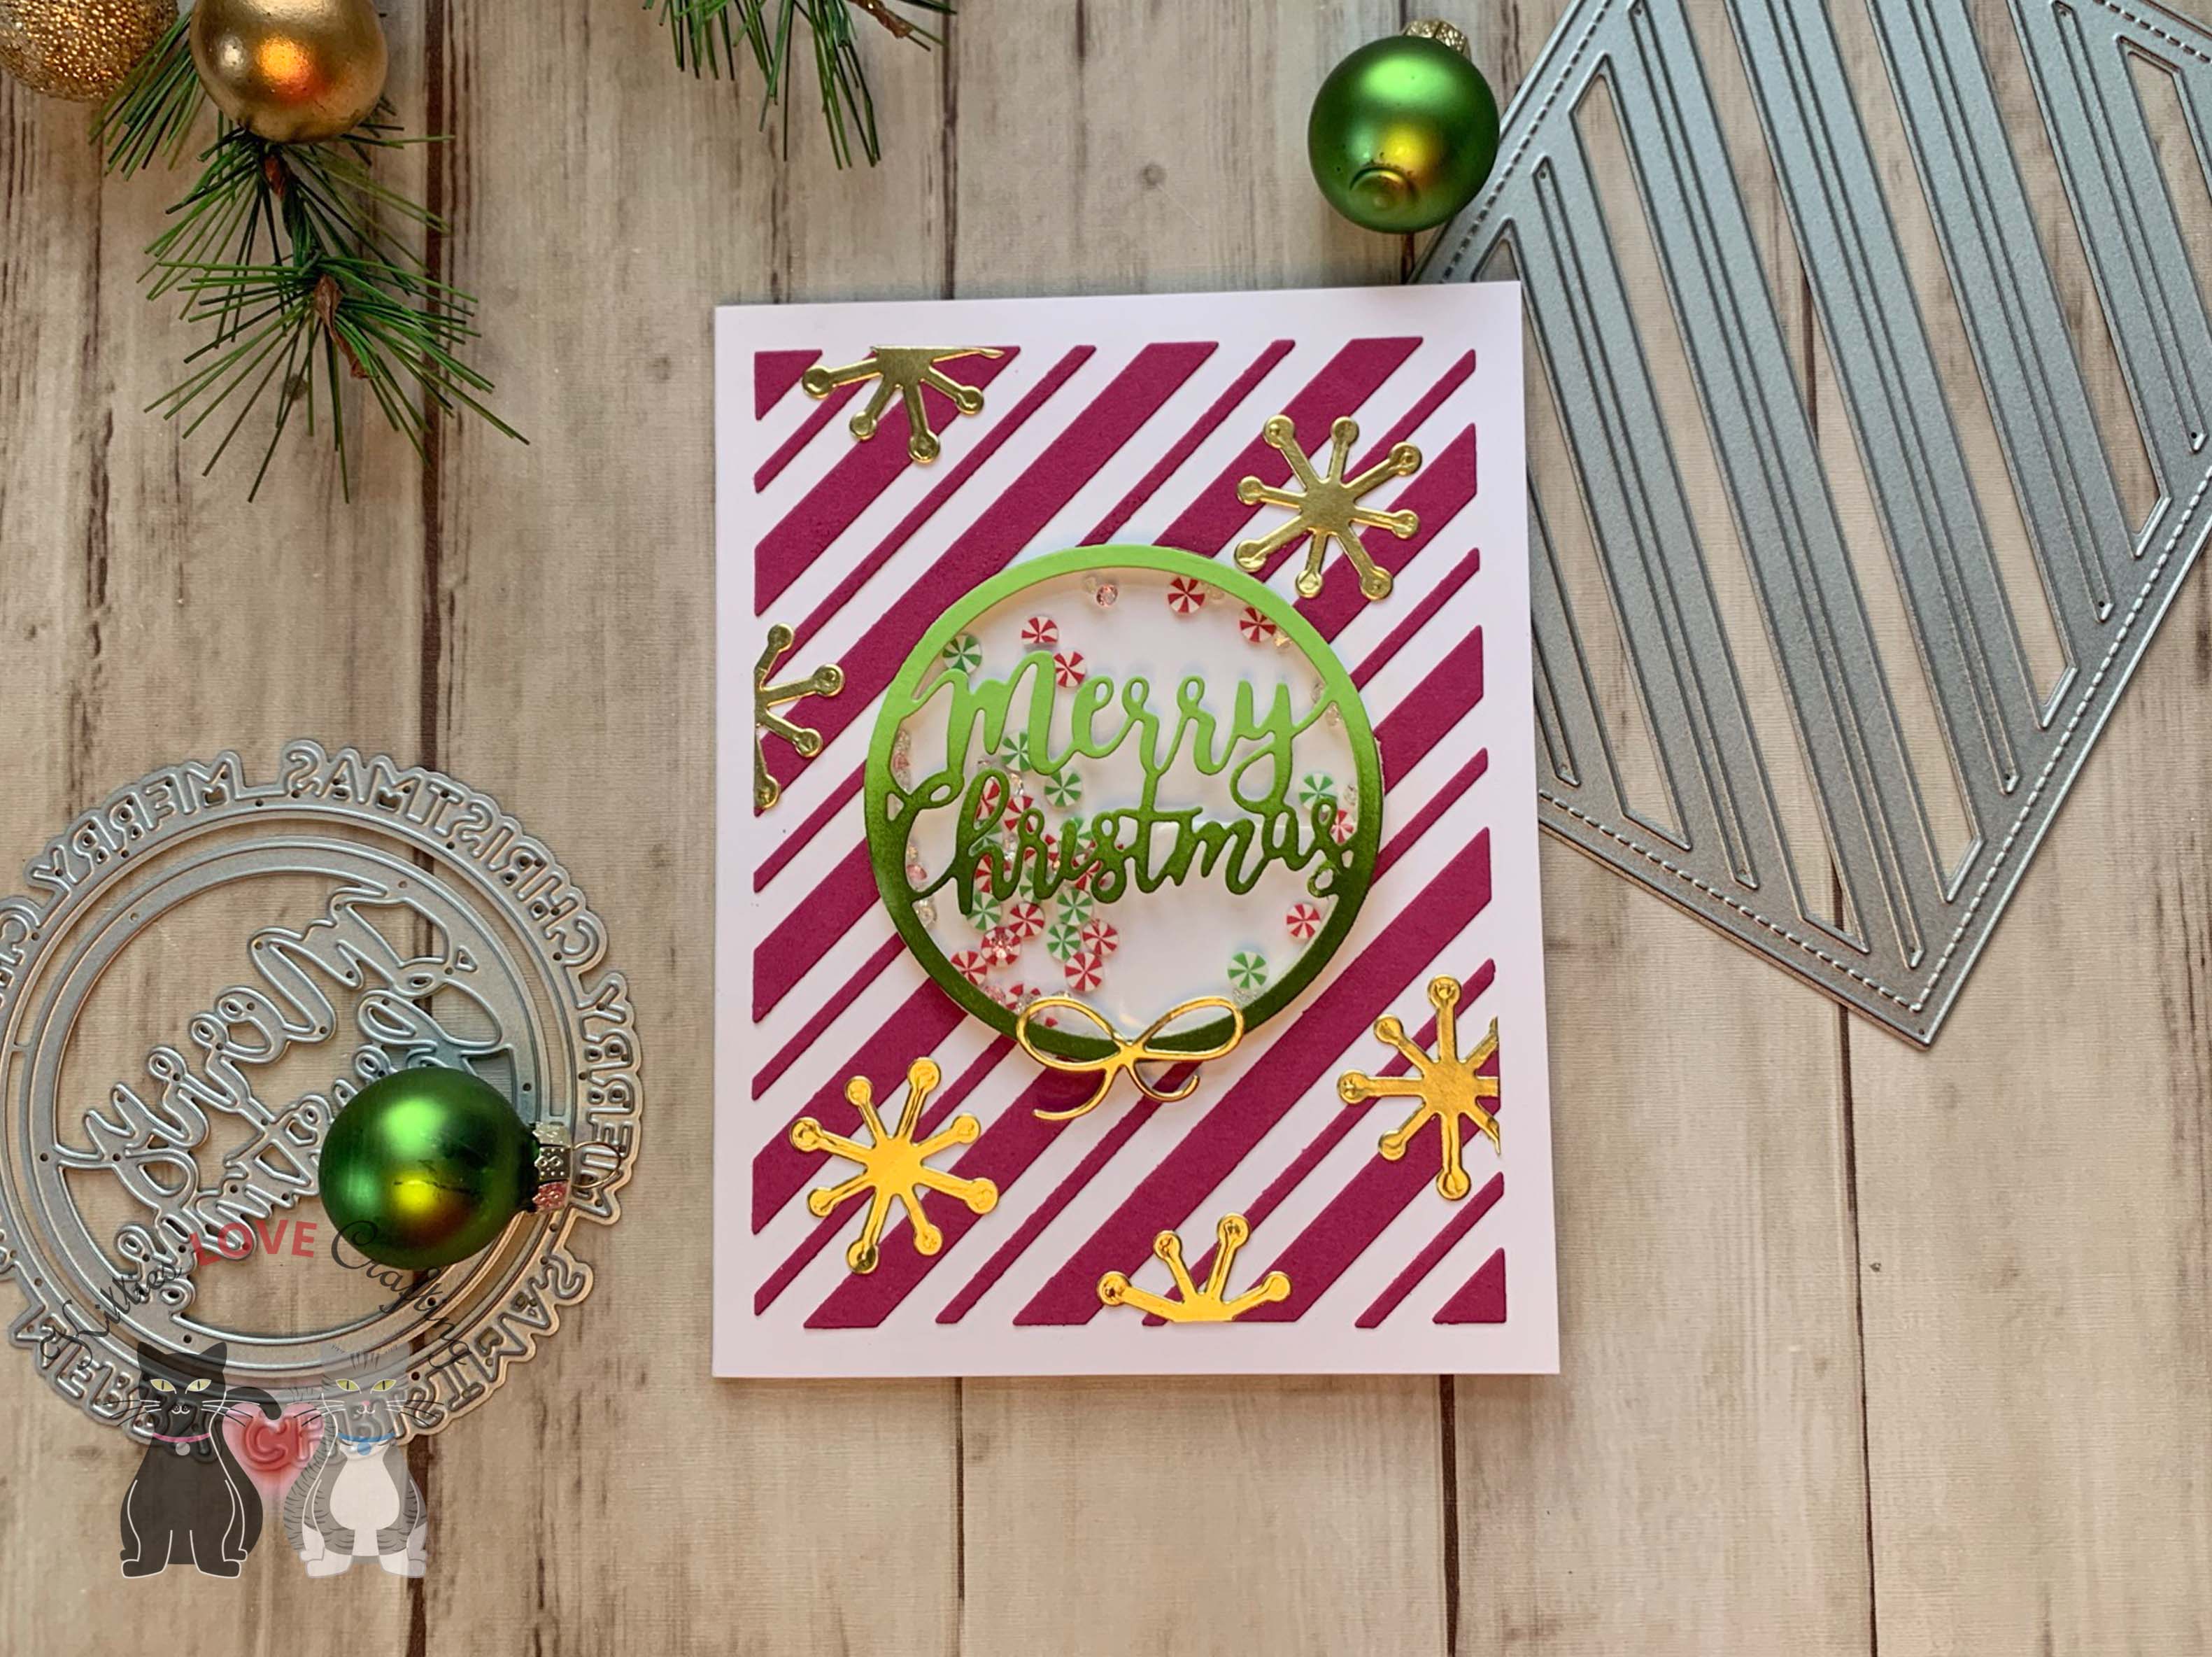
I die cut a piece of Acetate with a 2-1/2″ circle punch and adhered it to the back of the sentiment and added a very thin piece of 3M Foam Tape around the edges. I used Queen and Company Clear and Pink Diamond toppings (these are currently out of stock but I think will be back once Q and Co moves) and Candy Toppings to fill the shaker. I added another 2.5 inch circle behind the shaker from white cardstock.
I diecut a bow and several “snowflake” or “asterisk” images from Stampin’ Up! Gold Foil Sheets with the Catherine Pooler Retro Ornament Dies.
On the inside of the card, I stamped a sentiment from the Stampin’ Up! ‘Joy to the World’ Paper Pumpkin stampset (Paper Pumpkin is a subscription box so this stampset is not available for purchase) and Eucalyptus Ink.

Dimensions
- Card Base = 5-1/2 x 8-1/2″ and scored at 4-1/4″ Neenah 110lb Classic Crest Cardstock 8.5 X 11
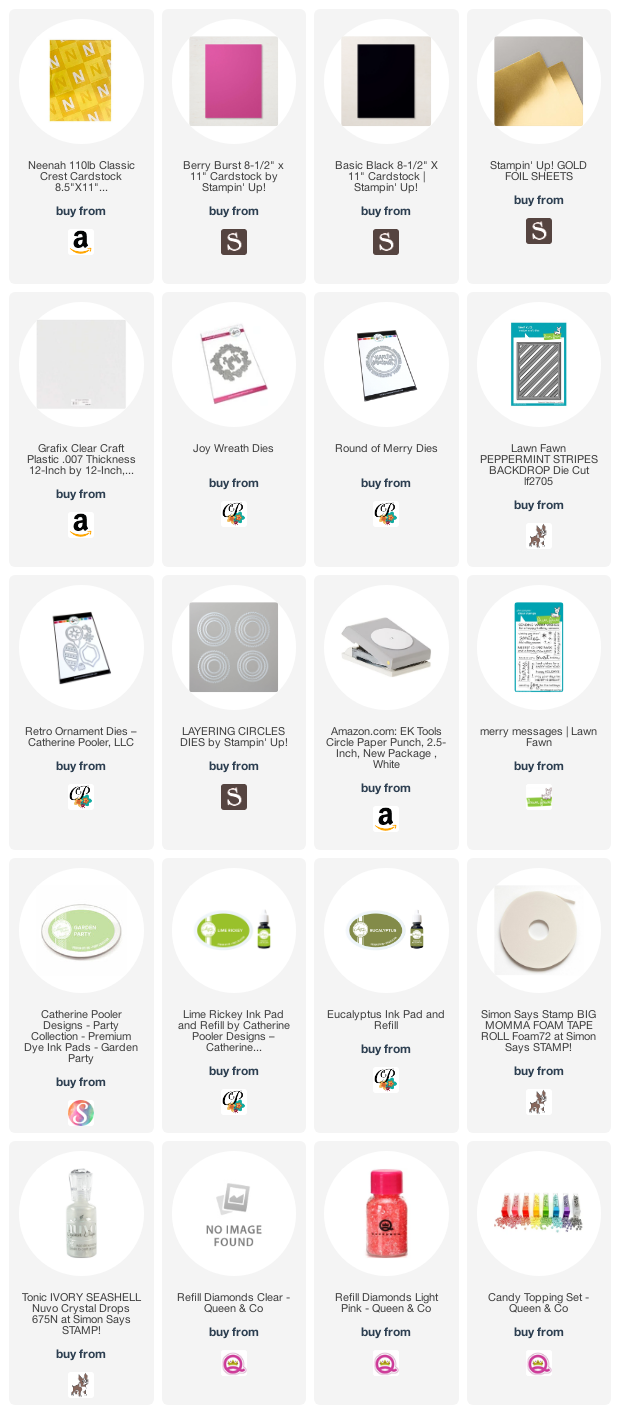
Supplies
 https://linkdeli.com/widget.js?id=f5e8378456858c916708
Thanks for reading this post. I hope you enjoyed and I’ve inspired you to give these cards a try for yourself. Leave comments or questions below or feel free to email.