Hello friends. It’s time to make some holiday cards. Starting things off with some super easy cards using dies to emboss backgrounds. It’s a super easy technique and produces some really cool results. You can use the embossed or debossed side as well.

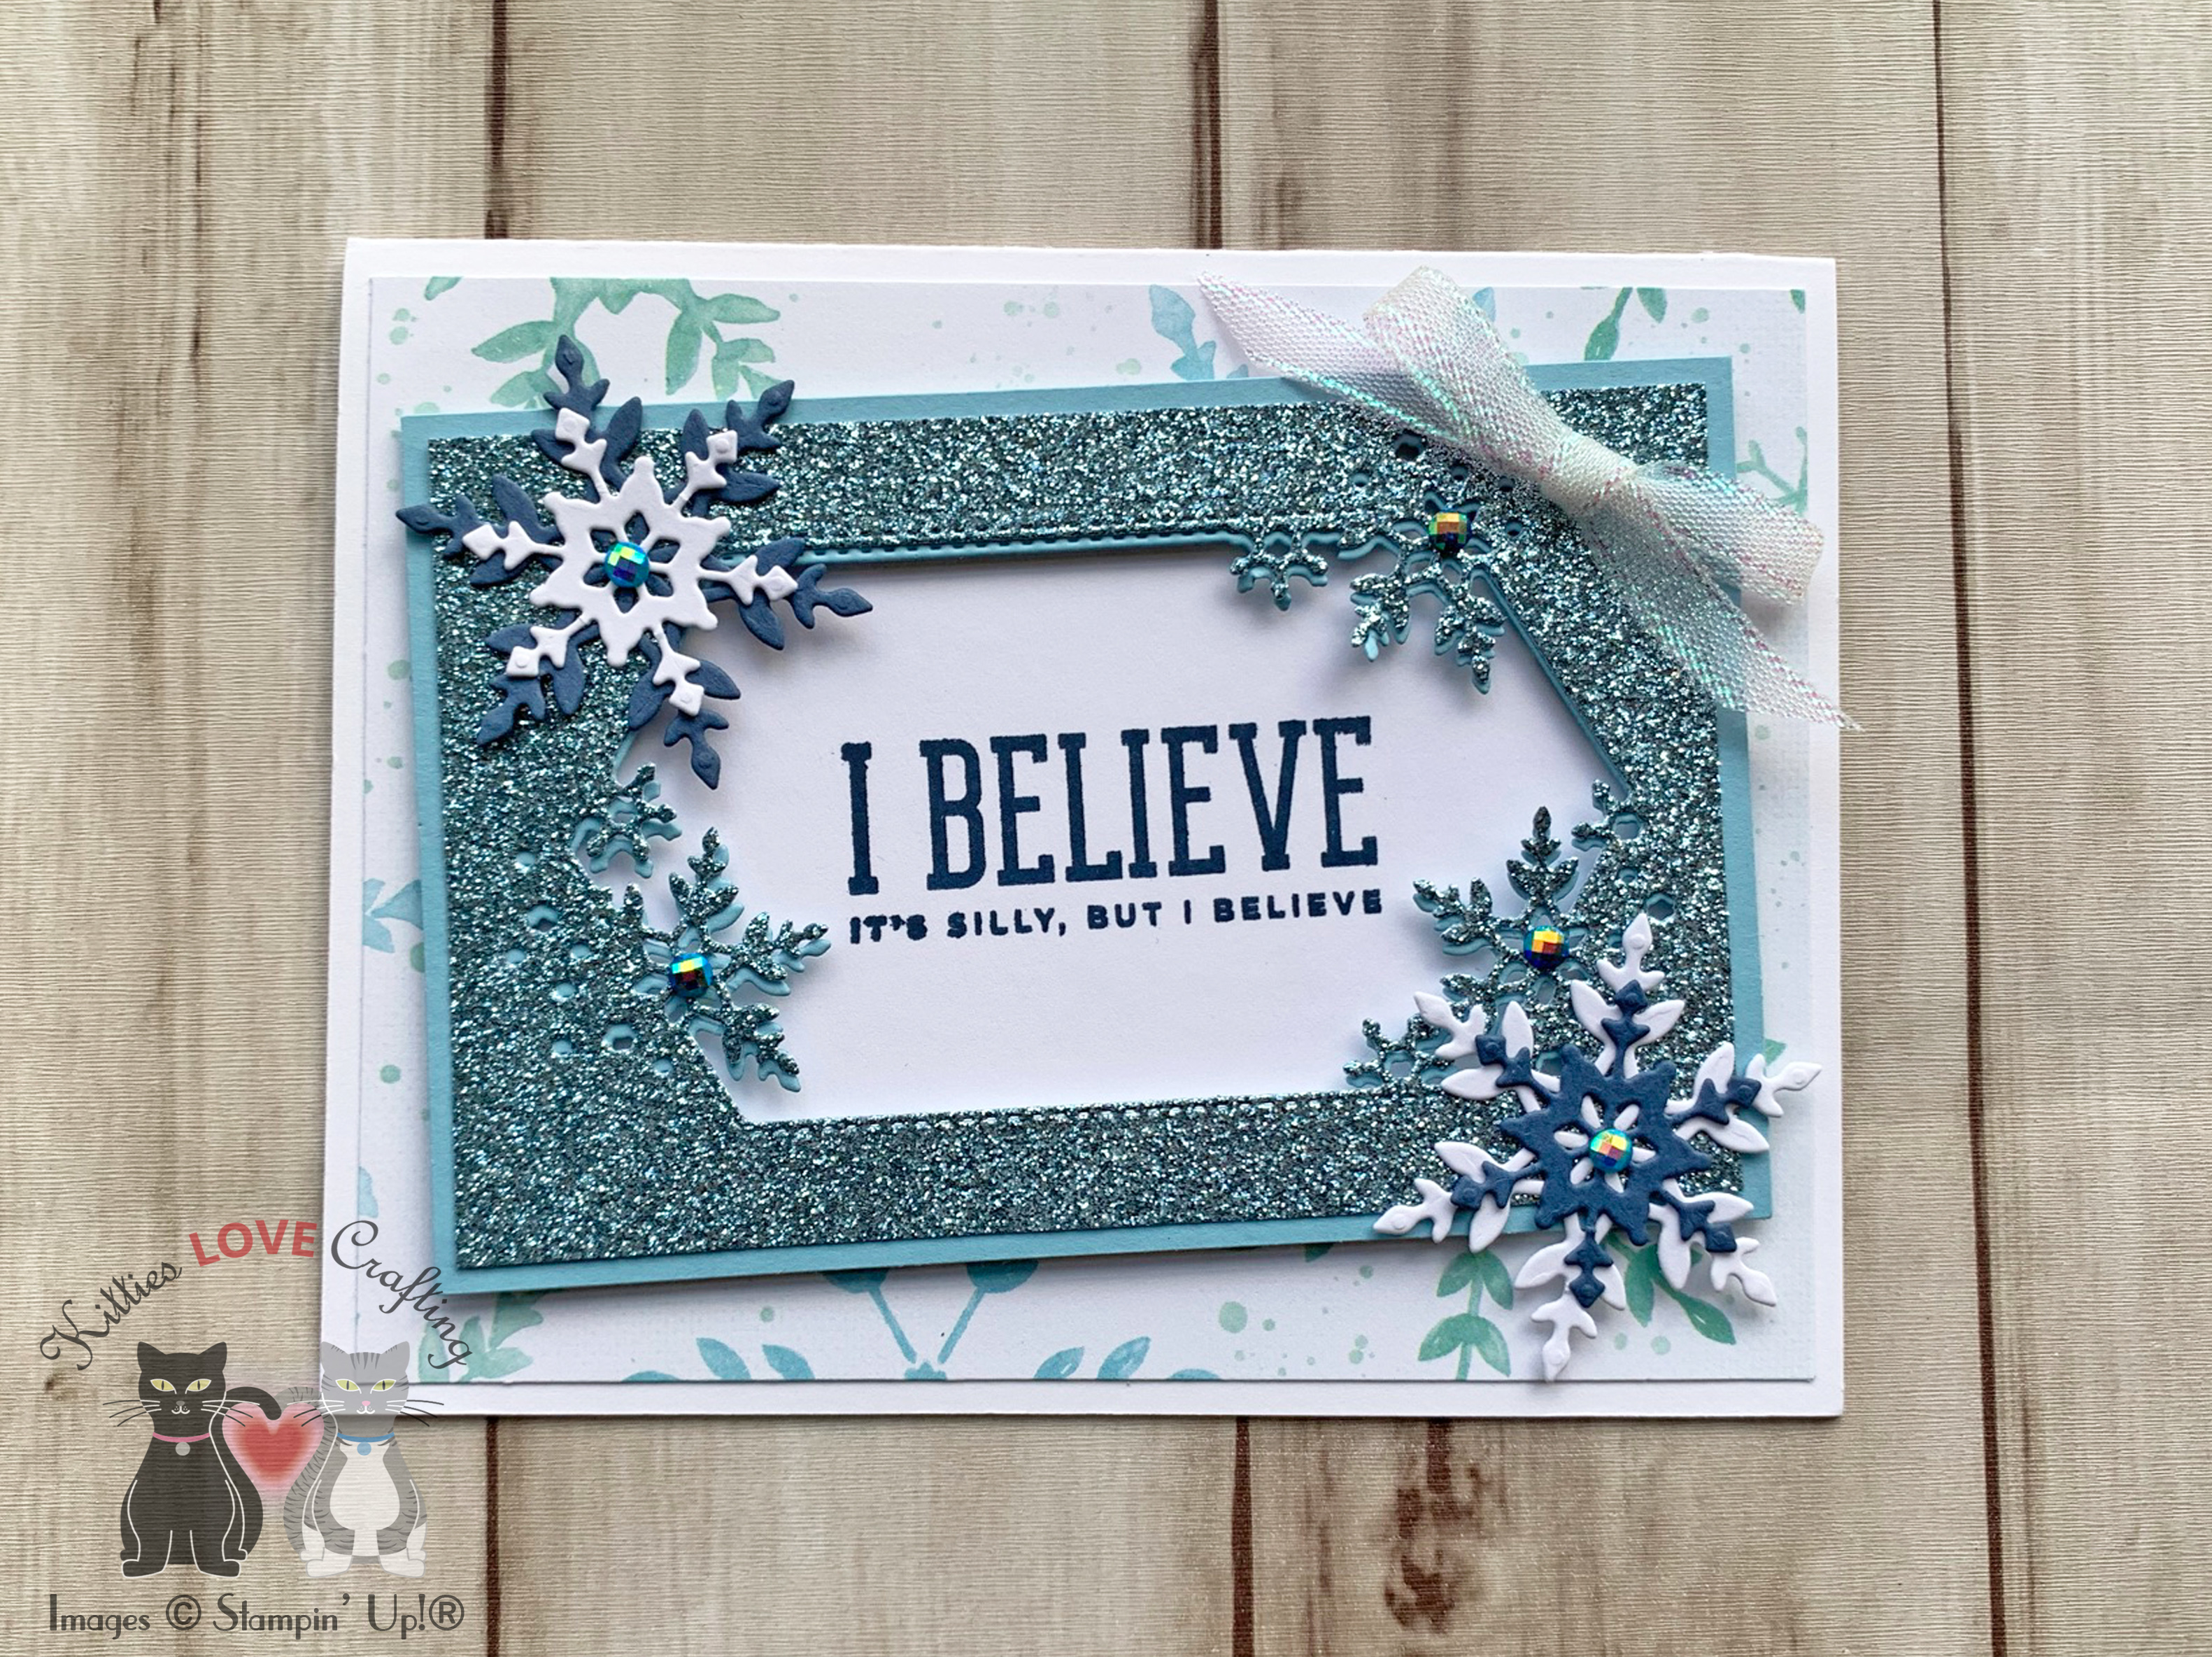
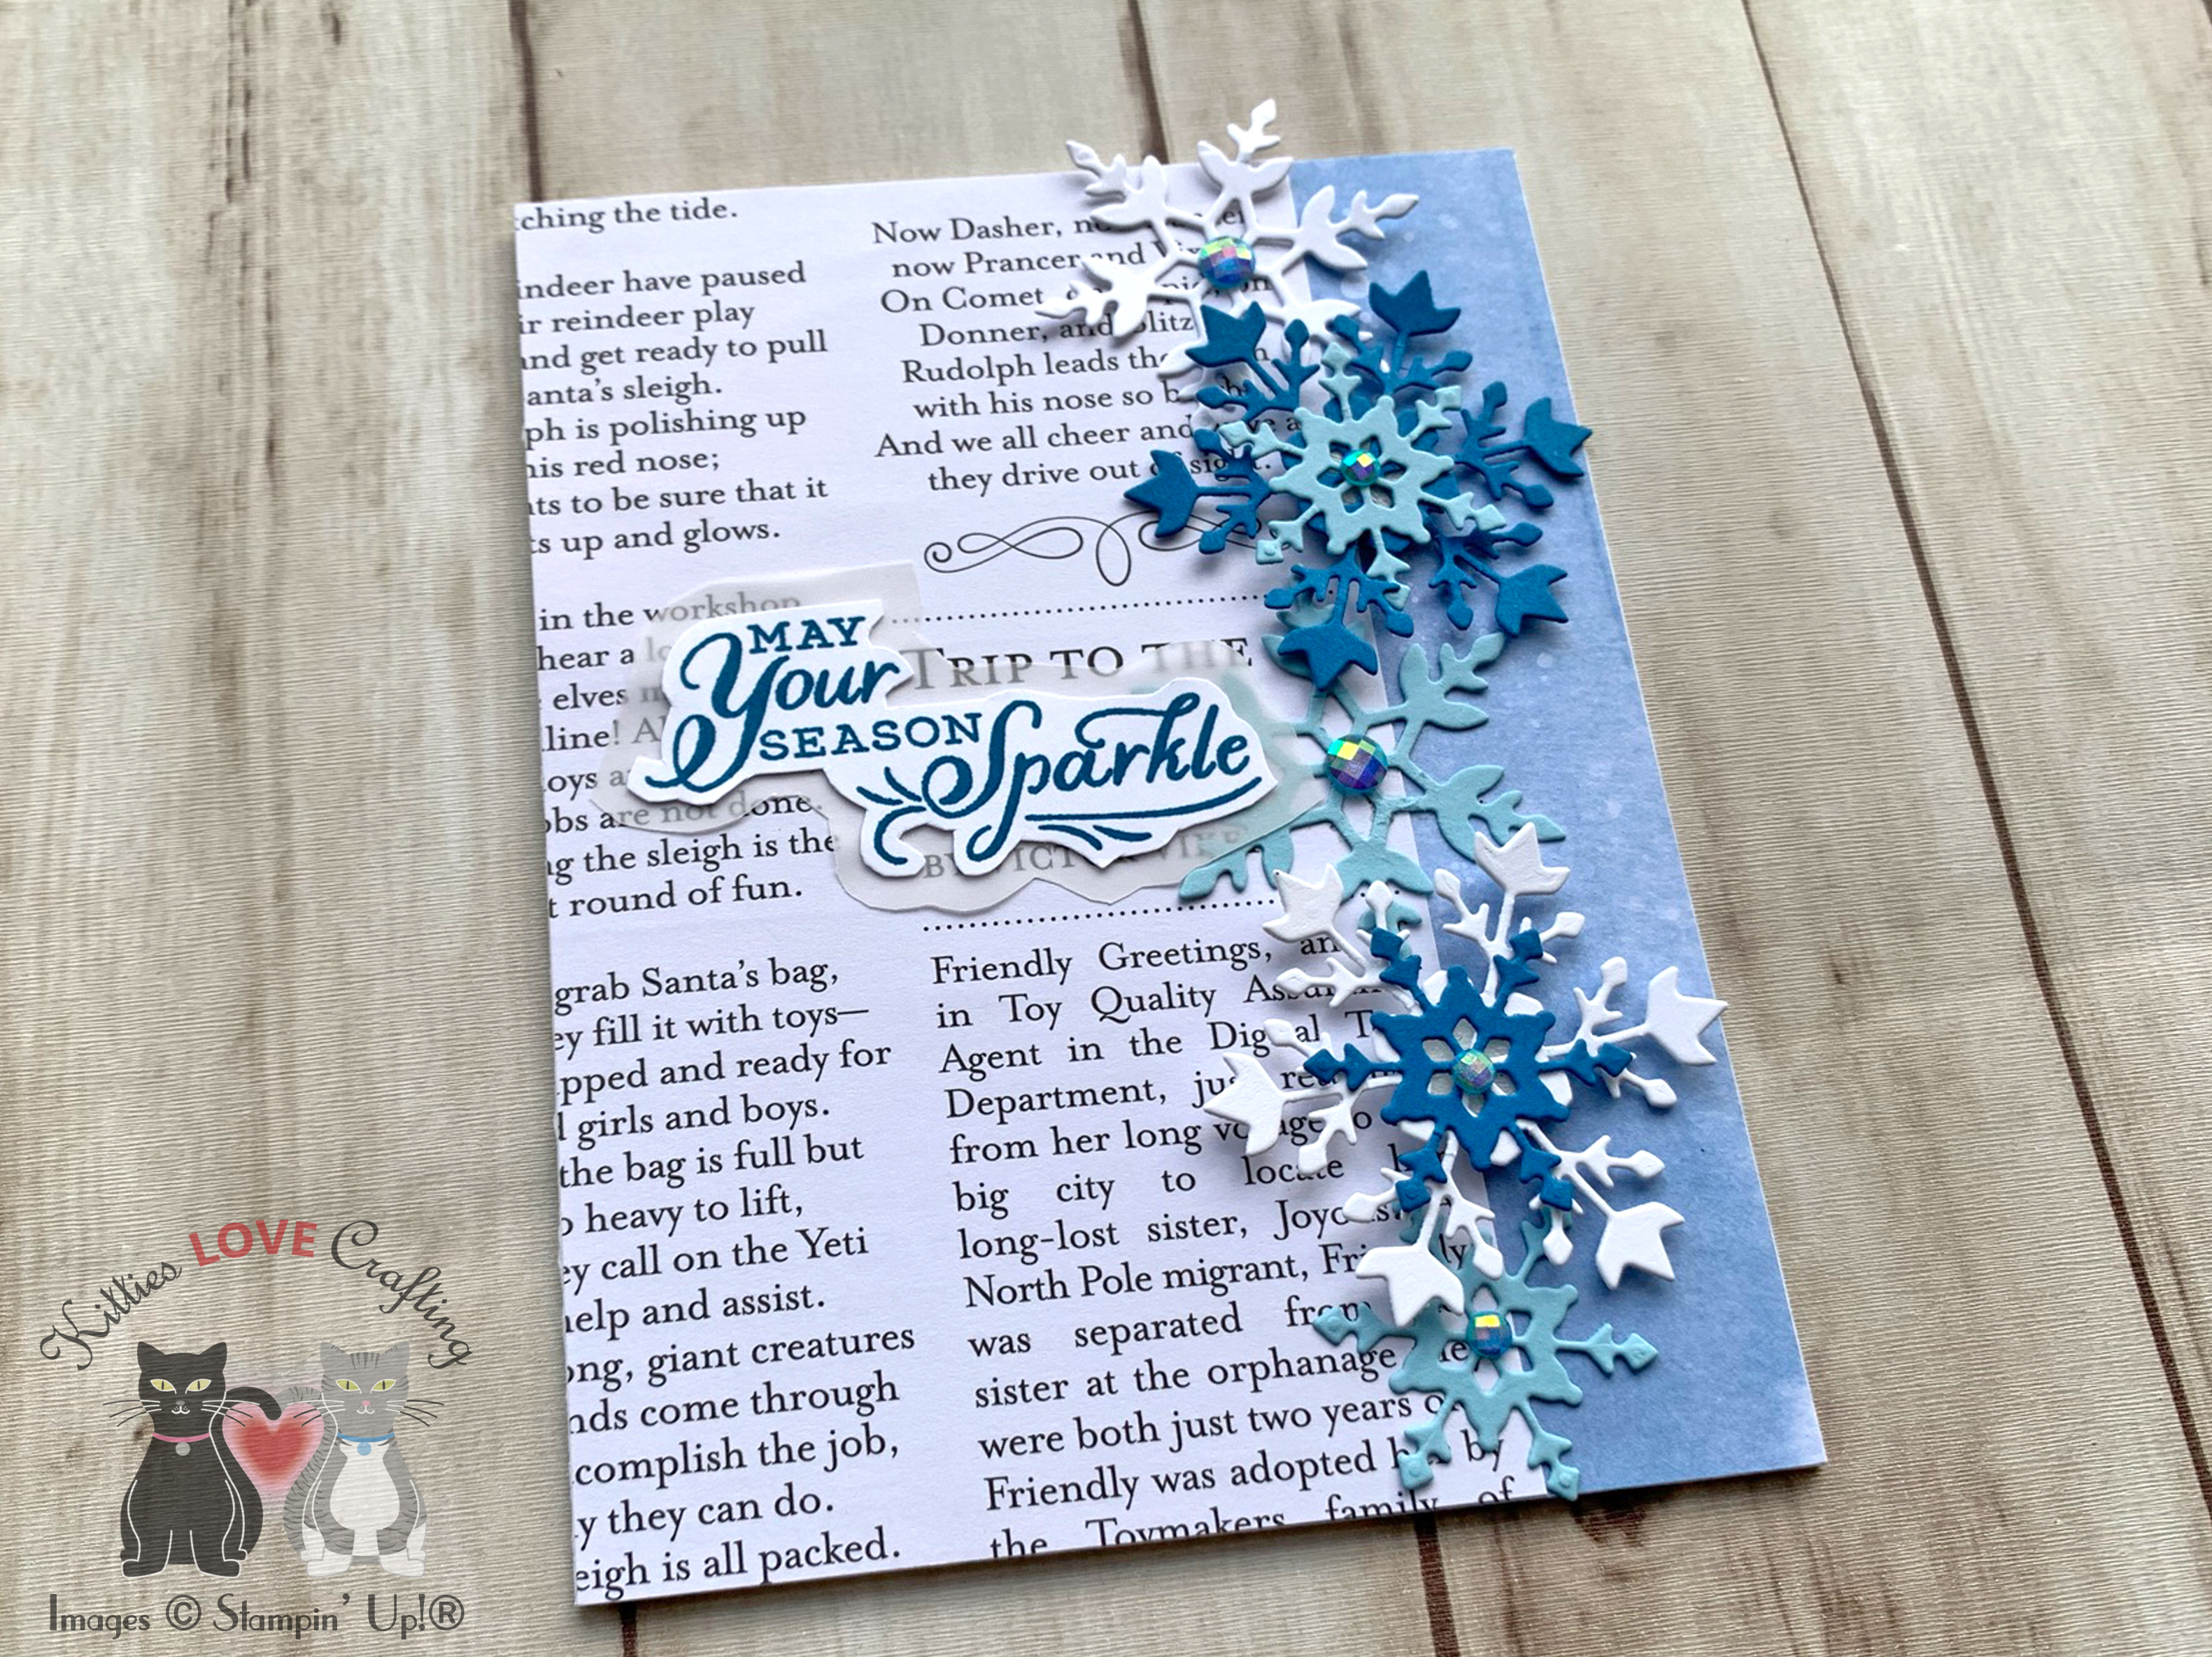
For the first card, I cut a piece of Neenah 110lb Classic Crest Cardstock 8.5 X 11″ to 5-1/2 x 8-1/2″ and scored at 4-1/4″ to create a card base and piece of Neenah 80lb Classic Crest Cardstock 8.5 X 11″ to 4 x 5-1/4” for the top panel. I used the Stampin’ Up! So Many Snowflakes dies (retired) to emboss the background. I followed the sandwich for wafer dies on my diecut machine (Sizzix Big Shot) and added another piece of cardstock to get a deeper impression. Play around with your sandwich and add a shim if necessary to get the desired raised effect.
I used Tim Holtz Tumbled Glass and Uncharted Mariner Distress Oxide Inks as well as Catherine Pooler Designs Black Jack Ink to color the background. Then I cut out the window using the die in the Stampin’ Up! So Many Snowflakes die set.

I stamped the sentiment from the Stampin’ Up! Snowflake Wishes Stamp set (retired) onto some Neenah 80lb Classic Crest Cardstock 8.5 X 11″ with Catherine Pooler Designs Black Jack Ink and adhered behind the panel.
I die cut snowflakes from Neenah 110lb Classic Crest Cardstock 8.5 X 11″, Simon Says Stamp 6×6 Silver Glitter Cardstock and Stampin; Up! 12 x 12 Balmy Blue Glimmer Paper (retired) using the Catherine Pooler Designs Delicate Snowflake Die (discontinued), Stampin’ Up! So Many Snowflakes (retired) and Stampin’ Up! Colorful Seasons.
I finished off the card by adding some Tonic Gloss Simply White Nuvo Crystal Drops and Silver Moondust Nuvo Glitter Drops.

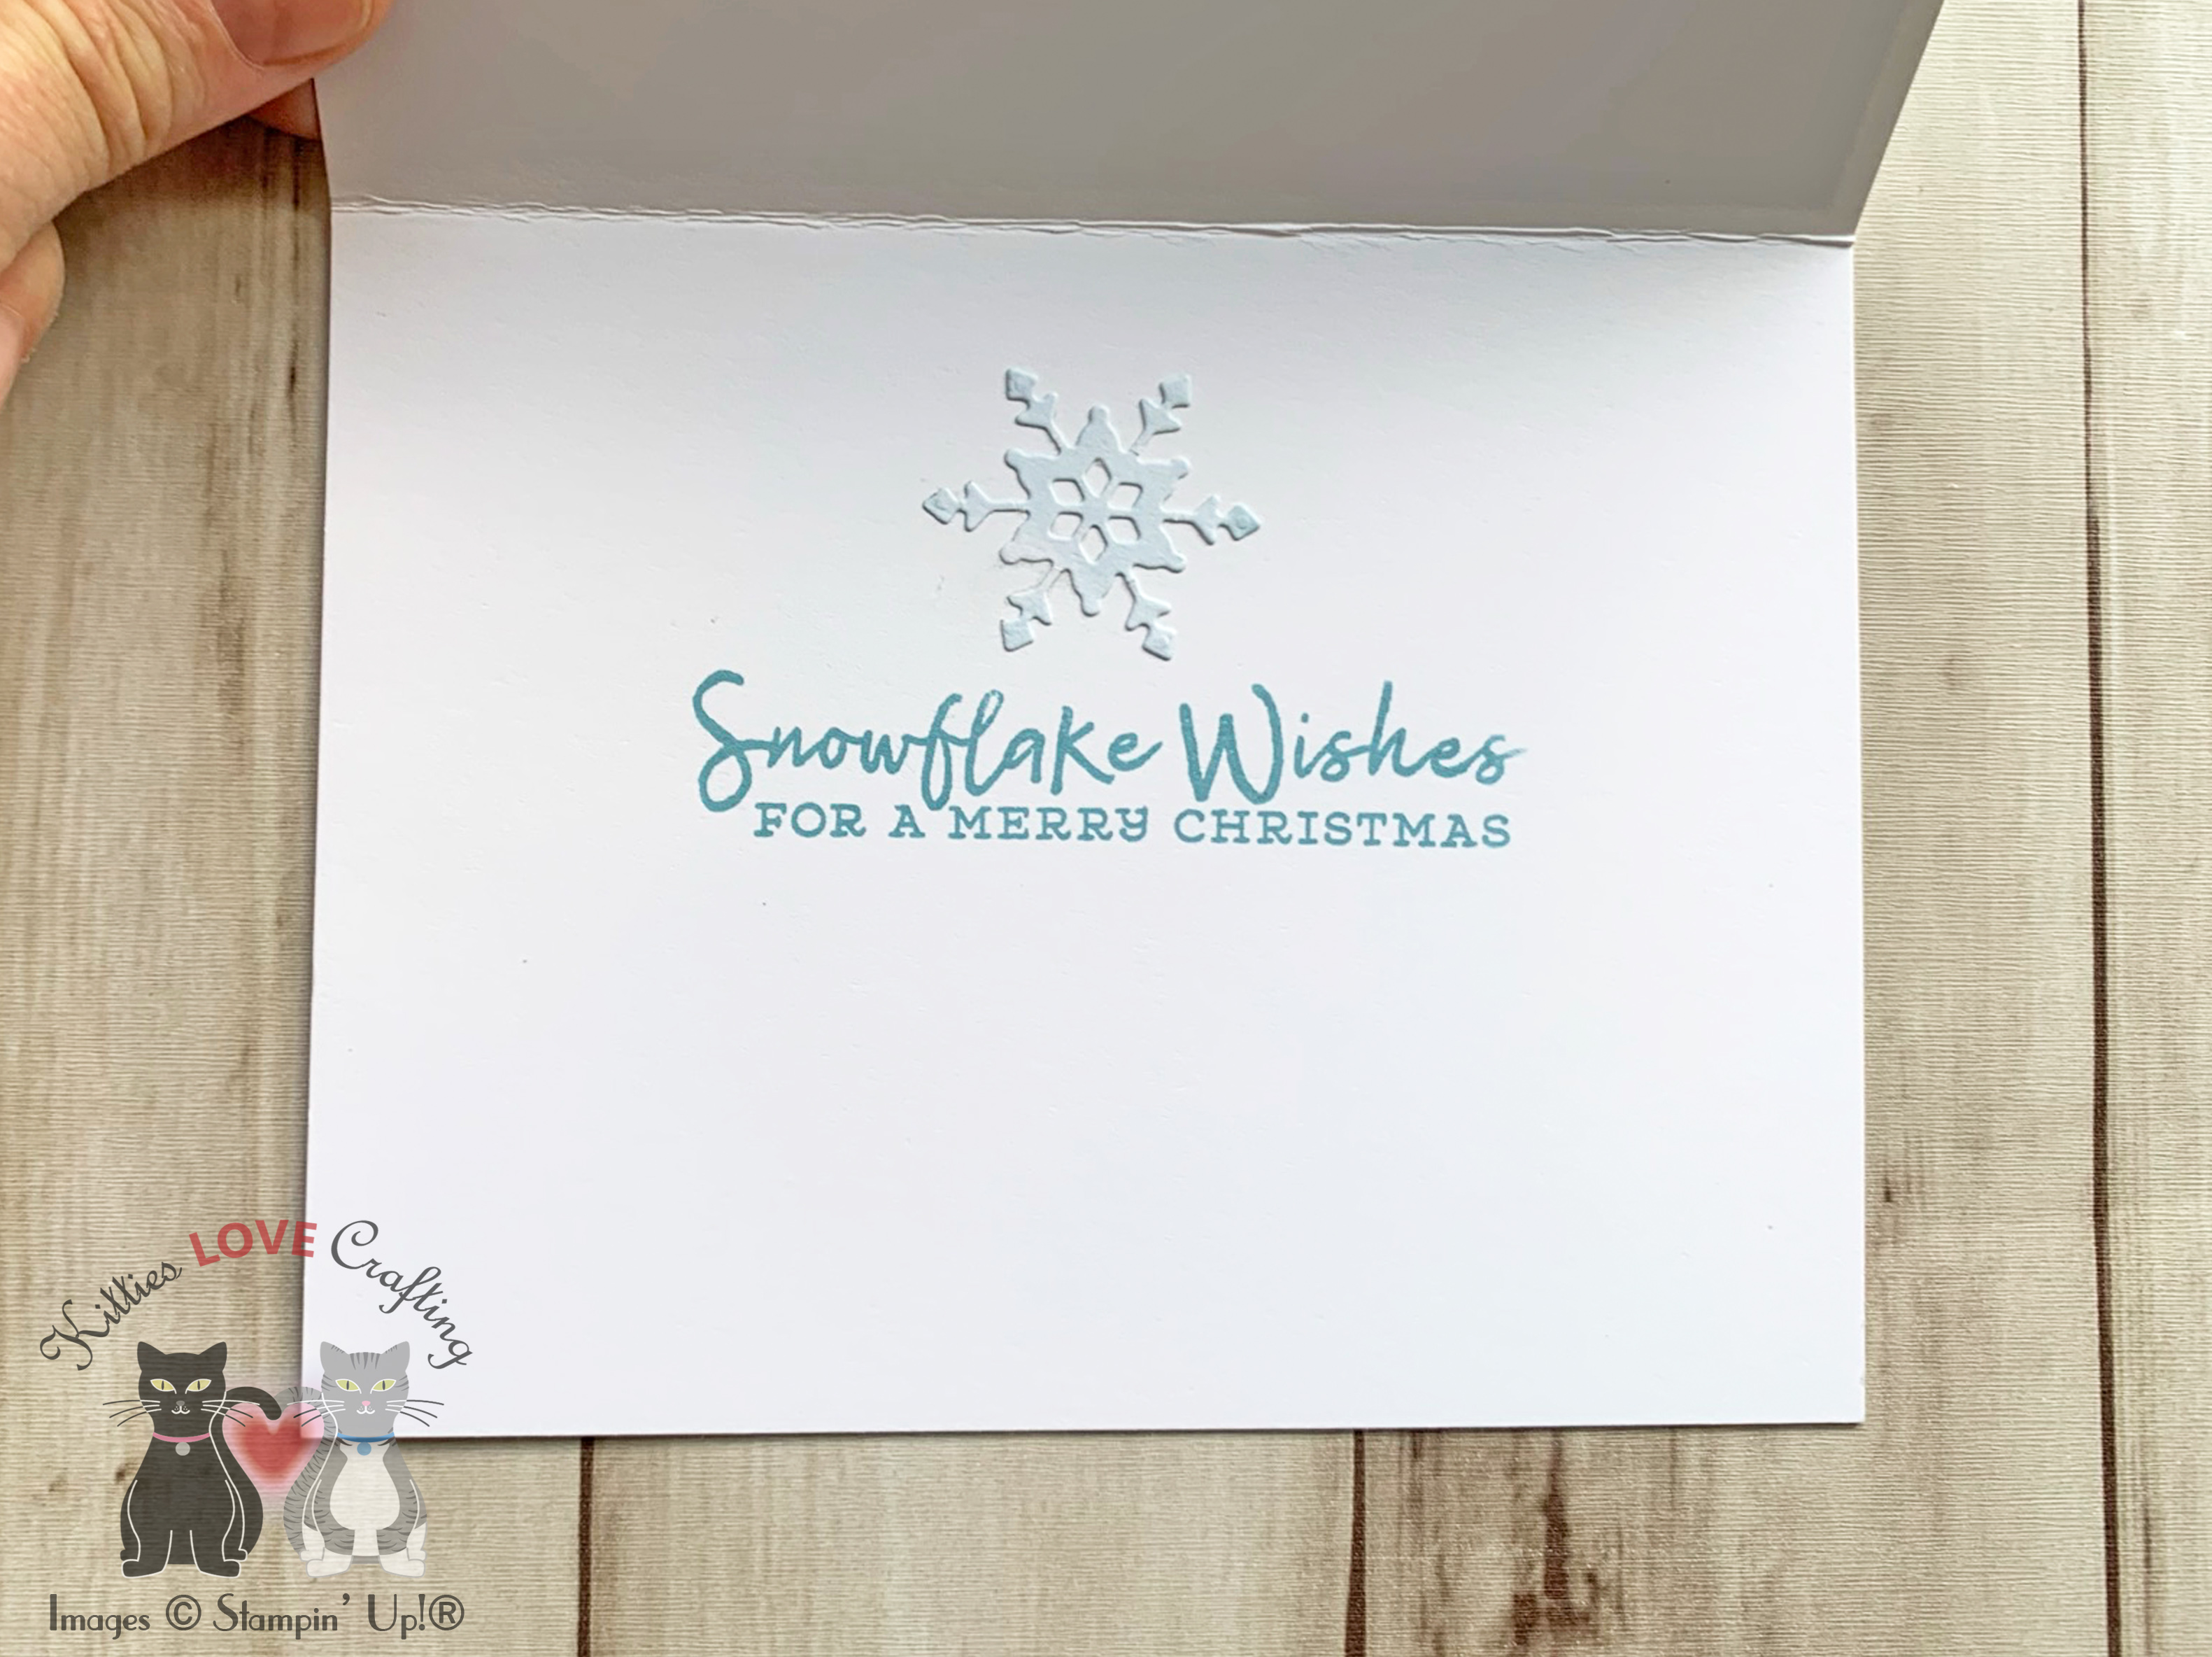
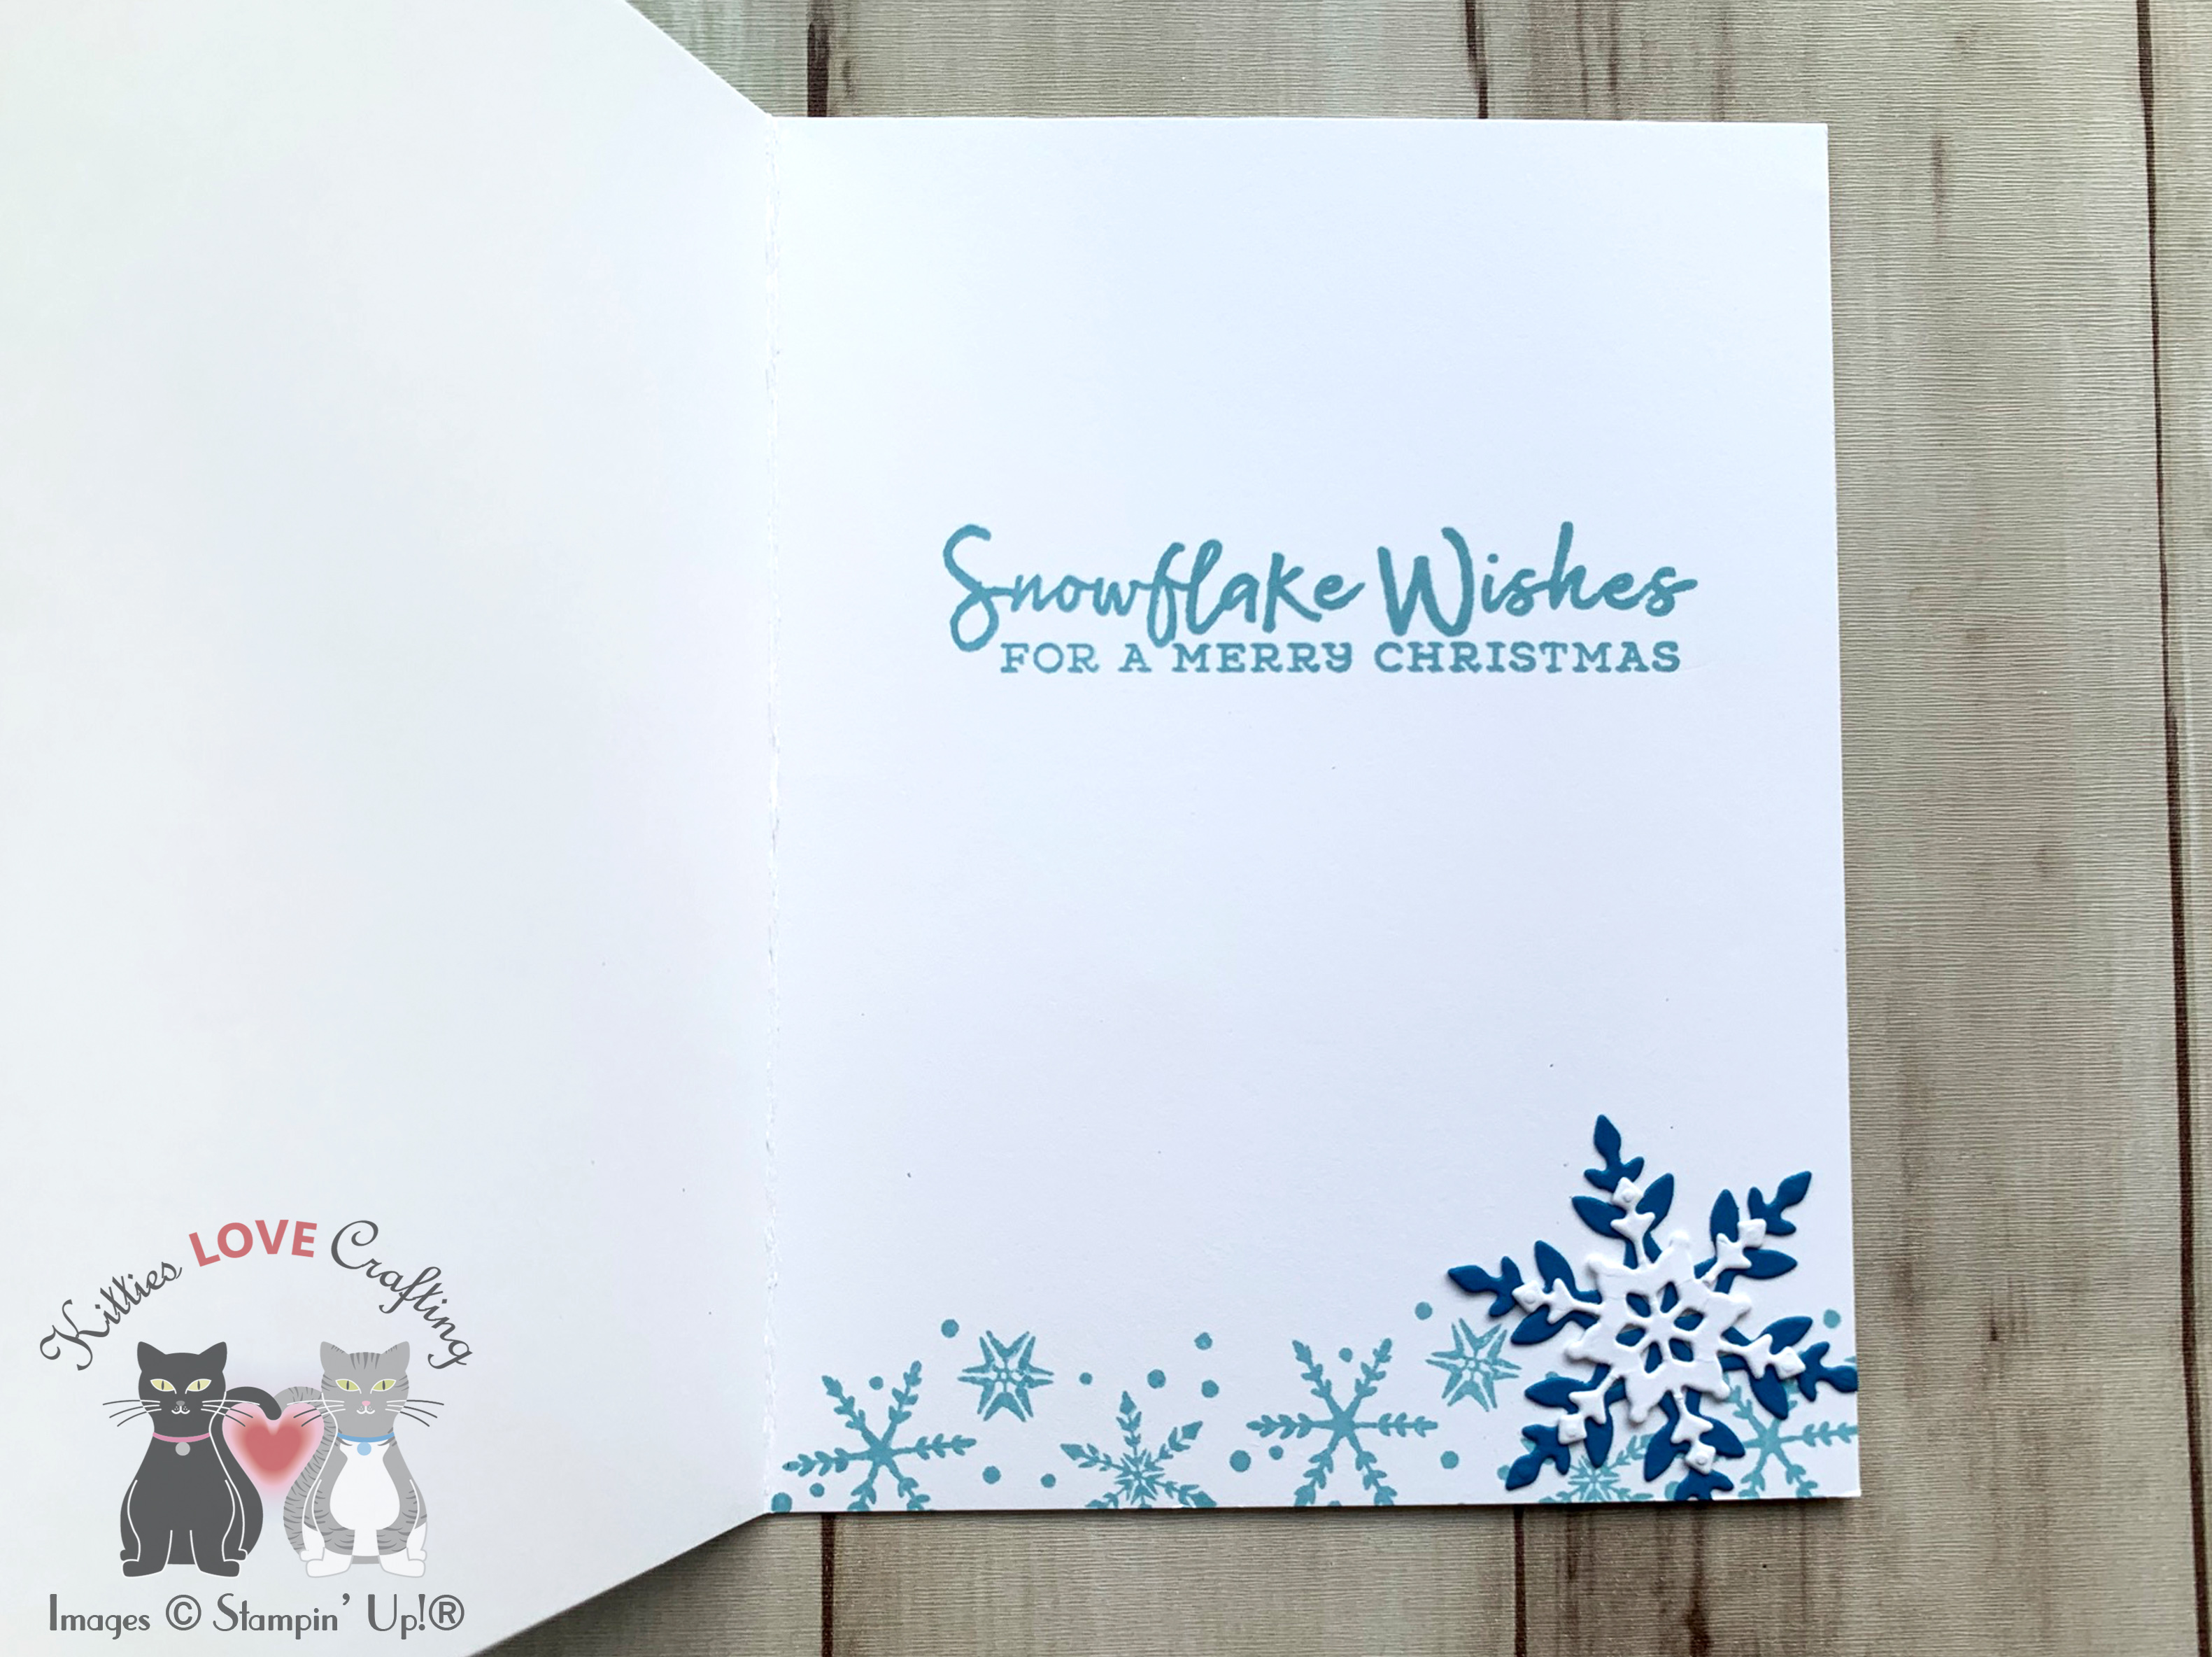
On the inside of the card, I stamped a sentiment from Lawn Fawn’s Merry Messages Stamp Set with Tim Holtz Uncharted Mariner Distress Oxide Ink and added some silver snowflakes.

Dimensions
- Card Base = 5-1/2 x 8-1/2″ and scored at 4-1/4″ Neenah 110lb Classic Crest Cardstock 8.5 X 11″
- Top Panel = 4 x 5-1/4” Neenah 80lb Classic Crest Cardstock 8.5 X 11″
For the second card, I cut a piece of Neenah 110lb Classic Crest Cardstock 8.5 X 11″ to 5-1/2 x 8-1/2″ and scored at 4-1/4″ to create a card base and piece of Strathmore Bristol Smooth Paper to 4 x 5-1/4” for the top panel. I used the Stampin’ Up! Colorful Seasons dies (retired) to emboss the background.

I used Tim Holtz Tumbled Glass, Uncharted Mariner, Kitsch Flamingo, and Picked Raspberry Distress Oxide Inks to color the background. I used the ink smooshing technique this time instead of ink blending. It created a nice watercolor effect.
I die cut snowflakes from Neenah 110lb Classic Crest Cardstock 8.5 X 11″, Simon Says Stamp 6×6 Silver Glitter Cardstock and Stampin; Up! 12 x 12 Balmy Blue Glimmer Paper (retired) as well as some bright pink glitter paper from my stash. I used the Hero Arts Fancy Snowflake Die (discontinued), Stampin’ Up! So Many Snowflakes (retired) and Stampin’ Up! Colorful Seasons.

I stamped the sentiment from the Stampin’ Up! Snowflake Wishes Stamp set (retired) onto some Neenah 80lb Classic Crest Cardstock 8.5 X 11″ with Catherine Pooler Designs Black Jack Ink, fussycut it, and adhered to the panel.
I finished off the card by adding some Tonic IVORY SEASHELL Nuvo Crystal Drops.
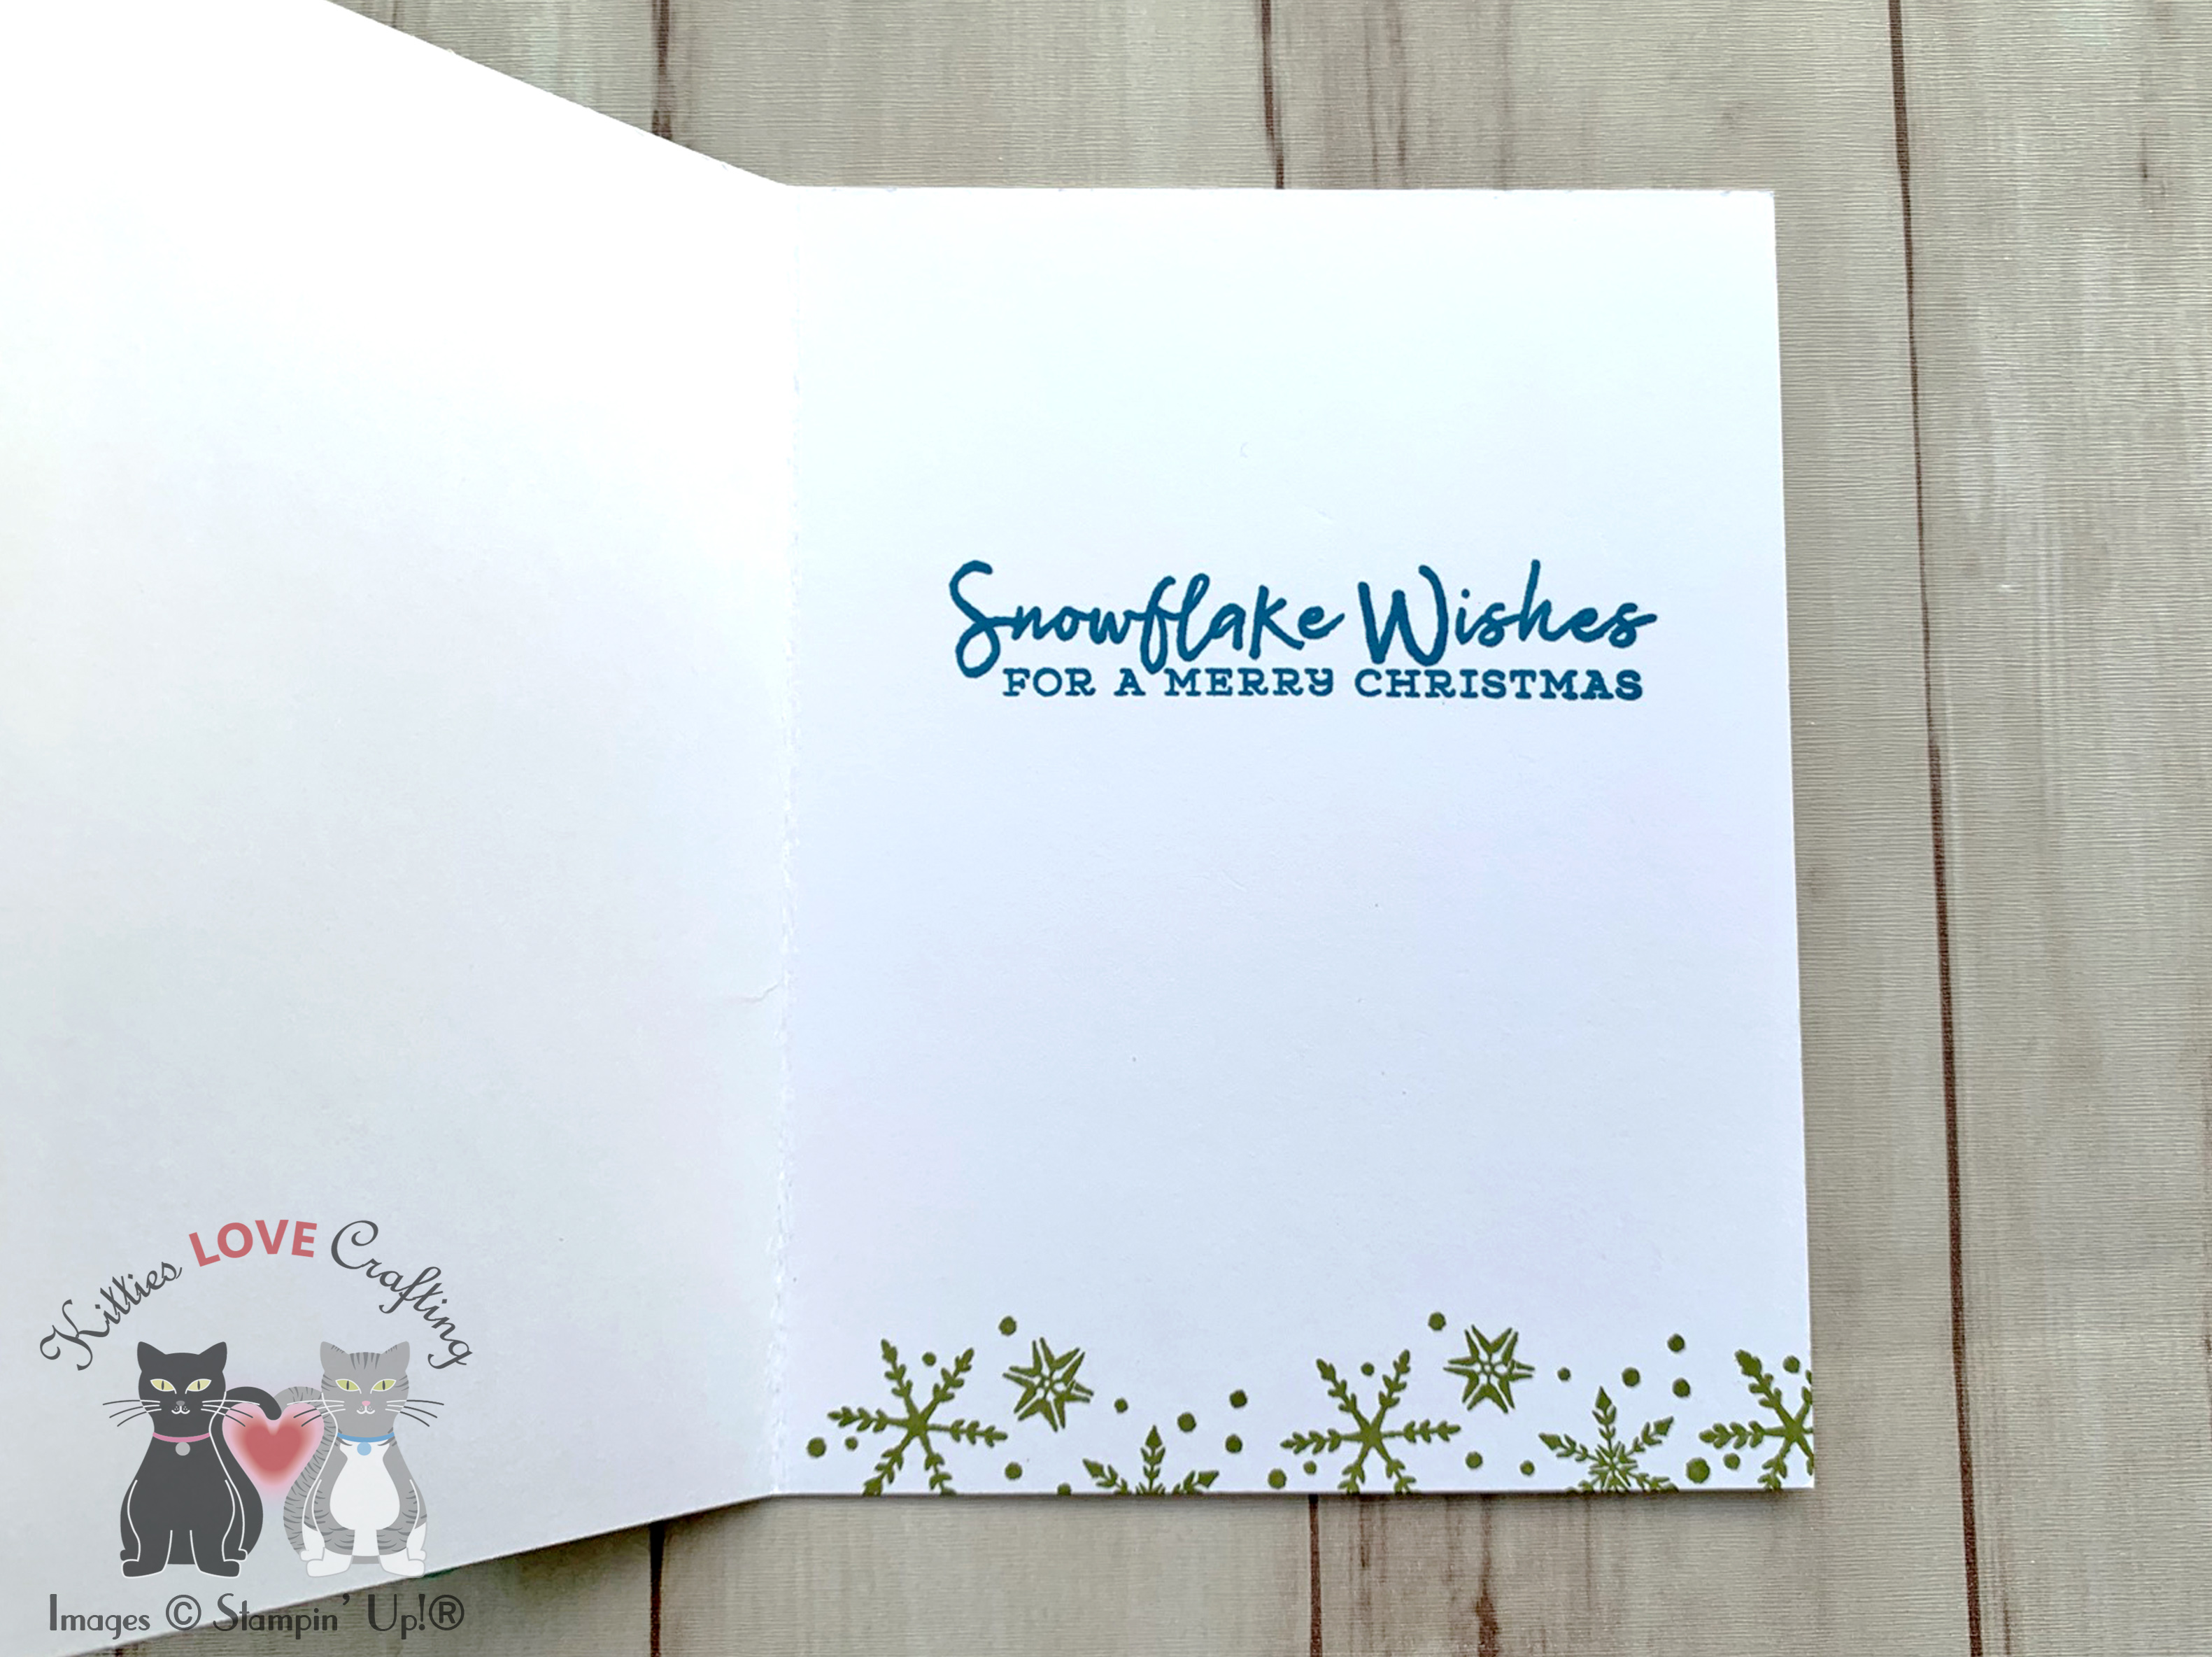
On the inside of the card, I stamped a sentiment from Lawn Fawn’s Merry Messages Stamp Set with Catherine Pooler Designs Black Jack Ink and added a Balmy Blue Glitter snowflake .

Dimensions
- Card Base = 5-1/2 x 8-1/2″ and scored at 4-1/4″ Neenah 110lb Classic Crest Cardstock 8.5 X 11″
- Top Panel = 4 x 5-1/4” Strathmore Bristol Smooth Paper
For the third card, I cut a piece of Neenah 110lb Classic Crest Cardstock 8.5 X 11″ to 5-1/2 x 8-1/2″ and scored at 4-1/4″ to create a card base and piece of Neenah 80lb Classic Crest Cardstock 8.5 X 11″ to 3-3/4 x 5” for the top panel. I also cut a piece of Simon Says Stamp 8-1/2 x 11″ Slate 100lb Cardstock, measuring 4 x 5-1/4″ to mat the top panel.

I die cut snowflakes from Neenah 110lb Classic Crest Cardstock 8.5 X 11″, Stampin; Up! 12 x 12 Balmy Blue Glimmer Paper (retired) as well as some pale and bright pink glitter paper from my stash. I used the Hero Arts Fancy Snowflake Die (discontinued), Stampin’ Up! So Many Snowflakes (retired) and Stampin’ Up! Colorful Seasons.

I stamped the sentiment from the Stampin’ Up! Snowflake Wishes Stamp set (retired) onto some Neenah 80lb Classic Crest Cardstock 8.5 X 11″ with Catherine Pooler Designs Black Jack Ink and adhered to the panel.
I finished off the card by adding some Tonic LIQUID MERCURY Nuvo Crystal Drops.
On the inside of the card, I stamped a sentiment from Lawn Fawn’s Merry Messages Stamp Set Tim Holtz Picked Raspberry Distress Oxide Ink and added a light pink and balmy blue snowflake.

Dimensions
- Card Base = 5-1/2 x 8-1/2″ and scored at 4-1/4″ Neenah 110lb Classic Crest Cardstock 8.5 X 11″
- Top Panel = 3-3/4 x 5” Neenah 80lb Classic Crest Cardstock 8.5 X 11″; 4 x 5-1/4” Simon Says Stamp 8-1/2 x 11″ Slate 100lb Cardstock
For the fourth card, I cut a piece of Neenah 110lb Classic Crest Cardstock 8.5 X 11″ to 5-1/2 x 8-1/2″ and scored at 4-1/4″ to create a card base and piece of Neenah 80lb Classic Crest Cardstock 8.5 X 11″ to 4 x 5-1/4” for the top panel. I used the Stampin’ Up! So Many Snowflakes dies (retired) to emboss the background.
I ink blended the background using Tim Holtz Kitsch Flamingo and Picked Raspberry Distress Oxide Inks.

I die cut snowflakes from Neenah 110lb Classic Crest Cardstock 8.5 X 11″ as well as some bright pink glitter paper from my stash. I used the Catherine Pooler Designs Delicate Snowflake Die (discontinued), Stampin’ Up! So Many Snowflakes (retired) and Stampin’ Up! Colorful Seasons.

I stamped the sentiment from the Stampin’ Up! Joy to the World Paper Pumpkin Stampset (retired) directly onto the card with Catherine Pooler Designs Black Jack Ink.
I finished off the card by adding some Tonic IVORY SEASHELL and Carnation Pink Nuvo Crystal Drops.
On the inside of the card, I stamped a sentiment from Lawn Fawn’s Merry Messages Stamp Set Tim Holtz Picked Raspberry Distress Oxide Ink and added bright pink snowflakes.

Dimensions
- Card Base = 5-1/2 x 8-1/2″ and scored at 4-1/4″ Neenah 110lb Classic Crest Cardstock 8.5 X 11″
- Top Panel = 4 x 5-1/4” Neenah 80lb Classic Crest Cardstock 8.5 X 11″
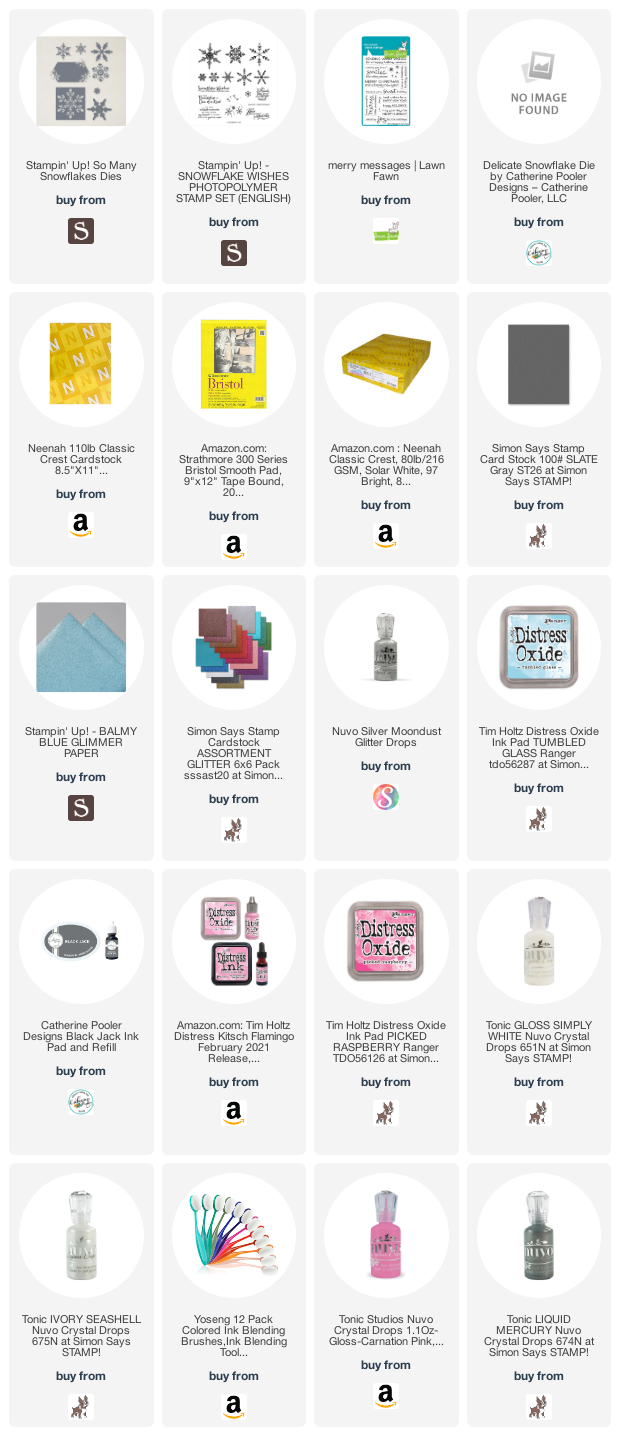
Supplies
 https://linkdeli.com/widget.js?id=f5e8378456858c916708
Thanks for reading this post. I hope you enjoyed and I’ve inspired you to give these cards a try for yourself. Leave comments or questions below or feel free to email.