Celebrations, Emboss Resist Technique, Love & Friendship

Two Cards Using One Die: No Waste

Hello friends. In honor of Pride month I made these two rainbow cards using the Catherine Pooler Designs Retro Love Dies. This die produces a very cool sentiment that allows you to use the word by itself, with the shadow or even cut out an outline of the word. You can also use it to create shaker cards.
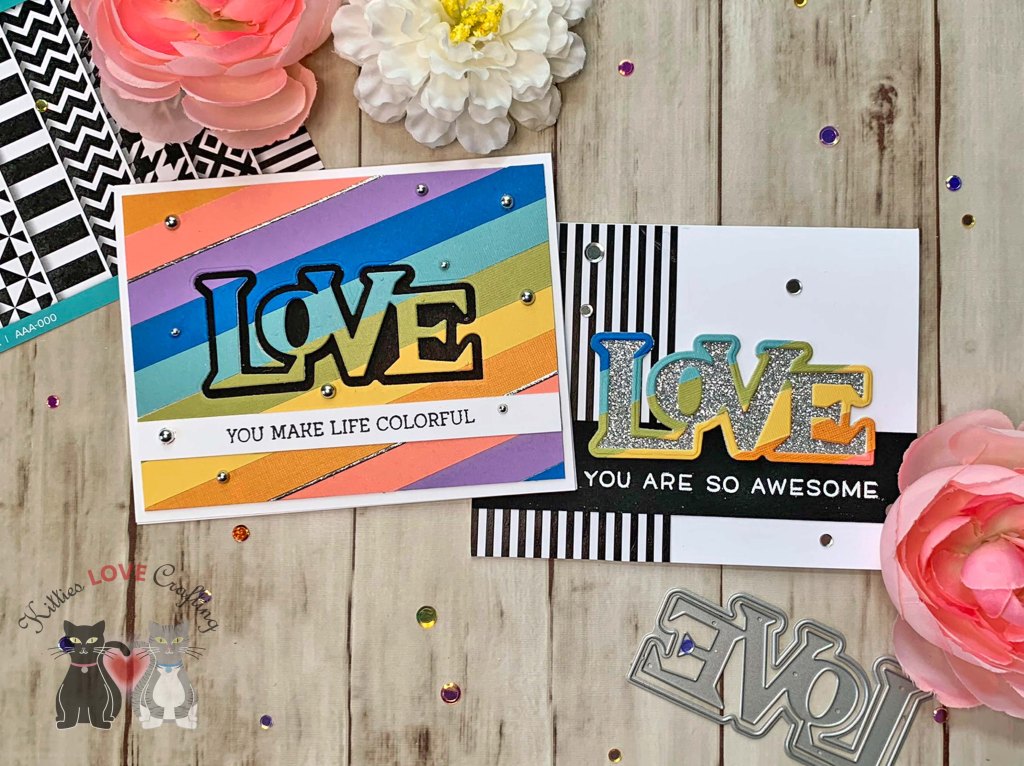
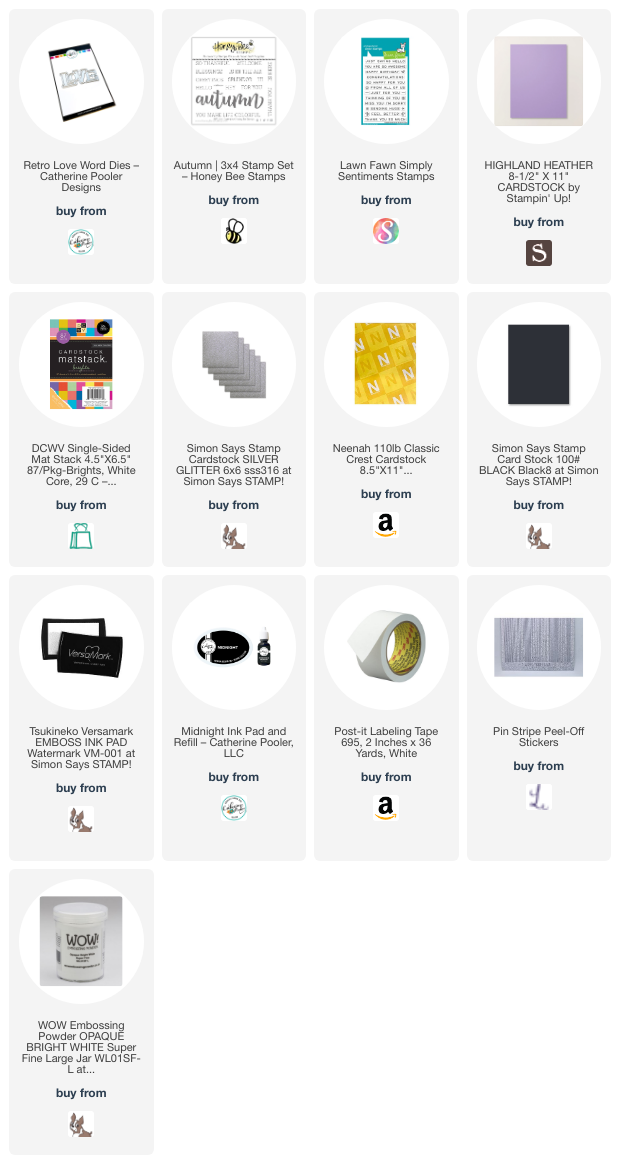
For this first card, I cut a piece of Neenah 100lb Classic Crest Cardstock 8.5 X 11″ to 5-1/2 x 8-1/2″ and scored at 4-1/4″ to create a card base, as well as another piece cut to 4 x 5-1/4″. I added double sided tape to the panel and then cut 1/2 inch strips of colored paper from DCWV Double-Sided Mat Stack 4.5″X6.5″ Brights (may be discontinued – link to similar stack below), Stampin’ Up! Pacific Point 8-1/2 x 11″ Cardstock (retired), and Stampin’ Up! Highland Heather 8-1/2 x 11″ Cardstock.

I trimmed the excess paper and die cut the word “LOVE” from the center of the card. I die cut the word 3x more from Simon Says Stamp 100# Black Cardstock so I can stack them and create dimension and added a piece of the black cardstock behind it.

I stamped the a sentiment from Honey Bee Stamps Autumn Buzzword stamps (retired) onto some Neenah 100lb Classic Crest Cardstock 8.5 X 11″ with Catherine Pooler Designs Midnight Ink and trimmed it down to 1/2 x 4 x 5-1/4″. Before adhering it to the card I added some Love From Lizi Silver Glitter Pin Stripe Peel-offs.

I finished off the card by adding some Pretty Pink Posh PLATINUM Pearls.

I left the inside of the card blank.

Dimensions


For the second card, I cut a piece of Neenah 100lb Classic Crest Cardstock 8.5 X 11″ to 5-1/2 x 8-1/2″ and scored at 4-1/4″ to create a card base. Then cut a piece of pattern paper from Catherine Pooler Designs Black Tie Gala 6 x 6 Paper (discontinued) to 2-1/2 x 4-1/4″. I also cut a piece of Simon Says Stamp 100# Black Cardstock to 1-3/16 x 5-1/2″ for the sentiment.

When I die cut the word “LOVE” and the shadow from the center of the previous rainbow panel, it left me with an outline which I will use for this card. I die cut the shadow from Silver Glitter Cardstock. I then stamped the sentiment from the Lawn Fawn Simply Sentiments Stampset with Versamark Ink and heat embossed with Wow White Embossing Powder.

I finished off the card by adding some Smooth Silver Sequin Discs.

On the inside of the card, I cut a piece of the same pattern paper blank to 1 x 5-1/2″.

Dimensions

Supplies

https://linkdeli.com/widget.js?id=f5e8378456858c916708

Thanks for reading this post. I hope I’ve inspired you to give these Pride cards a try for yourself. Leave comments or questions below or feel free to email.

Celebrations, Thank Yous

2 Cards Featuring Stitched Triangles by Stampin’ Up!

I love stackable geometric dies, especially with stitched details. They are so versatile because you can create a whole card using only the shapes, or add a shape behind a sentiment or focal point to emphasize it. For this card I decided to keep it simple and bright. I combined a rainbow of Stampin’ Up!’s cardstocks, Stitched Triangles Dies and a simple sentiment. It is a very simple card to make and can easily be mass produced. This die set is available in the new 2020-2021 Annual Catalog! There is also a coordinating stamp set.

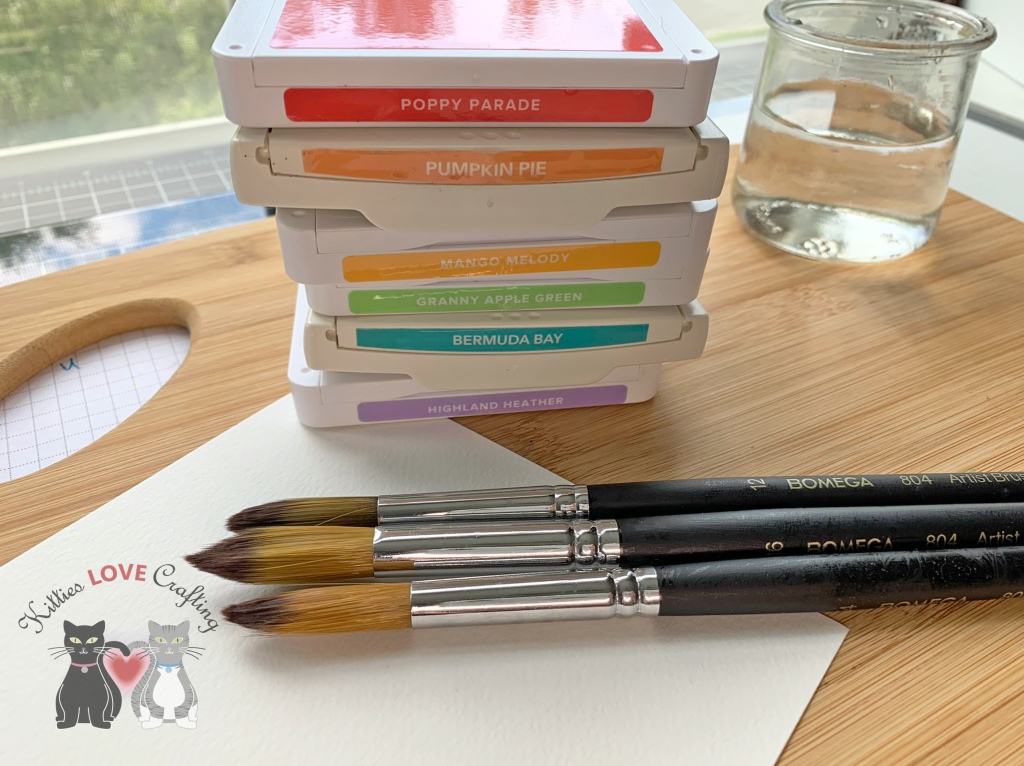
I started by cutting down a piece of Stampin’ Up! Whisper White 8-1/2″ X 11″ Thick Cardstock to 5-1/2 x 8-1/2″ and scored at 4-1/4″ to create a card base. Then I cut several triangles using the Stampin’ Up! Stitched Triangles Dies and Stampin’ Up!’s 8-1/2″ X 11″ Cardstock in Poppy Parade, Pumpkin Pie, Mango Melody, Granny Apple Green, Bermuda Bay, and Highland Heather.

I stacked sets of six triangles in rainbow order and adhered them together with Tombow Mono Multi Glue. And then adhered those to the card base, trimming the excess. I stamped a sentiment from the stamp set included in the Stampin’ Up!’s February 2020 Paper Pumpkin Kit – Lovely Day onto the card base with Memento Tuxedo Black Ink. I left the inside of the card blank and that completes this card. Super easy, right??

Dimensions


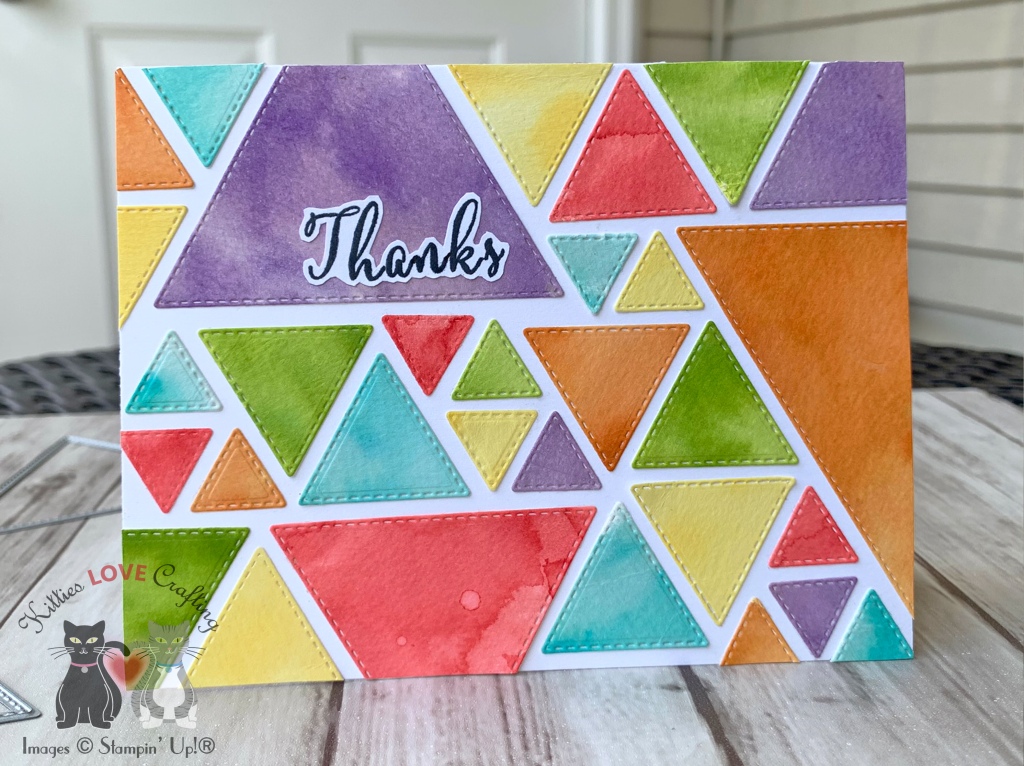
For the second card, I decided to create watercolor triangles. I used the ink refills to watercolor. I started by cutting down a piece of Stampin’ Up! Whisper White 8-1/2″ X 11″ Thick Cardstock to 5-1/2 x 8-1/2″ and scored at 4-1/4″ to create a card base. Then I cut down six panels of Stampin’ Up! Fluid 100 Watercolor Paper to 4-1/4 x 5-1/2″ and used ink refills for Poppy Parade, Pumpkin Pie, Mango Melody, Granny Apple Green, Bermuda Bay, and Highland Heather and a water brush to add color to each panel.

Then I cut several triangles from each panel using the Stampin’ Up! Stitched Triangles Dies. I laid all my triangles out on the card base and puzzle pieced them together basically. Once I was happy with the placement, I adhered them down with Tombow Mono Multi Glue.

I stamped a sentiment onto a scrap piece of Stampin’ Up! Whisper White 8-1/2″ X 11″ Thick Cardstock using Memento Tuxedo Black Ink and the alphabets in the Stampin’ Up! Make A Difference Photopolymer Stamp Set. On the inside I added a few extra triangles in the bottom right corner.

Dimensions


Supplies

https://linkdeli.com/widget.js?id=f5e8378456858c916708

Thanks for reading this post. I hope you enjoyed and I’ve inspired you to try these fun and quick cards for yourself! Leave comments or questions below or feel free to email me. Also if you would like a Stampin’ Up! catalog, please email me as well. All current catalogs can be found on the right side of this post and the Stampin’ Up! page. All news and fun stuff happening at Stampin’ Up! are listed there!

Birthdays, Celebrations

Shop Your Stash Day 1: Birthday Shaker Card

This month I decided to challenge myself to NOT buy any new craft supplies (with the exception of necessary supplies like white cardstock and adhesive). Like many of you, I realized that I have been spending a ton of money on cleaning supplies, hygiene and groceries since I have had to order online more than usual so it was time to cut some corners. I also thought this would help people who are struggling financially but who still want to craft.

I went through my stamps, dies, stencils and picked out some that I know I have not used very often and combined with the other things I already own. I alos thought it was a good time to go through my already made card stash and see what categories I was low on –birthdays is one such category so I started there.

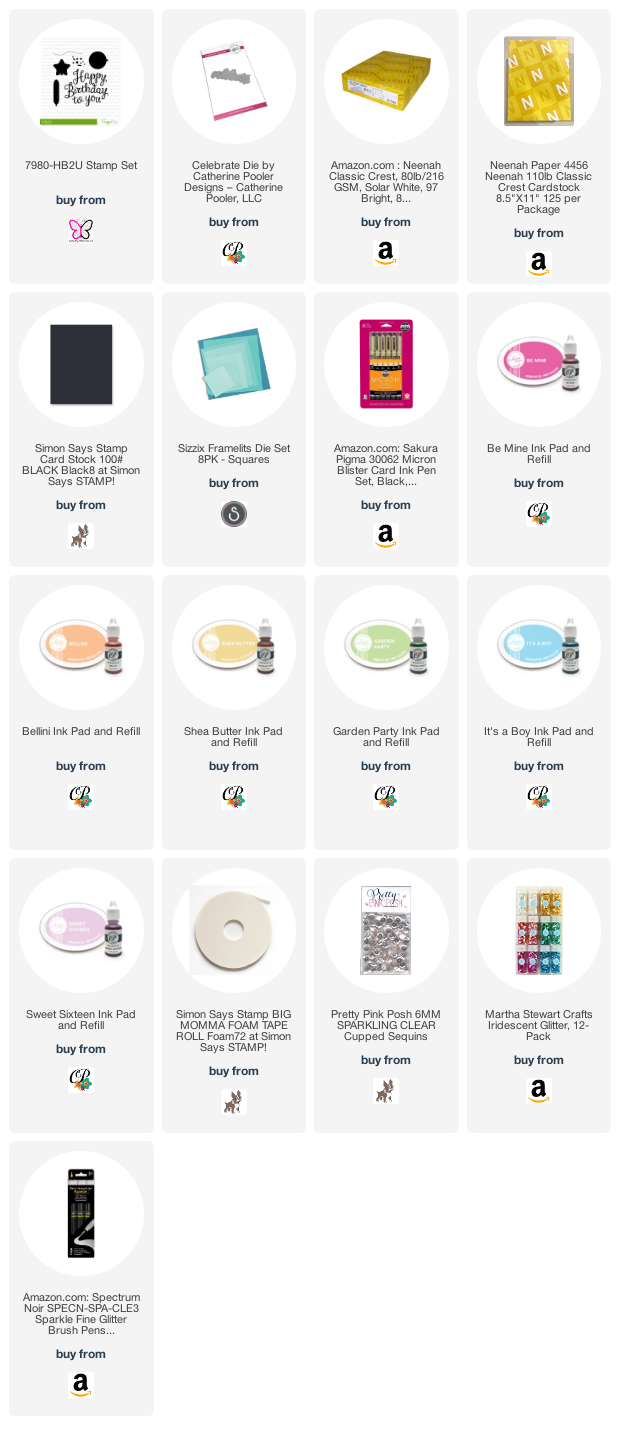
For this card, I started by cutting a piece of Neenah 110lb Classic Crest Cardstock 8.5 X 11″ to 5-1/2 x 8-1/2″ and scored at 4-1/4″ to create a card base and a piece of Neenah 80lb Classic Crest Cardstock 8.5 X 11″ to 3-7/8 x 5-3/16″ for the top panel. Next I created a window, measuring 2-15/16 x 2-15/16″, using the Sizzix Framelits Die Set 8PK – Squares to make the card front look like a polaroid. I also wanted it to be a simple shaker. I also diecut a black frame, measuring 3-3/8 x 3-3/8 x 3/16″ from Simon Says Stamp 100lb Black Cardstock. I used the 5th largest and the 6th largest dies.

Card front

I adhered the black frame onto the front panel window and added 3M Foam Tape behind it to create the shaker element and set that aside. Next, I used a scrap piece of Neenah 80lb Classic Crest Cardstock 8.5 X 11″ and marked off the window using a pencil. I stamped the balloon from Sugarpea Designs HB2U Stamp Set. This was included in the Young At Heart Stamp of Approval Box from Catherine Pooler (SoA boxes are no longer available). I used Catherine Pooler Designs Be Mine, Bellini, Shea Butter, Garden Party, It’s A Boy, and Sweet Sixteen inks. I trimmed the panel a bit so it would fit behind the window, I added bows and strings to the balloons using my Micron 08 Pen and some sparkle with the Spectrum Noir Sparkle Clear Fine Glitter Brush Pen. Then filled the shaker with Pretty Pink Posh 4 mm Sparkling Clear Sequins and Martha Stewart Crafts Iridescent Glitter in clear (no longer available). I adhered the background to the shaker and the shaker to the card base.

Next, diecut a sentiment from Catherine Pooler Designs ‘Celebrate Die’ from Neenah 110lb Classic Crest Cardstock 8.5 X 11″ and Simon Says Stamp 100# Black Card Stock. I used a direct-to-paper technique using Catherine Pooler Designs It’s A Boy Ink to color the white sentiment. Once dry, I adhered the two together slightly offsetting the black layer to create a shadow, and adhered that to the card.

On the inside of the card, I stamped the sentiment that comes with the Sugarpea Designs HB2U Stamp Set and Catherine Pooler Designs Sweet Sixteen Ink. And that completes this card. I challenge you to Shop Your Stash and share your creations below in the comments.

Card inside

Dimensions

Supplies

https://linkdeli.com/widget.js?id=f5e8378456858c916708

Thanks for reading this post. I hope you enjoyed and I’ve inspired you to Shop Your Stash and see what fun ideas you come up with and maybe rediscover supplies you forgot you had! Leave comments or questions below or feel free to email me.

Encouragement, Love & Friendship

Totally Awesome 80s Cards

Going back to the 80s for this post. Some of you may too young to have experienced the fun of the 80s, but these composition notebook stamps and dies from Catherine Pooler remind us all of our schooldays as youngsters. And while the fashion of the 80s was pretty horrible (in my opinion), there was nothing like a new composition notebook to start a new year of school.

These cards would be fun to make with kids who are currently stuck at home. You can make the notebooks any color and tons of different items in the shaker (maybe some glitter?).

I started this card by cutting a piece of Neenah 110lb Classic Crest Cardstock 8.5 X 11″ to 5-1/2 x 8-1/2″ and scored at 4-1/4″ and a piece of Simon Says Stamp 100# Black Card Stock to 5/8 x 5-1/2″. I stamped the Catherine Pooler Designs Composition Notebook Background Stamp using Catherine Pooler Midnight Ink onto the white panel. I diecut the shaker window using the Catherine Pooler Designs Composition Label Dies. I adhered the black strip to the left side of the card panel.

Card 1 Front

I stamped the sentiment from the Catherine Pooler Designs Composition Sentiments Stamp Set as well as the label border onto a piece of Grafix Wet Media .004 Dura-Lar Film, 14-Inch by 17-Inch using Jet Black Staz-on Ink. I combined the “YOU’RE” from the “YOU’RE COOL” sentiment with the “AWESOME”. Next, I adhered the acetate to the back of the window using 1/4″ Scor-Pal Scor-Tape and cut away any access. I also added 3M Foam Tape to the back of the panel to create the shaker area.

For the shaker bits, I used the direct-to paper technique to add color to some pieces of Neenah 110lb Classic Crest Cardstock 8.5 X 11″. I used Catherine Pooler Designs Inks in Party Dress, Rockin Red, Orange Twist, Tiara, Lime Rickey, Fiesta Blue, Suede Shoes and Grape Crush. I diecut stars and hearts using the dies included in the Catherine Pooler Designs Composition Label Dies and stamped the happy face from the Catherine Pooler Designs Composition Sentiments Stamp Set onto a few of the colored papers and used a circle punch to cut them out. I added all the shaker bits inside the window and adhered a piece of Neenah 110lb Classic Crest Cardstock 8.5 X 11″ to the back of the window and adhered it to the card base. I finished it off by adding a few extra shaker bits (happy face and stars) around the sentiment window.

Card 1 Closeup

For the inside of the card, I stamped a Lined Notebook Background from My Favorite Things (unfortunately, I think this stamp is no longer available) using Catherine Pooler Midnight Ink. Then I stamped another sentiment from the Catherine Pooler Designs Composition Sentiments Stamp Set in Fiesta Blue and added some of the leftover hearts that I had diecut previously.

Card 1 Inside

Dimensions


For the second card, I started by cutting a piece of Neenah 110lb Classic Crest Cardstock 8.5 X 11″ to 5-1/2 x 8-1/2″ and scored at 4-1/4″ and a piece of Simon Says Stamp 100# Black Card Stock to 5/8 x 5-1/2″. I stamped the happy face and small star from the Catherine Pooler Designs Composition Sentiments Stamp Set onto the panel. I used Catherine Pooler Designs Inks in Be Mine, Rockin Red, Orange Twist, Tiara, Lime Rickey, Fiesta Blue, Something Borrowed and Grape Crush to create a rainbow colored background.

Card 2 Front

Next, I diecut the edge of the card panel using the Catherine Pooler Designs Spiral Notebook Border Die and added the strip of black card stock behind it.

I diecut 3 of the labels from the Catherine Pooler Designs Composition Label Dies. I cut the smallest one from Neenah 110lb Classic Crest Cardstock 8.5 X 11″ and two from Neenah 110lb Classic Crest Cardstock 8.5 X 11″ and Simon Says Stamp 100# Black Card Stock. I stamped a sentiment and the lines from the label stamp from the Catherine Pooler Designs Composition Sentiments Stamp Set on the smallest label with Catherine Pooler Midnight Ink. To make the orange label piece I used the direct-to-paper technique with Orange Twist Ink. I adhered the top white label to the orange label and that to the black one, offsetting it a bit so it looks like a shadow. And then all that was adhered to the card using some 3M Foam Tape. Before adhering it to the card base, I added some Love From Lizi Lilac Mirror Peel-offs. I adhered it to the card base at an angle and snipped off the parts that hung over the edges. To finish it off, I added some of the stars I diecut for the previous card. I diecut a ton of them. As you can see I also used them for my picture background. 🙂

Card 2 Closeup

On the inside of the card I stamped a sentiment from the Catherine Pooler Designs Composition Sentiments Stamp Set with Grape Crush Ink. I also stamped the happy face with Be Mine, Rockin Red, Orange Twist, Tiara, Lime Rickey, Fiesta Blue, and Something Borrowed inks. And that completes this card. I had sooo much fun playing with these stamps and dies. Brought me back to my childhood. Oh to be young again….

Card 2 Inside

Dimensions

Supplies

https://linkdeli.com/widget.js?id=f5e8378456858c916708

Thanks for reading this post. I hope you enjoyed and I’ve inspired you to give these cards a try for yourself. Leave comments or questions below or feel free to email.