Hello friends. For this cute holiday card, I uses a technique I had forgotten about but recently reminded of while watching a Youtube video. The technique is stenciling on pattern paper. It’s an easy way to add depth and interest to a background without adding extra bulk. This card features the Lawn Fawn Spooky Forest Backdrop die and the Lawn Fawn Winter Village Stamps.
I decided to do a radical thing on this card and have NO sentiment on the outside. What?!? Unheard of, right? LOL. Sometimes it’s ok to leave the outside of your card with just a pretty scenes. Let the recipient be surprised when they open the card.
Thanks for reading this post. I hope I’ve inspired you to give this cute penguin Christmas card a try for yourself. Leave comments or questions below or feel free to email.
Thanks for reading this post. I hope I’ve inspired you to give this easy Thank You card a try for yourself. Leave comments or questions below or feel free to email.
Hello friends. There are still a few more weeks left of Fall and even though I’ve been knee deep in Christmas card making, I wanted to make some more Fall cards. I brought out some Honey Bee Stamps stamps and dies for this one. An easy way to make a dimensional background without having to emboss is to use diecuts.
Thanks for reading this post. I hope I’ve inspired you to give this cute Fall card a try for yourself. Leave comments or questions below or feel free to email.
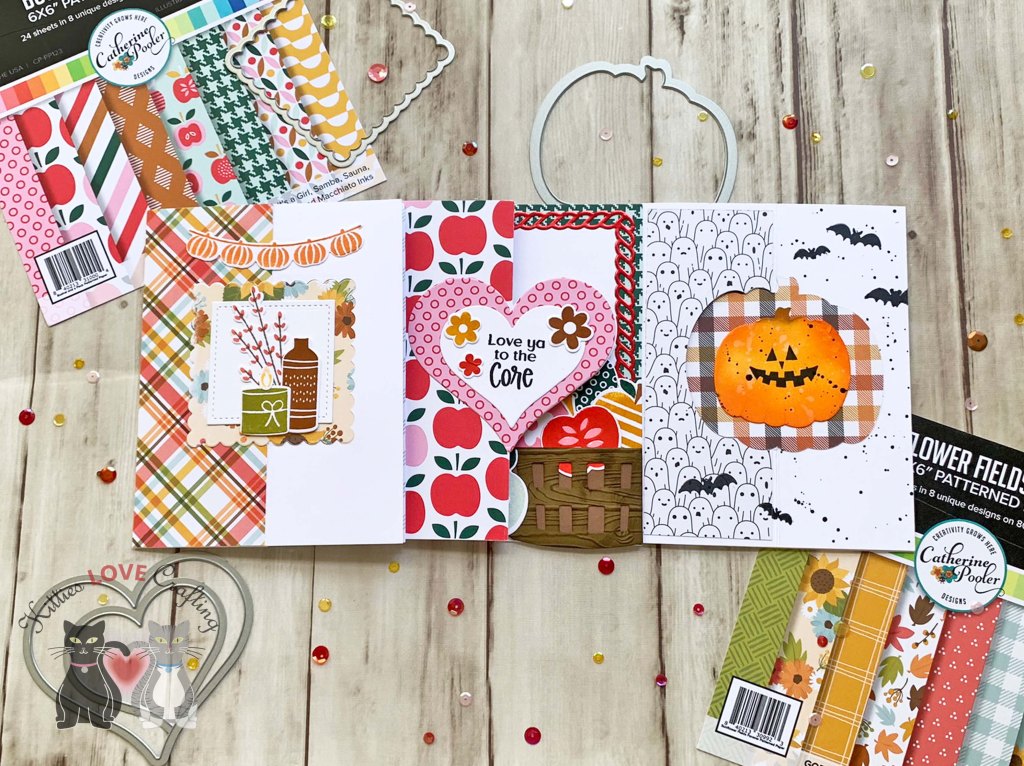
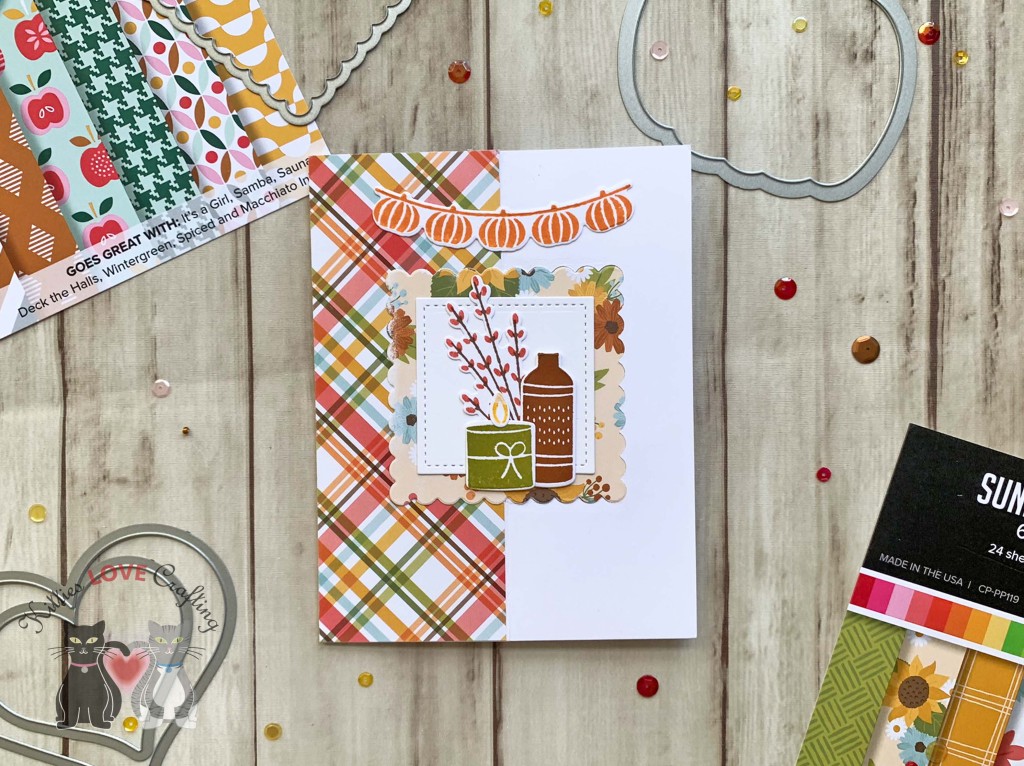
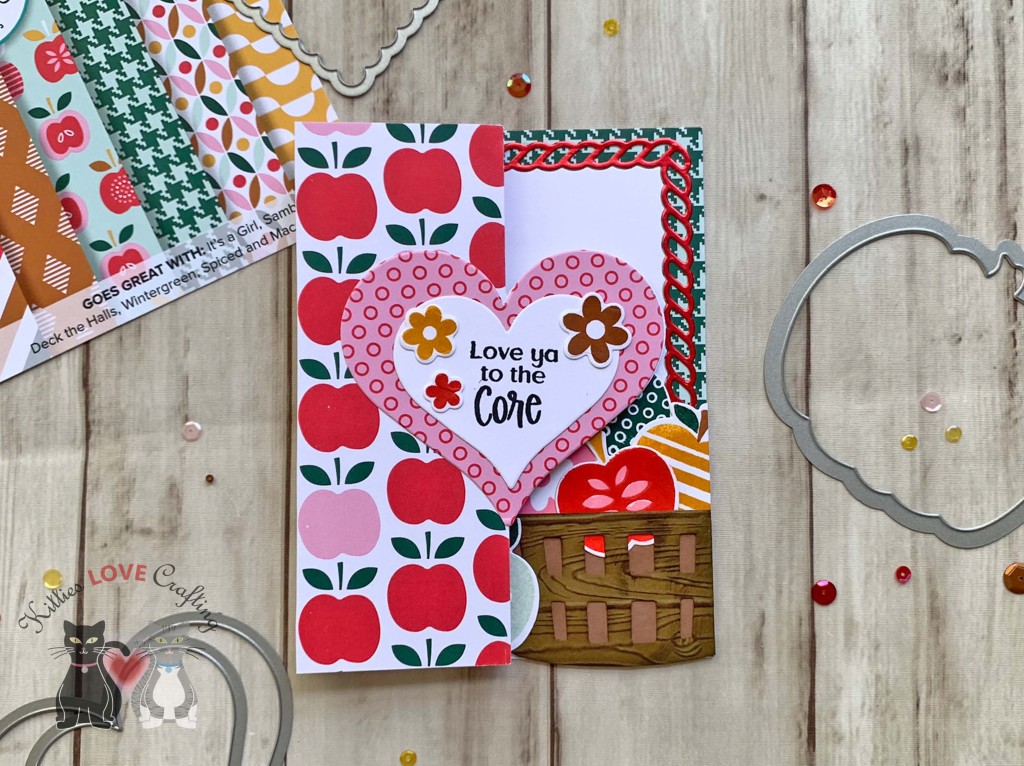
Hello friends. This post is all about adding fancy folds to your cards. I used different shaped dies and papers as well as a variety of stamps to create different themes. These were inspired by Catherine Pooler’s video on fancy folds over on Stampnation. Check it out here>>.
For the first card, I cut a piece of Neenah 100lb Classic Crest Cardstock 8.5 X 11″ to 5-1/2 x 8-1/2″ and scored at 4-1/4″ to create a card base and then I scored the front of the card at 2-1/8″. At this point you need to decide what shape you wll be die cutting out and which side you will be folding your panel. You will see that on my second and third cards the folds are in the opposite direction.
I chose a scallop square die from the Sizzix Framelits Squares Scallop Die Set. The way to achieve the flip window is to only die cut one half of the panel. To do this you just need to align your cutting plates along the score line covering only the side you will cut out.
For the second card, I cut a piece of Neenah 100lb Classic Crest Cardstock 8.5 X 11″ to 5-1/2 x 8-1/2″ and scored at 4-1/4″ to create a card base and then I scored the front of the card at 2-1/8″.
For this card, I chose a heart die from the Stampin’ Up! Sweet and SassyDie Set (retired). Same step as before for cutting the flip window.
For the third card, I cut a piece of Neenah 100lb Classic Crest Cardstock 8.5 X 11″ to 5-1/2 x 8-1/2″ and scored at 4-1/4″ to create a card base and then I scored the front of the card at 2-1/8″.
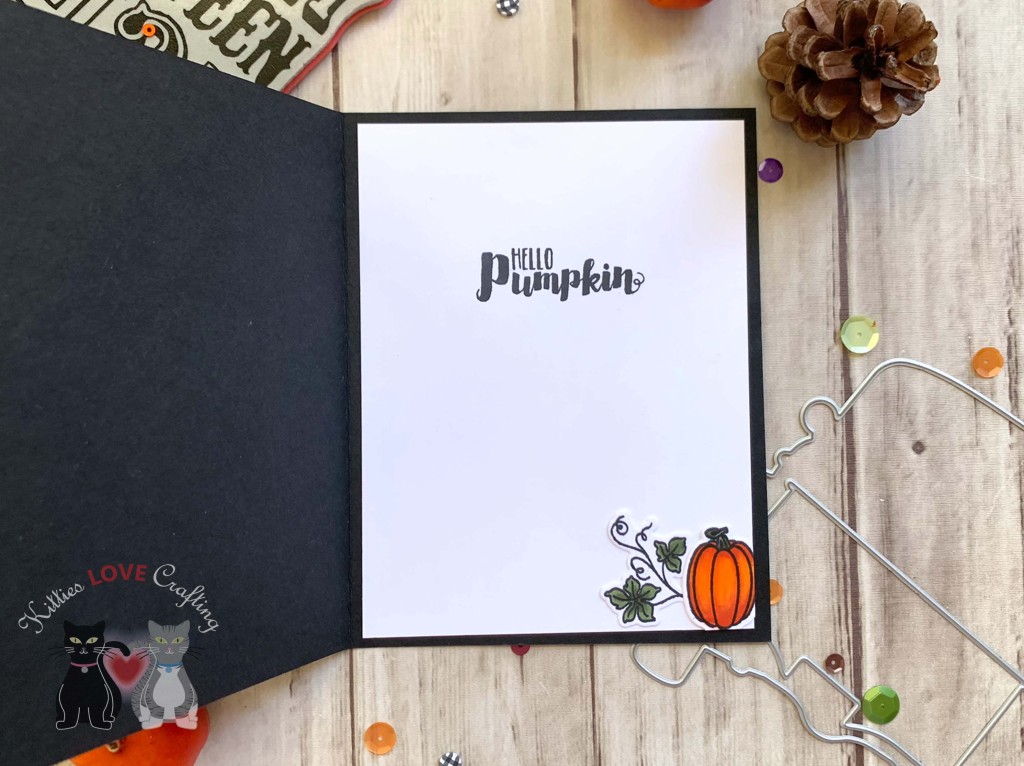
For this card, I chose a pumpkin die from the Sizzix Pumpkin Framelits (no longer available). Follow the same steps as in the previous two cards for cutting the flip window.
Next, I cut 3 pieces of pattern paper from the Honey Bee Stamps Halloween Harvest 6 x 6 Patterned Paper (discontinued) to 2 x 5-1/4″ and one to 4 x 5-1/4. I also die cut 2 pumpkins (of the same size) from the same paper. Then die cut a smaller pumpkin from Neenah 100lb Classic Crest Cardstock 8.5 X 11″ using the same dies. I inked it with Tim Holtz Spiced Marmalade,Carved Pumpkin, and Peeled Paint Distress Inks. I stamped a Jack-O-Lantern face from the Papertrey Ink Pumpkin Expressions Mini Stamp Set with Midnight Ink. I also added splatters to it and the right side of the card front with Black Acrylic Paint and stamped bats from the Lawn Fawn Happy Haunting stampset.
Thanks for reading this post. I hope I’ve inspired you to give these fun fancy fold cards a try for yourself. Leave comments or questions below or feel free to email.
Hello friends. I could not pass up the opportunity to make a coffee themed card using the Lawn Fawn Build-A-Drink Dies. Iced coffee is one of my favorite summer beverages so I had to make this card! I love how it turned out too!
On the aqua pattern paper background I added coffee rings using Stampin’ Up!’s Early Espresso and Pool Party Inks. I used the lids of small bottle like a small squeeze bottle and other aorund my craft room.
Thanks for reading this post. I hope I’ve inspired you to give this cute coffee summer card a try for yourself. Leave comments or questions below or feel free to email.
Hello friends. I’m bringing out an oldie but goodie from Honey Bee Stamps to make this fun St. Patrick’s Day card. I used the Honey Bee Stamps Frappe Shaker Card (which I’ve used a ton because I truly love it!) and combined it with the Lawn Fawn Lucky Clovers to make a quick card. Who doesn’t love a green drink?!
For this card, I die cut a piece of Neenah 100lb Classic Crest Cardstock 8.5 X 11″ with the Honey Bee Stamps Frappe Shaker Card (I think it may discontinued) to create the card base. And a piece of Cold Press Watercolor Paper die for the top panel and the whip cream portion which I will be watercoloring.
Thanks for reading this post. I hope I’ve inspired you to give this fun and easy St. Patrick’s Day shaker card a try for yourself. Leave comments or questions below or feel free to email.
Hi friends. Using the emboss resist technique to create a background is super easy and creates a very high contrast, impactful visual. Let me show you how easy this was to create.
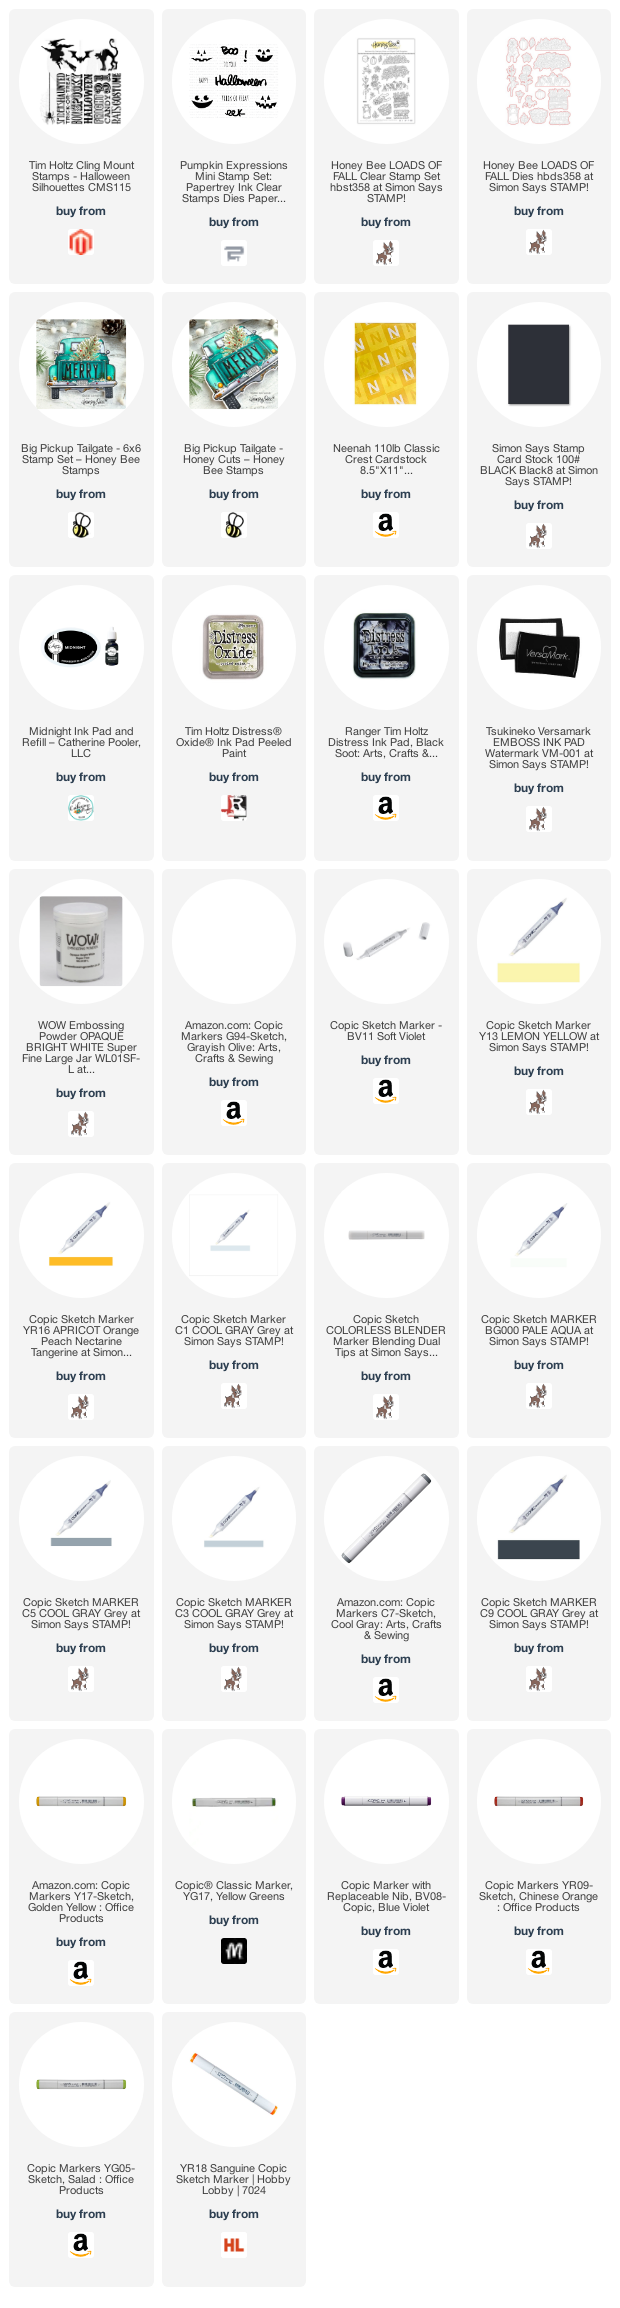
I used YR16, YR18, & YR09, N2, N6 & N8 for the pumpkins; G94 & G99 for the leaves; BV11, BV08, V25 & V28 for the truck bed; Y13 & Y17 for the truck head lights; C1, C3, C5, C7, & C9 for the metal on the truck; YG05, YG17 & YG67 for the license plate; and BG000 & 0 for the truck windows.
Thanks for reading this post! I hope you enjoyed and I’ve inspired you to make this cute Halloween card yourself! If you want to share you creations with me tag me on instagram @kittieslovecrafting. Leave comments or questions below or feel free to email me.
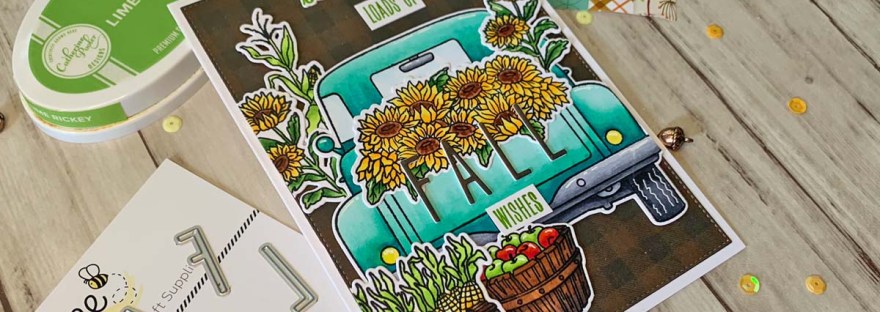
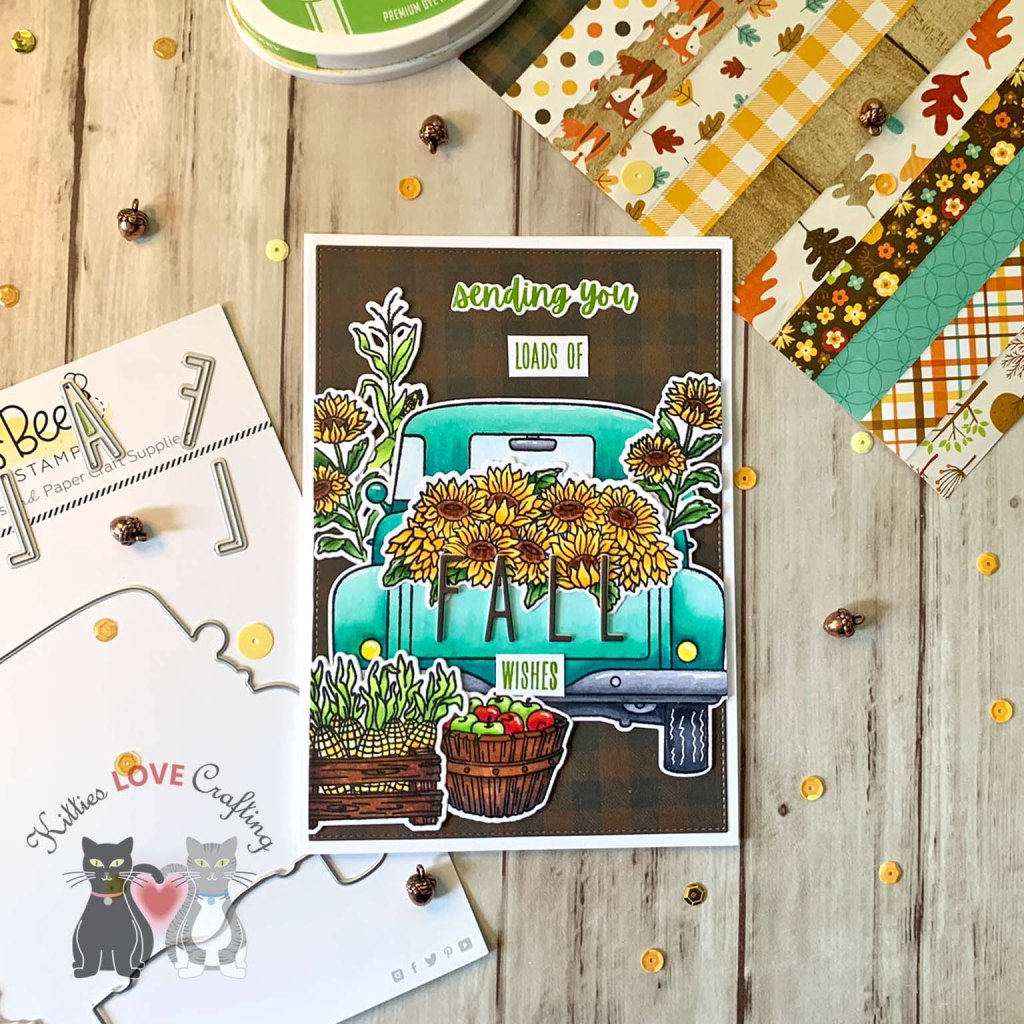
I stamped the images from the Honey Bee Stamps Big Pickup Tailgate 6×6 Stamp Set and the Honey Bee Loads of Fall Stamp Set onto Neenah 110lb Classic Crest Cardstock with Memento Tuxedo Black Ink. I colored them with Copic markers. I used Y13, Y18, E15, E37 & E29, YG13, YG17 & G07 for the sunflowers; Y00, Y13, Y18, YG01, YG25, E29, E37 & E79 for the corn; BG11, BG63, BG18 & BG49 for the truck bed; BG000 & 0 for the windows; C1, C3, C5, C7, & C9 for the metal; Y02 & Y13 for lights; R05 & R46, YG01 & YG25, E37, E79 & E25 for the apples; Y13 & Y17 for license plate. And diecut them with the coordinating dies.
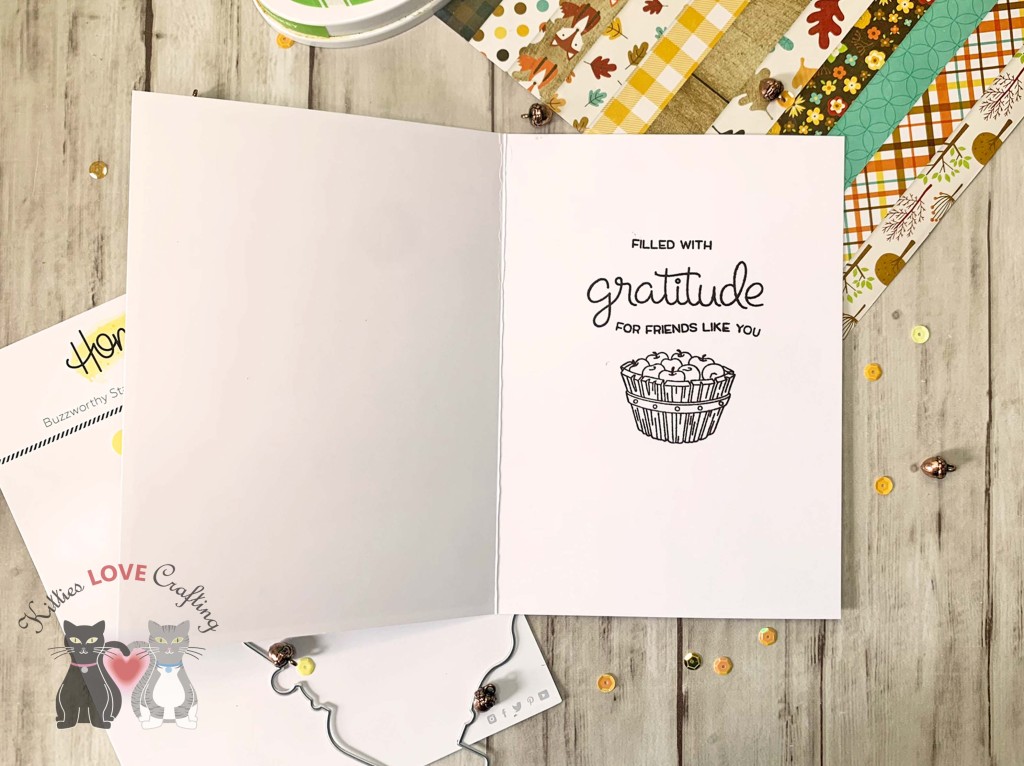
Thanks for reading this post! I hope you enjoyed and I’ve inspired you to make this cute Fall card yourself! If you want to share you creations with me tag me on instagram @kittieslovecrafting. Leave comments or questions below or feel free to email me.
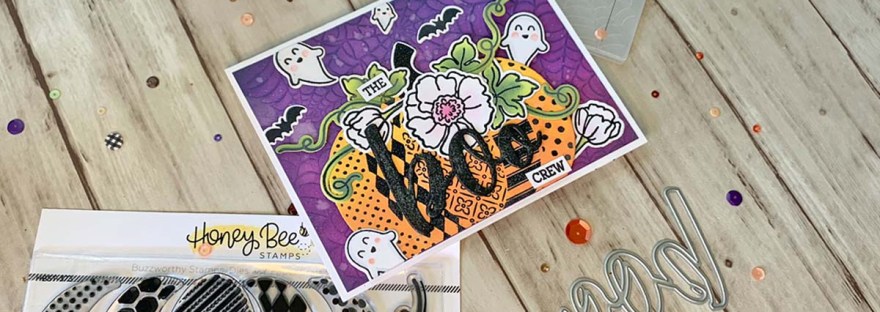
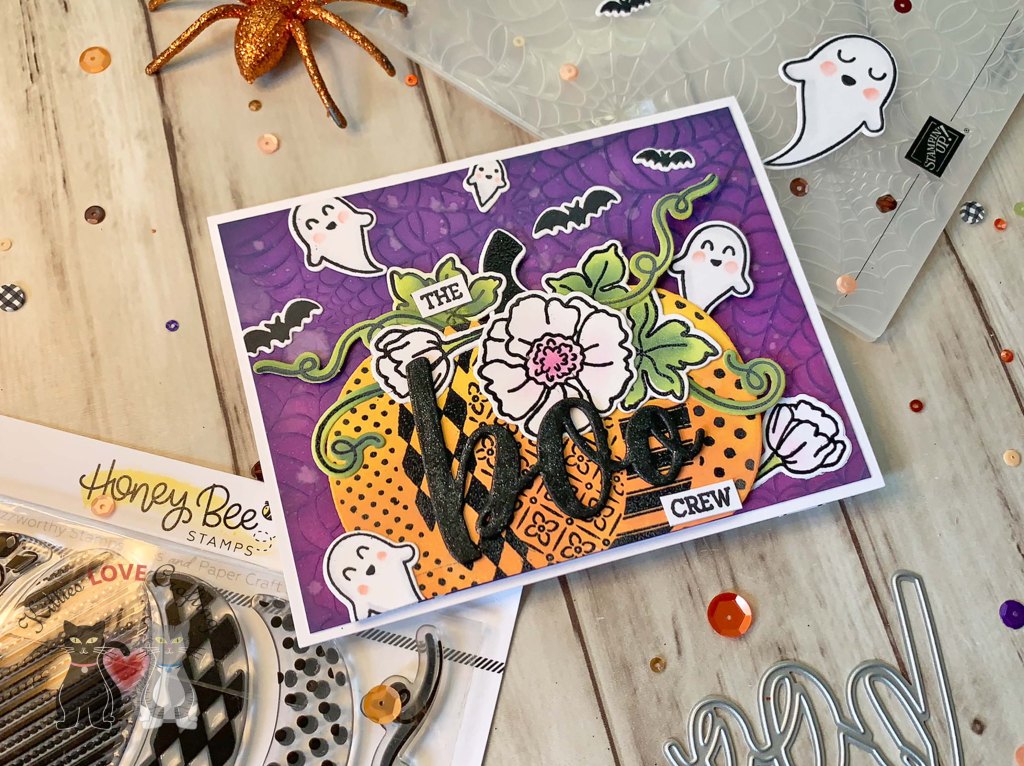
Hi friends. A quick way to create a dimensional background with little effort is to use an embossing folder. We all have a bunch of embossing folders we bought when it was all the rage to emboss everything and now they sit in a drawer or craft room shelf collecting dust. Am I right?!? Come on, you know it’s true??? LOL Well thankfully they are coming back in fashion and there are so many techniques you can do with them. Today we are keeping it simple — just some ink and a blender. No fancy tools needed either.
For this card, I cut a piece of Neenah 110lb Classic Crest Cardstock to 8-1/2 x 5-1/2″ and scored at 4-1/4″ to create the card base. Then cut a piece measuring 4 x 5-1/4″ and embossed with the Stampin’ Up! Cobwebs 3D Embossing Folder (retired); any spiderweb embossing folder will work here.
I used mostly Seedless Preserves and Villainous Poison Distress Oxide Inks to color the background. Then lightly went over the raised cobwebs with some Chipped Sapphire Distress Oxide Ink. I sprayed some water on the background to distress it further.
I stamped the ghost and bat images from Lawn Fawn Happy Haunting stampset and colored them with Copic Markers. I used C00, 0 and R20 for the ghosts. And then diecut them with the coordinating dies.
Thanks for reading this post! I hope you enjoyed and I’ve inspired you to make this cute Halloween card yourself! If you want to share you creations with me tag me on instagram @kittieslovecrafting. Leave comments or questions below or feel free to email me.
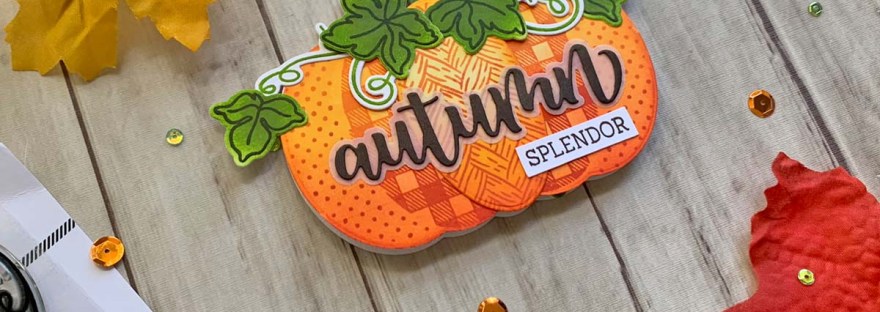
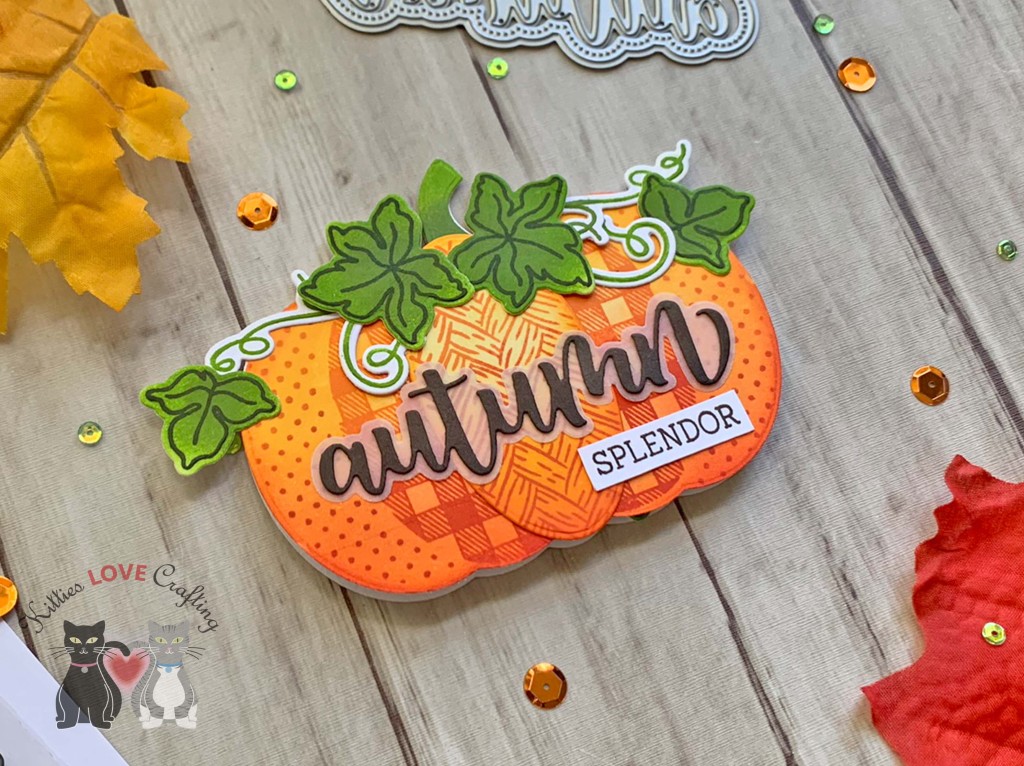
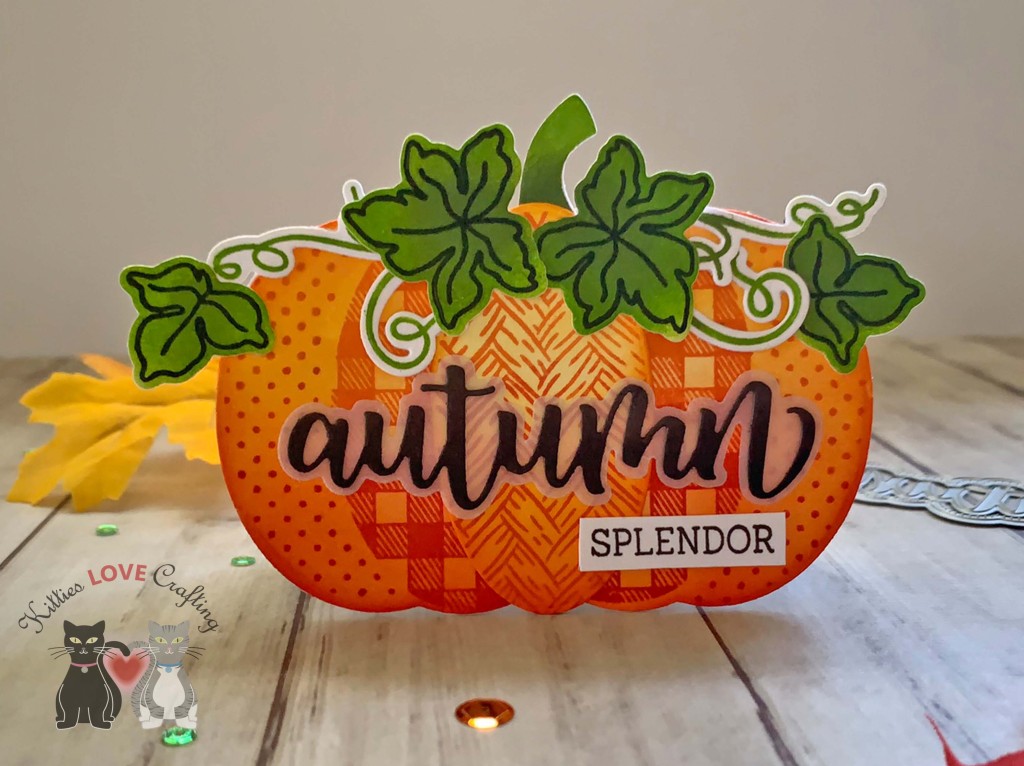
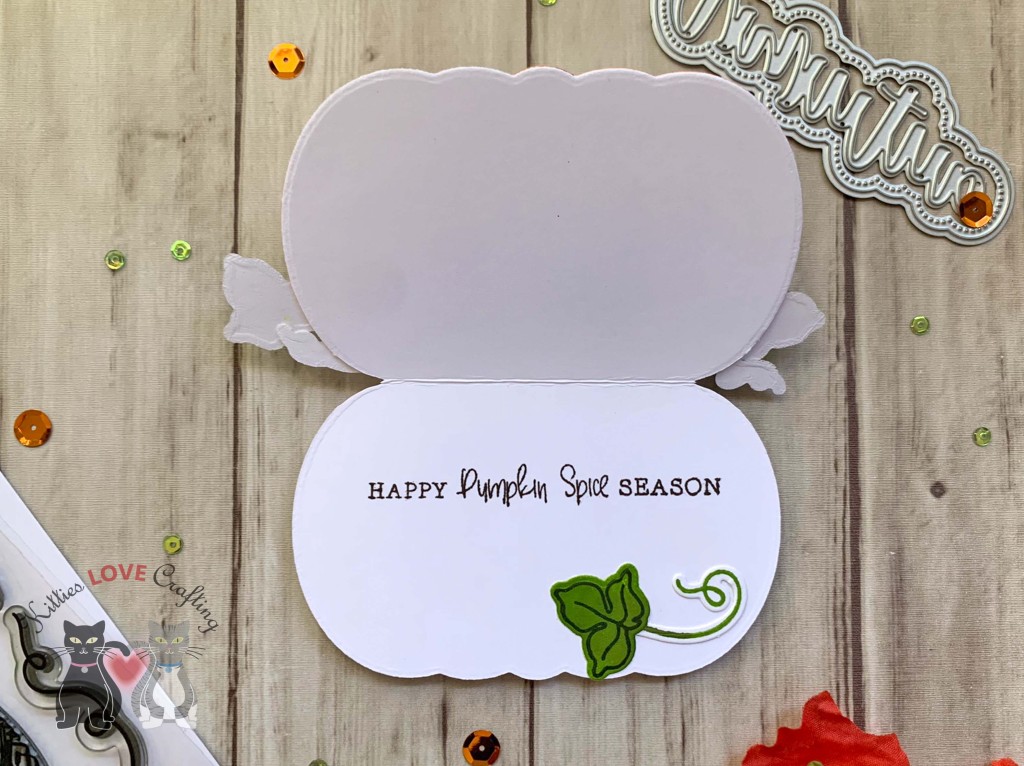
Hi friends. Here’s a quick pumpkin shaped card that can easily be mass produced. You can use these as cards, notes, invitations… I added additional ink over the pumpkins to give them more depth but you can easily stamp onto white cardstock or plain colored cardstock.
3or this card, I cut a piece of Neenah 110lb Classic Crest Cardstock to 7-1/2 x 4-3/4″ and scored at 3-3/4″ to create the card base. Then diecut it using the largest pumpkin from the Honey Bee Stamps Patchwork Pumpkin Dies, leaving the edge of thedie a bit off the card base so it doesn’t cut through the edge. I also cut a second piece of just the pumpkin.
Thanks for reading this post! I hope you enjoyed and I’ve inspired you to make this cute critter card yourself! If you want to share you creations with me tag me on instagram @kittieslovecrafting. Leave comments or questions below or feel free to email me.


 https://linkdeli.com/widget.js?id=f5e8378456858c916708