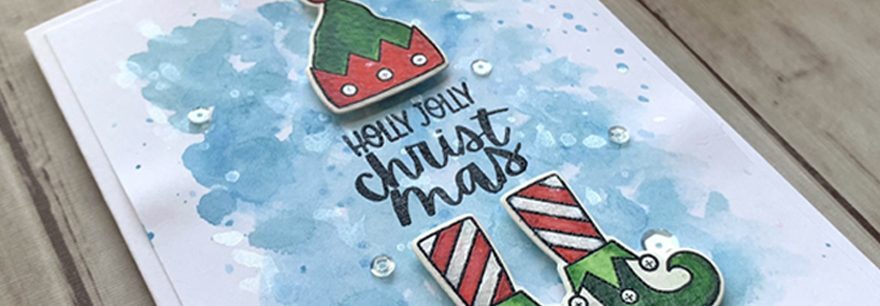
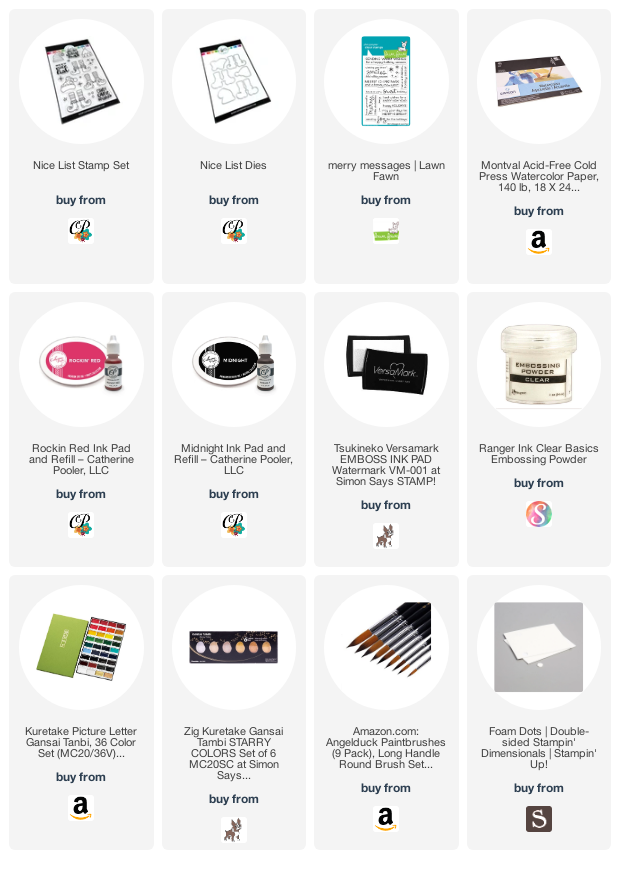
Hello friends. This cute little elf card was created using Catherine Pooler’s Nice List Stamp Set. It features cute elf hats and legs and feet. The sentiments were meant to be the body of the elf as in this card. I used a quick watercolored background with a heat embossed sentiment.
While that dried, I watercolored the background onto the card panel and also added some splatters wih the same color. I made sure not to add too much water to my watercolors since I was working on Neenah Cardstock and not watercolor paper. While that dried, I diecut the elf parts with the coordinating Nice List Dies. Once the background was dry, I stamped the sentiment from Catherine Pooler’s Nice List Stamp Set with Versamark Ink and heat embossed it with Clear Embossing Powder. I adhered the panel to the card base and the hat and shoes with Stampin’ Dimensionals. I finished it off by adding some clear sequins.
Thanks for reading this post. I hope you enjoyed and I’ve inspired you to give this cute and easy card a try for yourself. Leave comments or questions below or feel free to email.
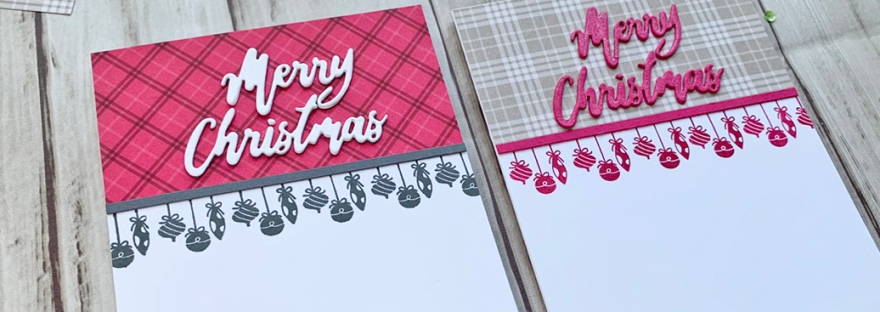
One tiny stamp, pattern paper and a sentiment die is all it takes to make these cards. Can’t get any easier, right?!?. They are found in the new Aug-Dec Mini Catalog which has a ton of awesome goodies for the holidays. This set of cards is good for last minute Christmas cards.
Both cards were created the same way, but just by changing the paper and ink colors you can achieve different looks. I started by cutting a piece of Whisper White 8-1/2″ X 11″ Thick Cardstock to 5-1/2 x 8-1/2″ and scored at 4-1/4″ to make a card base. Then cut a piece of Plaid Tidings 6 x 6 Designer Series Paper (Melon Mambo for the first and Crumb Cake for the second) to 2-1/4 x 4-1/4”. I then cut a strip of plain card stock, measuring 1/8 x 4-1/4” ( I used Basic Gray for the first card and Melon Mambo for the second card).
Thanks for reading this post. I hope you enjoyed and I’ve inspired you to make these easy and quick cards for yourself! Leave comments or questions below or feel free to email me. If you want to share you creations with me tag me on instagram @kittieslovecrafting. If you would like a Stampin’ Up! catalog, please email me as well. All current catalogs can be found on the right side of this post and the Stampin’ Up! page. All news and fun stuff happening at Stampin’ Up! are listed there!
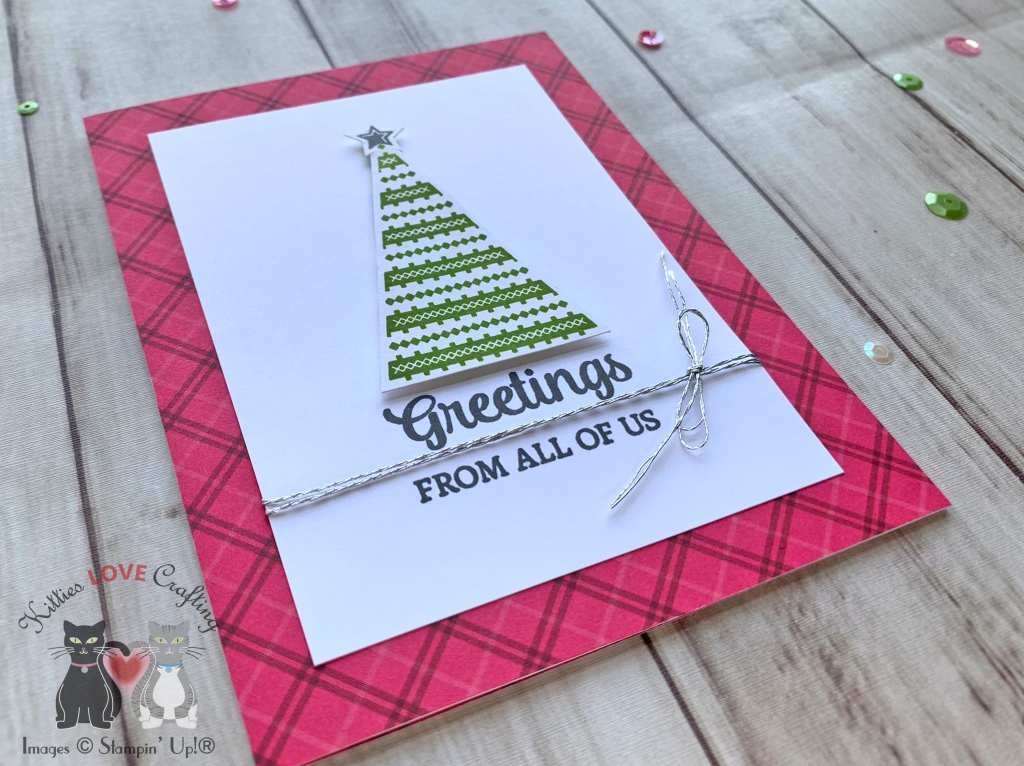
Here is a quick card that can be easily mass produced for the holidays! I used the Tree Angle Stampset by Stampin’ Up which can be found on page 22 of the new Aug-Dec Mini Catalog which has a ton of awesome goodies for the holidays. This stampset coordinates with the Stitched Triangles Dies (pg 179 of the Annual Catalog).
I figured out where my tree was going to sit and stamped a sentiment below that from the Tree Angle Stampset with Basic Gray. I added Stampin’ Dimensionals to teh back of the tree and added it to the white card panel. I added some Silver Twine from my stash and adhered the panel to the card.
Thanks for reading this post. I hope you enjoyed and I’ve inspired you to try this very quick holiday card using this stampset for yourself! Leave comments or questions below or feel free to email me. If you want to share you creations with me tag me on instagram @kittieslovecrafting. If you would like a Stampin’ Up! catalog, please email me as well. All current catalogs can be found on the right side of this post and the Stampin’ Up! page. All news and fun stuff happening at Stampin’ Up! are listed there!
As someone who loves to use old book pages in my junk journals, when I saw Wonder of the Season 12 x 12 Designer Series Paper in the new Stampin’ Up! Aug-Dec Mini Catalog, I knew I had to have it! It’s has pages with Christmas stories, recipes and holiday news stories, and there are pages with red foil on one side and black and white print on the other side and also gold foil pages. It can be found on page 31 of the catalog and is part of the Wonder of the Season Suite. I was able to make 2 cards and tags in a short amount of time.
I started the first card by cutting a piece of Whisper White 8-1/2″ X 11″ Thick Cardstock to 5-1/2 x 8-1/2″ and scored at 4-1/4″ to make a card base. Then cut a piece of Wonder of the Season 12 x 12 Designer Series Paper to 5 x 5-1/2″, ripped approximately 3/8″ from the top and bottom of it and adhered it on a diagonal to the card base, trimming off any excess. I cut a piece of 8-1/2″ x 11″ Vellum to 5 x 4-3/4 and ripped the top and bottom again so it is shorter than the pattern piece.
I fussycut the ornaments found on one of the red foil pages of the Wonder of the Season 12 x 12 Designer Series Paper and diecut “Merry Christmas” from Red Foil Sheets with the Word Wishes Dies. I adhered the sentiment and the ornaments to the vellum piece and adhered the vellum to the card, only adding glue behind the diecut and image and trimming off any excess from the sides. I finished it off by adding Pearls (discontinued). I colored some of them with Dark Real Red Stampin’ Blends.
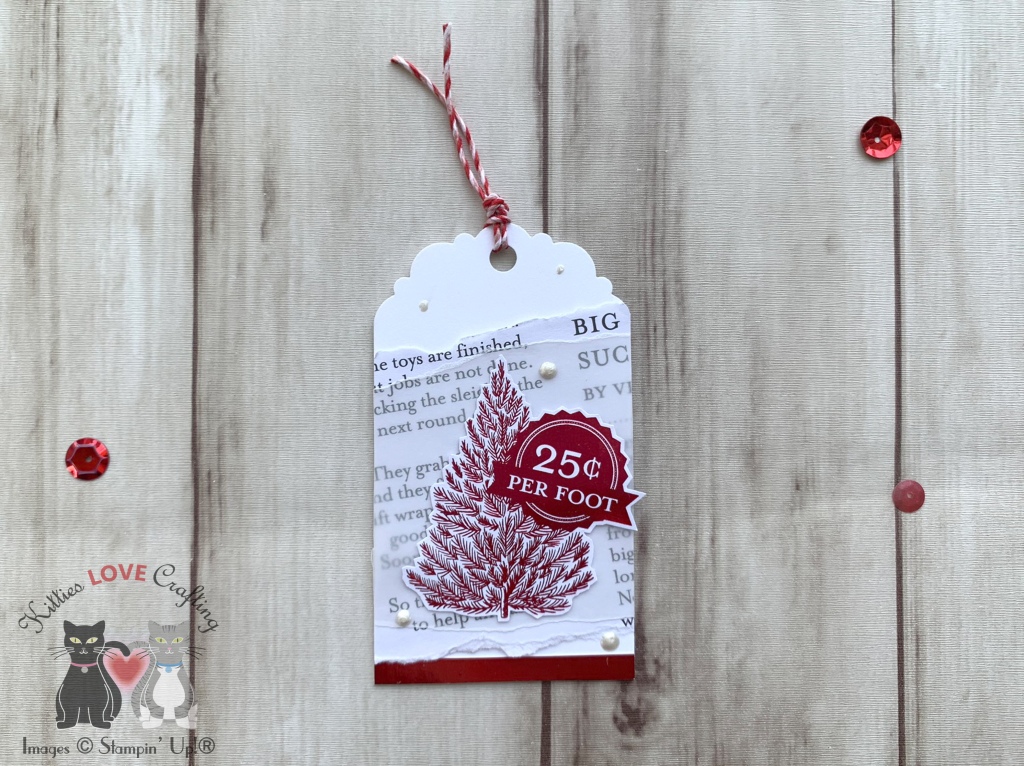
I fussycut a tree found on one of the red foil pages of the Wonder of the Season 12 x 12 Designer Series Paper and adhered it to the vellum piece and adhered the vellum to the tag, only adding glue behind the image and trimming off any excess from the sides. I finished it off by adding Pearls (discontinued) and stamping “TO” and “FROM” from the Make A Difference Stampset with Memento Black Ink. I added a piece of red and white twine as well.
Since I loved this paper so much I had to make more cards. I made one with the gold foil paper too.
I started the second card by cutting a piece of Whisper White 8-1/2″ X 11″ Thick Cardstock to 5-1/2 x 8-1/2″ and scored at 4-1/4″ to make a card base. Then cut a piece of Wonder of the Season 12 x 12 Designer Series Paper to 5 x 5-1/2″, ripped approximately 3/8″ from the top and bottom of it and adhered it on a diagonal to the card base, trimming off any excess. I cut a piece of 8-1/2″ x 11″ Vellum to 5 x 4-3/4 and ripped the top and bottom again so it is shorter than the pattern piece.
Thanks for reading this post. I hope you enjoyed and I’ve inspired you to try these easy cards and tags using this beautiful paper for yourself! Leave comments or questions below or feel free to email me. If you want to share you creations with me tag me on instagram @kittieslovecrafting. If you would like a Stampin’ Up! catalog, please email me as well. All current catalogs can be found on the right side of this post and the Stampin’ Up! page. All news and fun stuff happening at Stampin’ Up! are listed there!
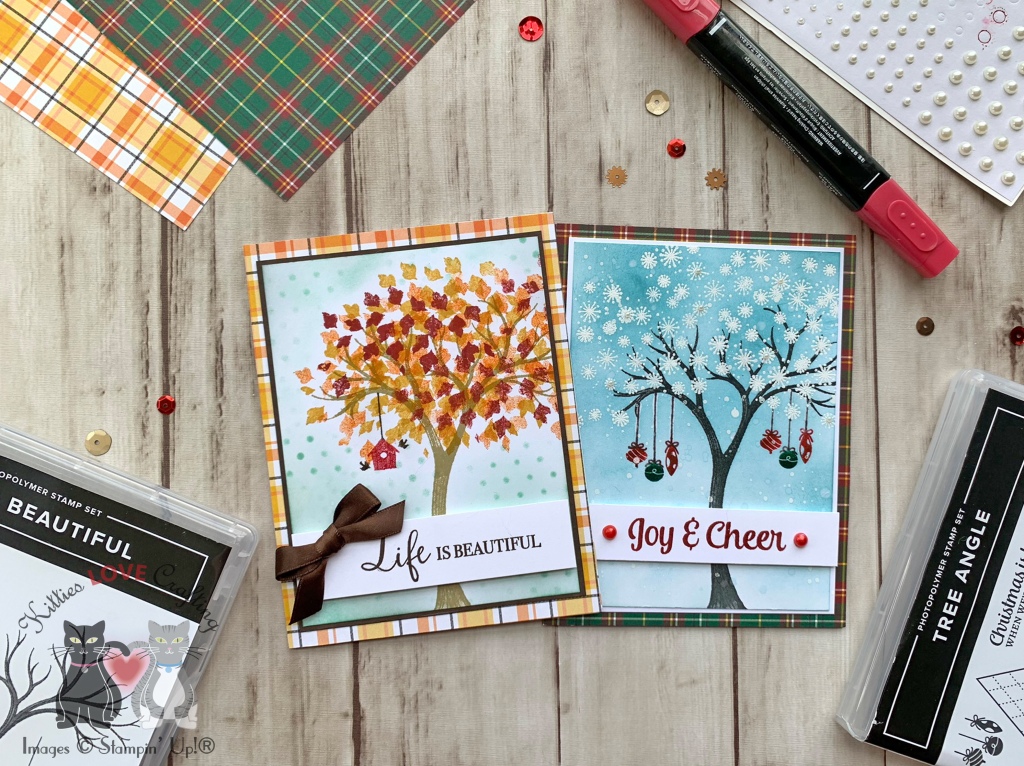
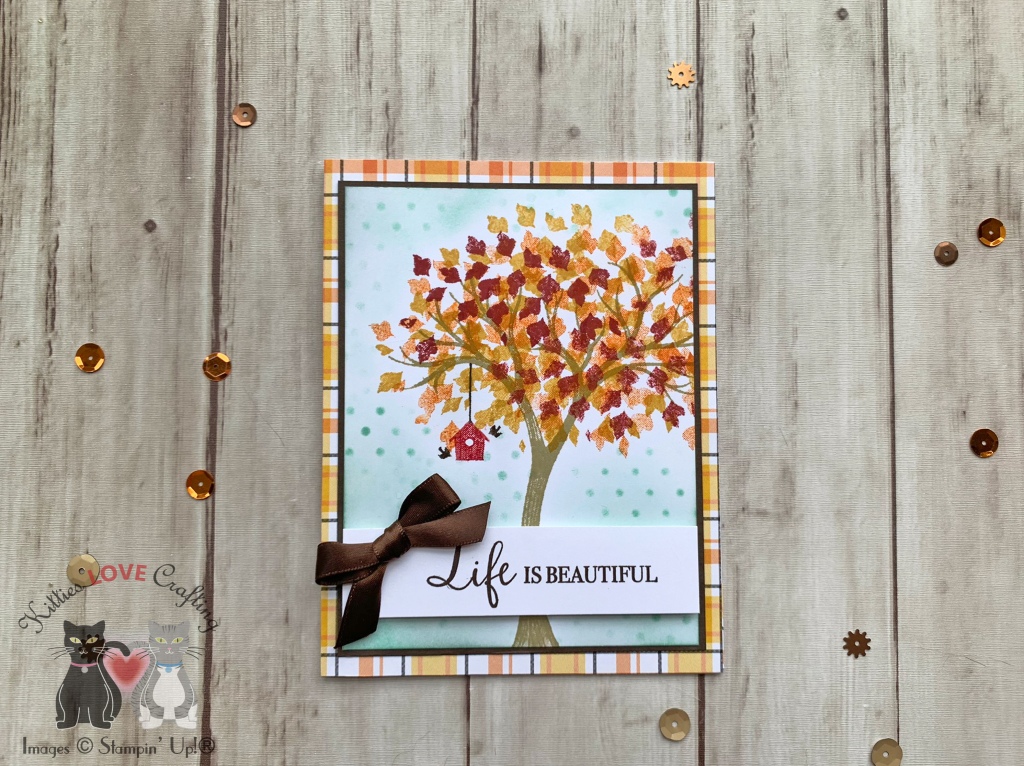
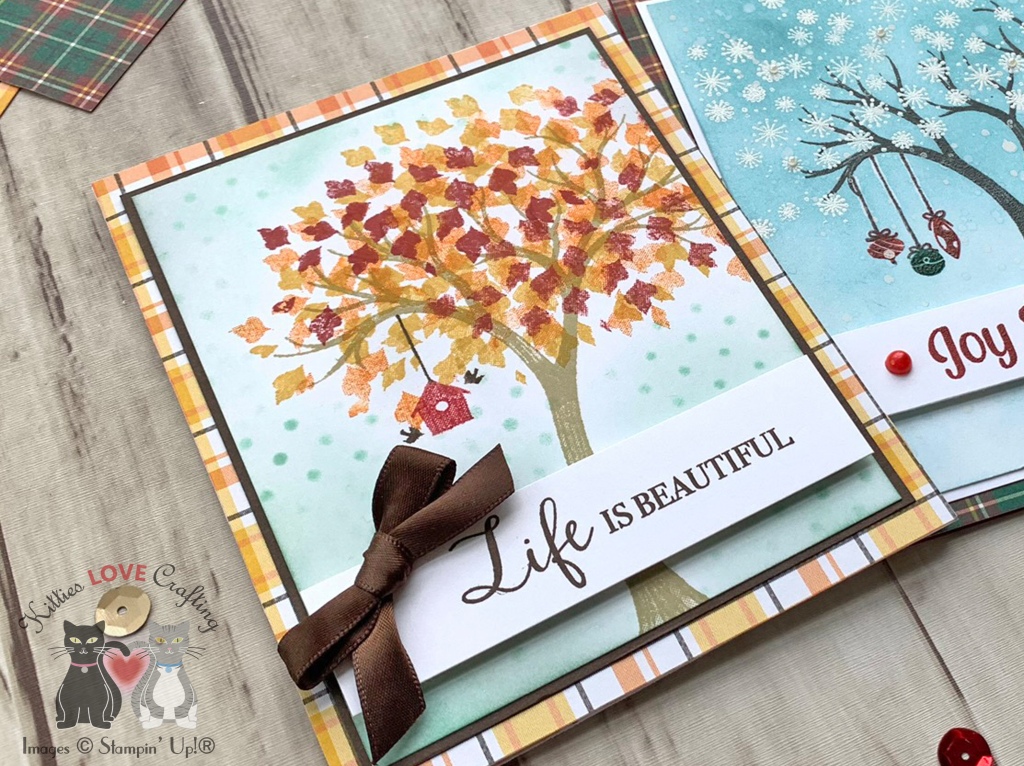
The Life Is Beautiful stampset by Stampin’ Up! at first glance looks like a very simple stampset but once you stamp the images you will notice the details in the images which give them dimension. It reminds me of another Stampin’ Up! (retired) stampset, Sheltering Tree, which I have loved for many years. Anyone else remember that stampset? I love this one sooo much more though–and I think it’s because of all the details. This lovely stampset can be found in the new Aug-Dec Mini Catalog which has a ton of awesome goodies for the holidays. I will definitely be making more cards with this stampset!
I went with a winter/Christmas theme for the second card; I just really wanted to heat emboss the snowflakes from the Life Is Beautiful stampset. This card features the Tree Angle stampset as well.
Thanks for reading this post. I hope you enjoyed and I’ve inspired you to try these cards using this beautiful stampset for yourself! Leave comments or questions below or feel free to email me. If you want to share you creations with me tag me on instagram @kittieslovecrafting. If you would like a Stampin’ Up! catalog, please email me as well. All current catalogs can be found on the right side of this post and the Stampin’ Up! page. All news and fun stuff happening at Stampin’ Up! are listed there!
Well I’m sure you have heard of Christmas in July, but have you heard of Halloween in July??? Quite frankly, I love making Halloween cards anytime of year! It’s my favorite holiday ever!!!
I used 0 and C1, Y02 and Y06, YR12 and YR16 for the candy corn, YR16 and YR09, YG01 and YG25 for the pumpkins, Y02 and YR12 for the pumpkin guts, BV11 and BV17 for the scoop, C1 and C3, N5 and N7 for the knife and W1, W3, and W5, E15, E23, and E37 for the squirrels. I diecut the images and adhered them to their respective panels and adhered those to the back of the top panel. I used Stampin’ Dimesionals to adhere some of the images and then to the card base. Then I adhered the rest of the images around the panel.
Thanks for reading this post. I hope you enjoyed and I’ve inspired you to Shop Your Stash and see what fun ideas you come up with and maybe rediscover supplies you forgot you had! Leave comments or questions below or feel free to email me.
Are you like me… You’ve been buying 12 x 12 paper pads for years and years and years and now have so many you don’t know what to do with it? Well here are just a few ways I like to use my paper pads up.
1. Use them in your junk journal. My new obsession is creating junk journals. I started watching videos on them and quickly became hooked. What is a junk journal, you ask??? It’s a journal you create using old papers, cardboards, receipts, tickets, magazine pages, junk mail. Then you can decorate it with embellishments, tags, anything you want really. Then you write in, use it as a planner or for memory keeping. If you want to learn more about it, check out this link. There are tons of videos on junk journaling.
I like to coffee dye pattern papers to age them before using them in my junk journal. Then I use them for the main pages, tags, pockets, fold outs and many, many more. It’s super easy to coffee dye paper. Mix instant coffee with hot water and either spray it onto the paper or use a metal or plastic tub/pan and dip it into coffee. Check out this video for more info.
2. Organization. Another great use for pattern paper is for organization. I used pattern papers to make dividers for my 6 x 6 paper pads. I keep mine in clear fridge bins; this one measures 8W x 14.5L x 4”H and I got this it from Amazon. I created these using old white 3 ring binder dividers I had purchased ions ago and then adding the pattern paper to the front of it. I cut the white dividers to 6-1/2”w x 7”h and the paper to 6”w x 7”h. Glue them together, add a label and you have cute dividers.
3. Make sticker books. Since I am a planner girl, I have a descent amount of stickers. And before the Happy Planner came out with their sticker books, I created my own after watching several videos on how to do this. It’s easy. You need card stock, some discs, a Happy Planner Punch or any Arc Disc Punch and extra planner pages or other paper to adhere the sticker sheets to. You can laminate your covers or leave them as is and add a sheet of clear acetate over it as I did with these since at the time I didn’t have a laminator.
For this sticker book, I cut 2 pieces of paper to 6-1/4 x 9”. You can also make dividers to organize your sticker book.
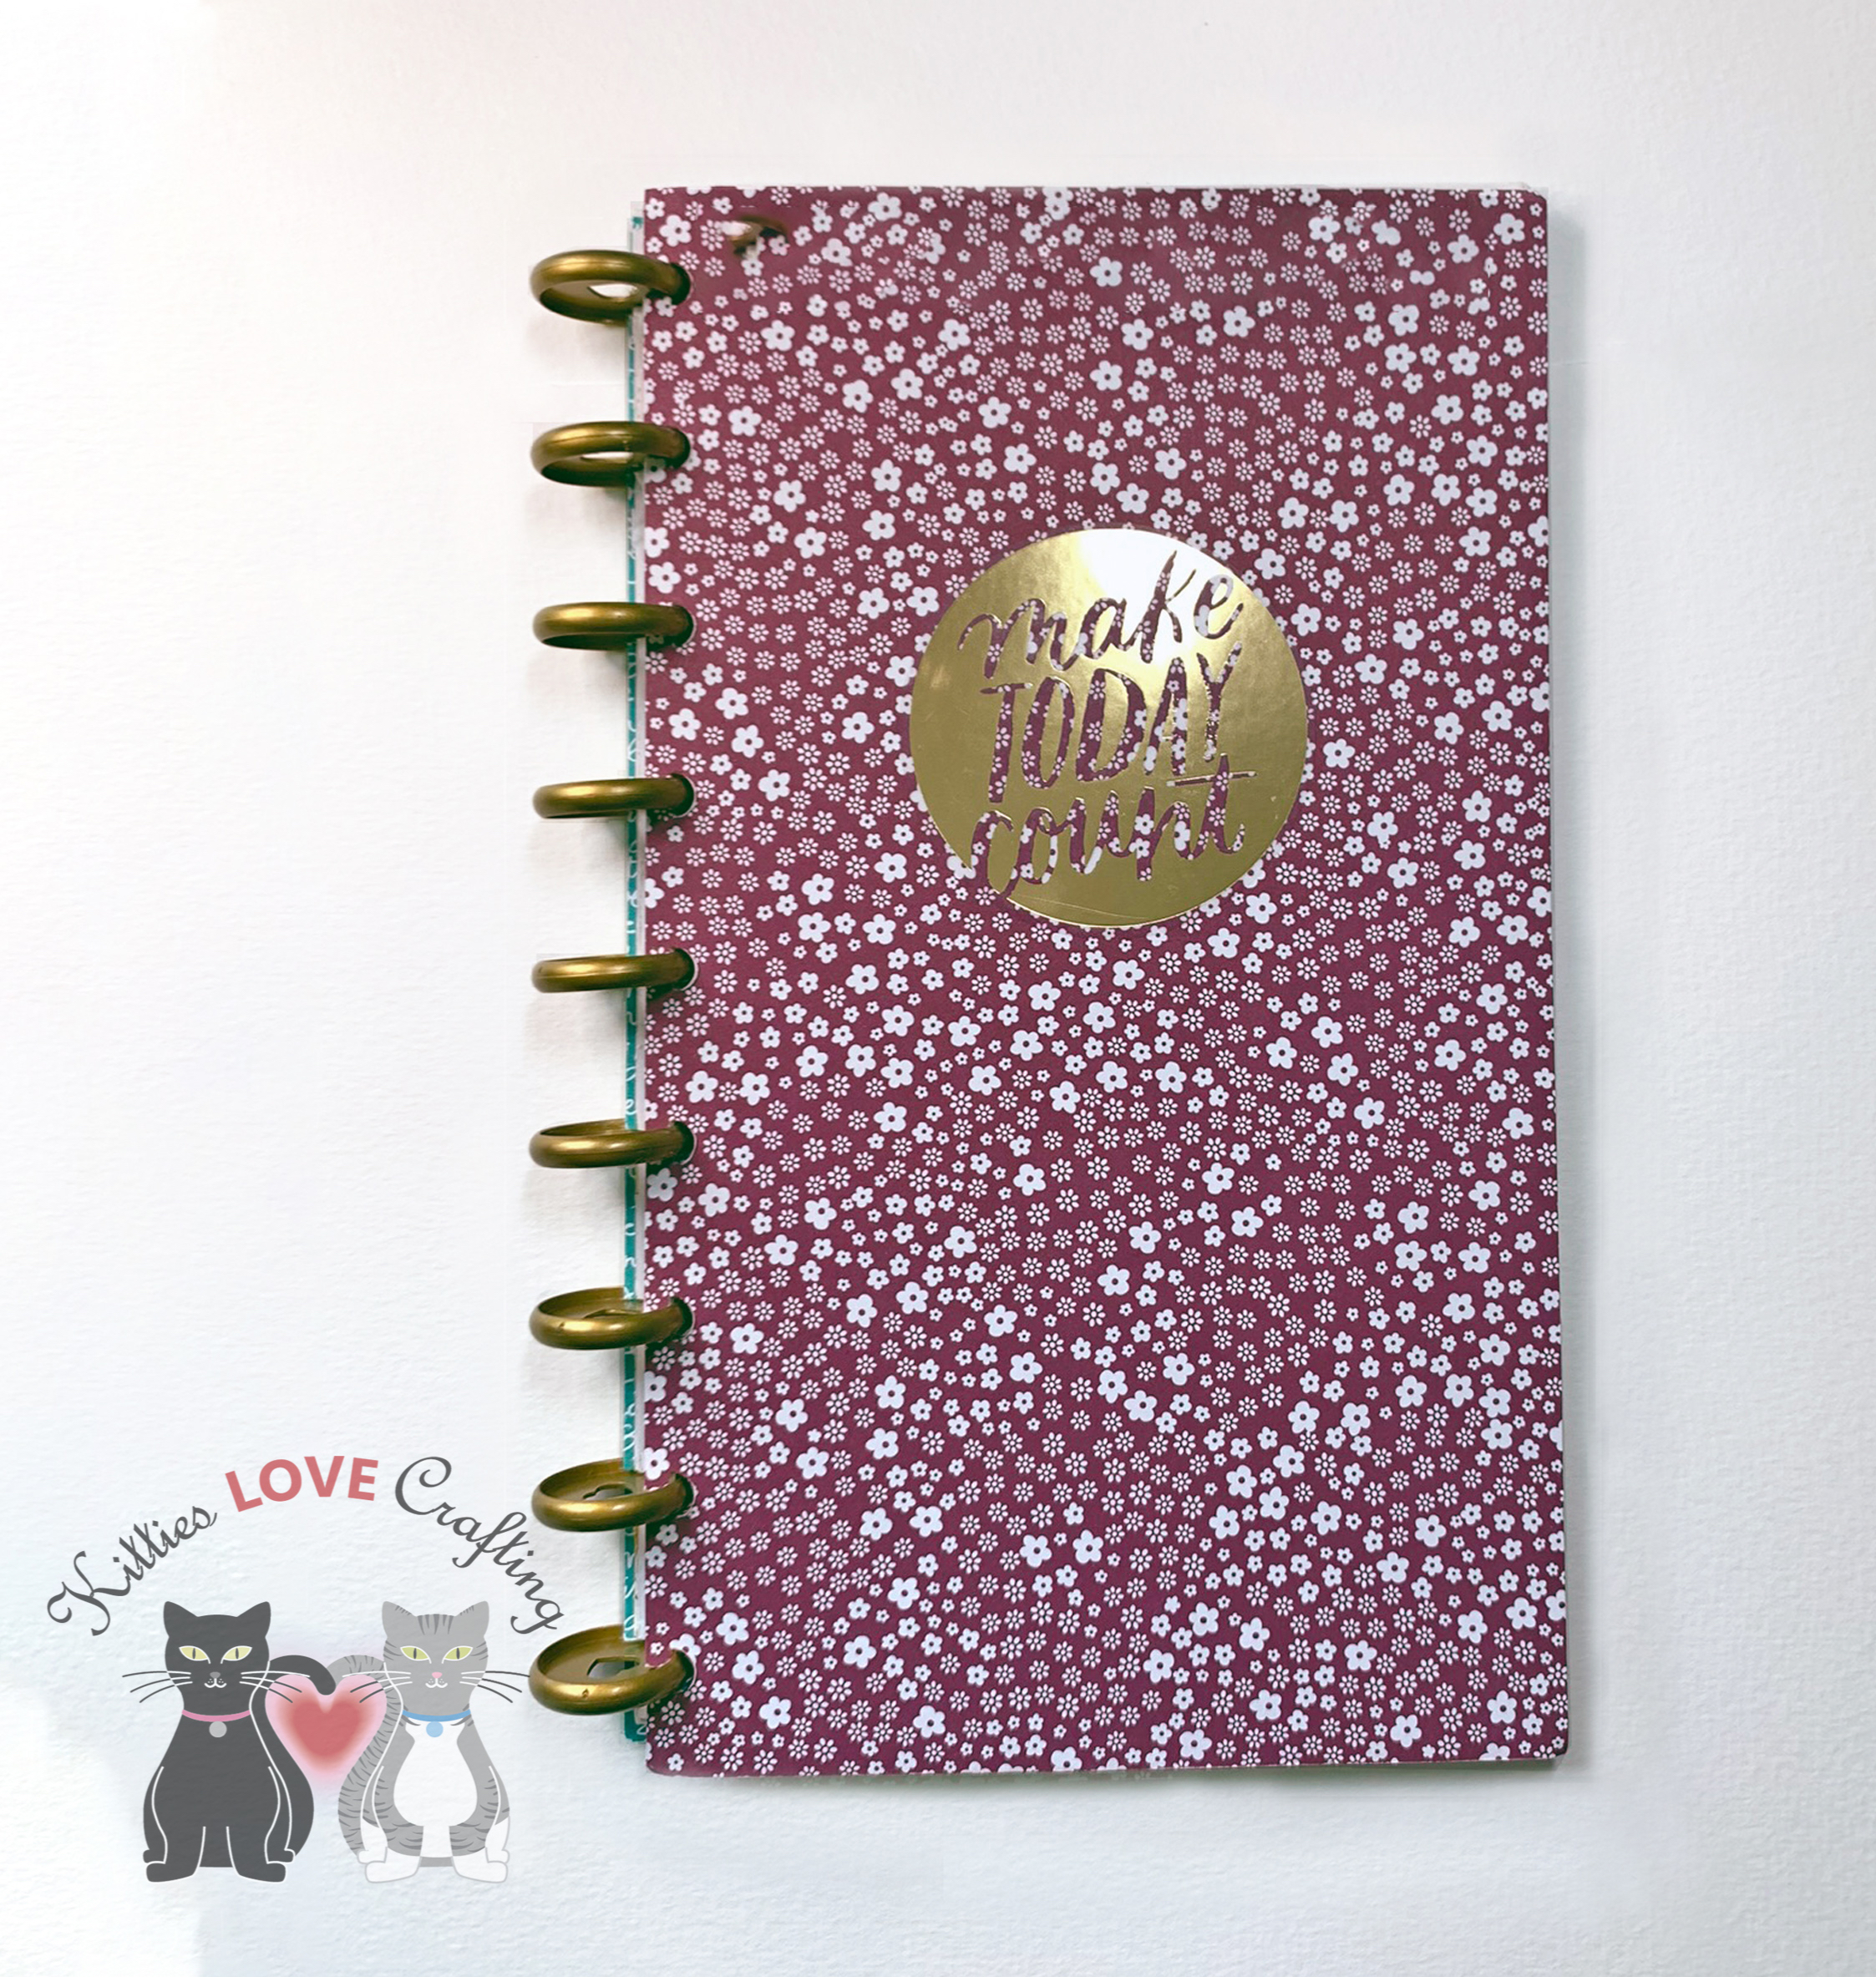
4. Make custom cover, dividers, dashboards for your planners and notebooks. Another thing I love is my planner and customizing it for the holidays. I’m a planner girl who loves to make it pretty and I found that it was easier to make my own once I bought a laminator machine. The easiest way to customize your planner is to use a paper pad that has cut aparts, stickers or other things you can use to add to your planner but no worries if you don’t. You can easily use colors from different paper pads that coordinate.
I used a paper pad from Authentique called Liberty to make my Fourth of July theme. I made mine for a Classic Happy Planner so my measurements will fit that planner. For my cover I cut the paper to 7-1/2 x 9-1/2, rounded the corners (important so you don’t stab yourself later), then I laminated it and trimmed it, leaving a 1/8″ border around it so the sides do not open so the final measures 7-3/4 x 9-3/4. Once cut, I punched the mushroom holes with my Arc Disc Punch.
For the dividers, I used dividers from my original Classic Happy Planner as a template. I find this is the easiest way to do this because they already have tabs. This will work with any size planner. But you can also just cut the paper down to the same size of your cover and then add a shape (like a star-for July 4th) as your tab. Adhere it in place before you laminate your dividers. Again, I rounded the corners before laminating then again once I trimmed them down. These measure 7-1/2 x 9-1/4″ before lamination and 7-5/8 x 9-1/4″ once laminated and trimmed.
I also cut out some of the cut aparts and laminating them to add into the pockets of my planner cover. These make great diecuts. You can also cut out images that appear on these cut aparts for a more customized diecut (i.e, cut around the liberty bell in the diecut shown below),
Another thing you can make is a bookmark or dashboard. Choose a width (I usually do half the width of my page and then use the dividers to trace a tab at the top of your bookmark. Laminate and cut it and you have a cute bookmark to mark your week or month or whatever you need.
Thanks for reading this post. I hope you enjoyed and I’ve inspired you to give these find some uses for all that paper you have in your stash. Leave comments or questions below or feel free to email.
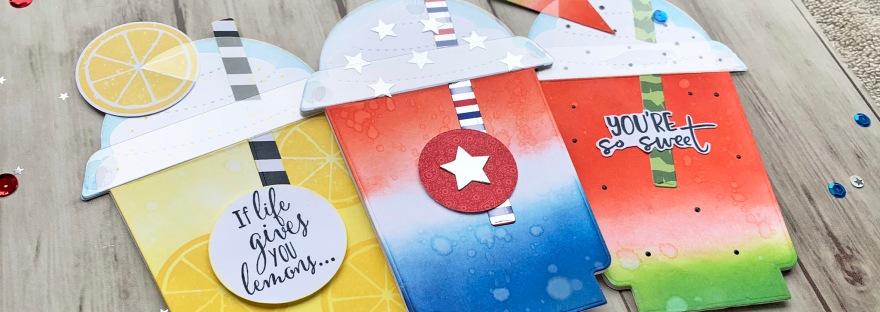
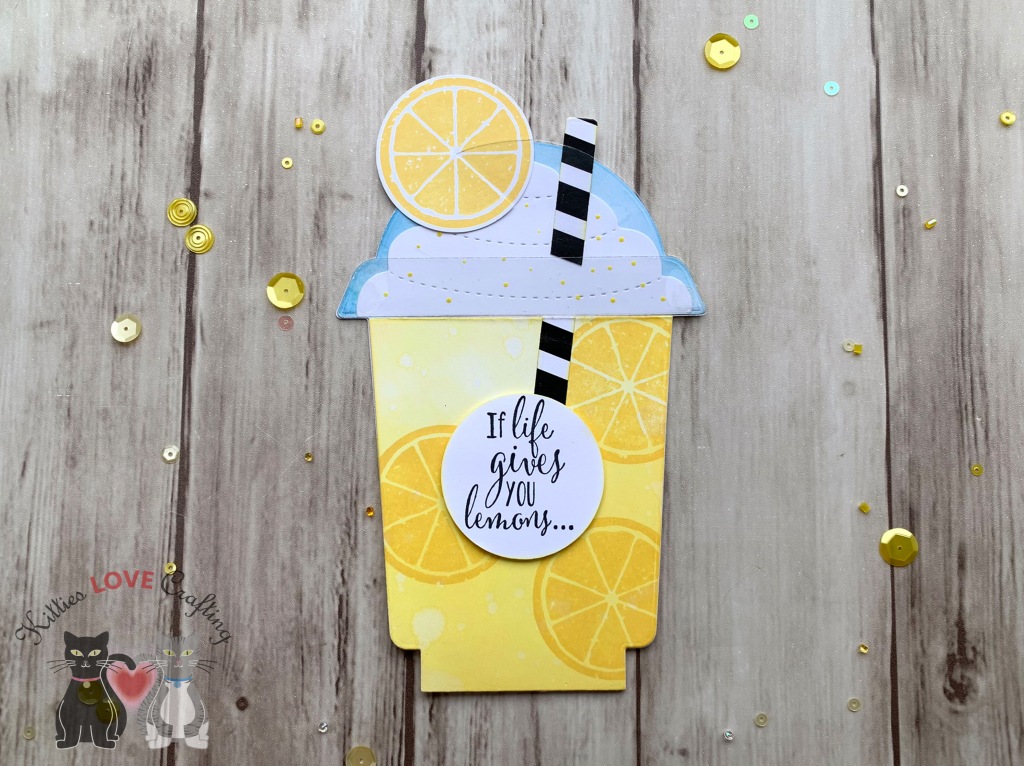
While it’s probably no surprise too many that I love coffee, I love coffee stamps and dies even more. This Honeybee Stamps Frappe Shake Card Dieset as well as their Honey Bee COFFEE CUP CARD Dies are my favorites! They have everything you need to make cute coffee cup and frappe cup shaped cards and shakers. And they fit in an A2 size envelope which is great!
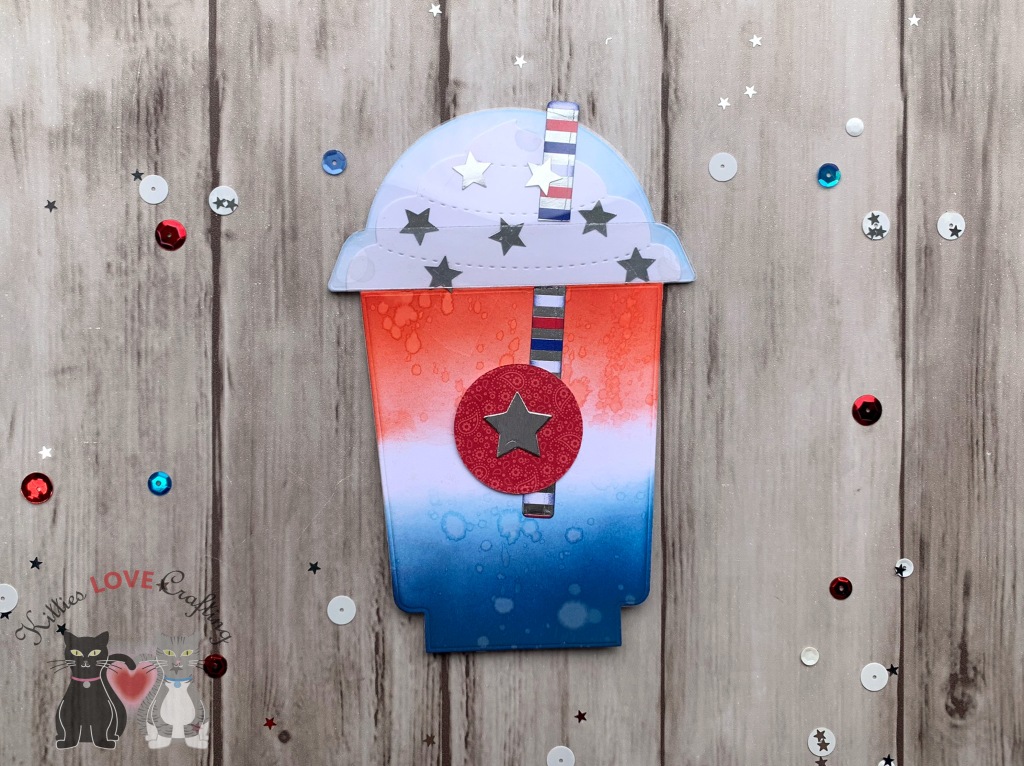
I thought it would be fun to reuse this dieset to make some non-coffee cards, instead make brightly colored summer beverages. I don’t know if you all remember the rocket bomb popsicles that were red, white and blue. I remember many summers as a kid eating those popsicles (they were refreshing and turned my tongue red or blue, depending on which end I ate first—what could be better??). LOL That was the inspiration for my first card.
I started by diecutting card bases using the large card, coffee cup, and the whipped cream dies in the set from Neenah 110lb Classic Crest Cardstock 8.5 X 11″ 3 times. I also diecut 3 sets of the lid and its rim from Acetate.
On the inside of the card, I stamped “Happy 4th of July” with a very old stampset I had (sorry don’t know where it came from) using Tim Holtz Chipped Sapphire Distress Oxide Ink and added 3 silver stars.
Card Inside
For the second card, I decided to make a delicious watermelon smoothie. Who doesn’t like a tasty frozen watermelon beverage on a hot summer day?!? I’m now craving a smoothie while writing this post. LOL.
Thanks for reading this post. I hope you enjoyed and I’ve inspired you to Shop Your Stash and see what fun ideas you come up with and maybe rediscover supplies you forgot you had! Leave comments or questions below or feel free to email me.
Happy Saturday friends! Hope you are all doing well and are safe. To go along with the cards in my previous post using the Hello Easter stampset from Simon Says Stamp, I decided to make some multimedia tags. I also dug up some items from my stash that I forgot I had (yeah that’s how old they are. LOL, Anyone else have this problem?) to use on the tags.
I colored them with COPICS. I used C000, C1, and 0 for the bunny and R81 and R85 for its ears; Y06, Y13 and Y18 for the bunny’s bow; YG06, YG07, and YG09, YR07 and YR16 for the egg the bunny holds; YR07, YR16 and R29 for one tulip; BG01, BG02, and BG05 for the second tulip; Y06, Y13 and Y18 for the daffodils and YG06, YG07, and YG09 for the stems; and Y00, Y06, and Y21 for the basket, V04, V06 and V09, YR07, YR16 and R29, BG01, BG02, and BG05 for the eggs inside the basket, R29 and R32 for the basket bow. Once I finished coloring the images, I fussycut them all out.
I colored them with COPICS. I used Y06, Y13 and Y18 for the ducky body, YR07 and YR16 for the feet and beak and R81 for the cheeks, V04, V06 and V09 for the bow; R32, R37 and R29 for the umbrella and V04, V06 and V09 for the umbrella bow; Y06, Y13 and Y18, YR07 and YR16 for the medallion; R81 and R85, BG000, BG01 and BG02 for the large egg, and YR07, YR16 and R29 for the egg’s bow. Once I finished coloring the images, I fussycut them all out.
Thanks for reading this post. I hope you enjoyed and I’ve inspired you to give these tags a try for yourself. Have a great Easter! Leave comments or questions below or feel free to email.
Happy Friday friends! Hope you are all doing well and are safe. With Easter right around the corner, I’m sharing some more super easy cards. These were made easy using the Simon Says Stamp’s Faberge Egg Dies.
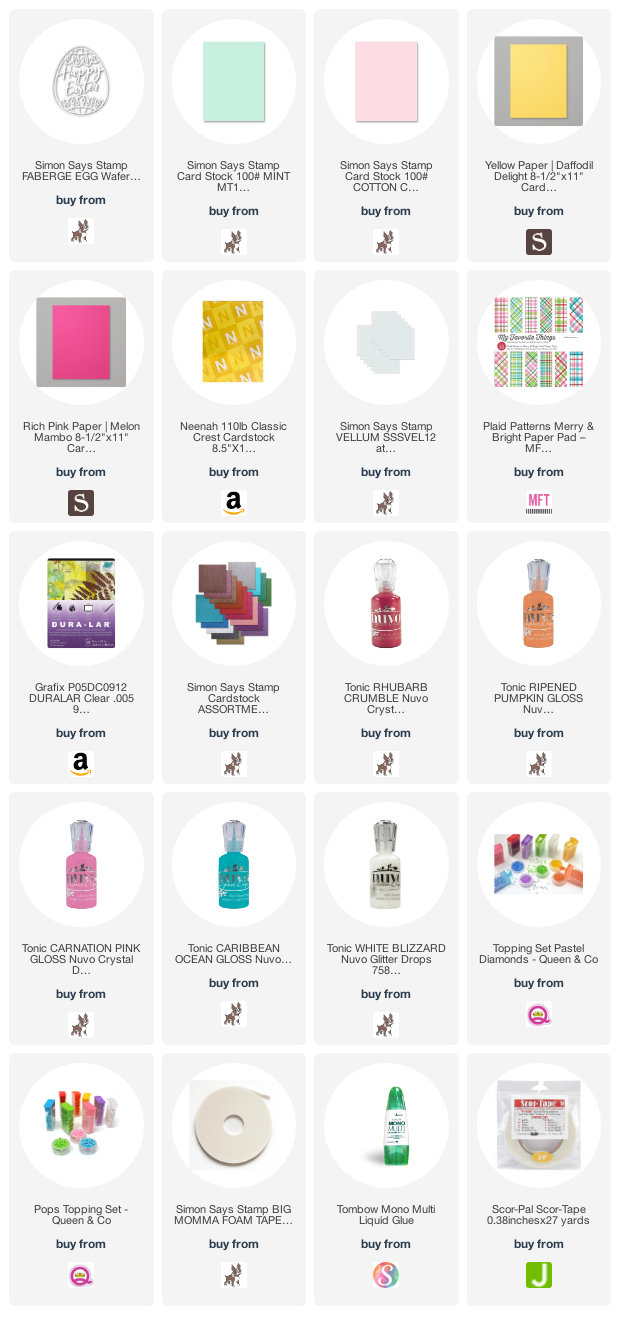
For the first card, I started by cutting a piece of Simon Says Stamp Cotton Candy 8.5 x 11” Cardstock and Simon Says Stamp Mint 8.5×11 cardstock to 5-1/2 x 8-1/2″ and scored at 4-1/4″ To make a card base. Then to make the egg-shaped card, I used the outline egg and just positioned slightly off the folded edge of the card. this will produce a shaped card.
I diecut out the Faberge Egg Dies from Stampin’ Up! Shimmer Paper in Mint Macaron and Sweet Sugarplum (these are no longer available but Simon Says Stamp has tons of glitter papers). Next, I diecut two pieces of Simon Says Stamp VELLUM using the outer Faberge Egg die. This will go behind the front decorative egg. I also diecut two different pattern papers with the same die. I chose one from My Favorite Things Plaid Patterns Merry & Bright Paper Pad and one front an older Lawn Fawn Perfectly Plaid Rainbow 6 x 6 Paper Pad (no longer available I think).
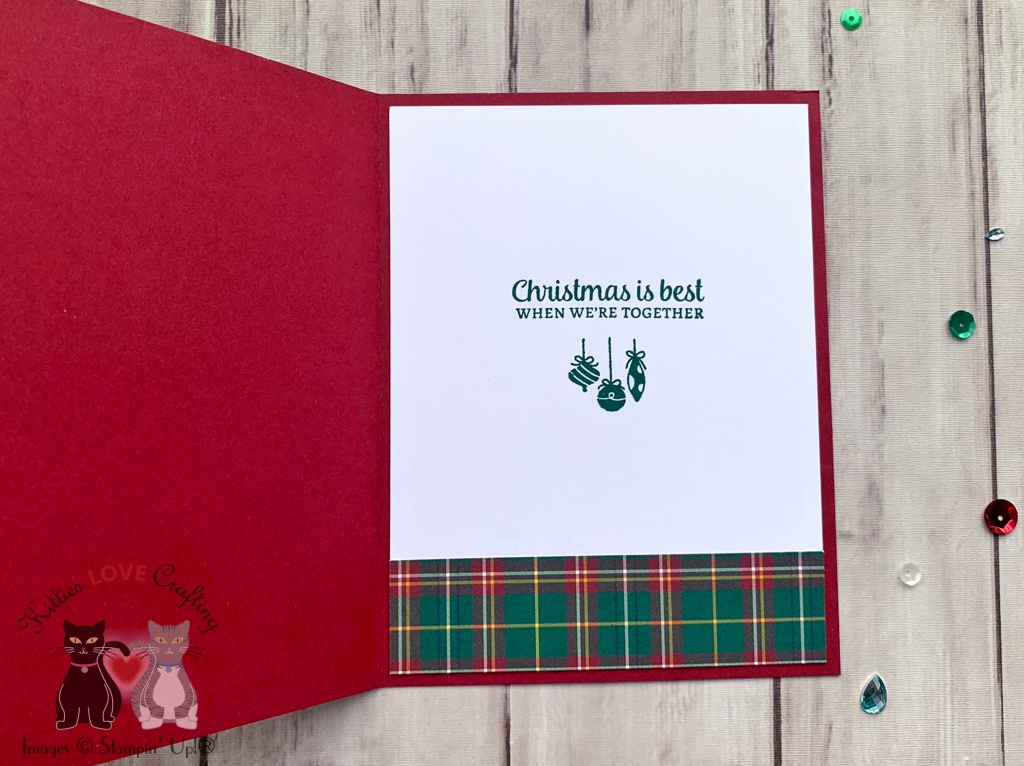
For the second card, I wanted to make a shaker card. Unlike most shaker cards this one did not take long at all. 😀 I started by cutting a piece of Daffodil Delight 8-1/2″ X 11″ Cardstock to 5-1/2 x 8-1/2″ and scored at 4-1/4″ to create a card base and a piece of Lawn Fawn Perfectly Plaid Rainbow 6 x 6 Paper Pad (no longer available I think) to 4-1/4 x 5-1/2”. I diecut an egg window into the pattern paper using the outline die from the Simon Says Stamp’s Faberge Egg Dies. Then I added a piece of Acetate behind it with some Scor-Tape. I diecut the Faberge Egg from Simon Says Stamp’s ASSORTMENT GLITTER Cardstock 6×6 Pack and carefully adhered it to the acetate with some Tombow Mono Multi Liquid Glue.
I then added some 3M Foam Tape behind it, creating a well around the window. I added some pink sequins from my stash as well as Queen and Company Pastel Diamonds in pink, yellow and orange and Queen and Company Pops Toppings in pink, yellow and orange. I adhered a piece of the Daffodil Delight Cardstock behind the shaker as well. Instead of trying to adhere it directly to the card, adding a piece of paper behind it is much easier. I adhered the shaker element to the card base and thought it looked a little plain. Even with the sparkle of the glitter Cardstock, it was missing something so I added a strip of Stampin’ Up! Melon Mambo 8-1/2″ X 11″ Cardstock, measuring 1/4 x 5-1/2”. To finish it off, I added some Nuvo Drops in White Blizzard.
On the inside of the card, I cut down a piece of Neenah 110lb Classic Crest Cardstock 8.5 X 11″ to 4-1/ x 5-1/2” and adhered it to the inside of the card base and added a strip of the same plaid pattern paper, measuring 3/4 x 4” to the bottom of the white panel.
Thanks for reading this post. I hope you enjoyed and I’ve inspired you to give these cards a try for yourself. They are super quick and fun to make! Have a great Easter! Leave comments or questions below or feel free to email.


 https://linkdeli.com/widget.js?id=f5e8378456858c916708