What is better than candy canes during the holiday season?!?? Well maybe, hot chocolate and candy canes (yum!). 🙂 This cute candy cane border is from Stampin’ Up!’s Sweetest Borders Dieset which also features a holly leaves border and individual candy canes, peppermints and holly leaves. Lots of options with this dieset. It can be found on page 21 of the new Aug-Dec Mini Catalog. It also coordinates with the Sweetest Time Stampset.

I kept these cards simple but changed the papers and ink colors. For the first card, I started by cutting a piece of Whisper White 8-1/2″ X 11″ Thick Cardstock to 5-1/2 x 8-1/2″ and scored at 4-1/4″ to make a card base. Then cut a piece of Plaid Tidings 6″ X 6″ Designer Series Paper to 4-1/4 x 5-1/2″ for the top panel and adhered it to the card base.
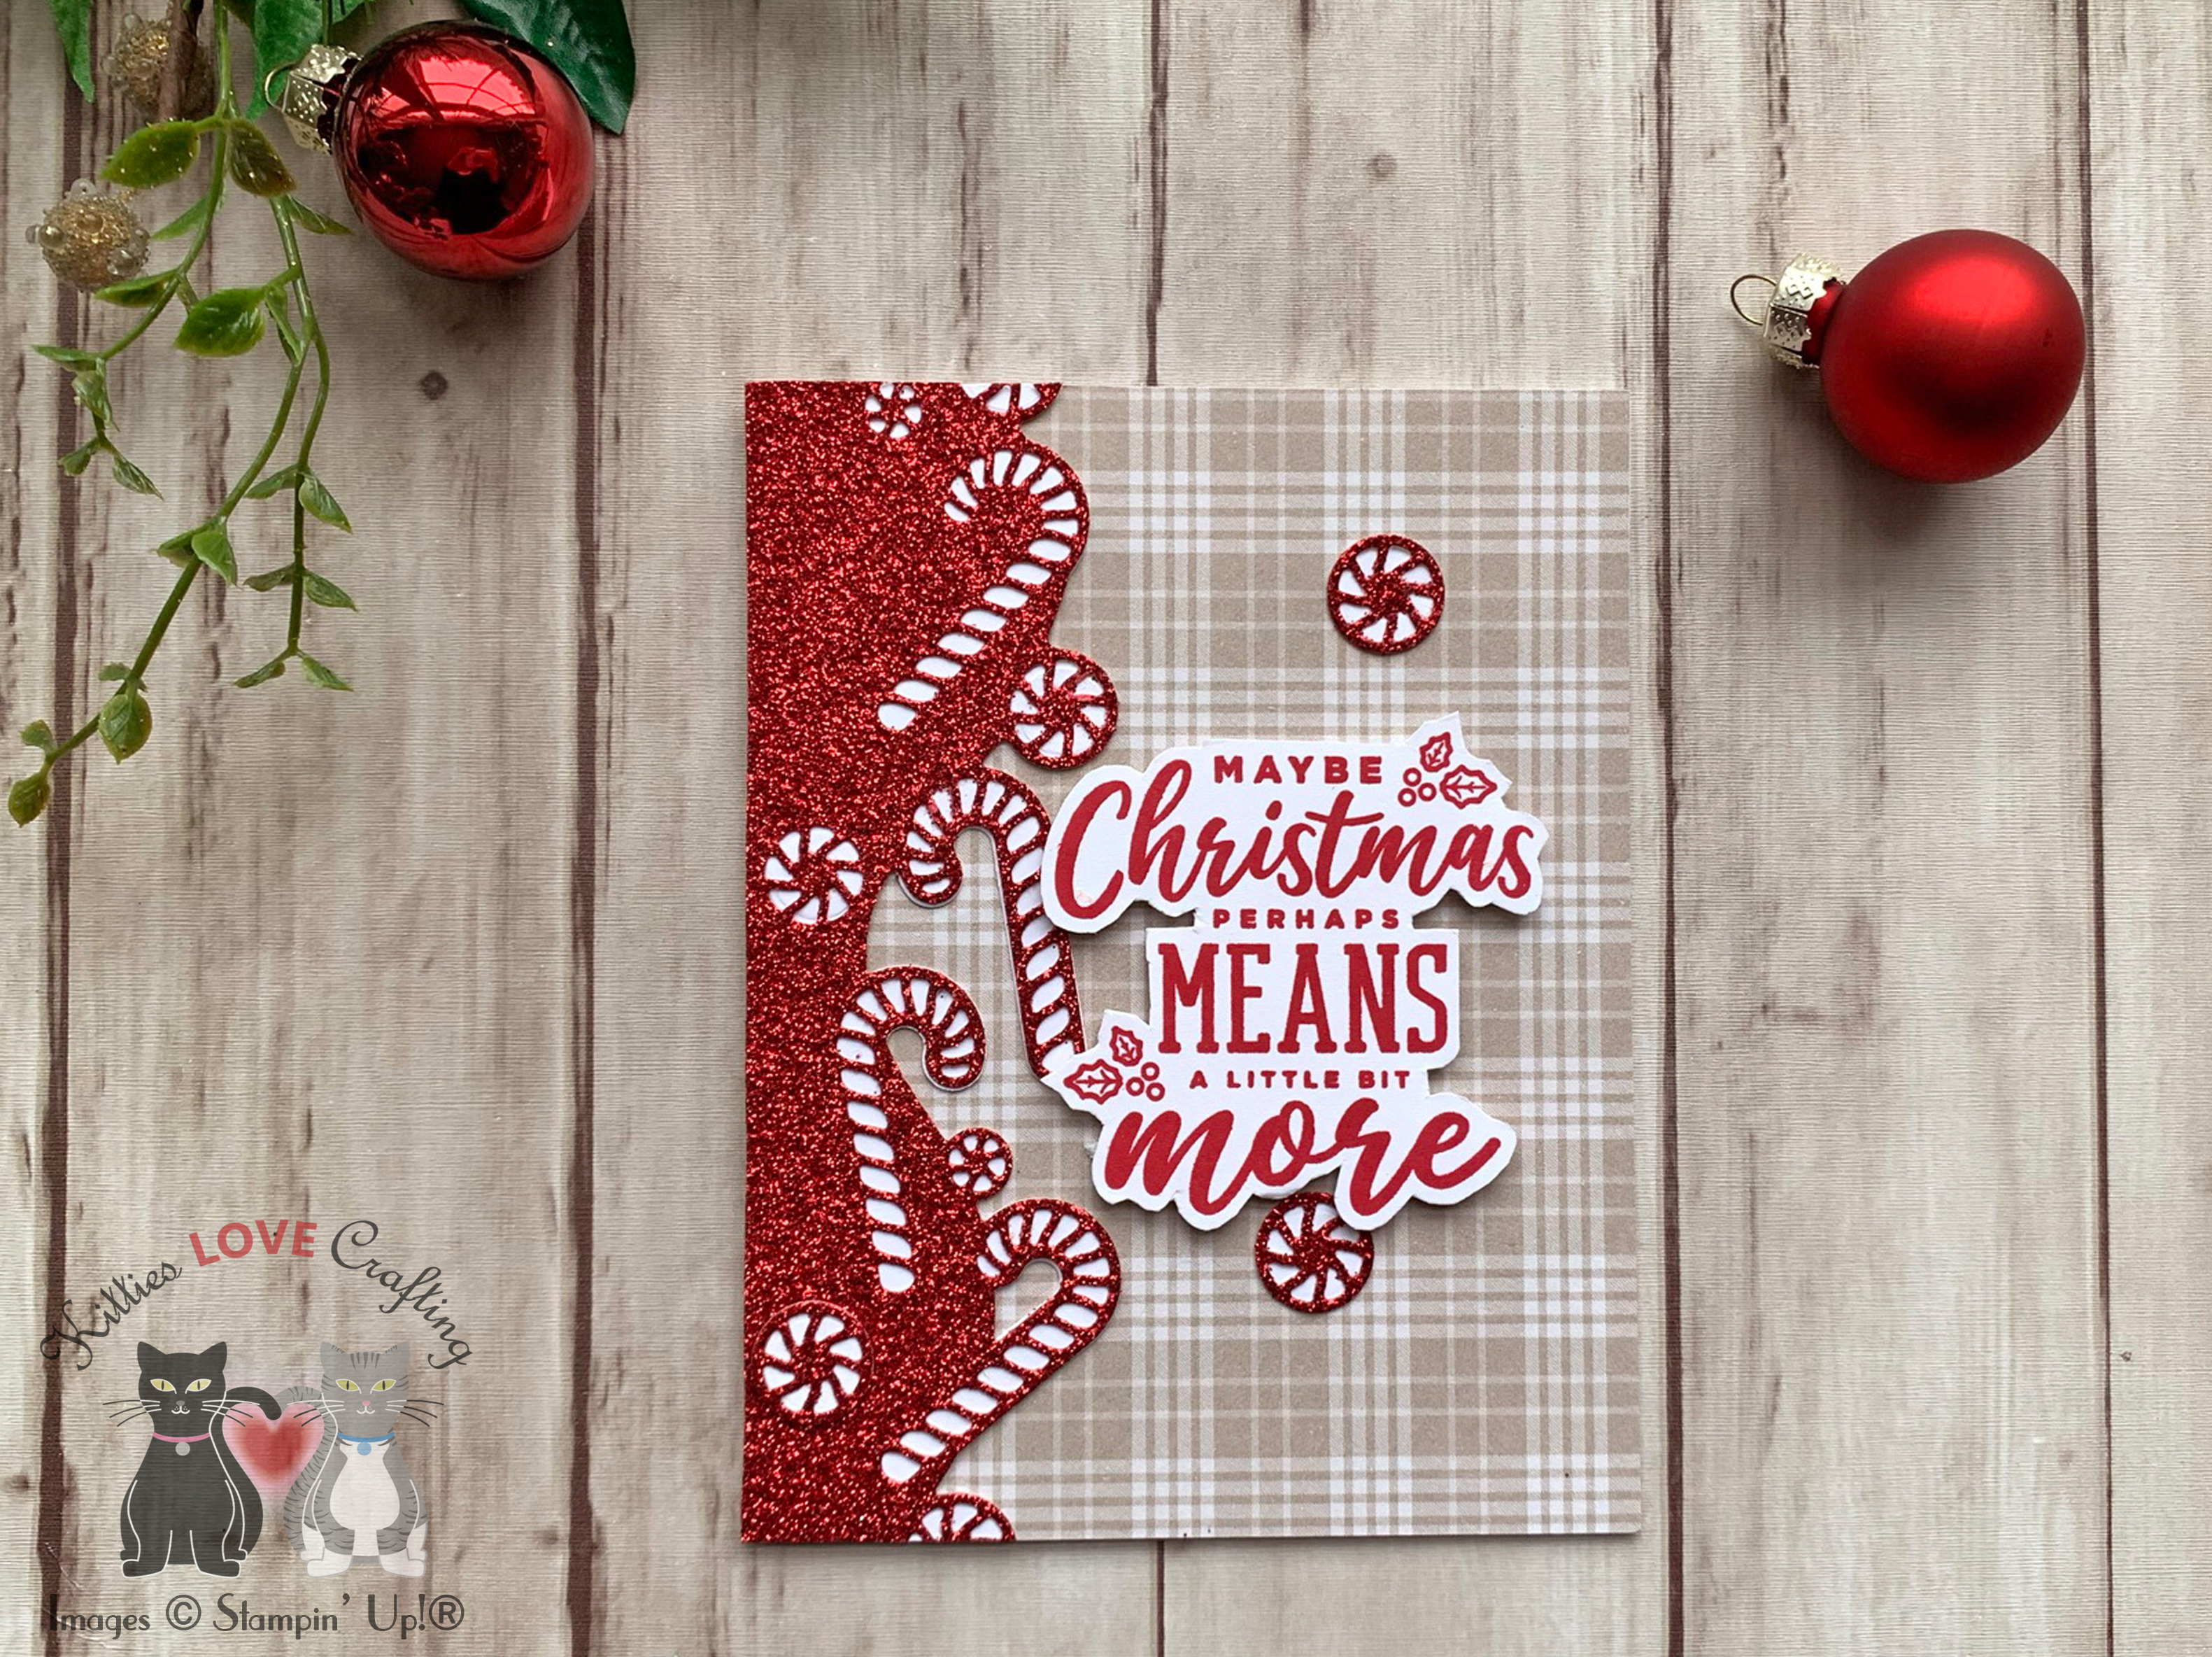
I diecut the candy cane border as well as some extra peppermints and candy canes with the Sweetest Borders Dies from Red Glitter Paper. I also diecut some candy canes and peppermints in white using the solid dies which cuts the backing. For the tiny peppermints I just added a piece of white cardstock behind it. I adhered the border to the card and trimmed off the excess.
I stamped a sentiment from the Christmas Means More stampset onto a piece of Whisper White 8-1/2″ X 11″ Thick Cardstock with Real Red Ink. I fussycut the sentiment and adhered it with Stampin’ Dimensionals.

On the inside, I stamped a sentiment from the Fireside Trimmings with Stampin’ Up! Crumb Cake Ink and added a red glitter candy cane. And that’s it for this card. Very easy!

Dimensions
- Card Base = 5-1/2 x 8-1/2″ and scored at 4-1/4″ Whisper White 8-1/2″ X 11″ Thick Cardstock
- Top Panel = 4-1/4 x 5-1/2″ Plaid Tidings 6″ X 6″ Designer Series Paper
For the second card, I started by cutting a piece of Whisper White 8-1/2″ X 11″ Thick Cardstock to 5-1/2 x 8-1/2″ and scored at 4-1/4″ to make a card base. Then cut a piece of Wonder of the Season 12 x 12” Specialty Designer Series Paper to 4-1/4 x 5-1/2″ for the top panel and adhered it to the card base.

I diecut the candy cane border as well as some extra peppermints and candy canes with the Sweetest Borders Dies from Red Foil. I also diecut some candy canes and peppermints in white using the solid dies which cuts the backing. For the tiny peppermints I just added a piece of white cardstock behind it. I adhered the border to the card and trimmed off the excess.

I stamped a sentiment from the Christmas Means More stampset onto a piece of Whisper White 8-1/2″ X 11″ Thick Cardstock with Olive Olive Ink. I fussycut the sentiment and adhered it with Stampin’ Dimensionals.
On the inside, I stamped a sentiment from the Fireside Trimmings with Real Red Ink and added a red foil candy cane. And that’s it for both these cards. So easy!

Dimensions
- Card Base = 5-1/2 x 8-1/2″ and scored at 4-1/4″ Whisper White 8-1/2″ X 11″ Thick Cardstock
- Top Panel = 4 x 5-1/4″ Wonder of the Season 12 x 12” Specialty Designer Series Paper
Supplies
 https://linkdeli.com/widget.js?id=f5e8378456858c916708
Thanks for reading this post. I hope you enjoyed and I’ve inspired you to try these easy holiday cards using this cute dieset for yourself! Leave comments or questions below or feel free to email me. If you want to share you creations with me tag me on instagram @kittieslovecrafting. If you would like a Stampin’ Up! catalog, please email me as well. All current catalogs can be found on the right side of this post and the Stampin’ Up! page. All news and fun stuff happening at Stampin’ Up! are listed there!