Hello everybody! I don’t know about you but I love a good shaker card and when it’s easy to make I’m all for it! I also love slimline cards so I decided to combine the two. This new Candy Cane Slimline Die from Catherine Pooler is perfect for all kinds of backgrounds You can layer it, inlay the pieces or do a tone on tone like I did here. The other die that I am loving from the Jolly Holiday release is the Peppermint Twist Cover Plate Die. You will see how I used it for this card.
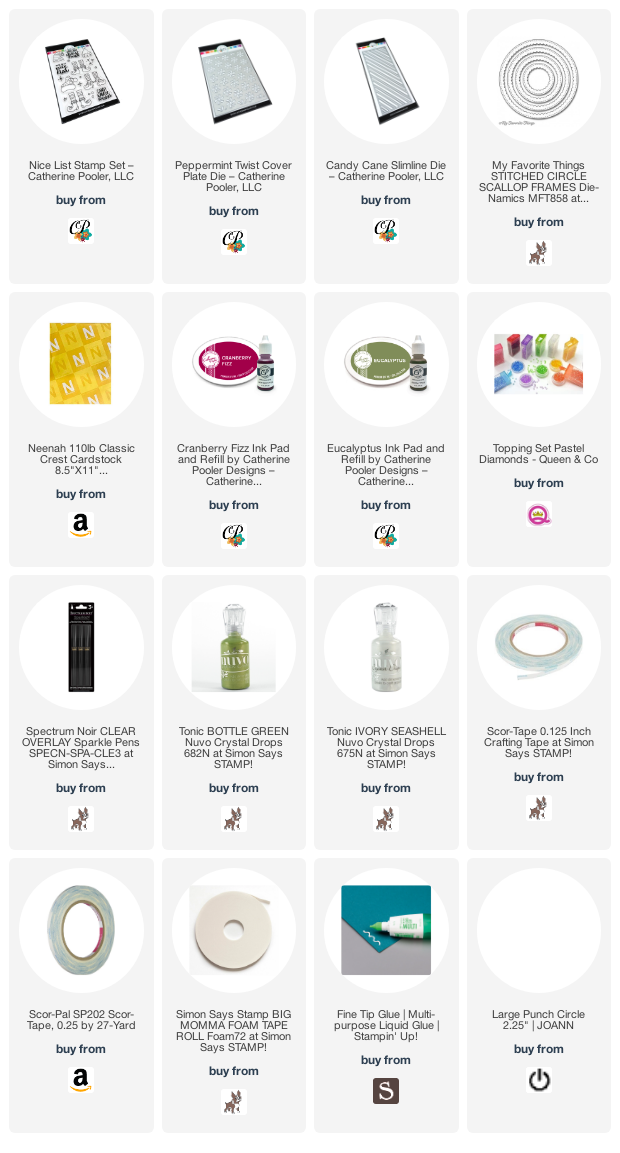
I started by cutting a piece of Neenah 110lb Classic Crest Cardstock 8.5 X 11″ to 7 x 8-1/2″ and scored at 3-1/3″ for my card base. next I used the Candy Cane Slimline Die to cut the front panel and adhered it to the card base. I used the My Favorite Things Stitched Circle Scallop Frames (I think this is no longer available but you can achieve the same look with a scallop circle die or punch and a smaller circle for the inside) to cut out a frame from Neenah 110lb Classic Crest Cardstock 8.5 X 11″.
I put together my shaker element by adding acetate to the back of the frame, using a punch to cut it out, some foam tape behind that and adding some Queen and Company Topping Pastel Diamonds in red, green and clear. I adhered the circle with the sentiment and adhered the whole thing to the card.
Thanks for reading this post. I hope you enjoyed and I’ve inspired you to give this card a try for yourself. Leave comments or questions below or feel free to email.
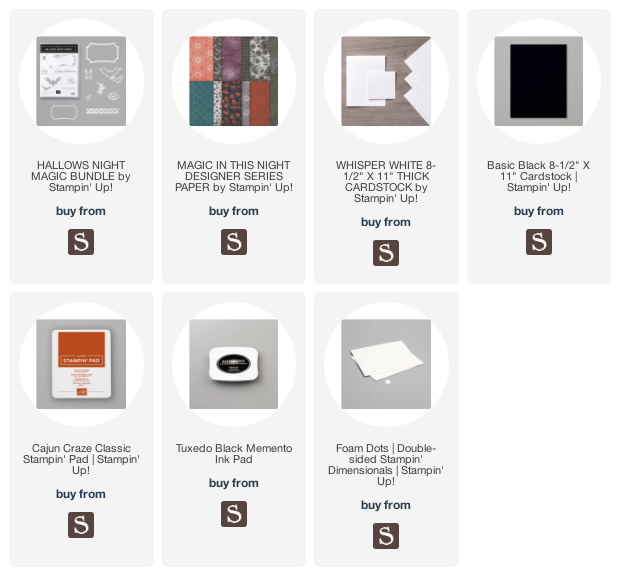
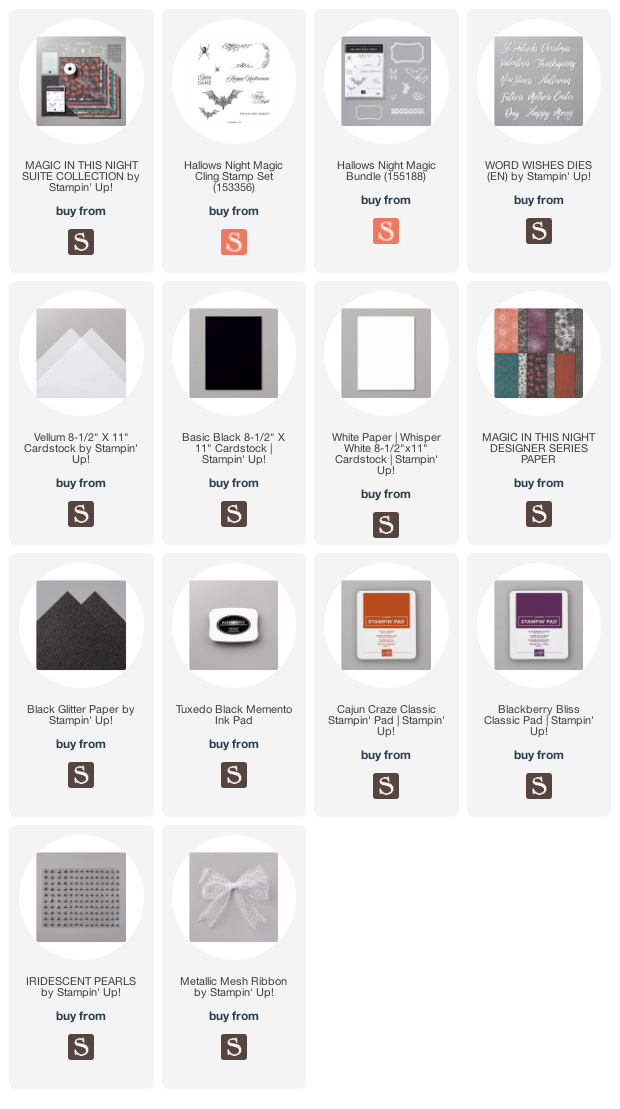
The flower die in the Halloween Magic Dies included in Stampin’ Up!’s Magic in This Night Suite reminds me of images you would see for the Dia de Los Muertos celebrations or a black rose found in a spooky haunted mansion. I decided to have some fun with it and create an “embossed” background. This suite can be found in the new Aug-Dec Mini Catalog on page 52.
Thanks for reading this post. I hope you enjoyed and I’ve inspired you to try this Halloween card for yourself! Leave comments or questions below or feel free to email me. If you want to share you creations with me tag me on instagram @kittieslovecrafting. If you would like a Stampin’ Up! catalog, please email me as well. All current catalogs can be found on the right side of this post and the Stampin’ Up! page. All news and fun stuff happening at Stampin’ Up! are listed there!
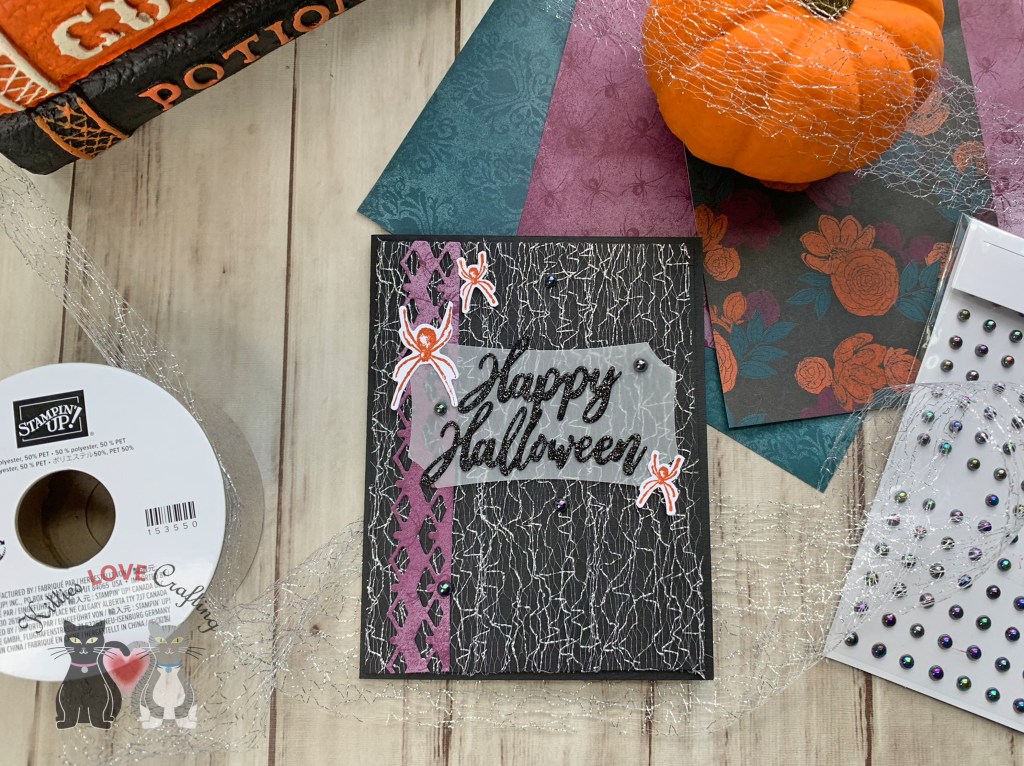
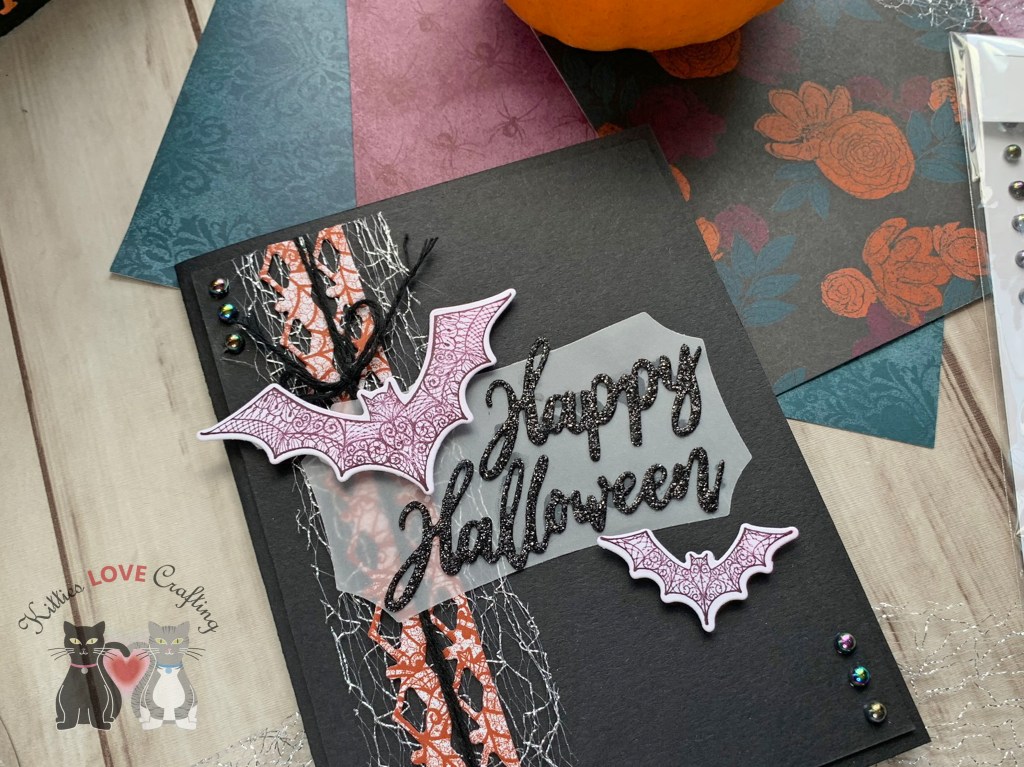
The Stampin’ Up!’s Magic in This Night Suite has this very cool looking Metallic Mesh Ribbon. I wasn’t sure how to use it at first but then started playing with it to see how it reacted to stretching etc and my brain immediately saw a web! It also adds some sparkle to your card because it glistens in the light. It’s just Stunning! This suite can be found in the new Aug-Dec Mini Catalog on page 52.
For my first card I used the ribbon as a background. I cut a piece of Basic Black 8-1/2″ X 11″ Cardstock to 5-1/2 x 8-1/2″ and scored at 4-1/4″ to create a card base and one piece to 4 x 5-1/4″ for the top panel. I added some Tear & Tape Adhesive to the top and bottom of the back of the panel and wrapped the Metallic Mesh Ribbon around it. Then added more tape to the rest of the card to adhere it to the card base.
For my second card, I cut a piece of Basic Black 8-1/2″ X 11″ Cardstock to 5-1/2 x 8-1/2″ and scored at 4-1/4″ to create a card base and one piece to 4 x 5-1/4″ for the top panel. I added some Tear & Tape Adhesive to the top and bottom of the back of the panel and wrapped a piece of the Metallic Mesh Ribbon around it.
Thanks for reading this post. I hope you enjoyed and I’ve inspired you to try these Halloween cards for yourself! Leave comments or questions below or feel free to email me. If you want to share you creations with me tag me on instagram @kittieslovecrafting. If you would like a Stampin’ Up! catalog, please email me as well. All current catalogs can be found on the right side of this post and the Stampin’ Up! page. All news and fun stuff happening at Stampin’ Up! are listed there!
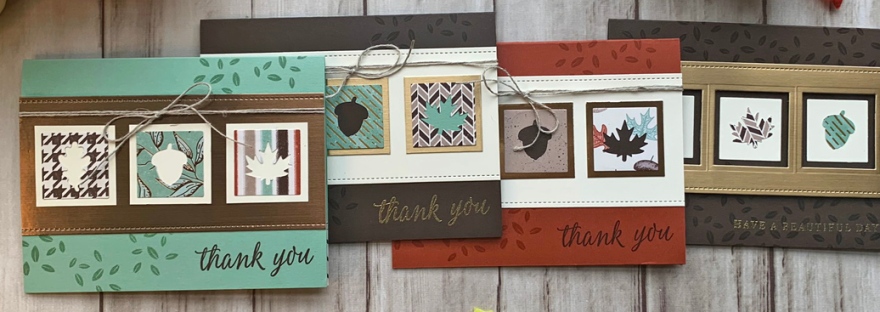
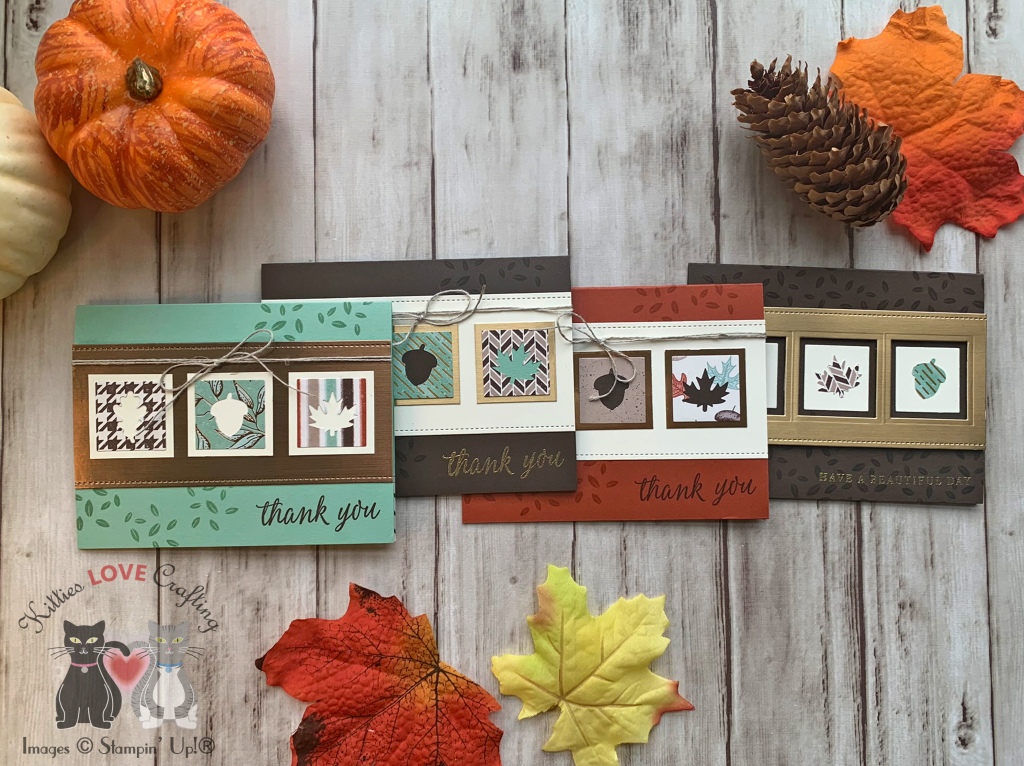
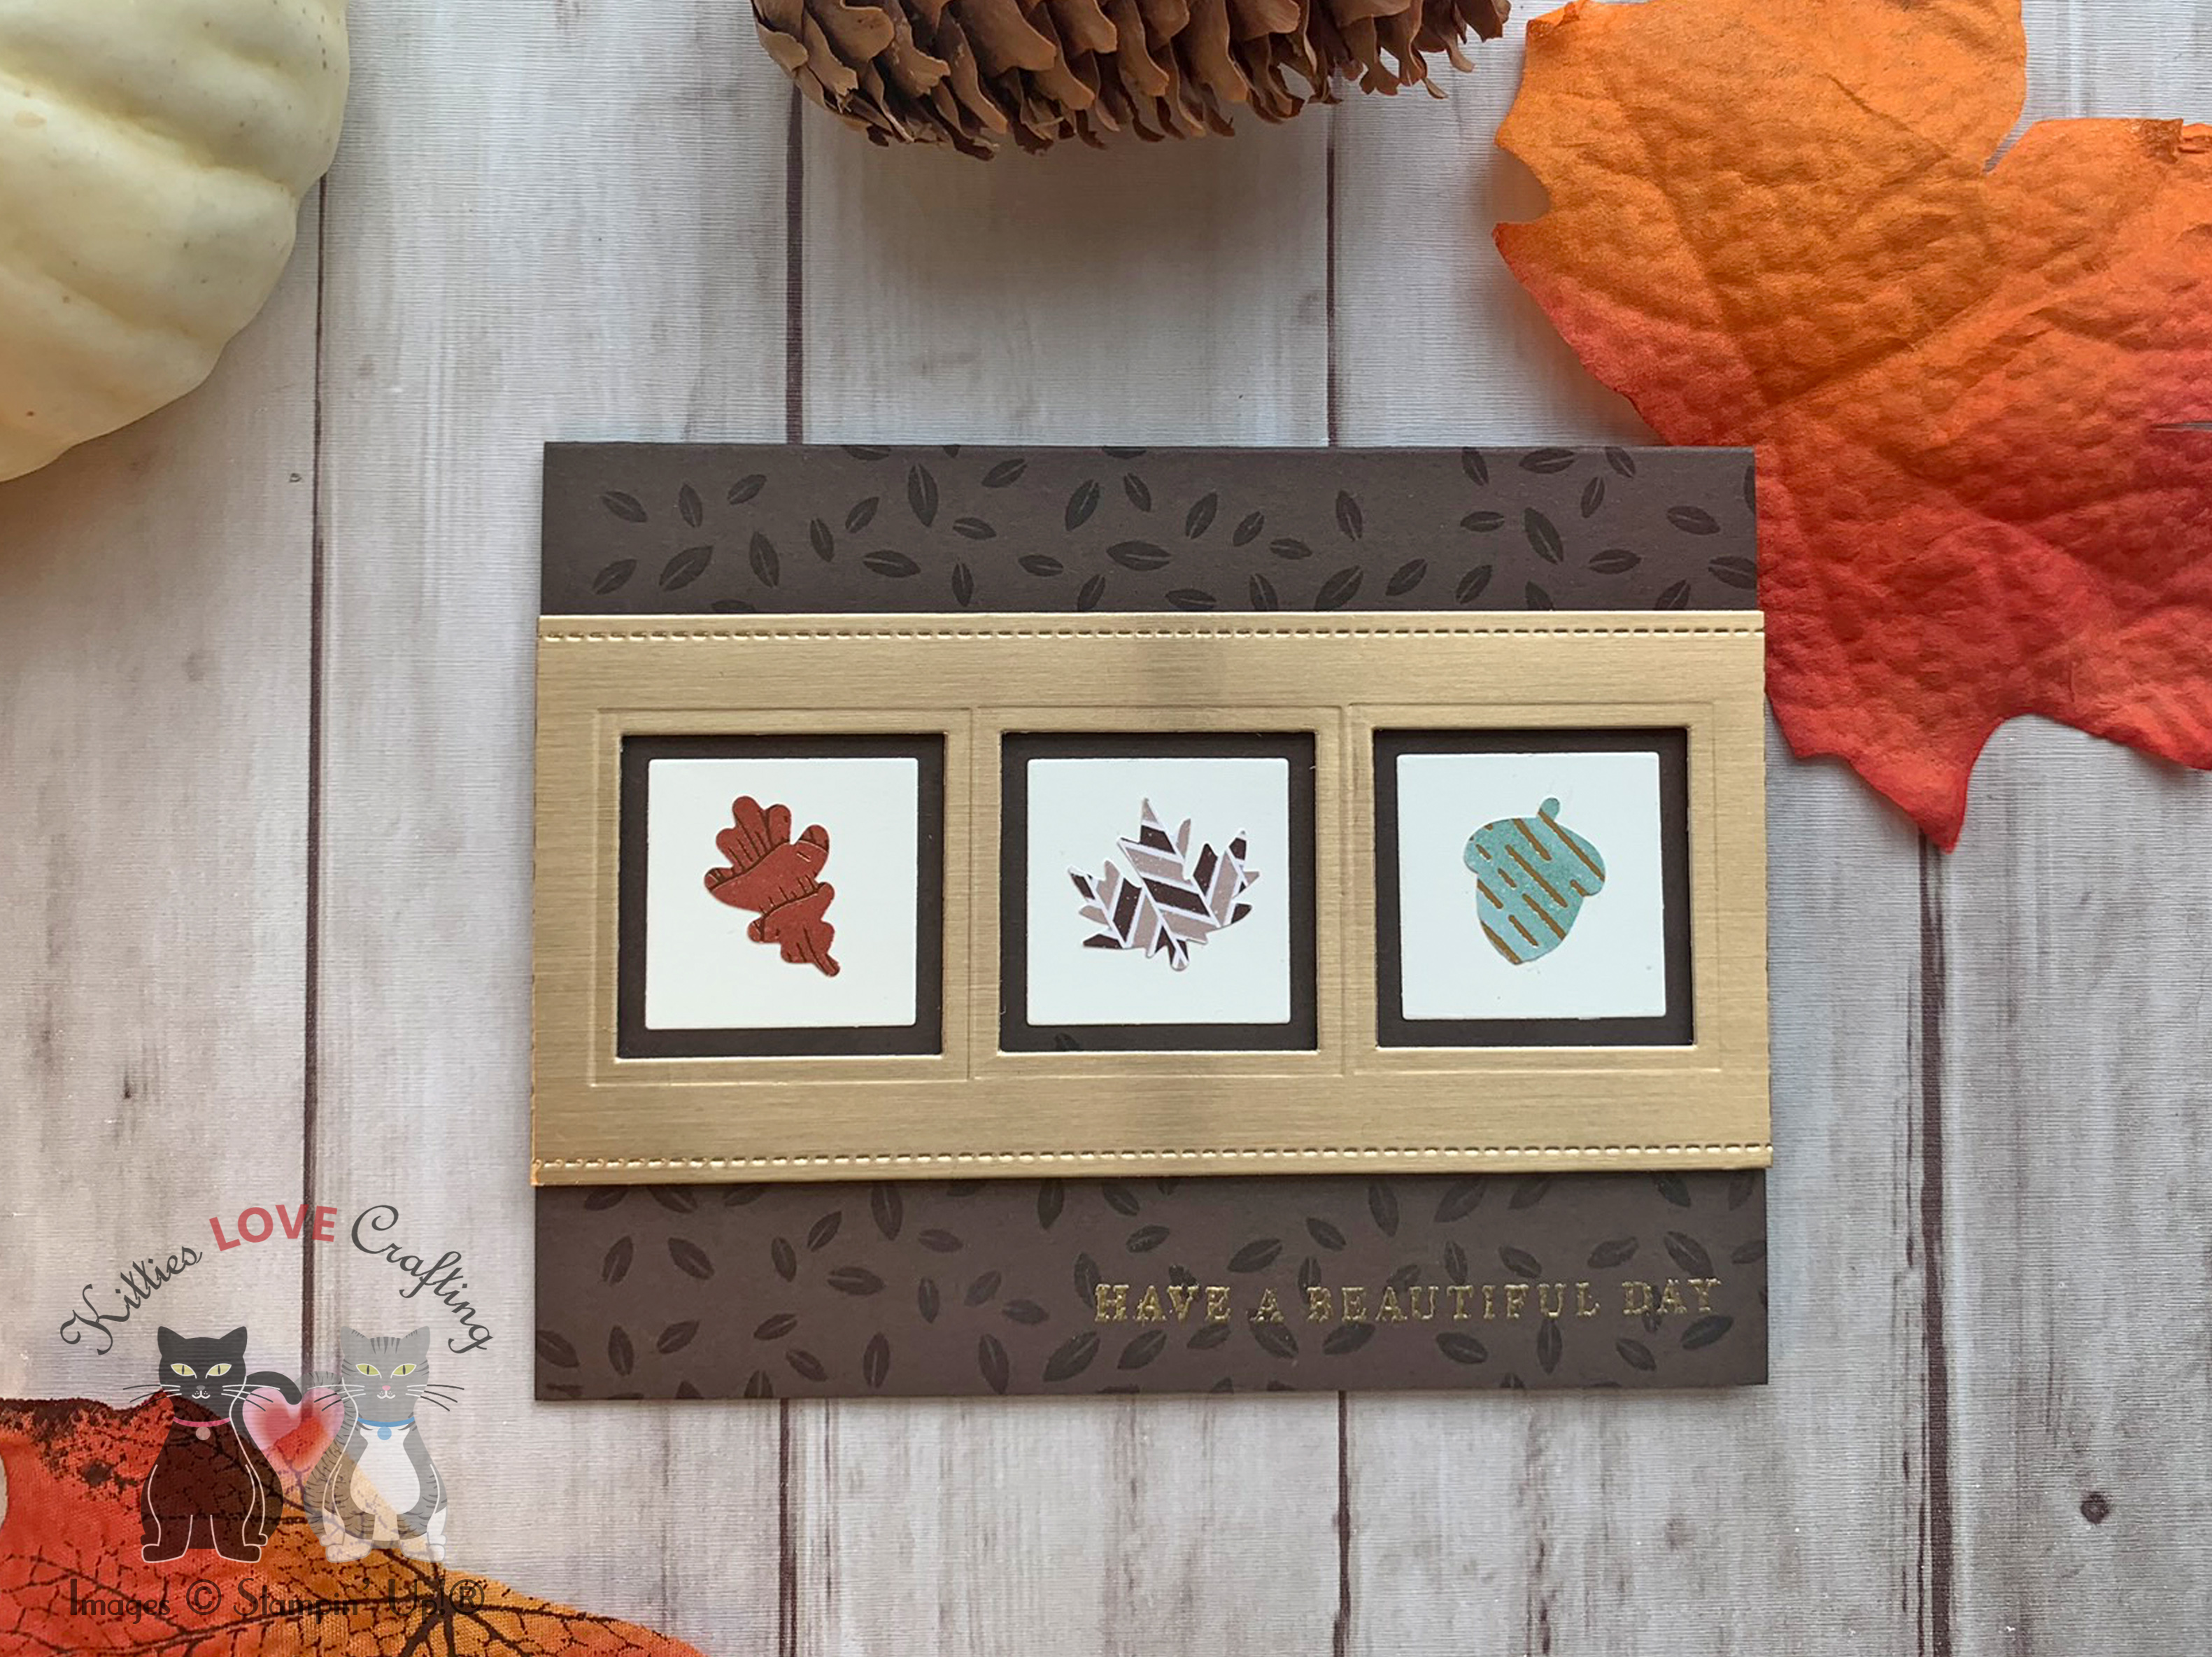
Hello friends. Need some quick thank you cards for Fall or Thanksgiving? Normally I would say these would be great to give a host after attending their dinner party. But since this year’s celebrations will look very different and we may not be gathering with friend and family, you can send these after receiving a gift or to a teacher for all the hard work they have had to do during these uncertain times. I made 3 cards and then found myself with extra leaf pieces from the squares I punched out so I made a fourth card.
I added 3M Foam Tapeto the back of the stitched gold foil piece and adhered it to the card base. I diecut three 1-3/16″ squares from Very Vanilla 8-1/2 x 11″ Cardstock using the Layering Squares Dies, adhered the leftover leaf images to each one, and adhered them inside the windows. And this completed this card.
Thanks for reading this post. I hope you enjoyed and I’ve inspired you to try these very quick and beautiful thank you cards for yourself! Leave comments or questions below or feel free to email me. If you want to share you creations with me tag me on instagram @kittieslovecrafting. If you would like a Stampin’ Up! catalog, please email me as well. All current catalogs can be found on the right side of this post and the Stampin’ Up! page. All news and fun stuff happening at Stampin’ Up! are listed there!
Happy Monday friends! Hope you are safe and had a good weekend. Today I am bringing you this card featuring a faux shaker. I saw this technique used by Jennifer McGuire and I decided to try it. I made it simpler by using pattern paper and some stamped snowflakes.
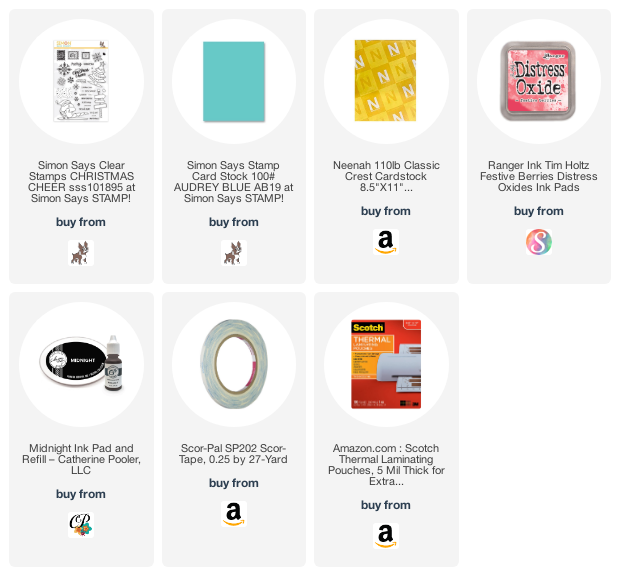
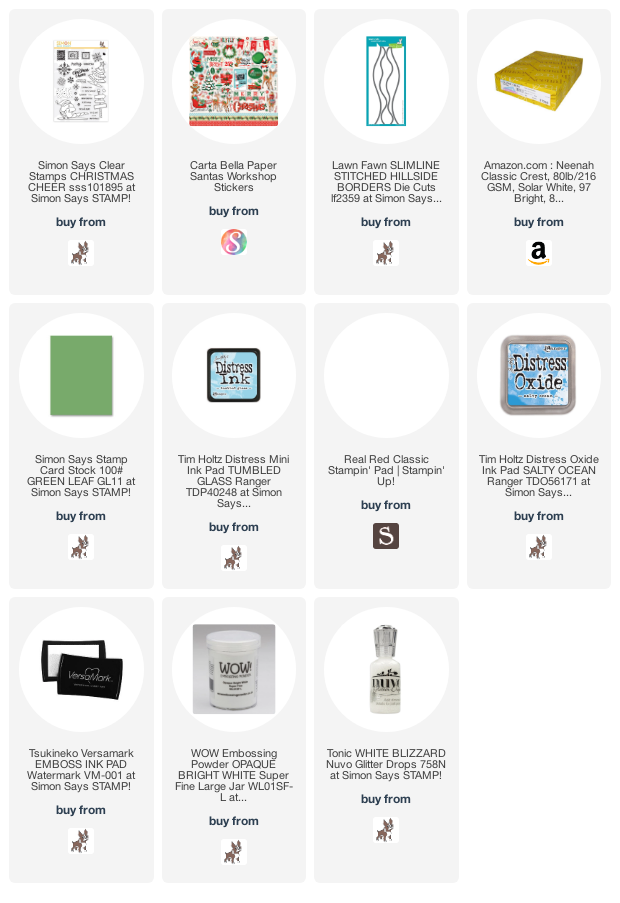
I started by cutting a piece of Simon Says Stamp Audrey Blue 100lb Card Stock to 5-1/2 x 8-1/2″ and scored at 4-1/4″, to create a card base. I cut out a strip from the front of the card base, measuring 1-1/4” in height and then two strips of the stories from the Carta Bella Santa’s Workshop 6 x 6 Designer Papers (discontinued), each measuring 1-1/2 x 5-1/2”.
I took some sequins and added them inside a laminating pouch and ran that through a lamination machine. I trimmed it down to approximately 3 x 5-1/2” and adhered it between the card base pieces and the pattern pieces using 1/4” double sided tape.
On the inside of the card, I adhered two strips of another pattern paper from the Carta Bella Santa’s Workshop 6 x 6 Designer Papers (discontinued), each measuring 1-1/2 x 5-1/2”, to the back of the front panel. Then I stamped another greeting from the Simon Says Stamp CHRISTMAS CHEER Stamps with Tim Holtz Festive Berries Distress Oxide Ink.
Thanks for reading this post. I hope you enjoyed and I’ve inspired you to give this technique a try for yourself. Leave comments or questions below or feel free to email.
Stickers are a great way to create quick cards and who doesn’t like quick cards for the holidays, right?!? I had some leftover stickers from the Carta Bella Paper – Santa’s Workshop Collection, Christmas, 12 x 12 Cardstock Stickers featured in the Says Stamp December 2018 Card Kit, Holiday Cheer (sold out) so I decided to use them on a slimline card. The larger sticker like the Santa and reindeer one are great fro slimline cards!
Thanks for reading this post. I hope you enjoyed and I’ve inspired you to give this card a try for yourself. Leave comments or questions below or feel free to email.
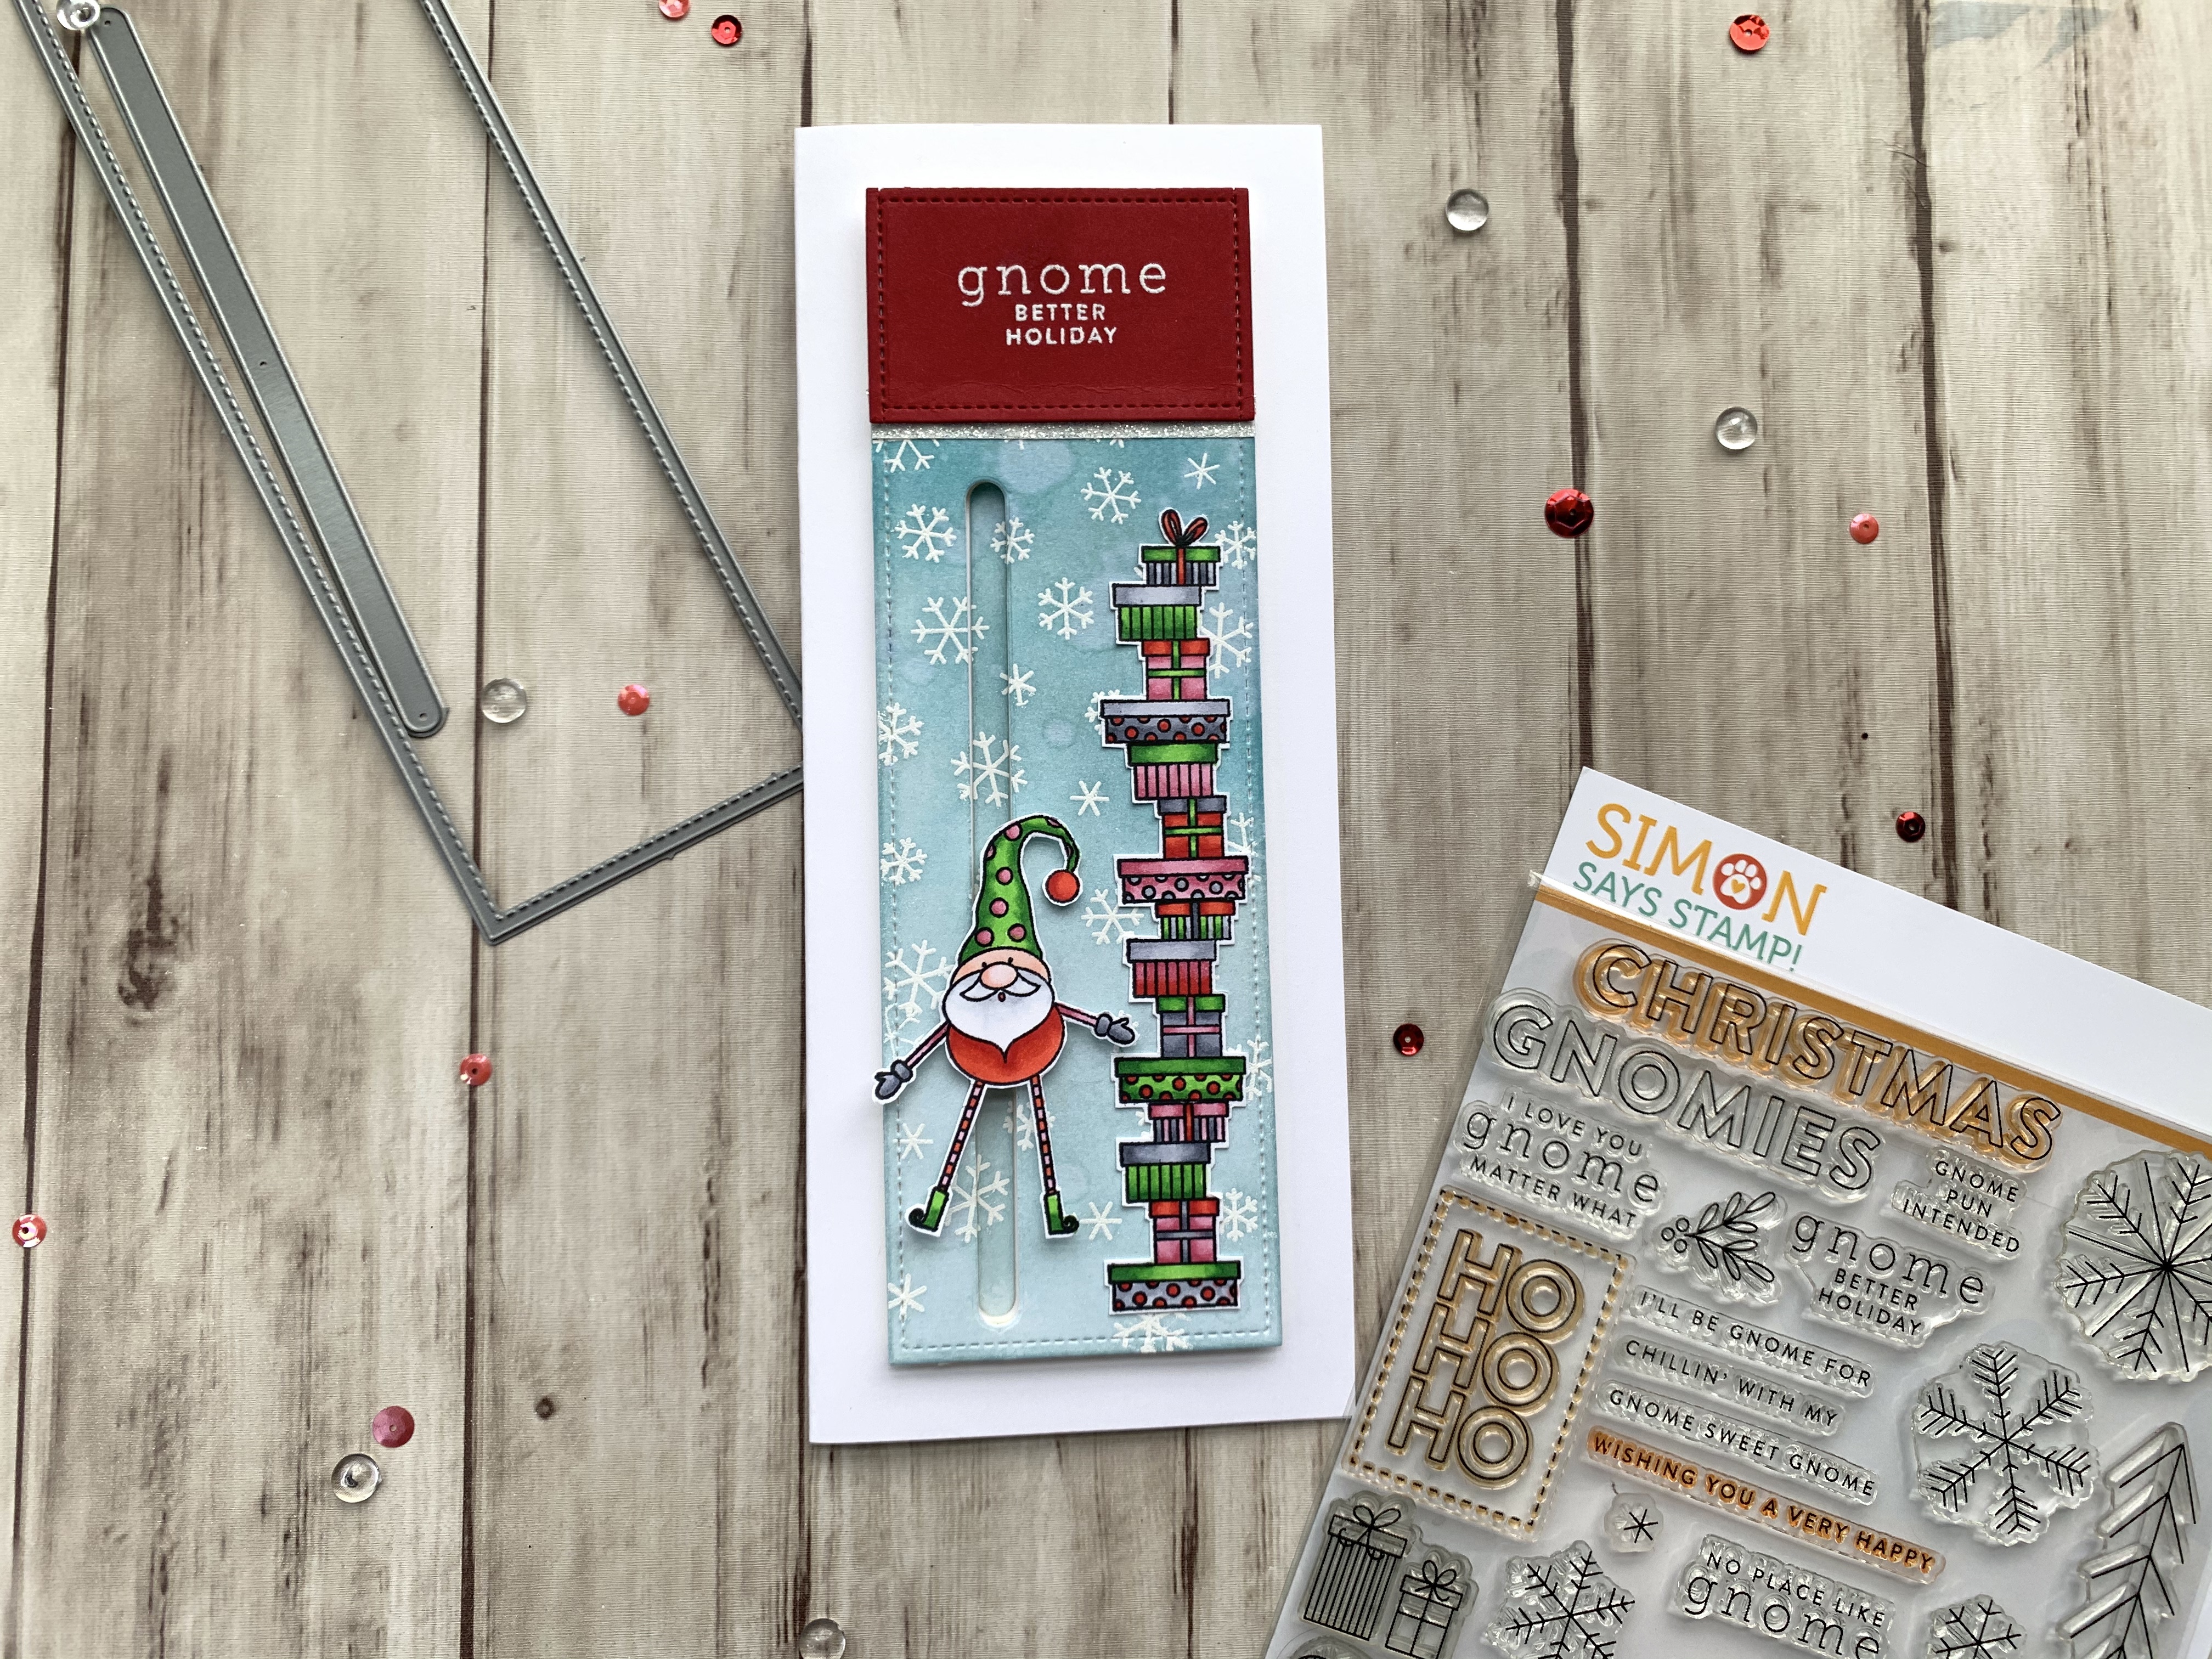
Happy Wednesday friends! I thought I would revisit an old Simon Says Stamp Card Kit. The ‘Gnome for the Holidays’ Card Kit was released in December 2019 and features the cute 6 x 8″ Gnome for the Holidays stampset. I thought it might be fun to make a slimline slider card with the little gnomes. It was fairly easy to make and can be even more simplified by skipping th eheat embossing and doing simple coloring on the images.
I colored the image with COPIC markers. I used YG05 + G07 (body), R20 (cheeks), R14 + R27 (gloves and socks), C3 + C5 (shoes) and C1 (arms) for the tree gnome; R14 + R27 (body), YG05 + G07 (hat), C1 + 0 (beard), R00 + R01 (face), R81+ R27 (socks), R81+ R85 (hat dots and sleeves), and C1 + C3 (gloves) for the second gnome; and R14, R27, R81, R85, YG05, G07, C1, C3, and C5 for the gifts.
I fussycut the images out and decided where they would go on my card. Then diecut the slider with the Lawn Fawn Large Slimline With Sliders Die Cuts. I added Foam Tape and a penny for the slider element and adhered it to the card base.
Thanks for reading this post. I hope you enjoyed and I’ve inspired you to give this card a try for yourself. Leave comments or questions below or feel free to email.
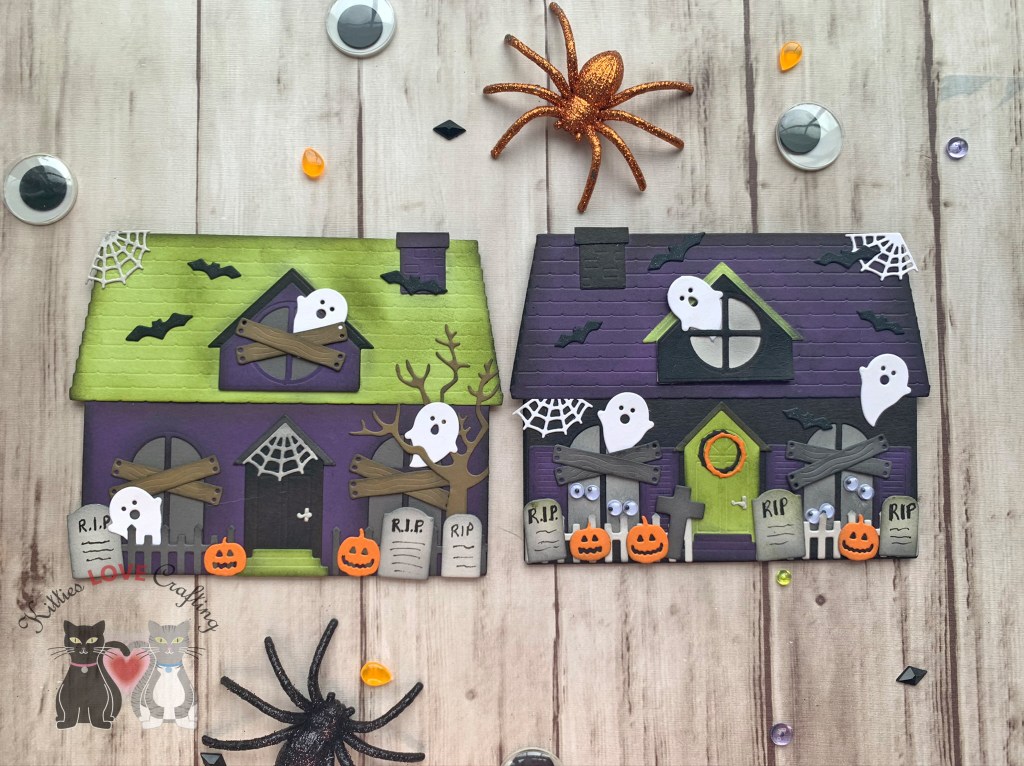
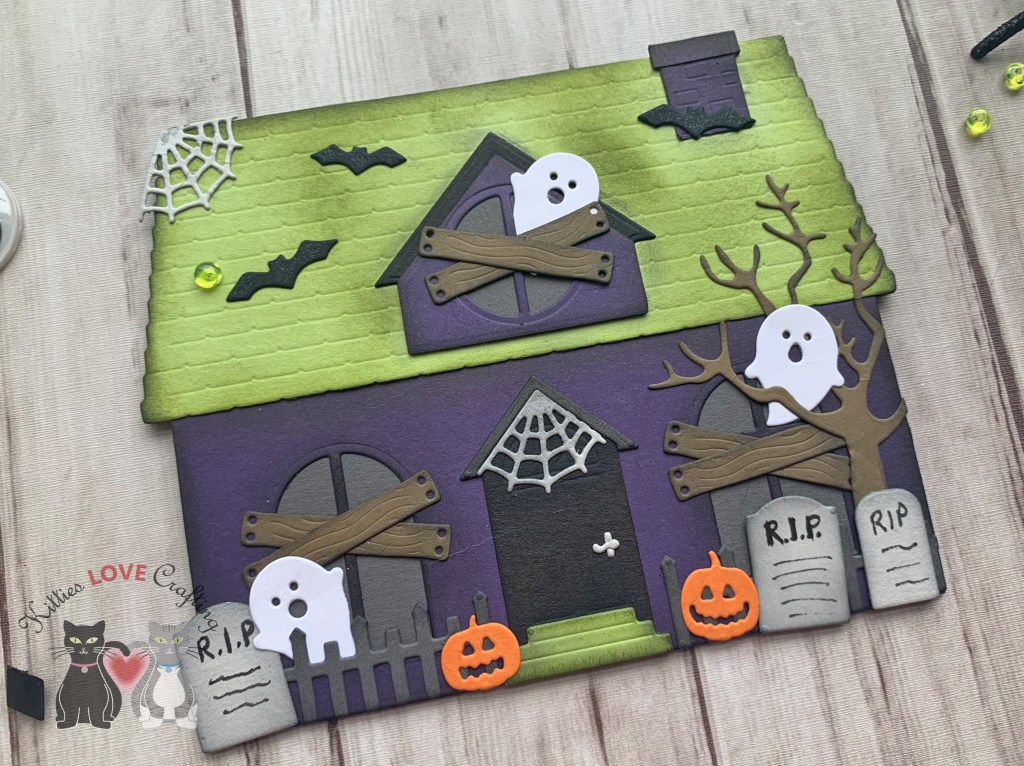
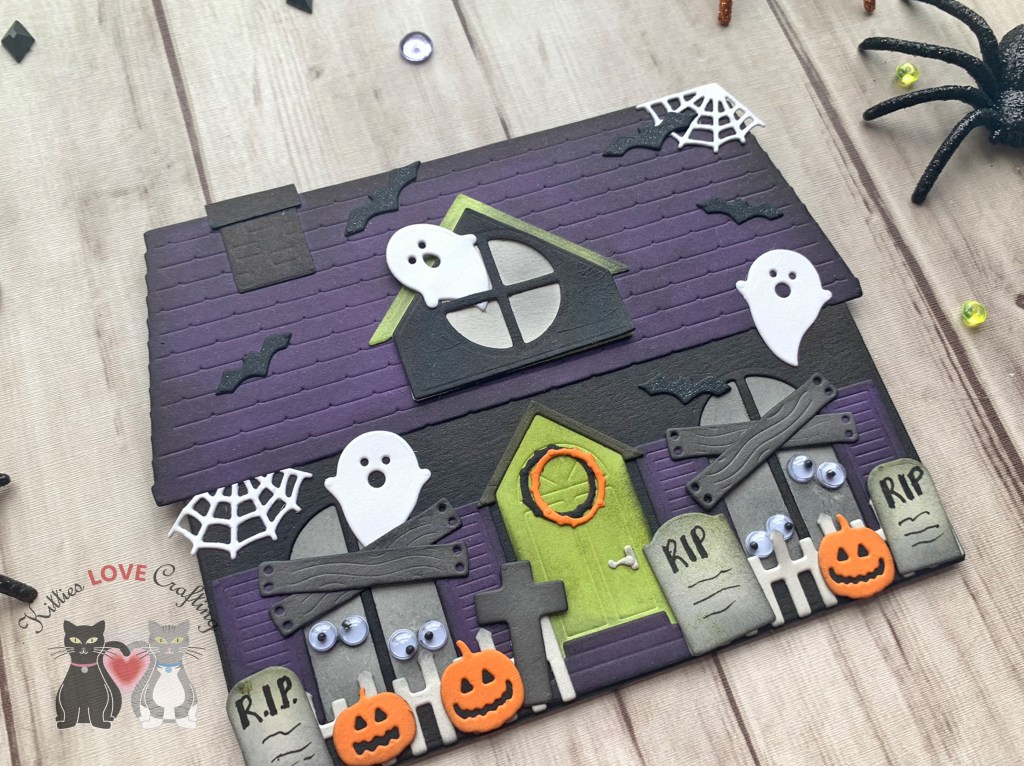
I’m back with another adorable card featuring the House Builder Card Base Dies from Honey Bee Stamps!!! This time I created Halloween houses which was so much fun! I love Halloween (always been my favorite holiday since I was a kid) so I have to make as many cards as possible! And yes I DO send out Halloween cards to family and friends, whether they have kids or not. Adults are entitled to some Halloween magic too, am I right?!? But this year especially I am making a point of sending out as many holiday cards as possible.
Thanks for reading this post. I hope you enjoyed and I’ve inspired you to try out these adorable House Builder dies and make some fun cards and gift boxes! Leave comments or questions below or feel free to email me.
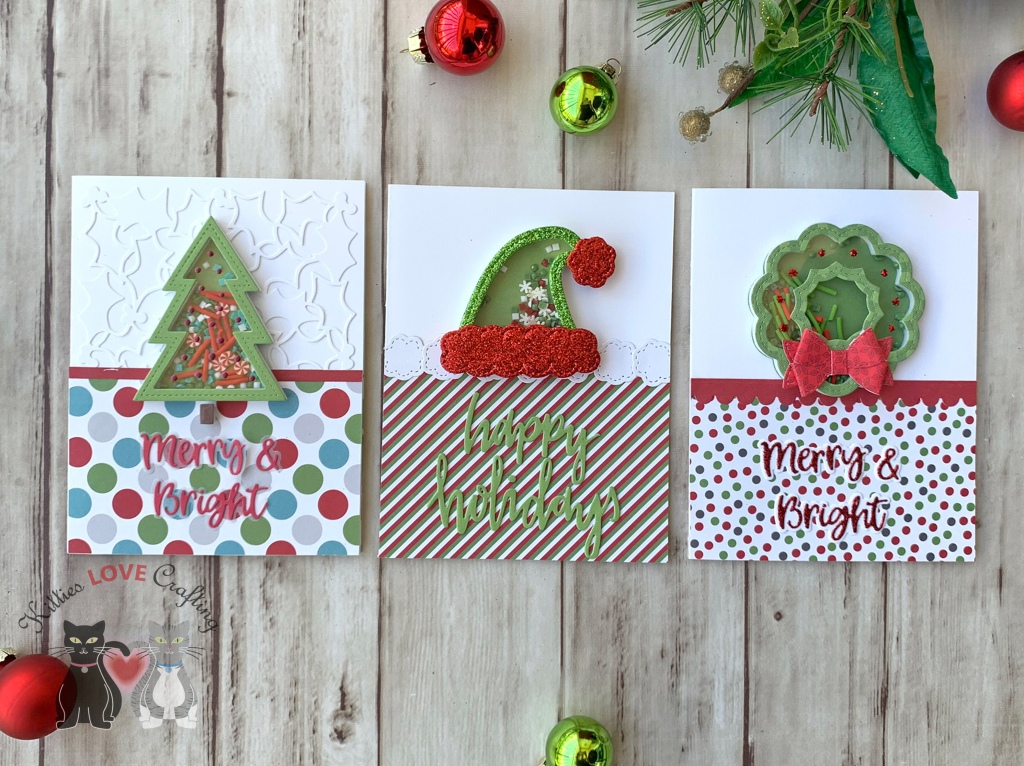
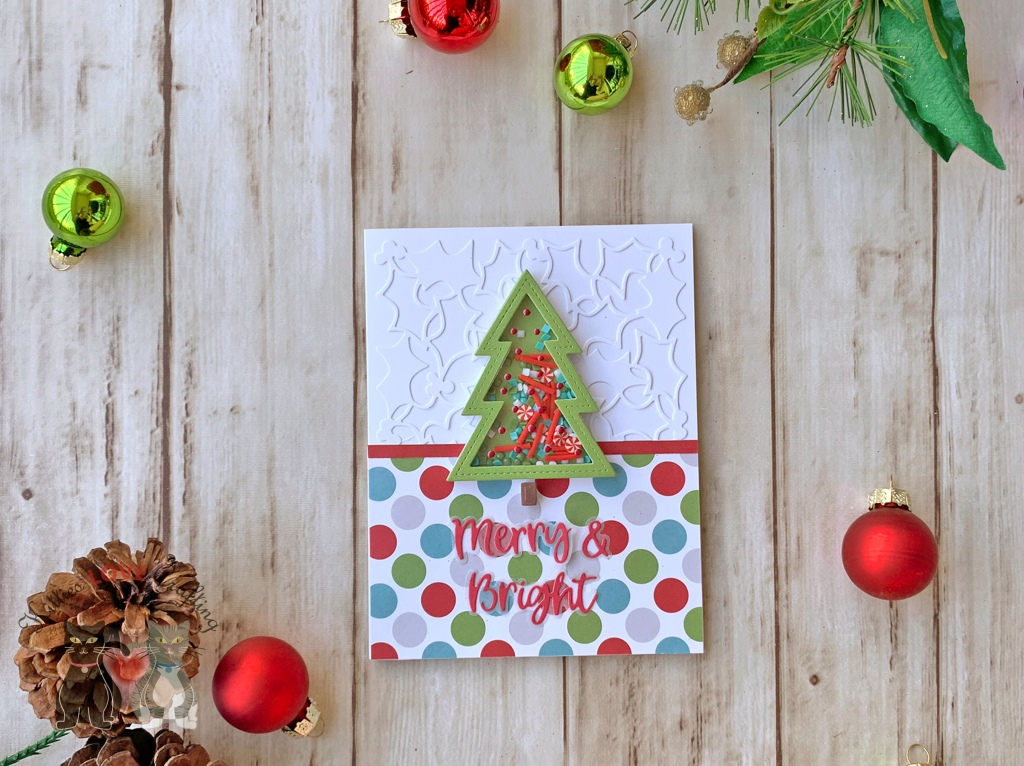
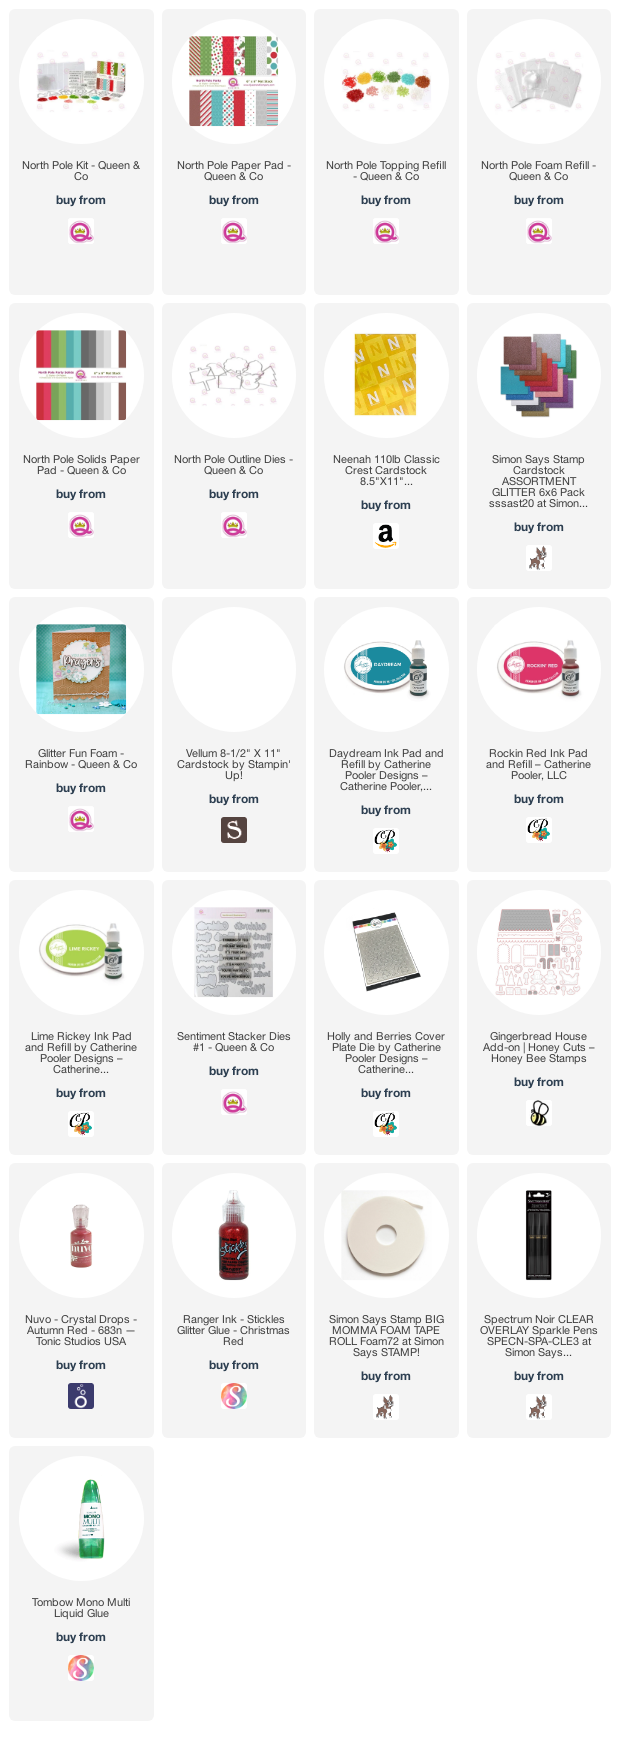
I love most of their shaker kits, but this one by far, the North Pole Kit, is my favorite Queen and Company Card Kit. It pairs great with their Glitter Foam (I used some for the hat card). The kit Includes: 25 steel dies, 6×6 paper pad, 4×6 stamp set, 11 custom toppings and 21 foam and acetate shakers. Tons of goodies to make tons of cards and they sell refills for the paper pad, shaker foam, acetate and toppings!
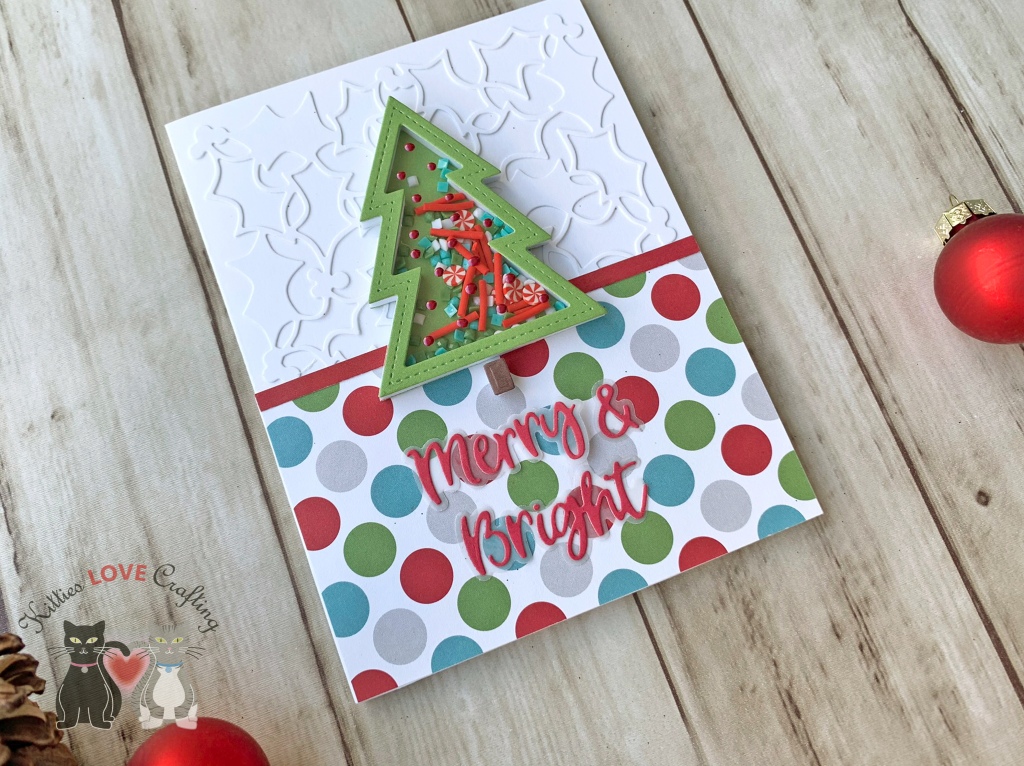
I started these cards by cutting some Neenah 110lb Classic Crest Cardstock 8.5 X 11″ to 5-1/2 x 8-1/2″ and scored at 4-1/4″. I cut three of those to create my card bases. For this first card, I diecut another piece of Neenah 110lb Classic Crest Cardstock 8.5 X 11″ with the Catherine Pooler Designs Holly and Berries Coverplate and adhered it to the card. (Tip: Save the outer border that is cut with this die to use later under the pattern paper. It will even out the papers so there’s no drooping.) I cut a piece of pattern paper from the North Pole Paper Pad (included in the kit) to 2-3/16 x 4-1/4″ and a red strip from the North Pole Solids Paper Pad to 2/16 x 4-1/4″ and adhered them to the card.
I assembled the tree shaker and added the toppings inside. I used the paper from the North Pole Solids Paper Pad for the tree and the trunk (saved the inside (solid) piece of the tree frame). I added some left over foam from the shakers to the tree trunk. I save all the extra foam from the shakers because they can be used on other cards.
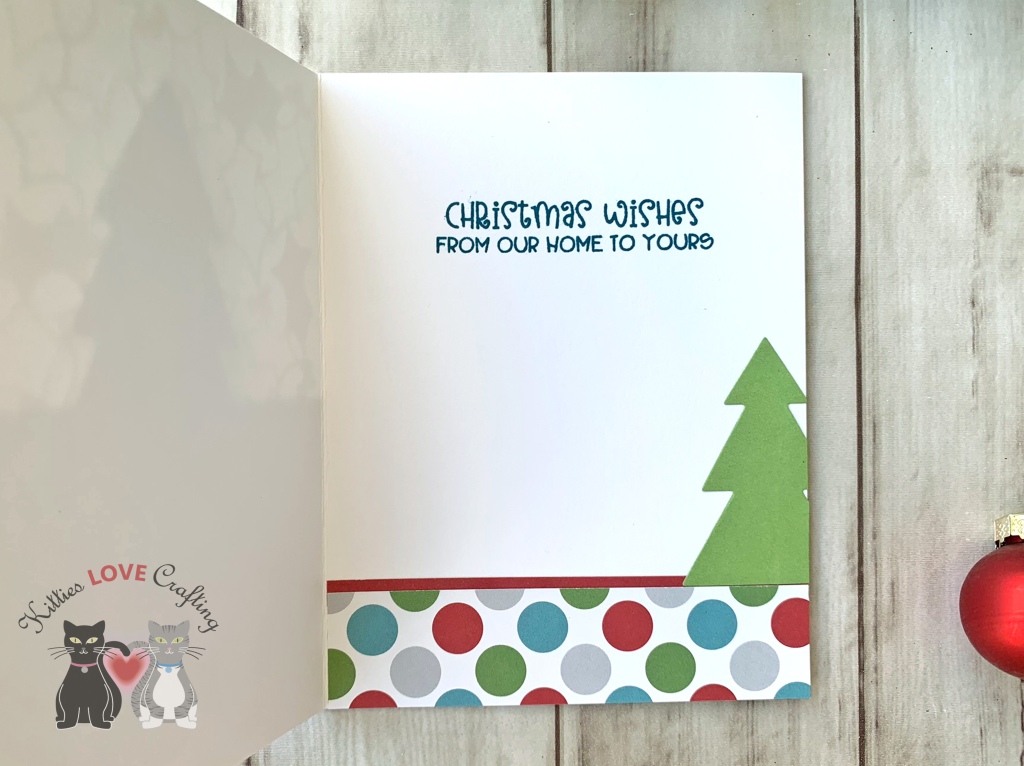
On the inside of the card, I added a red piece of North Pole Solids Paper Pad, measuring 1-1/8 x 4-1/4″and a piece of North Pole Paper Pad, measuring 1″x 4-1/4″ and stamped a sentiment from the stampset included in the kit and Catherine Pooler Daydream Ink. I added the solid inside piece of the tree frame to the bottom of the card.
For the second card, I cut a piece of pattern paper from the North Pole Paper Pad (included in the kit) to 2-7/8 x 4-1/4″ and a red strip from the North Pole Solids Paper Pad to 2/16 x 4-1/4″ and adhered them to the card base. I also used the die for the santa hat’s pom pom and diecut 7 from some Neenah 110lb Classic Crest Cardstock 8.5 X 11″ to create a cute border. I thought they looked like puffy clouds and just adds some more whimsy to the card.
I assembled the hat shaker and added the toppings inside. I used red and green glitter foam from Queen and Company’s Glitter Fun Foam – Rainbow Pack to turn this santa hat into an elf hat. I saw Kristie Marcotte do this last year and thought it was adorable so I created my own. I added some left over foam from the shakers to the pom pom and edges of the hat trim once I adhered them together. this ensures that all of the hat is the same height.
I used the Catherine Pooler Happy Holidays Die and the North Pole Solids Paper Pad to diecut a sentiment and adhered to the card. I added the cute hat to the card, and finished it by adding some shimmer to the sentiment with Spectrum Noir Clear Overlay Sparkle Pens. Look how sparkly that hat is!
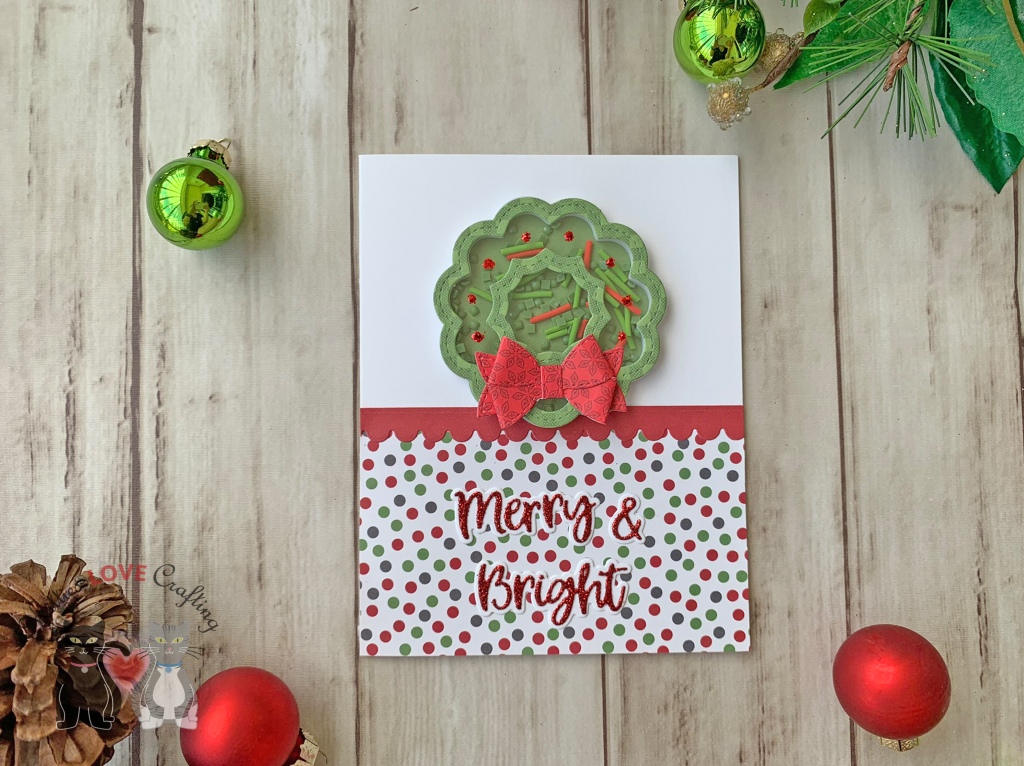
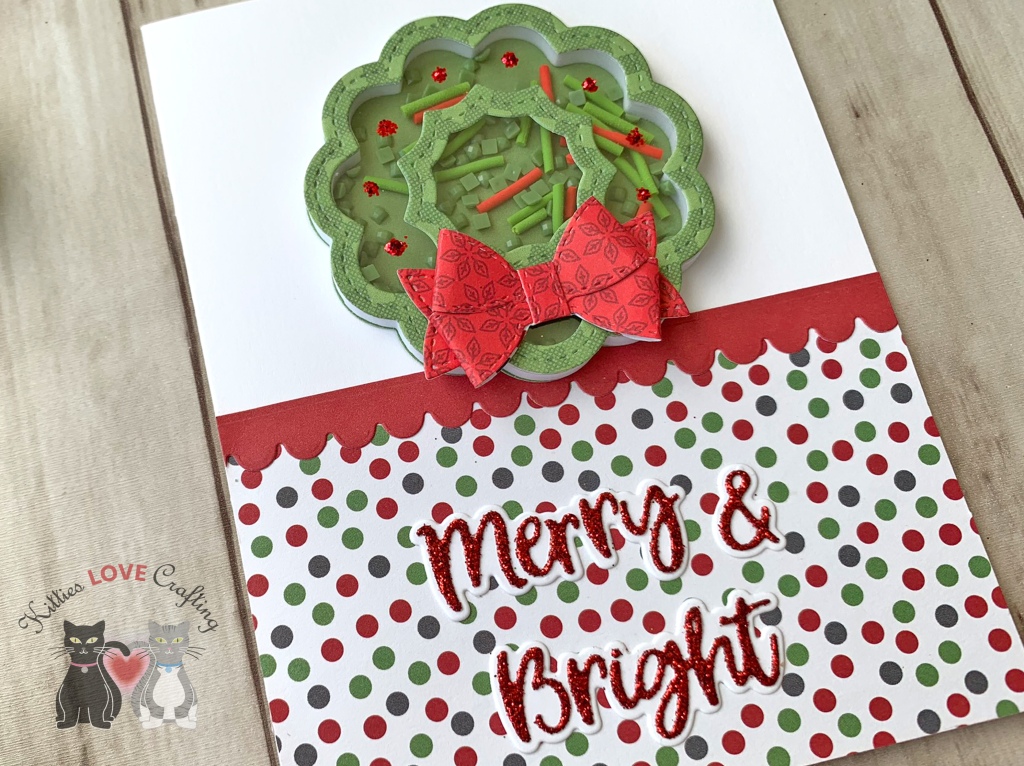
For the third card, I cut a piece of pattern paper from the North Pole Paper Pad (included in the kit) to 2-11/16 x 4-1/4″ and a red strip from the North Pole Solids Paper Pad using the scallop border die from the Honeybee Stamps Gingerbread House Add-on and adhered them to the card. This die is meant for the roof of the house but I though it made a great border!
I assembled the wreath shaker and added the toppings inside (saved the inside (solid) piece of the tree frame). I used green and red pattern paper from the North Pole Paper Pad for the wreath and bow.
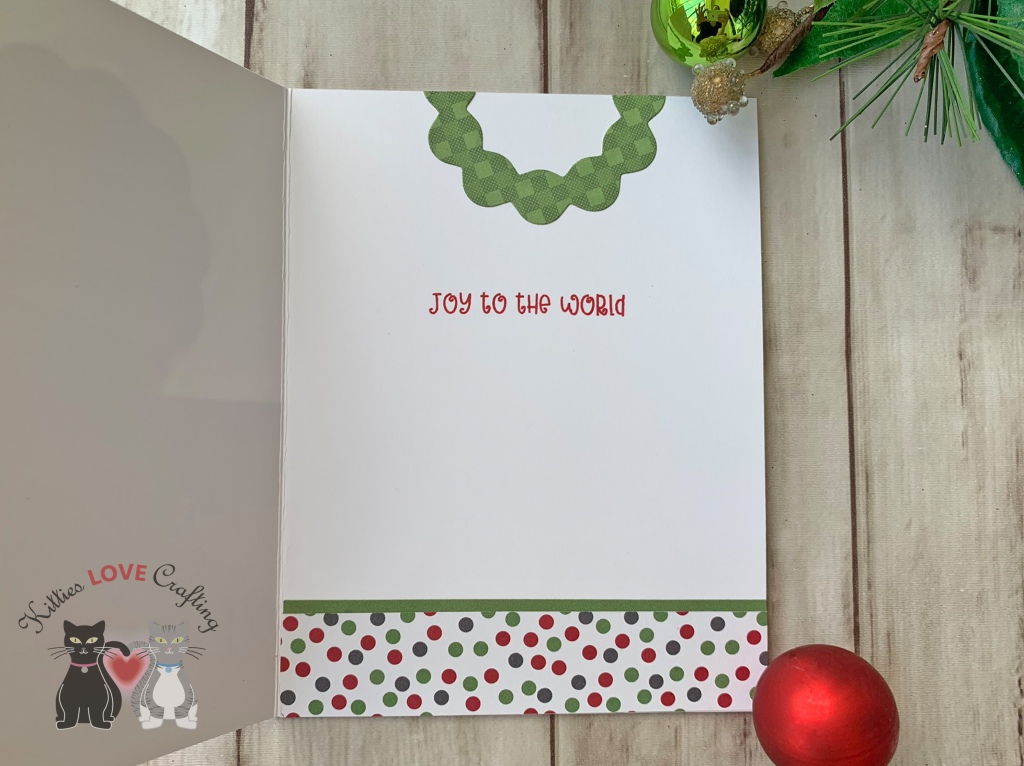
On the inside of the card, I added a green piece of North Pole Solids Paper Pad, measuring 1 x 4-1/4″and a piece of North Pole Paper Pad, measuring 7/8″x 4-1/4″ and stamped a sentiment from the stampset included in the kit and Catherine Pooler Rockin Red Ink. I added the solid inside piece of the wreath frame to the top of the card.
Thanks for reading this post. I hope you enjoyed and I’ve inspired you to try out these adorable House Builder dies and make some fun cards and gift boxes! Leave comments or questions below or feel free to email me.
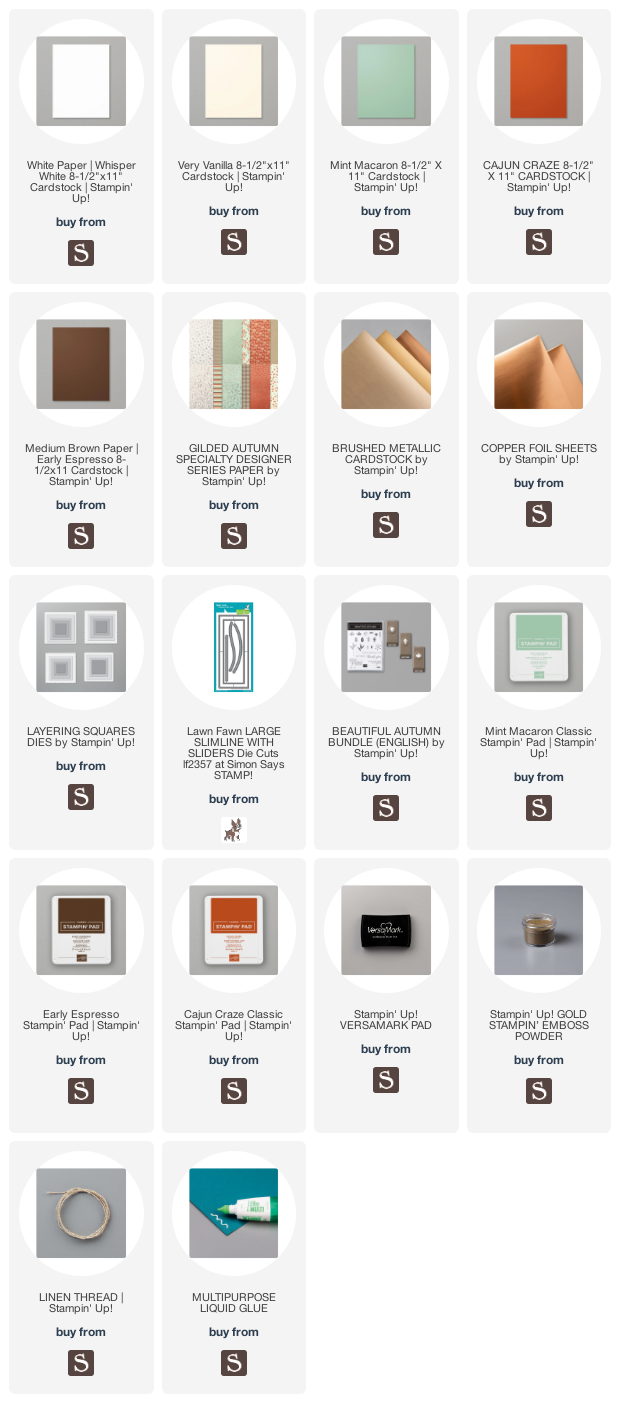
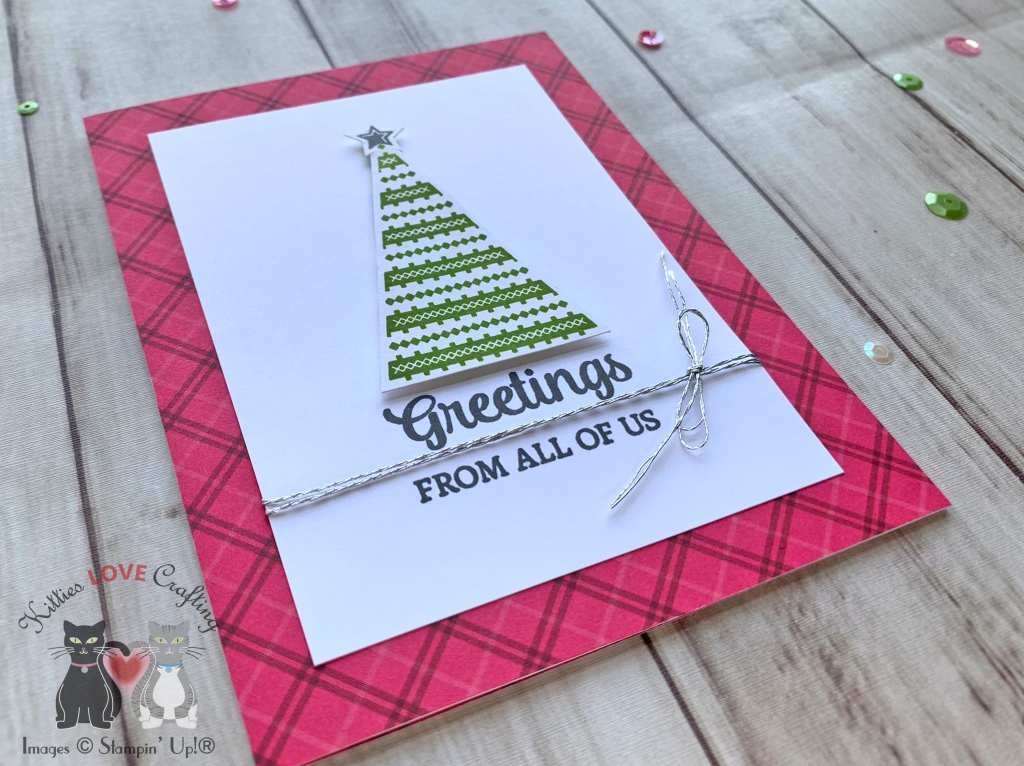
Here is a quick card that can be easily mass produced for the holidays! I used the Tree Angle Stampset by Stampin’ Up which can be found on page 22 of the new Aug-Dec Mini Catalog which has a ton of awesome goodies for the holidays. This stampset coordinates with the Stitched Triangles Dies (pg 179 of the Annual Catalog).
I figured out where my tree was going to sit and stamped a sentiment below that from the Tree Angle Stampset with Basic Gray. I added Stampin’ Dimensionals to teh back of the tree and added it to the white card panel. I added some Silver Twine from my stash and adhered the panel to the card.
Thanks for reading this post. I hope you enjoyed and I’ve inspired you to try this very quick holiday card using this stampset for yourself! Leave comments or questions below or feel free to email me. If you want to share you creations with me tag me on instagram @kittieslovecrafting. If you would like a Stampin’ Up! catalog, please email me as well. All current catalogs can be found on the right side of this post and the Stampin’ Up! page. All news and fun stuff happening at Stampin’ Up! are listed there!


 https://linkdeli.com/widget.js?id=f5e8378456858c916708