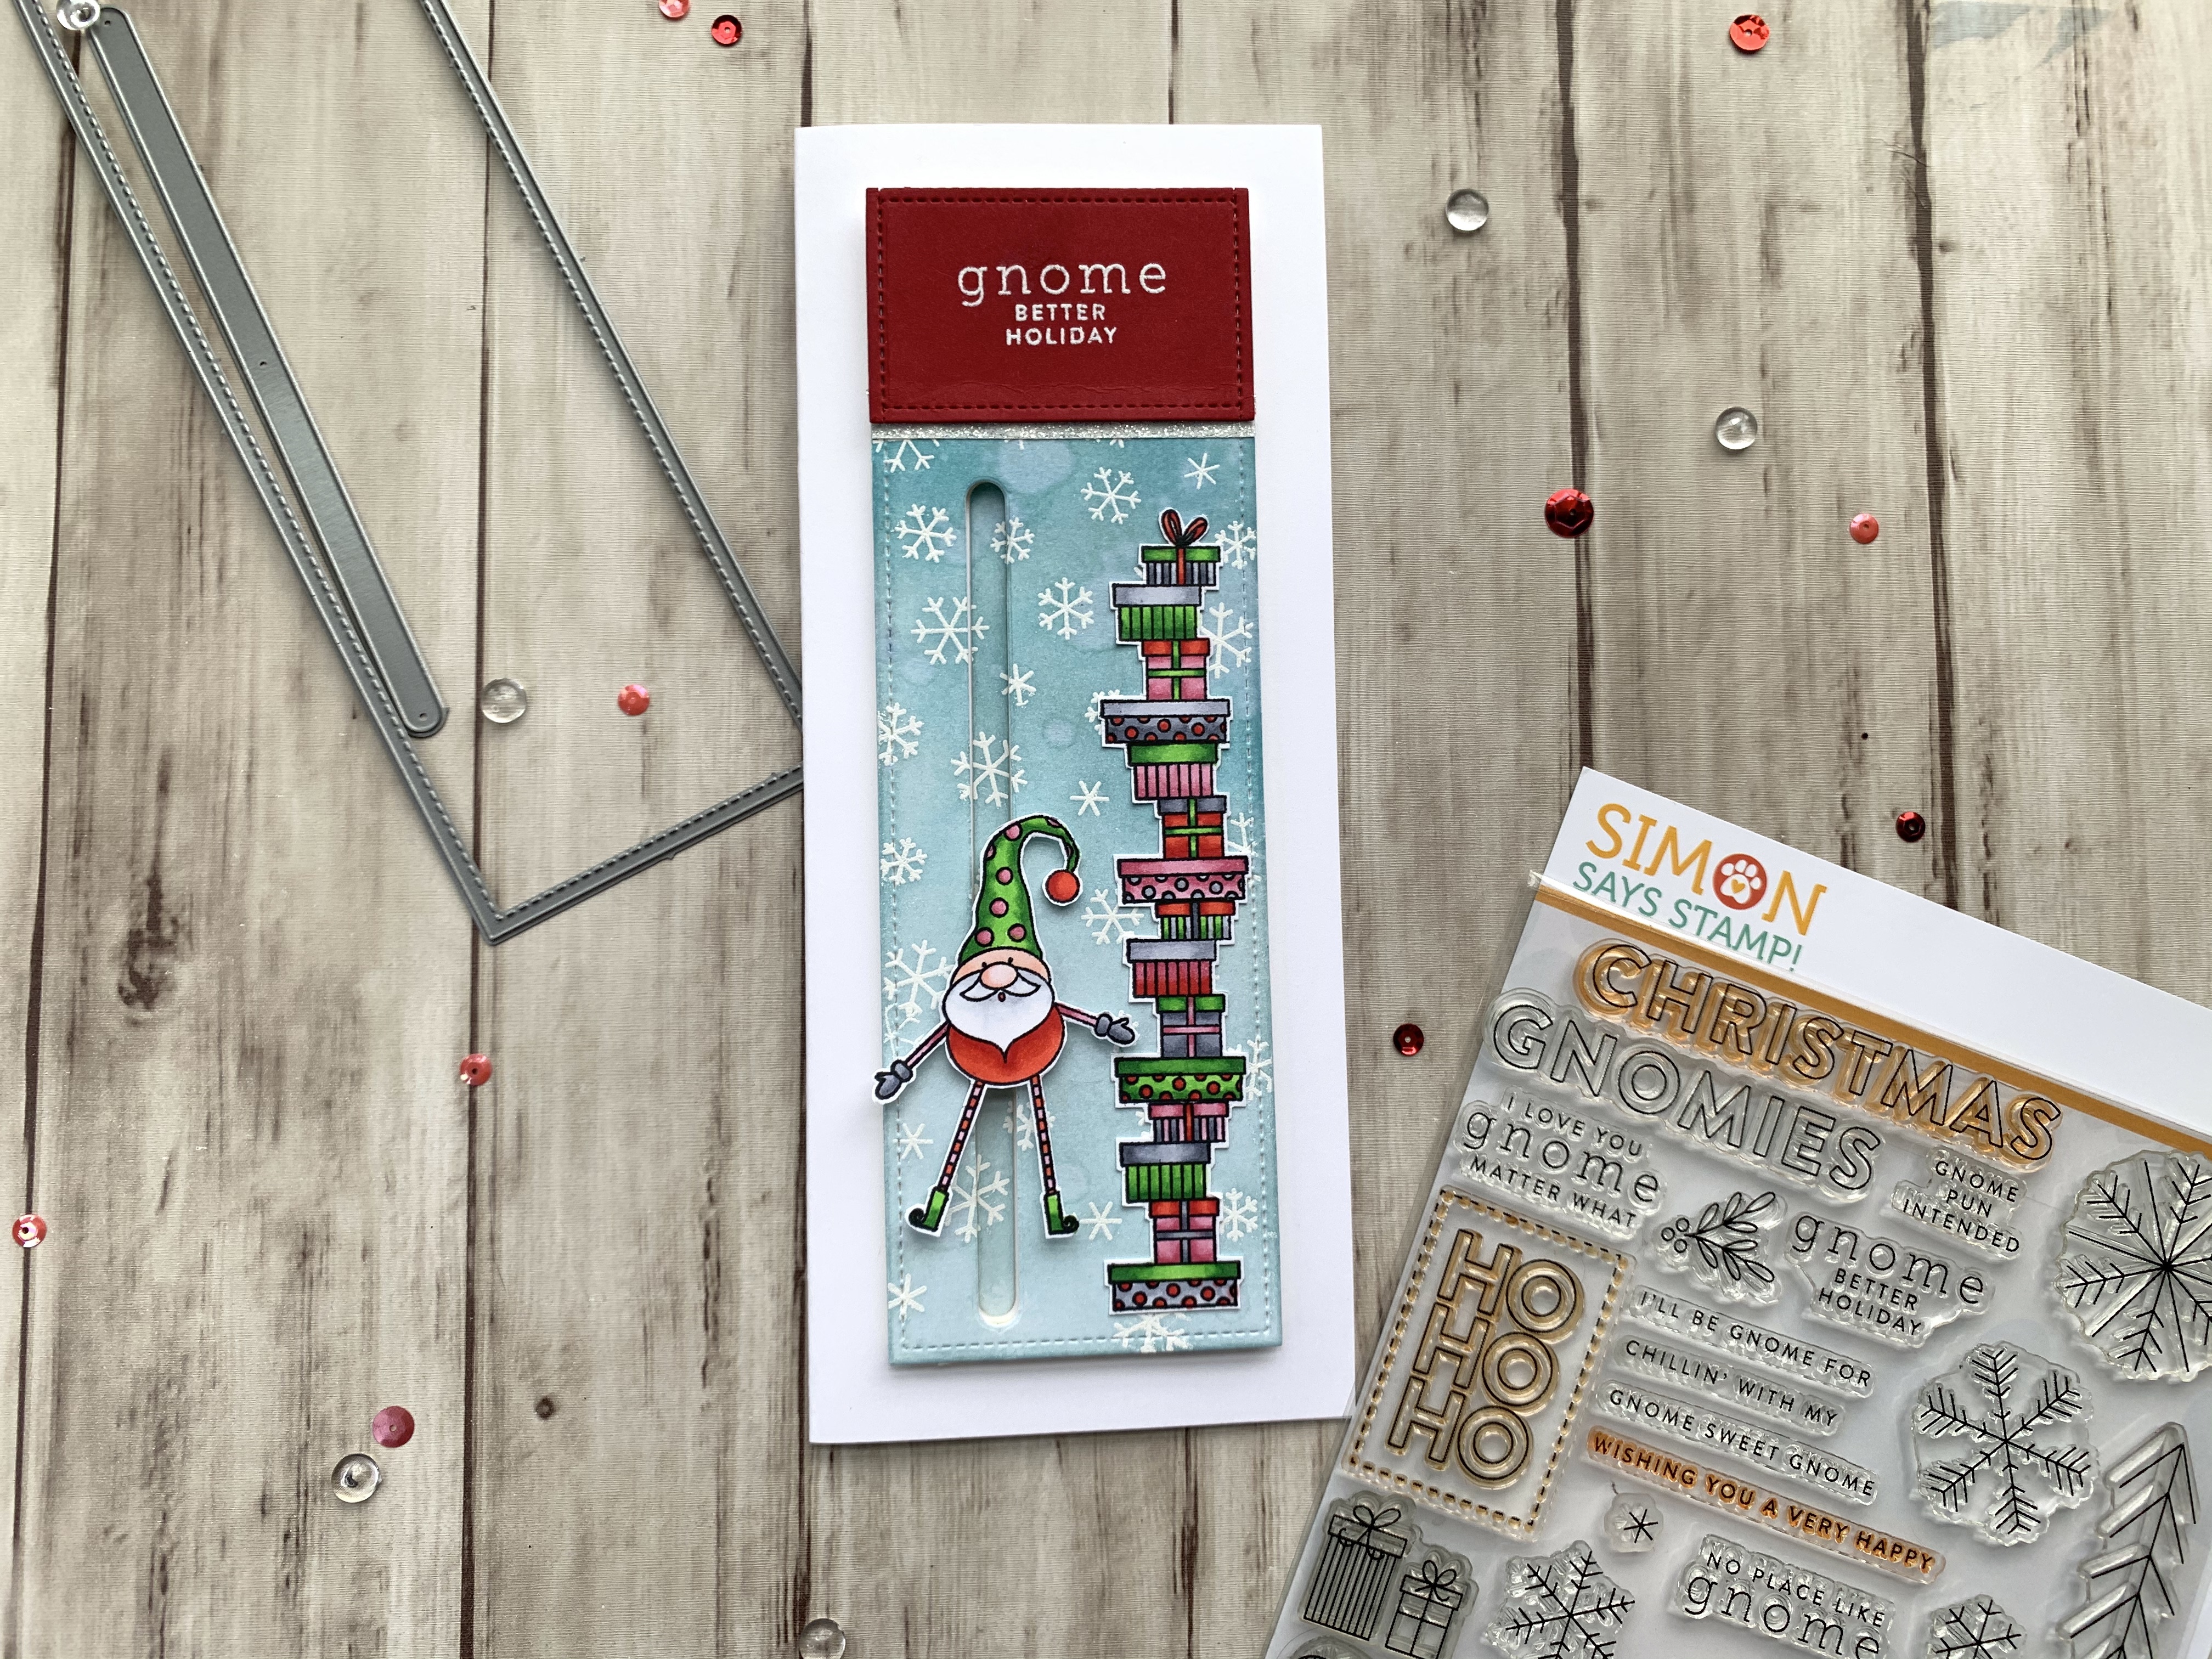
Hello friends. These little gnomes featured in the Stampin’ Up!’s Gnome for the Holidays are super adorable! They were pretty easy to color and fussycut. I was able to stamp and quickly color the images. This stampset can be found on page 23 of the new Aug-Dec Mini Catalog.
Ok so let’s see how this card came together. I started by cutting a piece of Whisper White 8-1/2″ X 11″ Thick Cardstock to 5-1/2 x 8-1/2″ and scored at 4-1/4″ to make a card base and two pieces to 4 x 5-1/4″. One piece I embossed using the Winter Snow Embossing Folder, then created a gradient sky using Balmy Blue Ink and Misty Moonlight Ink and adhered it to the card.

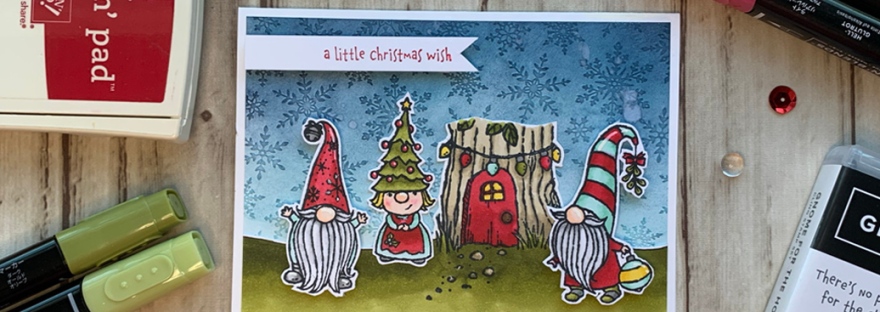
On the second piece, I stamped the gnome tree house with Memento Tuxedo Black Ink and drew the ground with a pencil and went over it with a Sakura Pigma Micron Blister Black Pen, 05. Make sure to use a marker that will not bleed with your paper or what ever coloring medium you will be using. I also stamped the gnomes onto another piece of Whisper White 8-1/2″ X 11″ Thick Cardstock with Memento Tuxedo Black Ink.
I colored the images with Stampin’ Blends. I used Real Red Light & Dark, Old Olive Light & Dark, Crumb Cake Light & Dark, Daffodil Delight Light & Dark, Pool Party Light & Dark and Smoky Slate Light & Dark. I fussycut all the images out, leaving a white border and adhered them to the card, adding Stampin’ Dimensionals to some of the gnomes.

I stamped a sentiment from Stampin’ Up!’s Gnome for the Holidays onto a piece of Whisper White 8-1/2″ X 11″ Thick Cardstock with Real Red Ink and trimmed it down to 1/2 x 2-7/8″ and cut out banner tails on one side. I adhered it using Stampin’ Dimensionals. I finished off the card by ading some highlights to the images using a Uni-Ball Signo Broad Point White Gel Pen.
On the inside, I just stamped a gnome from the Stampin’ Up!’s Gnome for the Holidays with Real Red Ink.
Dimensions
- Card Base = 5-1/2 x 8-1/2″ and scored at 4-1/4″ Whisper White 8-1/2″ X 11″ Thick Cardstock
- Top Panels = 4 x 5-1/4″ (2) Whisper White 8-1/2″ X 11″ Thick Cardstock
- Sentiment Strip = 2-7/8 x 4-9/16
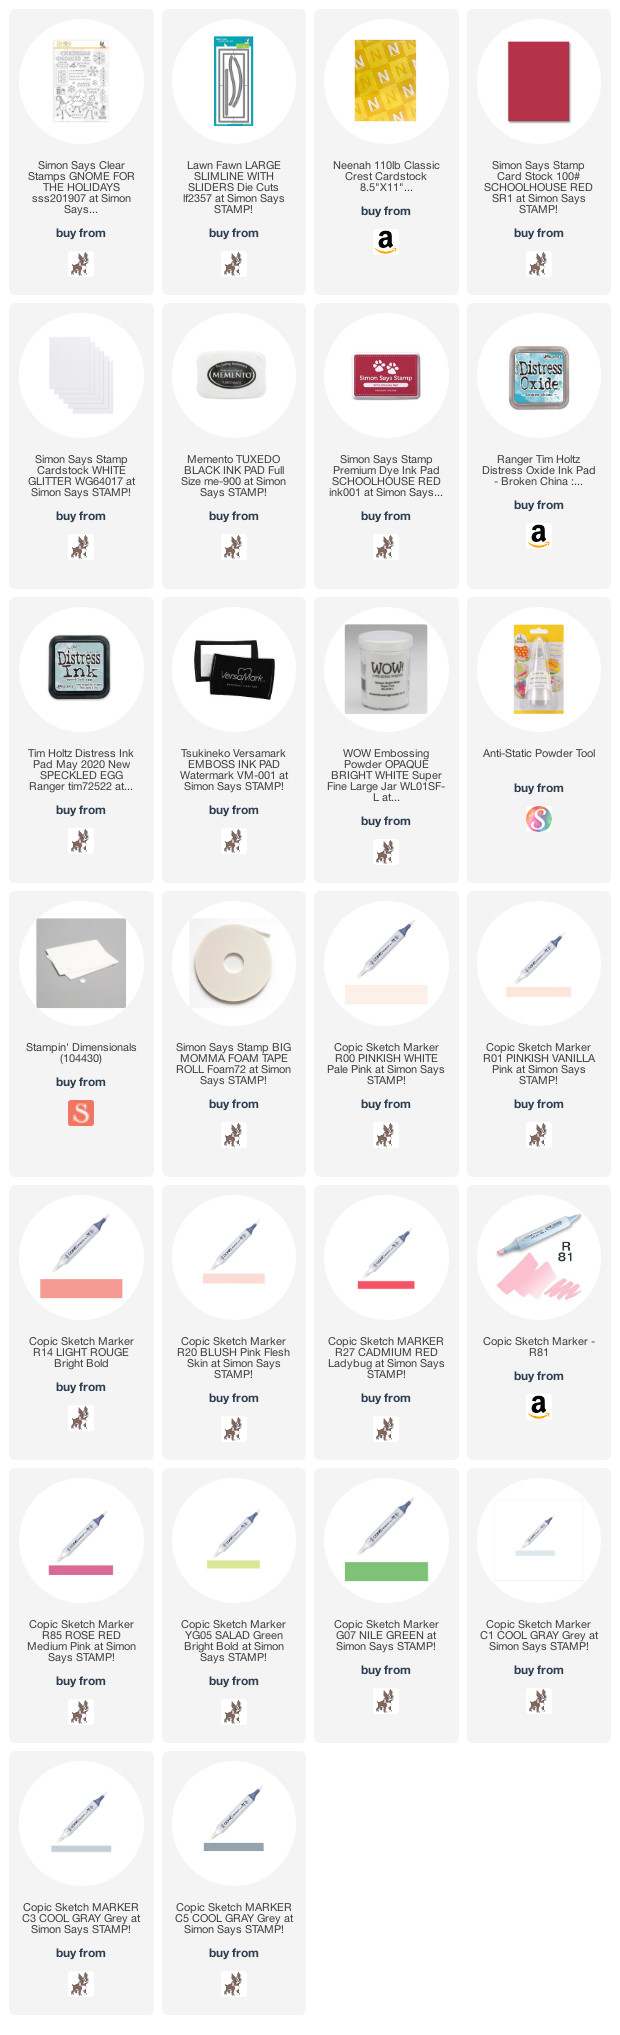
Supplies
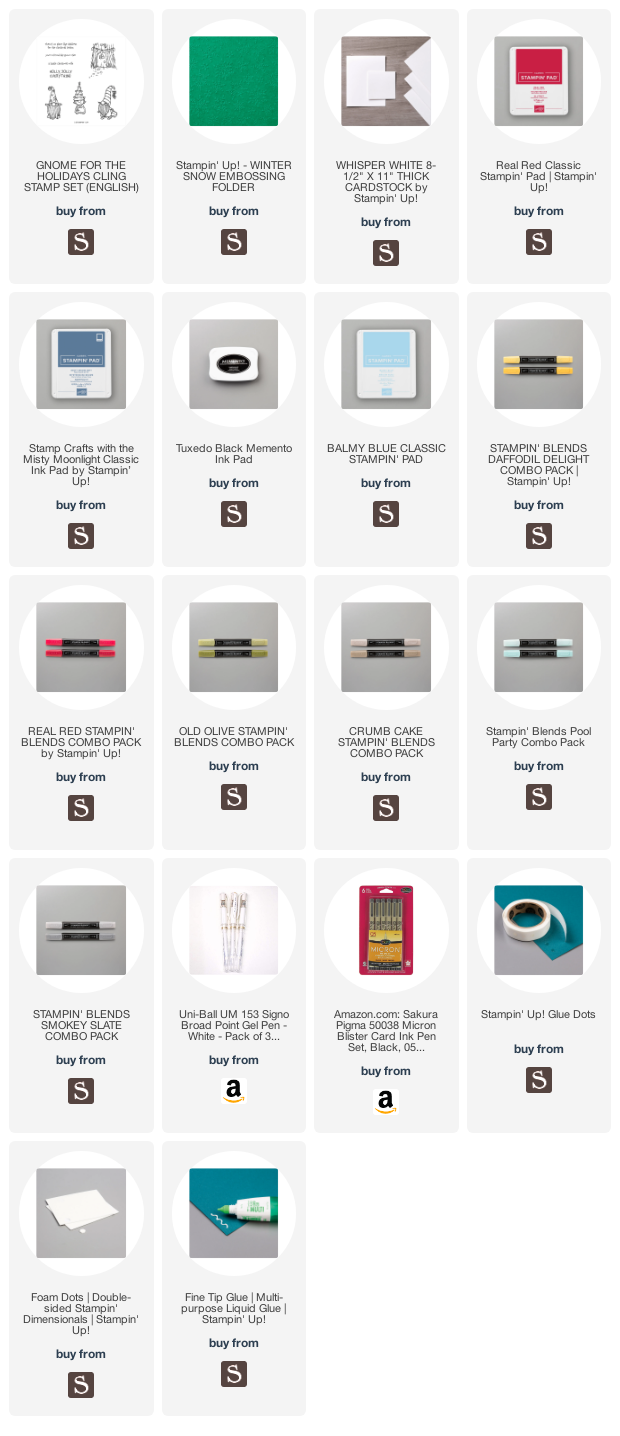 https://linkdeli.com/widget.js?id=f5e8378456858c916708
Thanks for reading this post. I hope you enjoyed and I’ve inspired you to try these easy holiday cards using this stampset for yourself! Leave comments or questions below or feel free to email me. If you want to share you creations with me tag me on instagram @kittieslovecrafting. If you would like a Stampin’ Up! catalog, please email me as well. All current catalogs can be found on the right side of this post and the Stampin’ Up! page. All news and fun stuff happening at Stampin’ Up! are listed there!