Autumn, Fall

Fall Card Series #2: Catherine Pooler Appley Ever After

Hello friends. The second card in my series is a really cute but simple card using the Catherine Pooler Designs Appley Ever After Stamp Set. There is no coloring required with these images so creating cards is a breeze!

For this card, I cut a piece of Neenah 100lb Classic Crest Cardstock 8.5 X 11″ to 5-1/2 x 8-1/2″ and scored at 4-1/4″ to create a card base and a piece of Catherine Pooler Bushel and a Peck 6 x 6 Patterned Paper to 4 x 5-1/4″.

I die cut the frame from Tim Holtz Idea-ology 8 x 8 Paper Stash Metallic Jewels Kraft Stock using the Catherine Pooler Fall Frames Dies. I also die cut the inside piece from the frames from Neenah 100lb Classic Crest Cardstock 8.5 X 11″.

For the images, I die cut the basket from Stampin! Up! Early Espresso 8-1/2 x 11″ Cardstock using the CP Bushel Basket Die, embossed it with the Stampin’ Up! Pinewood Planks 3D Embossing Folder (retired) and inked it with Stampin! Up! Early Espresso Ink. I used a piece of Lawn Fawn Paper Bag 100lb Cardstock to back the basket.

I stamped several of the apples from the Catherine Pooler Designs Appley Ever After Stamp Set onto Neenah 100lb Classic Crest Cardstock 8.5 X 11″ with It’s a Girl, Samba, SaunaWintergreen, and Deck the Halls

I finished off the card by adding some Orange Marmalade Nuvo Jewel Drops.

On the inside of the card I added a piece of the same pattern paper measuring 1 x 5-1/2″ and added an apple.

Dimensions


Supplies

https://linkdeli.com/widget.js?id=f5e8378456858c916708

Thanks for reading this post. I hope Iโ€™ve inspired you to give this cute Fall card a try for yourself. Leave comments or questions below or feel free to email.

Autumn, Fall, Shaker, Window Cards

Fall Card Series #1: Catherine Pooler Woven Cover Plate

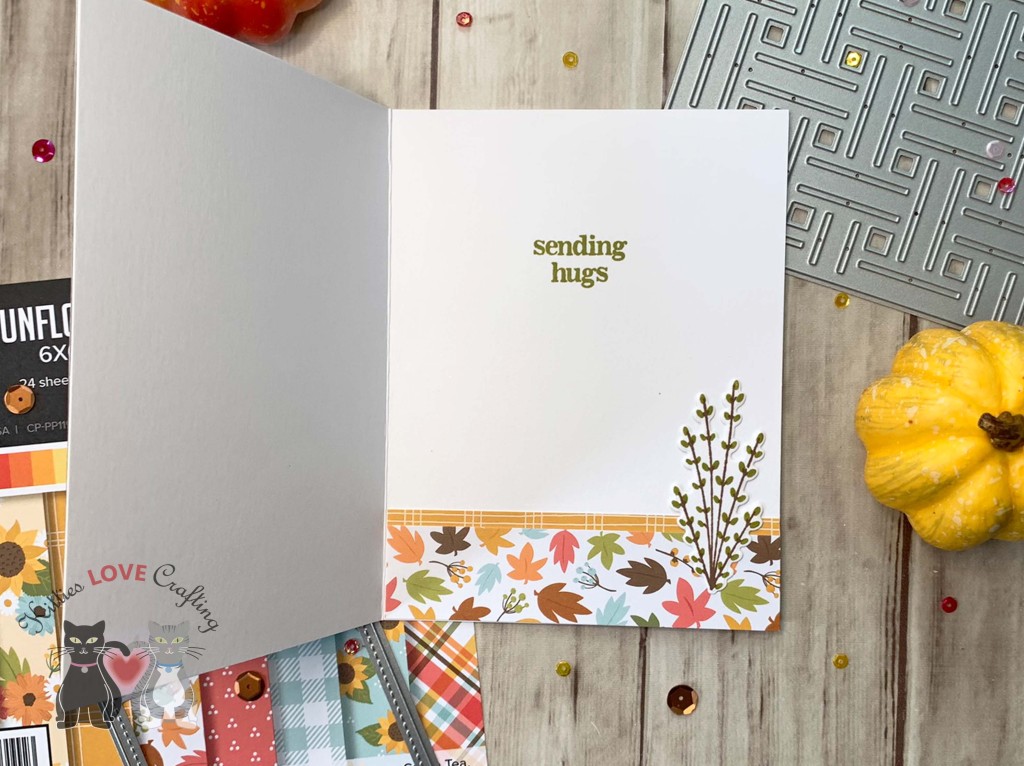
Hello friends. I am starting my Fall series with a card featuring the new release from Catherine Pooler Designs. More cards using these products will be coming soon. For this one I featured the Woven Cover Plate. This cover plate adds lots of texture to your cards without to much work. That’s a win win!

For this card, I cut a piece of Neenah 100lb Classic Crest Cardstock 8.5 X 11″ to 5-1/2 x 8-1/2″ and scored at 4-1/4″ to create a card base. I die cut two pieces of pattern paper from the Catherine Pooler Sunflower Fields Forever 6 x 6 Patterned Paper with the CP Woven Cover Plate Die, cut them each in half and adhered them together. I then added a strip of gold metallic cardstock from Tim Holtz Idea-ology 8 x 8 METALLIC KRAFT STOCK, measuring 1 x 5-1/2″. I backed the panel with some Stampin’ Up! Early Espresso 8-1/2 x 1 1″ Cardstock.

I die cut a panel from Neenah 100lb Classic Crest Cardstock 8.5 X 11″ using Lawn Fawn Small Stitched Square Stackables. For the images, I die cut a pumpkin from Neenah 100lb Classic Crest Cardstock 8.5 X 11″ with the CP Fall Frames Dies and colored them with Orange Peel, Spiced, Green Tea, Eucalyptus inks. I also stamped images onto Neenah 100lb Classic Crest Cardstock 8.5 X 11″ with the CP Bless this House Stamp Set using Buttercream, Sauna, Green Tea & Eucalyptus for the candle and Over Coffee & Polished for the sprig.

The sentiment was stamped from the CP Joyful Thanks Sentiments onto Neenah 100lb Classic Crest Cardstock 8.5 X 11″ with Versamark Emboss Ink and heat set with Gold Embossing Powder and die cut with the coordinating dies.

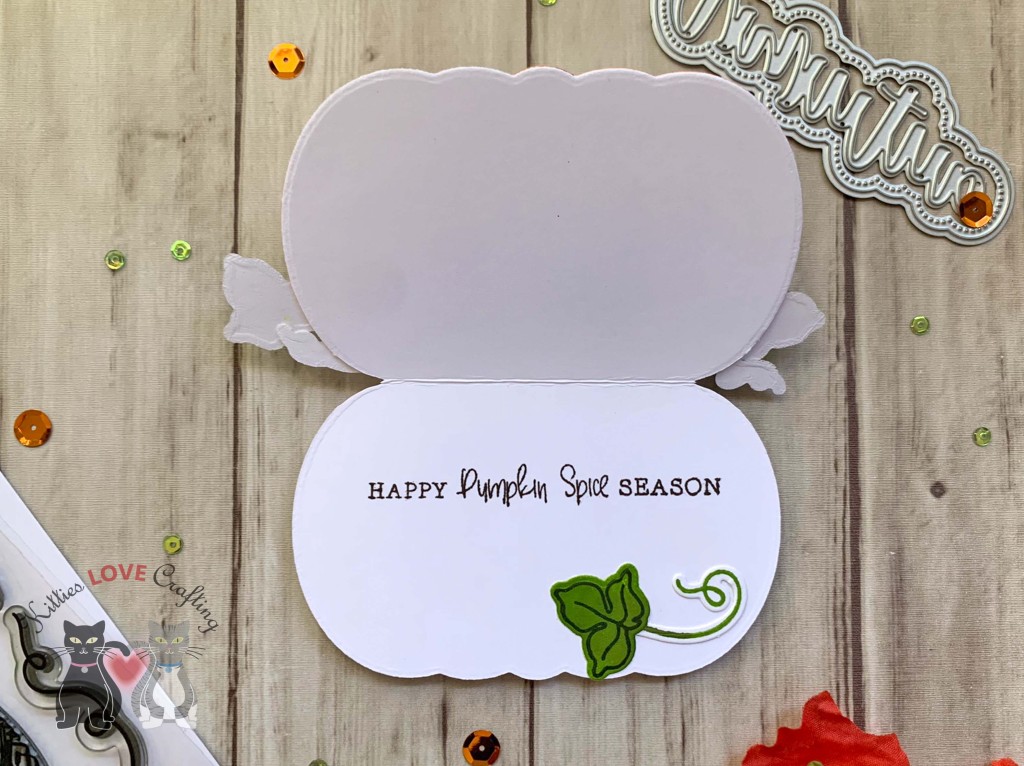
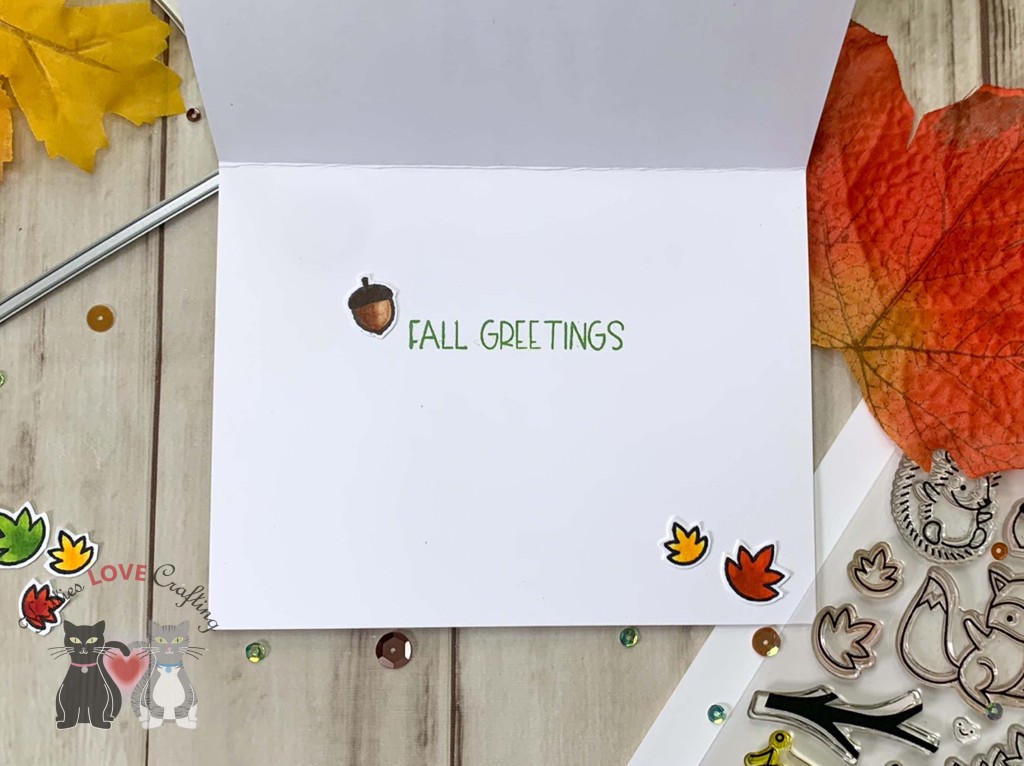
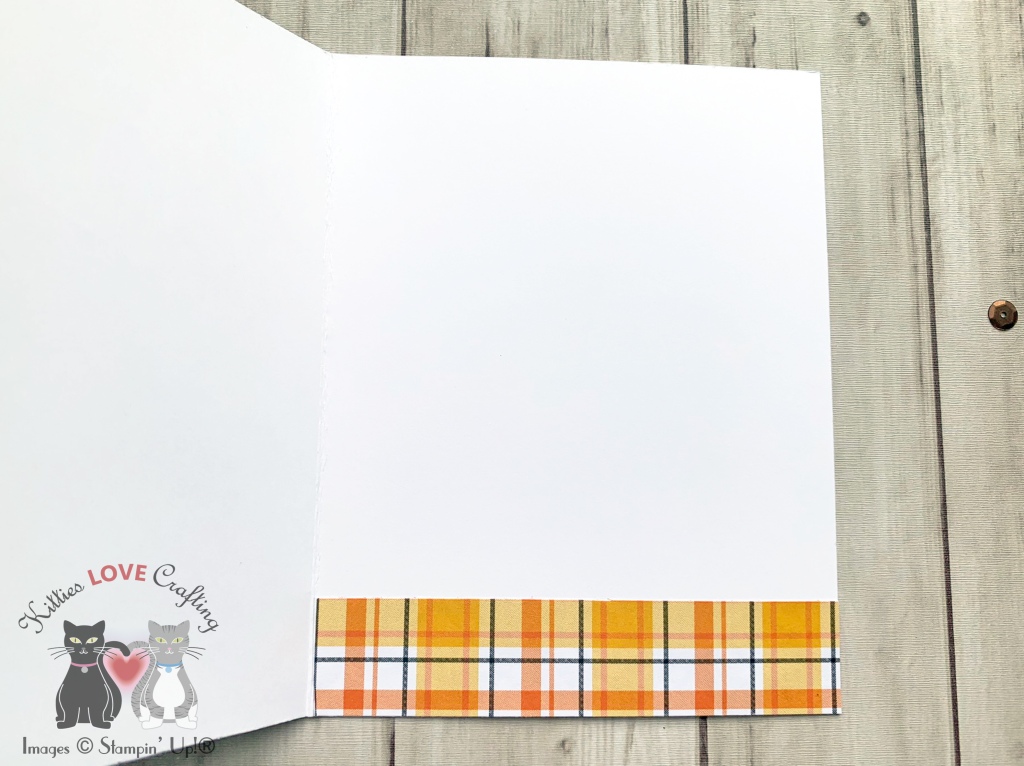
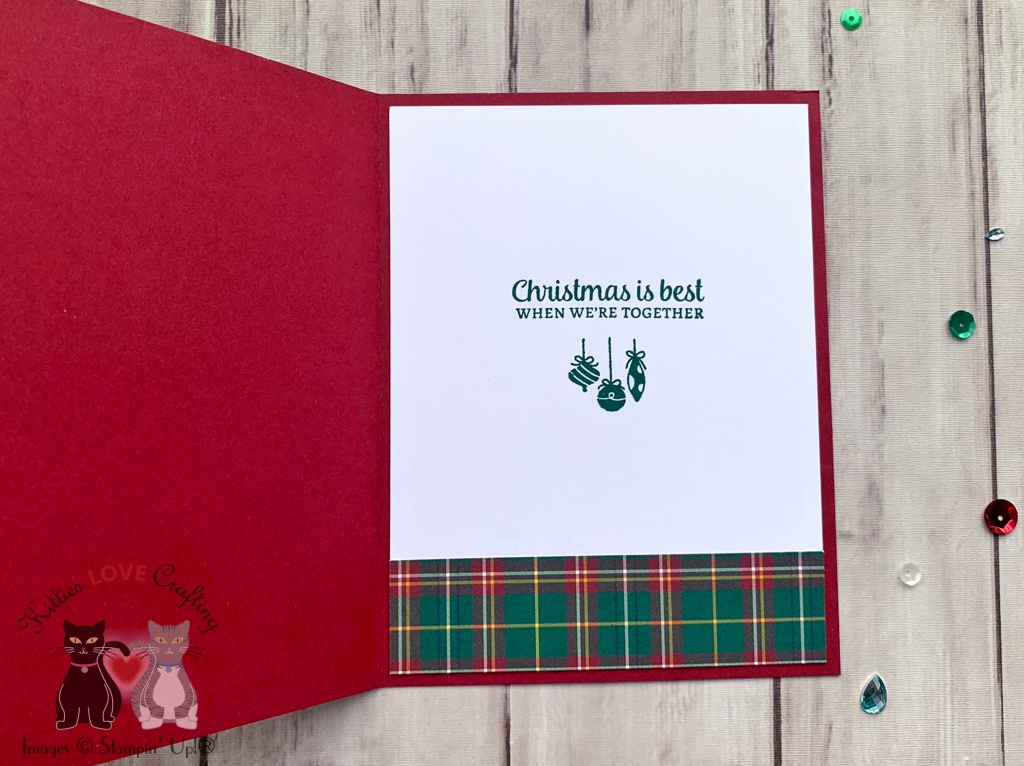
On the inside of the card I added a piece of pattern paper measuring 1 x 4-1/4″ and another measuring 1-1/8 x 4-1/4″. I stamped a sentiment from the CP Joyful Thanks Sentiments with Eucalyptus ink and added another sprig.

Dimensions


Supplies

https://linkdeli.com/widget.js?id=f5e8378456858c916708

Thanks for reading this post. I hope Iโ€™ve inspired you to give this Fall card a try for yourself. Leave comments or questions below or feel free to email.

Autumn, Fall, Fall

Fall Card featuring Honey Bee Stamps Big Pickup Tailgate and Loads of Fall

Hi friends. Here’s another cute Fall card featuring Honey Bee Stamps Big Pickup Tailgate and Loads of Fall.

For this card, I cut a piece of Neenah 110lb Classic Crest Cardstock to 10 x 7″ and scored at 5″ to create the card base. Then die cut a piece of pattern paper from the Echo Park Paper Company 12 x 12 A Perfect Autumn Collection Kit using the Queen & Company Foundation 18 Dies.

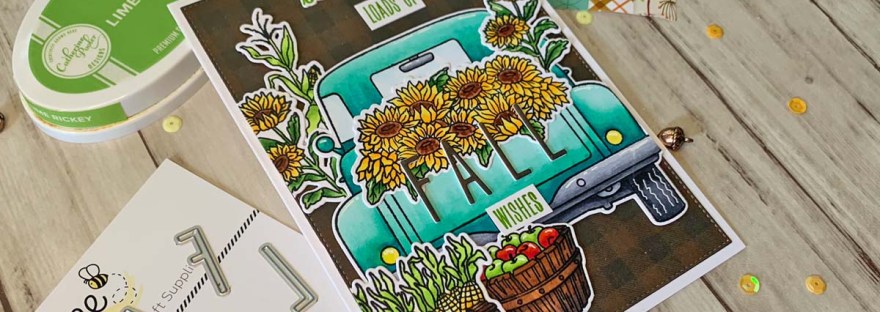
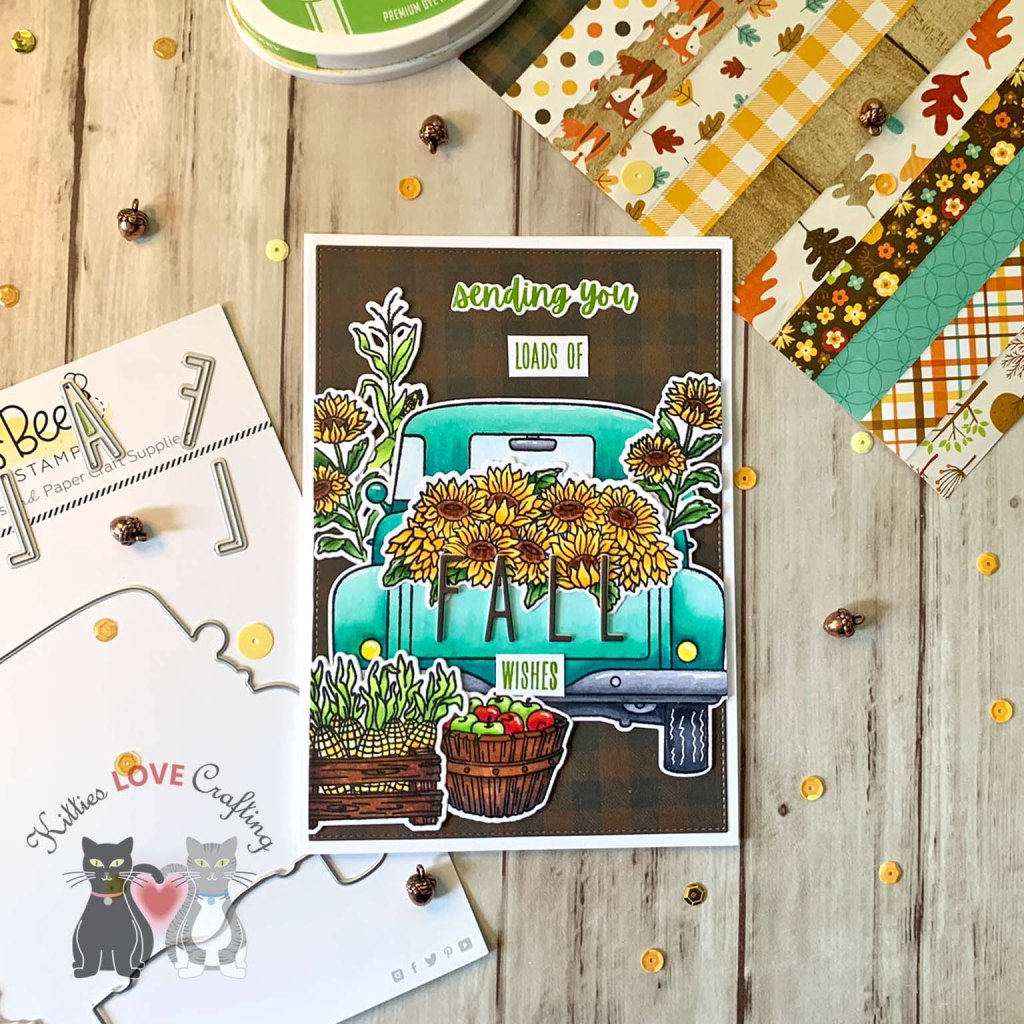
I stamped the images from the Honey Bee Stamps Big Pickup Tailgate 6×6 Stamp Set and the Honey Bee Loads of Fall Stamp Set onto Neenah 110lb Classic Crest Cardstock with Memento Tuxedo Black Ink. I colored them with Copic markers. I used Y13, Y18, E15, E37 & E29, YG13, YG17 & G07 for the sunflowers; Y00, Y13, Y18, YG01, YG25, E29, E37 & E79 for the corn; BG11, BG63, BG18 & BG49 for the truck bed; BG000 & 0 for the windows; C1, C3, C5, C7, & C9 for the metal; Y02 & Y13 for lights; R05 & R46, YG01 & YG25, E37, E79 & E25 for the apples; Y13 & Y17 for license plate. And diecut them with the coordinating dies.

I stamped the sentiment from Honey Bee Stamps Big Pickup Cab 6×6 Stamp Set onto Neenah 110lb Classic Crest Cardstock with Catherine Pooler Designs Lime Rickey Ink and diecut it with the coordinating dies. Then I die cut Honey Bee Tailgate Alphabet Dies from a piece of pattern paper from the Echo Park Paper Company 12 x 12 A Perfect Autumn Collection Kit once as well as from white cardstock twice.

I finished it off by adding highligts with a White Gel Pen.

On the inside of the card, I stamped a sentiment from Lawn Fawn Scripty Autumn Sentiments as well as from Honey Bee Loads of Fall Stamp Set with Memento Tuxedo Black Ink.

Dimensions


Supplies

https://linkdeli.com/widget.js?id=f5e8378456858c916708

Thanks for reading this post! I hope you enjoyed and Iโ€™ve inspired you to make this cute Fall card yourself! If you want to share you creations with me tag me on instagram @kittieslovecrafting. Leave comments or questions below or feel free to email me.

Autumn, Fall, Fall

Fall Shaped Card featuring Honey Bee Stamps

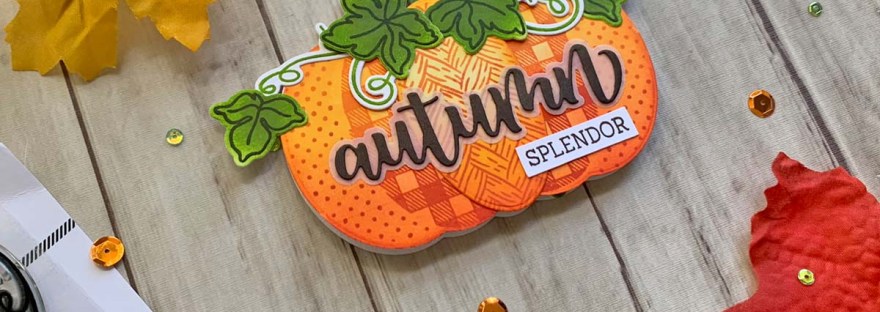
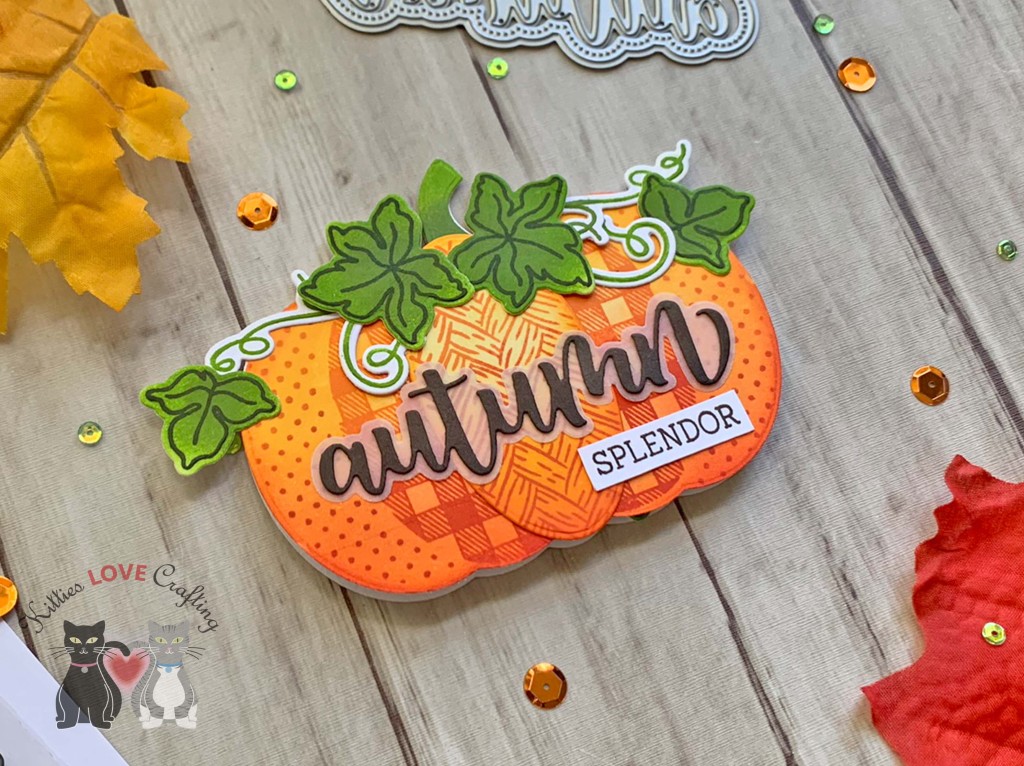
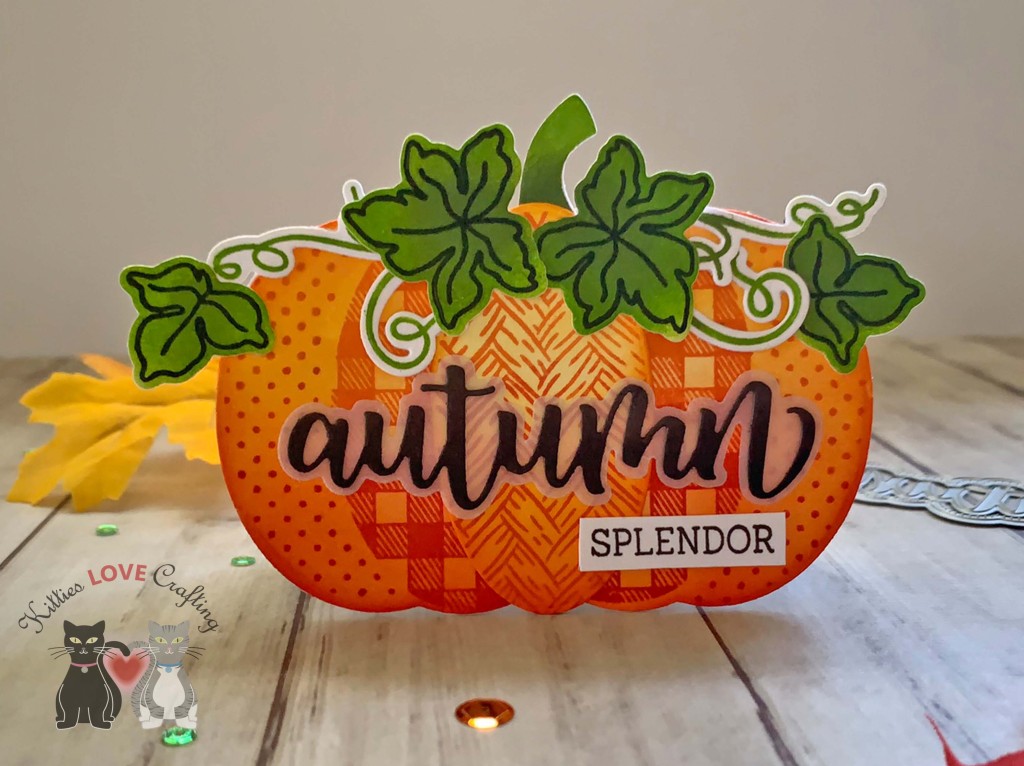
Hi friends. Here’s a quick pumpkin shaped card that can easily be mass produced. You can use these as cards, notes, invitations… I added additional ink over the pumpkins to give them more depth but you can easily stamp onto white cardstock or plain colored cardstock.

3or this card, I cut a piece of Neenah 110lb Classic Crest Cardstock to 7-1/2 x 4-3/4″ and scored at 3-3/4″ to create the card base. Then diecut it using the largest pumpkin from the Honey Bee Stamps Patchwork Pumpkin Dies, leaving the edge of thedie a bit off the card base so it doesn’t cut through the edge. I also cut a second piece of just the pumpkin.

I stamped the pumpkin using both Catherine Pooler Designs Orange Twist and Mandarin Spice Inks then inked with Catching Rays, Sauna, and Orange Twist Inks to create gradient. The stamped the leaves with Memento Tuxedo Ink and colored them with. the stamped the stem and spirals with Lime Rickey and Eucalyptus Inks.

I stamped the sentiment from Honey Bee Stamps Autumn 3×4 Stamp Set onto Neenah 110lb Classic Crest Cardstock with Stampin’ up! Early Espresso Ink and die cut the ‘autumn’ from Stampin’ up! Early Espresso 8-1/2 x 11″ Cardstock and the shadow from Vellum with Honey Bee Stamps Autumn – Honey Cuts.

On the inside of the card, I stamped a sentiment from Queen and Company Happy Harvest Fall Kit with Stampin’ up! Early Espresso Ink and added anextra leaf and spiral.

Dimensions


Supplies

https://linkdeli.com/widget.js?id=f5e8378456858c916708

Thanks for reading this post! I hope you enjoyed and Iโ€™ve inspired you to make this cute critter card yourself! If you want to share you creations with me tag me on instagram @kittieslovecrafting. Leave comments or questions below or feel free to email me.

Autumn, Embossed Background, Fall, Fall, Mini Slimline, Techniques, Watercolor techniques

Fall Mini Slimline Card featuring Lawn Fawn’s You Autumn Know

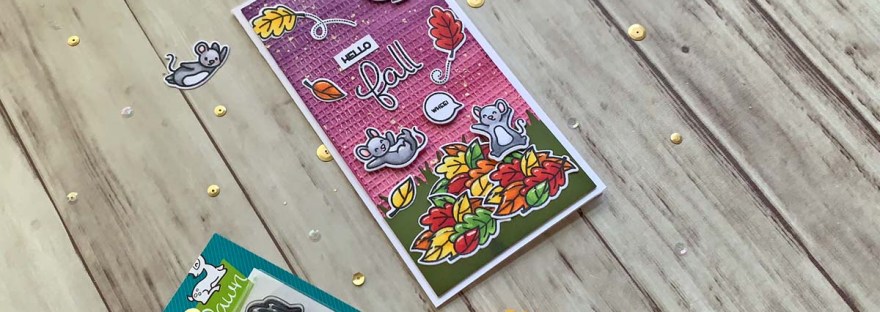
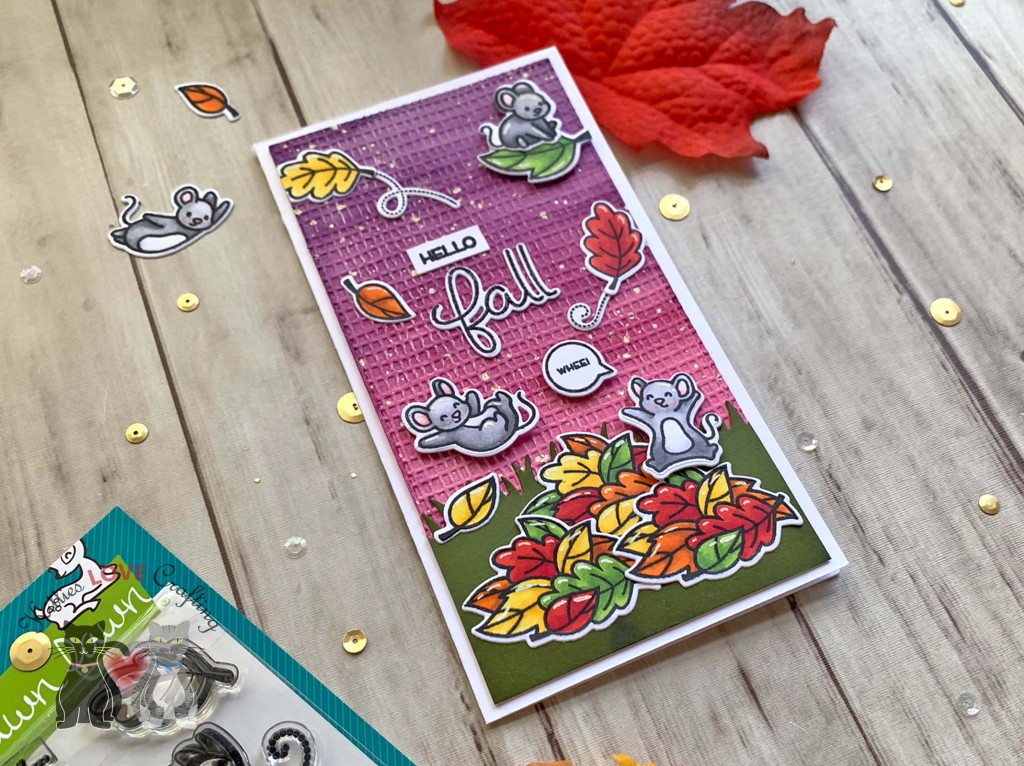
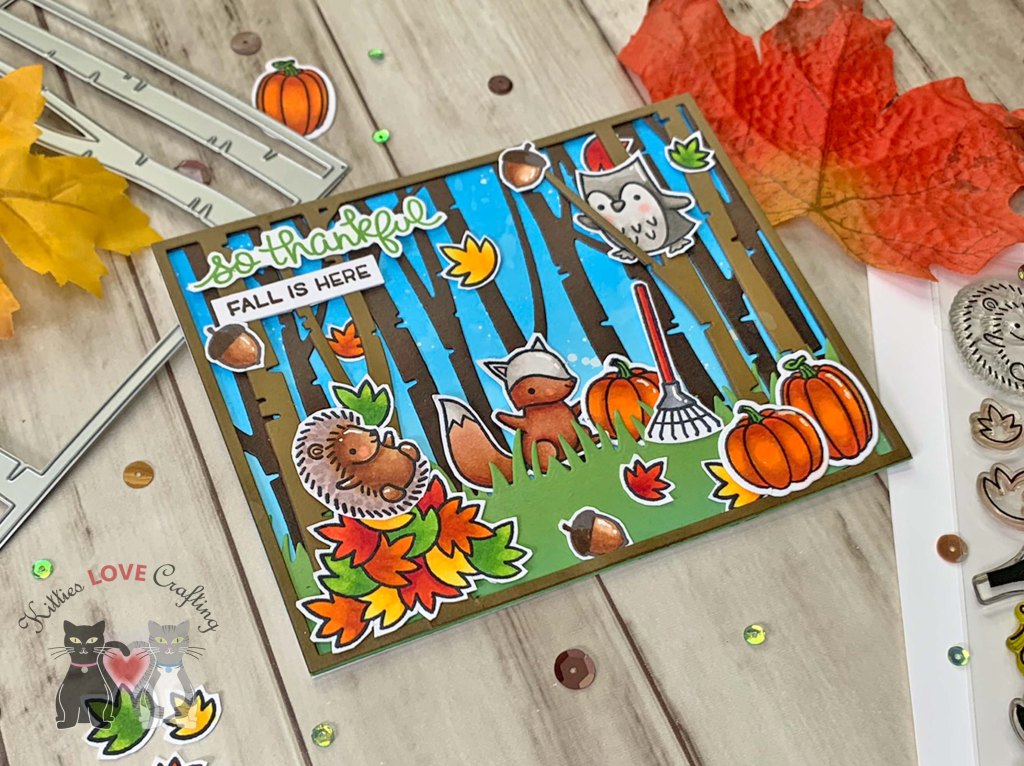
Hi friends. The little mice in the Lawn Fawn You Autumn Know Stampset are so stinking cute that I just had to make this mini slimline card and added some texture to the background by using an older Crafters Companion Embossing Folder.

For this card, I cut a piece of Neenah 110lb Classic Crest Cardstock to 7 x 6-1/2″ and scored at 3-1/4″ to create the card base. I also diecut a piece of Neenah white cardstock with the Queen and Company Foundation 17 dies.

Then I used my Kuretake Gansai Tambi 36 colors Watercolor Paint Set to color the background. I used a red, blue and purple color. Then created some splashes with the Zig Kuretake Gansai Tambi Starry Colors Set. I created some texture by using the Crafters Companion Textures Artist Collection Hessian Embossing Folder (retired).

I die cut the grass from Stampin’ Up! Old Olive 8-1/2″ X 11″ Cardstock with the Lawn Fawn Simple Grassy Hillsides and added some Stampin’ Up! Old Olive Ink.

I stamped the images from Lawn Fawn You Autumn Know Stampset onto Neenah 110lb Classic Crest Cardstock with Memento Tuxedo Black Ink and colored them with Copic Markers. I used Y13 & Y18, YR16 & YR27, R17 & R29, YG03 & YG25 for the leaves; and R20, N1, N2, N4 & copic blender for the mice and die cut with the coordinating dies.

I stamped the sentiment from Lawn Fawn Scripty Autumn Sentiments onto Neenah 110lb Classic Crest Cardstock with Memento Tuxedo Ink and then Versamark Ink and embossed it using Ranger Clear Embossing Powder and die cut with the coordinating die set.

I finished the card by adding some highlights with a White Signo Gel Pen.

On the inside of the card, I stamped a sentiment from Lawn Fawn Scripty Autumn Sentiments with Memento Tuxedo Ink and and added an extra leaf.

Dimensions


Supplies

https://linkdeli.com/widget.js?id=f5e8378456858c916708

Thanks for reading this post! I hope you enjoyed and Iโ€™ve inspired you to make this cute mini slimline card yourself! If you want to share you creations with me tag me on instagram @kittieslovecrafting. Leave comments or questions below or feel free to email me.

Autumn, Fall

Critter Scene Card featuring Lawn Fawn’s Jump for Joy

Hi friends. Here’s another cute scene card for Fall/Autumn. I pulled out some older Lawn Fawn and Honey Bee Stamps stamps and dies to make this one. I used the Honey Bee Stamps Birch A2 Cover Plate Base and Top Plate and Lawn Fawn Jump For Joy Stamps and Dies. I love the forest critters in this stampset. So cute!

For this card, I cut a piece of Neenah 110lb Classic Crest Cardstock to 5-1/2 x 8-1/2″ and scored at 4-1/4″ to create the card base. I inked the sky directly to the card base using Tim Holtz Tumbled Glass and Salty Ocean Distress Oxide Inks. Then added some splatter with White Acrylic Paint.

I diecut the tree base from Stampin’ Up! Early Espresso 8-1/2″ X 11″ Cardstock and the top layer from both Stampin’ Up! Soft Suede 8-1/2″ X 11″ Cardstock and Stampin’ Up! Early Espresso 8-1/2″ X 11″ Cardstock, using the Honey Bee Stamps Birch A2 Cover Plate Base and Top Plate so I can stack them. I die cut the grass from Simon Says Stamp 100# Green Leaf Cardstock with the Lawn Fawn Grassy Border and colored with Tim Holtz Mowed Lawn Distress Oxide Ink.

I stamped the forest critters, leaves, acorns and rake from Lawn Fawn Jump For Joy Stamps and the pumpkins from Honey Bee Loads of Fall Stamp Set onto Neenah 110lb Classic Crest Cardstock with Memento Tuxedo Ink and colored them with Copic Markers.

I used YR16, YR27 & YR09, YG25 & YG17 for the pumpkins; R17, R26, & R05, Y17 & Y18, YR09, YR13, YR16 & YR27 for the leaves; E0000, E34 & E37 for the acorns; E70, E74, E34 , E37 & R20 for the porcupine; , W0, W1, W3, W5 & W7, R20 for the owl; E13, E99, E09, E37, R20, W0 & W3 for the squirrel; N2, N4, N5, R05, R17 & R46 for the rake and die cut with the coordinating dies.

I stamped the sentiment from Lawn Fawn Jump For Joy Stamps onto Neenah 110lb Classic Crest Cardstock with Tim Holtz Mowed Lawn Distress Oxide Ink and Memento Tuxedo Ink. This stampset has a coordinating die set which cuts out the larger sentiments and leaves.

I finished the card by adding some highlights with a White Signo Gel Pen.

On the inside of the card, I stamped a sentiment from Queen and Company Happy Harvest Fall Kit and added some extra leaves and an acorn.

Dimensions


Supplies

https://linkdeli.com/widget.js?id=f5e8378456858c916708

Thanks for reading this post! I hope you enjoyed and Iโ€™ve inspired you to make this cute critter card yourself! If you want to share you creations with me tag me on instagram @kittieslovecrafting. Leave comments or questions below or feel free to email me.

Autumn, Fall, Fall, Seasons

Loads of Fall Card featuring Honey Bee Stamps

Hi friends. Here’s another cute Fall/Autumn card using the Honey Bee Stamps Loads Of Fall stampset and dies and the Honey Bee Stamps Big Pickup Tailgate Stampset and dies. Lots of fun images in both these stampsets and lots of combinations you can use to create a variety of different cards, not just seasonal ones.

I started by stamping all the images I needed from the Honey Bee Stamps Loads Of Fall stampset and the Honey Bee Stamps Big Pickup Tailgate Stampset onto Neenah 110lb Classic Crest Cardstock 8.5 X 11″ with Memento Tuxedo Black Ink and set them aside to dry.

I cut a piece of Catherine Pooler Sand Dunes 8-1/2 x 11″ Cardstock (retired) to 10 x 7″ and scored at 5″ to make the card base. I also cut a piece of Honey Bee Stamps Halloween Harvest 6×6 Paper Pad to 4-3/4 x 6″. Since this paper pad is only 6 x 6 I had to get creative and fill in the sides with more paper. So I cut two pieces of patter paper to 1/2 x 4-3/4″ and adhered it behind the larger piece.

I colored the images with Copic Markers. I used B00, B02, and B06 for the truck; N1, N2 & N4 for the metal portions such as the mirror; N5 and N8 for the tires; BG000 & 0 for the windows; R05 & R27 for the lights; R05 & R27 for the doggy bandana, E29, E23, & E37 for the dog; YR14 & YR21 for the license plate; YG61, G94, YG99, & E15 for the jug; YR16, YR04 & Y18, Y13 & Y16, YG61, G94, & YG99, YG91 & E15 for the pumpkins; R05 & R27, E55, E57 & E29 for the apple bucket.

On the inside of the card, I cut a piece of Neenah 110lb Classic Crest Cardstock 8.5 X 11″ to 4-3/4 x 6-3/4โ€ and stamped a sentiment from the Honey Bee Stamps Big Pickup Cab Stampset and Lawn Fawn Thanks Thanks Thanks with Honey Bee Stamps Big Pickup Tailgate Stampset onto Neenah 110lb Classic Crest Cardstock 8.5 X 11″ with Memento Tuxedo Black Ink.

Dimensions


Supplies

https://linkdeli.com/widget.js?id=f5e8378456858c916708

Thanks for reading this post. I hope you enjoyed and Iโ€™ve inspired you to give this cute fall card a try for yourself. Leave comments or questions below or feel free to email me.

Autumn, Christmas, Fall, Stampin' Up!, Thanksgiving

Stampin’ Up!’s Fireside Trimming stampset

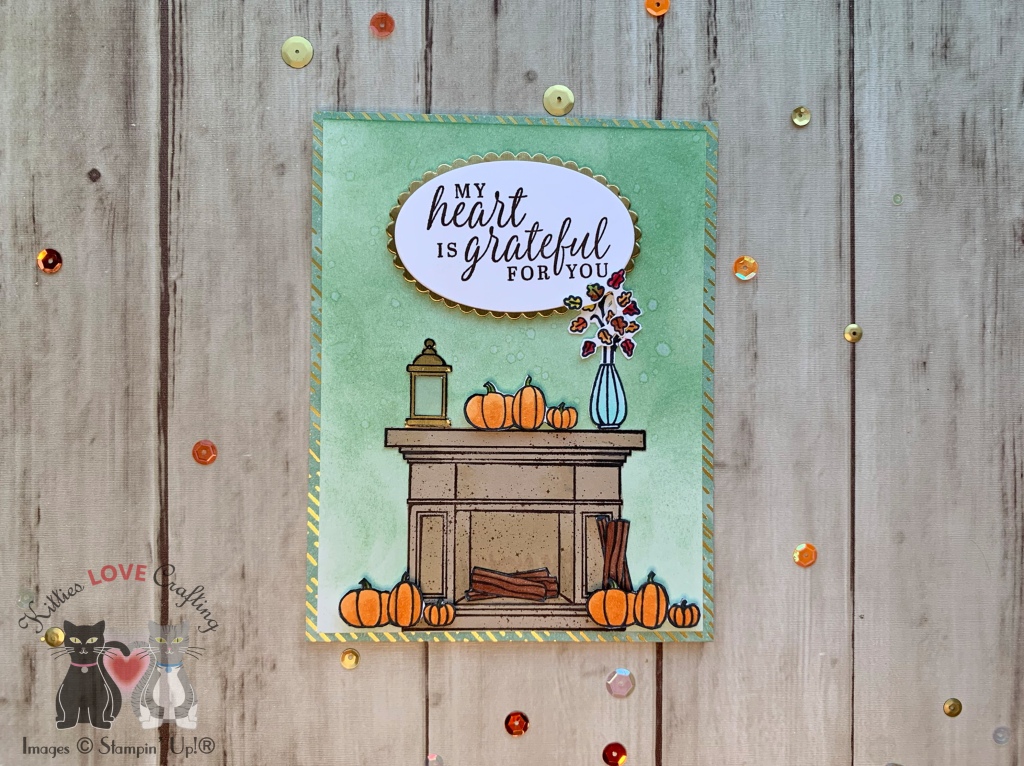
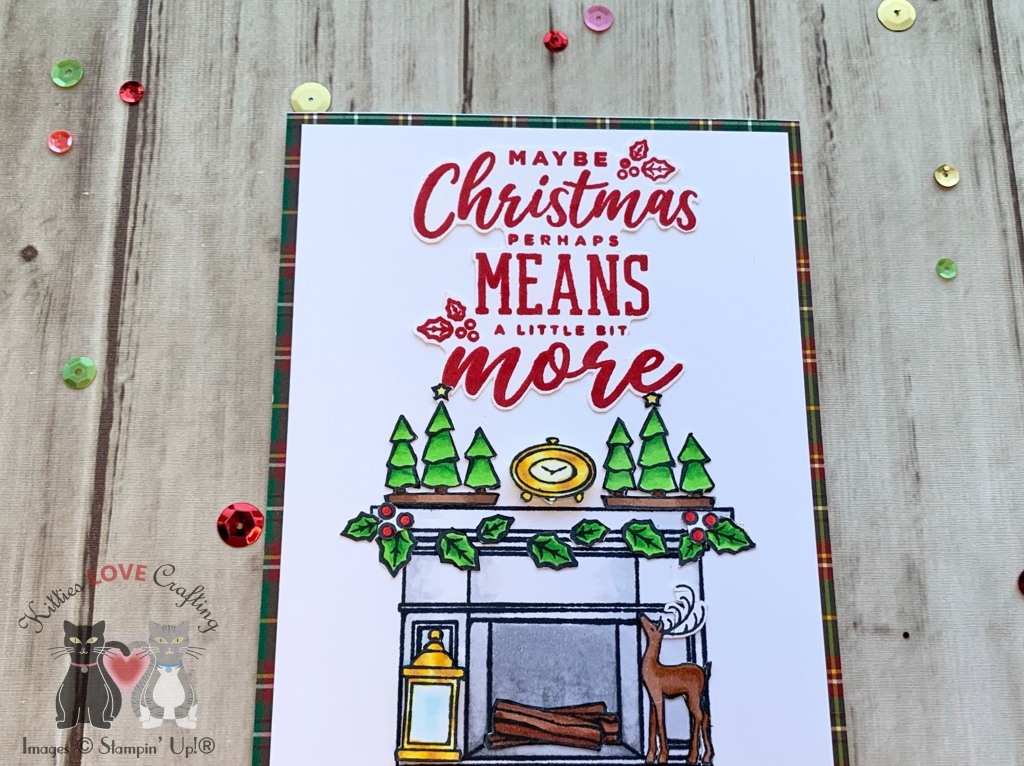
Hi friends. I have one last Fall card and of course another Christmas card. Now I know Fall is over for most of us even though the calendar says it doesnโ€™t end until December 21st but I wanted to show the possibilities with this stamp set. Stampin’ Up!’s Fireside Trimming stampset is good for Fall, Halloween, Christmas and many other occasions. This stampset can be found on page 20 of the new Aug-Dec Mini Catalog. It also coordinates with the Fireside Dies.

For the first card, I started by cutting a piece of Whisper White 8-1/2″ X 11″ Thick Cardstock to 5-1/2 x 8-1/2″ and scored at 4-1/4″ to make a card base. Then cut a piece of Guilded Autumn 12 x 12 Specialty Designer Series Paper to 4-1/4 x 5-1/2″ for the top panel and adhered it to the card base. I also cut a piece of Whisper White 8-1/2″ X 11″ Thick Cardstock to 4 x 5-1/4″ and used Mint Macaron Ink to create a gradient background. I spritzed some water on the panel, dried it and adhered it to the card.

I stamped the fireplace from Stampin’ Up!’s Fireside Trimming stampset with Memento Tuxedo Black Ink onto a piece of pattern paper from Guilded Autumn 12 x 12 Specialty Designer Series Paper. I used Crumb Cake Stampin’ Blends to add depth to the inside areas, fussycut it out (you can use the coordinating dies but I don’t have them yet) and adhered it to the card.

I stamped the images with Memento Tuxedo Black Ink onto a piece of Whisper White 8-1/2″ X 11″ Thick Cardstock and colored them using Stampin Blends and Copic markers. I used Pumpkin Pie Light & Dark and Granny Apple Green Light & Dark for the pumpkins; Cajun Craze Light & Dark, Granny Apple Green Light & Dark, Real Red Light & Dark for the leaves in the vase; Copic BG10 & BG11 for the vase; and E27 & E29 for the wood piles. I fussycut out all the images and adhered to the card. I popped up the pumpkins with Stampin’ Dimensionals. I also stamped the lantern onto a piece of Gold Brushed Metallic Cardstock with Tsukineko Stazon Jet Black Ink, cut out the window and adhered a piece of Vellum behind it.

I stamped the sentiment from Stampin’ Up!’s Beautiful Autumn stampset with Early Espresso Ink onto Whisper White 8-1/2″ X 11″ Thick Cardstock and diecut it to 1-9/16 x 2-1/2″ with the Layering Ovals Dies and a scallop oval from Gold Brushed Metallic Cardstock, measuring 1-3/4 x 2-11/16″. I adhered the ovals and added some Stampin’ Dimensionals to the back before adhering to the card.

I left the inside of the card blank.

Dimensions


For the second card, I started by cutting a piece of Whisper White 8-1/2″ X 11″ Thick Cardstock to 5-1/2 x 8-1/2″ and scored at 4-1/4″ to make a card base. Then cut a piece of Plaid Tidings 6″ X 6″ Designer Series Paper to 4-1/4 x 5-1/2″ for the top panel. I cut another piece of Whisper White 8-1/2″ X 11″ Thick Cardstock to 4 x 5-1/4″.

I stamped the fireplace from Stampin’ Up!’s Fireside Trimming stampset with Memento Tuxedo Black Ink onto the panel, and all the images onto another piece of Whisper White 8-1/2″ X 11″ Thick Cardstock. I also stamped several holly from the Christmas Means More Stampset. On this card I colored everything with Copic Markers. I used YG05 & G07 for the trees and holly leaves, R17 & R29 for the holly berries, E25 & E27 for the tree bases and reindeer, E29 for the tree trunks, E25, E27 & E29 for the wood logs, Y11, Y18 & Y23 for the lantern and clock) and N1, N2, N5 & ) for the fireplace. I fussycut the images and adhered them to the card panel. I popped up the lantern and clock with Stampin’ Dimensionals. And adhered the panel to the card.

I stamped the sentiment from Christmas Means More Stampset onto Whisper White 8-1/2″ X 11″ Thick Cardstock with Real Red Ink, fussycut it out and adhered it to the panel.

On the inside of the card, I stamped a sentiment from the Stampin’ Up!’s Fireside Trimming stampset Memento Tuxedo Black Ink and the wreath with with Old Olive Ink.

Dimensions


Supplies

https://linkdeli.com/widget.js?id=f5e8378456858c916708

Thanks for reading this post. I hope you enjoyed and Iโ€™ve inspired you to try these fall cards using this beautiful suite for yourself! Leave comments or questions below or feel free to email me. If you want to share you creations with me tag me on instagram @kittieslovecrafting. If you would like a Stampin’ Up! catalog, please email me as well. All current catalogs can be found on the right side of this post and the Stampin’ Up! page. All news and fun stuff happening at Stampin’ Up! are listed there!

Autumn, Birthdays, Fall, Fall, Thanksgiving

2 cards Using One Stampset and Easy Watercolor Backgrounds

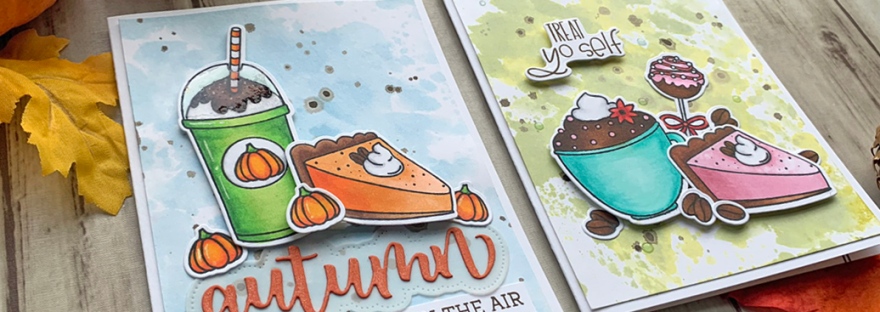
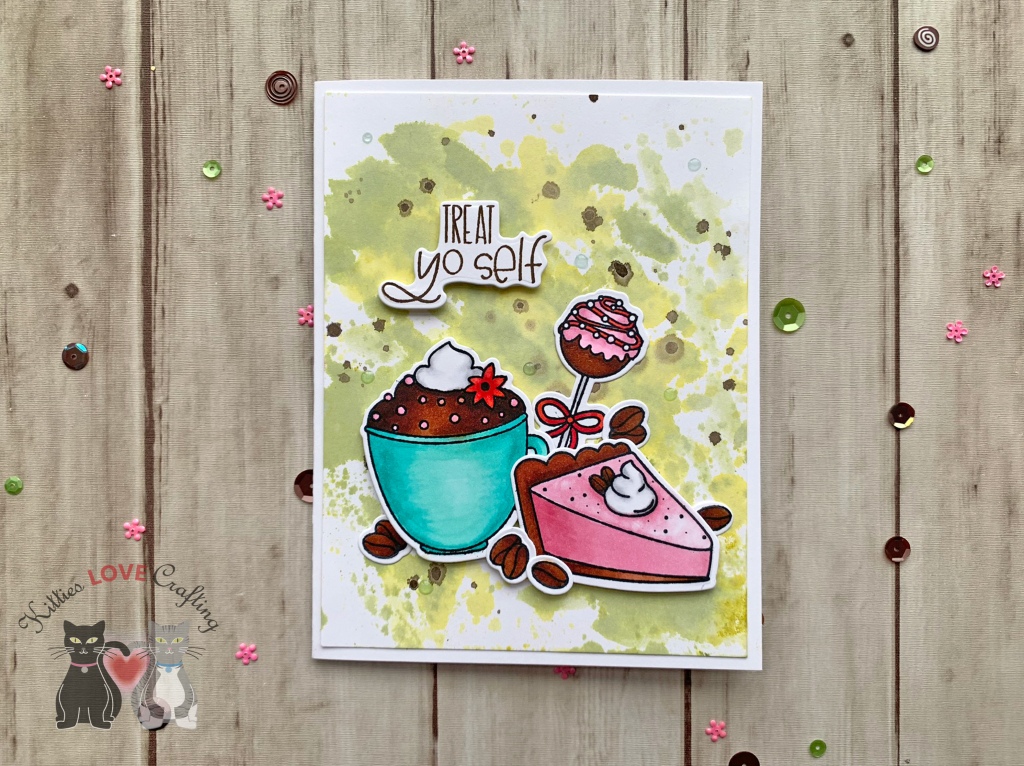
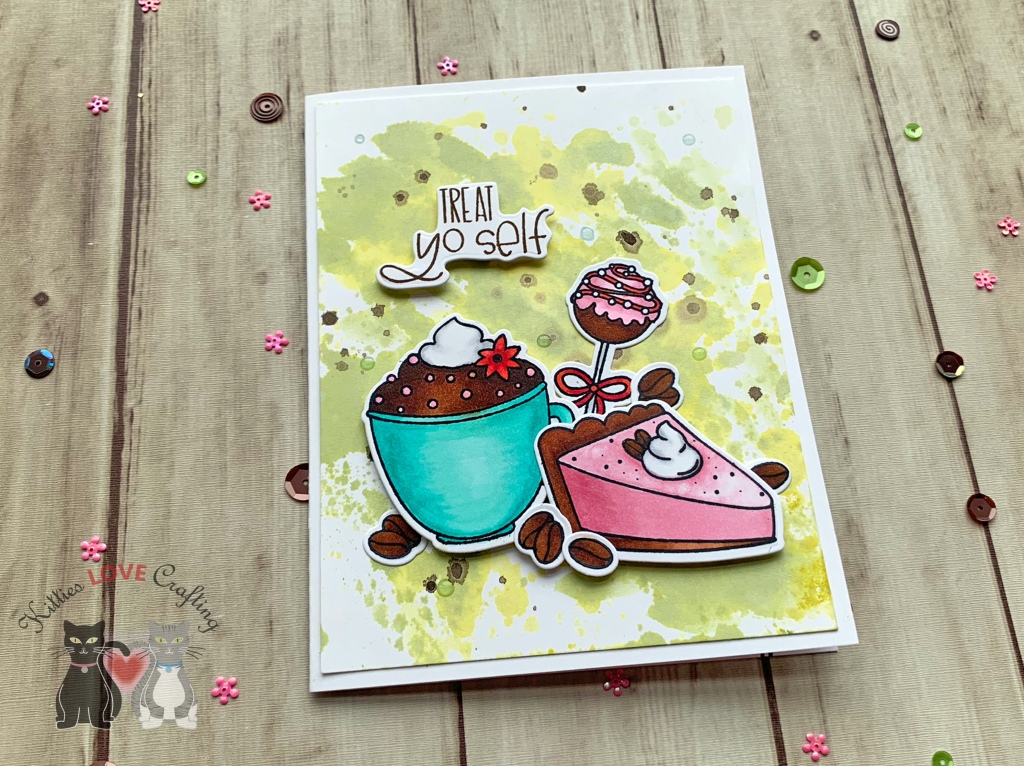
Hello friends. Do you need some last minute Fall or Thanksgiving cards or perhaps a Birthday card?? The Honey Bee Stamps Treat Yo Self 6×6 Stamp Set is great for such cards! I created very simple watercolor backgrounds using one color of distress ink. These cards also use minimal supplies. And while I used my Copics and added shadowing and highlights to the images, you can color them flat and make it simpler. They would still look great!

For my first card, I started by cutting a piece of Neenah 110lb Classic Crest Cardstock 8.5 X 11″ to 5-1/2 x 8-1/2″ and scored at 4-1/4 to create the card base. I cut a piece of Strathmore 300 Series Bristol Smooth Paper to 4 x 5-1/4″. I used Ranger Tim Holtz Broken China Distress Ink to watercolor the background and added splatters using Tim Holtz GROUND ESPRESSO Distress Paint and set it aside to dry.

I stamped the images from the Treat Yo Self 6×6 Stamp Set with Memento Tuxedo Black Ink onto a piece of Neenah 110lb Classic Crest Cardstock 8.5 X 11″, colored them with Copic Markers and die cut them with the coordinating Honey Cuts Treat Yo Self Dies. I used Y18 + YR04 + YR09 and YG03 + YG05 + G07 for the pumpkins; E25 + E29 + E49 (chocolate syrup), BG10 + 0 (lid), YG03 + YG05 + G07 (cup), N2 + 0 and YR04 + YR09 (straw) on the cup; and YR00 + YR14 + Y04 + Y09 (filling), N1 + 0 (whipped cream), E33 + E25 + E29 (crust and coffee beans/nuts) for the pie.

I adhered the watercolored panel to the card base using wet glue and the images using wet glue and Stampin’ Dimensionals. I die cut the ‘Autumn’ word and the largest shadow using the Honey Bee Autumn Buzzword Dies. I used Stampin’ Up! Tangerine Tango 8-1/2 x 11″ Cardstock (retired) for the word and Simon Says Stamp Vellum for the shadow. I stamped a sentiment from the Honey Bee Autumn Buzzword Stamp Set onto a piece of Neenah 110lb Classic Crest Cardstock 8.5 X 11″ with Ground Espresso Distress Oxide Ink and cut it down to 3/8 x 1-3/4″. I adhered all the sentiment pieces to the card using wet glue. To finish off the card I added highlights using a Uni-Ball Signo Broad Point White Gel Pen, shimmer to the ‘Autumn’ buzzword with Spectrum Noir Clear Overlay Sparkle Pen, and added Ranger Glossy Accents to the lid.

The inside of the card was left blank.

Dimensions


For my second card, I started by cutting a piece of Neenah 110lb Classic Crest Cardstock 8.5 X 11″ to 5-1/2 x 8-1/2″ and scored at 4-1/4 to create the card base. I cut a piece of Strathmore 300 Series Bristol Smooth Paper to 4 x 5-1/4″. I used Ranger Tim Holtz Peeled Paint Distress Ink and Tim Holtz Crushed Olive Distress Ink to watercolor the background and added splatters using Tim Holtz GROUND ESPRESSO Distress Paint and set it aside to dry.

I stamped the images from the Treat Yo Self 6×6 Stamp Set with Memento Tuxedo Black Ink onto a piece of Neenah 110lb Classic Crest Cardstock 8.5 X 11″, colored them with Copic Markers and die cut them with the coordinating Honey Cuts Treat Yo Self Dies. I used BG11 + BG15 (mug), N2 + 0 (whipped cream), E37 + E29 + E49 (chocolate frosting), and RV10 + R83 (flower); E15 + E37 + E29 (crust and beans/nuts), N2 + 0 (whipped cream), R81 + R83 + R85 (filling) for the pie slice; E37 + E29 + E49 for the beans; and R83 + RV10 (frosting), E37 + E29 (cake), R17 + R27 + R29 (ribbon) and N2 + 0 (popsicle stick) for the cake pop.

I adhered the watercolored panel to the card base using wet glue and the images using wet glue and Stampin’ Dimensionals. I stamped a sentiment from the Treat Yo Self 6×6 Stamp Set onto a piece of Neenah 110lb Classic Crest Cardstock 8.5 X 11″ with Ground Espresso Distress Oxide Ink and die cut it with the coordinating Honey Cuts Treat Yo Self Dies. I adhered the the sentiment to the card using Stampin’ Dimensionals. To finish off the card I added Nuvo Sea Breeze Jewel Drops.

On the inside of the card, I stamped a sentiment from Lawn Fawn Village Shops and the cake pop from Treat Yo Self 6×6 Stamp Set with Ground Espresso Distress Oxide Ink. And that completes this card.

Dimensions


Supplies

https://linkdeli.com/widget.js?id=f5e8378456858c916708

Thanks for reading this post. I hope you enjoyed and Iโ€™ve inspired you to give these watercolored cards a try for yourself. Leave comments or questions below or feel free to email me.

Autumn, Christmas, Fall, Holidays 2020, Stampin' Up!, Winter

Life Is Beautiful by Stampin’ Up! (from the new Aug-Dec Mini Catalog)

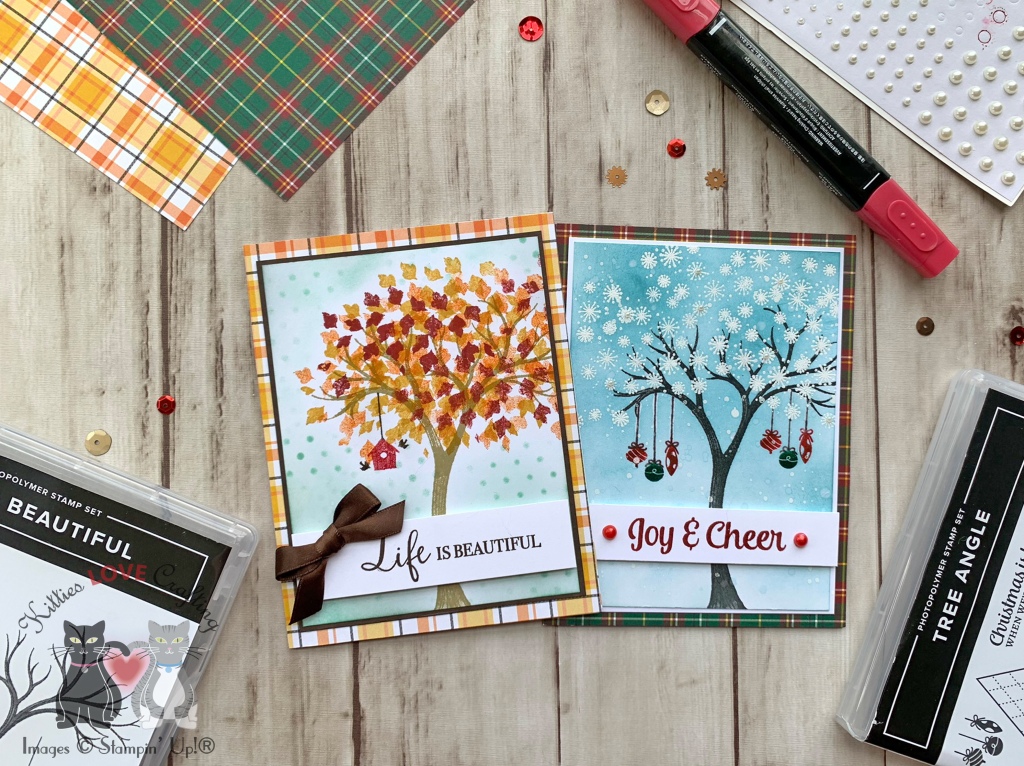
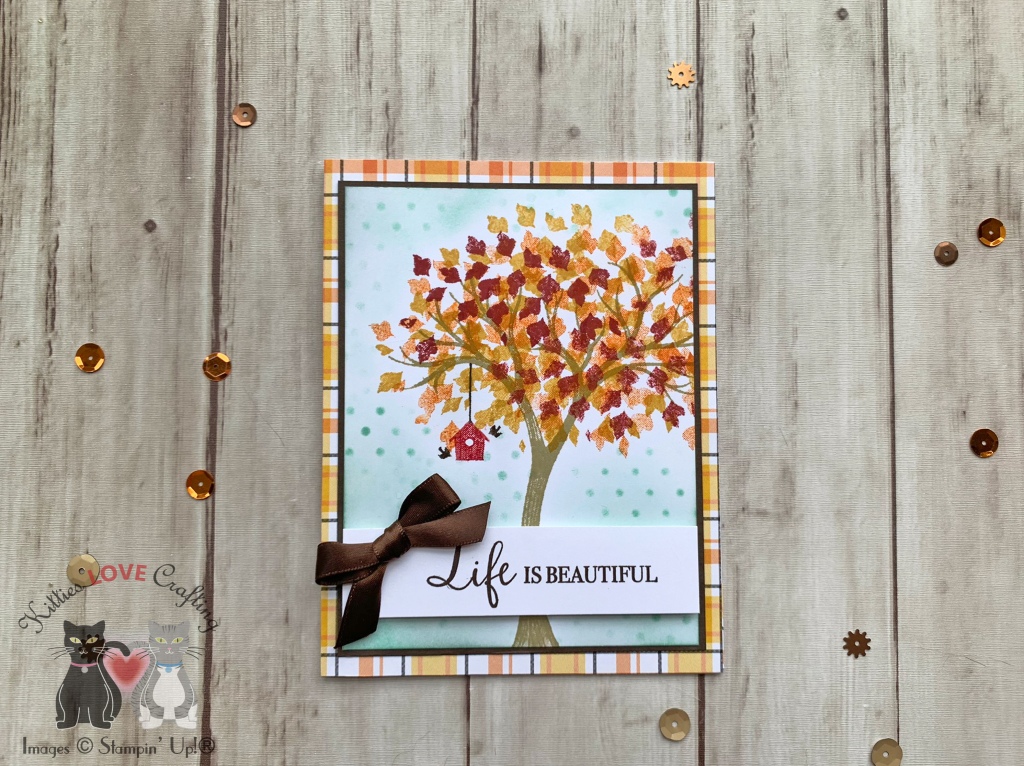
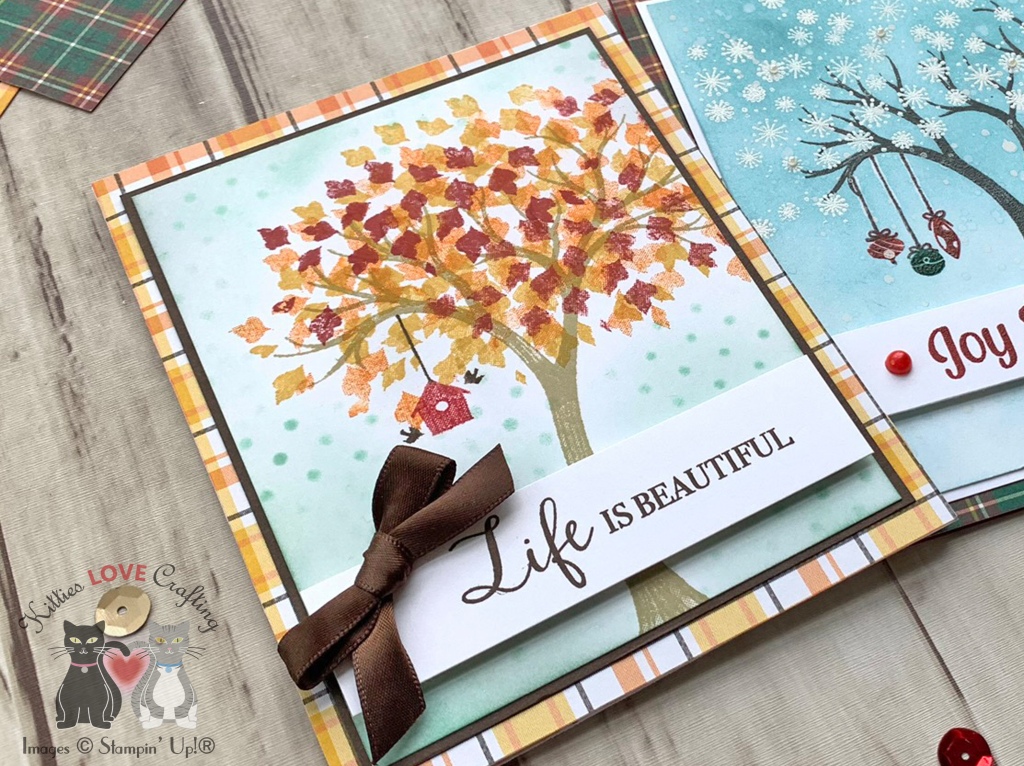
The Life Is Beautiful stampset by Stampin’ Up! at first glance looks like a very simple stampset but once you stamp the images you will notice the details in the images which give them dimension. It reminds me of another Stampin’ Up! (retired) stampset, Sheltering Tree, which I have loved for many years. Anyone else remember that stampset? I love this one sooo much more though–and I think it’s because of all the details. This lovely stampset can be found in the new Aug-Dec Mini Catalog which has a ton of awesome goodies for the holidays. I will definitely be making more cards with this stampset!

I started the first card by cutting a piece of Whisper White 8-1/2″ X 11″ Thick Cardstock to 5-1/2 x 8-1/2″ and scored at 4-1/4″ to make a card base. Then cut a piece of Plaid Tidings 6 x 6 Designer Series Paper to 4-1/4 x 5-1/2″ for the top panel, a piece of Early Espresso 8-1/2 x 11″ Cardstock to 3-7/8 x 5 1/16″, and a piece of Whisper White 8-1/2″ X 11″ Cardstock to 3-3/4 x 4-7/8″. I adhered the plaid paper to the card base and the Early Espresso 8-1/2 x 11″ Cardstock panel to the plaid paper.

I stamped the tree trunk from the Life Is Beautiful stampset to the white panel with Crumb Cake Ink, I layered the leaves by stamping them several times with Bumblebee, Pumpkin Pie and Cherry Cobbler inks, and used Early Espresso and Real Red Stampin’ Write Markers to stamp the little bird house.

For the background I used a American Crafts Heidi Swapp Stencil 6 X6 Polka Dot with Pool Party Ink then inked around the background to give it some more color. I adhered that to the Early Espresso 8-1/2 x 11″ Cardstock and then stamped a sentiment from the same stampset onto Whisper White 8-1/2″ X 11″ Cardstock with Early Espresso Ink. I cut it down to 1 x 3-3/4″, added Stampin’ Dimensionals behind it and added it to the card. I finished it off by adding a piece of 3/8″ chocolate brown satin ribbon.

I left the inside of the card blank and just added cut a piece of Plaid Tidings 6 x 6 Designer Series Paper, measuring 1 x 4-1/4″.

Dimensions


I went with a winter/Christmas theme for the second card; I just really wanted to heat emboss the snowflakes from the Life Is Beautiful stampset. This card features the Tree Angle stampset as well.

I started the second card by cutting a piece of Cherry Cobbler 8-1/2″ X 11″ Cardstock to 5-1/2 x 8-1/2″ and scored at 4-1/4″ to make a card base. Then cut a piece of Plaid Tidings 6 x 6 Designer Series Paper to 4-1/4 x 5-1/2″ for the top panel, a piece of Whisper White 8-1/2″ X 11″ Cardstock to 3-7/8 x 5 1/16″, and another piece of Whisper White 8-1/2″ X 11″ Cardstock to 3-3/4 x 4-7/8″. I adhered the plaid paper to the card base and the Whisper White 8-1/2″ X 11″ Cardstock panel to the plaid paper.

I stamped the tree trunk from the Life Is Beautiful stampset to the white panel with Basic Gray Ink, then stamped the whole image with Versamark Ink and heat embossed with Clear Stampin’ Emboss Powder. I stamped the ornaments from the Tree Angle stampset with Cherry Cobbler and Shaded Spruce inks, and Smoky Slate Stampin’ Write Markers to stamp the string on the ornaments. I used an Sponge Dauber to apply the ink to each of the ornaments since there were two coors involved. I then stamped the whole image with Versamark Ink and heat embossed with Clear Stampin’ Emboss Powder. Tip: Use a stamping platform such as the Stamparatus to do this so it’s in the same spot.

I used the snowflakes stamp from the Life Is Beautiful stampset with Versamark Ink and stamped it several times over the tree, then added White Stampin’ Emboss Powder. I did some ink blending in the background with Balmy Blue Ink, and adhered the panel to the card.

I stamped a sentiment from the Tree Angle stampset onto Whisper White 8-1/2″ X 11″ Cardstock with Cherry Cobbler Ink and cut it down to 3/4 x 4โ€ and adhered with Stampinโ€™ Dimensionals. To finish it off I added tiny Stampinโ€™ Up! Pearls (retired) to the snowflakes and colored two large ones with Real Red Stampinโ€™ Blends.

On the inside of the card, I added a piece of Plaid Tidings 6 x 6 Designer Series Paper, measuring 1 x 4-1/4″ and stamped the sentiment and ornaments from the Tree Angle stampset with Shaded Spruce Ink.

Dimensions


Supplies

https://linkdeli.com/widget.js?id=f5e8378456858c916708

Thanks for reading this post. I hope you enjoyed and Iโ€™ve inspired you to try these cards using this beautiful stampset for yourself! Leave comments or questions below or feel free to email me. If you want to share you creations with me tag me on instagram @kittieslovecrafting. If you would like a Stampin’ Up! catalog, please email me as well. All current catalogs can be found on the right side of this post and the Stampin’ Up! page. All news and fun stuff happening at Stampin’ Up! are listed there!