Fourth of July, Holidays 2021, Summer

Fourth of July/Patriotic House Card featuring Honey Bee Stamps

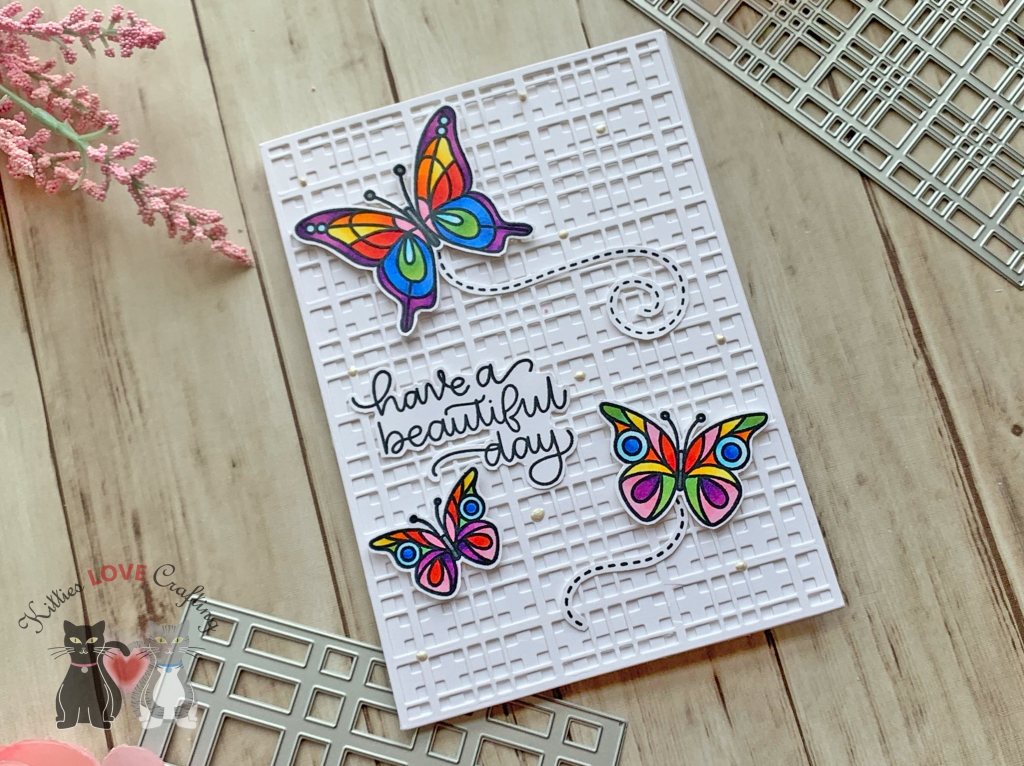
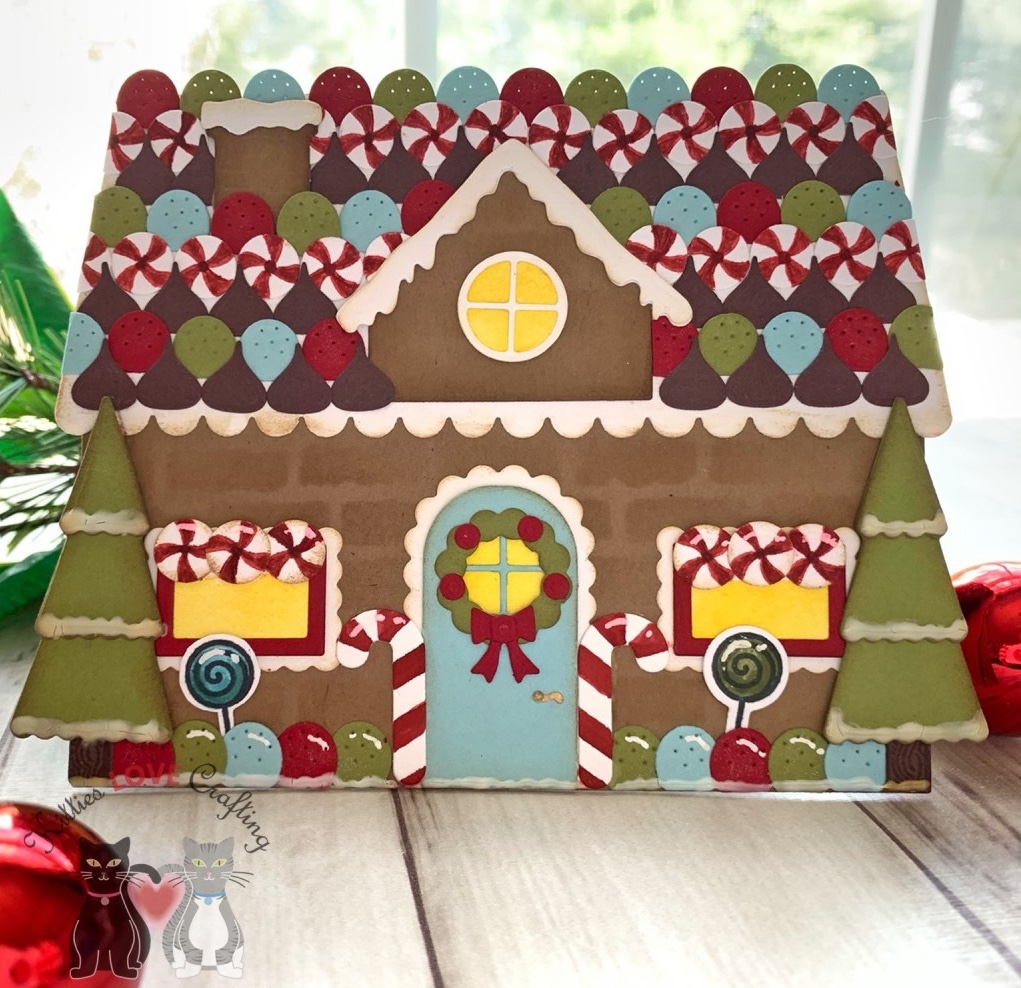
When I purchased this Honey Bee Stamps Farmhouse Add-on Dies and Stampset I knew I had to make a patriotic themed card. And love how it turned out! There really are endless possibilities with the House Builder Card Base Dies and add-on dies and stampsets available.

For this card, I started by diecutting the house card base 2x from the House Builder Card Base Dies, chimney, roof, 2 windows, porch steps and four bushes from Neenah 110lb Classic Crest Cardstock 8.5 X 11″.

I adhered the two houses with the pre-scored strip that comes in the House Builder Card Base Dies to create the card base. Be sure to use double-sided tape or something very strong so they don’t come apart. Then stenciled bricks on the front of the house with Tim Holtz BRICKED Layering Stencil and Stampinโ€™ Up! Smoky Slate Ink, also colored the porch steps with Stampinโ€™ Up! Smoky Slate Ink, roof and chimney with Tim Holtz BLUEPRINT SKETCH and Chipped Sapphire Distress Inks, the door with Barn Door, bushes with Twisted Citron and Mowed Lawn and windows with Broken China Distress Inks.

I adhered the roof and chimney to the card base and added a brick pattern to the chimney with a White Gel Pen.

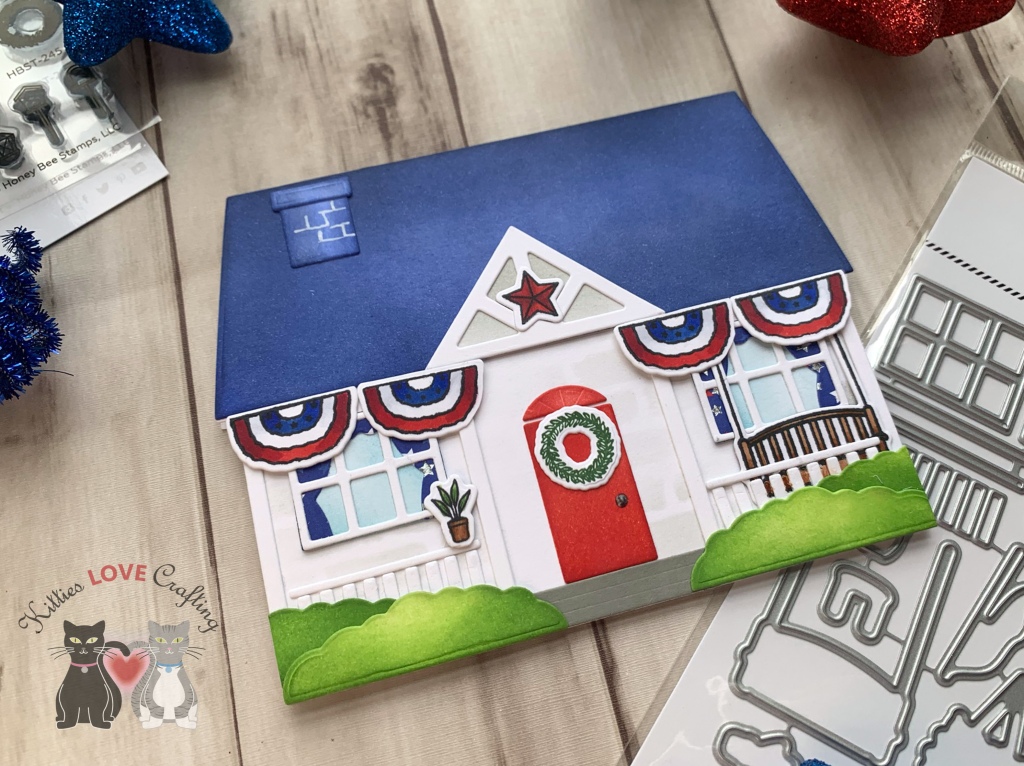
I diecut the window frames, porch header (I added a piece of vellum behind it which I colored with Stampinโ€™ Up! Smoky Slate Ink), window frames, porch rails and beams/columns from Neenah 110lb Classic Crest Cardstock 8.5 X 11″ with the Farmhouse Add-on Dies. I also diecut curtains from Doodlebug Designs Yankee Doodle 6×6 Paper Pad (I believe it’s discontinued) with the House Builder Card Base.

I stamped the decorative star, bunting, bench and one flower pot onto some Neenah 110lb Classic Crest Cardstock 8.5 X 11″ with Memento Tuxedo Ink and colored them with Copic Markers. I also stamped a wreath with Mowed Lawn Distress Ink. I used E23 and E27 for the bench and flower pot, YG17 and YG67 for the plant, R27, R46 and R59 for the star and R27, R46 & R59, B26 & B29, and C1 & 0 for the bunting. Then die cut the images with the Farmhouse Add-on Dieset. As a finishing touch I added a doorknob with Tonic LIQUID MERCURY Nuvo Crystal Drops. A die for the doorknob is included in the dieset but it’s so tiny I’m always afraid to misplace it.

On the inside of the card, I stamped a sentiment “Happy Fourth of July” using a really old greeting stampset (maybe Lawn Fawn or SSS- it was before I started labelling my stamps) and added bunting underneath.
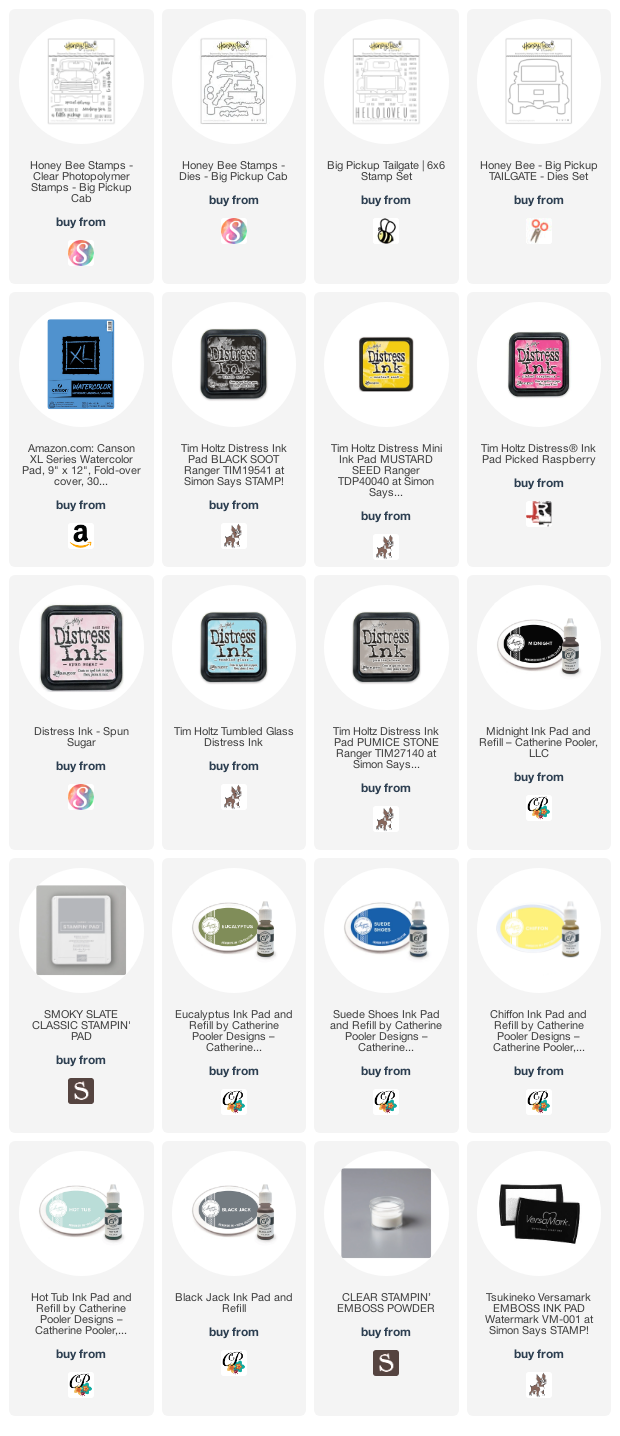
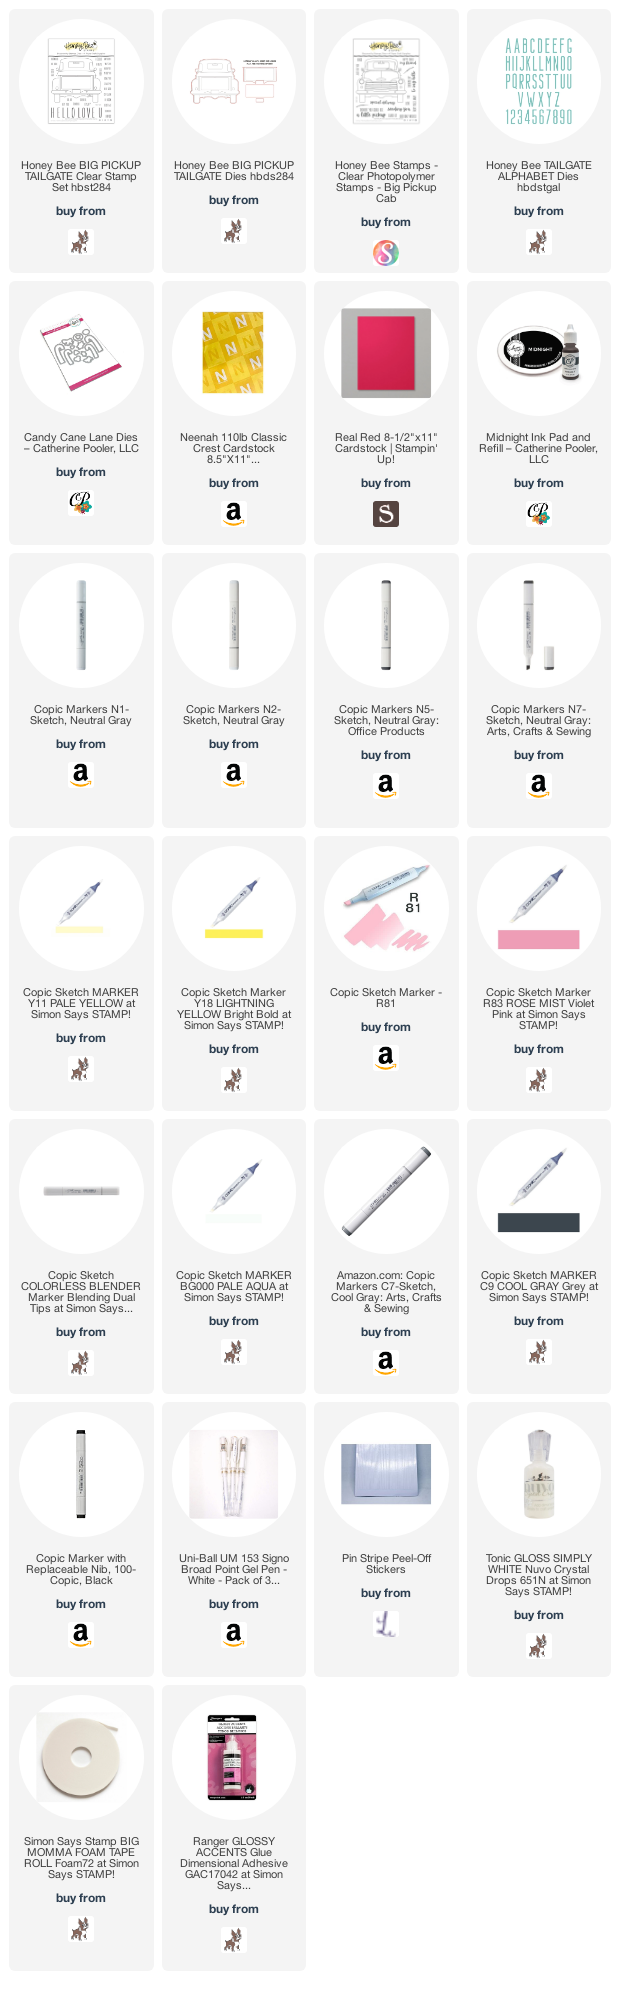
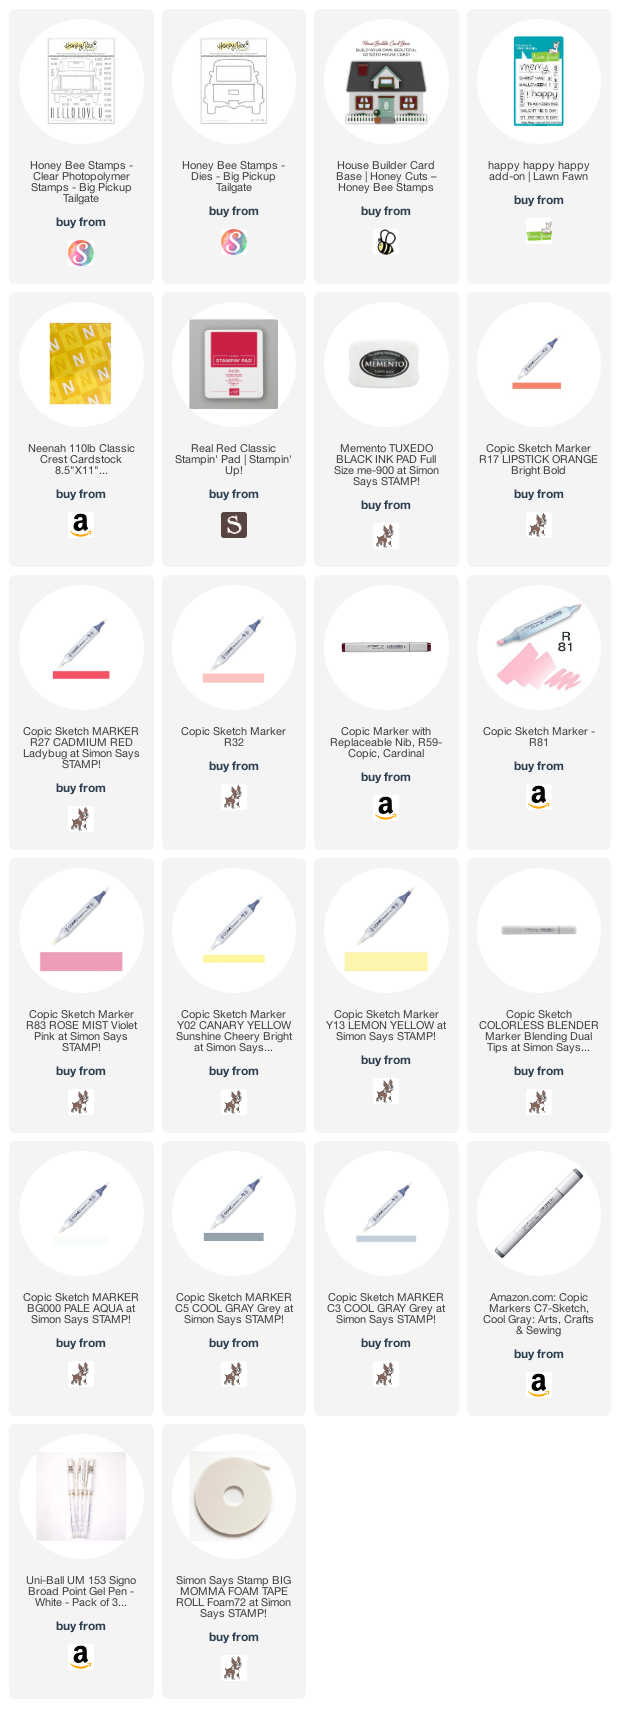
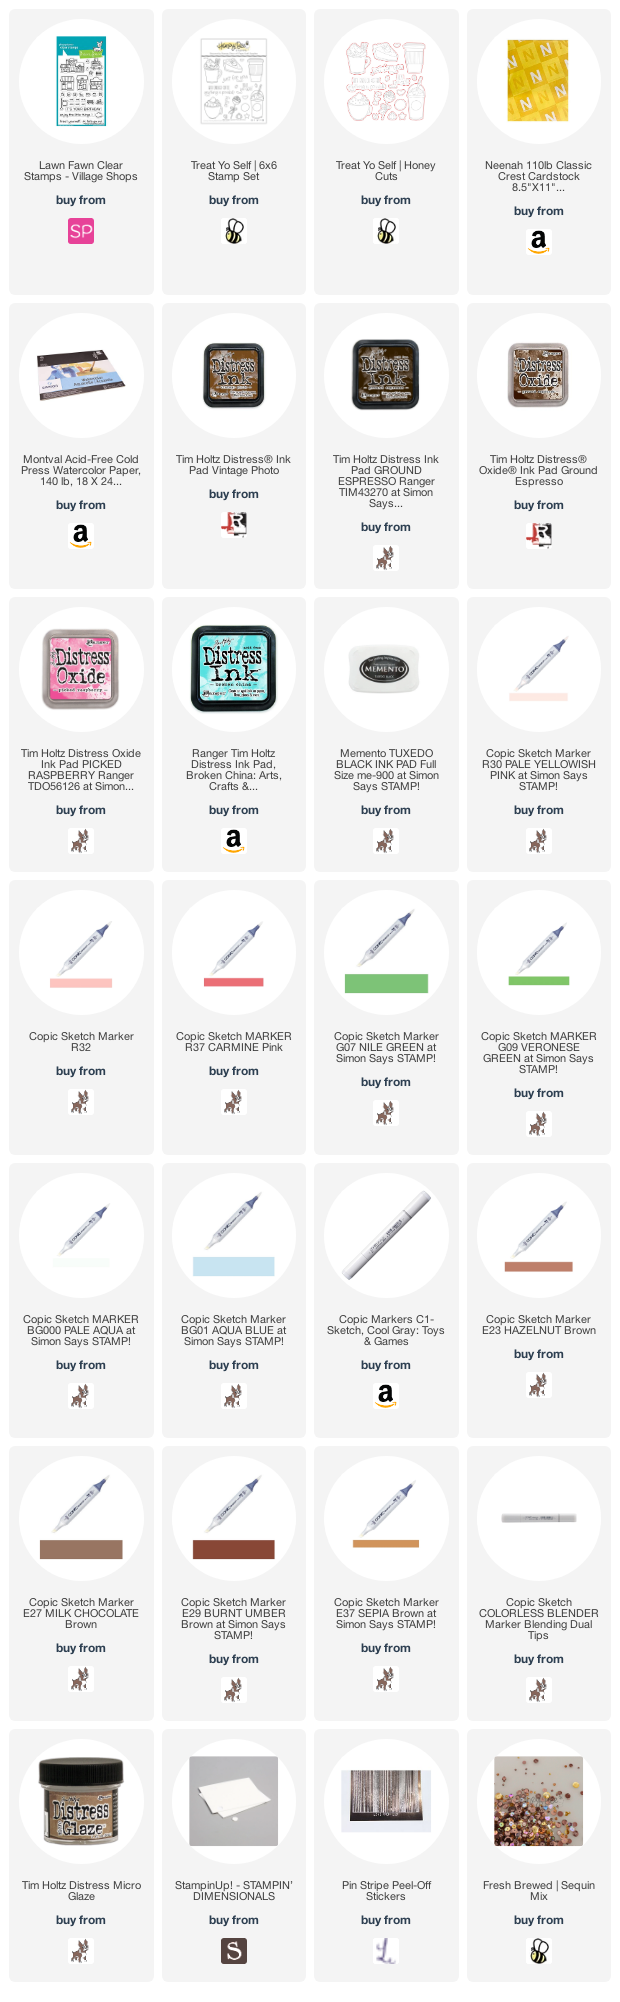
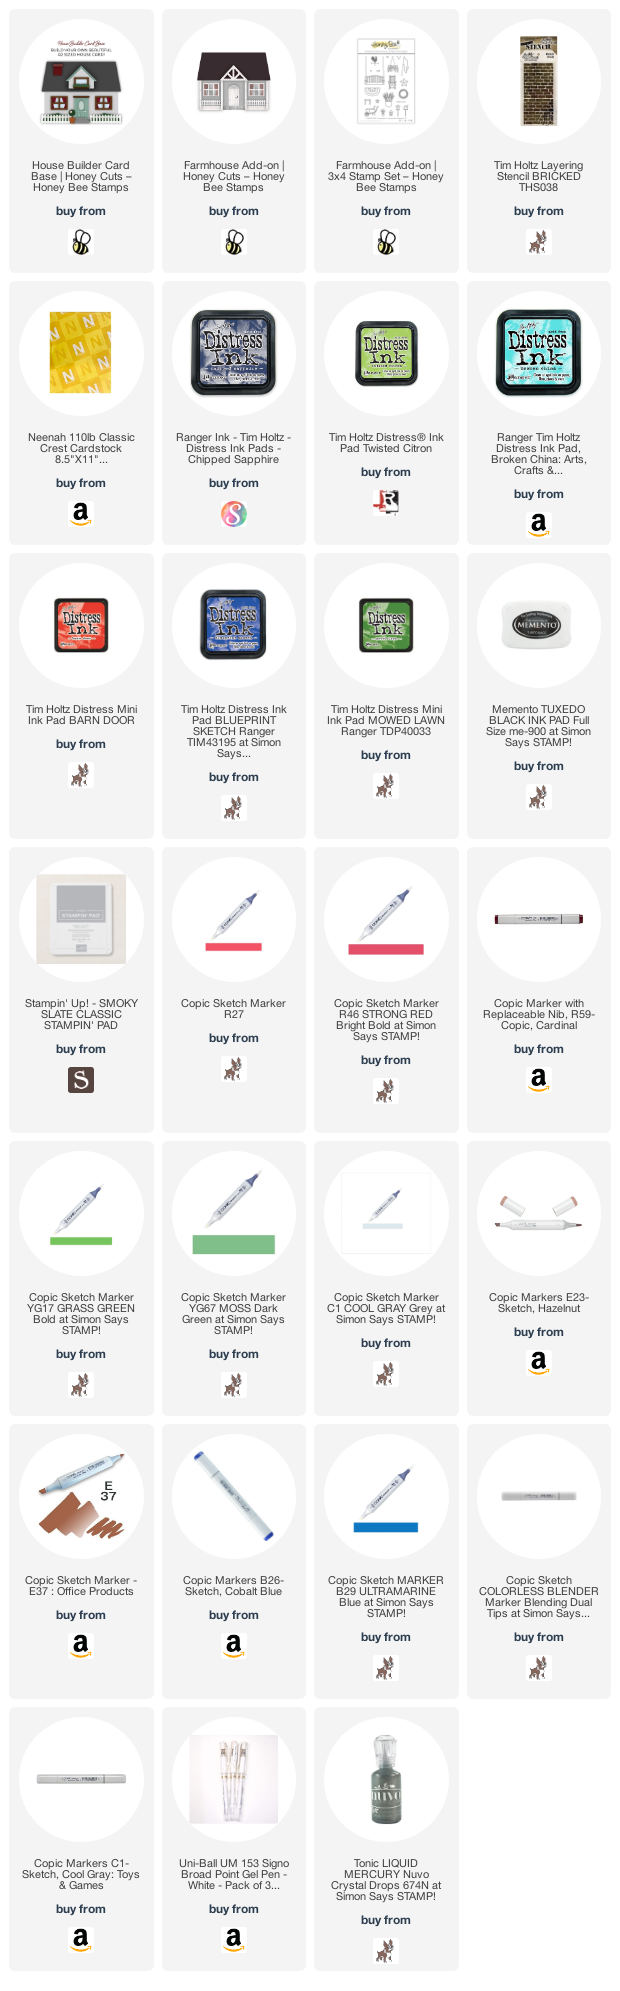

Supplies

Doodlebug Designs Yankee Doodle 6×6 Paper Pad
https://linkdeli.com/widget.js?id=f5e8378456858c916708

Thanks for reading this post. I hope you enjoyed and Iโ€™ve inspired you to give these cute farmhouse card a try for yourself. Leave comments or questions below or feel free to email me.

Father's Day, Holidays 2021, Masculine, Watercolor techniques

Watercolor Father’s Day Shape Card

Hi friends. I’m back with a very easy watercolor card for Father’s Day, using the Honey Bee Stamps Big Pickup Tailgate Stampset. If you are not a great watercolorist and have trouble coloring within the lines (like me), this technique will save you tons of aggravation. It also uses minimal supplies.

I started by stamping the truck image from Honey Bee Stamps Big Pickup Tailgate Stampset with Versamark Ink onto Canson XL Series Watercolor Pad. Then added Gold Embossing Powder over it and heat set it. I also stamped the sentiment on the license plate and “Happy Father’s Day” from the Lawn Fawn HAPPY HAPPY HAPPY Stampset and heat set them with the same embossing powder.

I used my Kuretake GANSAI TAMBI Watercolor Set to color the image. I love these watercolors. theya re very pigmented and produce beautiful colors. But you can easily use dye inks to watercolor as well. Once dry, I diecut the truck with the coordinating dies. I also cut another truck from the Canson XL Series Watercolor Pad for the back of the car as well as a strip measuring 1″ wide x 3/4″ long and scored it at 1/2″. I adhered the strip to the back and front panels of the card to create the card base.

I left the inside of the card blank.


Supplies

https://linkdeli.com/widget.js?id=f5e8378456858c916708

Thanks for reading this post. I hope you enjoyed and Iโ€™ve inspired you to give this easy watercolor card a try for yourself. Leave comments or questions below or feel free to email me.

Celebrations, Hello, Just Because, Love & Friendship

Stretching Your Background Dies featuring Honey Bee Stamps Dies

Hello crafty people. I decided to challenge myself to see how many different ways I can use one background die. I chose the Honey Bee Stamps Plaid A7 Base Cover Plate and Plaid A7 Cover Top Plate which I bought during the holidays but only got to use once. I used it as it was intended for one card, a focal image and an embellishment.

For the first card, I started by cutting a piece of Neenah 110lb Classic Crest Cardstock to 7 x 10″ and scored at 5″ to create the card base. I also diecut the Honey Bee Stamps Plaid A7 Base Cover Plate and Plaid A7 Cover Top Plate and adhered them to the card base.

I stamped the butterflies, sentiment and trails from the Simon Says Stamp Beautiful Day stampset (Unfortunately no longer available but any butterfly stamps will do). I colored the images with Copic Markers. I used R17 + R27, R81 + R83, YR09 + YR16, Y13 + Y18, YG17 + YG45, BG000 + B01, V06 + V09, and B24 + B26.

I don’t have the dies for this stampset so I fussycut the images and sentiment. I adhered the sentiment to the card using Tombow Mono Multi Glue and the butterflies with Stampin’ Dimensionals.

I finished it off by adding Nuvo Drops in Ivory Seashell. I left the inside blank. It was a super easy card to create. The only slightly time consuming thing was coloring the images but that didn’t take that long either. I love how the rainbow butterflies look against the white background!

Dimensions


For the second card, I started by again cutting a piece of Neenah 110lb Classic Crest Cardstock to 7 x 10″ and scored at 5″ to create the card base. I cut a piece of pattern paper from Doodlebug Designs 12 x 12 Milk and Cookies Paper (unavailable) and adhered it to the card base.

I diecut two 2-1/4″ circles from Neenah 110lb Classic Crest Cardstock and one from Vellum. I ran the two white circles through my diecut machine with the Honey Bee Stamps Plaid A7 Base Cover Plate and Plaid A7 Cover Top Plate and adhered all three circles together.

I used Stampin’ Up!’s Coffee Cafe Stamp & Die Bundle (retired) and Stampin’ Up!’s Fruit Basket stampset (retired) and Itty BItty Fruit Punch Pack (retired). I diecut the cup, the cupcake wrapper, two whipped creams and label from Neenah 110lb Classic Crest Cardstock, the lid from Vellum and the straw from pattern paper (Echo Park Spring Dots andSTRIPES 6 x 6 Paper Pad-discontinued).

I inked the cup with Tim Holtz SPUN SUGAR and PICKED RASPBERRY Distress Ink and the cupcake wrapper with GROUND ESPRESSO Distress Ink and I added some colore around the edges of the cupckae label with Catherine Pooler Lime Rickey Ink. I added shading to whipped cream with Copic Marker C1 + 0 and R81 and 0 and some sprinkles with the Ground Espresso Distress Marker.

I stamped the ince cubes from the Stampin’ Up! Coffee Cafe Stampset with Memento Tuxedo Black Ink onto Neenah 110lb Classic Crest Cardstock, colored with R81, BG000 + 0 Copic Markers and cut with the coodinating dies. I stamped the strawberries from Stampin’ Up!’s Fruit Basket stampset (retired) with Catherine Pooler Lime Rickey Ink and Catherine Pooler Samba Ink onto Neenah 110lb Classic Crest Cardstock and Itty BItty Fruit Punch Pack (retired) to punch them out.

I stamped the sentiment from Honey Bee Shake-It-Off Stamp Set (unavailable) onto Neenah 110lb Classic Crest Cardstock with Catherine Pooler Lime Rickey Ink and fussycut it out.

I finished it off by adding Ranger GLOSSY ACCENTS Glue Dimensional Adhesive to the ice cubes. I left the inside blank.

Dimensions


For the third card, I used the Honey Bee Stamps Donut Card Die (retired) with Catherine Pooler Sand Dunes 8-1/2 x 11″ Cardstock (unavailable) to create the card base. I used Lawn Fawn Guava 8-1/2 x 11″ Cardstock to diecut the icing and then diecut a another donut piece with Neenah 110lb Classic Crest Cardstock 8.5 X 11″ then used the Honey Bee Stamps Plaid A7 Base Cover to turn that donut shape into the donut glaze. I inked the edges of all the donut pieces using Tim Holtz Vintage Photo Distress Ink and adhered them.

I diecut the sentiment from Stampin’ Up!’s Early Espresso 8-1/2″ X 11″ Cardstock using Honey Bee Stamps Donut Worry Dies (recently retired). You can also use the Donut Worry 4×4 Stamp Set (retiring soon). I diecut the sentiment shadow from Catherine Pooler Sand Dunes 8-1/2 x 11″ Cardstock (unavailable) added Tim Holtz Vintage Photo Distress Ink and adhered them to the card.

On the inside of the card, I diecut another sentiment using the Honey Bee Stamps Donut Worry Dies (recently retired) from Neenah 110lb Classic Crest Cardstock 8.5 X 11″ and adhered it to the card.


Supplies

https://linkdeli.com/widget.js?id=f5e8378456858c916708

Thanks for reading this post. I hope you enjoyed and Iโ€™ve inspired you to take a look at your background dies/coverplates and use them in other ways. If you want to share you creations with me tag me on instagram @kittieslovecrafting. Leave comments or questions below or feel free to email me.

Birthdays, Celebrations, Masculine, Watercolor techniques

Creating Feminine and Masculine Watercolor Cards Using One Stampset

Hi friends. I’m back with some more cute cards using the Honey Bee Stamps Big Pickup Cab Stampset. Do you have stampsets that you think won’t work for both feminine and masculine cards?!? Try changing the color. It worked great for these birthday cards.

I started by stamping the truck image from Honey Bee Stamps Big Pickup Cab Stampset with Catherine Pooler Designs Midnight Ink onto Canson XL Series Watercolor Pad. Then added Clear Embossing Powder over it and heat set it. Next I used Tim Holtz Spun Sugar Distress Ink and Picked Raspberry Distress Ink for the truck, Mustard Seed Distress Ink for the headlights, Pumice Stone and Black Soot Distress Inks for the tires and metal items, and Tumbled Glass Distress Ink for the windshield.

Once dry, I stamped the sentiment on the hood with Catherine Pooler Designs Midnight Ink and diecut the truck with the coordinating dies. I also cut another truck from the Canson XL Series Watercolor Pad for the back of the car as well as a strip measuring 1″ wide x 3/4″ long and scored it at 1/2″. I adhered the strip to the back and front panels of the card to create the card base.


For the second card, I followed the same procedure except I used Catherine Pooler Designs Suede Shoes and Eucalyptus Inks for the truck, Catherine Pooler Designs Chiffon Ink for the headlights, Stampin’ Up! Smoky Slate and Catherine Pooler Designs Black Jack Ink for the tires and metal items, and Catherine Pooler Designs Hot Tub Ink for the windshield.

And that completes these cards. They are pretty easy to make. The watercoloring is a little time consuming but I find it cathartic. If it’s not your thing, use your favorite coloring tools instead.

I left the inside of the cards blank.


Supplies

https://linkdeli.com/widget.js?id=f5e8378456858c916708

Thanks for reading this post. I hope you enjoyed and Iโ€™ve inspired you to give these watercolor cards a try for yourself. Leave comments or questions below or feel free to email me.

Love & Friendship, Valentine's Day

Big Pickup Tailgate Valentine’s Day Card featuring Honey Bee Stamps Tailgate Alphabet Dies

Hi friends. Here’s another cute Valentine’s Day Card using the Honey Bee Stamps Big Pickup Tailgate Stampset and Honey Bee Stamps Tailgate Alphabet Dies.

I started by cutting a piece of Stampin’ Up! Real Red 8.5 X 11″ Cardstock to 6-1/2 x 10″ and scored at 5″ to create a card base and a piece of pattern paper from my stash to 5 x 6″ which I adhered to the card base. I stamped the truck from the Honey Bee Stamps Big Pickup Tailgate Stampset onto Neenah 110lb Classic Crest Cardstock 8.5 X 11″ with Memento Tuxedo Black Ink as well as two extra truck bed images.

I colored the images with Copic Markers and die cut it with the coordinating dies. I used N1, N2, N5, N7 and 0 (for the cab); N1, N2, and N5 (for the truck bed); N2, N5, and N7 (for the bumper and underside); Y11, and Y18 (for the headlights) and BG000 and 0 (for the windows); R81 and R83 (license plate); C7, C9 and 100 (for the wheels). I adhered the truck to the card, adding 3M Foam Tape to the extra pieces of the truck bed.

I diecut the sentiment from Stampin’ Up! Real Red 8.5 X 11″ Cardstock with the Honey Bee Stamps Tailgate Alphabet Dies and adhered it to the card. To finish off the card, I added 3 red hearts, White Pin Stripe Love From Lizi Peel-offs, White Nuvo Gloss Drops and Glossy Accents to the headlights.

On the inside of the card, I cut a piece of Neenah 110lb Classic Crest Cardstock 8.5 X 11″ to 4-3/4 x 6-3/8″ and adhered it to the card. I stamped a sentiment from Honey Bee Stamps Big Pickup Cab Stampset with Memento Tuxedo Black Ink and added another red heart.

Dimensions


Supplies

https://linkdeli.com/widget.js?id=f5e8378456858c916708

Thanks for reading this post. I hope you enjoyed and Iโ€™ve inspired you to give this card a try for yourself. Leave comments or questions below or feel free to email me.

Holidays 2021, Love & Friendship, Valentine's Day

Truck Shaped Valentine’s Day Card featuring Honey Bee Stamps

Hi friends. This cute little pickup truck is from Honey Bee Stamps Big Pickup Tailgate Stampset. And it is adorable! I love this stampset. I loved it so much I also purchased the Big Pickup Cab Stampset and Dies as well as the Tailgate Alphabet Dies!!! This stamp set alone gives you lots of options to make a variety of cards. I made mine into a truck shaped card which is so much fun!

I started by stamping the truck image from Honey Bee Stamps Big Tailgate Stampset with Memento Tuxedo Black Ink onto Neenah 110lb Classic Crest Cardstock 8.5 X 11″ and die cutting it with the coordinating die set. I also cut a second truck (no stamping) for the back of the card. I stamped ‘Hot Rod’ on the license plate and stamped a second version of the truck bed and a sentiment on it and used the die to cut just the back piece. This dieset allows you to cut three different components of the truck bed which allows for so many more fun options.

I colored the truck using Copic Markers. I used R17 + R27 + R59 (for the truck bed); R17 + R23 (for the back of the bed truck with sentiment); Y02 + Y13 (for the headlights); BG000 + 0 blender for the windows; C3 + C5 + C7 (for the metal components); and R81 + R83 (for the license plate). I adhered the sentiment piece using 3M Foam Tape. To finish it off, I added some highlights using a Uni-Ball Signo Broad Point White Gel Pen.

On the inside of the card, I stamped a sentiment from Lawn Fawn Happy Happy Happy Add-On Stampset with Stampin’ Up! Real Red Ink.


Supplies

https://linkdeli.com/widget.js?id=f5e8378456858c916708

Thanks for reading this post. I hope you enjoyed and Iโ€™ve inspired you to give this card a try for yourself. Leave comments or questions below or feel free to email me.

Love & Friendship, Slimline

Using Only Dies to Make A Slimline Valentine’s Day Card

Hi friends. Need a quick and easy card for Valentine’s Day??? This card uses only dies and paper and came together very quickly. Here’s how it came together.

I started by cutting a piece of Neenah 110lb Classic Crest Cardstock 8.5 X 11″ to 7 x 8-1/2″ and scored a at 3-1/2″. I used the Honey Bee Stamps Slimline Thin Frames Dies and Stampin’ Up!’s Poppy Parade 8-1/2 x 11″ Cardstock and a pink cardstock from Hunkydory Matt-tastic Adorable Scorable Core Colourways Collection to cut out the frames. This die is cool because it cuts all 14 frames at the same time so I just had to run it through two times. I adhered used the five largest frames to the card base, alternating colors. I cut a piece of the Neenah 110lb Classic Crest Cardstock 8.5 X 11″ to 2-1/4 x 7-1/4 and embossed it with the Craftwell Delicate Dots 8.5 X 11″ Embossing Folder, and adhered to the front of the card.

For my sentiment I diecut the word ‘LOVE’ from Simon Says Stamp 6 x 6 Red Glitter Cardstock using the Honey Bee Bee Bold Alphabet Dies as well as from Neenah 110lb Classic Crest Cardstock 8.5 X 11″ two times and adhered those stacked to the card. To finish it off, I added two small hearts which I cut out using a heart punch from Stampin’ Up!’s Poppy Parade 8-1/2 x 11″ Cardstock.

On the inside of the card, I stamped a sentiment from Lawn Fawn Happy Happy Happy Add-On Stampset with Stampin’ Up! Poppy Parade Ink and added another punched heart.

Dimensions


Supplies

https://linkdeli.com/widget.js?id=f5e8378456858c916708

Thanks for reading this post. I hope you enjoyed and Iโ€™ve inspired you to give this card a try for yourself. Leave comments or questions below or feel free to email me.

Christmas, Fall

Gingerbread House Card featuring Honey Bee Stamps

Do you love decorating gingerbread houses but don’t like the mess? Fear not I have the perfect craft for you! This gingerbread house features Honey Bee Stamps Gingerbread House Add-On Stamps and Dieset. Combine it with the House Builder Card Dieset to make tons of cute house cards for all occasions.

For this card, I started by diecutting the house card base 2x with the House Builder Card Dies, chimney (from Honey Cuts Gingerbread House Add-on), and one gable from Lawn Fawn Paper Bag 8-1/2 x 11″ Cardstock, the roof, 2 scalloped windows, the scallop door frame, the round gable window and snow for roof and chimney from Neenah 110lb Classic Crest Cardstock 8.5 X 11″, the door from Simon Says Stamp Surf Blue 8-1/2 x 11″ Cardstock. I inked around the edges of all those pieces with Gathered Twigs Distress Ink. I wanted to make the gingerbread and frosting look more like real so using the ink especially around the “cookie” pieces helps give it dimension.

I adhered the two houses with the pre-scored strip that comes in the House Builder Card Base Dies to create the card base. Be sure to use double-sided tape or something very strong so they don’t come apart. Then stenciled a brick pattern on the front of the card using Gathered Twigs Distress Ink and Tim Holtz Bricked Layering Stencil. I diecut small rectangle window frame from the House Builder Card Dieset with Simon Says Stamp Schoolhouse Red 110lb 8-1/2 x 11″ Cardstock and the window and door inside pieces from Neenah 110lb Classic Crest Cardstock 8.5 X 11″ using the circle and rectangle dies from Honey Cuts Gingerbread House Add-on and the House Builder Card Base Dies and inked with Tim Holtz Mustard Seed Distress Ink Pads.

I adhered the roof, windows, gable the scallop door frame, the round gable window and snow and door to the card.

I used Stampin’ Up! Old Olive 8-1/2″ X 11″ Cardstock for trees, wreath and some gumdrops, Simon Says Stamp Schoolhouse Red 110lb 8-1/2 x 11″ Cardstock for some gumdrops, the wreath bow, and berries on wreath, Simon Says Stamp Surf Blue 8-1/2 x 11″ Cardstock for gumdrops, Neenah Classic Crest, 80lb Solar White for all the peppermints and two candy canes (which I colored with Tim Holtz Festive Berries Distress Marker), Stampin’ Up Chocolate Chip 8-1/2″ X 11″ Cardstock (discontinued) for the chocolate kisses and the tree trunks (which I stamped with the tree trunk stamp from Gingerbread House Add-On Stamps and Gathered Twigs Distress Ink), and a gold metallic paper for the door knob, diecut with the House Builder Card Base Dies. I also stamped two lollipops from the Gingerbread House Add-On Stamps and Memento Tuxedo Black Ink onto Neenah Classic Crest, 80lb Solar White and colored them with Tumbled Glass and Peeled Paint Distress Markers.

Once adhered to the card, I added sparkle to the snow on the roof, chimney and gumdrops with a Spectrum Noir CLEAR OVERLAY Sparkle Pen, some “snow” with Nuvo Crystal Drops in Gloss White and white higlights with Uni-Ball Signo Broad Point White Gel Pen.

On the inside of the card, I stamped a sentiment from the Lawn Fawn Happy Happy Happy Add-On Stamps.

Dimensions


Supplies

https://linkdeli.com/widget.js?id=f5e8378456858c916708

Thanks for reading this post. I hope you enjoyed and Iโ€™ve inspired you to give these watercolored cards a try for yourself. Leave comments or questions below or feel free to email me.

Autumn, Birthdays, Fall, Fall, Thanksgiving

2 cards Using One Stampset and Easy Watercolor Backgrounds

Hello friends. Do you need some last minute Fall or Thanksgiving cards or perhaps a Birthday card?? The Honey Bee Stamps Treat Yo Self 6×6 Stamp Set is great for such cards! I created very simple watercolor backgrounds using one color of distress ink. These cards also use minimal supplies. And while I used my Copics and added shadowing and highlights to the images, you can color them flat and make it simpler. They would still look great!

For my first card, I started by cutting a piece of Neenah 110lb Classic Crest Cardstock 8.5 X 11″ to 5-1/2 x 8-1/2″ and scored at 4-1/4 to create the card base. I cut a piece of Strathmore 300 Series Bristol Smooth Paper to 4 x 5-1/4″. I used Ranger Tim Holtz Broken China Distress Ink to watercolor the background and added splatters using Tim Holtz GROUND ESPRESSO Distress Paint and set it aside to dry.

I stamped the images from the Treat Yo Self 6×6 Stamp Set with Memento Tuxedo Black Ink onto a piece of Neenah 110lb Classic Crest Cardstock 8.5 X 11″, colored them with Copic Markers and die cut them with the coordinating Honey Cuts Treat Yo Self Dies. I used Y18 + YR04 + YR09 and YG03 + YG05 + G07 for the pumpkins; E25 + E29 + E49 (chocolate syrup), BG10 + 0 (lid), YG03 + YG05 + G07 (cup), N2 + 0 and YR04 + YR09 (straw) on the cup; and YR00 + YR14 + Y04 + Y09 (filling), N1 + 0 (whipped cream), E33 + E25 + E29 (crust and coffee beans/nuts) for the pie.

I adhered the watercolored panel to the card base using wet glue and the images using wet glue and Stampin’ Dimensionals. I die cut the ‘Autumn’ word and the largest shadow using the Honey Bee Autumn Buzzword Dies. I used Stampin’ Up! Tangerine Tango 8-1/2 x 11″ Cardstock (retired) for the word and Simon Says Stamp Vellum for the shadow. I stamped a sentiment from the Honey Bee Autumn Buzzword Stamp Set onto a piece of Neenah 110lb Classic Crest Cardstock 8.5 X 11″ with Ground Espresso Distress Oxide Ink and cut it down to 3/8 x 1-3/4″. I adhered all the sentiment pieces to the card using wet glue. To finish off the card I added highlights using a Uni-Ball Signo Broad Point White Gel Pen, shimmer to the ‘Autumn’ buzzword with Spectrum Noir Clear Overlay Sparkle Pen, and added Ranger Glossy Accents to the lid.

The inside of the card was left blank.

Dimensions


For my second card, I started by cutting a piece of Neenah 110lb Classic Crest Cardstock 8.5 X 11″ to 5-1/2 x 8-1/2″ and scored at 4-1/4 to create the card base. I cut a piece of Strathmore 300 Series Bristol Smooth Paper to 4 x 5-1/4″. I used Ranger Tim Holtz Peeled Paint Distress Ink and Tim Holtz Crushed Olive Distress Ink to watercolor the background and added splatters using Tim Holtz GROUND ESPRESSO Distress Paint and set it aside to dry.

I stamped the images from the Treat Yo Self 6×6 Stamp Set with Memento Tuxedo Black Ink onto a piece of Neenah 110lb Classic Crest Cardstock 8.5 X 11″, colored them with Copic Markers and die cut them with the coordinating Honey Cuts Treat Yo Self Dies. I used BG11 + BG15 (mug), N2 + 0 (whipped cream), E37 + E29 + E49 (chocolate frosting), and RV10 + R83 (flower); E15 + E37 + E29 (crust and beans/nuts), N2 + 0 (whipped cream), R81 + R83 + R85 (filling) for the pie slice; E37 + E29 + E49 for the beans; and R83 + RV10 (frosting), E37 + E29 (cake), R17 + R27 + R29 (ribbon) and N2 + 0 (popsicle stick) for the cake pop.

I adhered the watercolored panel to the card base using wet glue and the images using wet glue and Stampin’ Dimensionals. I stamped a sentiment from the Treat Yo Self 6×6 Stamp Set onto a piece of Neenah 110lb Classic Crest Cardstock 8.5 X 11″ with Ground Espresso Distress Oxide Ink and die cut it with the coordinating Honey Cuts Treat Yo Self Dies. I adhered the the sentiment to the card using Stampin’ Dimensionals. To finish off the card I added Nuvo Sea Breeze Jewel Drops.

On the inside of the card, I stamped a sentiment from Lawn Fawn Village Shops and the cake pop from Treat Yo Self 6×6 Stamp Set with Ground Espresso Distress Oxide Ink. And that completes this card.

Dimensions


Supplies

https://linkdeli.com/widget.js?id=f5e8378456858c916708

Thanks for reading this post. I hope you enjoyed and Iโ€™ve inspired you to give these watercolored cards a try for yourself. Leave comments or questions below or feel free to email me.

Birthdays, Celebrations

Creating a Coffee Themed Birthday Gatefold Card featuring Honey Bee Stamps

Honey Bee Stamp’s new release includes this many coffee themed items so of course I was all in! I’ve seen many people stack the images from the Treat Yo Self 6×6 Stamp Set to create their cards so I thought how fun would it be to make a gatefold card with stacked coffee treats. What I really love about this stampset is how large the images are. And of course, Honey Bee Stamps also release sentiment stamps and dies to go with this coffee collection. What could be better I ask?!?! I won’t be using those on this card but stay tuned because there will be more cards coming using this collection.

I started by cutting a piece of Montval Acid-Free Cold Press Watercolor Paper to 5-1/2 x 11-1/2″ and scored at 4″ and 8-1/2″ on the long side. I used watercolor paper instead of my traditional Neenah 110lb because distress inks blend beautifully on it. More on that later…

I used Tim Holtz Distress Ink in Vintage Photo and Ground Espresso to ink up the left flap on the card, creating an ombre effect. Then I stamped all the coffee beans from the Treat Yo Self 6×6 Stamp Set with Ground Espresso Distress Oxide Ink. Then I cut a piece of Stampin’ Up!’s Irresistibly Yours DSP (discontinued) to 3 x 5-1/2″ and used Tim Holtz Distress Ink in Broken China and Vintage Photo to create another ombre, revealing the embossed areas on these papers and adhered it to the card. Stampin’ up needs to bring these papers back because they are great for easy backgrounds and you can color them with anything you want.

I stamped four images from the Treat Yo Self 6×6 Stamp Set with Memento Tuxedo Black Ink onto a piece of Neenah 110lb Classic Crest Cardstock 8.5 X 11″. I colored them with COPICS markers. I used R32 + R37, G07 + G09, C1 + 0, BG000 + 0 and E37 + E27 for the first cup; BG000 + BG01, G07 + G09, and C1 + 0 for the second cup; R32 + R37, E37 + E29, C1 + 0 and BG01 for the third cup; and E23 + E37, R30, R32 + R37, E23 + E29 and C1 + 0 for the pie. I diecut them using the Treat Yo Self coordinating dies.

I adhered the three coffee cups to the card and trimmed off the excess of the card flap. I stamped a sentiment from the Treat Yo Self 6×6 Stamp Set with Tim Holtz’s Picked Raspberry Distress Oxide Ink and cut it with the coordinating die. I added it to the card with some Stampin’ Dimensionals. I finished it by adding Love from Lizi Pin Stripe Peel-Off Stickers in Brown Mirror to the right panel and some Fresh Brewed Sequin Mix to the front of the card.

On the inside of the card, I stamped a sentiment from Lawn Fawn Village Shops and coffee beans from Treat Yo Self 6×6 Stamp Set with Ground Espresso Distress Oxide Ink and added the pie image. And that completes this card.

Dimensions


Supplies

https://linkdeli.com/widget.js?id=f5e8378456858c916708

Thanks for reading this post. I hope you enjoyed and Iโ€™ve inspired you to give this card a try for yourself. Leave comments or questions below or feel free to email me.