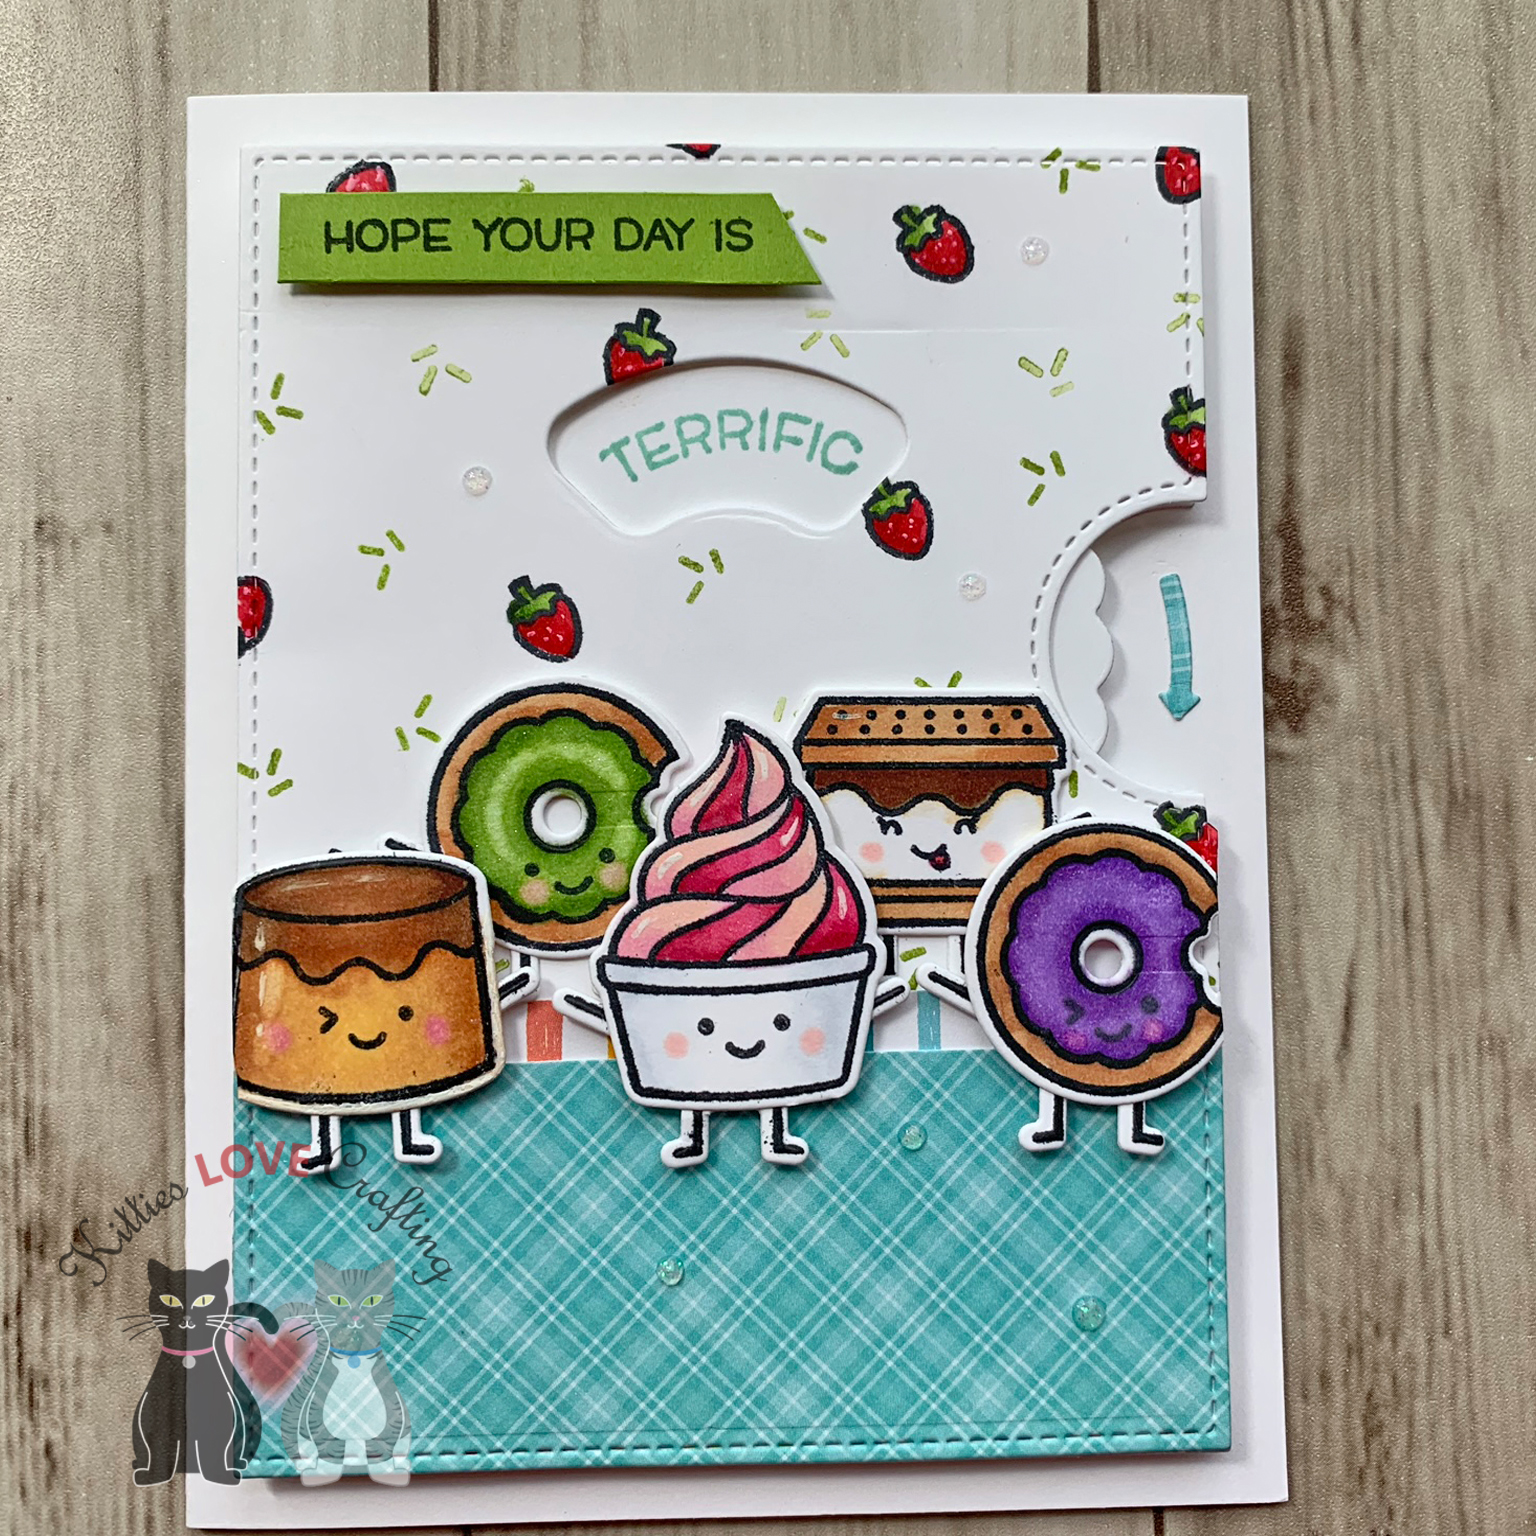
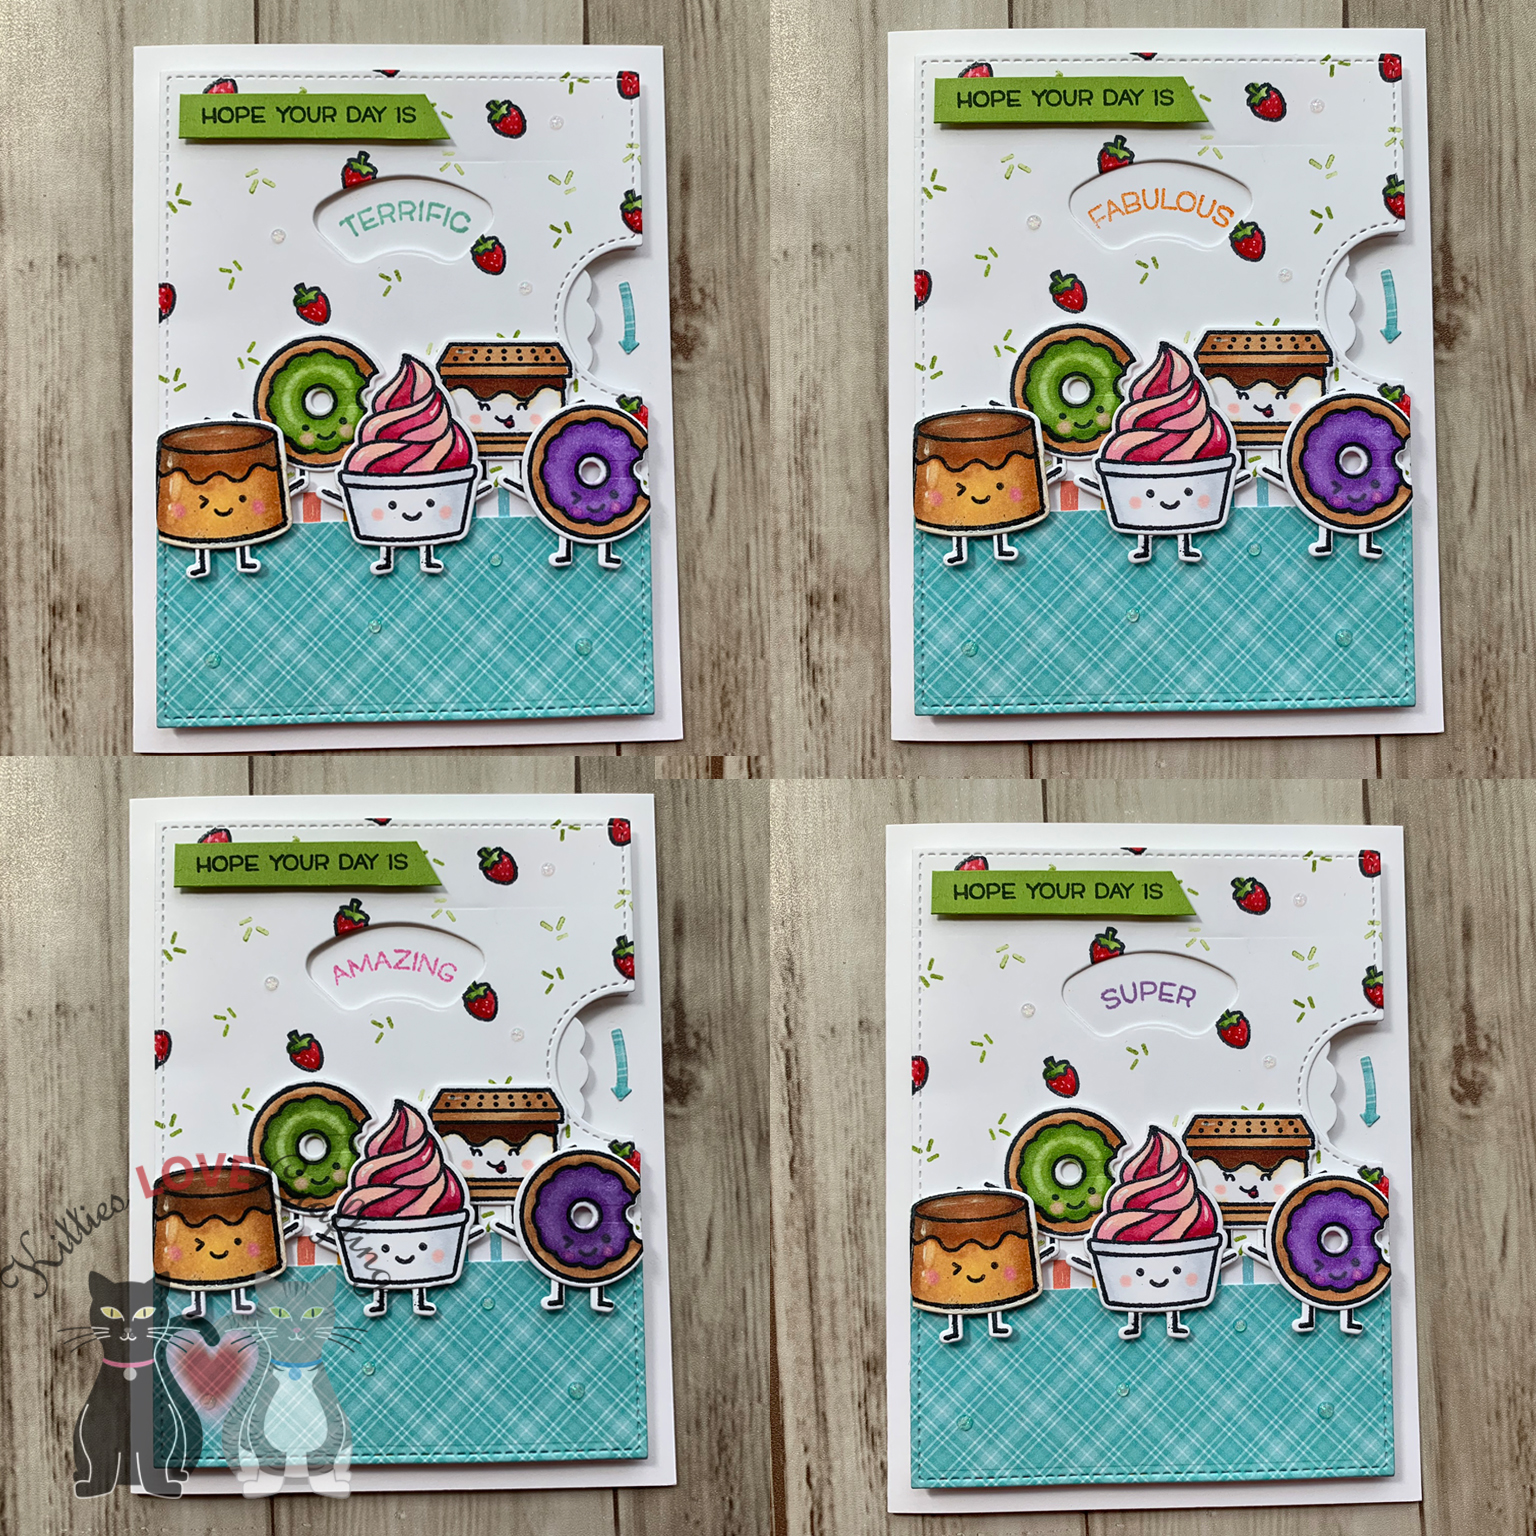
Hello friends. This fun A2 size interactive birthday card features the Lawn Fawn Reveal Wheel dies and Lawn Fawn Sweet Friends. It’s a cute interactive card. Four words In the rotating window complete the sentiment. This card is available for purchase in my Etsy shop.
Hope you’ve enjoyed this process post and I hope I’ve inspired you to create some cards of your own. Thanks for stopping by and once again please leave questions in the comments or feel free to email me if you prefer.
Hello friends. To celebrate the new Lawn Fawn’s Reveal Wheel add-on products, I made this little interactive birthday card. I love the Reveal Wheel dies. They are awesome! They make it super easy to make cute and fun cards and Lawn Fawn keeps making new dies and stampsets to go along with it.
Ok let’s get to the card making! After all that’s why you are all here. I began by cutting out all the Reveal Wheel pieces (including the ice cream cone frame with the LF Reveal Wheel Sweetest Flavor Add-on) out of Neenah Solar White 110lb Cardstock. It’s a good idea to use heavy cardstock; it gives the wheel more stability. The last thing you want is the wheel to bend while the recipient is playing with their card. Ugh! You need to cut out two panels (one with the cutout window and one without – this will be your back piece).
TIP: Make sure to use a water- based ink if using alcohol markers and an archival ink for water-based mediums such as pencils (if using gamsol), water-based markers or watercolors.
I let the ink dry and colored the images as well as colored the ice cream cone frame. Then diecut the stamped images using the coordinating dies. I also fussy cut the cone off of one of the ice cream cones and the ice cream cone frame. While those dried, I stamped the sentiment onto Stampin’ Up! Vellum and cut itdown to 11/16 x 3 3/4”.
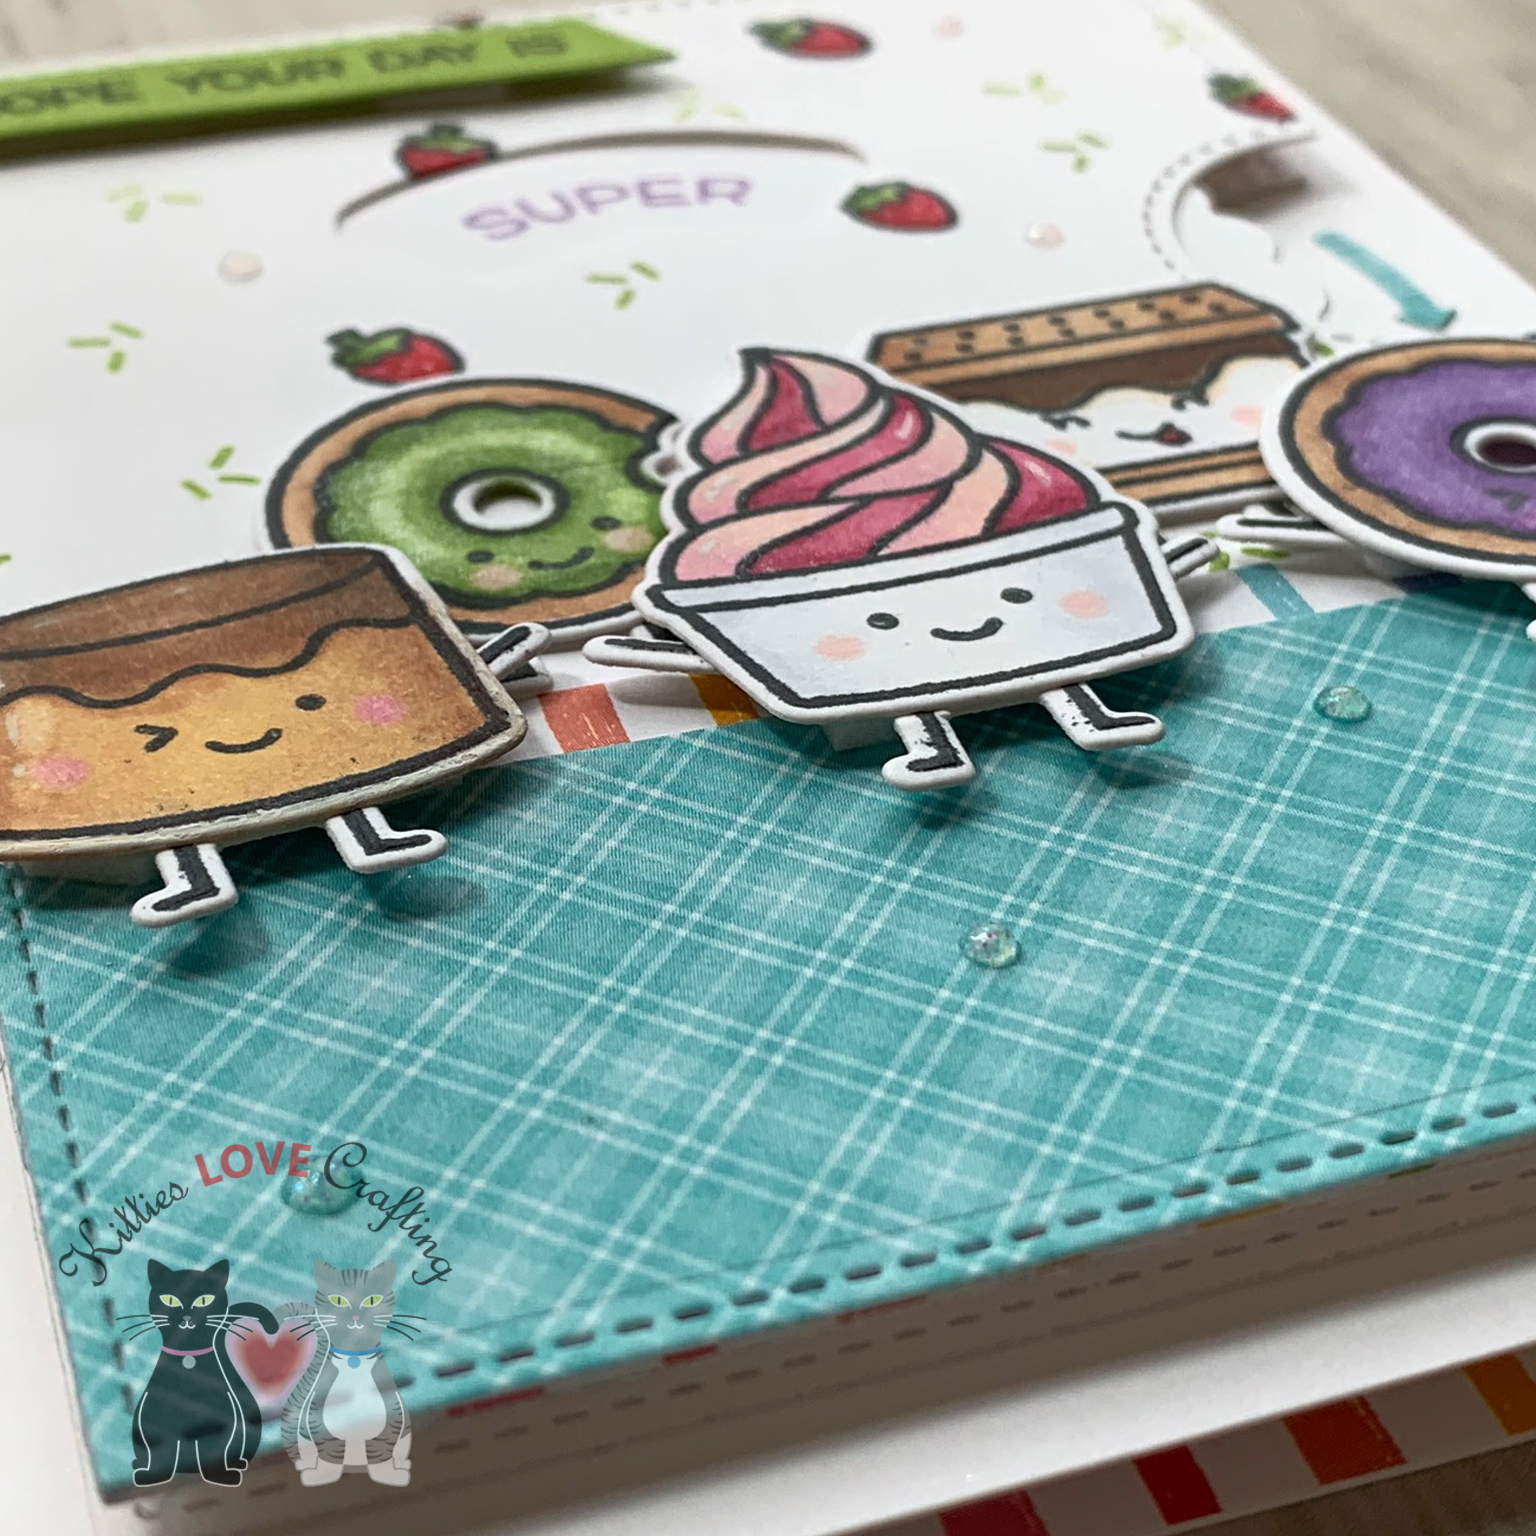
Time to work on the Wheel itself. I colored the Wheel the same color as the middle ice cream scoop using my Prismacolor pencils and Gamsol. I stamped the faces from both Lawn Fawn Sweetest Flavor andLawn Fawn Sweet Friends around the wheel. Ok. All that’s left to do is assemble this little card. Attached the little Wheel to the larger one with a tiny brad, added 3 Stampin’ Dimensionals behind the tiny wheel and it to the back card panel. Added the black one, behind that and glued it all to the card base. Next I added the ice cream, sentiment strip and little tiny arrow to the card. Embellished with some Nuvodrops in a few different colors and it’s all done. And always make sure your card is fully functional by playing with it. LOL.
Hope you’ve enjoyed this process post and I hope I’ve inspired you to create some cards of your own. Thanks for stopping by and once again please leave questions in the comments or feel free to email me if you prefer.
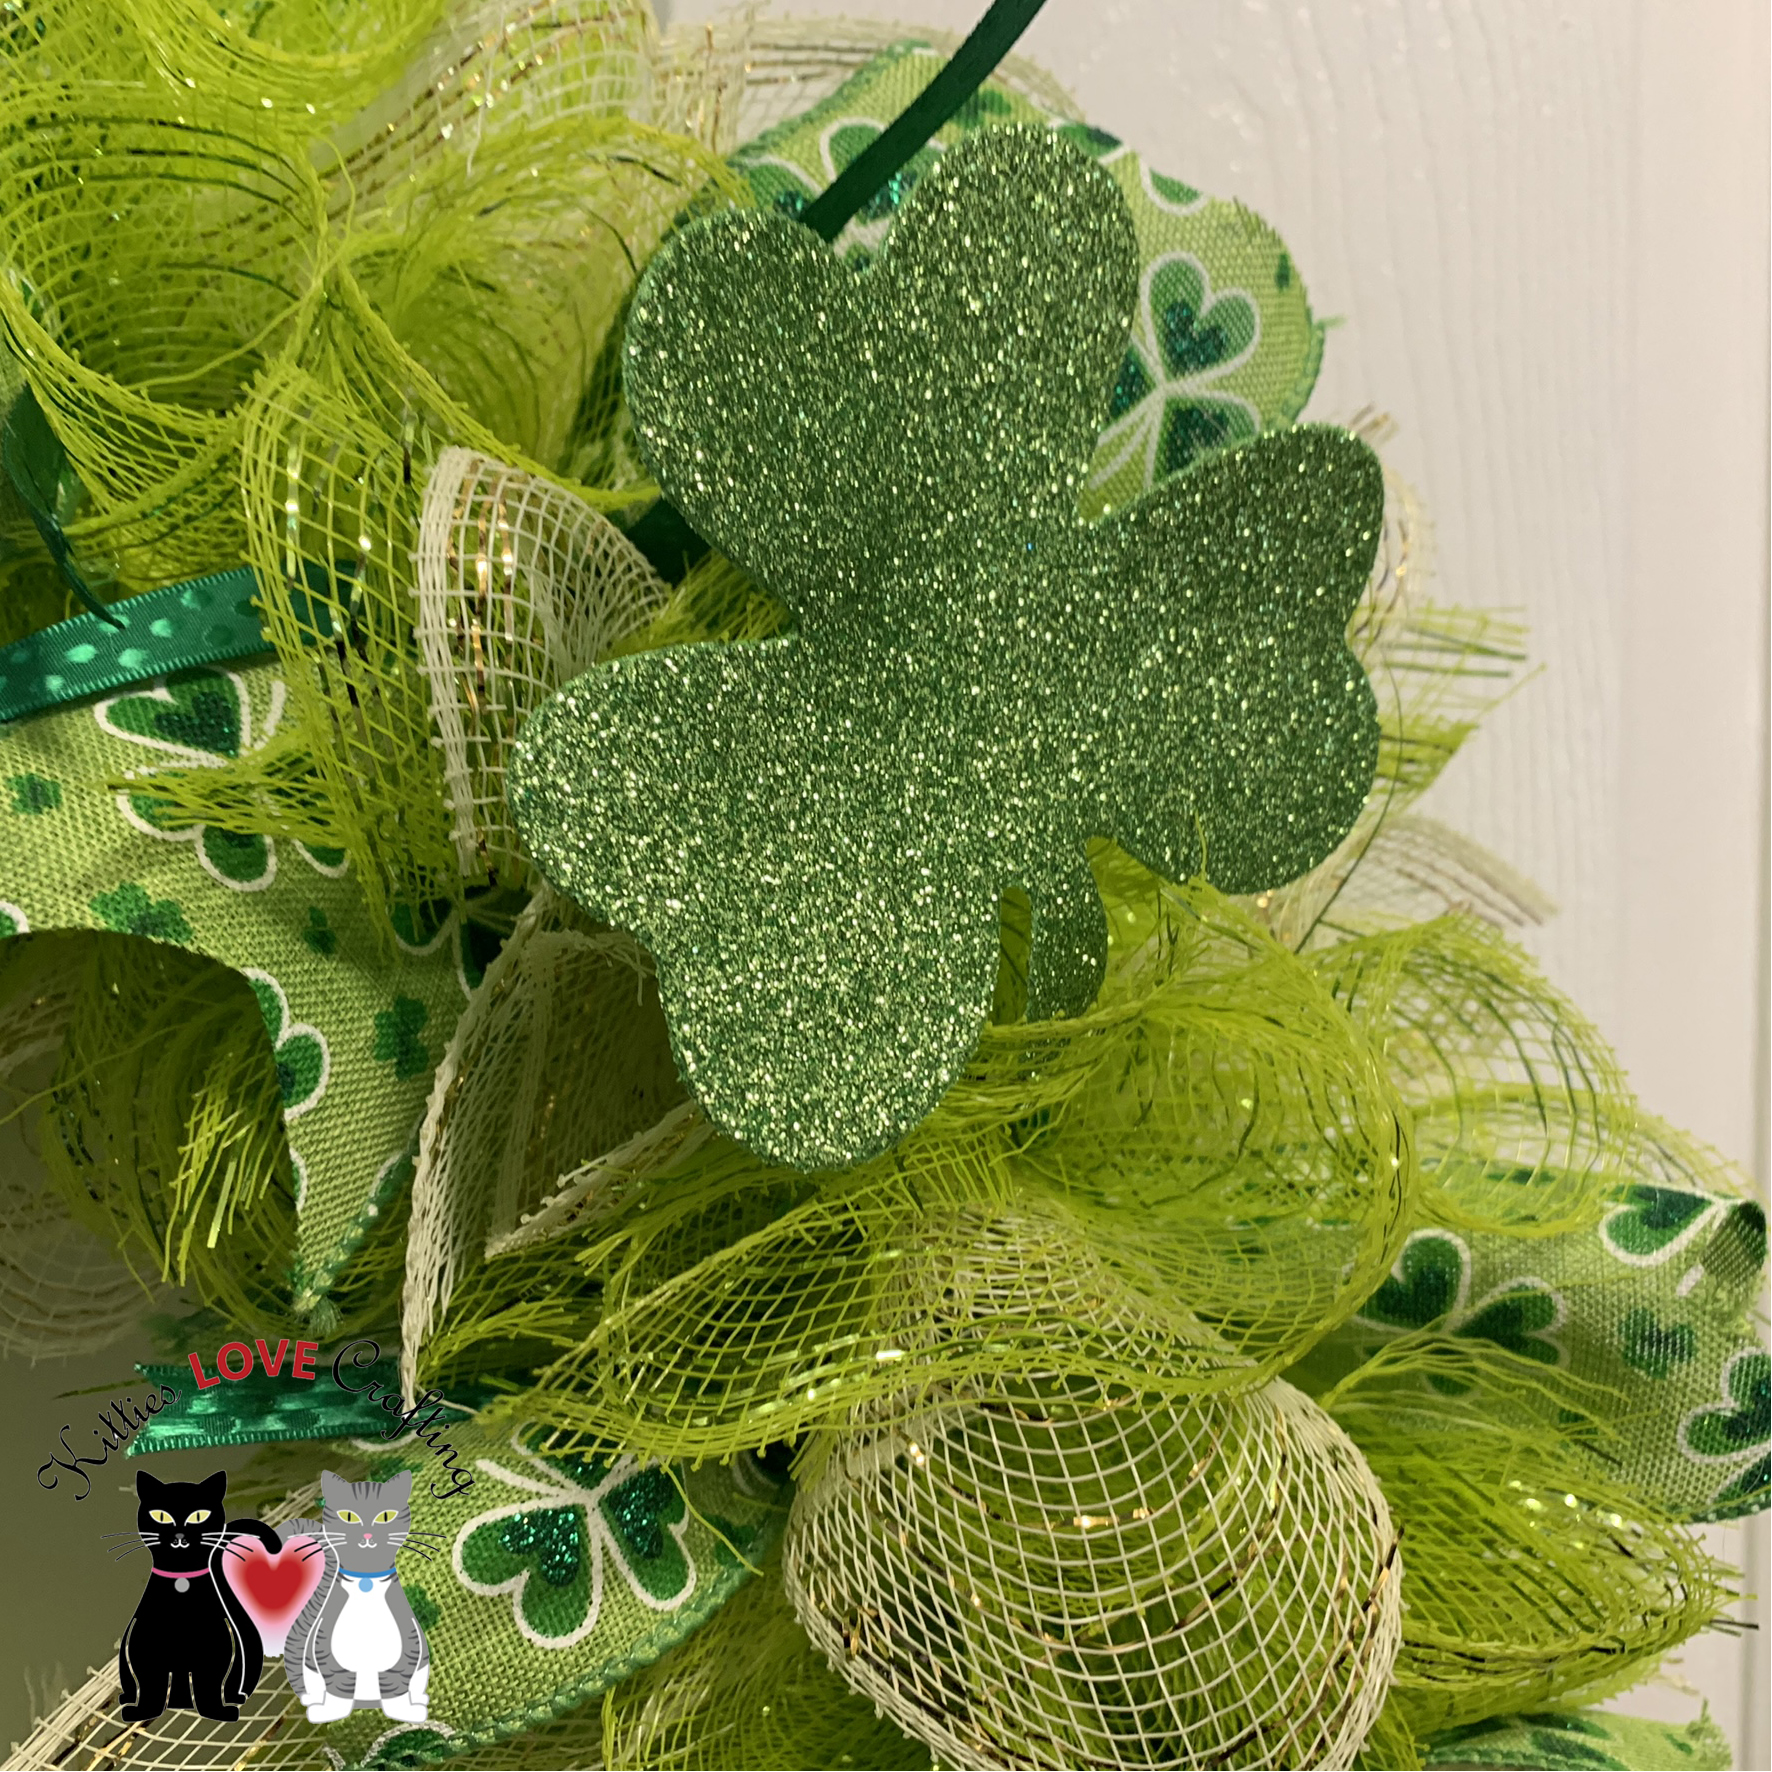
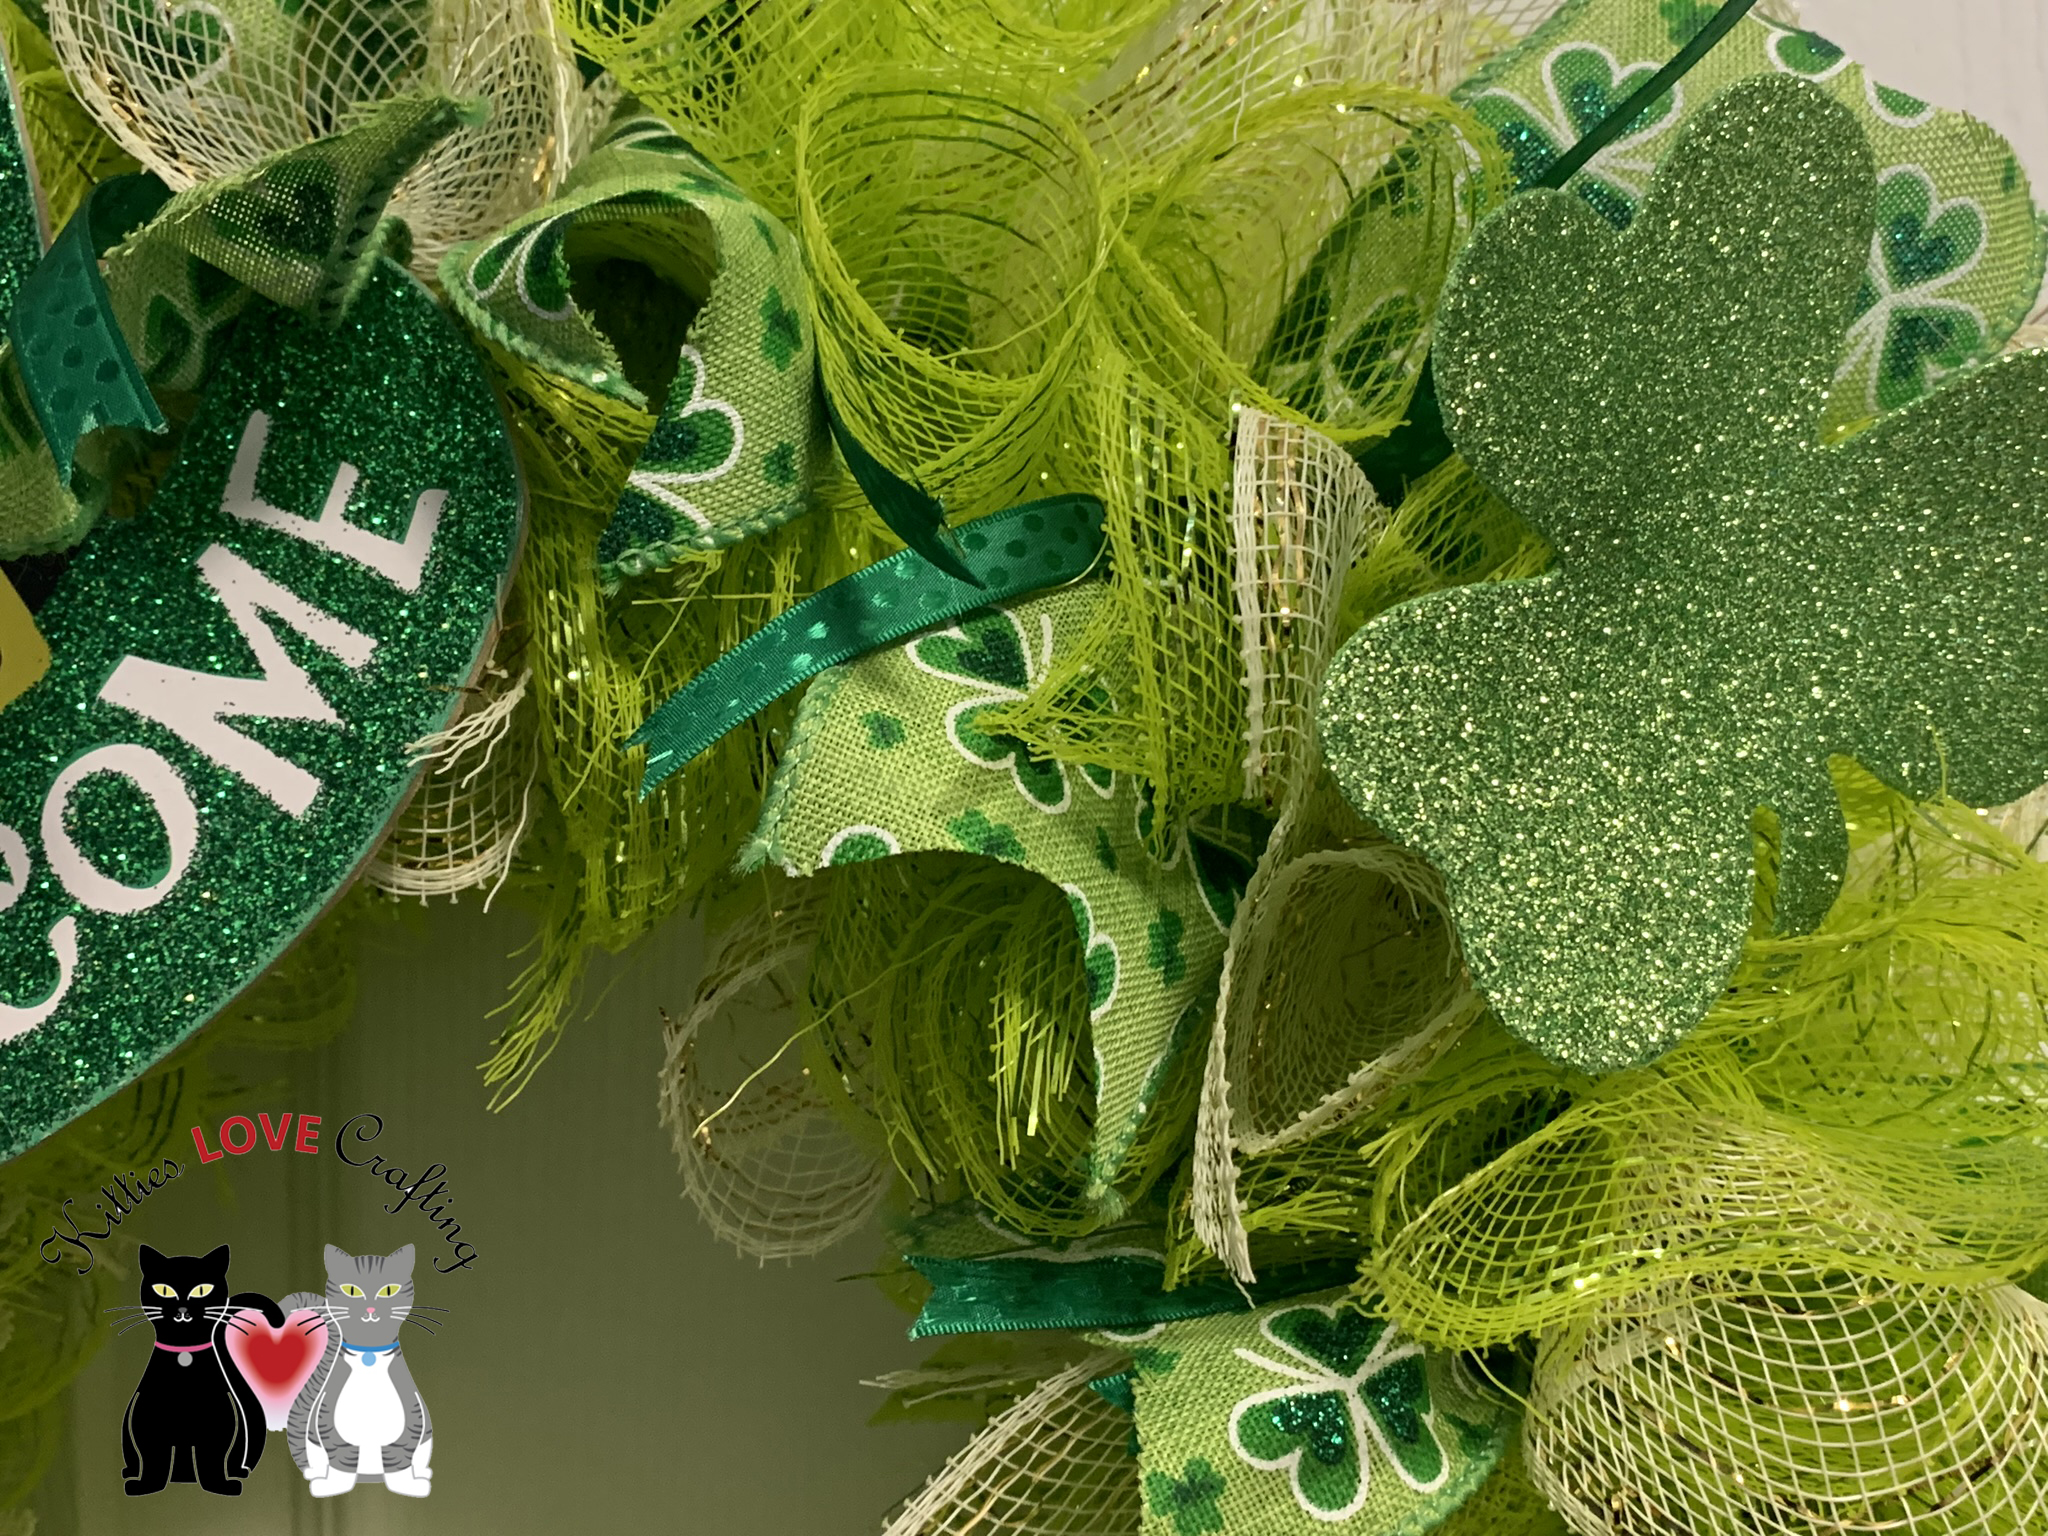
Happy Friday everyone. I don’t know about you but we are starting to get ready for spring in my house. And with Spring comes green…and lots of it. So let’s start it off by celebrating St. Patrick’s Day! My husband is Irish and so I like to put up decorations for the holiday. Since I don’t have one yet, I made a wreath for the front door. My neighbors must think I’m crazy about holidays or just plain crazy because I’ve had a different wreath and welcome mat for every holiday since we moved in last September. LOL
St. Patrick’s Day WreathSt. Patrick’s Day Wreath_Hat DetailSt. Patrick’s Day Wreath_closeupSt. Patrick’s Day Wreath_ closeup 2St. Patrick’s Day Wreath_closeup 3St. Patrick’s Day Wreath_closeup 4
Supplies:
Mesh – Dollar Tree 6-inch long deco mesh in lime green and white with gold metallic (3 rolls each color)
Embellishments – Glitter Leprechaun Hat (dollar tree), Glitter foam shamrocks (dollar tree or Michaels – you can find them in the St. Patrick’s Day section)
Thanks for stopping by to check out my post. Please feel free to leave questions or comments about any of the products listed above or feel free to email me if you prefer.
Hello everyone. I’ve always loved been making wreaths. I started making them when I lived in my small NY apartment and could not keep alot of decorations. A wreath has the ability to capture a holiday, a season, a theme or occasion in a small space. I had to put my passion on hold for awhile due to lack of space (apartment living, arrgh). Now that I have space to store and make them, it’s reignited my love of wreath-making. Look for more wreaths to come in the future!
I have never made one before so, of course, I turned to Youtube. Where else do you learn how to do everything in life, right? You can learn to change a tire, put on makeup and make a wreath all in one day. LOL. I came across this very funny Youtuber, This Southern Girl Can who makes them. She’s pretty much got it down to a science at this point. She uses dollar store supplies to make budget friendly wreaths. Check her out her Youtube channel.
Step 2. A) Cut mesh pieces that are approximately 6 inches in length. This will give you 6 x 6 squares. Alternatively, just roll each piece of mesh over itself so it makes one full loop. Cut ribbon 9 inches long (this is 1.5 times the length of the mesh pieces). B) Also cut your chenille stems (pipe cleaners) in half and then fold those pieces in half again.
Step 3. Take 3 pieces of mesh and 1 piece of ribbon. Roll mesh into coils (rolls). Hold each between your Index and 3rd fingers while you roll the other 2 pieces and pinch all together. Add ribbon with pattern side out away from your finger, then tie with a chenille stem piece. Twist once or twice to secure.
Step 4. A) Now add this bundle to your wreath form by feeding the chenille stem ends through the middle two wires on the wreath form. (see picture Step 4A). B) Continue adding bundles until you fill the whole form. I used 10 bundles per section. A section consists of the space between the 2 vertical wire pieces There are 6 sections so you will use 60 bundles when complete (you can see the sections in picture 4A).
Valentine’s Day Mesh Wreath_FinalValentine’s Day Mesh Wreath_Closeup
Supplies:
Mesh – Dollar Tree 6-inch long mesh in red and white(3 rolls each color)
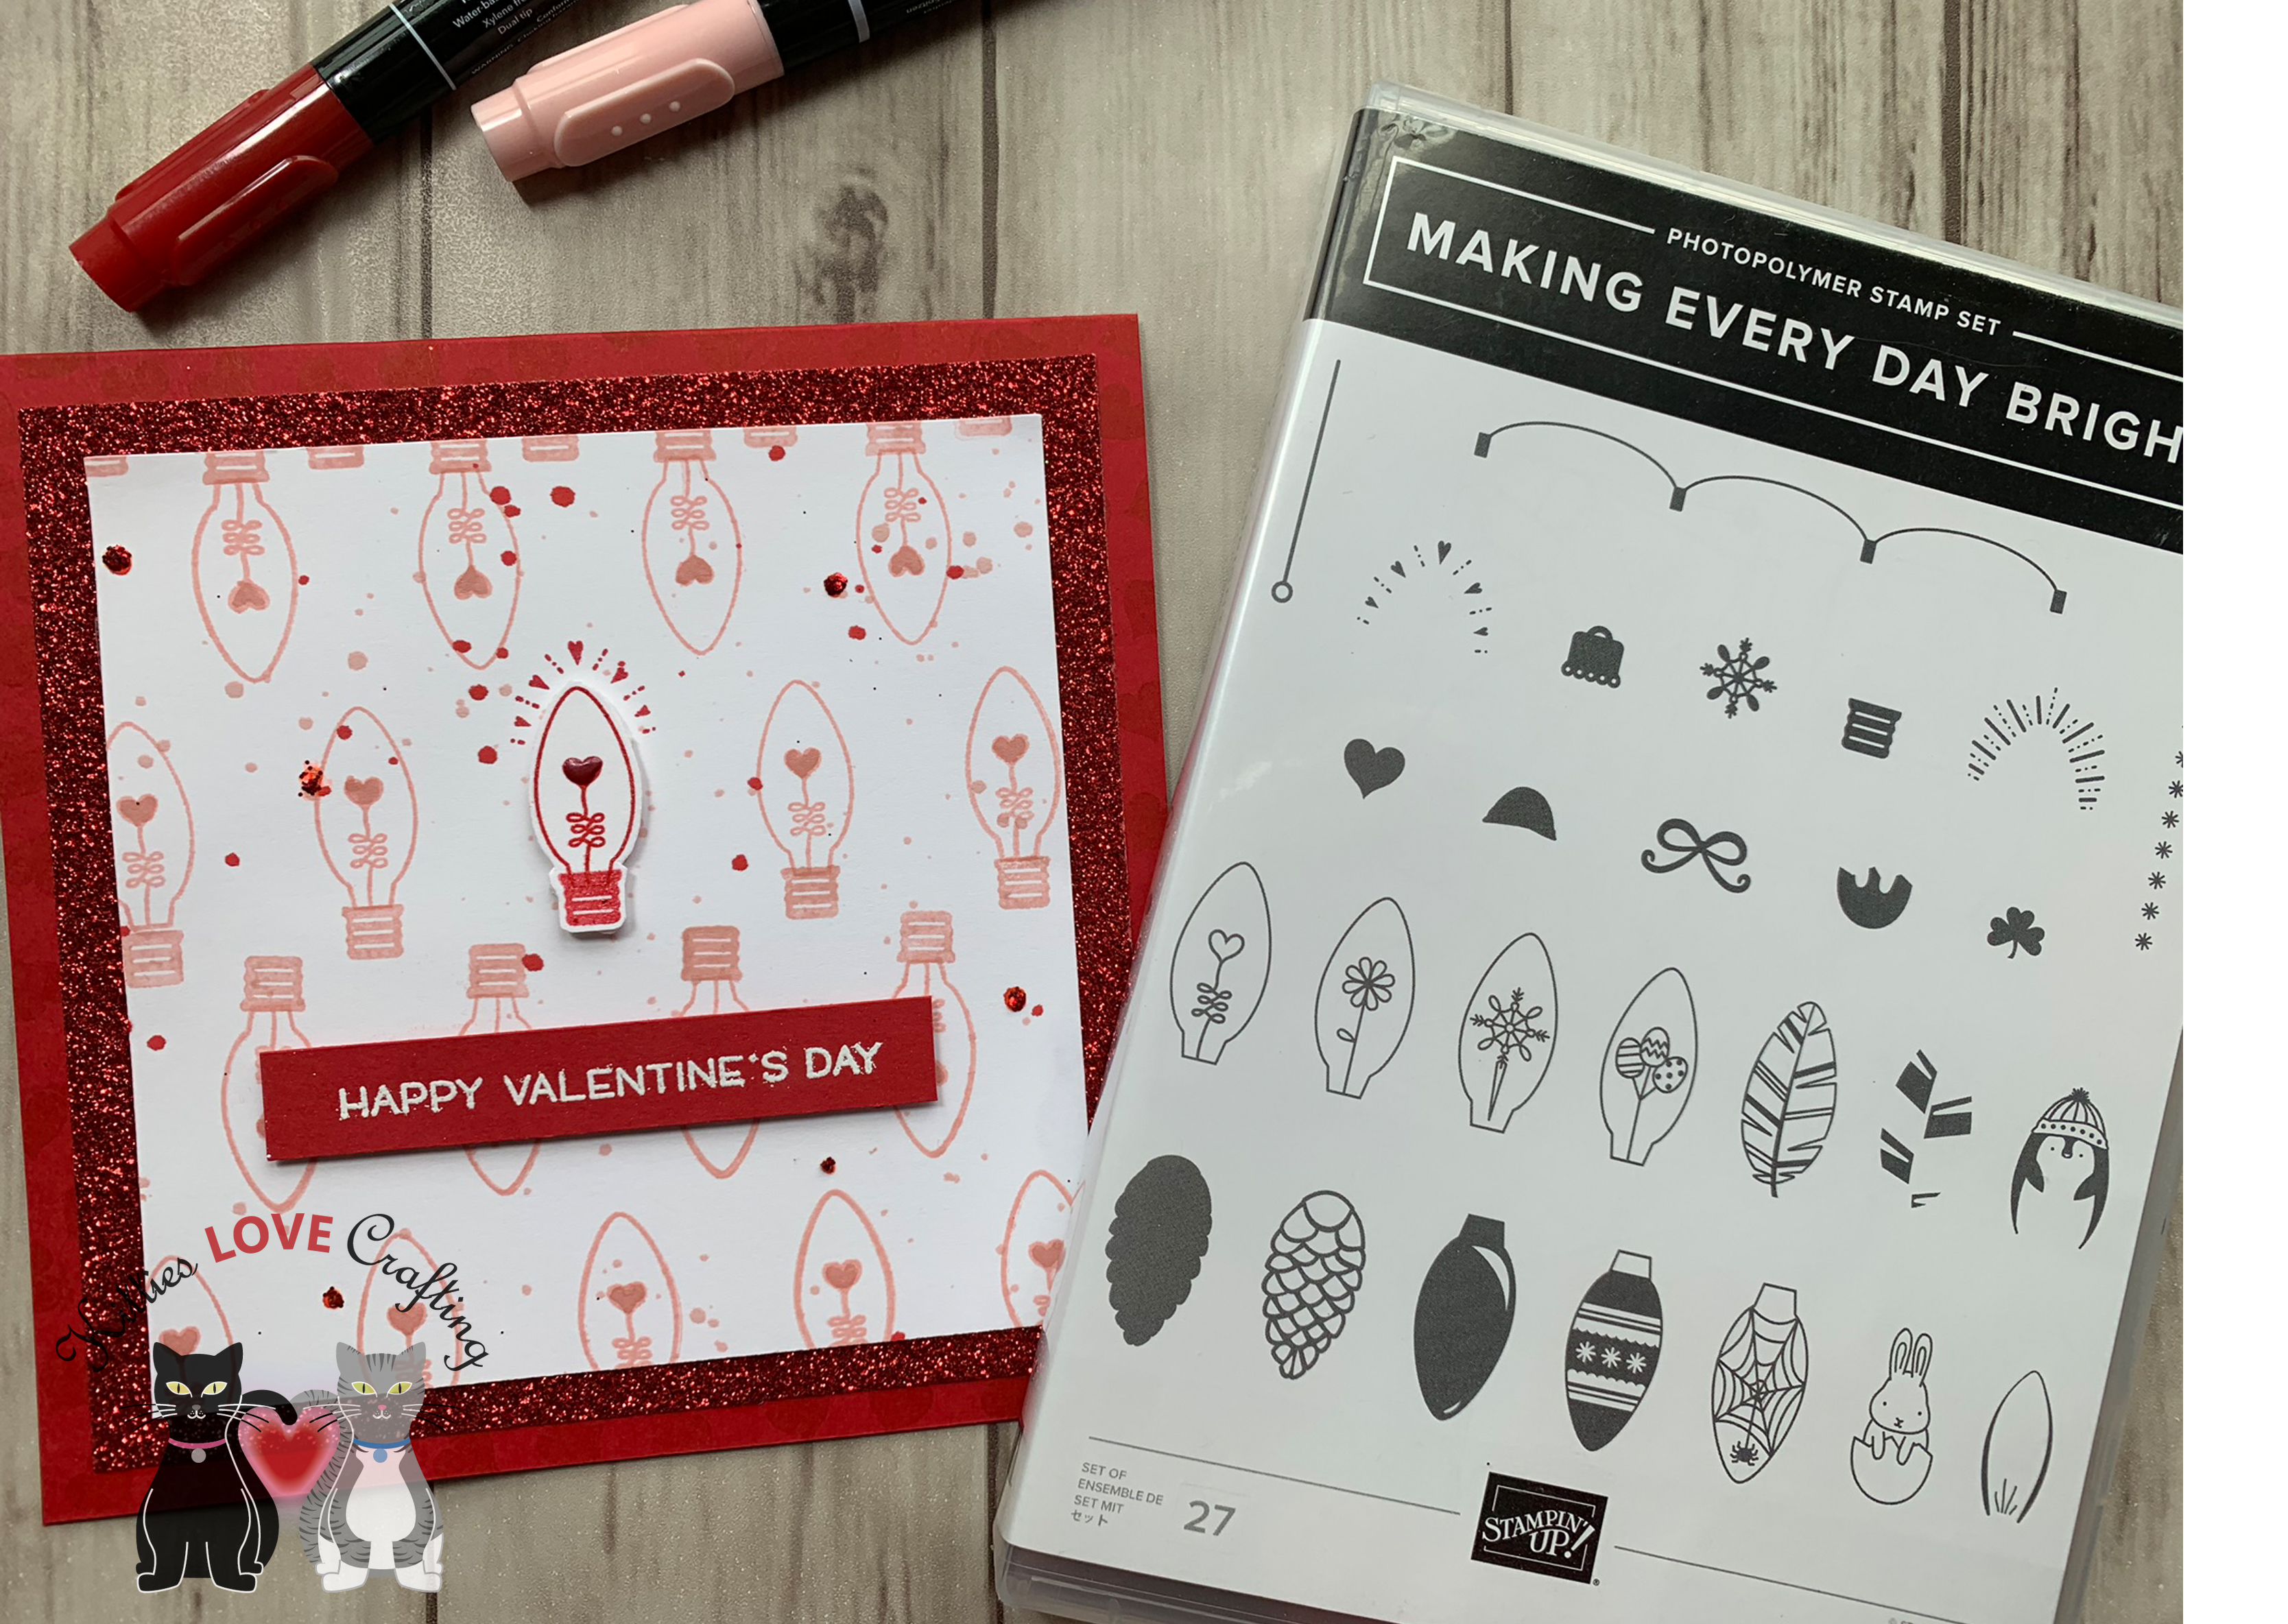
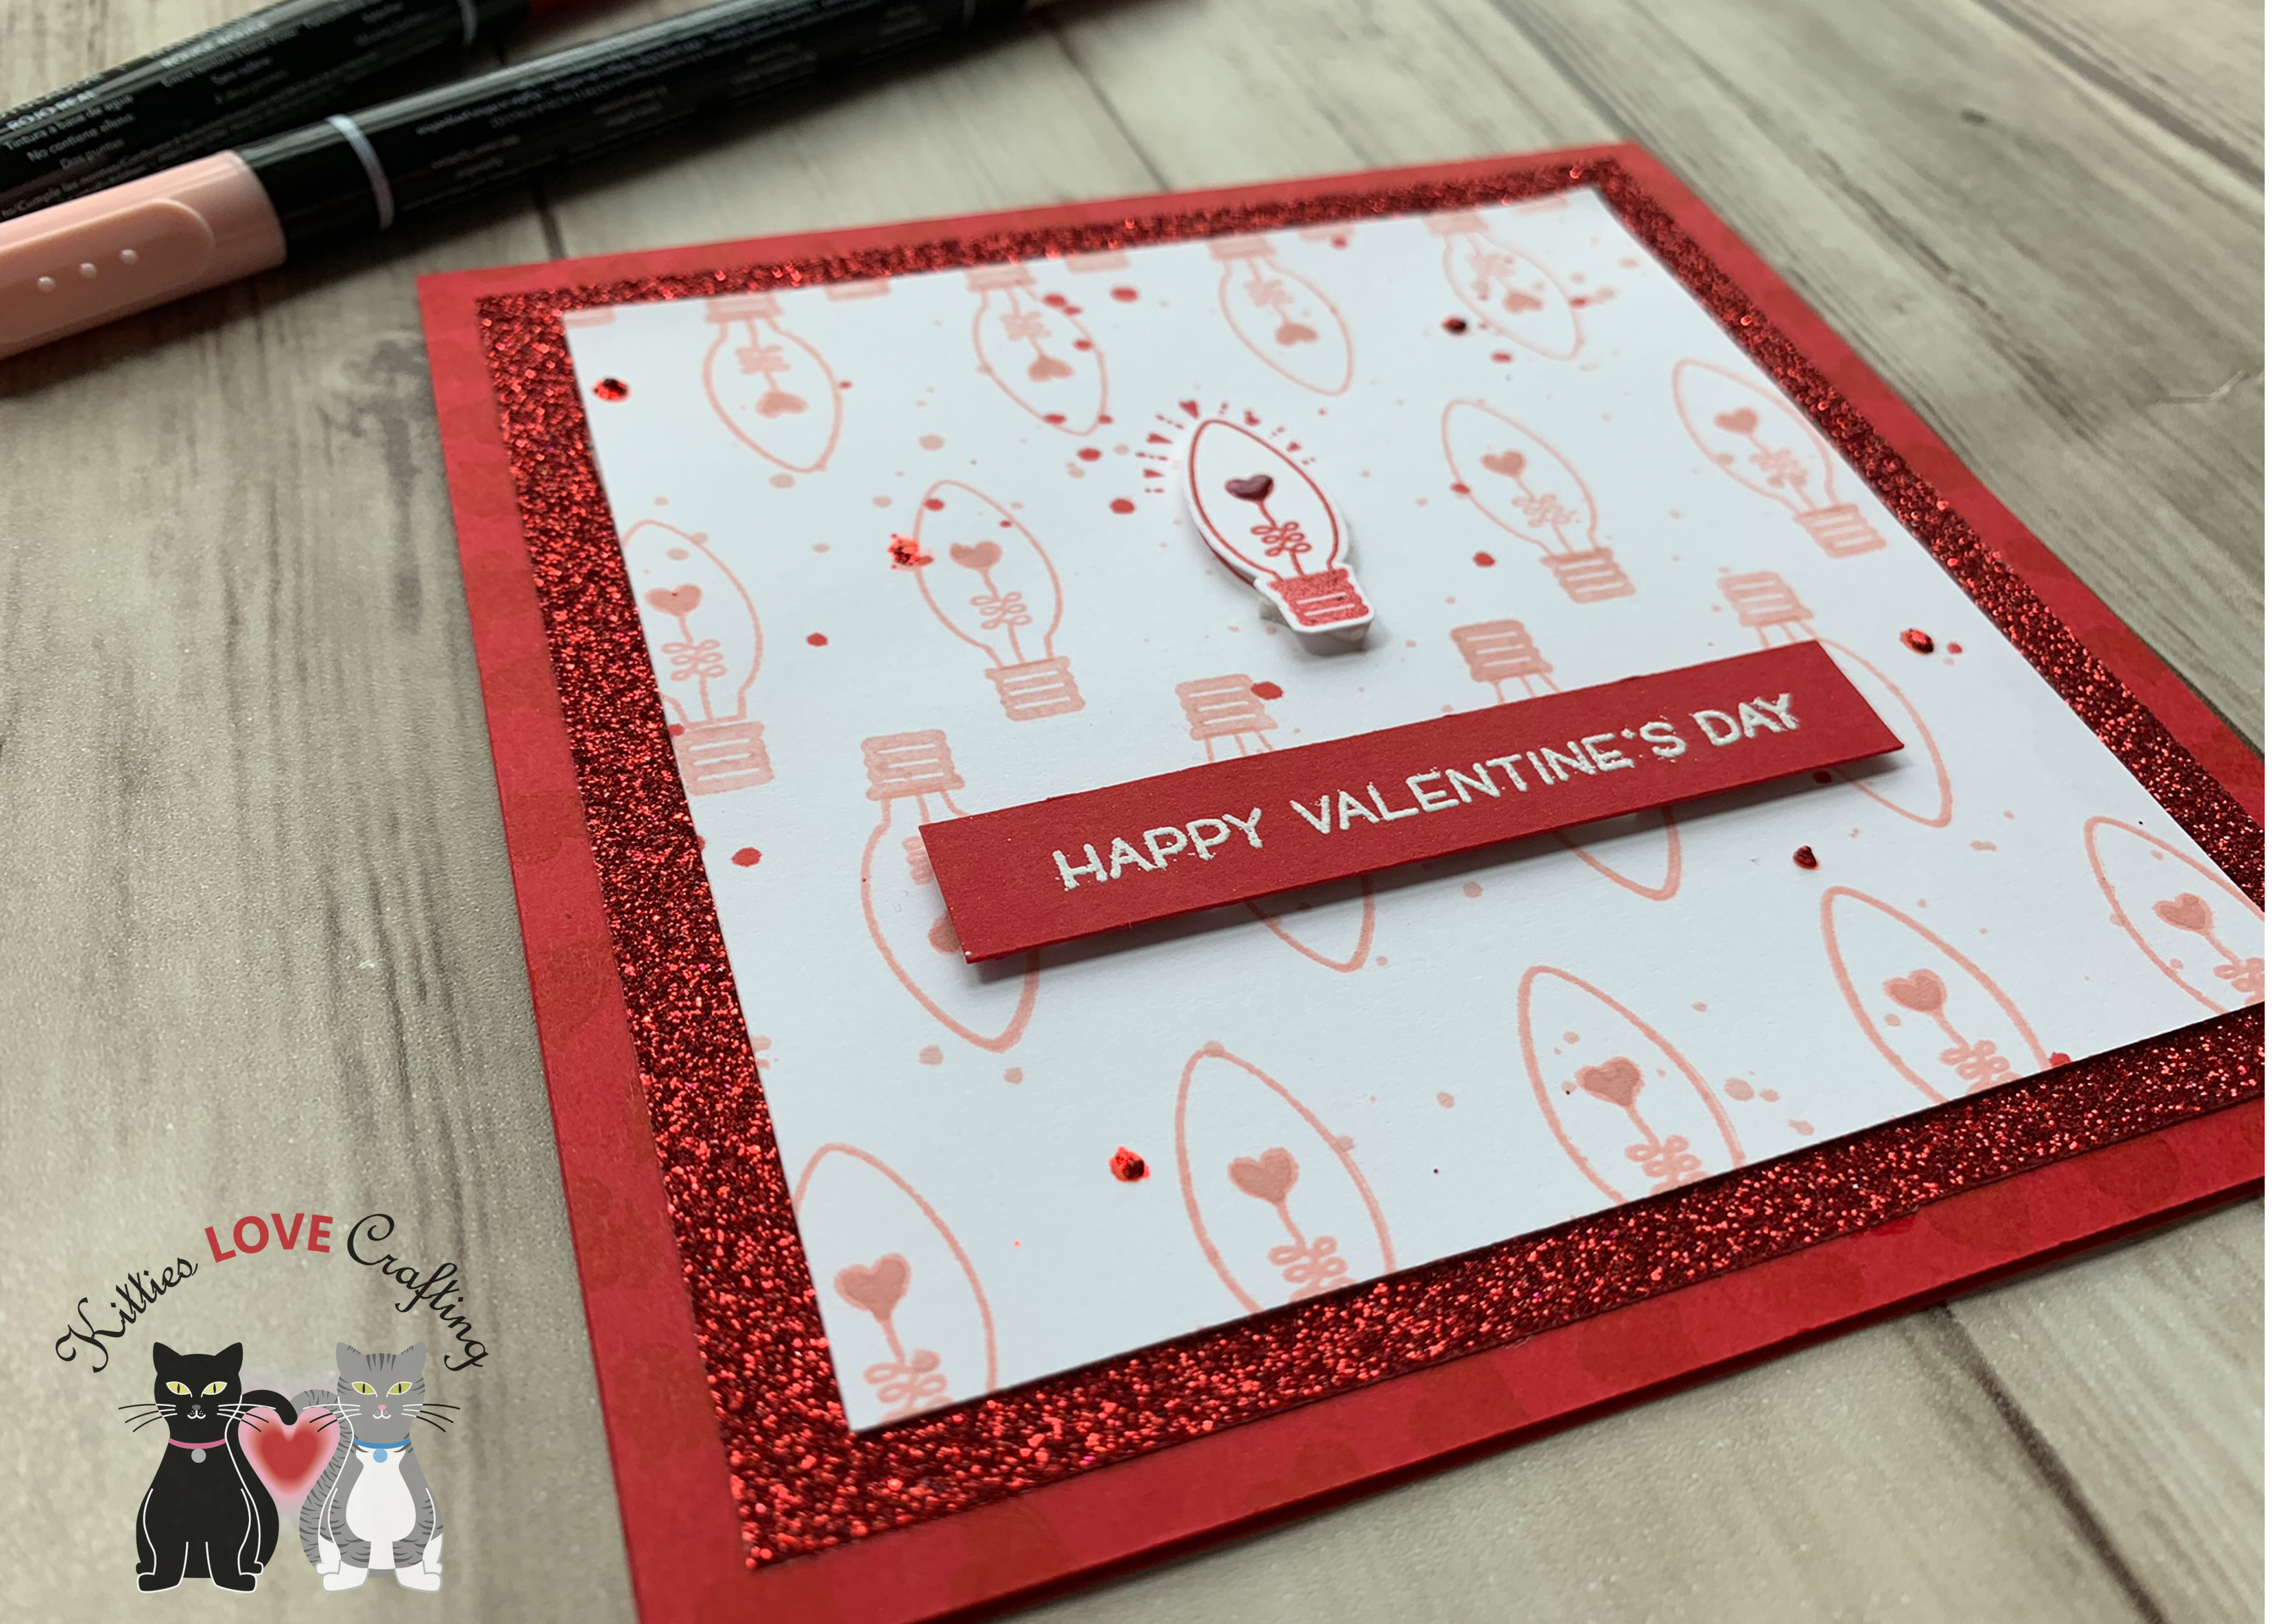
Hello friends. This card wraps up my Valentine’s Day card series for 2019! I’ve enjoyed sharing my cards with all of you. For this last one I broke out one of my Stampin Up! Christmas stampsets. Unfortunately it was recently retired so it’s no longer available. But no worries if you don’t have this stampset because you can use any small stamp you may have to recreate the look. If you absolutely must have it though, check Etsy or EBay. Lots of people sell SU! Stamps in both places. Enjoy!
Making Every Day Bright Valentine Card
This card was super easy to make. I just stamped the little light bulb image in Stampin Up! Blushing Bride ink all over the background. Using a stamp positioner is the key to aligning them in rows. Also, stamped the light bulb “glow” in red over the middle bulb.
Hope you’ve enjoyed seeing my creations and I hope I’ve inspired you to create some cards of your own Thanks for stopping by and once again please leave questions in the comments or feel free to email me if you prefer.
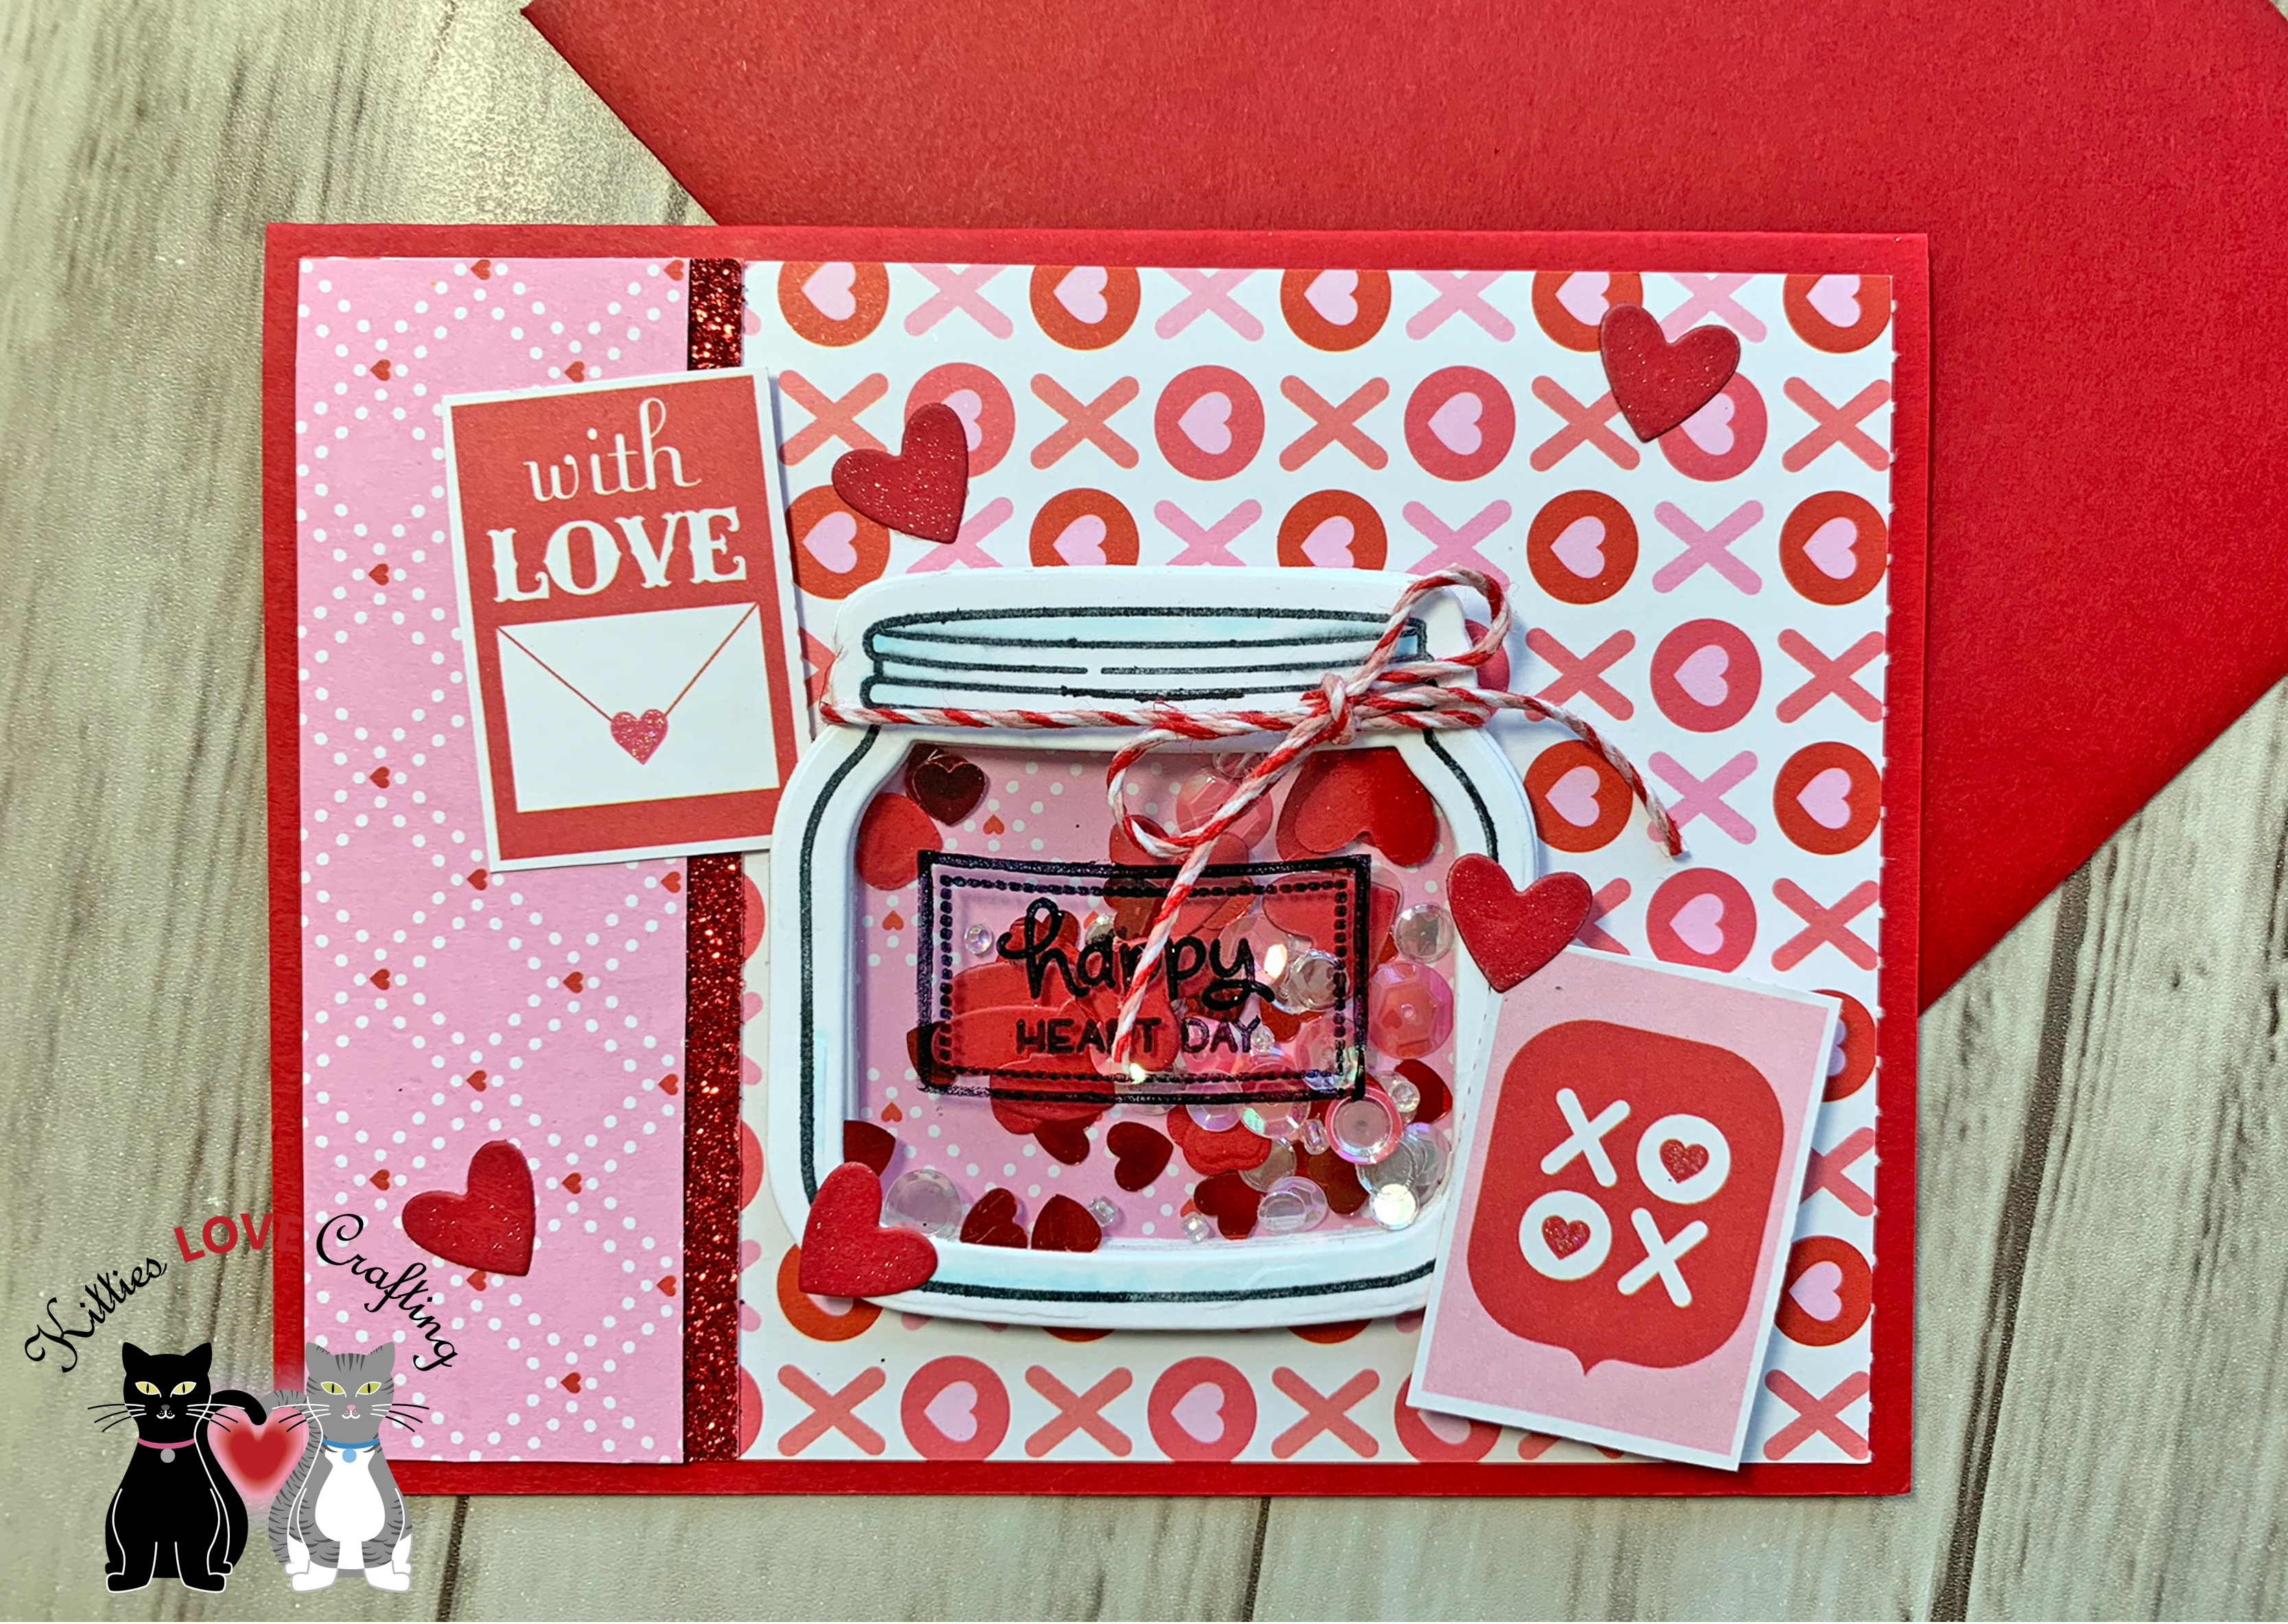
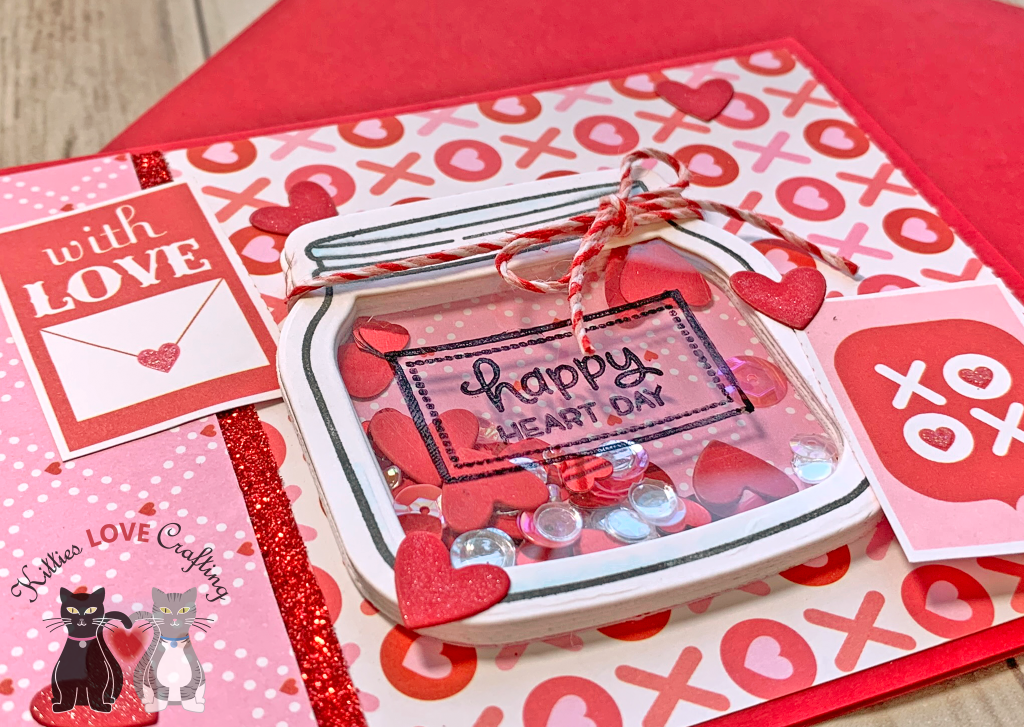
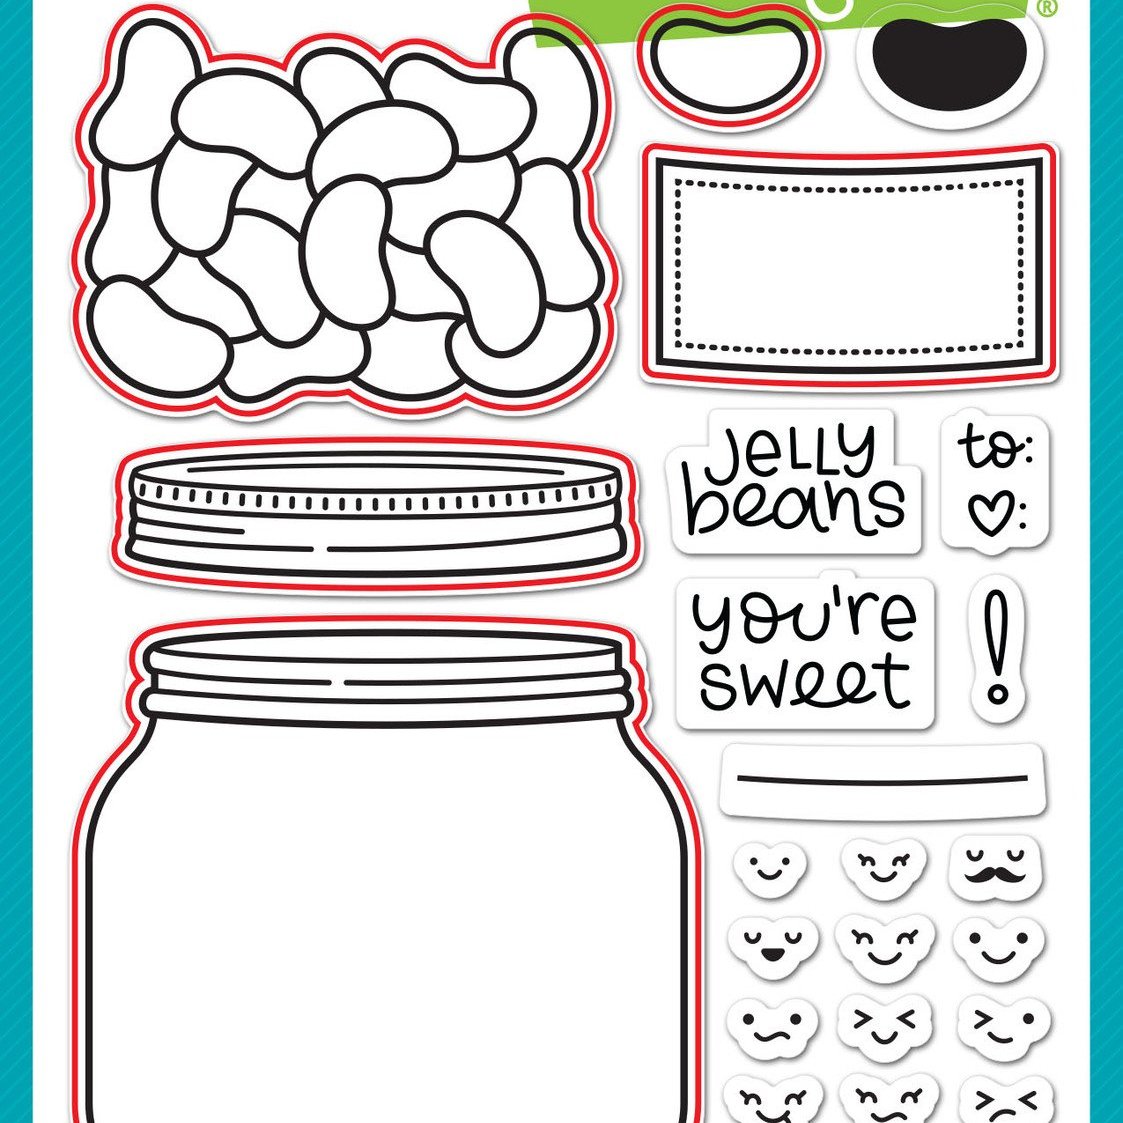
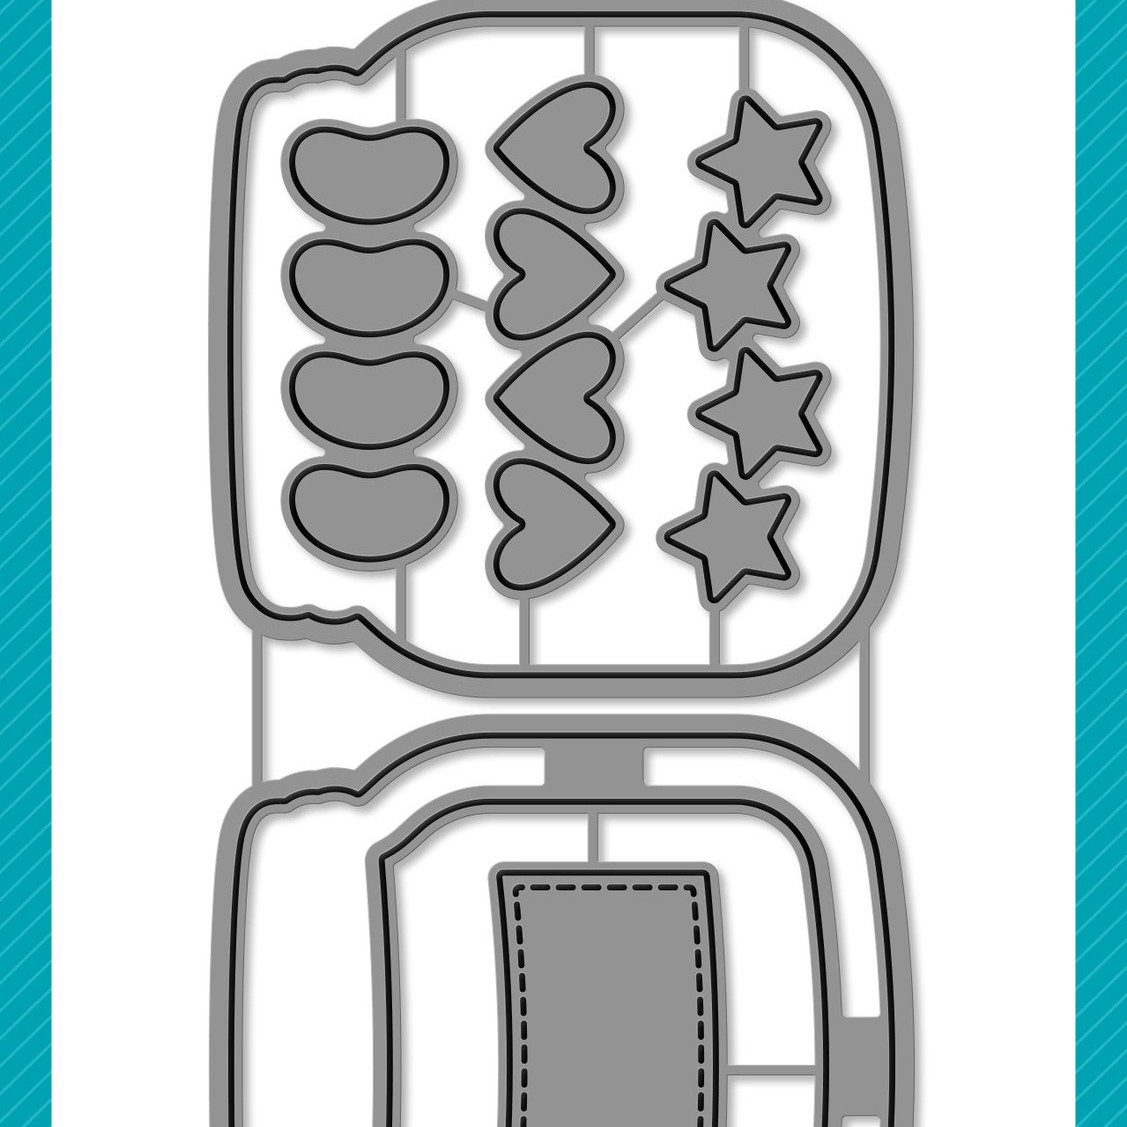
Hello friends. My Valentine’s Day card series is coming to end soon. I’ve had lots of fun making these cards. For this card, I had to pull out the adorable Lawn Fawn HOW YOU BEAN? stamp set and Valentine’s add-on. I just love a good mason jar stamp, don’t you?!? And Lawn Fawn was brilliant in creating add-ons for this set so you can use it over and over again. That’s a great value for your dollar!
I will also be posting a DIY Valentine’s project this coming Monday. I love making holiday decorations so I thought I’d share this one with you all. It’s budget friendly but looks like beautiful once complete. So look out for that post! 🙂
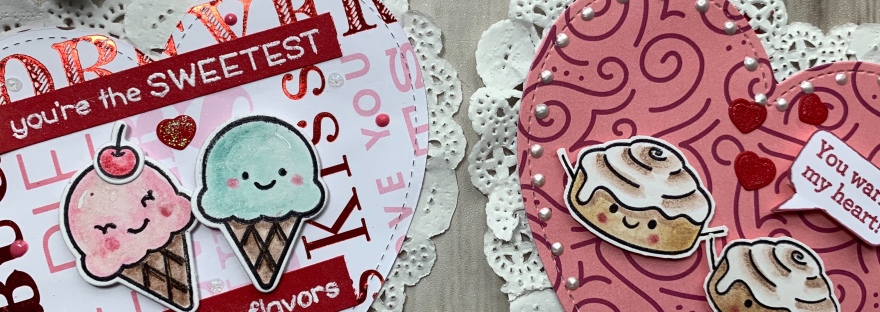
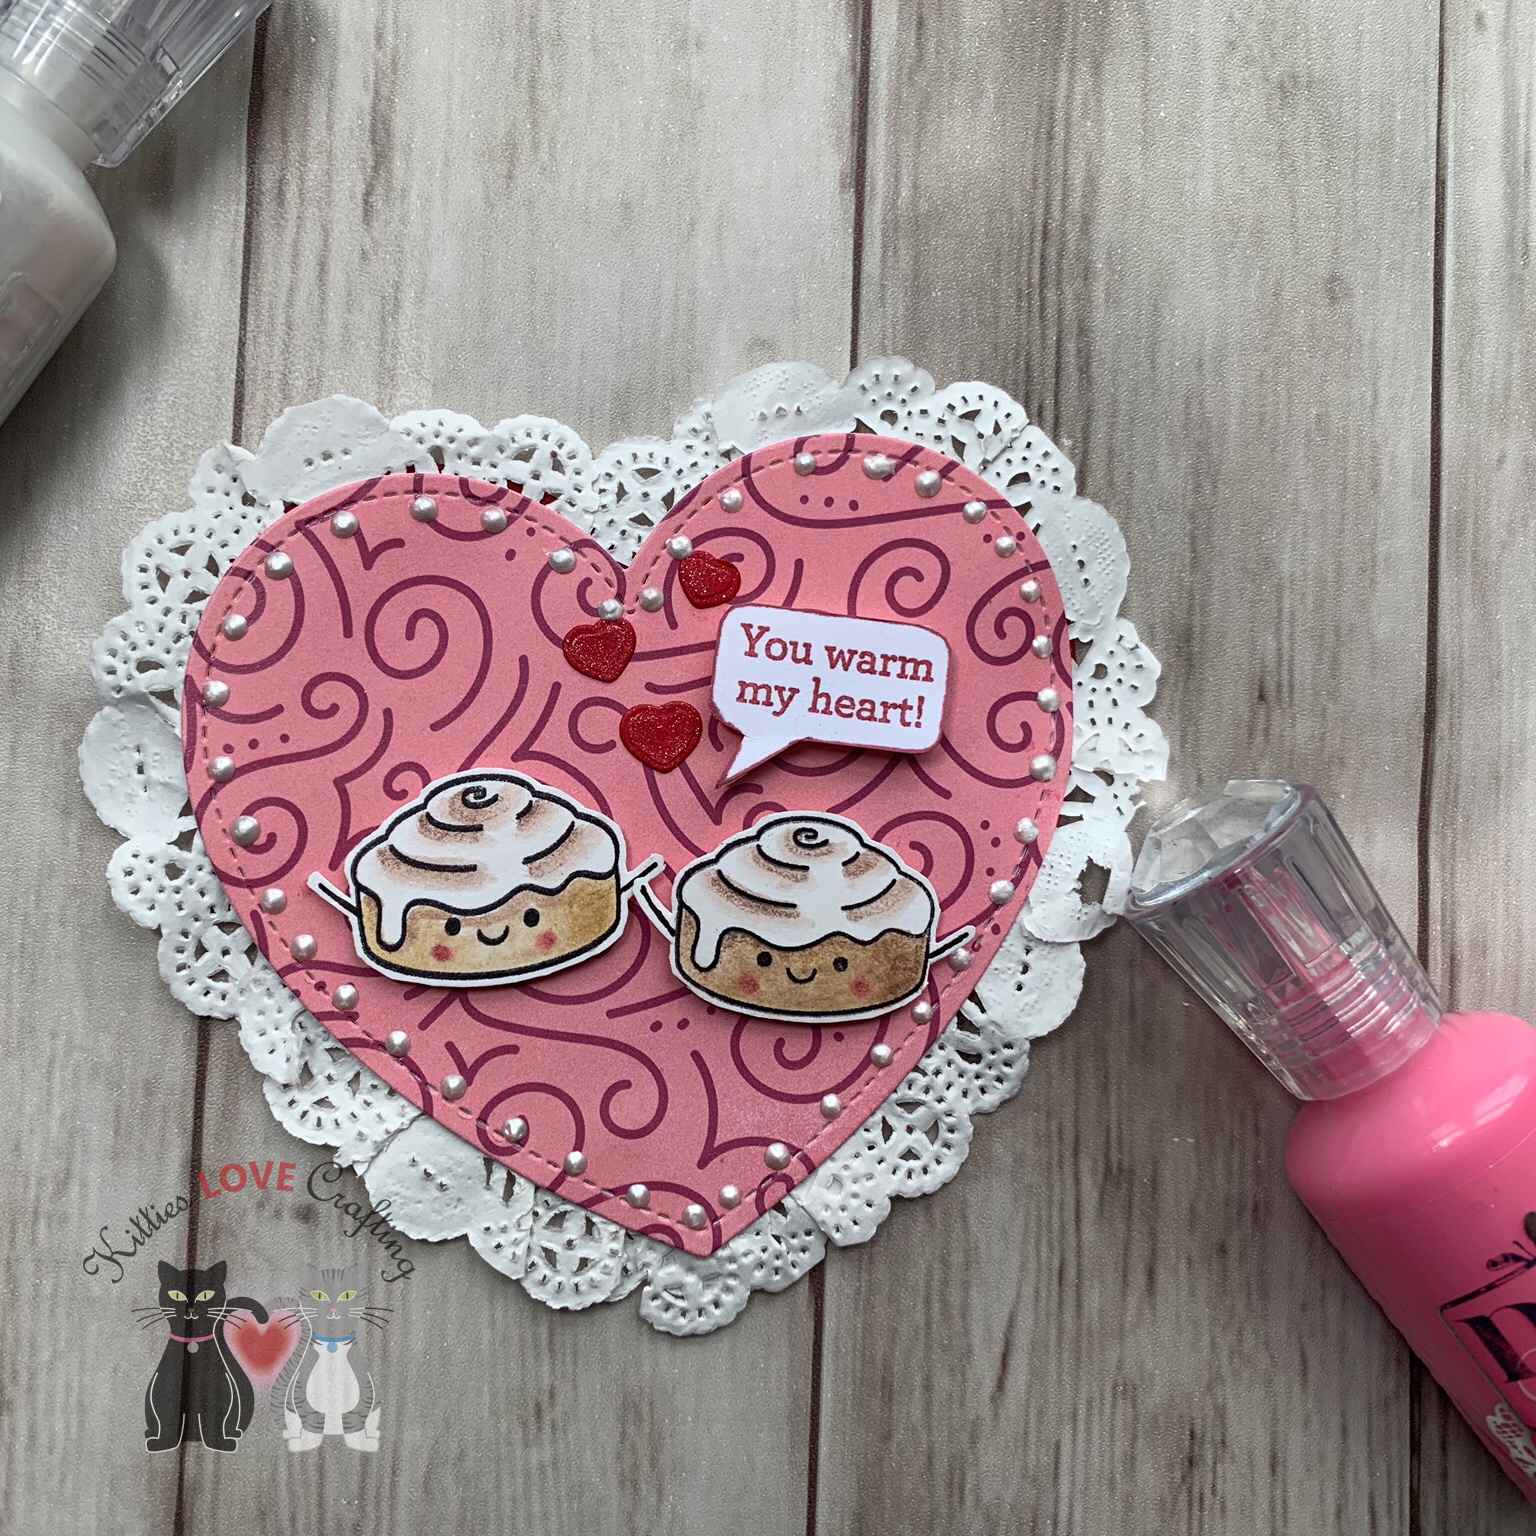
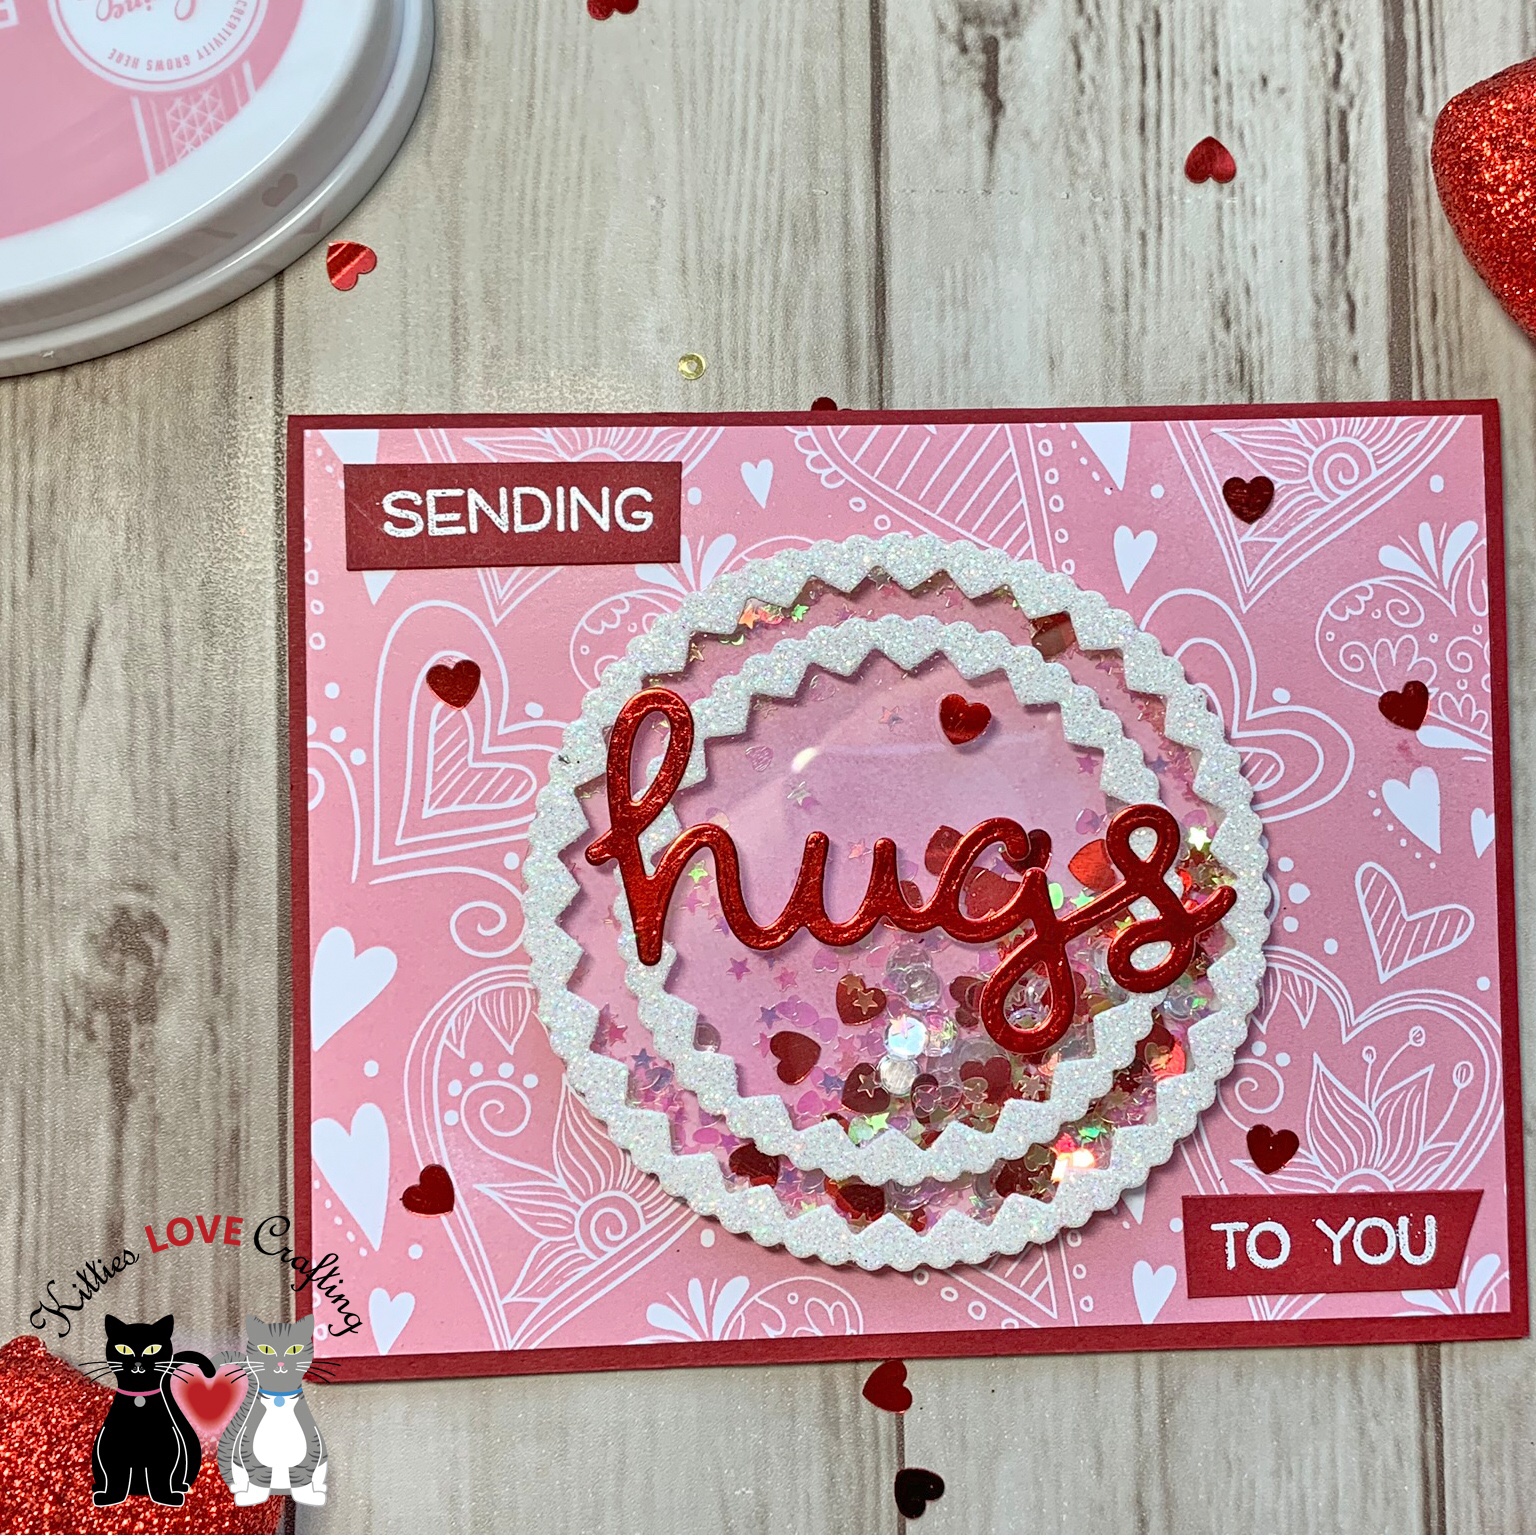
Hello everyone. Since the temperature here in the Northeast has been absolutely frigid, I thought I’d share some cards to warm the heart. 😀 To all my fellow Northeasterners and my friends in the Midwest who are worse off than we are, I wish all a warm and safe weekend. And for everyone elsewhere in the country and around the world, have a great weekend!
Hello everyone. Since the temperature here in the Northeast has been absolutely frigid, I thought I’d share some cards that warm the heart. 😀 To all my fellow Northeasterners and my friends in the Midwest who are worse off than we are, I wish all a warm and safe weekend. And for everyone elsewhere in the country and around the world, have a great weekend!
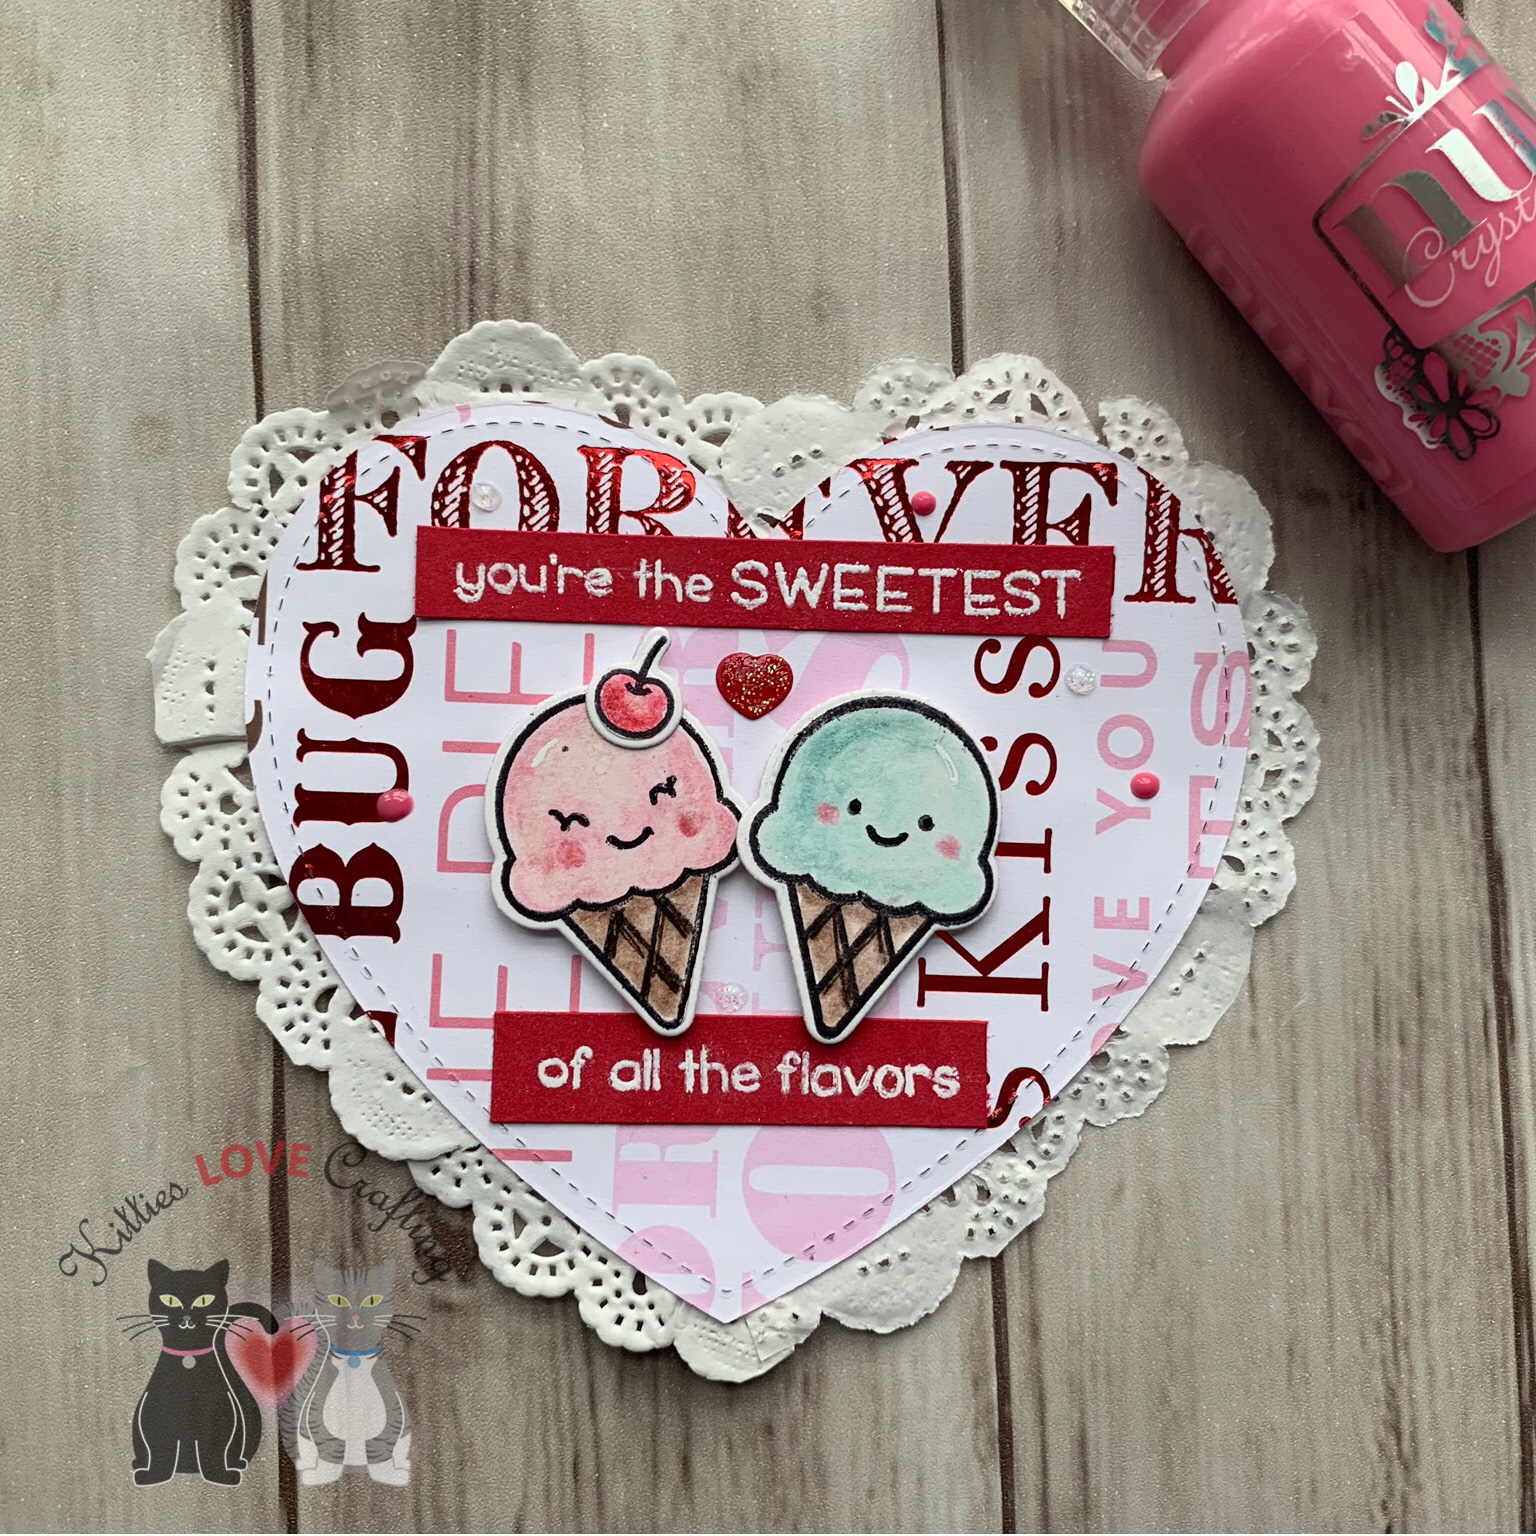
Hello friends. Welcome to my blog. This weekend I got busy making some cards for Valentine’s Day. I can’t believe that January is almost over and Valentine’s Day is just around the corner! No better way to launch my blog then to spread some love with these cards.
These cards were fairly quick to make despite how complicated they look.
Thanks for stopping by to read my post. In the future I will be upload more detailed blog posts with card sizes, etc. Keeping it simple while I navigate this new adventure.


 Step 1
 Step 2A
 Step 2B
 Step 3
 Step 4A
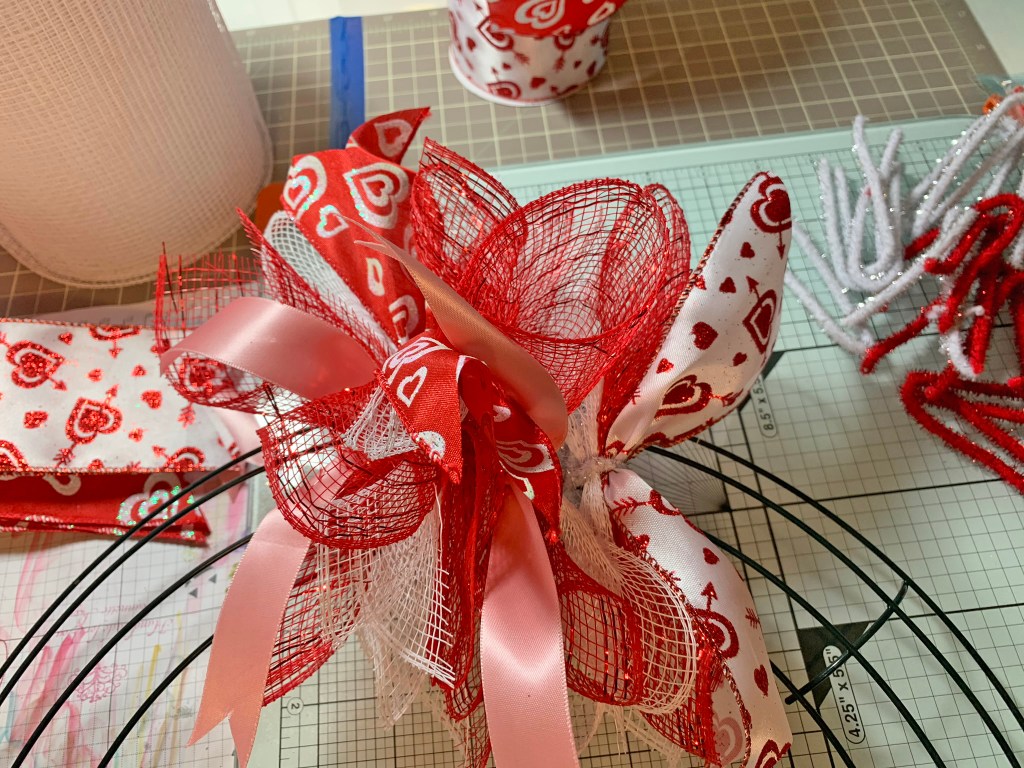 Step 4B