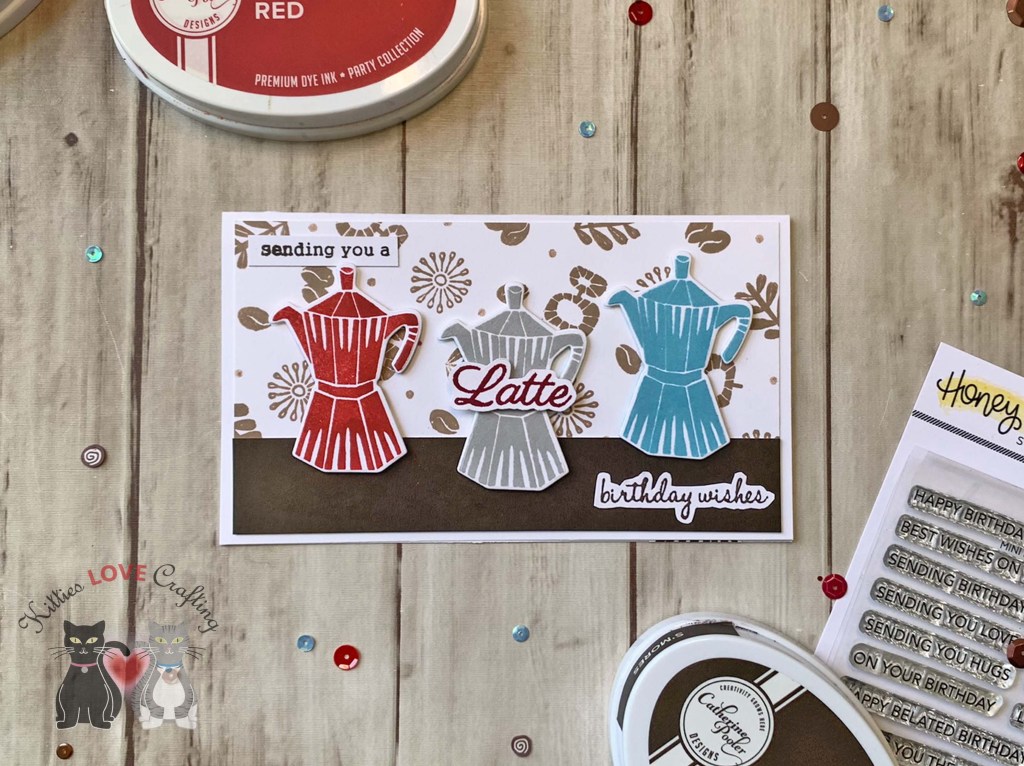
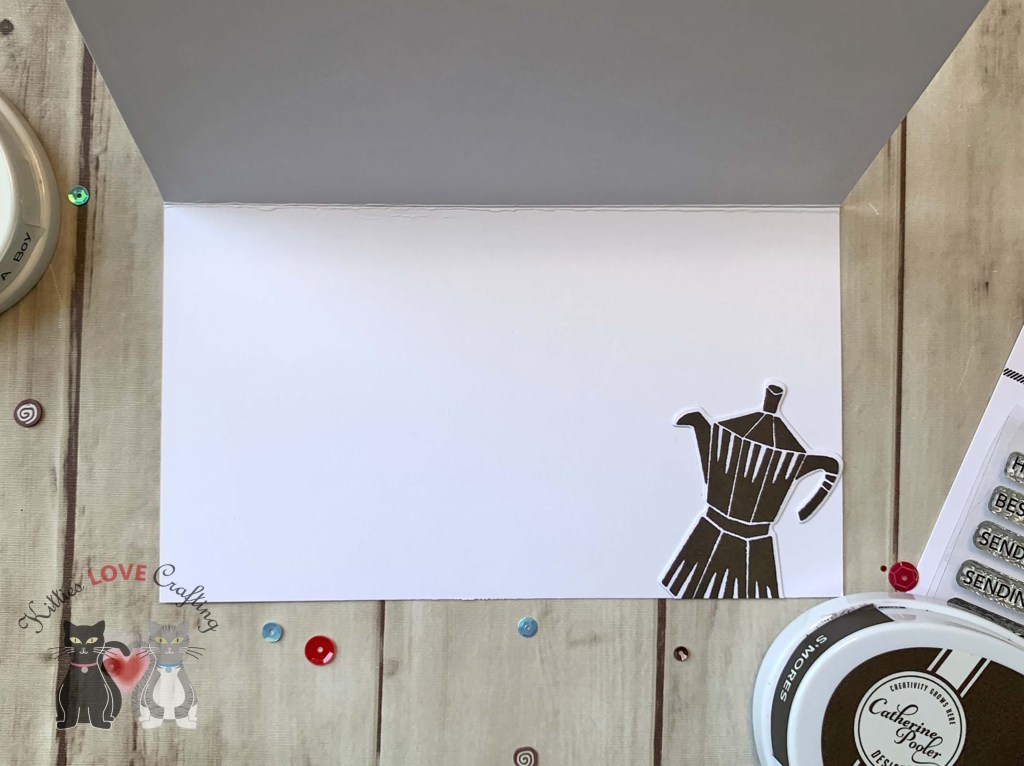
Hello friends. Here’s a quick and easy coffee-themed birthday card using older stamp sets from my stash. I love the modern graphic style of this coffee set!
For the background piece, I stamped the smaller images from the Catherine Pooler Designs Perfect Blend Stampset (discontinued) with Catherine Pooler Sand Castle Ink and then I used the direct-to-paper technique with S’mores Ink to color the strip.
Thanks for reading this post. I hope I’ve inspired you to give this cute mini slimline coffee birthday card a try for yourself. Leave comments or questions below or feel free to email.
Hello friends. I realize this is kinda late but I still wanted to share this cute Mother’s Day card using the Trinity Stamps Tiny Teacup dies. I combined it was some older stamps and dies from Queen & Company as well as Catherine Pooler dies.
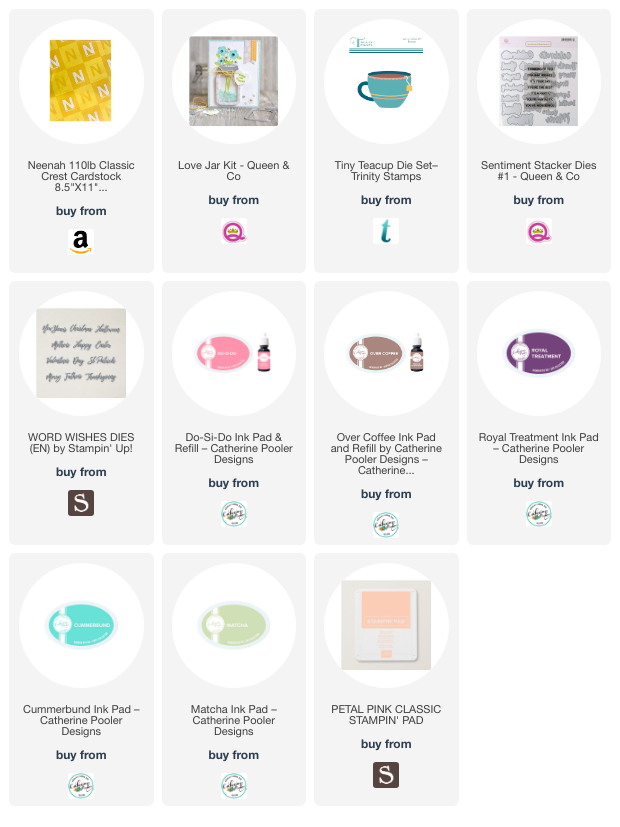
For this card, I cut a piece of Neenah 100lb Classic Crest Cardstock 8.5 X 11″ to 5-1/2 x 8-1/2″ and scored at 4-1/4″ to create the card base and another piece to 4-1/4 x 5-1/2″. I stenciled the background using the Catherine Pooler Designs Cookie Sheet Die (included in the Baking Spirits Bright Card Kit) and Matcha Ink.
Thanks for reading this post. I hope I’ve inspired you to give this cute Mother’s Day card a try and use some of your older supplies. Leave comments or questions below or feel free to email.
Well I’m sure you have heard of Christmas in July, but have you heard of Halloween in July??? Quite frankly, I love making Halloween cards anytime of year! It’s my favorite holiday ever!!!
I used 0 and C1, Y02 and Y06, YR12 and YR16 for the candy corn, YR16 and YR09, YG01 and YG25 for the pumpkins, Y02 and YR12 for the pumpkin guts, BV11 and BV17 for the scoop, C1 and C3, N5 and N7 for the knife and W1, W3, and W5, E15, E23, and E37 for the squirrels. I diecut the images and adhered them to their respective panels and adhered those to the back of the top panel. I used Stampin’ Dimesionals to adhere some of the images and then to the card base. Then I adhered the rest of the images around the panel.
Thanks for reading this post. I hope you enjoyed and I’ve inspired you to Shop Your Stash and see what fun ideas you come up with and maybe rediscover supplies you forgot you had! Leave comments or questions below or feel free to email me.
When I was going through my die stash I remembered how much I loved my Reveal Wheel dies from Lawn Fawn as well as the Lawn Fawn How You Bean? Stamp sets so I decided to combine them and see what happens. After all fish fit in a mason jar right?? (I probably wouldn’t put real fish in the mason jar but it’s fine for fake fish!)
I inked up the panel using MFT’s Snow Drifts Coverup Die (not available) as a stencil ccombined with Salty Ocean and Mermaid Lagoon, Mowed Lawn and Tumbled Glass Distress Oxide Ink. I created a gradient using Salty Ocean and Mermaid Lagoon first, then turned the die 180 degrees and used Mowed Lawn to layer over it, and finally Tumbled Glass over all of it to mute it some. I used the same color combo on the large wheel, without the stencil. I sprayed some water on everything with my RANGER Tim Holtz DISTRESS SPRAYER and blotted it.
I colored the images with COPIC markers. I used Y06, Y15 and YR04 for the goldfish, E53, E33, and E37 for the sandcastle, B95 and 97 for the shark, YG25 and YG03 for the plants, R05, R14, R17 and R27 for the crab, R05 and R12 for the coral, Y06, Y15, B24 and B26 for the striped fish and E53 and E33 for the sand in the jar tank.
Thanks for reading this post. I hope you enjoyed and I’ve inspired you to Shop Your Stash and see what fun ideas you come up with and maybe rediscover supplies you forgot you had! Leave comments or questions below or feel free to email me.
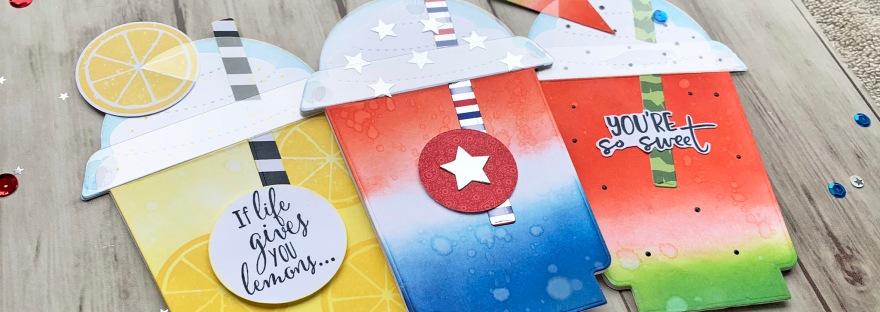
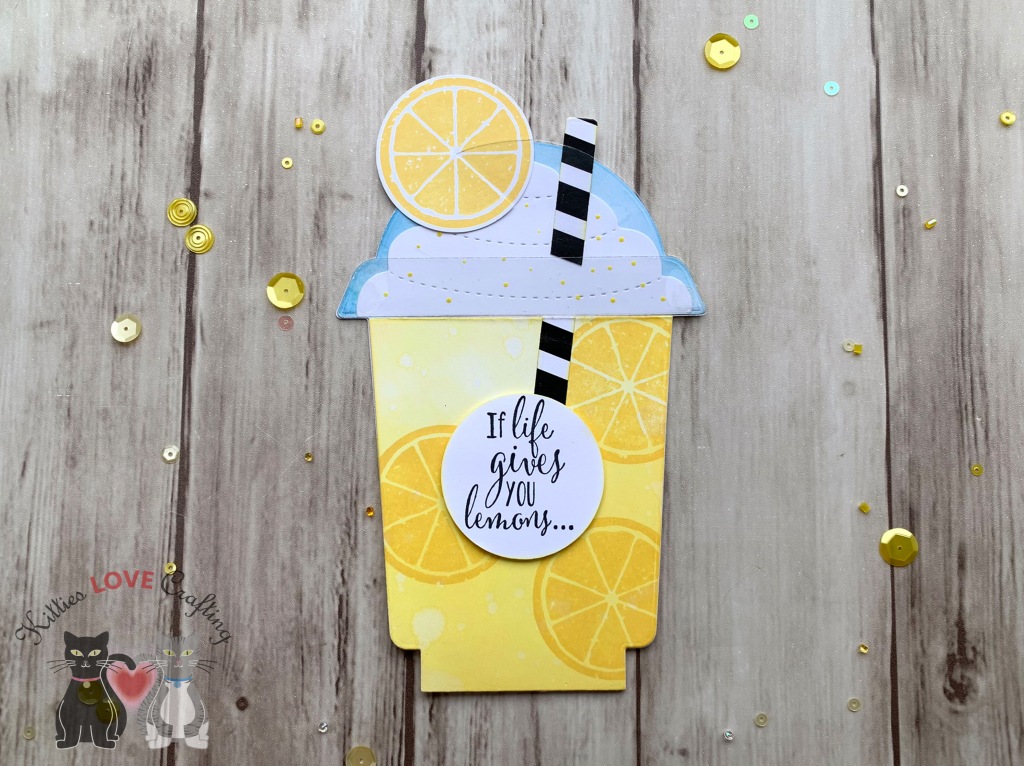
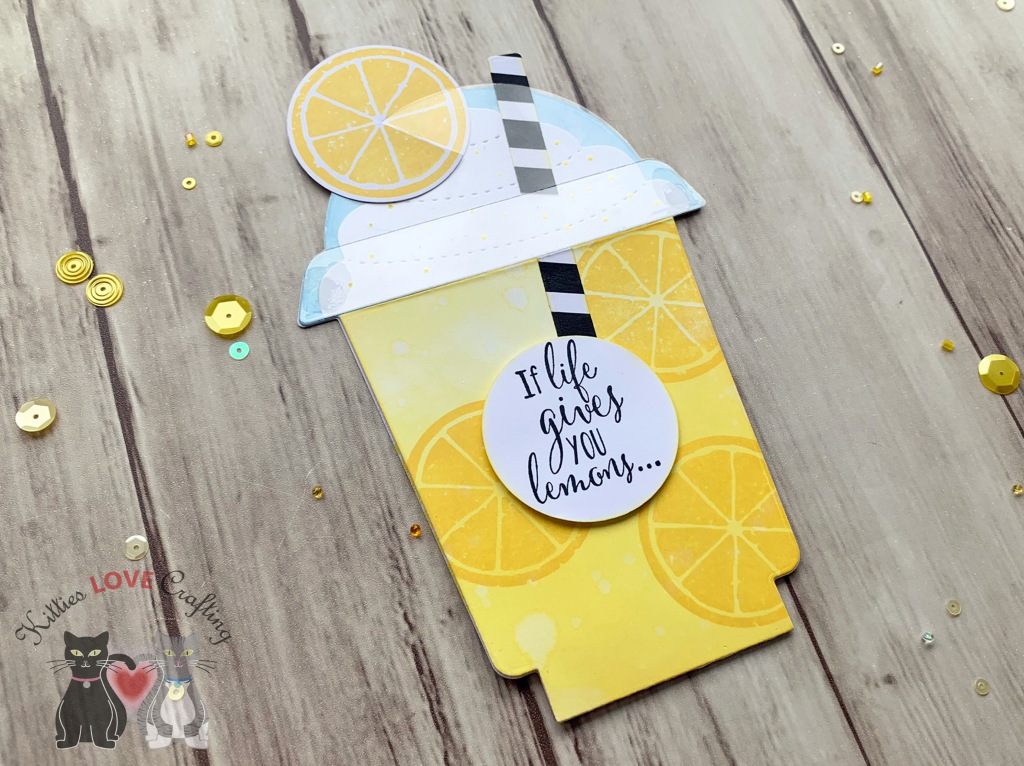
While it’s probably no surprise too many that I love coffee, I love coffee stamps and dies even more. This Honeybee Stamps Frappe Shake Card Dieset as well as their Honey Bee COFFEE CUP CARD Dies are my favorites! They have everything you need to make cute coffee cup and frappe cup shaped cards and shakers. And they fit in an A2 size envelope which is great!
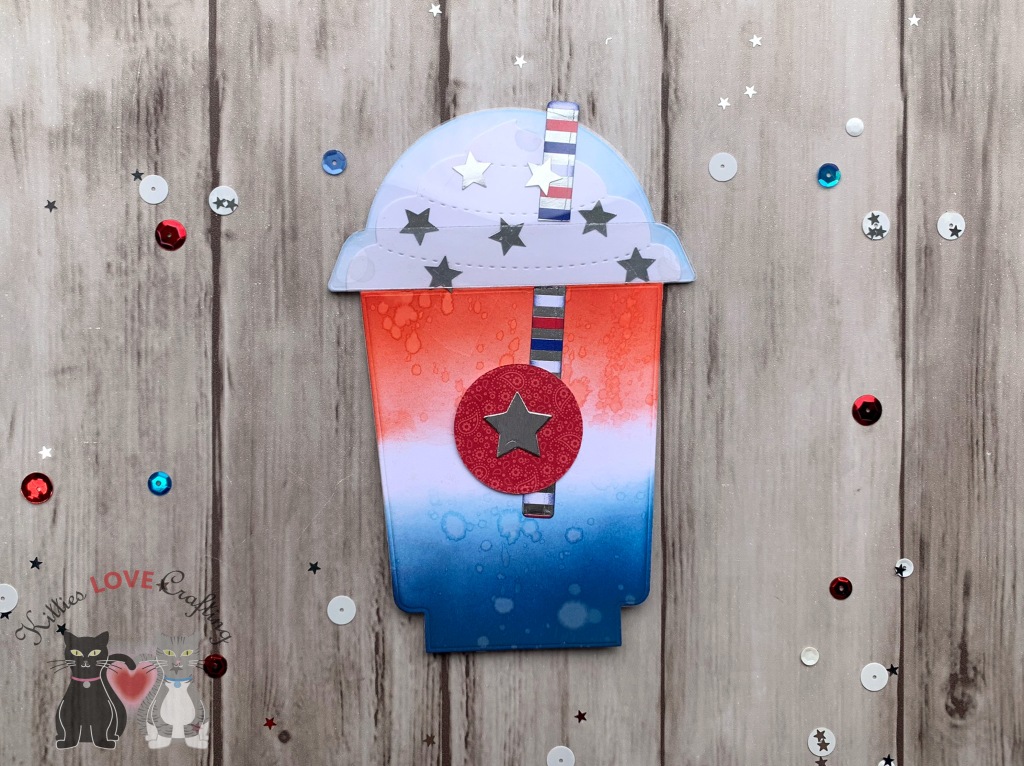
I thought it would be fun to reuse this dieset to make some non-coffee cards, instead make brightly colored summer beverages. I don’t know if you all remember the rocket bomb popsicles that were red, white and blue. I remember many summers as a kid eating those popsicles (they were refreshing and turned my tongue red or blue, depending on which end I ate first—what could be better??). LOL That was the inspiration for my first card.
I started by diecutting card bases using the large card, coffee cup, and the whipped cream dies in the set from Neenah 110lb Classic Crest Cardstock 8.5 X 11″ 3 times. I also diecut 3 sets of the lid and its rim from Acetate.
On the inside of the card, I stamped “Happy 4th of July” with a very old stampset I had (sorry don’t know where it came from) using Tim Holtz Chipped Sapphire Distress Oxide Ink and added 3 silver stars.
Card Inside
For the second card, I decided to make a delicious watermelon smoothie. Who doesn’t like a tasty frozen watermelon beverage on a hot summer day?!? I’m now craving a smoothie while writing this post. LOL.
Thanks for reading this post. I hope you enjoyed and I’ve inspired you to Shop Your Stash and see what fun ideas you come up with and maybe rediscover supplies you forgot you had! Leave comments or questions below or feel free to email me.
This month I decided to challenge myself to NOT buy any new craft supplies (with the exception of necessary supplies like white cardstock and adhesive). Like many of you, I realized that I have been spending a ton of money on cleaning supplies, hygiene and groceries since I have had to order online more than usual so it was time to cut some corners. I also thought this would help people who are struggling financially but who still want to craft.
I went through my stamps, dies, stencils and picked out some that I know I have not used very often and combined with the other things I already own. I alos thought it was a good time to go through my already made card stash and see what categories I was low on –birthdays is one such category so I started there.
Thanks for reading this post. I hope you enjoyed and I’ve inspired you to Shop Your Stash and see what fun ideas you come up with and maybe rediscover supplies you forgot you had! Leave comments or questions below or feel free to email me.


 https://linkdeli.com/widget.js?id=f5e8378456858c916708