Love & Friendship, Valentine's Day

Honey Bee Stamps House Builder Valentine’s Day Card

Hi friends. I used the House Builder Card Base Dies from Honey Bee Stamps along with the Treat Shop Add-On Dies and Stamps to make this cute Valentineโ€™s Day Card. I couldn’t pass up the opportunity to make another card with these dies. They are still one of my faves!

For this card, I started by cutting a piece of Neenah 110lb Classic Crest Cardstock 8.5 X 11″ to 10 x 7″and scored it at 5″ and a panel to 5 x 7″ for the background, which I inked with Tim Holtz Tumbled Glass and Salty Ocean Distress Inks. Then diecut the house card base 1x with the House Builder Card Base Dies from Pebbles Forever My Always 6 x 6 Paper.

Then die cut the roof and window awnings from both Neenah 110lb Classic Crest Cardstock 8.5 X 11″ and Stampin’ Up! Real Red 8-1/2″ X 11″ Cardstock from the Honey Bee Stamps Treat Shop Add-On Dies. I cut out every other strip on the awnings and adhered them to the white one to create a cute striped awning. I diecut out the window from the front of the card.

The door was diecut from the same two color cardstocks using the Honey Cuts Gingerbread House Add-On and the stairs from Simon Says Stamp Card Stock 100# Slate Gray Cardstock. I added some dimension to the house base, the door, steps, and awning with ink. I used Catherine Pooler Pink Champagne for the house base, Stampin’ Up! Real Red Ink for the roof and door and Memento Tuxedo Black Ink for the steps. I also diecut the bushes from Stampin’ Up! Old Olive 8-1/2 x 11″ Cardstock with the House Builder Card Base Dies and added Stampin’ Up! Old Olive Ink around the edges.

I added a piece of Vellum behind the window as well as a piece of Neenah 110lb Classic Crest Cardstock 8.5 X 11″ to create a frosted window appearance. I added a strip of Simon Says Stamp Card Stock 100# FOG Gray Cardstock to the bottom of the card before adhering the house. I stamped all the images from the Honey Bee Stamps Treat Shop Add-On 6×6 Stamp Set onto Neenah 110lb Classic Crest Cardstock 8.5 X 11″ with Memento Tuxedo Black Ink. Additionally, I used Clear Embossing Powder on the “Candy Shop” and “We Are Open” signs for some added dimension and interest.

I colored them with Copic Markers. I used BG000 and Copic Blender 0 for all glass elements (cake dome, candy dome and gumball machine); R81 & R83, C1, C3, & C5 for the chairs and table; R14 & R27, R81 & R83 for the umbrella. E25 & E29, R81, R83 & R85, C1 & 0 for the cupcakes; R14 & R27, C00 & 0, BG000, G94 and E25 for the gumball machine; E25 & E29 for the chocolates; R81, R83 & R85 for the present; and G94 & G99, R81 & R83, E25 & E29, R14 & R27 for the candies.

I popped up the “Candy Shop” sign, “We Are Open” sign and the cake dome with Stampin’ Dimensionals. I created the heart banner by stamping the little heart from Honey Bee Stamps Little Pickup 4×6 Stamp Set with Stampin’ Up! Real Red Ink onto a piece of and cut them using the coordinating dies. Then I drew a black line using a Sharpie Ultra Fine Point Marker (you need to use a permanent marker when writing on vellum or it will smudge).

I finished off the card by adding some highlights to some of the images with a White Gel Pen.

On the inside of the card, I stamped a sentiment from Lawn Fawn’s Happy Happy Happy Add-on Stampset with Stampin’ Up! Real Red Ink and added a tiny awning which I cut from Neenah 110lb Classic Crest Cardstock 8.5 X 11″ and Stampin’ Up! Real Red 8-1/2″ X 11″ Cardstock using the Honey Bee Stamps Treat Shop Add-On Dies. I added some left over images I had colored and die cut.
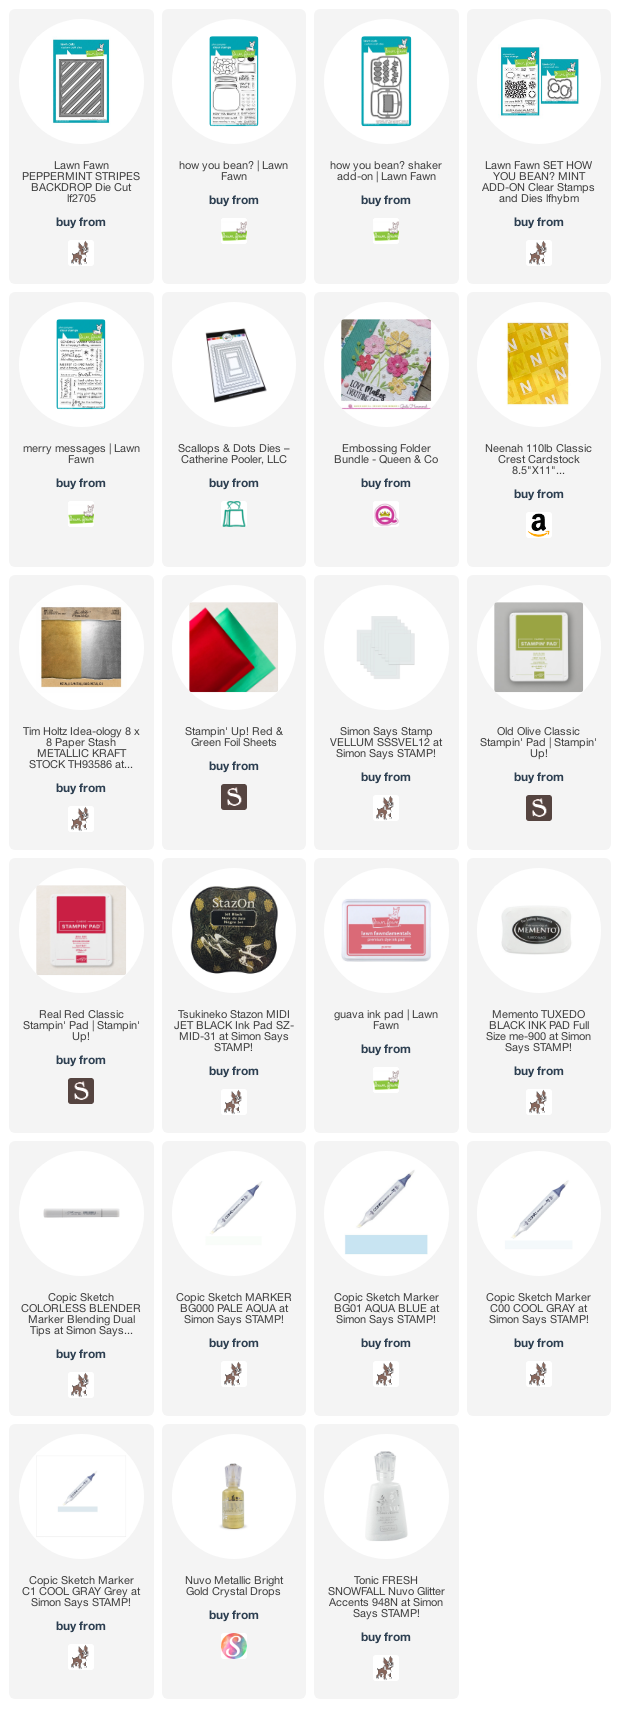
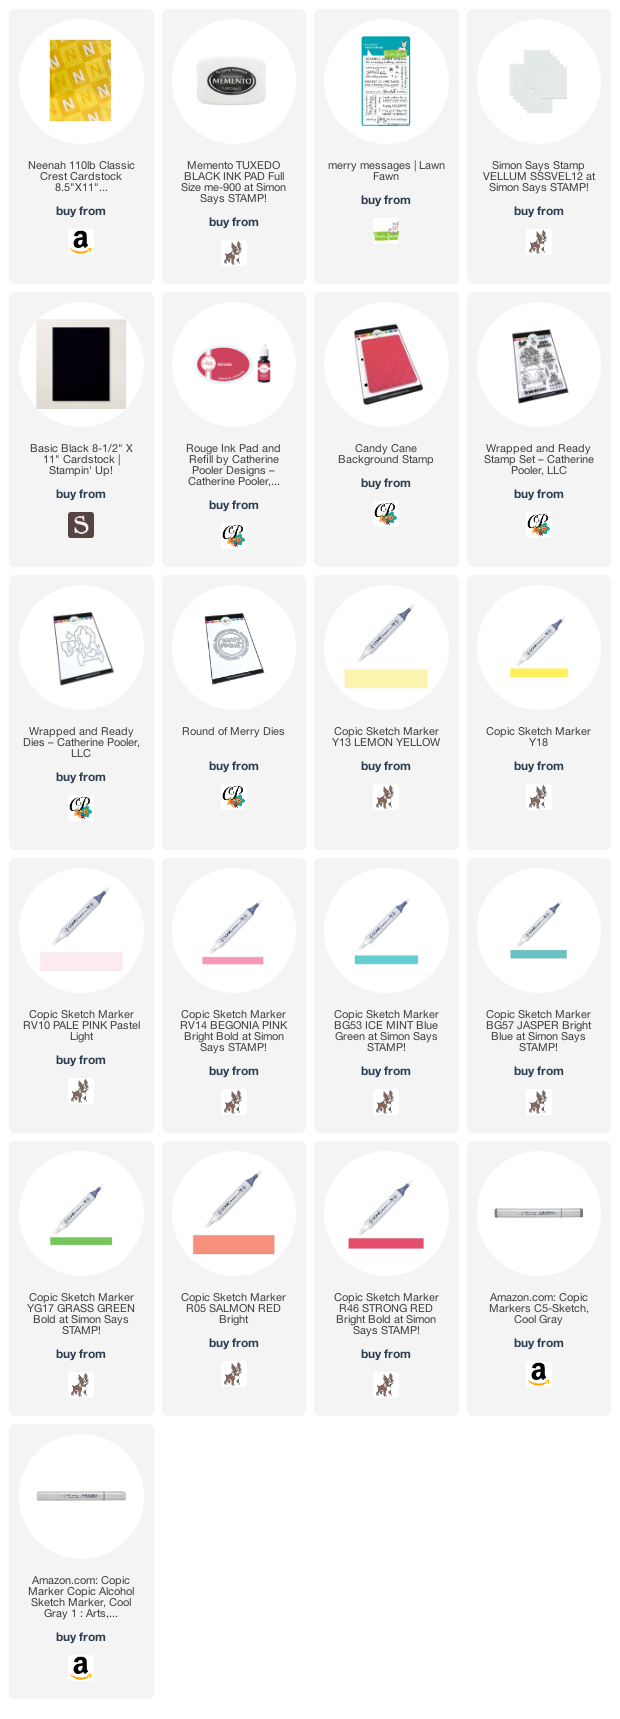
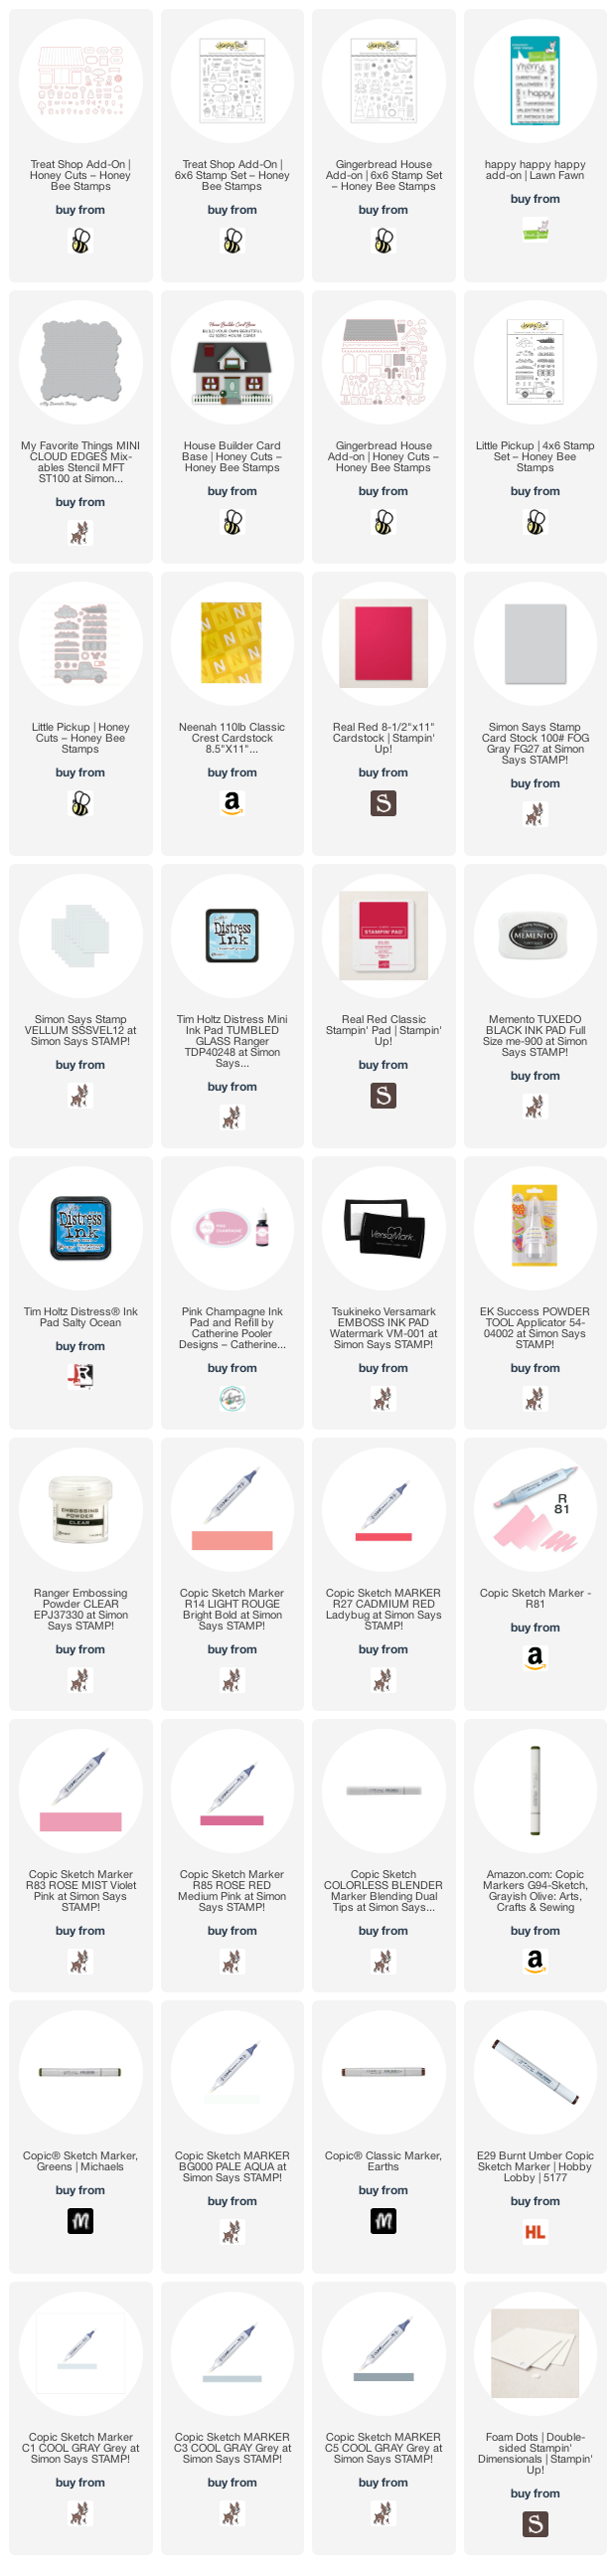

Supplies

https://linkdeli.com/widget.js?id=f5e8378456858c916708

Thanks for reading this post. I hope you enjoyed and Iโ€™ve inspired you to give this cute Valentine’s Day card a try for yourself. Leave comments or questions below or feel free to email me.

Love & Friendship, Valentine's Day, Watercolor techniques

Stretching Your Stamps: Valentine’s Day Cards

Hello friends. I came across these two birthday gift stampsets I have from Lawn Fawn while organizing and thought they would be cute on some Valentine’s Day card. These stamp sets are meant for birthdays but why not try to make Valentine’s Day cards instead. Itโ€™s time to challenge myself.

I used the Lawn Fawn, Party Pig, which I received as my birthday gift from Lawn Fawn in 2021 but also decide to use the Party Panda stamp set I received in 2020 as well. I combined them with the Giant Be My Valentine sentiment die to create a lovely focal image. Combining this die and some pattern papers helped me create two very quick cards!

For the first card, I cut a piece of Neenah 110lb Classic Crest Cardstock 8.5 X 11″ to 5-1/2 x 8-1/2″ and scored at 4-1/4″ to create the card base. Then cut another panel of Simple Stories – Sweet Talk Collection – 6 x 8 Papers (had some left over from my SSS Feb 2021 Card Kit – Love You Beary) to 4 x 5-1/4″.

I diecut a piece of Stampin’ Up! Real Red 8-1/2 x 11″ Cardstock with the Lawn Fawn Lacy Heart Stackables which I embossed it using the Crafters Companion Embossalicious Grand Dots Embossing Folder (retired but I linked a similar one).

I diecut the sentiment from Neenah 110lb Classic Crest Cardstock 8.5 X 11″ (3x) using the Lawn Fawn Giant Be My Valentine Die and stacked them.

I stamped the panda image and cupcake from the Lawn Fawn Party Panda mini stampset (2020 birthday gift with purchase) onto Neenah 110lb Classic Crest Cardstock 8.5 X 11″ with Memento Tuxedo Black Ink.

I colored them with Copic markers. Then I used C1 & 0 to add shading to the panda; R81, 83, & 85 for the cupcake, E23 & E29 for the cupcake wrapper, and R17 for the cherry on top of the cupcake. I die cut all the images with the coordinating dies and added some Stampin Dimensionals to the panda before adhering to the card. And added some Pretty Pink Posh Sparkling Clear Mix Cupped Sequins to finish it.

On the inside of the card, I stamped a sentiment the Lawn Fawn Happy Happy Happy add-on Stamps with Stampin’ Up! Real Red Ink.

Dimensions


For the second card, I cut a piece of Neenah 110lb Classic Crest Cardstock 8.5 X 11″ to 5-1/2 x 8-1/2″ and scored at 4-1/4″ to create the card base. Then cut another panel of Simple Stories – Sweet Talk Collection – 6 x 8 Papers (had some left over from my SSS Feb 2021 Card Kit – Love You Beary) to 4 x 5-1/4″.

I diecut a piece of Vellum Cardstock with the Lawn Fawn Lacy Heart Stackables which I embossed it using the Crafters Companion Embossalicious Grand Dots Embossing Folder (retired but I linked a similar one).

I diecut the sentiment from Neenah 110lb Classic Crest Cardstock 8.5 X 11″ (2x) and one from Stampin’ Up! Red Foil 12 x 12 Cardstock (retired) using the Lawn Fawn Giant Be My Valentine Die and stacked them together.

I stamped the pig and gift images from the Lawn Fawn Party Pig mini stampset (2021 birthday gift with purchase) onto Neenah 110lb Classic Crest Cardstock 8.5 X 11″ with Memento Tuxedo Black Ink and colored them with Copic markers. I used RV52, RV55, RV66, C1, C3, C7 & 0 to for the pig; R17 & R27, E29 & E27 for the gift. I die cut all the images with the coordinating dies.

I added some Stampin Dimensionals to the pig before adhering to the card. And added some Pretty Pink Posh Sparkling Clear Mix Cupped Sequins to finish it.

On the inside of the card, I stamped a sentiment the Lawn Fawn Happy Happy Happy add-on Stamps with Stampin’ Up! Real Red Ink.

Dimensions


Supplies

https://linkdeli.com/widget.js?id=f5e8378456858c916708

Thanks for reading this post. I hope you enjoyed and Iโ€™ve inspired you to give these cards a try for yourself. Leave comments or questions below or feel free to email.

Love & Friendship, Slimline, Stenciled Background, Valentine's Day, Window Cards

Valentine’s Day Slimline Window Scene Cards

Hi friends. The Lawn Fawn Scent With Love Clear Stamps and Dies is great for scene cards so I decided to make a slimline card. But had so much fun making them I made four instead. ๐Ÿ™‚

For these cards, I cut two pieces of Neenah 110lb Classic Crest Cardstock 8.5 X 11″, one piece of Simon Says Stamp Cardstock 100# COTTON CANDY and one of Stampin’ Up! Blushing Bride 8-1/2 x 11″ Cardstock to 7 x 8-1/2″ and scored at 3-1/2″ to create four card bases. I die cut the scallop slimline panel from two different pattern papers from my stash and two from Neenah 110lb Classic Crest Cardstock 8.5 X 11″, using the Catherine Pooler Essentials Slimline Die.

On the white panels, I stenciled hearts using the Simon Says Stamp Stencil Tumbling Hearts Stencil with Tim Holtz Distress Kitsch Flamingo Distress Oxide Ink and on the other panel, clouds using My Favorite Things Cloud Stencil and Mini Cloud Edges Mix-ables Stencil with Tim Holtz Broken China Distress Oxide Ink. I die cut out the windows using the Catherine Pooler Essentials Slimline Die. These dies make it so easy to make a 3 window slimline card.

I added a piece of Neenah 110lb Classic Crest Cardstock 8.5 X 11″ to the back of the pattern paper backgrounds and a piece of vellum behind the stenciled panels, cut to 3-1/2 x 8-1/8″. Before adhering stenciled backgrounds to the card, I added the negative pieces of the window to the card. I stenciled some tiny hearts onto the background of the white windows with Hero Arts Heart Confetti Fancy Die (I die cut acetate to create the stencil) and Catherine Pooler Be Mine Ink.

I stamped a bunch of images from the Lawn Fawn SCENT WITH LOVE Clear Stamps and Dies and the Lawn Fawn SCENT WITH LOVE ADD-ON Clear Stamps and Dies onto some Neenah 110lb Classic Crest Cardstock 8.5 X 11″ with Memento Tuxedo Black Ink.

The images were colored with Copic colors. I used R14, 27 & 46 for all the red items; R81, 83, & 85 for all the pink items; YG25 & 17 for all the greenery; C1, 5, & 7 and 0 for the skunks; and E74 & 79 for all the chocolate items. I die cut all the images with the coordinating dies.

I finished them all by adding some Tonic Fresh Snowfall Nuvo Glitter Accents.

On the inside of the pink cards, I cut a piece of Neenah 110lb Classic Crest Cardstock to 3 x 8″ and stamped a sentiment and the three hearts from the Lawn Fawn SCENT WITH LOVE ADD-ON Clear Stamps and Dies with Memento Tuxedo Black Ink. For the white cards, I just stamped the image directly inside the cards.

Dimensions


Supplies

https://linkdeli.com/widget.js?id=f5e8378456858c916708

Thanks for reading this post. I hope you enjoyed and Iโ€™ve inspired you to give these cards a try for yourself. Leave comments or questions below or feel free to email.

Holidays 2022, Love & Friendship, Valentine's Day

Valentine’s Day Card featuring Lawn Fawn Giant Sentiment Dies

Happy New Year friends. Here’s some quick and simple cards you can make using the Giant XOXO and Giant Be My Valentine Dies. I also used the Lawn Fawn Quilted Heart Backdrop: Landscape Die which may be one of my new favorites!

For the first card, I cut a piece of Simon Says Stamp Cardstock 100lb Doll Pink 8-1/2 x 11″ to 5-1/2 x 8-1/2″ and scored at 4-1/4″ to create the card base. Then diecut the front panel with the Lawn Fawn Quilted Heart Backdrop: Landscape Die from Neenah 110lb Classic Crest Cardstock 8.5 X 11″ and a piece of Stampin’ Up! Red 12 x 12 Glitter Paper (retired) to 4 x 5-1/4″ to add behind it.

I diecut 3 of the XOXO sentiment from Neenah 110lb Classic Crest Cardstock 8.5 X 11″ using the Lawn Fawn GIANT XOXO Die and 3 from Simon Says Stamp 100lb Black 8-1/2 x 11″ Cardstock. I used Picked Raspberry Distress Ink to create an ombre effect on teh three sentiments then adhered them to the black ones, slightly shifting to create a shadow effect. I adhered all the pieces to the card base and this card is done! Super quick as I said previously.

On the inside of the card, I cut a piece of Neenah 110lb Classic Crest Cardstock 8.5 X 11″ to 4 x 5-1/4″ and adhered it to the inside of the card and stamped a sentiment and the hearts from the Lawn Fawn SCENT WITH LOVE ADD-ON Clear Stamps and Dies with Catherine Pooler Designs Midnight Ink.

Dimensions


For the second first card, I cut a piece of Simon Says Stamp Cardstock 100lb Lipstick Red 8-1/2 x 11″ to 5-1/2 x 8-1/2″ and scored at 4-1/4″ to create the card base. Then diecut the front panel with the Lawn Fawn Quilted Heart Backdrop: Landscape Die from Neenah 110lb Classic Crest Cardstock 8.5 X 11″ and a piece of Stampin’ Up! Black12 x 12 Glitter Paper (retired) to 4 x 5-1/4″ to add behind it.

I diecut the Be My Valentine sentiment from Neenah 110lb Classic Crest Cardstock 8.5 X 11″ using the Lawn Fawn GIANT BE MY VALENTINE Die and one from Simon Says Stamp 100lb Black 8-1/2 x 11″ Cardstock. I used Worned Lipstick and Candied Apple Distress Ink to create an ombre effect on the sentiment then adhered it to the black one, slightly shifting to create a shadow effect. I adhered all the pieces to the card base and this card is done!

On the inside of the card, I cut a piece of Neenah 110lb Classic Crest Cardstock 8.5 X 11″ to 4 x 5-1/4″ and adhered it to the inside of the card and stamped a sentiment and the hearts from the Lawn Fawn SCENT WITH LOVE ADD-ON Clear Stamps and Dies with Catherine Pooler Designs Midnight Ink.

Dimensions


Supplies

https://linkdeli.com/widget.js?id=f5e8378456858c916708

Thanks for reading this post. I hope you enjoyed and Iโ€™ve inspired you to give these cards a try for yourself. Leave comments or questions below or feel free to email.

Love & Friendship, Valentine's Day, Watercolor techniques

Valentine’s Day Card featuring Lawn Fawn Scent With Love

Happy New Year friends. Hope you all had some quality safe time with family and friends and are ready for a new and hopefully better year!

For my first cards of the new year I am making some cute Valentine’s cards using Lawn Fawn SCENT WITH LOVE Clear Stamps and Dies and Giant XOXO and Giant Be My Valentine combined with some simple watercolor/smooshed backgrounds. I haven’t done any watercoloring techniques in a while and wanted to play with this technique again. It’s great for quick backgrounds!

For the first card, I cut a piece of Simon Says Stamp 100lb Surf Blue 8-1/2 x 11″ Card Stock to 5-1/2 x 8-1/2″ and scored at 4-1/4″ to create the card base. Then cut another panel of Simple Stories – Sweet Talk Collection – 6 x 8 Papers (had some left over from my SSS Feb 2021 Card Kit – Love You Beary) to the same size as the card base (4-1/4 x 5-1/2″).

I took a piece of Strathmore 300 Series Bristol Smooth Paper, measuring 4-1/4 x 5-1/2″ and Catherine Pooler Cummerbund Ink to create the background. I used the smoosh technique (you put ink on an acrylic block or glass surface, add ink and lots of water and press your paper doen onto it) which is super easy and fun. Then I had to wait for it to dry….(always hard for me since I’m super impatient. LOL). Once dry, I used the Catherine Pooler Scallops & Dots Dies (I used the largest scallop) to cut it out. Always make sure the paper is completely dry before die cutting or it will tear the paper!

While waiting for the background to dry, I stamped a bunch of images from the Lawn Fawn SCENT WITH LOVE Clear Stamps and Dies and the Lawn Fawn SCENT WITH LOVE ADD-ON Clear Stamps and Dies onto some Neenah 110lb Classic Crest Cardstock 8.5 X 11″ with Memento Tuxedo Black Ink.

I colored the images with Copic colors. I used R17, 27 & 46 for all the red items; R81, 83, & 85 for all the pink items; YG25 & 17 for all the greenery; C1, 3, 5, & 7 for the skunks; and E74 & 79 for all the chocolate items. I die cut all the images with the coordinating dies.

I diecut the sentiment from Neenah 110lb Classic Crest Cardstock 8.5 X 11″ using the Lawn Fawn GIANT BE MY VALENTINE. I cut two of them and stacked them on top of each other. I stamped the rest of the sentiment from Lawn Fawn SCENT WITH LOVE Clear Stamps and Dies with Memento Tuxedo Black Ink and cut it to 1/2 x 3-1/2″. I chose a little skunk and the rose to add to the front of the card.

I finished it by adding some Kat Scrappiness 6mm Metallic Red Solid Heart Sequins.

On the inside of the card, I cut a piece of Neenah 110lb Classic Crest Cardstock 8.5 X 11″ to 4 x 5-1/4″ and adhered it to the inside of the card and stamped a sentiment and the heart balloon from the Lawn Fawn SCENT WITH LOVE ADD-ON Clear Stamps and Dies with Memento Tuxedo Black Ink.

Dimensions


For the second card, I cut a piece of Neenah 110lb Classic Crest Cardstock 8.5 X 11″ to 5-1/2 x 8-1/2″ and scored at 4-1/4″ to create the card base. Then again cut another panel of Simple Stories – Sweet Talk Collection – 6 x 8 Papers to 4-1/4 x 5-1/2″.

For the background again I used Strathmore 300 Series Bristol Smooth Paper, measuring 4-1/4 x 5-1/2″ and Catherine Pooler Pink Champagne and Pucker Up Inks to create the background, using the smoosh technique again. Once dry, I used the Catherine Pooler Scallops & Dots Dies (I used the largest scallop) to cut it out.

For this card, I diecut the sentiment from Neenah 110lb Classic Crest Cardstock 8.5 X 11″ using the Lawn Fawn Giant XOXO. Again cut two of them and stacked them. I stamped the rest of the sentiment from Lawn Fawn SCENT WITH LOVE Clear Stamps and Dies with Memento Tuxedo Black Ink and cut it to 1/2 x 3-1/2″. I chose a two little skunks, the envelope, and heart balloon images from the Lawn Fawn SCENT WITH LOVE Clear Stamps and Dies and Lawn Fawn SCENT WITH LOVE ADD-ON Clear Stamps and Dies.

I finished it by adding some Metallic Bright Gold Nuvo Crystal Drops.

On the inside of the card, I stamped a sentiment and the heart scent trail from the Lawn Fawn SCENT WITH LOVE Clear Stamps and Dies and the Lawn Fawn SCENT WITH LOVE ADD-ON Clear Stamps and Dies with Memento Tuxedo Black Ink.

Dimensions


Supplies

https://linkdeli.com/widget.js?id=f5e8378456858c916708

Thanks for reading this post. I hope you enjoyed and Iโ€™ve inspired you to give these cards a try for yourself. Leave comments or questions below or feel free to email.

Christmas, Slimline

Slimline Christmas House Card featuring Scrappy Tails Crafts

Hello friends. This festive holiday card features several of the Scrappy Tails Crafts add-on dies for the Slimline Bird House Pop Up Card Metal Die. These are tons of fun to play with and quickly becoming another favorite house builder set. These standalone dies are especially great for those of you who dislike or struggle with stamping.

For this card, I cut a piece of Neenah 110lb Classic Crest Cardstock 8.5 X 11″ to 9 x 8-1/2″ and scored at 4-1/2″ to create the card base, which I inked with Tim Holtz Broken China Distress Oxide and Salty Ocean Distress Oxide Inks to create a gradient background.

I die cut the house and chimney from Stampin’ Up! Sahara Sand 8-1/2″ X 11″ Cardstock with Slimline Bird House Pop Up Card Metal Die and then used the Slimline Brick Background Metal Craft Die to emboss the brick pattern onto them. I inked around the edges of both pieces with Stampin’ Up! Sahara Sand Ink. I diecut the roof, window frames and base from Simon Says Stamp Cardstock 100# Slate Gray 8-1/2 x 11″ Cardstock using the Slimline Bird House Pop Up Card Metal Die and German and American Christmas House Add-On Metal Craft Die and inked around them with Stampin’ Up! Basic Gray Ink. I also backed the windows with panels I cut from Neenah 110lb Classic Crest Cardstock 8.5 X 11″ and inked with Tim Holtz Mustard Seed Distress Ink.

I die cut the snow and pots for the Christmas trees (using the German and American Christmas House Add-On Metal Craft Die) and the lights strings (using the Christmas House Roof Add-On Metal Craft Die) from Neenah 110lb Classic Crest Cardstock 8.5 X 11″. I colored the light string with a green marker, then diecut the lights from red, green, yellow and aqua cardstock from my stash. The door was cut from Stampin’ Up! Cherry Cobbler 8-1/2″ X 11″ Cardstock using the Slimline Neighborhood House Pop Up – Add On Die and inked the pieces with Stampin’ Up! Cherry Cobbler Ink; the door knobs were cut from Tim Holtz Idea-ology 8 x 8 Paper Stash Metallic Kraft Stock.

All the greenery was die cut from Bazzill Basics – 12 x 12 Parakeet Cardstock and inked with Catherine Pooler Eucalyptus Ink. And the bows and ornaments for the trees were die cut from Stampin’ Up! Red & Green 12″ X 12″ Foil Sheets.

I finished it off by adding some splatters with White Acrylic Paint and Tonic Fresh Snowfall Nuvo Glitter Accents to the snow and Nuvo Crystal Drops in Metallic Bright Gold to the garland and wreaths on the door.

On the inside of the card, I die cut a sentiment from Stampin’ Up! Cherry Cobbler 8-1/2″ X 11″ Cardstock using the Stampin’ Up! Word Wishes Dies and added another small wreath.

Dimensions


Supplies

https://linkdeli.com/widget.js?id=f5e8378456858c916708

Thanks for reading this post. I hope you enjoyed and Iโ€™ve inspired you to give this card a try for yourself. Leave comments or questions below or feel free to email.

Christmas

Holiday Card featuring Catherine Pooler’s Wrapped and Ready Stampset

Hello friends. This little car from Catherine Pooler Wrapped and Ready Stampset is so cute! I also love how large it is so it covers a good portion of an A2 card or a mini slimline card as well. In a previous post I created a mini slimline card using this stampset.

For this card, I cut a piece of Neenah 110lb Classic Crest Cardstock 8.5 X 11″ to 5-1/2 x 8-1/2″ and scored at 4-1/4″ to create the card base and piece of to 4-1/4 x 5-1/2โ€ for the top panel, which I colored using Tumbled Glass and Broken China Distress Inks then diecut using Catherine Pooler’s Scallops & Dots Dies and embossed the panel with one of Queen and Company’s Embossing Folder Bundle folders.

I stamped the car image and several ornaments from the Catherine Pooler Wrapped and Ready Stampset onto Neenah 110lb Classic Crest Cardstock 8.5 X 11″ with Memento Tuxedo Black Ink, and the sentiment with Catherine Pooler Rockin Red Ink.

I colored the car with Copic Markers. I used R05, R17 & R46; Y02 and Y18; and C1, C3, C5, C7 & C9 for the car. R05, R17 & R46; Y02 and Y18; C1, C3, C5, C7; YG01, YG25, YG17; BV11 & BV08; YR14 & YR16; B00 & B02; and R81 & R85 for the gifts; and R05, R17 & R46; YG01, YG25, YG17; and C1, C3, C5 for the ornaments. I used a White Uni-Ball Gel Pen to add highlights to the car.

I adhered the sentiment and some of the ornaments using 3M Foam Tape. I finished it off by adding Ranger Glossy Accents Glue to the windshield.

I left the inside of the card empty.

Dimensions


https://linkdeli.com/widget.js?id=f5e8378456858c916708

Thanks for reading this post. I hope you enjoyed and Iโ€™ve inspired you to give these cards a try for yourself. Leave comments or questions below or feel free to email.

Christmas

Quick Mini Slimline Holiday Card

Hello friends. Need a quick Holiday card?!? Here’s a mini slimline card that took little time to make. The coloring is the most time consuming but you can just do flat coloring (no shading) to save time.

For this card, I cut a piece of Neenah 110lb Classic Crest Cardstock 8.5 X 11″ to 6 x 6″ and scored at 3″ to create the card base and piece of to 3 x 6โ€ for the top panel, which I diecut with the Catherine Pooler Marquise Slimline Cover Plate Die.

I stamped the car image from the Catherine Pooler Wrapped and Ready Stampset onto Neenah 110lb Classic Crest Cardstock 8.5 X 11″ with Memento Tuxedo Black Ink, and the sentiment with Catherine Pooler Rockin Red Ink.

I colored the car with Copic Markers. I used Y02 and Y15; YG25, YG17 and G28; and C1, C3, C5 & C7 for the car. R05, R17 & R46; Y02 and Y15; YG25, YG17 and G28; C1, C3 & C5; BV11 & BV08; YR14 & YR16; B00, B02, & B04; and R81 & R85 for the gifts. I adhered it to the card using 3M Foam Tape.

I finished it off by adding some Nuvo Rosewater and Key Lime Jewel Drops .

Dimensions


https://linkdeli.com/widget.js?id=f5e8378456858c916708

Thanks for reading this post. I hope you enjoyed and Iโ€™ve inspired you to give these cards a try for yourself. Leave comments or questions below or feel free to email.

Christmas, Encouragement

Fun Minty Cards featuring Lawn Fawn Dies

Hello friends. When Lawn Fawn came out with the How You Bean? Mint Add-on, I knew I had to get it. I love that they keep adding sets to go with the How You Bean? set. They are so much fun to play with and endless possibilities for cards. I used the same background die for both — the Lawn Fawn Peppermint Stripes Backdrop along with the same two stamp sets above to make two cards for different occasions.

For both cards, I cut two pieces of Neenah 110lb Classic Crest Cardstock 8.5 X 11″ to 5-1/2 x 8-1/2″ and scored at 4-1/4″ to create card bases. Then I die cut Stampin’ Up! Real Red 8-1/2″ x 11″ Cardstock and Lawn Fawn Guava 8-1/2 x 11″ Cardstock with the Lawn Fawn Peppermint Stripes Backdrop and adhered each to the card base.

For the first card, I die cut a panel from Vellum with the Catherine Pooler Scallops and Dots Die Set and embossed it with one of the embossing folders from the the Queen and Company Embossing Folder Bundle.

I stamped the mason jar from Lawn Fawn HOW YOU BEAN? stampset with Memento Tuxedo Black Ink onto some Neenah 110lb Classic Crest Cardstock 8.5 X 11″ and the lid with Tsukineko Stazon Midi Jet Black Ink Pad onto a piece of Stampin’ Up! RED & GREEN 12″ X 12″FOIL SHEETS. Then stamped the peppermints from the Lawn Fawn Set How You Bean? Mint Add-on with Memento Tuxedo Black Ink onto some Neenah 110lb Classic Crest Cardstock 8.5 X 11″.

I used Copic Markers to color the jar and add some shading to the peppermints. I used BG000 + BG01 and C1 and C00 for the peppermints. I diecut all the images with the coordinating dies and adhered them to the card, popping up a few peppermints using Stampin’ Dimensionals.

I stamped a sentiment from Lawn Fawn’s Merry Messages Stamp Set with Stampin’ Up! Real Red Ink onto Neenah 110lb Classic Crest Cardstock 8.5 X 11″ and trimmed it before adding to the card.

I finished it by adding some Tonic FRESH SNOWFALL Nuvo Glitter Accents.

On the inside of the card, I stamped a sentiment from Lawn Fawn’s Merry Messages Stamp Set and peppermints from the Lawn Fawn Set How You Bean? Mint Add-on with Stampin’ Up! Real Red Ink.

Dimensions


For the second card, I die cut a panel from Vellum with the Catherine Pooler Scallops and Dots Die Set. I stamped the mason jar from Lawn Fawn HOW YOU BEAN? stampset with Memento Tuxedo Black Ink onto some Neenah 110lb Classic Crest Cardstock 8.5 X 11″ and the lid with Tsukineko Stazon Midi Jet Black Ink Pad onto a piece of Tim Holtz Idea-ology 8 x 8 Paper Stash Metallic Kraft Stock. Then stamped the peppermints from the Lawn Fawn Set How You Bean? Mint Add-on with Stampin’ Up! Old Olive Ink onto some Neenah 110lb Classic Crest Cardstock 8.5 X 11″.

I used Copic Markers to color the jar and add some shading to the peppermints. I used BG000 + 0 and C1 and C00 for the peppermints. I diecut all the images with the coordinating dies and adhered them to the card.

I stamped a sentiment from Lawn Fawn Set How You Bean? Mint Add-on with Lawn Fawn Guava Ink onto Neenah 110lb Classic Crest Cardstock 8.5 X 11″ and trimmed it before adding to the card.

I finished it by adding some Metallic Bright Gold Nuvo Crystal Drops.

On the inside of the card, I stamped a sentiment and peppermints from the Lawn Fawn Set How You Bean? Mint Add-on with Stampin’ Up! Old Olive Ink.

Dimensions


Supplies

https://linkdeli.com/widget.js?id=f5e8378456858c916708

Thanks for reading this post. I hope you enjoyed and Iโ€™ve inspired you to give these cards a try for yourself. Leave comments or questions below or feel free to email.

Christmas, Window Cards

Quick and Easy Faux Window Card featuring Catherine Pooler Round of Merry Dies

Hello friends. Here’s a super simple Christmas card using Catherine Pooler Round of Merry Dies and the Candy Cane Background stamp.

For this card, I cut a piece of Neenah 110lb Classic Crest Cardstock 8.5 X 11″ to 5-1/2 x 8-1/2″ and scored at 4-1/4″ to create a card base and piece of Neenah 80lb Classic Crest Cardstock 8.5 X 11″ to 4-1/4 x 5-1/2โ€ for the top panel. I stamped the background with Candy Cane Background stamp and Rouge Ink, and trimmed it down to 4 x 5-1/4″.

I die cut the sentiment from both Neenah 110lb Classic Crest Cardstock 8.5 X 11″ and Stampin’ Up! Basic Black 8-1/2″ X 11″ Cardstock with the Catherine Pooler Round of Merry Dies. I left the dies connected so I got the extra circle frame piece which I also used on this card. I stacked the white and black sentiments before adhering to the card. I also added a piece of Vellum behind the sentiment piece. you can use a punch or die to cut this out or do what I did which is trace the outside edge of the inner circle and cut slightly inside that line. It doesn’t have to be perfect since no one will see this.

I stamped the little tree from the Wrapped and Ready Stamp Set with Memento Tuxedo Black Ink and colored it with Copic Markers. I used Y13 + Y18 for the star and some ornaments; RV10 + RV14, BG53 + BG57, R05 + R46 for ornaments; YG17 for the tree; and C1 + C5 for the pot. Then die cut the image with the Wrapped and Ready Dies. I finished it off by adding some clear sequins from my stash.

On the inside of the card, I stamped a sentiment from Lawn Fawn’s Merry Messages Stamp Set with Rouge Ink

Dimensions


Supplies

https://linkdeli.com/widget.js?id=f5e8378456858c916708

Thanks for reading this post. I hope you enjoyed and Iโ€™ve inspired you to give these cards a try for yourself. Leave comments or questions below or feel free to email.