Hello friends. You don’t have pattern paper for your card background?!? No problem. Use tissue paper. Tissue paper is readily available at several store in the gift wrap section. Dollar Tree or any other dollar store sells them and you can make several cards from one sheet!

For this card, I die cut a piece of Neenah 100lb Classic Crest Cardstock 8.5 X 11″ to 5-1/2 x 11″ and scored at 5-1/2″ to create a card base and another piece which I cut to 5 x 5″. I adhered a piece of Valentine’s Day tissue paper I got from the Dollar Tree to that 5 x5″ panel. Then, ran it through my embossing/diecutting machine with an embossing folder from Queen & Company (unfortunately no longer available).
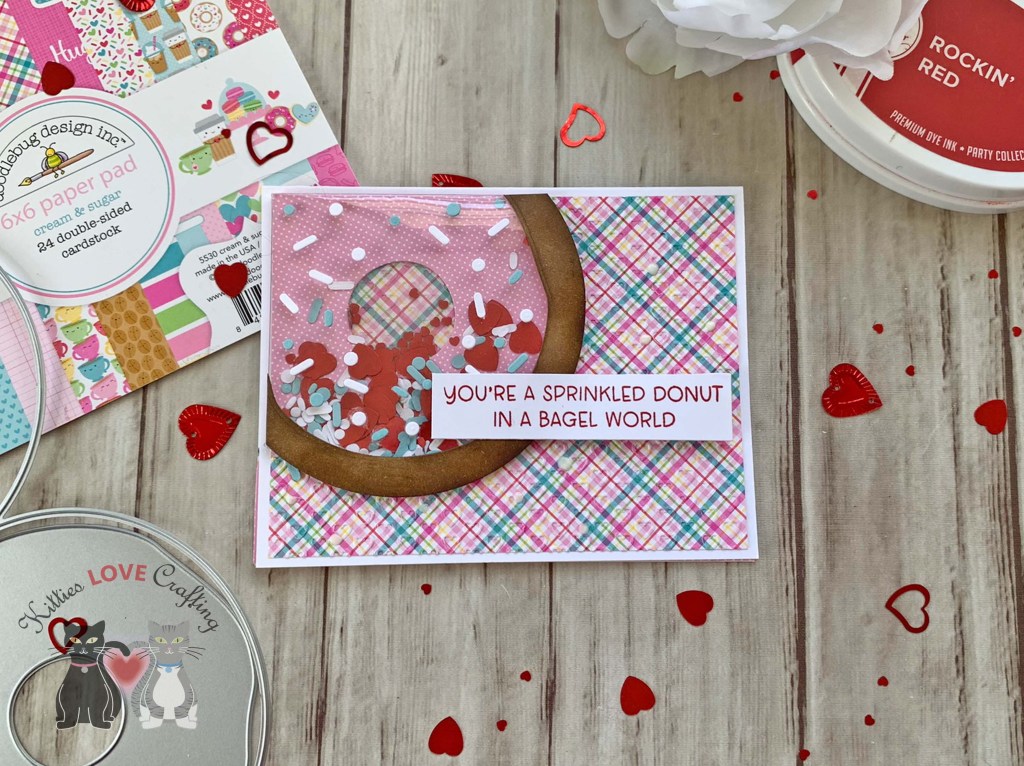
I die cut a lacy heart from Neenah 100lb Classic Crest Cardstock 8.5 X 11″ using the Lawn Fawn Lacy Heart Stackables. I also die cut all images from Neenah 100lb Classic Crest Cardstock 8.5 X 11″ using the Trinity Stamps Tiny Donut Dipper Die Set. I colored them using Copic Markers. I used E37 & E49 and E33 & E21 for the donuts; RV04, RV09 & RV21 and R20, R27 & R22 for the donut frostings; E37 & E49 and E21 & E33 for the donut holes; and RV10 & RV04, and R20 & R22 for their frostings
I stamped a sentiment from Simon Says Stamp Love You Beary Much Stampset onto Neenah 100lb Classic Crest Cardstock 8.5 X 11″ with Catherine Pooler Designs Rockin’ Red Ink.

I added a piece of acetate to the center of the donut and the added the heart on top and the other white piece of the circle card which I added to the back of the front panel.
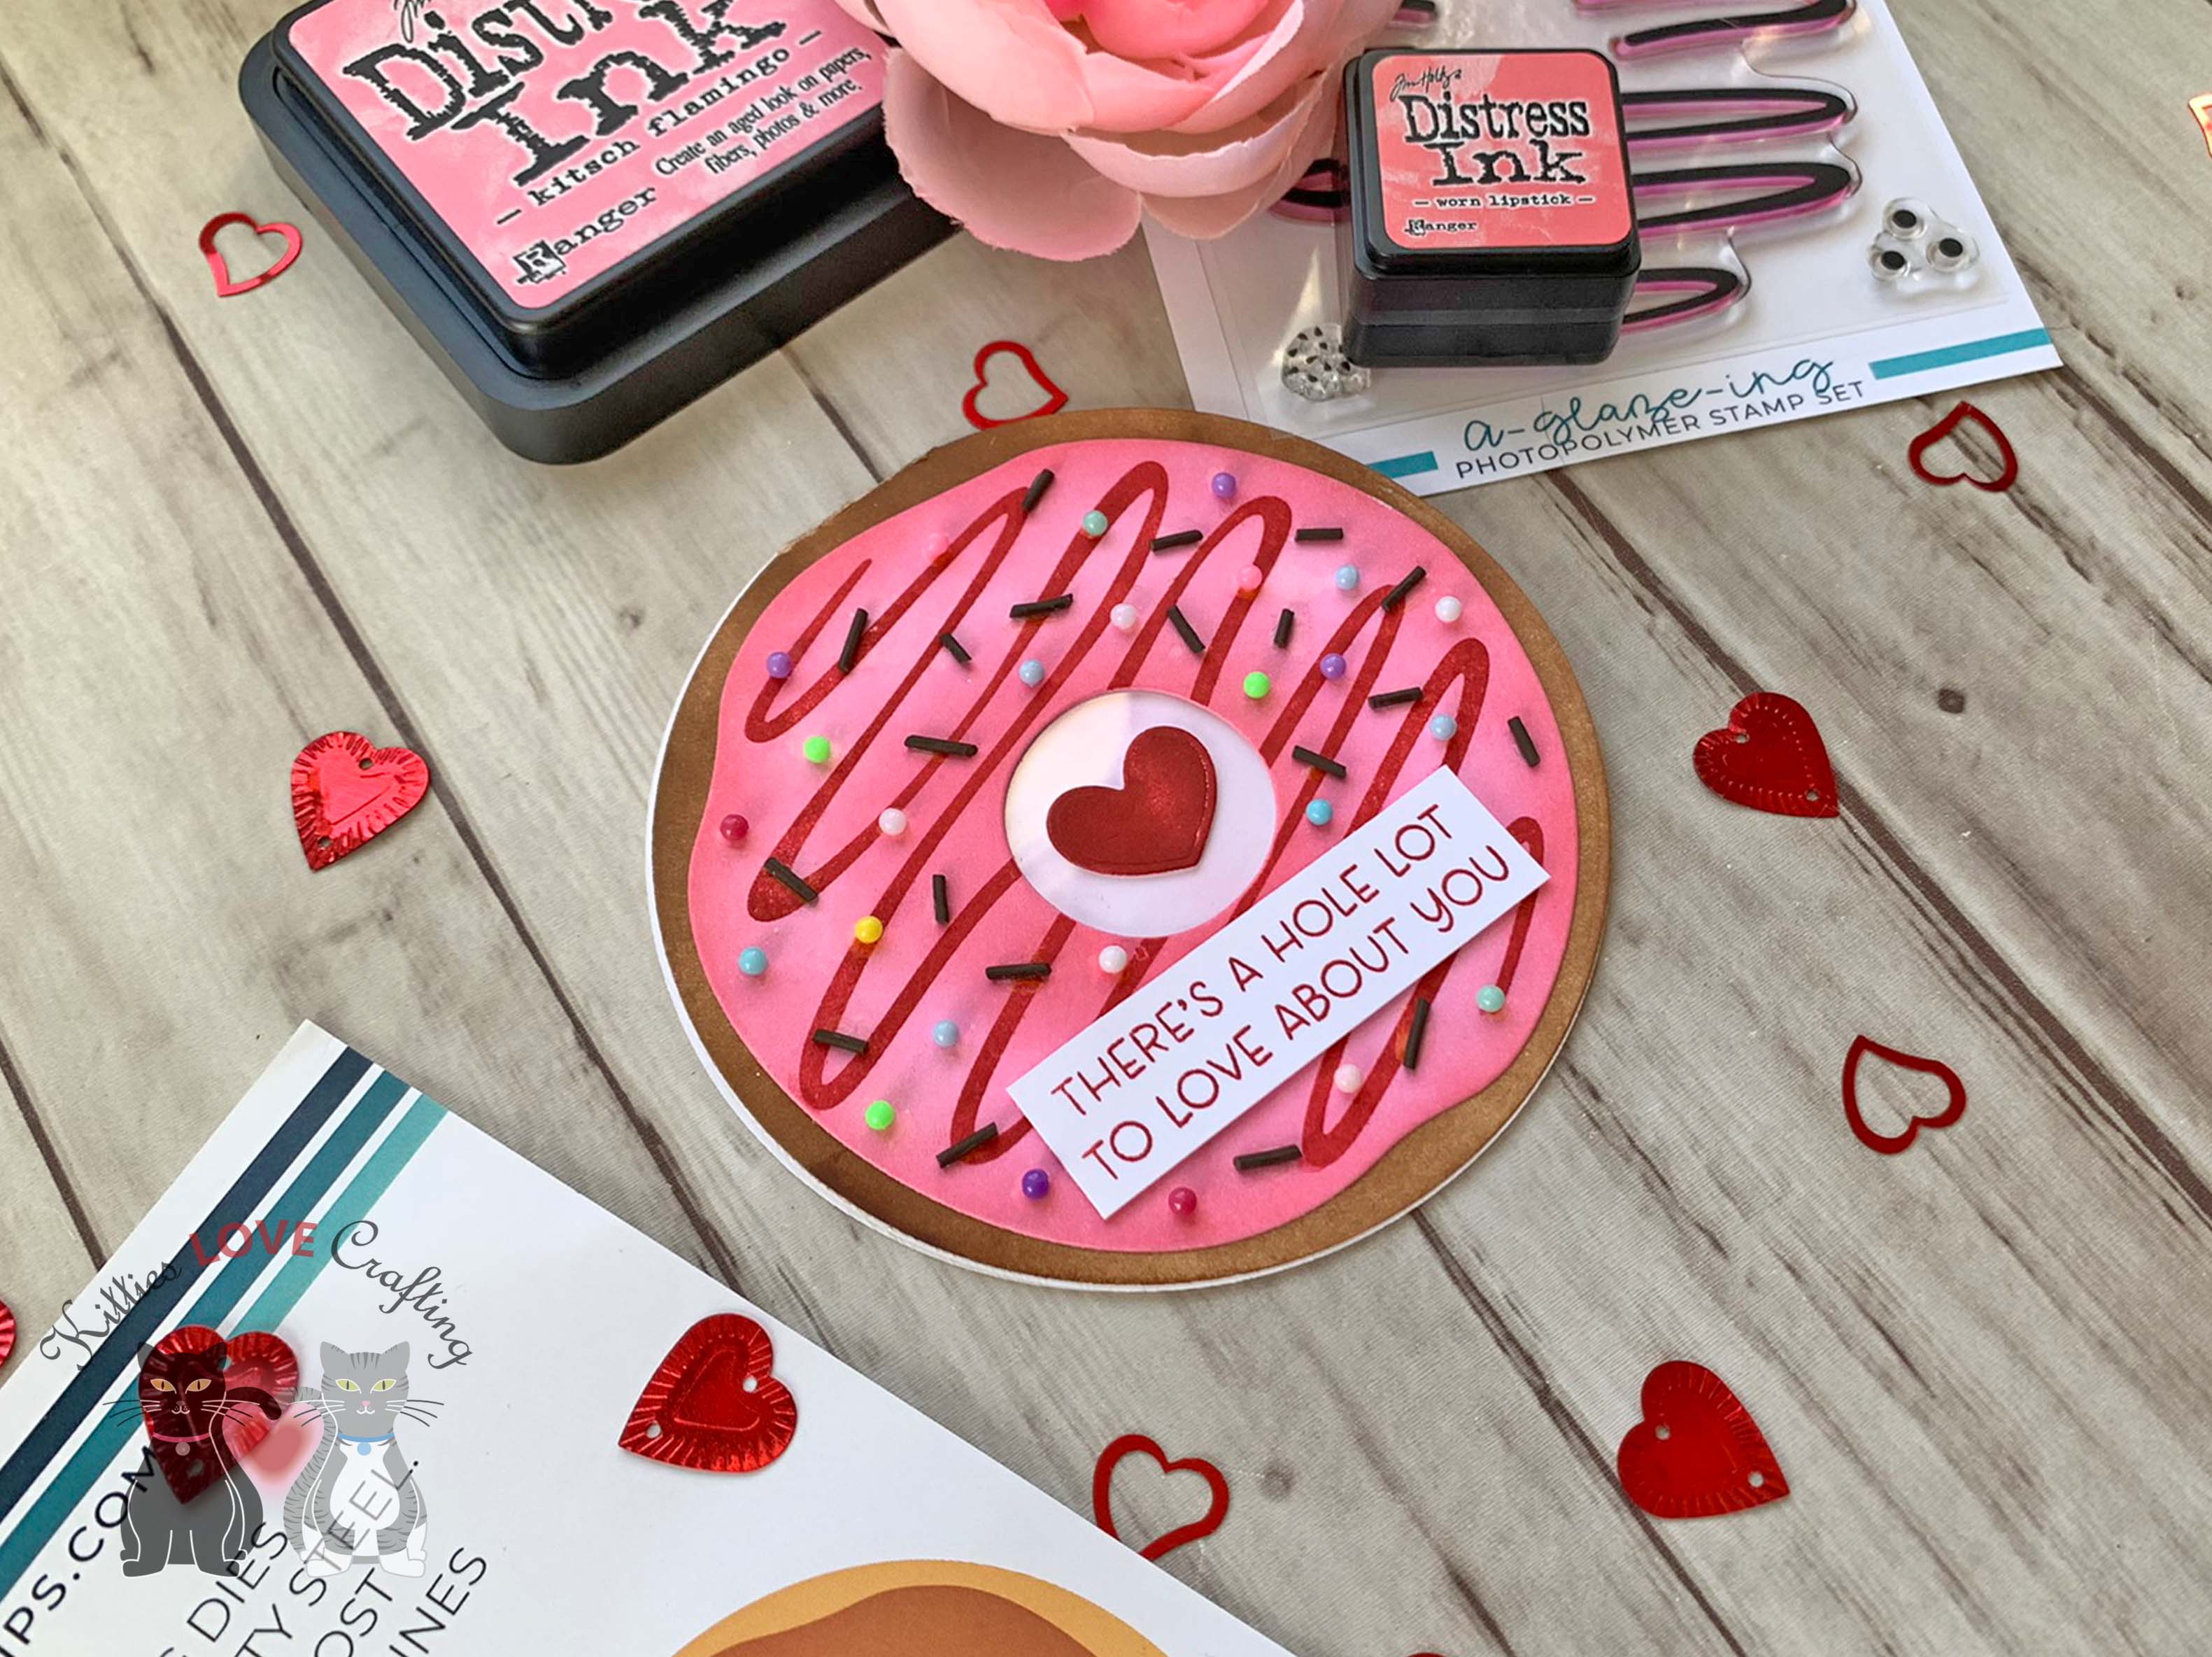
I stamped a sentiment from the Trinity Stamps A-GLAZE-ing 4×8 Stamp Set onto Neenah 100lb Classic Crest Cardstock 8.5 X 11″ with Catherine Pooler Designs Midnight Ink. I popped it up with some 3M Foam Tape.
I finsihed off the card by adding some Nuvo Fresh Snowfall Glitter Drops and some Ranger Glossy Accents Glue Dimensional Adhesive over the glaze and one donut hole.
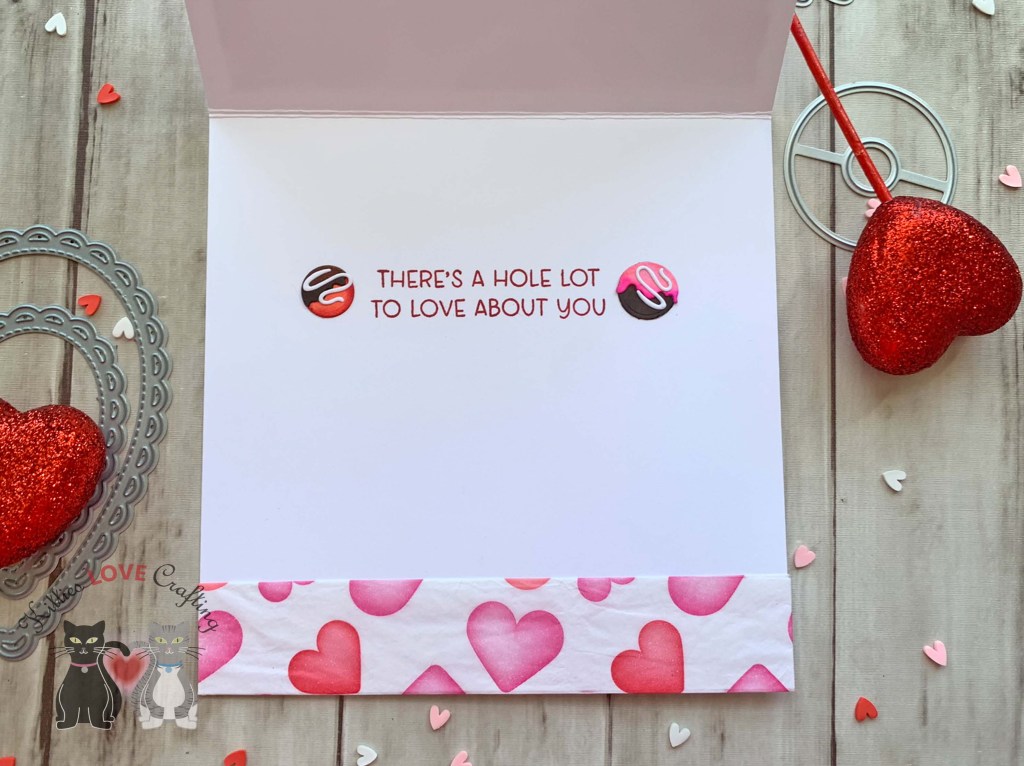
On the inside of the card, I cut a piece of Neenah 100lb Classic Crest Cardstock 8.5 X 11″ to 1 x 5-1/2″ and adhered a piece of Valentine’s Day tissue paper. I stamped a sentiment from the Trinity Stamps A-GLAZE-ing 4×8 Stamp Set with Catherine Pooler Designs Rockin’ Red Ink and added some more donut holes.
Dimensions
- Card Base = 5-1/2 x 11″ and scored at 5-1/2″ Neenah 100lb Classic Crest Cardstock 8.5 X 11″
- Top Panel = 5 x 5″ Neenah 100lb Classic Crest Cardstock 8.5 X 11″ and Valentine’s Day tissue paper
- Inside Strip = 1 x 5-1/2″ Neenah 100lb Classic Crest Cardstock 8.5 X 11″ and Valentine’s Day tissue paper
Supplies
 https://linkdeli.com/widget.js?id=f5e8378456858c916708
Thanks for reading this post. I hope I’ve inspired you to give this cute Valentine’s Day card a try for yourself. Leave comments or questions below or feel free to email.