Cards, Christmas

Holiday Snowglobe Scene Card feat. Lawn Fawn Frosty Family

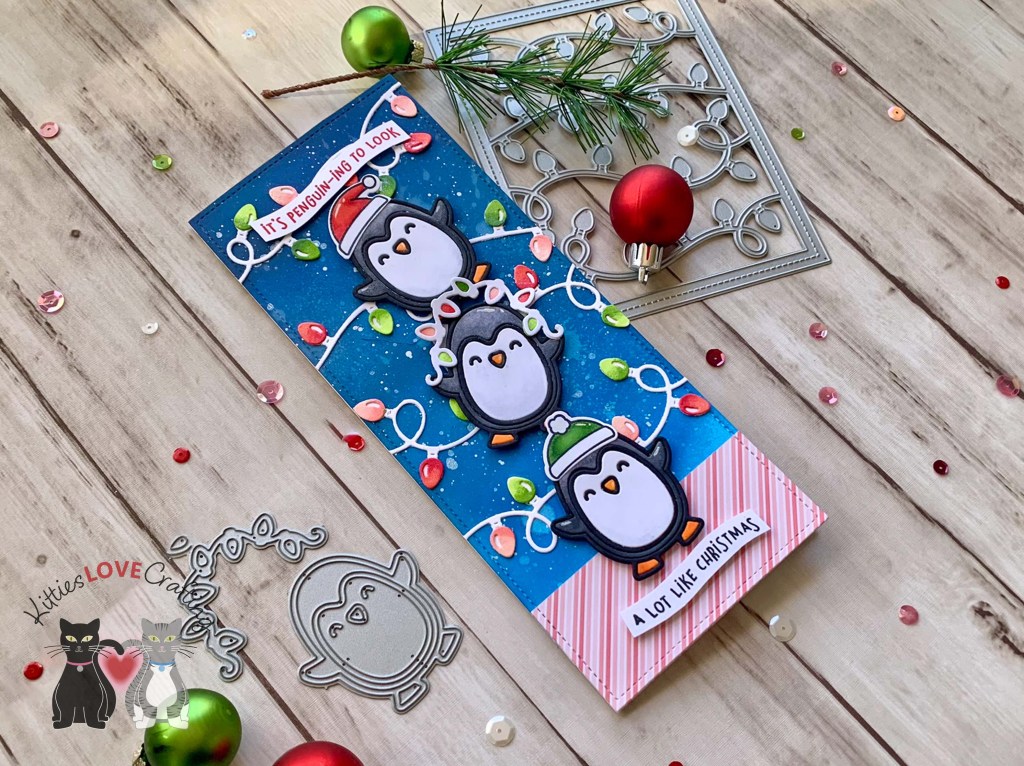
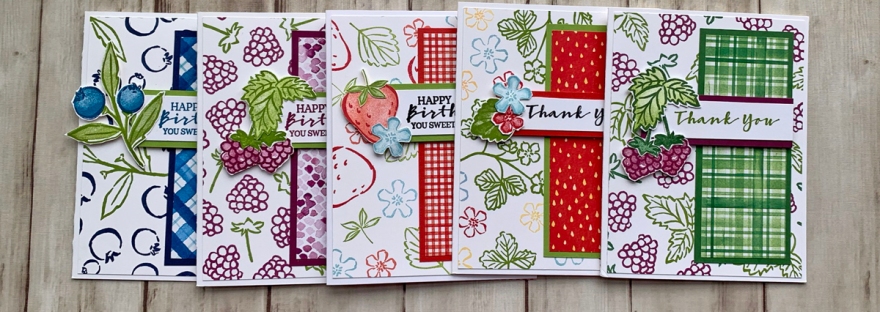
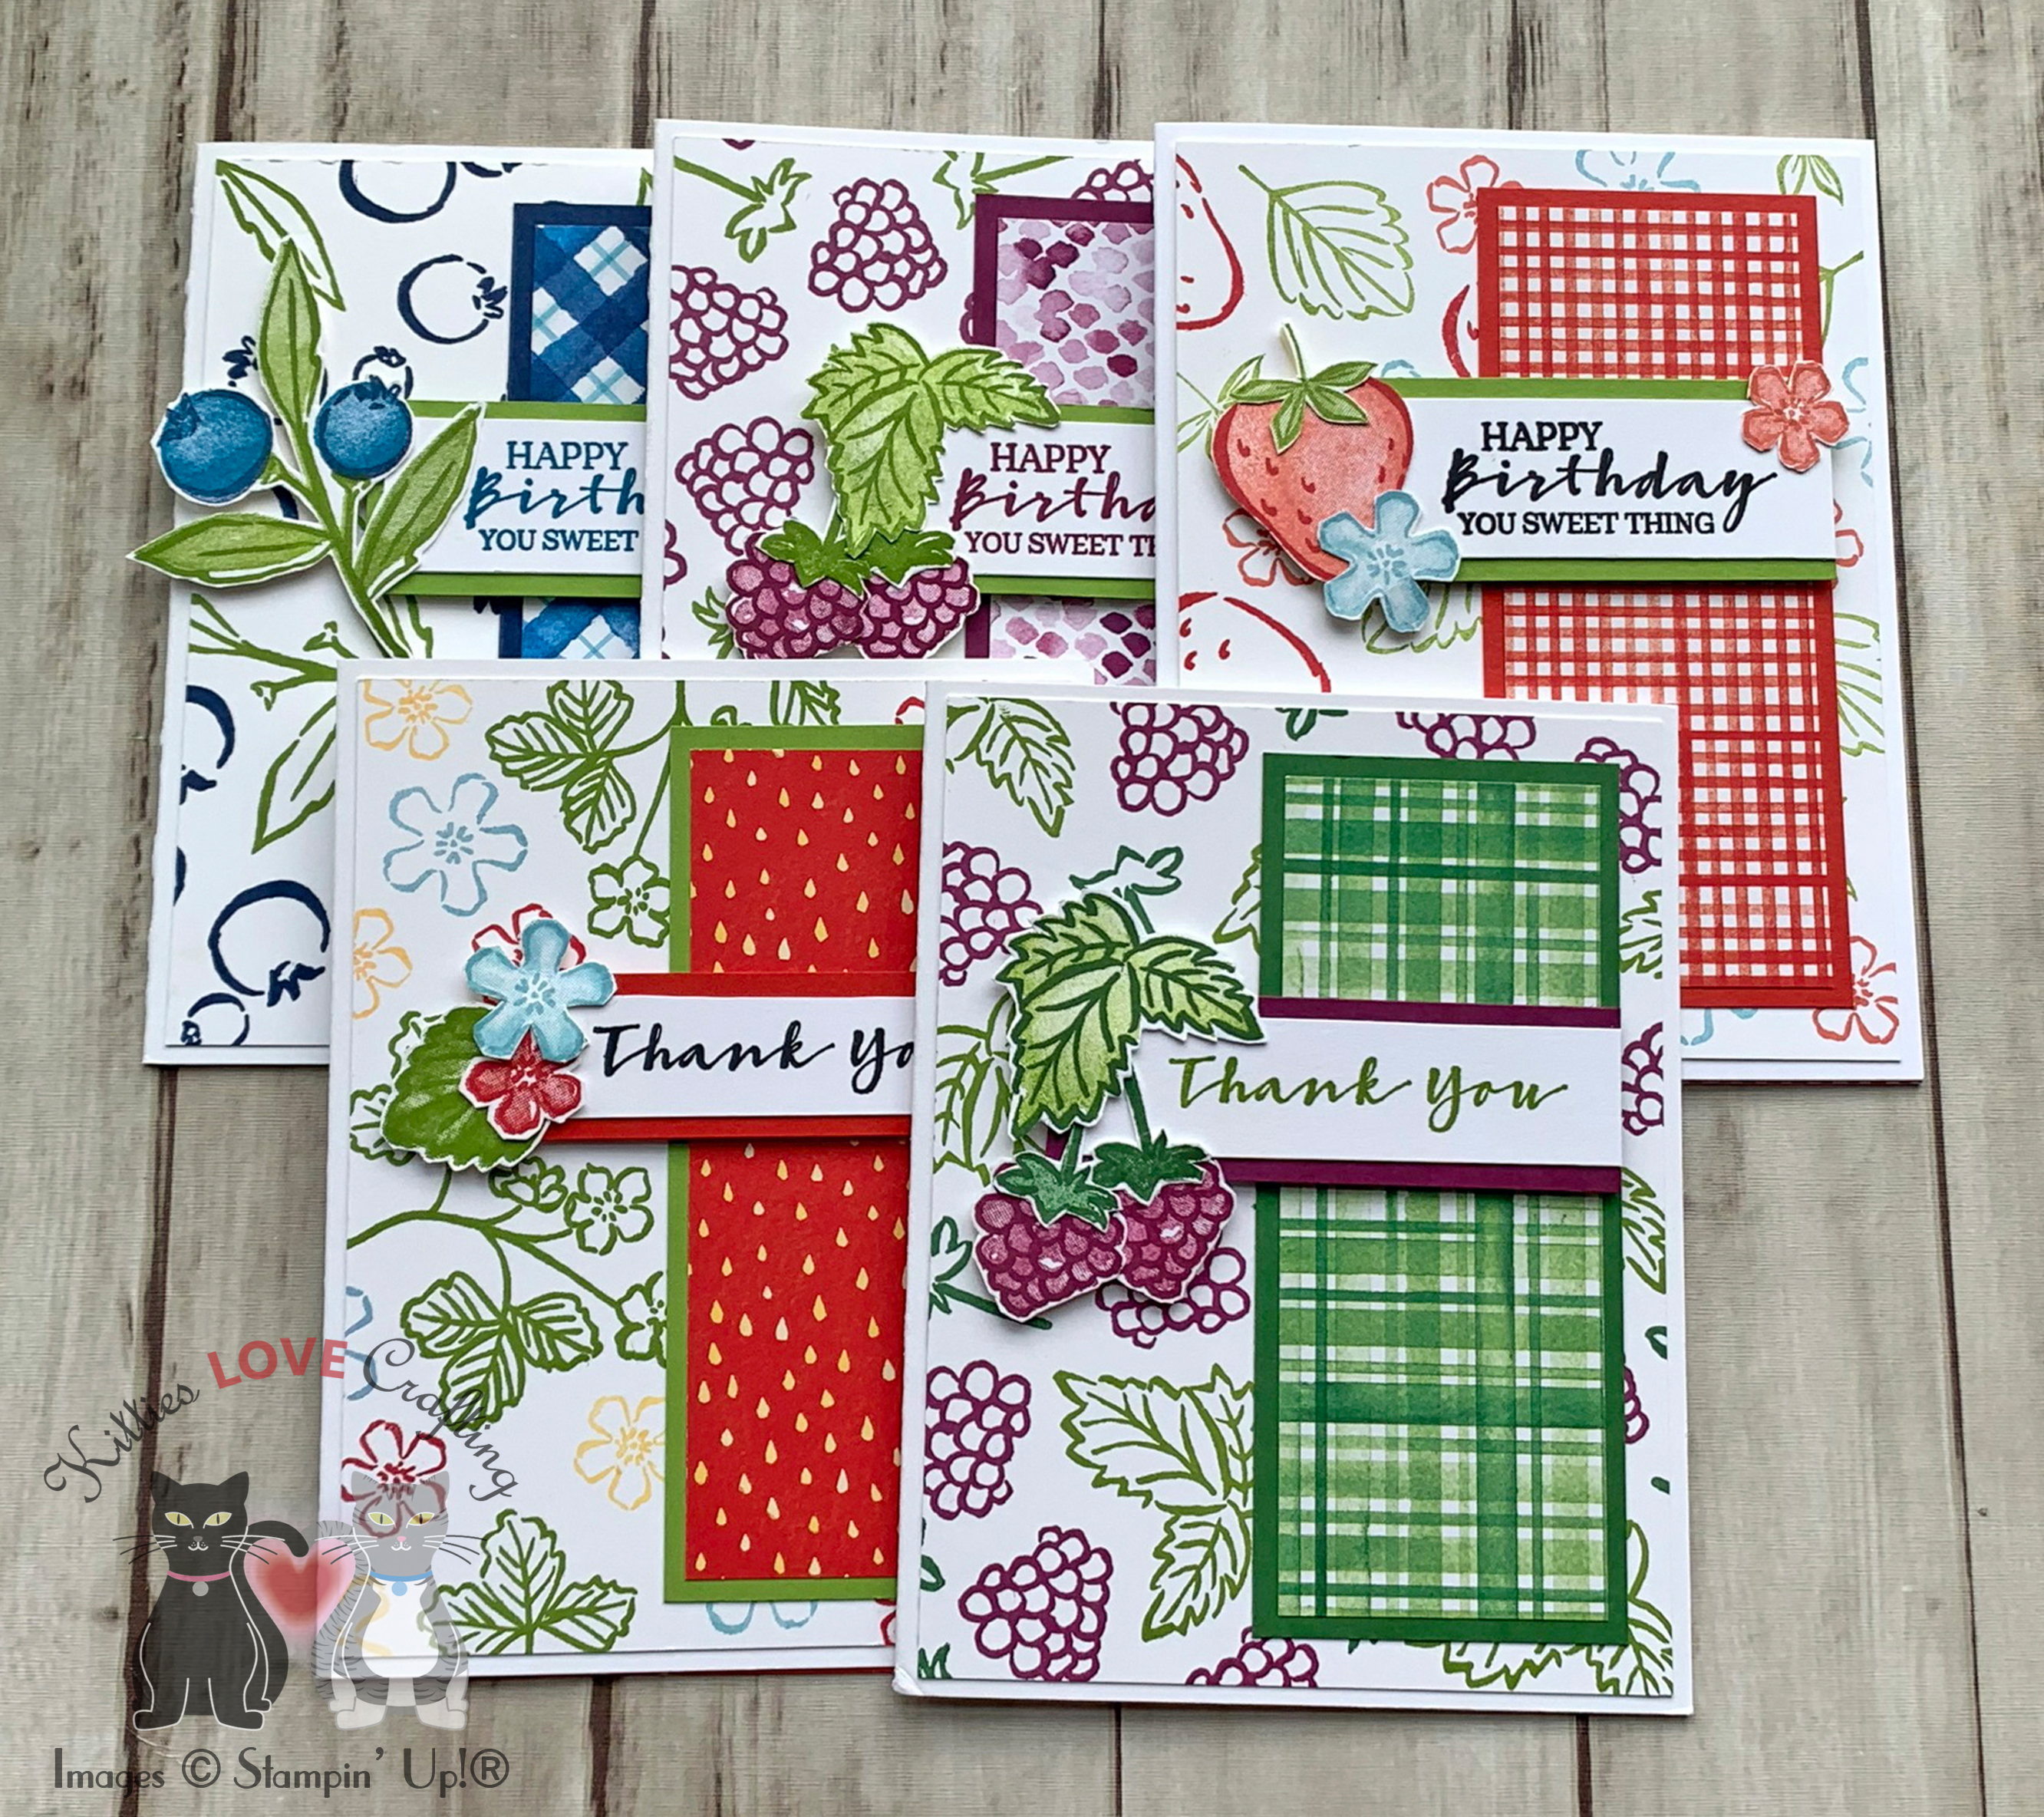
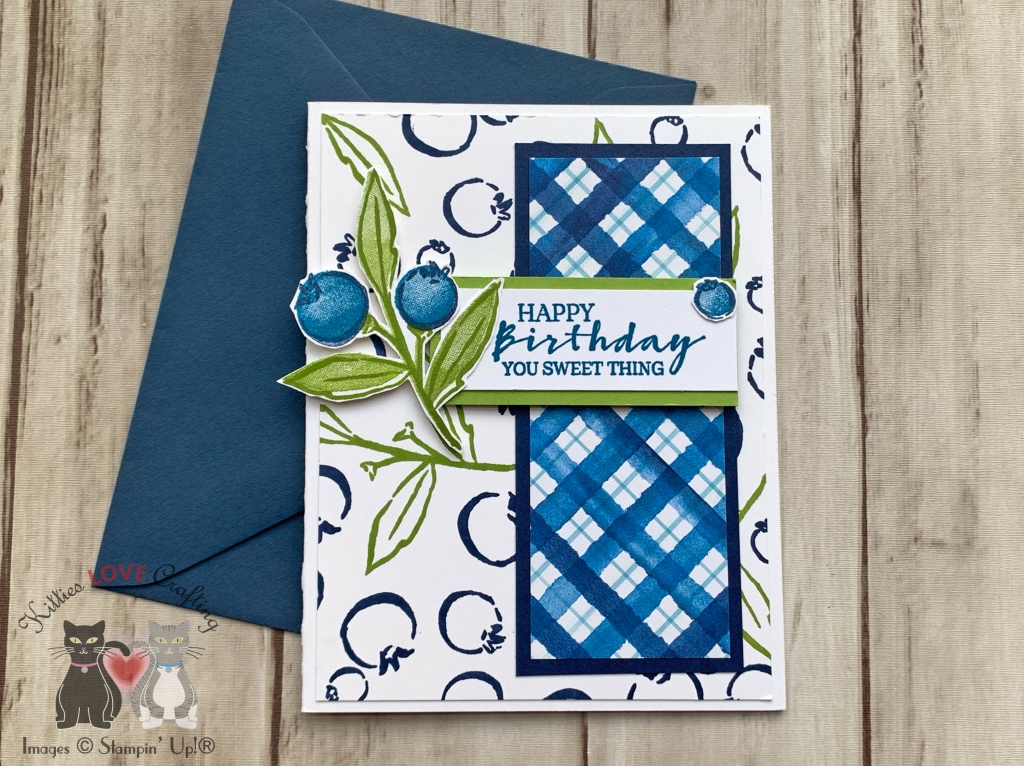
Hello friends. This cute little snowman family from Lawn Fawn Frosty Family Stamps was just so much fun to color and use on a card. I used the Catherine Pooler Snowglobe Dies (discontinued) to create this cute snowglobe scene.

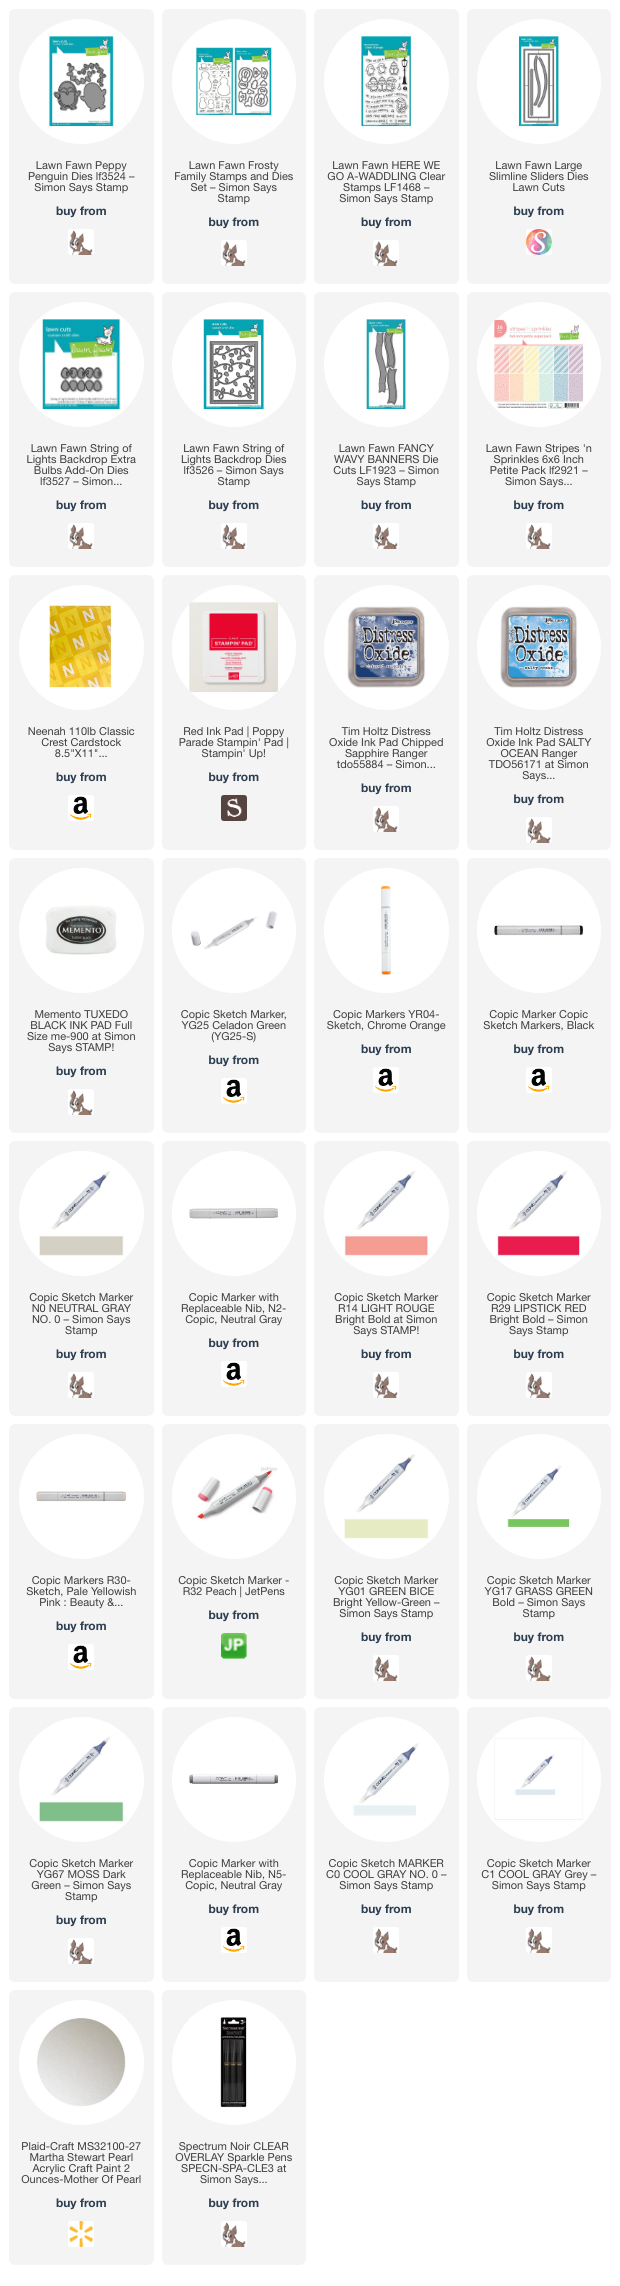
For this card, I cut a piece of Stampin’ Up! Poppy Parade 8-1/2″ X 11″ Cardstock to 11 x 5-1/2″ and scored at 5-1/2″ as well as a piece of Lawn Fawn Candy Cane Lane 6 x 6″Inch Paper Pack to 5-1/4 x 5-1/4″ using Queen & Company’s Foundation 16 Dies.

I die cut the snowglobe background from Neenah 100lb Classic Crest Cardstock 8.5 X 11″ using the Catherine Pooler Snowglobe Dies (discontinued). Then used Tim Holtz Tumbled Glass and Uncharted Mariner Distress Oxide Inks to ink blend the sky. I sprayed some water on it as well as some splatter with Plaid-Craft Martha Stewart Pearl Acrylic Craft Paint. I die cut the snowy hills from Neenah 100lb Classic Crest Cardstock 8.5 X 11″ using Lawn Fawn Stitched Hillside Borders Dies and the snowglobe base from Tim Holtz Idea-Ology Metallic Gold & Silver Kraft Cardstock.

I stamped the snowmen and accessories from the Lawn Fawn Frosty Family Stamps onto Neenah 100lb Classic Crest Cardstock 8.5 X 11″ with Memento Tuxedo Black Ink. I colored the image with Copic markers. I used BG000 & 0, R20, YR14 & YR04, and 100 for the snowmen; R17 & R46 and YG17 & YG67 for the scarves; W5 & W7 for the twig hands; and C1 & 0, R17 & R46 and YG17 & YG67 for the hats.

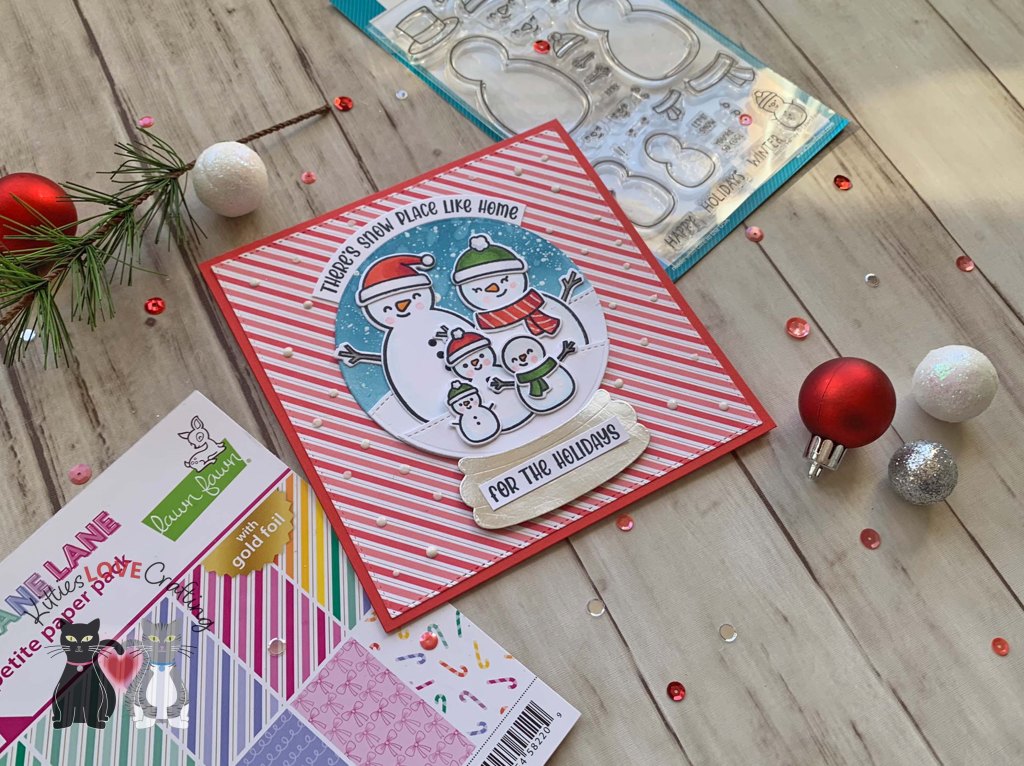
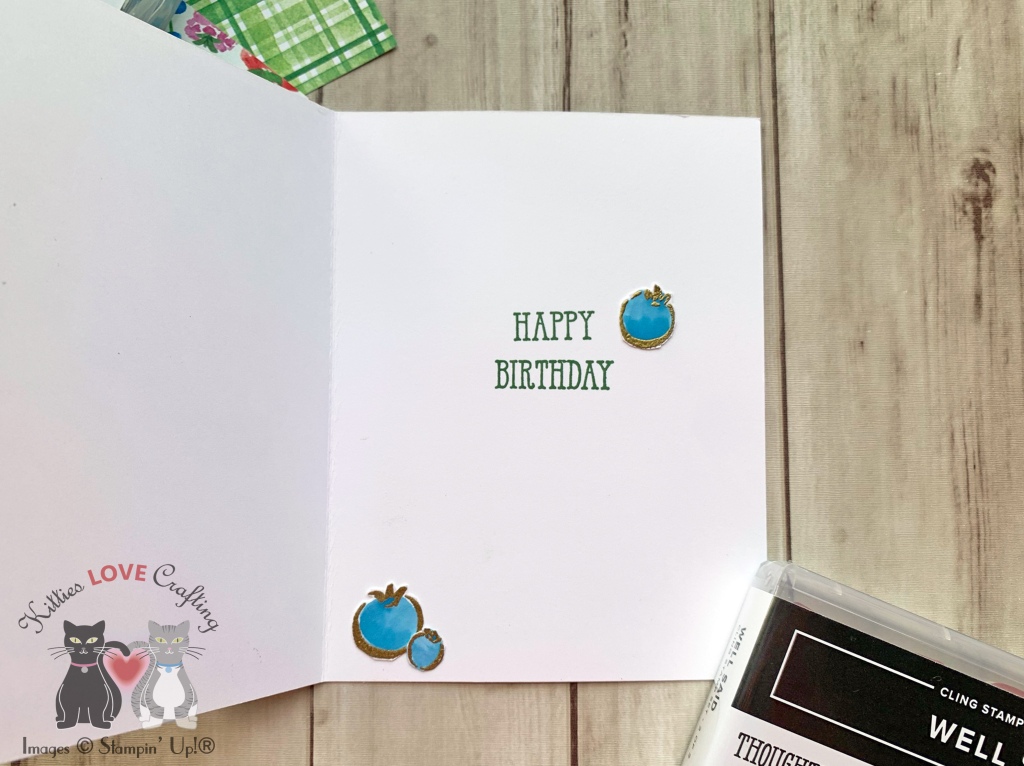
For the sentiment, I stamped it from the Lawn Fawn Henry’s Build-A-Sentiment – Winter onto Neenah 100lb Classic Crest Cardstock 8.5 X 11″ with Memento Tuxedo Black Ink. I curved the top portion of the sentiment.

I finished the card by adding some shimmer with a Spectrum Noir Clear Overlay Sparkle Pen and some Nuvo White Gloss Drops.

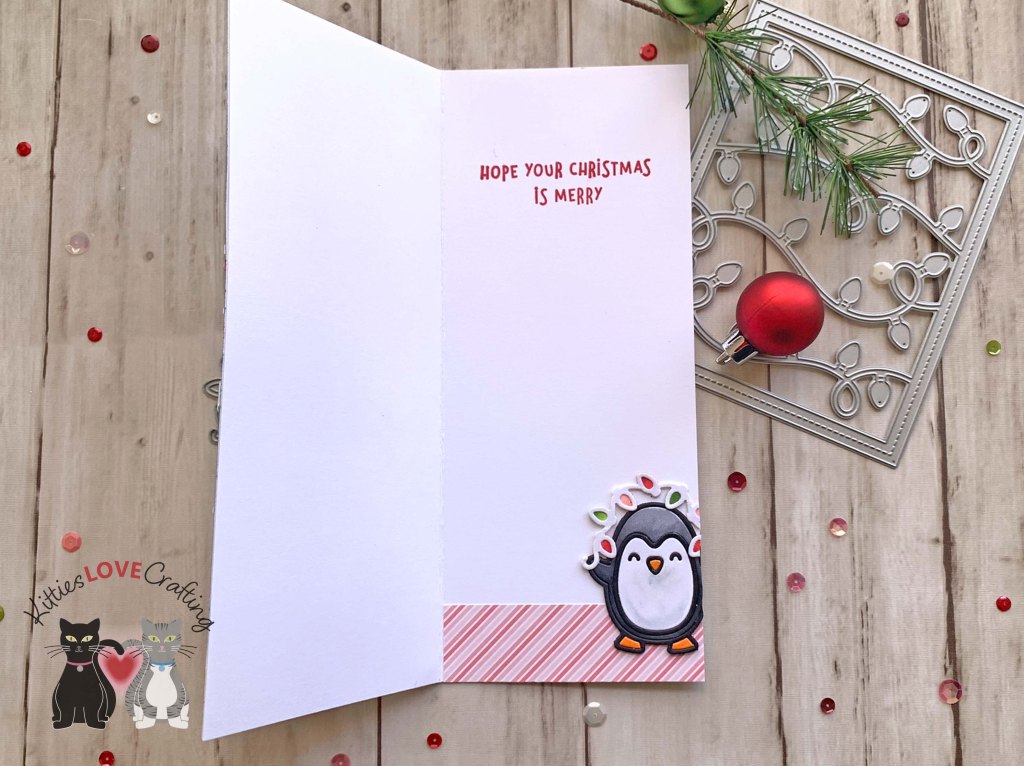
On the inside of the card, I cut a piece of Neenah 100lb Classic Crest Cardstock 8.5 X 11″ to 5-1/4 x 5-1/4″ using Queen & Company’s Foundation 16 Dies and a strip of Lawn Fawn Candy Cane Lane 6 x 6″ Inch Paper Pack to 1 x 5-1/4″. I stamped another sentiment from Lawn Fawn Henry’s Build-A-Sentiment – Winter with Stampin’ Up! Poppy Parade Ink.

Dimensions


Supplies

https://linkdeli.com/widget.js?id=f5e8378456858c916708

Thanks for reading this post. I hope Iโ€™ve inspired you to make this cute snowmen family card! Leave comments or questions below or feel free to email.

Cards, Christmas, Slimline

Adding Dimension to Die Cuts with Markers: Peppy Penguin Slimline Card

Hello friends. Once again, I cannot resist using this cute penguin die set from Lawn Fawn. I knew I had to have this little penguin when the release came out! He is very versatile and can be used for many occasions. On this card, I have three penguins precariously perched on top of each other. So very cute!!!

For this card, I cut a piece of Neenah 100lb Classic Crest Cardstock 8.5 X 11″ to 7 x 8-1/2″ and scored at 3-1/2″ to create a slimline card base. I die cut another piece with the Lawn Fawn Large Slimline with Sliders. I used the largest die which measures 3-1/2 x 8-1/2″ and gives it a stitched edge. I also cut a piece of Lawn Fawn Stripes ‘n Sprinkles 6×6 Inch Petite Pack to 1-1/2 x 3-1/2″ then used the slimline die to add the stitched lines on the border.

For the background, I used Tim Holtz Salty Ocean and Chipped Sapphire Distress Oxide Inks to ink blend. Then sprayed some water on it and added splatters with some pearlescent white acrylic paint.

I die cut all the penguins and the lights from Neenah 100lb Classic Crest Cardstock 8.5 X 11″ with the Lawn Fawn Peppy Penguin and String of Lights Backdrop and colored them with Copic markers. I used 100, N2, N5 & N7, N0 & 0 and YR04 for the penguin; YG01 & YG25, YG25 & YG67, R30 & R32, and R14 & R29 for the lights. I stamped the hats from Frosty Family Stampset onto Neenah 100lb Classic Crest Cardstock 8.5 X 11″ with Memento Tuxedo Black Ink. I used Copic Markers to color them. I used R14 & R27, YG17 & YG67, C1 & 0.

I finished off the card by adding some highlights to the hats with a white gel pen and sparkly to the lightbulbs with my Spectrum Noir Clear Overlay Sparkle Pen.

On the inside of the card, I added a strip of pattern paper from Lawn Fawn Stripes ‘n Sprinkles 6×6″ Petite Pack cut to 1 x 3-1/2″ and added another penguin. I stamped the sentiment from the Lawn Fawn Here We Go A-Waddling Stamps with Stampin’ Up! Poppy Parade Ink.

Dimensions


Supplies

https://linkdeli.com/widget.js?id=f5e8378456858c916708

Thanks for reading this post. I hope Iโ€™ve inspired you to give this cute slimline penguin card a try for yourself. Leave comments or questions below or feel free to email.

Cards, Love & Friendship, Stenciled Background, Valentine's Day

A Simple Valentine’s Day Card featuring Trinity Stamps

Hello friends. One last card for my Valentine’s Day card series. Sorry this one is a bit late.

For this card, I cut a piece of Neenah 100lb Classic Crest Cardstock 8.5 X 11″ to 5-1/2 x 8-1/2″ and scored at 4-1/4″ to create a card base, another piece to 3-1/2 x 5-1/4. I stamped the background using the drizzle from the A-GLAZE-ing 4×8 Stamp Set with Catherine Pooler Designs Sand Castle Ink. I also splattered some more ink with CP Sand Castle, Stampin’ Up! Real Red, and CP Cotton Candy Inks. I added some pattern paper, measuring 4 x 5-1/4″ from my stash, behind the panel.

I die cut the donuts from Stampin’ Up! Chocolate Chip 8-1/2 x 11″ Cardstock (retired), Stampin’ Up! Mint Macaron 8-1/2 x 11″ Cardstock (retired), Stampin’ Up! Poppy Parade 8-1/2 x 11″ Cardstock, Simon Says Stamp Cotton Candy 8-1/2 x 11″ Cardstock and Neenah 100lb Classic Crest Cardstock 8.5 X 11″ using the Tiny Donut Dipper Die Set.

I used ink to add some dimension to the donut frostings. I used CP Cotton Candy, Stampin’ Up! Real Red, Stampin’ Up! Just Jade (retired), and Stampin’ Up! Highland Heather inks.

I stamped the sentiment from the A-GLAZE-ing 4×8 Stamp Set onto Stampin’ Up! Chocolate Chip 8-1/2 x 11″ Cardstock (retired) with Lawn Fawn YETI Pigment Ink and WOW Opaque Bright White Super Fine Embossing Powder. I popped it up by using 3M Foam Tape.

I finished off the card by adding my Spectrum Noir Clear Overlay Sparkle Pen to add glitter to the donuts, Sugared Surprise Sprinkles Embellishment Mix, Crushed Grapes Gloss Crystal Drops, Autumn Red Crystal Drops, Nuvo Dragon Scales Dream Drops, Nuvo Carnation Pink Crystal Drops, and Nuvo Gloss White Crystal Drops.

On the inside of the card, I stamped a sentiment from the Sprinkles on my Donut 3×3 Stamp Set with Stampin’ Up! Real Red Ink and die cut with the coordinating die. I also added a mini donut.

Dimensions


Supplies

https://linkdeli.com/widget.js?id=f5e8378456858c916708

Thanks for reading this post. I hope Iโ€™ve inspired you to give this cute Valentine’s Day card a try for yourself. Leave comments or questions below or feel free to email.

Birthdays, Stampin' Up!, Thank Yous

5 Cards featuring Stampinโ€™ Up! Berry Blessings and Sweet Strawberry

Hello friends. I had a lot of fun creating this very easy fruity card set featuring Stampin’ Up!’s Berry Blessings Stampset (featured on page 14 of the Sale-A-Bration Catalog) and Sweet Strawberry Stampset. The Sweet Strawberry Stampset coordinates with the Strawberry Builder Punch found on page 44 of the January-June 2021 Mini Catalog. This set is available for purchase in my shop.

For the all the cards, I started by cutting a piece of Whisper White 8-1/2″ X 11″ Thick Cardstock to 5-1/2 x 8-1/2″ and scored at 4-1/4″ to make a card base and a panel to 4 x 5-1/4″. I stamped the outline images from the Berry Blessings Stampset and Sweet Strawberry Stampset to create the background and adhered it to the card base. Then cut a piece of Berry Delightful 12 x 12 DSP to 1-7/8 x 4-1/2″ and a piece of a Stampin’ Up! colored cardstock to x 1-3/4 x 4-3/4″ and adhered them together. I stamped and fussycut all focal point images using both the outlines and solid stamps. I then stamped all the sentiments onto a piece of Whisper White 8-1/2″ X 11″ Thick Cardstock, Cut them down and added colored cardstock behind them. I adhered the sentiment and images with 3M Foam Tape and Stampin’ Dimensionals.

For the first card, I used Stampin’ Up! Night of Navy 8-1/2 x 11″ Cardstock and Ink, Granny Apple Green 8-1/2 x 11″ Cardstock and Ink and Pacific Point Ink. And the sentiment strip measures 15/16 x 2-3/4″ and the color cardstock behind it measures 1-3/16 x 2-3/4″.

On the inside, I cut a piece of Berry Delightful 12 x 12 DSP to 1 x 4-1/4″ and left the inside blank.

Dimensions


For the second card, I used Stampin’ Up! Rich Razzleberry 8-1/2 x 11″ Cardstock and Ink, and Granny Apple Green 8-1/2 x 11″ Cardstock and Ink. And the sentiment strip measures 15/16 x 2-3/4″ and the color cardstock behind it measures 1-3/16 x 2-3/4″.

On the inside, I cut a piece of Berry Delightful 12 x 12 DSP to 1 x 4-1/4″ and left the inside blank.

Dimensions


For the third card, I used Stampin’ Up! Poppy Parade 8-1/2 x 11″ Cardstock and Ink, and Granny Apple Green 8-1/2 x 11″ Cardstock, Balmy Blue Ink, Calypso Coral Ink, and Memento Tuxedo Ink. And the sentiment strip measures 15/16 x 2-3/4″ and the color cardstock behind it measures 1-3/16 x 2-3/4″.

On the inside, I cut a piece of Berry Delightful 12 x 12 DSP to 1 x 4-1/4″ and left the inside blank.

Dimensions


For the fourth card, I used Stampin’ Up! Poppy Parade 8-1/2 x 11″ Cardstock and Ink, and Granny Apple Green 8-1/2 x 11″ Cardstock, Balmy Blue Ink, Daffodil Delight, and Memento Tuxedo Ink. And the sentiment strip measures 15/16 x 2-3/4″ and the color cardstock behind it measures 1-3/16 x 2-3/4″.

On the inside, I cut a piece of Berry Delightful 12 x 12 DSP to 1 x 4-1/4″ and left the inside blank.

Dimensions


For the fifth card, I used Stampin’ Up! Garden Green 8-1/2 x 11″ Cardstock and Ink, and Granny Apple Green Ink, and Rich Razzleberry 8-1/2 x 11″ Cardstock and Ink. And the sentiment strip measures 15/16 x 2-3/4″ and the color cardstock behind it measures 1-3/16 x 2-3/4″.

On the inside, I cut a piece of Berry Delightful 12 x 12 DSP to 1 x 4-1/4″ and left the inside blank.

Dimensions


Supplies

https://linkdeli.com/widget.js?id=f5e8378456858c916708

Thanks for reading this post. I hope you enjoyed and Iโ€™ve inspired you to try these easy birthday cards using this stampset and paper for yourself! Leave comments or questions below or feel free to email me. If you want to share you creations with me tag me on instagram @kittieslovecrafting.

Love & Friendship, Slimline

Using Only Dies to Make A Slimline Valentine’s Day Card

Hi friends. Need a quick and easy card for Valentine’s Day??? This card uses only dies and paper and came together very quickly. Here’s how it came together.

I started by cutting a piece of Neenah 110lb Classic Crest Cardstock 8.5 X 11″ to 7 x 8-1/2″ and scored a at 3-1/2″. I used the Honey Bee Stamps Slimline Thin Frames Dies and Stampin’ Up!’s Poppy Parade 8-1/2 x 11″ Cardstock and a pink cardstock from Hunkydory Matt-tastic Adorable Scorable Core Colourways Collection to cut out the frames. This die is cool because it cuts all 14 frames at the same time so I just had to run it through two times. I adhered used the five largest frames to the card base, alternating colors. I cut a piece of the Neenah 110lb Classic Crest Cardstock 8.5 X 11″ to 2-1/4 x 7-1/4 and embossed it with the Craftwell Delicate Dots 8.5 X 11″ Embossing Folder, and adhered to the front of the card.

For my sentiment I diecut the word ‘LOVE’ from Simon Says Stamp 6 x 6 Red Glitter Cardstock using the Honey Bee Bee Bold Alphabet Dies as well as from Neenah 110lb Classic Crest Cardstock 8.5 X 11″ two times and adhered those stacked to the card. To finish it off, I added two small hearts which I cut out using a heart punch from Stampin’ Up!’s Poppy Parade 8-1/2 x 11″ Cardstock.

On the inside of the card, I stamped a sentiment from Lawn Fawn Happy Happy Happy Add-On Stampset with Stampin’ Up! Poppy Parade Ink and added another punched heart.

Dimensions


Supplies

https://linkdeli.com/widget.js?id=f5e8378456858c916708

Thanks for reading this post. I hope you enjoyed and Iโ€™ve inspired you to give this card a try for yourself. Leave comments or questions below or feel free to email me.

Birthdays, Celebrations, Spring, Stampin' Up!, Summer

Using the Same Word Die Two Ways – Birthday Cards

Hi everyone! I made some fruity birthday cards using the positive and negative created using the Happy Birthday To You Die from My Favorite Things (discontinued). This is a great way to make multiple cards with minimal supplies and not waste anything. This paper I uses can be found on page 14 of the new Sale-A-Bration Catalog.

For the first card, I started by cutting a piece of Whisper White 8-1/2″ X 11″ Thick Cardstock to 5-1/2 x 10″ and scored at 5-1/2″ to make a card base and a piece of Berry Delightful 12 x 12 DSP to 4-1/4″ x 4-3/4″. I also cut the front of the card to 4-3/4″ long.

I diecut the sentiment from the Berry Delightful 12 x 12 DSP using Happy Birthday To You Die from My Favorite Things (discontinued) and adhered a piece of Blackberry Bliss 8-1/2 x 11″ Cardstock to the back of it and adhered both to card base with Tombow Mono Multipurpose Glue. I saved the positive letters that were diecut with the die to use on my next card.

To add a pop of color behind the front panel and to the inside, I cut a piece of Garden Green 8-1/2 x 11″ Cardstock and adhered it on the right side of the card inside. Next, I fussycut images from the Berry Delightful 12 x 12 DSP and adhere them to the front of the card, popping up two of them with Stampin’ Dimensionals. I finished it by adding some Love From Lizi White Pin Stripe Peel-offs.

On the inside, I stamped a sentiment from Stampin’ Up! Well Said Stamp Set with Poppy Parade Ink and a fussycut a strawberry from the Berry Delightful 12 x 12 DSP.

Dimensions


For the first card, I started by cutting a piece of Whisper White 8-1/2″ X 11″ Thick Cardstock to 5-1/2 x 8-1/2″ and scored at 4-1/4″ to make a card base. I adhered the letters for the sentiment to the card with Tombow Mono Multipurpose Glue. Tip: To easily aand perfectly dhere the sentiment, cut a scrap piece of the sentiment and tape it down to the card suing low-tack tape. Then adhere your letters in the negative space. You won’t need to try to space out or align the letters.

Next, I fussycut some fruit and leaf images from the Berry Delightful 12 x 12 DSP and adhered them to the card. I finished it off by adding some Pearl Basic Jewels.

On the inside, I stamped a sentiment from Stampin’ Up! Well Said Stamp Set with Blackberry Bliss Ink and a fussycut a strawberry from the Berry Delightful 12 x 12 DSP.

Dimensions


Supplies

https://linkdeli.com/widget.js?id=f5e8378456858c916708

Thanks for reading this post. I hope you enjoyed and Iโ€™ve inspired you to try these easy birthday cards using this stampset and paper for yourself! Leave comments or questions below or feel free to email me. If you want to share you creations with me tag me on instagram @kittieslovecrafting.

Birthdays, Spring, Stampin' Up!, Summer

Stampinโ€™ Up! Berry Blessings Stampset and Berry Delightful DSP

Happy New Year everyone! New year, time for some new posts! I want to start the year by introducing you to this cute watercolor berry stampset (Berry Blessings Stampset) and paper featured on page 14 of the new Sale-A-Bration Catalog. Yes, it is time for Sale-A-Bration people!!! It’s time to get free items with your purchases and who doesn’t like free goodies?!? I get very excited about gift-with-purchase promotions. ๐Ÿ™‚

This stampset looks like you spent hours watercoloring images without the hassle; I love watercoloring but it can be time consuming and I’m not great at it. It also coordinates with the Sweet Strawberry Stampset and Strawberry Builder Punch found on page 44 in the new January-June 2021 Mini Catalog.

I kept these simple, letting the stamps and paper to do the hard work for me. For the first card, I started by cutting a piece of Whisper White 8-1/2″ X 11″ Thick Cardstock to 5-1/2 x 8-1/2″ and scored at 4-1/4″ to make a card base and a panel to 4 x 5-1/4″. Then diecut a circle with a 2-5/8 circle die from the Stampinโ€™ Up! Circle Layering Dies.

I diecut a 2-7/8 circle from a piece of Strathmore 300 Series Bristol Smooth Paper and used Stampin’ Up! Balmy Blue Ink and a large watercolor brush to create a watercolor background on the circle piece. Then added splashes using a small watercolor brush and Stampin’ Up! Balmy Blue Ink and Granny Apple Green Ink to the watercolor circle as well as the top panel. Once dry, I adhered the circle to the back of the top panel in the window and the top panel to the card base with Tombow Mono Multipurpose Glue.

Next, I stamped and fussycut fruit and leaf images from the Berry Blessings Stampset and also fussycut some strawberries from the Berry Delightful 12 x 12 DSP. I used Granny Apple Green Ink, Pacific Point Ink, and Rich Razzleberry Ink.

Before adhering the fruit images, I stamped a sentiment from Berry Blessings Stampset with Poppy Parade Classic Ink onto the card then adhered the fruit images, popping some up with Stampin’ Dimensionals. Lastly I added some black lines around the circle using a circle die and a Black 0.03 Sakura Pigma Micron Pen.

On the inside, I stamped a sentiment from Stampin’ Up! Well Said Stamp Set with Pacific Point Ink and some berries from the Berry Blessings Stampset with Granny Apple Green Ink, and Rich Razzleberry Ink.

Dimensions


For the second card, I made an stepped up version. I started by cutting a piece of Whisper White 8-1/2″ X 11″ Thick Cardstock to 5-1/2 x 8-1/2″ and scored at 4-1/4″ to make a card base and a panel of Berry Delightful 12 x 12 DSP to 4 x 5-1/4″ and a piece of Vellum to 3-5/8″ x 4-1/2″ and adhered them to the card base.

Then diecut a 2-7/8 circle from Whisper White 8-1/2″ X 11″ Thick Cardstock and 2-5/8 circle from Berry Delightful 12 x 12 DSP with dies from the Stampinโ€™ Up! Circle Layering Dies and adhered them to the card.

Next, I stamped fruit and leaf images from the Berry Blessings Stampset with Versamark Ink and heat embossed with Gold Emboss Powder. I watercolored the images using Granny Apple Green Ink, Garden Green Ink, Pacific Point Ink, Poppy Parade Ink and Rich Razzleberry Ink. I fussycut them all out and adhered them to the card, popping some up with Stampin’ Dimensionals.

Lastly, I stamped a sentiment from Berry Blessings Stampset with Rich Razzleberry Ink, fussycut it out, and adhered it to the card. To finish it off, I added some Metallic Bright Gold Nuvo Drops and Gold Twine.

On the inside, I stamped a sentiment from Stampin’ Up! Well Said Stamp Set with Garden Green Ink and adhered some blueberries I had previously stamped and watercolored.

Dimensions


Supplies

https://linkdeli.com/widget.js?id=f5e8378456858c916708

Thanks for reading this post. I hope you enjoyed and Iโ€™ve inspired you to try these easy birthday cards using this stampset and paper for yourself! Leave comments or questions below or feel free to email me. If you want to share you creations with me tag me on instagram @kittieslovecrafting. If you would like a Stampin’ Up! catalog, please email me as well. All current catalogs can be found on the right side of this post and the Stampin’ Up! page. All news and fun stuff happening at Stampin’ Up! are listed there!

Christmas, Holidays 2020, Stampin' Up!

Creating Two Different Backgrounds Using Stampin’ Up!’s Tree Angle Stampset

These two card backgrounds were created using the stamps in the Tree Angle Stampset by Stampin’ Up which can be found on page 22 of the new Aug-Dec Mini Catalog. You can make lots of quick backgrounds with these stamps. This stampset coordinates with the Stitched Triangles Dies (pg 179 of the Annual Catalog).

For the first card, I started by cutting a piece of Whisper White 8-1/2″ X 11″ Thick Cardstock to 5-1/2 x 8-1/2″ and scored at 4-1/4″ to make a card base. Then cut a piece of Whisper White 8-1/2″ X 11″ Cardstock to 3-3/4 x 5″ for the top panel.

I stamped the poinsettia and leaf tree patterns all over the background from the Tree Angle Stampset onto Whisper White 8-1/2″ X 11″ Cardstock with Stampin’ Up! Real Red and Old Olive Inks and adhered the panel to the card base.

I die cut a 3″ scalloped square from Stampin’ Up!’s 8-1/2″ X 11″ Vellum Cardstock using the Stampin’ Up! Layering Squares Dies and the “Merry Christmas” sentiment from Red Foil using the Word Wishes Dies and adhered them to the card with Tombow Mono Multi Glue. I also cut two strips of the Red Foil, measuring 1/4 x 5″ and 1/16 x 5″ and adhered them to the card panel. I finished it off by adding three adhesive Pearls (retired) on each side.

On the inside, I stamped a sentiment from the Tree Angle Stampset with Stampin’ Up! Real Red Ink.

Dimensions


For the second card, I started by cutting a piece of Whisper White 8-1/2″ X 11″ Thick Cardstock to 5-1/2 x 8-1/2″ and scored at 4-1/4″ to make a card base. Then cut a piece of Stampin’ Up!’s Garden Green 8-1/2″ X 11″ Cardstock to 4 x 5-1/4″ for the top panel.

I stamped all the tree patterns except the poinsettias from the Tree Angle Stampset onto all over the Garden Green panel with Stampin’ Up! Garden Green Ink, creating a geometric pattern and adhered the panel to the card base.

I stamped three of the trees from the Tree Angle Stampset ontoa piece of Whisper White 8-1/2″ X 11″ Cardstock with Stampin’ Up! Poppy Parade and Blushing Bride for the trees, and Soft Suede Ink for the tree stumps. I used Versamark Ink and Gold Emboss Powder to stamp and heat emboss the star as well as the sentiment from stampset. I used some Stampin’ Dimensionals to adhere the red tree and star.

On the inside, I stamped another sentiment from the Tree Angle Stampset with Stampin’ Up! Poppy Parade Ink and some of the trees with Blushing Bride and Garden Green Inks. And that completes this card.

Dimensions


Supplies

https://linkdeli.com/widget.js?id=f5e8378456858c916708

Thanks for reading this post. I hope you enjoyed and Iโ€™ve inspired you to try these easy holiday cards using this stampset for yourself! Leave comments or questions below or feel free to email me. If you want to share you creations with me tag me on instagram @kittieslovecrafting. If you would like a Stampin’ Up! catalog, please email me as well. All current catalogs can be found on the right side of this post and the Stampin’ Up! page. All news and fun stuff happening at Stampin’ Up! are listed there!