Fall, Halloween, Stampin' Up!

Magic in This Night Suite by Stampin’ Up! (from the new Aug-Dec Mini Catalog)

Halloween is my favorite holiday so when I saw this suite I had to get it. It has an embossing folder, stampset, dies, gorgeous paper and beautiful shimmery ribbon. What I love most is that the colors are dark. I like my Halloween cards to be distressed and spooky where possible. I like cute happy ones too but prefer gloomy and dark cards. But you can easily pair this suite with some brighter colors like gorgeous grape, pumpkin pie and granny apple green and it would be awesome too! And can we talk about the sparkle on this black glitter cardstock?!? I will definitely be using this suite again and again this year! You can find this awesome suite in the new Aug-Dec Mini Catalog.

I started this card by cutting a piece of Blackberry Bliss 8-1/2″ X 11″ Cardstock to 5-1/2 x 8-1/2″ and scored at 4-1/4″ to make a card base and one piece to 4 x 5-1/4″ which I then embossed with the new Cobwebs Embossing Folder (part of the Magic in This Night Suite). I used Tim Holtz BLACK SOOT Distress Ink and inked all around the edges of the top panel and lightly over the top of the raised areas of the cobweb. I adhered that to the card base with Tombow Mono Multipurpose Liquid Glue.

I diecut the large label from Halloween Magic Dies from the Black Glitter Paper included in the suite and the small label from Basic Black 8-1/2″ X 11″ Cardstock. Before diecutting the small label I stamped the sentiment from the Hallows Night Magic Stampset with Versarmark Ink and added White Emboss Powder and heat embossed. Make sure to use an antistatic powder before embossing. I then adhered both labels together.

I also heat embossed the large bats from the stampset onto the Basic Black 8-1/2″ X 11″ Cardstock and then diecut them as well as the tiny bats with the coordinating dies from the Halloween Magic Dies. I cut a piece of the Pretty Peacock pattern paper from the Magic in the Night 12 x 12 Designer Series Paper to 3 x 3″. I adhered that to the card panel and diecut the border from the same dieset from another pattern paer, trimmed it down to 3″ long and adhered below the pretty peacock paper square. I adhered the labels and the bats to the card. I finished it by adding some of the Iridescent Pearls included in the suite.

On the inside of the card, I cut a piece of Whisper White 8-1/2″ X 11″ Cardstock to 4 x 5-1/4″ adn adhered it on the inside. I stamped a sentiment from the Hallows Night Magic Stampset with Blackberry Bliss Ink and added three tiny bats.

Dimensions


Supplies

https://linkdeli.com/widget.js?id=f5e8378456858c916708

Thanks for reading this post. I hope you enjoyed and I’ve inspired you to try this Halloween card using this beautiful suite for yourself! Leave comments or questions below or feel free to email me. If you want to share you creations with me tag me on instagram @kittieslovecrafting. If you would like a Stampin’ Up! catalog, please email me as well. All current catalogs can be found on the right side of this post and the Stampin’ Up! page. All news and fun stuff happening at Stampin’ Up! are listed there!

Autumn, Celebrations, Christmas, Fall, Just Because, Love & Friendship, Stampin' Up!, Winter

Lots to Celebrate by Stampin’ Up! (from the new Aug-Dec Mini Catalog)

I finally got to play with the new Lots to Celebrate Stampset by Stampin’ Up which is available in the new Aug-Dec Mini Catalog. I love mason jars and mason jar stamps so it only made sense to buy this one. :). It’s really cute and has stamps for different occasions. It aso coordinates with the Jar of Flowers stampset. But wait there’s more…there’s a coordinating punch. No need to fussy cut it when there’s a punch! You also save 10% when you purchase the Jar of Flowers Bundle.

I started this card by cutting a piece of Soft Suede 8-1/2″ X 11″ Cardstock to 5-1/2 x 8-1/2″ and scored at 4-1/4″ to make a card base. Then cut a piece of Crumb Cake 8-1/2″ X 11″ Cardstock to 4 x 5-1/42 x 4-1/4″” for the top panel and a piece of the Guilded Autumn Specialty Paper Pack to 2 x 4-1/4″. I stamped the background by using the leaf stamps from the Beautiful Autumn stampset and Crumb Cake Ink and adhered it to the card base. I also adhered the pattern paper strip to the card.

I stamped the mason jar from the Lots to Celebrate Stampset onto Whisper White 8-1/2″ X 11″ Cardstock with Memento Tuxedo Black Ink. I stamped the trail inside the jar with Crumb Cake Ink and the leaves with Cajun Craze Ink, Mint Macaron Ink, Soft Suede Ink and Cherry Cobbler Ink. I stamped the lid with Versamark Ink and heat embossed with Gold Emboss Powder and the doily with Soft Suede Ink. I used the Jar Punch to cut out the Mason Jar and fussycut the lid and doily and adhered them together. I added some Linen Thread and Acorn Trinket (from the Guilded Autumn Suite).

I punched a 2-1/4″ circle from Mint Macaron 8-1/2″ X 11″ Cardstock and a 2’1/2″ circle from Gold Foil and adhered them together. I stamped a sentiment from the Lots to Celebrate Stampset with Soft Suede Ink onto Whisper White 8-1/2″ X 11″ Cardstock and cut it down to 3/4 x 1-1/2″. I adhered the circles, mason jar and sentiment to the card.

On the inside of the card, I cut a piece of Whisper White 8-1/2″ X 11″ Cardstock to 4 x 5-1/4″and a strip of Guilded Autumn Specialty Paper Pack to 5/8 x 4-1/4″ and adhered them to the card. Lastly, I stamped a sentiment from the Lots to Celebrate Stampset with Mint Macaron Ink.

Dimensions


I made a second version of this card with a winter theme and simplified it a bit. I started card by cutting a piece of Night Of Navy 8-1/2″ X 11″ Cardstock to 5-1/2 x 8-1/2″ and scored at 4-1/4″ to make a card base. Then cut a piece of Plaid Tidings 6 x 6 Designer Series Paper to 2 x 5-1/4″. I stamped the background by using the the snowflakes from the Lots to Celebrate Stampset and Night Of Navy Ink. I adhered the pattern paper strip to the card.

I stamped the mason jar from the Lots to Celebrate Stampset onto Whisper White 8-1/2″ X 11″ Cardstock with Memento Tuxedo Black Ink. I stamped the trail inside the jar with Smoky Slate Ink and the snowflakes with Misty Moonlight Ink and Rich Razzleberry Ink. I stamped the lid with Versamark Ink and heat embossed with Silver Emboss Powder and the doily with Cherry Cobbler Ink. I used the Jar Punch to cut out the Mason Jar and fussycut the lid and doily and adhered them together. I added some white embroidery floss from my stash to the jar as well.

I punched a 2-1/4″ circle from Misty Moonlight 8-1/2″ X 11″ Cardstock and a 2’1/2″ circle from Silver Foil and adhered them together. I stamped a sentiment from the Lots to Celebrate Stampset with Rich Razzleberry Ink onto Whisper White 8-1/2″ X 11″ Cardstock and cut it down to 7/8 x 1-5/8. I adhered the circles, mason jar and sentiment to the card.

On the inside of the card, I cut a piece of Whisper White 8-1/2″ X 11″ Cardstock to 4 x 5-1/4″and a strip of Plaid Tidings 6 x 6 Designer Series Paper to 5/8 x 4-1/4″ and adhered them to the card.

Dimensions


Supplies

https://linkdeli.com/widget.js?id=f5e8378456858c916708

Thanks for reading this post. I hope you enjoyed and I’ve inspired you to try these cards using this adorable stampset for yourself! Leave comments or questions below or feel free to email me. If you want to share you creations with me tag me on instagram @kittieslovecrafting. If you would like a Stampin’ Up! catalog, please email me as well. All current catalogs can be found on the right side of this post and the Stampin’ Up! page. All news and fun stuff happening at Stampin’ Up! are listed there!

Autumn, Fall, Love & Friendship, Stampin' Up!, Thank Yous

Guilded Autumn Suite by Stampin’ Up (from the new Aug-Dec Mini Catalog)

The colors in the Guilded Autumn Suite by Stampin’ Up are stunning. It has the perfect Fall colors, one of my favorites for many years being Cajun Craze. It is the primary color I envision when I think of Fall. What’s your favorite Fall color? Honestly, when I got this Suite I was stumped as to what to make with it but I was having a creative block at the time. I flipped through the catalog and decided to CASE one of the cards on page 44. I loved the colors and the wreath. I encourage you to CASE cards from the catalogs if you can’t figure out what to make. It helps get the creative juices flowing.

For this card, I started by cutting a piece of Cajun Craze 8-1/2 x 11″ Cardstock to 5-1/2 x 8-1/2″ and scored at 4-1/4″ to create a card base. I also cut a piece of pattern paper from the Guilded Autumn 12 x 12 Specialty Paper Pack to 4 x 4″ and a Very Vanilla 8-1/2 x 11″ Cardstock to 3-3/4 x 3-3/4″. I stamped the leaves from the Beautiful Autumn stampset with Cajun Craze Ink onto the card base and adhered the pattern paper to the card base with Tombow Mono Multi Liquid Glue. I diecut a circle in the center of the Very Vanilla 8-1/2 x 11″ Cardstock square with the Layering Circle Dies.

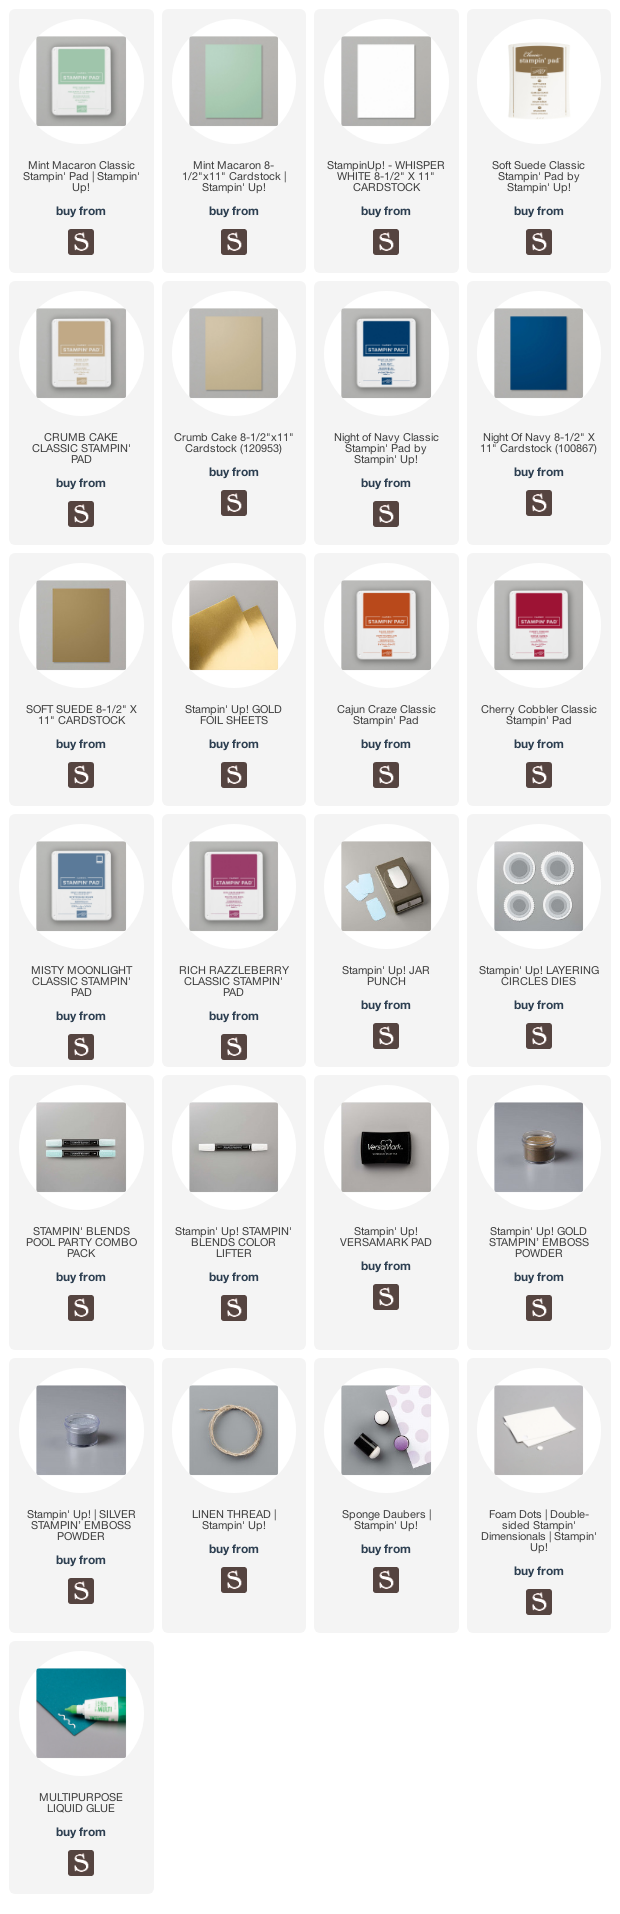
For the wreath I wanted to do something different from the original. I used the pattern paper that has copper and gold foiled leaves and acorns because when I saw this paper I fell in love. I used the Autumn Punch Pack to cut out the individual images. Having the punches made this process soooo much faster! I recommend getting this suite or the Beautiful Autumn Bundle.

I adhered the tiny images to around the circle on the very vanilla square panel. Tip: don’t add glue to the front end of your images. it makes it easier to tuck other leaves and later the sentiment strip underneath them. I stamped the sentiment from the Beautiful Autumn stampset onto a piece of Very Vanilla 8-1/2 x 11″ Cardstock with Cajun Craze Ink and trimmed it down to 3/4 x 2-7/8″, adhered it to a piece of Gold Foil paper cut to 1 x 2-7/8″ and it to the wreath, tucking ti under some of the leaves. I added Foam to the back of the Very Vanilla panel and added it to the card front.

To finish it off, I added a piece of Linen Thread. This card already has a ton of shine so it didn’t need a lot more extraness.

For the inside of the card, again I kept it simple. I cut a piece of Whisper White 8-1/2″ X 11″ Cardstock to 4 x 5-1/4″ and added a strip of the Gold Foil paper, measuring 1/2 x 4″ and two gold foiled acorns from the pattern paper to the bottom.

I also made tags for the cards to show you how you can make a whole gift set if you want. For the tag, I started by cutting a piece of Crumb Cake 8-1/2 x 11″ Cardstock to 2 x 4-3/4″ and a piece of paper paper from the Guilded Autumn 12 x 12 Specialty Paper Pack to 2 x 2 and adhered them together. Next, I punched the top of it with the Scalloped Tag Topper Punch. I cut out a piece of Cajun Craze 8-1/2 x 11″ Cardstock, measuring 2 x 2 which I tore on one end and adhered to the bottom of the tag. I rounded the bottom corners with the Crop-A-Dile – Corner Chomper Tool. I cut out a strip of the Gold Foil paper, measuring 1/4 x 2″ and added it to the bottom of the tag.

I cut a 2-1/8″ circle from Very Vanilla 8-1/2 x 11″ Cardstock using the Layering Circle Dies. and stamped a sentiment from Beautiful Autumn stampset with Cajun Craze Ink. I adhered the circel to the tag offset and cut off the excess. I used the Autumn Punch Pack to punch out several leaves from the same paper I used for the card wreath. I adhered them around the circle to create a wreath. Lastly, I added copper ribbon and Linen Thread to the top of the tag.

Dimensions


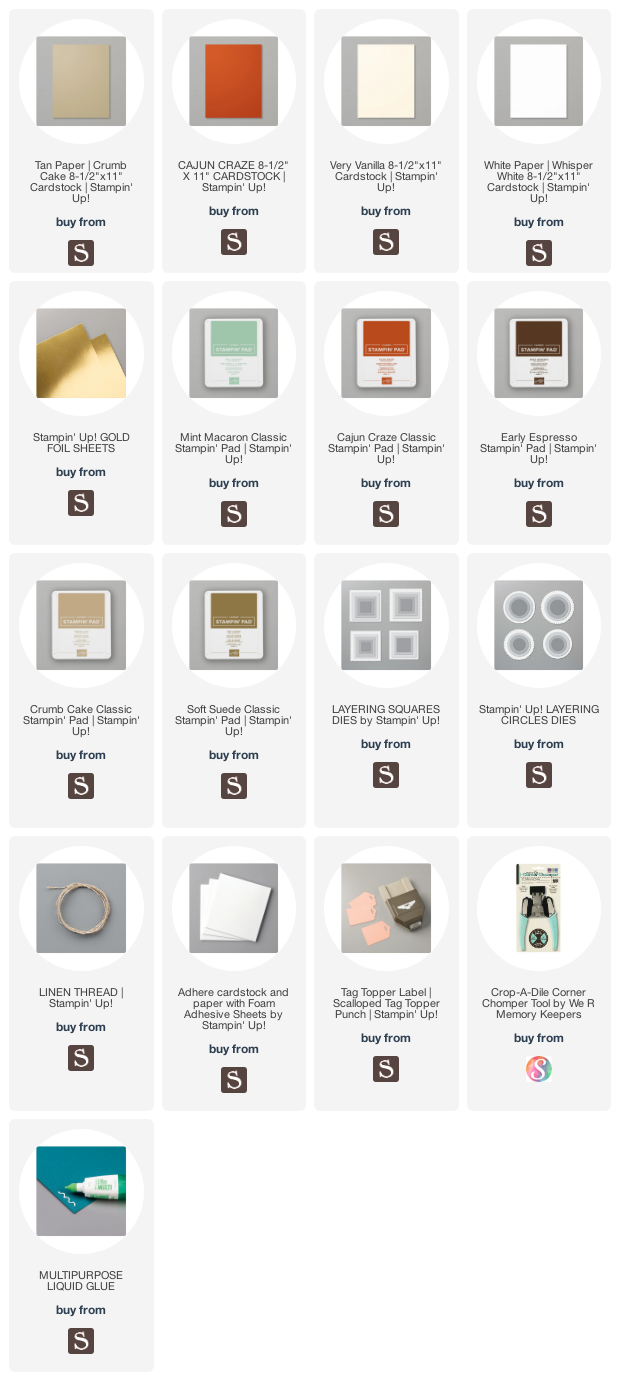
While I was making the first card, I thought ‘I wonder what it would look like if the wreath was square?’ So… I created a simpler version of the first one.

For this card, I started by cutting a piece of Cajun Craze 8-1/2 x 11″ Cardstock to 5-1/2 x 8-1/2″ and scored at 4-1/4″ to create a card base. I also cut a piece of pattern paper from the Guilded Autumn 12 x 12 Specialty Paper Pack to 3-3/4 x 5-1/2″. I cut a 2-5/8″ square on the inside of the top panel with the Layering Squares Dies.

I stamped the leaves, acorn and pinecone from the Beautiful Autumn stampset onto Whisper White 8-1/2″ X 11″ Cardstock with Cajun Craze Ink, Mint Macaron Ink, Early Espresso Ink, Crumb Cake Ink and Soft Suede Ink. To create the lighter effect for the inside of the images I stamped off once. I used the Autumn Punch Pack to punch out the images. I fussycut the pinecones.

I adhered the images around the square window of the top panel with Tombow Mono Multi Liquid Glue. I stamped the sentiment from the Beautiful Autumn stampset onto a piece of 3-1/4 x 3-1/4″ Whisper White 8-1/2″ X 11″ Cardstock with Early Espresso Ink. I added Foam to the back of the panel, adhered the sentiment pane behind it and then to the card base. I added two strips of Gold Foil paper cut to 1/8 x 5-1/2″ to the top and bottom of the front panel. I finished it off by adding Linen Thread to the wreath.

For the inside of the card, I cut a piece of Whisper White 8-1/2″ X 11″ Cardstock to 4 x 5-1/4″ and added a strip of the same Guilded Autumn 12 x 12 Specialty Paper Pack, measuring 9/16 x 4″ and a few extra stamped images to the bottom.

For the tag to match this card, I started by cutting a piece of Cajun Craze 8-1/2 x 11″ Cardstock to 2 x 4-3/4″. Next, I punched the top of it with the Scalloped Tag Topper Punch. I cut out a piece of Guilded Autumn 12 x 12 Specialty Paper Pack, measuring 1-1/2 x 2 which I tore on one end and adhered to the bottom of the tag. I cut out a strip of the Gold Foil paper, measuring 1/2 x 2″ and added it to the bottom of the tag. I rounded the bottom corners with the Crop-A-Dile – Corner Chomper Tool.

I stamped a sentiment from Beautiful Autumn stampset onto a piece of Whisper White 8-1/2″ X 11″ Cardstock with Early Espresso Ink and cut it down to 1 x 2″ and added it to the tag. I used the Autumn Punch Pack to punch out several leaves from the one of the papers in the Guilded Autumn 12 x 12 Specialty Paper Pack which has leaves and acorns and adhered them to the tag. Lastly, I added Linen Thread to the top of the tag.

Dimensions


Supplies

https://linkdeli.com/widget.js?id=f5e8378456858c916708

Thanks for reading this post. I hope you enjoyed and I’ve inspired you to try these fall cards using this beautiful suite for yourself! Leave comments or questions below or feel free to email me. If you want to share you creations with me tag me on instagram @kittieslovecrafting. If you would like a Stampin’ Up! catalog, please email me as well. All current catalogs can be found on the right side of this post and the Stampin’ Up! page. All news and fun stuff happening at Stampin’ Up! are listed there!

Fall, Holidays 2019, Thanksgiving

3 Cards Using Happy Harvest Kit from Queen & Company

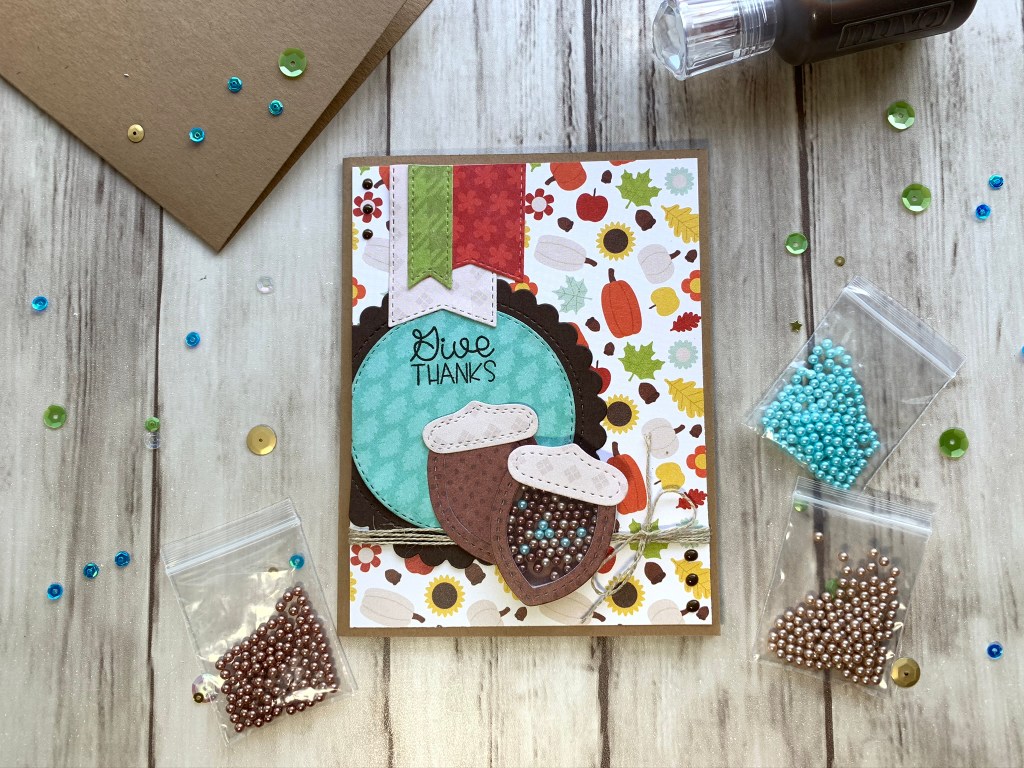
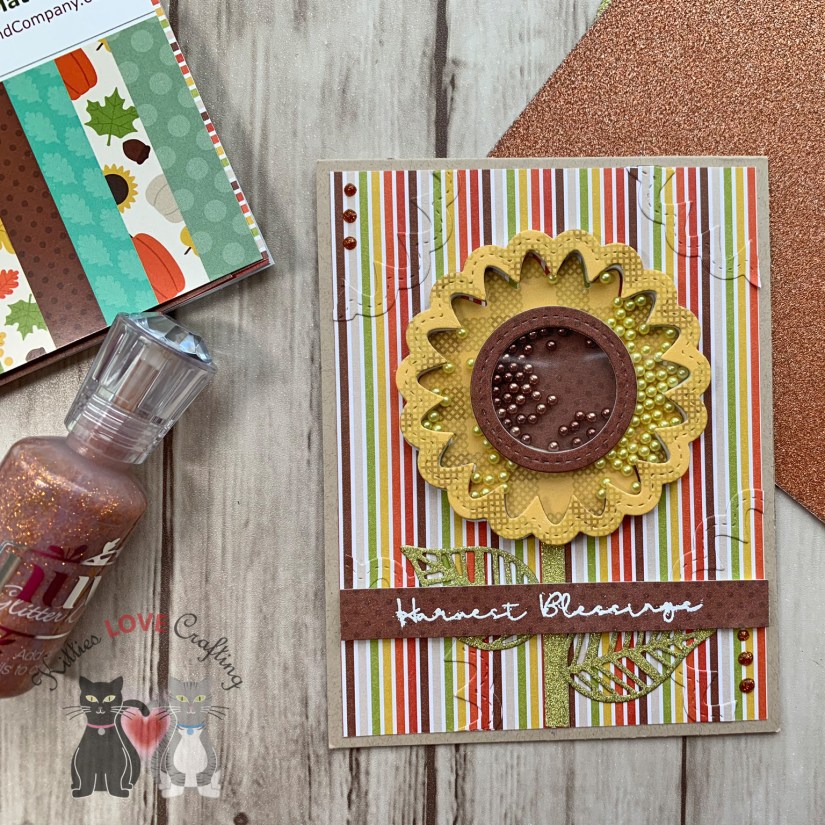
Hello friends. Well November is upon us and Thanksgiving fast approaches. I don’t know about you, but I like to send out cards to friends and family for all the fall and winter holidays during September through December. These cute shaker cards were made using the Queen & Company Happy Harvest Kit and are primarily Thanksgiving cards. Their shaker dies and kits make it super easy to create adorable shaker cards in a shorter amount of time than if you have to create them from scratch.

For this first card, I cut down a piece of Lawn Fawn 100lb Paper Bag Cardstock 8.5 x 11″ to 5-1/2 x 8-1/2″ and scored at 4 1/4″ to make a card base. Then cut a piece of the pattern paper to 4 x 5-1/4″ Happy Harvest Paper Pad (may be unavailable) from the Happy Harvest Fall Kit (may be unavailable) for the top panel.

Using two of the pattern papers and dies included in the kit, I diecut the acorns and created the shaker element with the acetate, self-adhesive foam shapes and pearl toppings in 3 colors. I diecut a stitched circle from Queen & Company Foundation Dies #1 with some more of the pattern papers, a scallop circle from Stampin’ Up! Early Espresso 8-1/2″ X 11″ Cardstock, and 3 banners with the Queen & Company Foundation Dies #2.

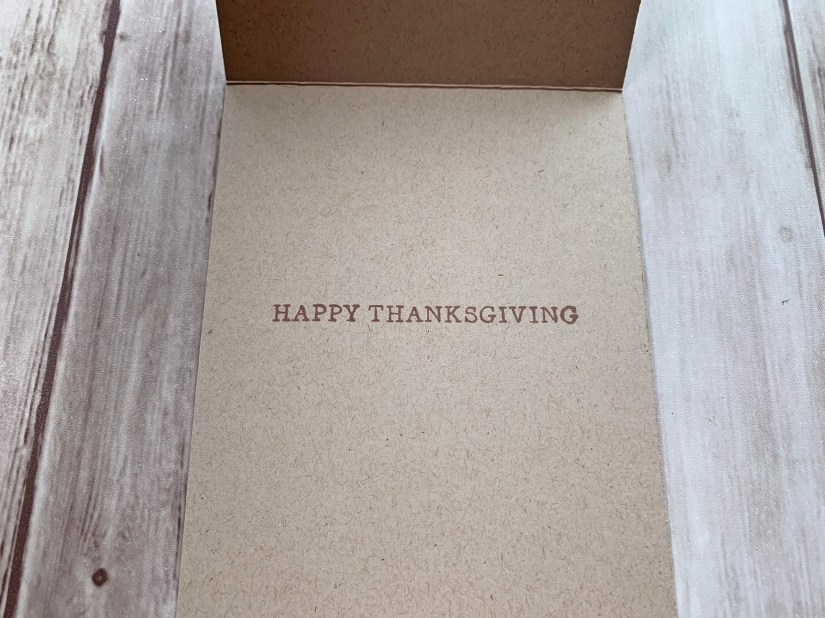
I adhered the circles on the bottom 2/3rds of the card over to the left side of the front panel and trimmed any excess. Then adhered the banners and stamped a sentiment from the stampset (not sold seperately) included in the kit using Catherine Pooler Orange Twist Ink.

I added some Ashland™ Natural Jute Twine from my stash to the bottom of the card panel and adhered the shaker element and extra acorn image. I adhered the card panel to the card base and embellished it with some Nuvo Crystal Drops in Dark Walnut.

On the inside I cut a piece of Neenah 110lb Classic Crest Cardstock 8.5″X11″ to 4 x 5-1/4″ and added a piece of Happy Harvest Paper Pad from the Happy Harvest Fall Kit, measuring 1-3/8 x 4” to the bottom. I stamped a “HAPPY THANKSGIVING” sentiment from the kit with Stampin’ Up! Early Espresso Ink.

Dimensions

For the second card, I cut down a piece of Stampin’ Up! Early Espresso 8-1/2″ X 11″ to 5-1/2 x 8-1/2″ and scored at 4 1/4″ to make a card base. Then cut a piece of the pattern paper to 4 x 5-1/4″ Happy Harvest Paper Pad (may be unavailable) from the Happy Harvest Fall Kit (may be unavailable) for the top panel.

I diecut the large banner from the Queen & Company Foundation Dies #2 set in a pattern paper from the kit and backed it with a piece of Stampin’ Up! Early Espresso 8-1/2″ X 11″ and trimmed around the banner leaving an 1/8″ border. I also diecut a smaller banner from the same die set, a stitched circle from the Queen & Company Foundation Dies #1 from Neenah 110lb Classic Crest Cardstock 8.5″X11″ and a scallop circle from the same set with the green glitter paper included in the kit. I adhered the banners and the circles to the card panel and stamped a sentiment from the Happy Harvest stampset included in the kit onto the white circle with Stampin’ Up! Early Espresso Ink.

I created the turkey shaker using the dies and shaker elements included in the kit. I added some toppings in aqua light and dark browns. I finished off the card by adding some Love From Lizi Pin-stripe Peel-offs in Gold Mirror Moondust and Nuvo Crystal Drops in Ripened Pumpkin and Caribbean Ocean.

On the inside I cut a piece of Neenah 110lb Classic Crest Cardstock 8.5″X11″ to 4 x 5-1/4″ and added a piece of Happy Harvest Paper Pad from the Happy Harvest Fall Kit, measuring 1-1/4 x 4” to the bottom. I stamped a “HAPPY THANKSGIVING” sentiment from the kit with Stampin’ Up! Early Espresso Ink.

Dimensions

For the third card, I cut down a piece of Stampin’ Up! Crumb Cake 8-1/2″ X 11″ Cardstock to 5-1/2 x 8-1/2″ and scored at 4 1/4″ to make a card base. Then cut a piece of the pattern paper to 4 x 5-1/4″ Happy Harvest Paper Pad (may be unavailable) from the Happy Harvest Fall Kit (may be unavailable) for the top panel and adhered it to the card base.

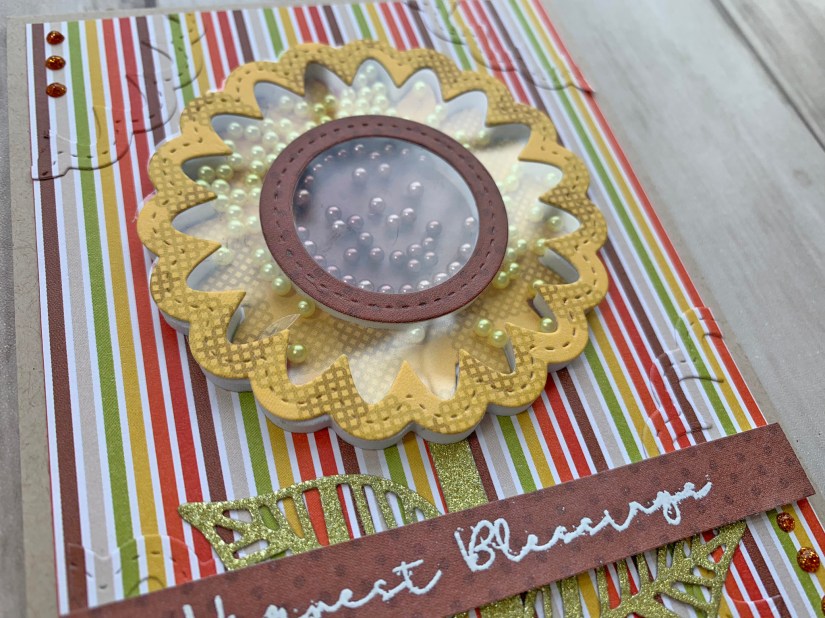
Next, I created a double shaker element using the sunflower dies and shaker pieces using some of the Happy harvest pattern paper in the kit. I added some of the toppings in brown to the center and yellow ones to the sunflower portion.

I diecut leaves from the Catherine Pooler Fallen Leaves Dies from some of the green glitter paper included. I adhered the sunflower shaker to the card panel and then I diecut several of the sunflower frame the same striped pattern paper as the background and placed them on the paper, matching the stripes so that it appears as it is embossed. I adhered the stem and leaves.

I stamped the “Harvest Blessings” onto a piece of a brown polka dot using Versamark Ink and Wow White Opaque Embossing Powder, making sure to prep the surface with anti-static powder beforehand. I popped it up onto the card with some 3M Foam Tape and finished off the card with some Nuvo Glitter Drops in Orange Soda.

On the inside I stamped a “HAPPY THANKSGIVING” sentiment from the kit with Stampin’ Up! Crumb Cake Ink. And that completes this card.

Dimensions

https://linkdeli.com/widget.js?1559654439292

Thanks for reading stopping by and I hope I’ve inspired you to go make some cards of your own. Leave comments or questions below or feel free to email me.

Celebrations, Fall, Just Because

Donut Cards

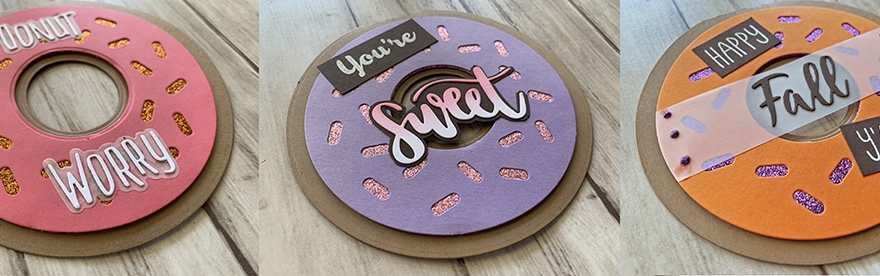
Happy Monday everyone! Coming to you today with some fun and delicious cards. I love coffee and donuts but since I am trying to be good (yeah, right!) and not eat too much sugar, I will make them into cards instead.

This die from Honey Bee Stamps really makes them super quick and easy to make. There are also so many ways to embellish this cute donut card. It can be for birthdays, holidays, seasons, or just because.

All the cards bases were created using Lawn Fawn Paper Bag 8. 1/2 x 11” Cardstock along with the Honey Bee Stamps Donut Card Die. On this first card I used Lawn Fawn Guava 8 1/2 x 11” Cardstock and the Honey Bee Stamps Donut Card Die to create the frosting and added a layer of orange Queen & Co Rainbow Glitter Fun Foam to highlight the sprinkles. In retrospect I should’ve made the sprinkles 3D, but oh well.

I diecut the sentiment from Neenah Solar White 8 1/2 x 11” 110lb Cardstock using the Honey Bee Stamps Donut Worry Dies for the inside and the outside of the card. I used Stampin’ Up! Vellum for the sentiment shadow. I glued all of it with Tombow Mono Multi Liquid Glue.

The second card uses SU! Highland Heather 8 1/2 x 11 Cardstock for the frosting and a layer of light pink Queen & Co Rainbow Glitter Fun Foam to highlight the sprinkles.

I diecut the word ‘Sweet’ from Neenah Solar White 8 1/2 x 11” 110lb Cardstock using the Catherine Pooler Celebrate Friends Stamp of Approval Collection Sweet Die. I then ink blended Catherine Pooler It’s A Girl ink to create an ombré effect on the word. I glued that down onto a scrap of Stampin’ Up! 8 1/2 x 11 Early Espresso 8 1/2 x 11” cardstock and fussycut around it to create a shadow. I stamped the word ‘You’re’ from Stampin’ Up!’s Cool Treats (retired) with Versamark clear embossing ink onto a piece of Stampin’ Up! 8 1/2 x 11 Early Espresso 8 1/2 x 11” cardstock and heat embossed it with Wow white embossing powder. I adhered those two pieces to the front of the card with Tombow Mono Multi Liquid Glue.

On the inside I diecut out a donut shape using the Honey Bee Stamps Donut Card Die circle die from Neenah Solar White 8 1/2 x 11” 110lb Cardstock and stamped a sentiment from Stampin’ Up!’s Cool Treats (retired) in Catherine Pooler Designs Over Coffee Ink and glued the piece inside the card.

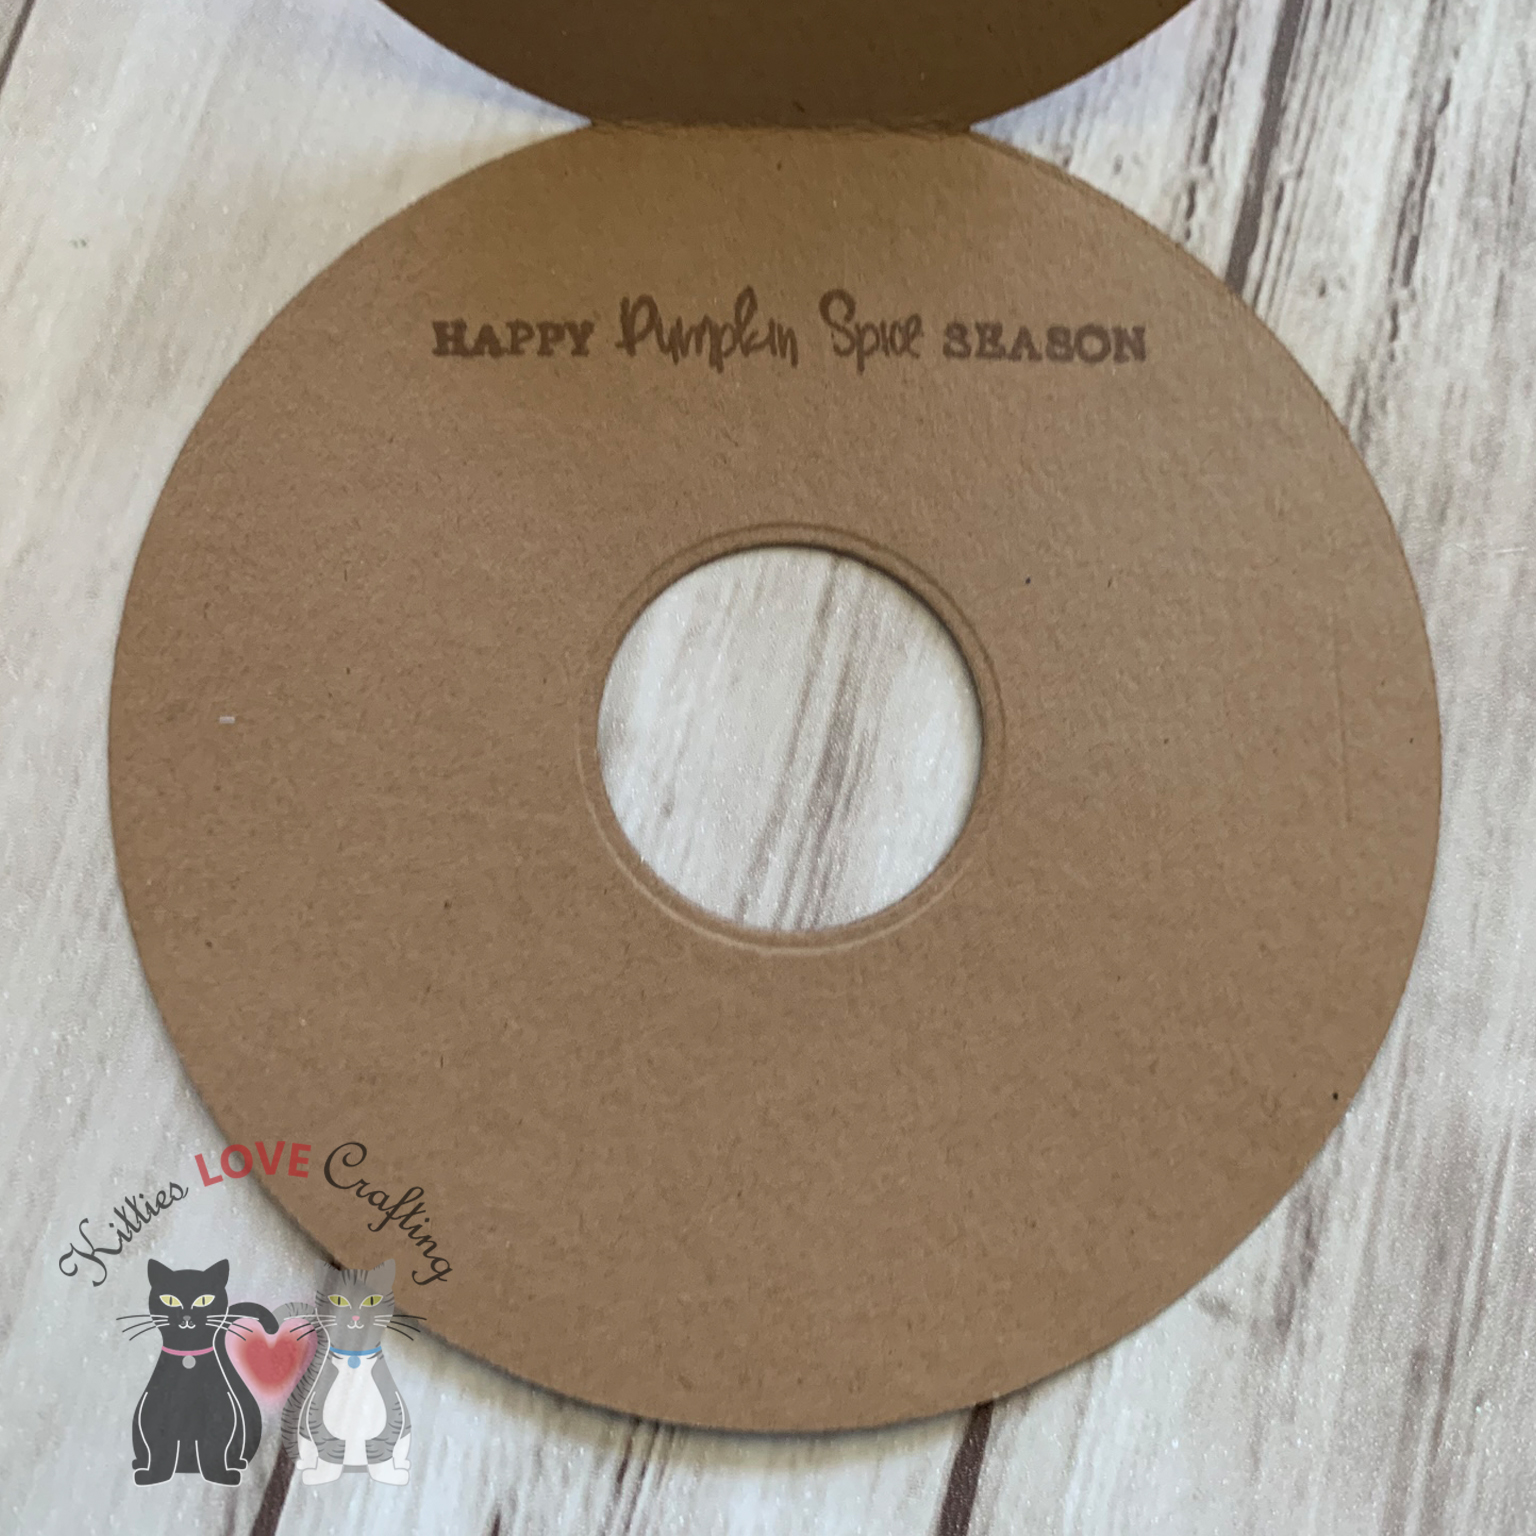
For the last card I had to make it a Fall card, not only because I love Fall but also because I love pumpkin spiced everything and donuts are no exception. Can’t wait for Fall people!

Anyways I used SU! Pumpkin Pie 8 1/2 x 11 Cardstock for the yummy orange frosting and layered purple Queen & Co Rainbow Glitter Fun Foam (ok it’s a little bit more Halloween than Fall but that’s ok ‘cuz I live Halloween too).

For the sentiment, I stamped part of it using the Honey Bee Stamps Happy Fall Y’all stampset, Versamark clear embossing ink and heat embossed it with Wow white embossing powder onto a piece of Stampin’ Up! 8 1/2 x 11 Early Espresso 8 1/2 x 11” cardstock. Then diecut the ‘Fall’ word from Stampin’ Up! 8 1/2 x 11 Early Espresso 8 1/2 x 11” cardstock with the Fall die from the same stampset.

To make the word appear to float over the donut hole, I used a strip of Stampin’ Up! Vellum and adheredit over the hole. I used the circle die in the Donut Card dieset to trim the sides. I then adhered the rest of the sentiment pieces above and below. I used Nuvo Crystal Drops in Violet Galaxy to add some embellishment.

Lastly I stamped a sentiment from the Queen & Co Happy Harvest Kit with Catherine Pooler Designs Over Coffee Ink and this card is complete.

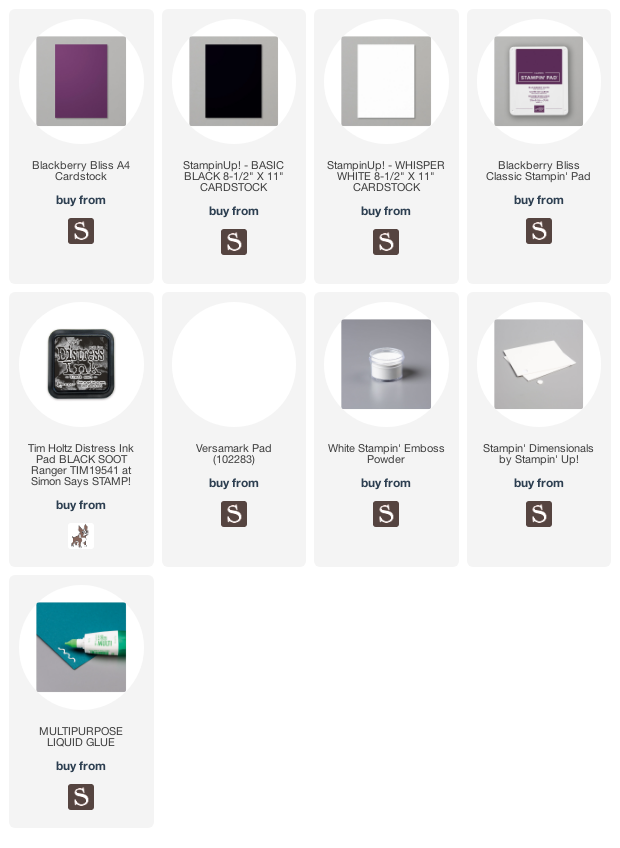
Before I go I just want to say that if you want to make these cards and you don’t have all the supplies I used and don’t want to purchase them, just look through your stash of stamps, dies, and papers and make them your own. It’s fun to play with different looks. The possibilities are really endless. Have FUN with it!!!

Dimensions

Supplies

Thanks for stopping by and I hope I’ve inspired you to give the Honey Bee Donut Card Die a try and make some donut cards of your own. Leave comments or questions below or feel free to email me.