I have been an avid crafter for two decades and started card making about fifteen years ago and just fell in love. It started as something to reduce stress but now it’s something I can’t live without. It’s so much fun to play with ink and paper and end up with something pretty cool that you can share with someone else. I love the fact that something that brings me so much joy can bring happiness to others too. i am a wife and mother to two sweet fur babies, Cola and Bailey, that love to hang around while I craft. They bring me just as much joy as crafting. I couldn’t imagine my life without either!
December’s cute and cuddly Paper Pumpkin kit—called “Beary Comforting”—is designed to uplift your loved ones as this beary tough year finally comes to a close. After a year like 2020, we all could use a big bear hug! With the help of this bear-themed kit, you can create 12 unbearably cute cards featuring warm and fuzzy friends, sweet stamps, and meaningful messages. Near or far, send your friends and family the extra comfort, love, and encouragement they need with this month’s Paper Pumpkin kit!
Coordinating colors this month are Basic Gray, Calypso Coral, Cinnamon Cider, Daffodil Delight, Rich Razzleberry, Soft Sea Foam, Whisper White
Subscription Information
Subscribe to the December 2020 Paper Pumpkin Kit from November 11 to December 10 at paperpumpkin.com.
Note: Supplies may be limited toward the end of each subscription period.
Leave comments or questions below or feel free to email me. . If you would like a Stampin’ Up! catalog, please email me as well. All current catalogs can be found on the right side of this post and the Stampin’ Up! page. All news and fun stuff happening at Stampin’ Up! are listed there!
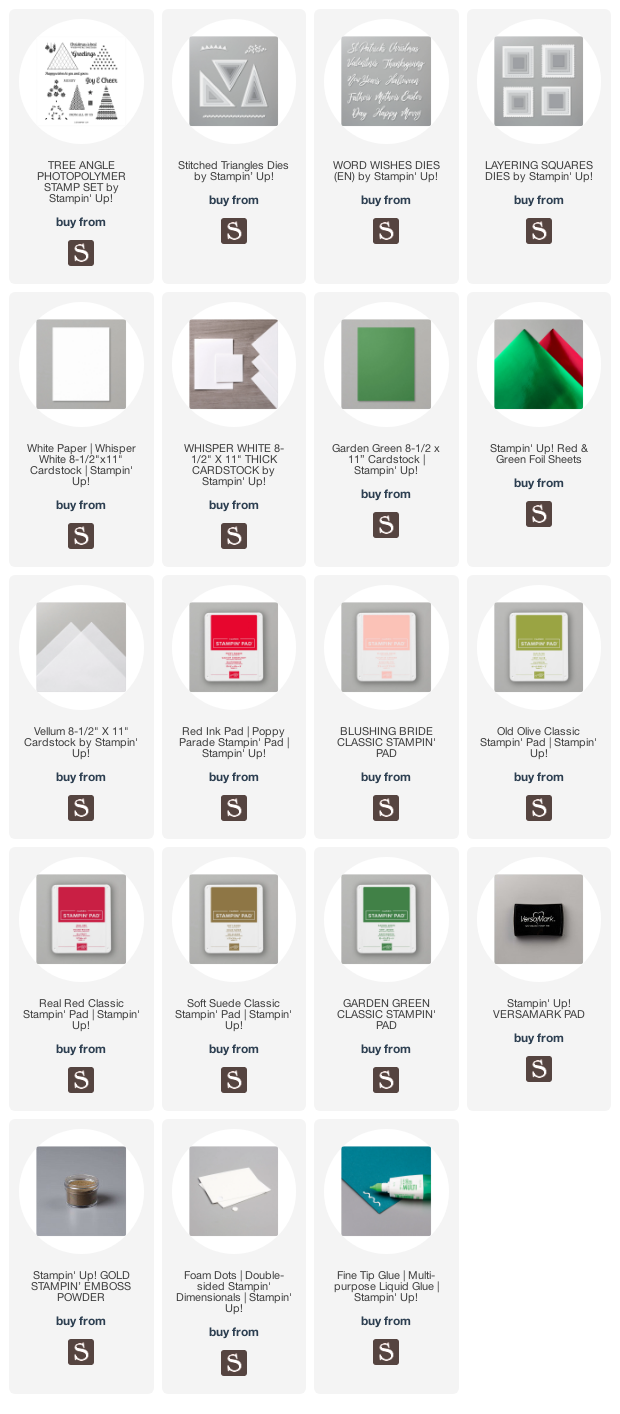
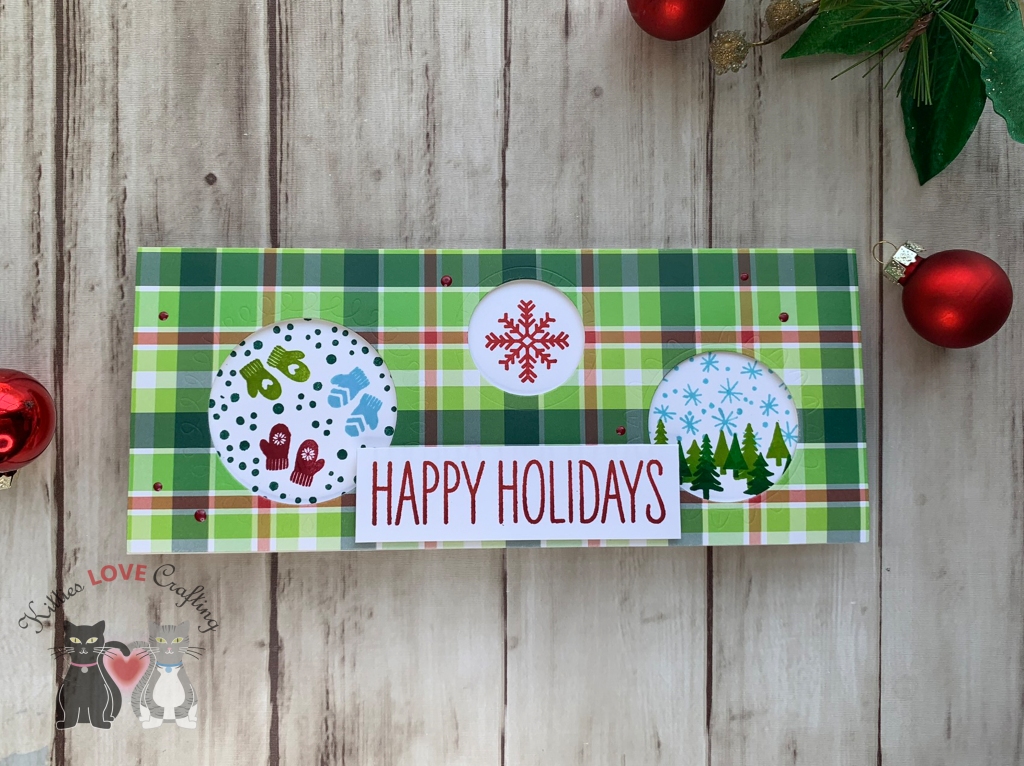
These two card backgrounds were created using the stamps in the Tree Angle Stampset by Stampin’ Up which can be found on page 22 of the new Aug-Dec Mini Catalog. You can make lots of quick backgrounds with these stamps. This stampset coordinates with the Stitched Triangles Dies (pg 179 of the Annual Catalog).
I stamped all the tree patterns except the poinsettias from the Tree Angle Stampset onto all over the Garden Green panel with Stampin’ Up! Garden Green Ink, creating a geometric pattern and adhered the panel to the card base.
Thanks for reading this post. I hope you enjoyed and I’ve inspired you to try these easy holiday cards using this stampset for yourself! Leave comments or questions below or feel free to email me. If you want to share you creations with me tag me on instagram @kittieslovecrafting. If you would like a Stampin’ Up! catalog, please email me as well. All current catalogs can be found on the right side of this post and the Stampin’ Up! page. All news and fun stuff happening at Stampin’ Up! are listed there!
Hello everybody! I don’t know about you but I love slimline cards and I love window cards and if I can use a die to quickly accomplish that create both of those then I am one happy camper! This Doodle Window Slimline Die from Catherine Pooler Designs’ Jolly Holiday release is great for just that. You can add all kinds of stuff in the windows — sentiments, characters, sequins for a shaker, paper etc.
Thanks for reading this post. I hope you enjoyed and I’ve inspired you to give these fun slimline cards a try for yourself. Leave comments or questions below or feel free to email.
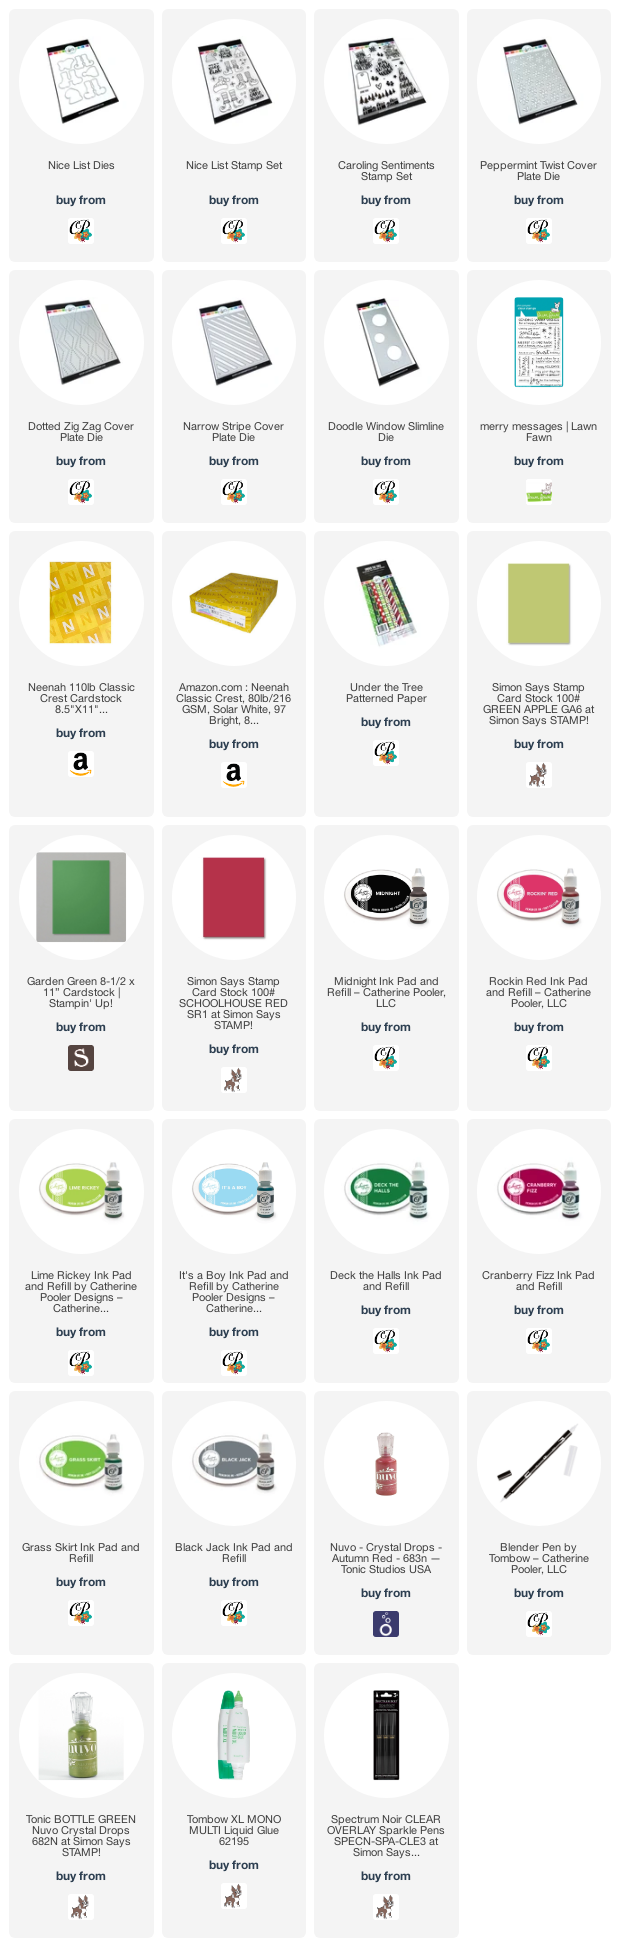
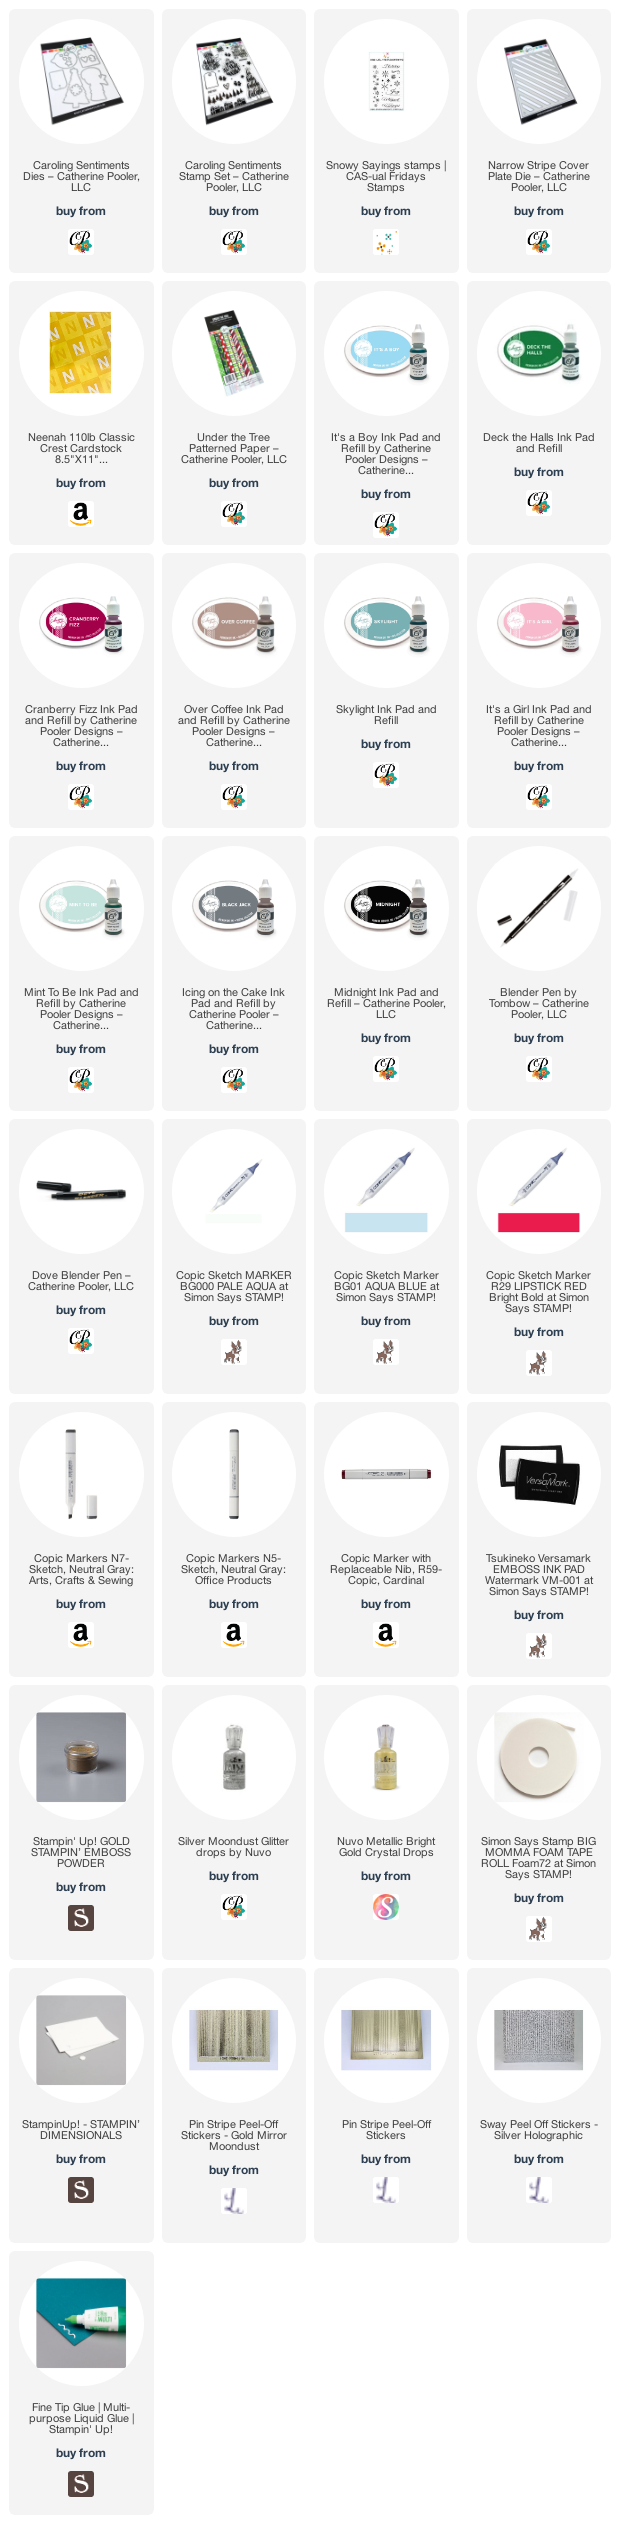
Hello friends. Catherine Pooler’s Caroling Sentiments Stampset is a great stampset to create quick cards. It features large sentiments that are shaped like images and is part of the new Jolly Holiday release. If you need some quick Christmas cards this year, check it out! Super cute!
I stamped the snowman image onto a piece of Neenah 110lb Classic Crest Cardstock 8.5 X 11″ with Midnight Ink from Catherine Pooler. I stamped a second hat and scarf as well. I colored the hat and scarf with COPIC markers. I used BG000 + BG01 and N5 + N7 for the hat; and R29 + R59 for the scarf. I diecut it with the coordinating dies, added some Foam Tape to the back and adhered it to the card panel.
For my second card, I wanted to play with heat embossing one of the sentiments and the onament one seemed fitting. I cut a piece of Neenah 110lb Classic Crest Cardstock 8.5 X 11″ to 4-1/2 x 8″ and scored at 4″ to create a card base and another to 3-3/4 x 4-1/4″ for the top panel.I used the Narrow Stripe Cover Plate Die to create a stencil using masking paper, then stenciled using It’s a Girl Ink from Catherine Pooler. I diecut a window using the ornament die from the Caroling Sentiments Dies and set that aside.
On the inside of the card, I stamped a sentiment from a very old stampset I have with Cranberry Fizz and used some of the leftover presents to adhere at the bottom.
Thanks for reading this post. I hope you enjoyed and I’ve inspired you to give these cards a try for yourself. Leave comments or questions below or feel free to email.
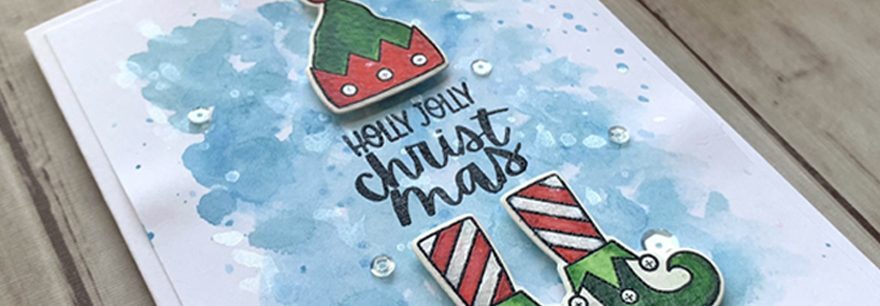
Hello friends. This cute little elf card was created using Catherine Pooler’s Nice List Stamp Set. It features cute elf hats and legs and feet. The sentiments were meant to be the body of the elf as in this card. I used a quick watercolored background with a heat embossed sentiment.
While that dried, I watercolored the background onto the card panel and also added some splatters wih the same color. I made sure not to add too much water to my watercolors since I was working on Neenah Cardstock and not watercolor paper. While that dried, I diecut the elf parts with the coordinating Nice List Dies. Once the background was dry, I stamped the sentiment from Catherine Pooler’s Nice List Stamp Set with Versamark Ink and heat embossed it with Clear Embossing Powder. I adhered the panel to the card base and the hat and shoes with Stampin’ Dimensionals. I finished it off by adding some clear sequins.
Thanks for reading this post. I hope you enjoyed and I’ve inspired you to give this cute and easy card a try for yourself. Leave comments or questions below or feel free to email.
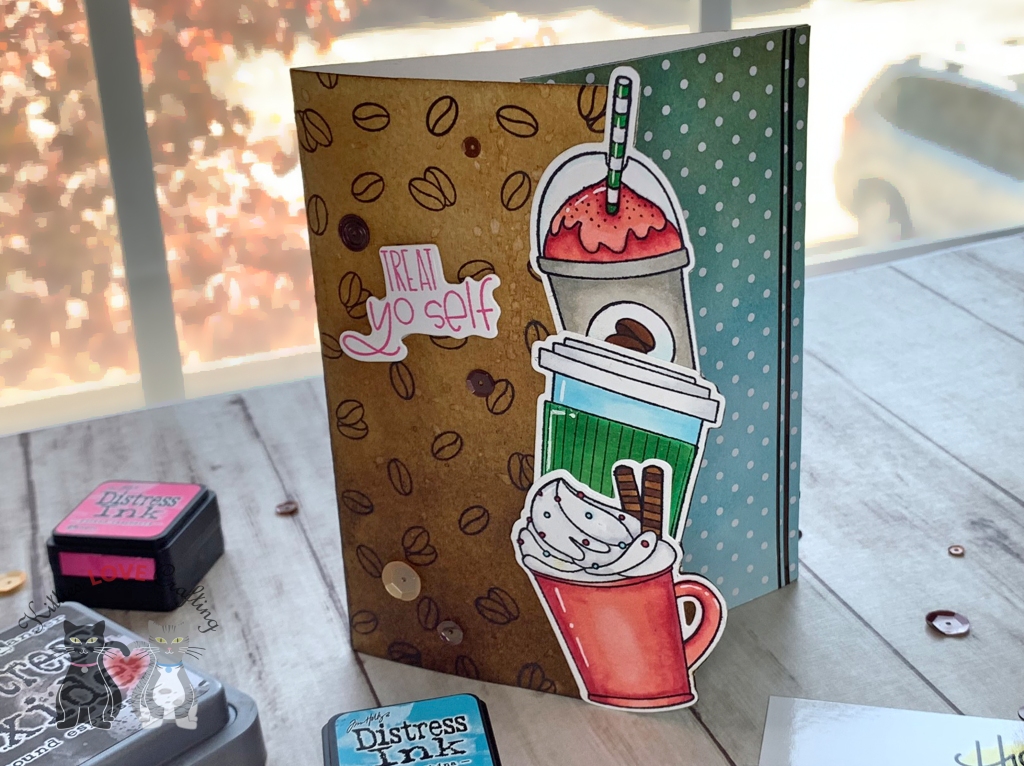
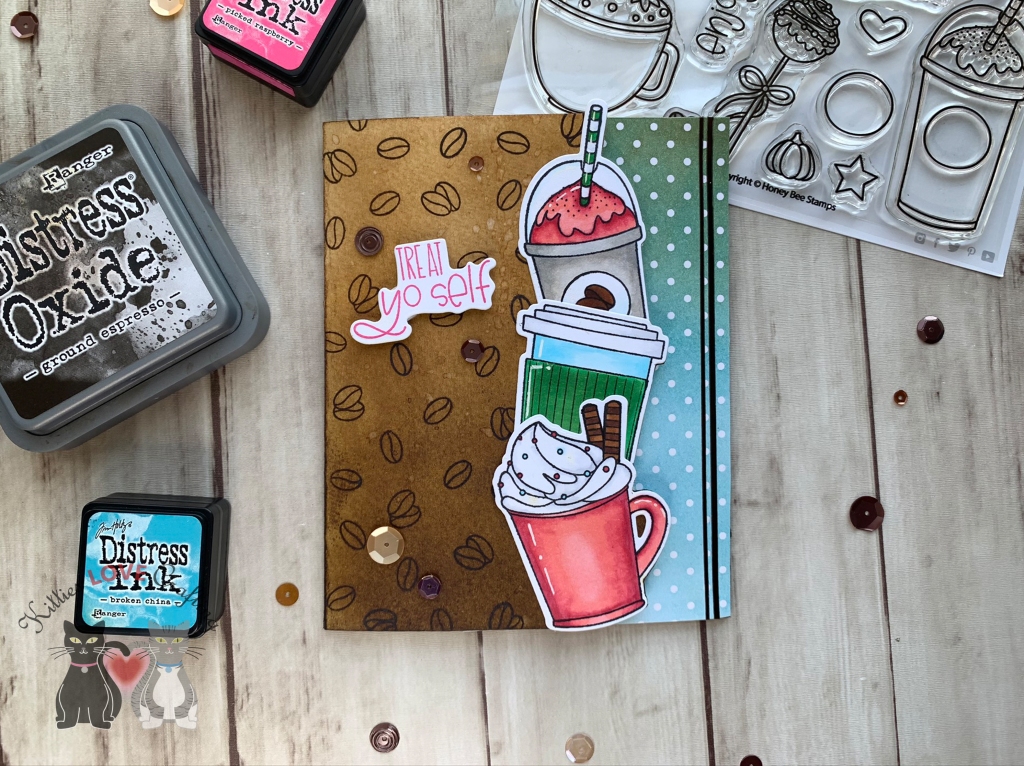
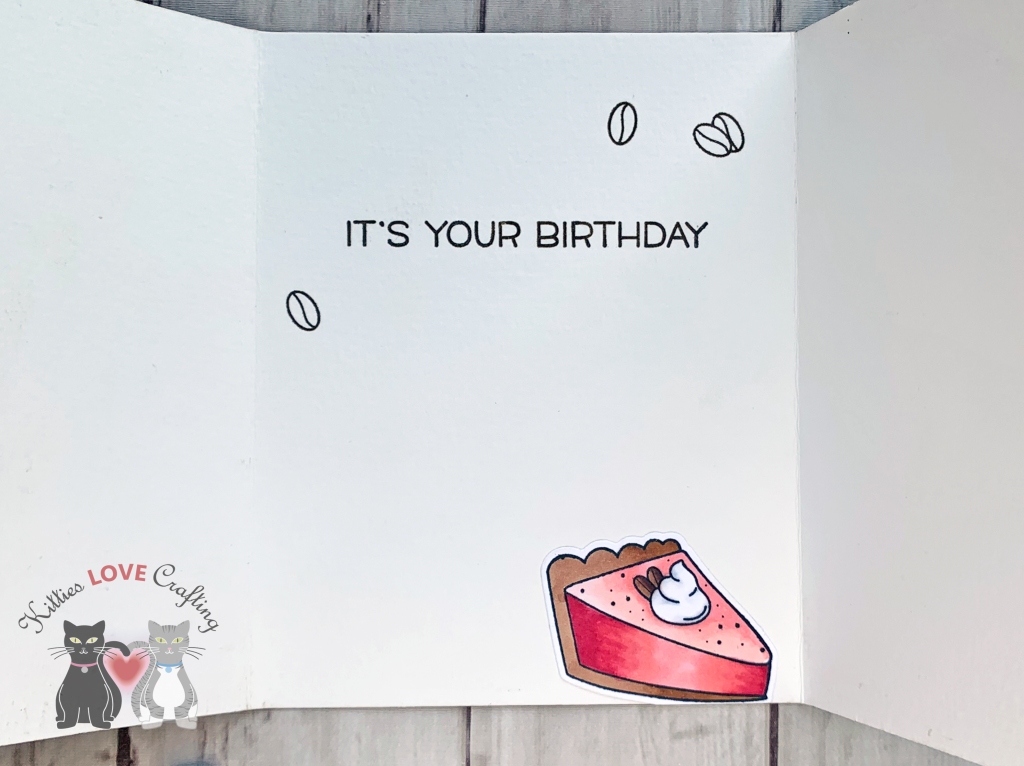
Honey Bee Stamp’s new release includes this many coffee themed items so of course I was all in! I’ve seen many people stack the images from the Treat Yo Self 6×6 Stamp Set to create their cards so I thought how fun would it be to make a gatefold card with stacked coffee treats. What I really love about this stampset is how large the images are. And of course, Honey Bee Stamps also release sentiment stamps and dies to go with this coffee collection. What could be better I ask?!?! I won’t be using those on this card but stay tuned because there will be more cards coming using this collection.
I started by cutting a piece of Montval Acid-Free Cold Press Watercolor Paper to 5-1/2 x 11-1/2″ and scored at 4″ and 8-1/2″ on the long side. I used watercolor paper instead of my traditional Neenah 110lb because distress inks blend beautifully on it. More on that later…
I used Tim Holtz Distress Ink in Vintage Photo and Ground Espresso to ink up the left flap on the card, creating an ombre effect. Then I stamped all the coffee beans from the Treat Yo Self 6×6 Stamp Set with Ground Espresso Distress Oxide Ink. Then I cut a piece of Stampin’ Up!’s Irresistibly Yours DSP (discontinued) to 3 x 5-1/2″ and used Tim Holtz Distress Ink in Broken China and Vintage Photo to create another ombre, revealing the embossed areas on these papers and adhered it to the card. Stampin’ up needs to bring these papers back because they are great for easy backgrounds and you can color them with anything you want.
Thanks for reading this post. I hope you enjoyed and I’ve inspired you to give this card a try for yourself. Leave comments or questions below or feel free to email me.
Hello everybody! I don’t know about you but I love a good shaker card and when it’s easy to make I’m all for it! I also love slimline cards so I decided to combine the two. This new Candy Cane Slimline Die from Catherine Pooler is perfect for all kinds of backgrounds You can layer it, inlay the pieces or do a tone on tone like I did here. The other die that I am loving from the Jolly Holiday release is the Peppermint Twist Cover Plate Die. You will see how I used it for this card.
I started by cutting a piece of Neenah 110lb Classic Crest Cardstock 8.5 X 11″ to 7 x 8-1/2″ and scored at 3-1/3″ for my card base. next I used the Candy Cane Slimline Die to cut the front panel and adhered it to the card base. I used the My Favorite Things Stitched Circle Scallop Frames (I think this is no longer available but you can achieve the same look with a scallop circle die or punch and a smaller circle for the inside) to cut out a frame from Neenah 110lb Classic Crest Cardstock 8.5 X 11″.
I put together my shaker element by adding acetate to the back of the frame, using a punch to cut it out, some foam tape behind that and adding some Queen and Company Topping Pastel Diamonds in red, green and clear. I adhered the circle with the sentiment and adhered the whole thing to the card.
Thanks for reading this post. I hope you enjoyed and I’ve inspired you to give this card a try for yourself. Leave comments or questions below or feel free to email.
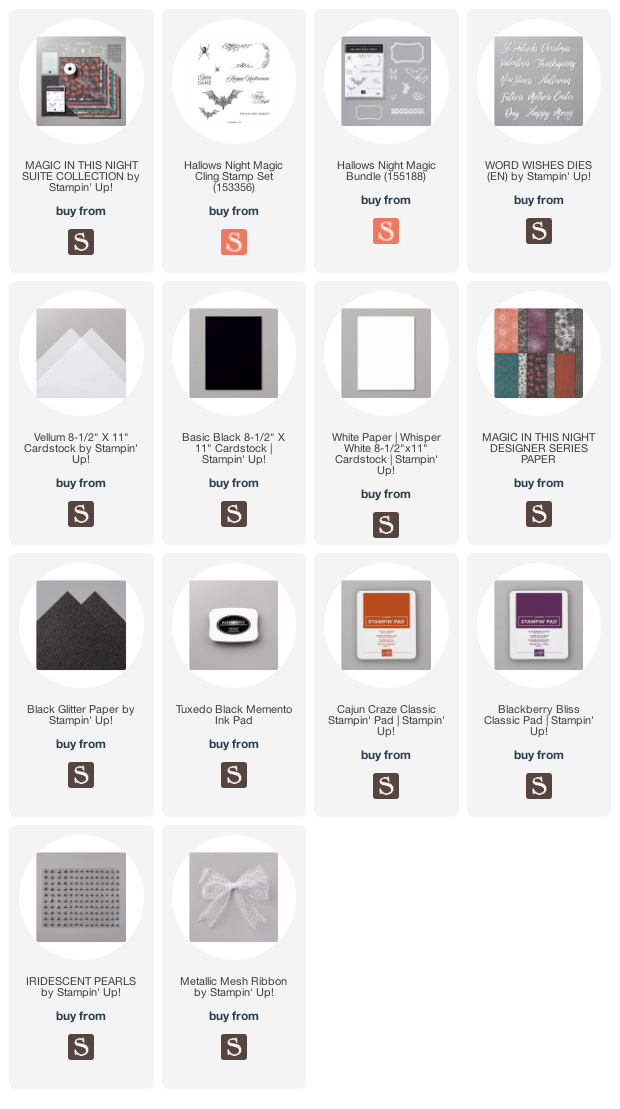
The flower die in the Halloween Magic Dies included in Stampin’ Up!’s Magic in This Night Suite reminds me of images you would see for the Dia de Los Muertos celebrations or a black rose found in a spooky haunted mansion. I decided to have some fun with it and create an “embossed” background. This suite can be found in the new Aug-Dec Mini Catalog on page 52.
Thanks for reading this post. I hope you enjoyed and I’ve inspired you to try this Halloween card for yourself! Leave comments or questions below or feel free to email me. If you want to share you creations with me tag me on instagram @kittieslovecrafting. If you would like a Stampin’ Up! catalog, please email me as well. All current catalogs can be found on the right side of this post and the Stampin’ Up! page. All news and fun stuff happening at Stampin’ Up! are listed there!
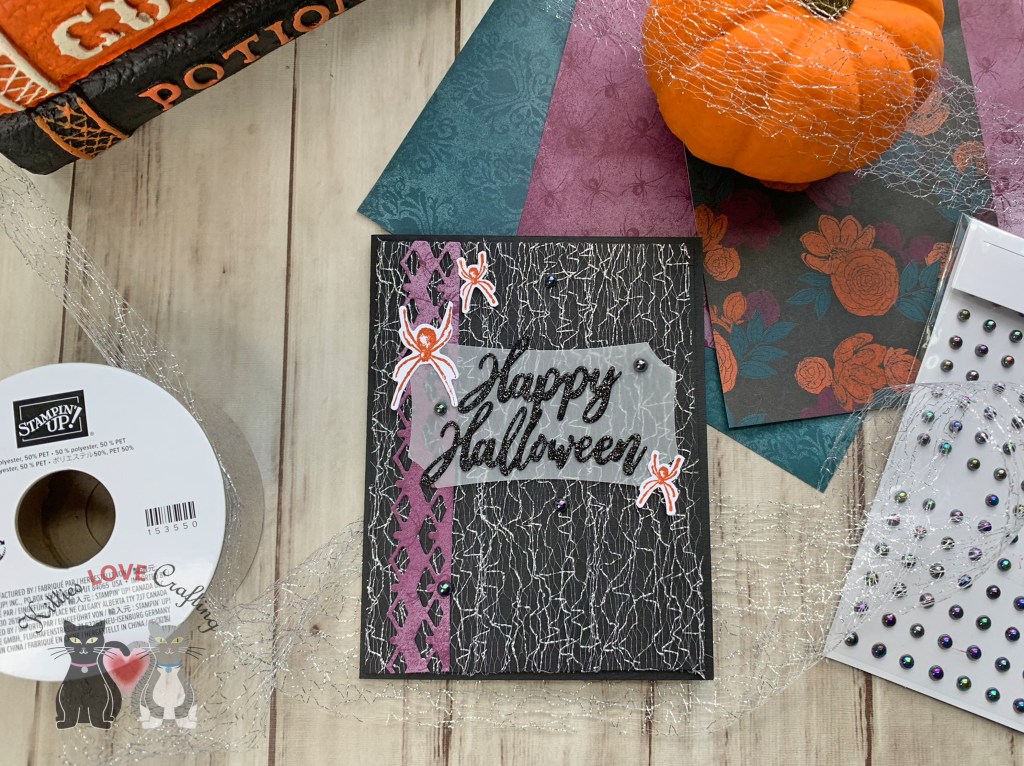
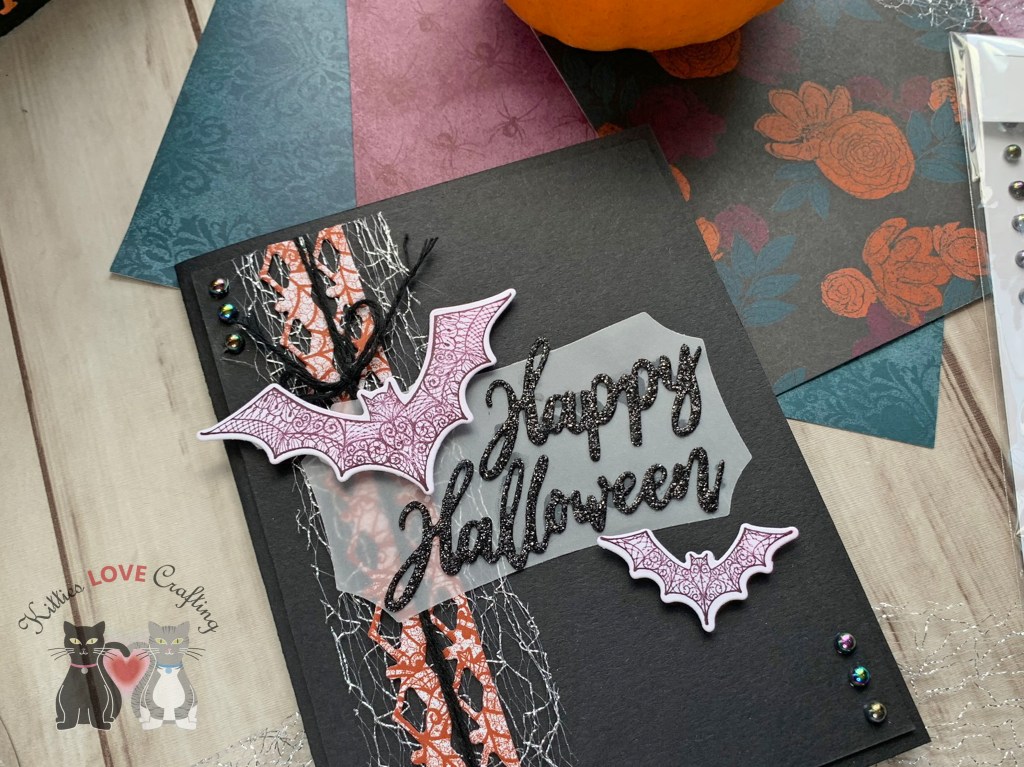
The Stampin’ Up!’s Magic in This Night Suite has this very cool looking Metallic Mesh Ribbon. I wasn’t sure how to use it at first but then started playing with it to see how it reacted to stretching etc and my brain immediately saw a web! It also adds some sparkle to your card because it glistens in the light. It’s just Stunning! This suite can be found in the new Aug-Dec Mini Catalog on page 52.
For my first card I used the ribbon as a background. I cut a piece of Basic Black 8-1/2″ X 11″ Cardstock to 5-1/2 x 8-1/2″ and scored at 4-1/4″ to create a card base and one piece to 4 x 5-1/4″ for the top panel. I added some Tear & Tape Adhesive to the top and bottom of the back of the panel and wrapped the Metallic Mesh Ribbon around it. Then added more tape to the rest of the card to adhere it to the card base.
For my second card, I cut a piece of Basic Black 8-1/2″ X 11″ Cardstock to 5-1/2 x 8-1/2″ and scored at 4-1/4″ to create a card base and one piece to 4 x 5-1/4″ for the top panel. I added some Tear & Tape Adhesive to the top and bottom of the back of the panel and wrapped a piece of the Metallic Mesh Ribbon around it.
Thanks for reading this post. I hope you enjoyed and I’ve inspired you to try these Halloween cards for yourself! Leave comments or questions below or feel free to email me. If you want to share you creations with me tag me on instagram @kittieslovecrafting. If you would like a Stampin’ Up! catalog, please email me as well. All current catalogs can be found on the right side of this post and the Stampin’ Up! page. All news and fun stuff happening at Stampin’ Up! are listed there!
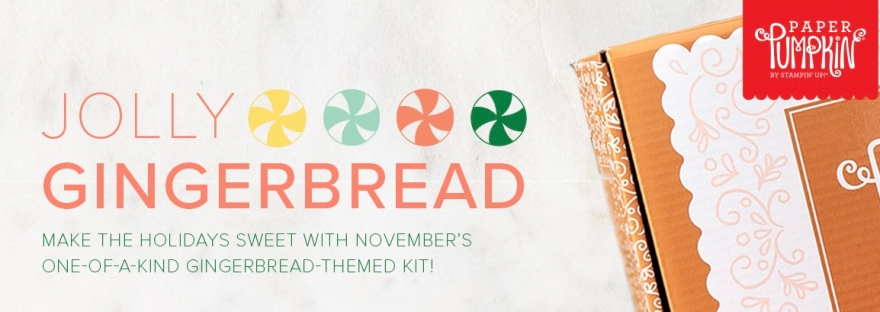
November’s cute, gingerbread-themed kit contains enough supplies to create one-of-a-kind Christmas crafts! Whether it’s a gift card carrier, traditional card, or tasty-looking tag, this sweet and seasonal kit is the key to heartfelt holiday gifting. With curly cutouts, sugary stickers, and delicious die-cut designs in a special-edition box, a jolly holiday will be on its way with this kit!!
Coordinating colors: Cinnamon Cider, Daffodil Delight, Calypso Coral, Mint Macaron, Shaded Spruce, Blushing Bride, and Whisper White
Subscription Information
Subscribe to the November 2020 Paper Pumpkin Kit from 11 October to 10 November at paperpumpkin.com.
Note: Supplies may be limited toward the end of each subscription period.