Birthdays, Cards, Celebrations, Shaker

Birthday Cards: A Very Simple Shaker Card featuring Trinity Stamps

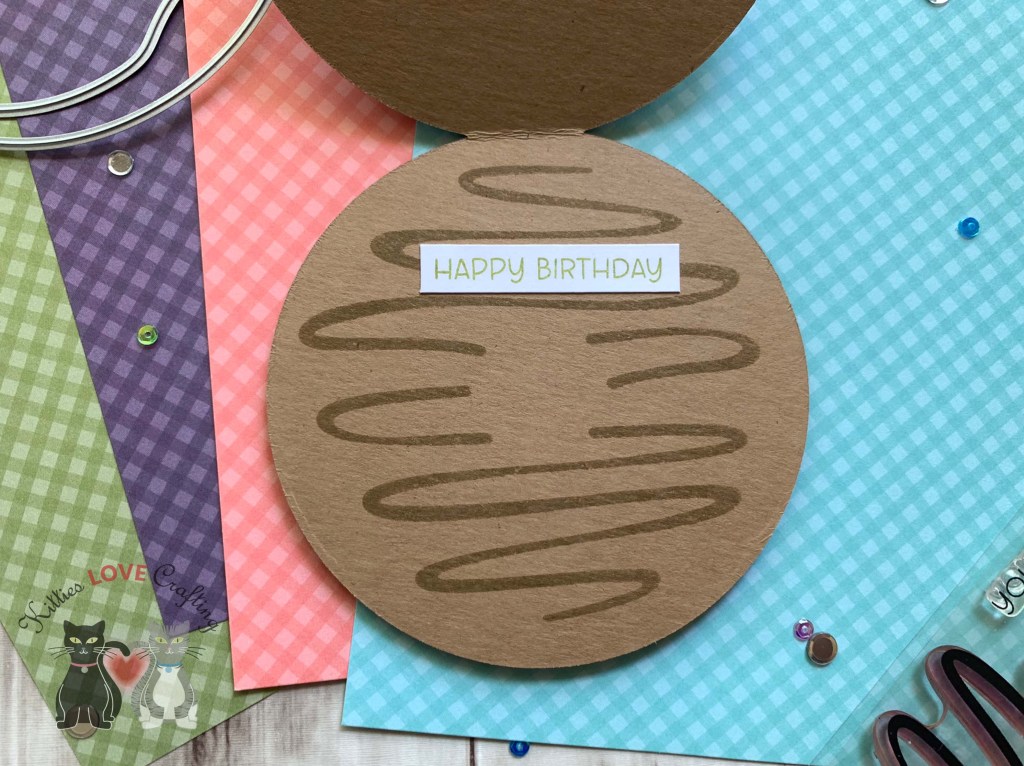
Hello friends. Here is a very easy and quick shaker Birthday card featuring Trinity Stamps new Circle Shaped Card Die Set as well as the A-GLAZE-ing 4×8 Stamp Set. I love how all fun sparkly shaker bits look inside this card!

For this card, I die cut a piece of Lawn Fawn Paper Bag 8-1/2 x 11″ Cardstock using the Circle Shaped Card Die Set. I also cut a second piece which I will cut in half for the shaker. From this panel I diecut the center with the frosting die in the set.

I die cut the background from Honey Bee Stamps Giddy For Gingham 6 x 8.5″ Paper Pad with a circle die. I used the same die to cut the acetate for my shaker window.

For the shaker bits I die cut them from DCWV The Glitzy Glitter 12 x 12″ Cardstock, Altenew – Glitter Gradient Cardstock Set – Ocean Reflection, and also added some Trinity Stamps Sugared Surprise Sprinkles Embellishment Mix.

I stamped the sentiment from the A-GLAZE-ing 4×8 Stamp Set onto Neenah 100lb Classic Crest Cardstock 8.5 X 11″ with Stampin’ Up! Pear Pizazz Ink (retired) and cut down into strips.

On the inside of the card, I stamped the swirl from the A-GLAZE-ing 4×8 Stamp Set with Stampin’ Up! Crumb Cake Ink and a sentiment from the A-GLAZE-ing 4×8 Stamp Set onto Neenah 100lb Classic Crest Cardstock 8.5 X 11″ with Stampin’ Up! Pear Pizazz Ink (retired).

Dimensions


Supplies

https://linkdeli.com/widget.js?id=f5e8378456858c916708

Thanks for reading this post. I hope Iโ€™ve inspired you to give this cute circle shaped Birthday card a try for yourself. Leave comments or questions below or feel free to email.
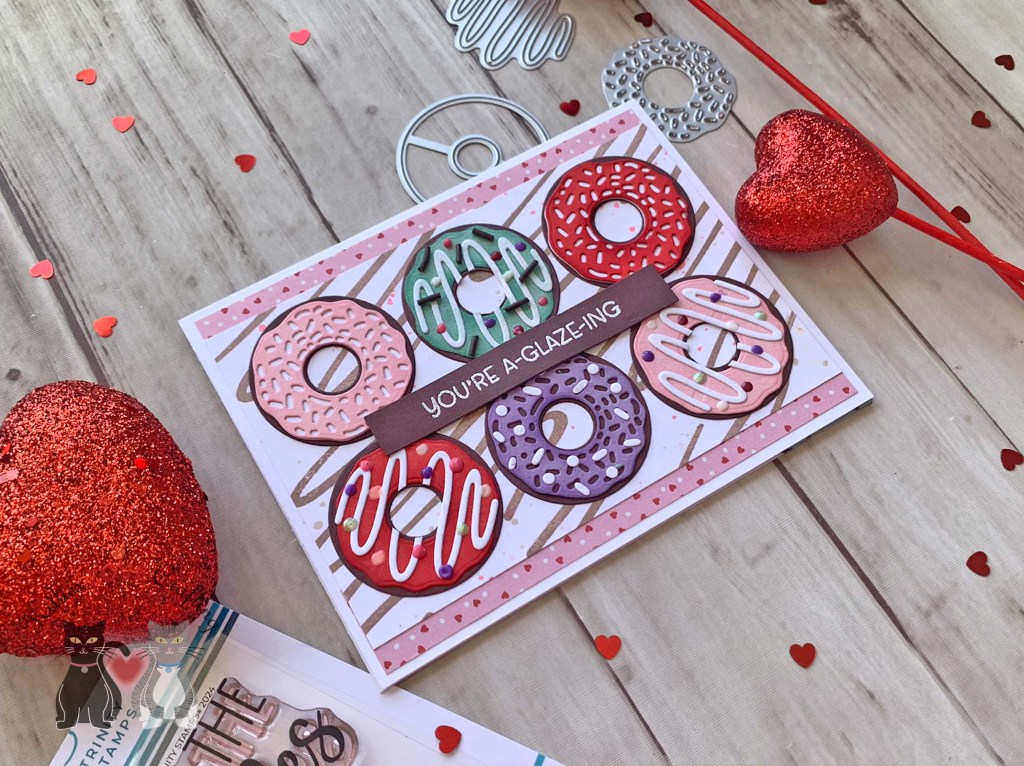
Cards, Love & Friendship, Stenciled Background, Valentine's Day

A Simple Valentine’s Day Card featuring Trinity Stamps

Hello friends. One last card for my Valentine’s Day card series. Sorry this one is a bit late.

For this card, I cut a piece of Neenah 100lb Classic Crest Cardstock 8.5 X 11″ to 5-1/2 x 8-1/2″ and scored at 4-1/4″ to create a card base, another piece to 3-1/2 x 5-1/4. I stamped the background using the drizzle from the A-GLAZE-ing 4×8 Stamp Set with Catherine Pooler Designs Sand Castle Ink. I also splattered some more ink with CP Sand Castle, Stampin’ Up! Real Red, and CP Cotton Candy Inks. I added some pattern paper, measuring 4 x 5-1/4″ from my stash, behind the panel.

I die cut the donuts from Stampin’ Up! Chocolate Chip 8-1/2 x 11″ Cardstock (retired), Stampin’ Up! Mint Macaron 8-1/2 x 11″ Cardstock (retired), Stampin’ Up! Poppy Parade 8-1/2 x 11″ Cardstock, Simon Says Stamp Cotton Candy 8-1/2 x 11″ Cardstock and Neenah 100lb Classic Crest Cardstock 8.5 X 11″ using the Tiny Donut Dipper Die Set.

I used ink to add some dimension to the donut frostings. I used CP Cotton Candy, Stampin’ Up! Real Red, Stampin’ Up! Just Jade (retired), and Stampin’ Up! Highland Heather inks.

I stamped the sentiment from the A-GLAZE-ing 4×8 Stamp Set onto Stampin’ Up! Chocolate Chip 8-1/2 x 11″ Cardstock (retired) with Lawn Fawn YETI Pigment Ink and WOW Opaque Bright White Super Fine Embossing Powder. I popped it up by using 3M Foam Tape.

I finished off the card by adding my Spectrum Noir Clear Overlay Sparkle Pen to add glitter to the donuts, Sugared Surprise Sprinkles Embellishment Mix, Crushed Grapes Gloss Crystal Drops, Autumn Red Crystal Drops, Nuvo Dragon Scales Dream Drops, Nuvo Carnation Pink Crystal Drops, and Nuvo Gloss White Crystal Drops.

On the inside of the card, I stamped a sentiment from the Sprinkles on my Donut 3×3 Stamp Set with Stampin’ Up! Real Red Ink and die cut with the coordinating die. I also added a mini donut.

Dimensions


Supplies

https://linkdeli.com/widget.js?id=f5e8378456858c916708

Thanks for reading this post. I hope Iโ€™ve inspired you to give this cute Valentine’s Day card a try for yourself. Leave comments or questions below or feel free to email.

Cards, Embossed Background, Love & Friendship, Valentine's Day

Cute Valentine’s Day Card featuring Trinity Stamps Tiny Teacup and Tiny Donut Die Sets

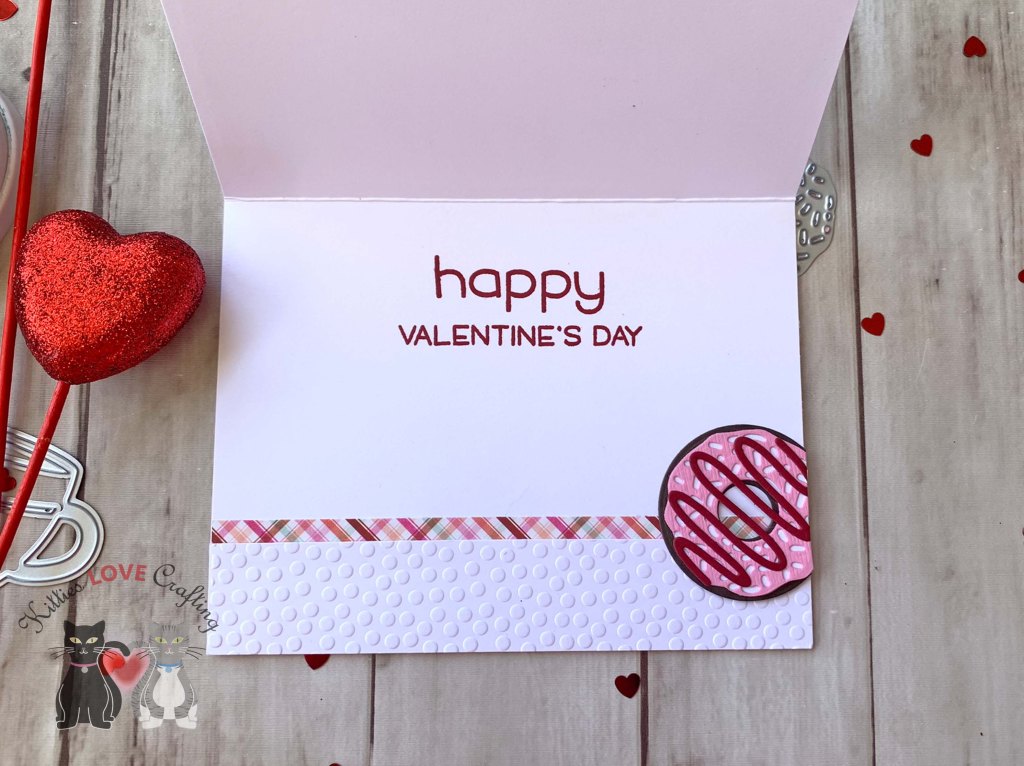
Hello friends. I am loving all the new Trinity Stamps yummy donut dies and stamps! It’s so easy to make cards with these dies, I just had to make more… For this one I had to CASE a card from Carrie Rhoades (from the Trinity Stamps Creative Team), featuring the Tiny Teacup and Tiny Donut Die Sets. It is a super cute card!

For this card, I cut a piece of Neenah 100lb Classic Crest Cardstock 8.5 X 11″ to 5-1/2 x 8-1/2″ and scored at 4-1/4″ to create a card base, another piece to 4 x 5-1/4. I colored the panel with Catherine Pooler Designs Hot Tub and Skylight inks. Then I added splatters with Hot Tub, Skylight and S’mores inks. I cut another piece of Neenah 100lb Classic Crest Cardstock 8.5 X 11″ to 1-1/4 x 4″ and embossed it using the Queen and Company Embossing Folder from the Embossing Folder Bundle (discontinued).

I die cut the teacup and donuts using the Tiny Teacup Die Set and Tiny Donut Dipper Die Set from Simple Stories Sweet Talk 12 x 12 Paper (discontinued), Lawn Fawn Kraft 8-1/2 x 11″ Cardstock, Stampin’ Up! Cherry Cobbler 8-1/2″ X 11″ Cardstock, Bazill Strawberry Cheesecake 12 x 12 Cardstock (discontinued), and Stampin’ Up! Early Espresso 8-1/2 x 11″ Cardstock.

I stamped the sentiment from the A-GLAZE-ing 4×8 Stamp Set onto Stampin’ Up! Cherry Cobbler 8-1/2″ X 11″ Cardstock with Lawn Fawn YETI Pigment Ink and WOW Opaque Bright White Super Fine Embossing Powder. I popped it up by using 3M Foam Tape.

On the inside of the card, I added a strip of embossed Neenah 100lb Classic Crest Cardstock 8.5 X 11″ cut to 1 x 5-1/2″ as well as a piece of pattern paper cut to 1-1/2 x 5-1/2″. I stamped a sentiment from Lawn Fawn’s Happy Happy Happy Add-On with Stampin’ Up! Cherry Cobbler Ink (retired). I also added another donut.

Dimensions


Supplies

https://linkdeli.com/widget.js?id=f5e8378456858c916708

Thanks for reading this post. I hope Iโ€™ve inspired you to give this cute Valentine’s Day card a try for yourself. Leave comments or questions below or feel free to email.

Cards, Love & Friendship, Stenciled Background, Valentine's Day

Create a Stenciled Background Using A Die featuring Trinity Stamps

Hello friends. Here is a very easy card for Valentine’s Day featuring Trinity Stamps new Circle Shaped Card Die Set as well as the Sprinkles On My Donut Die for the background. If you missed it, check out my previous post for another quick and easy card using the Circle Shaped Card Die Set.

For this card, I cut a piece of Neenah 100lb Classic Crest Cardstock 8.5 X 11″ to 5 x 10″ and scored at 5″ to create a card base, a piece of Catherine Pooler Designs Rockin’ Red Prints 6 x 6 Pattern Paper to 5 x 5″, and another piece of Neenah 100lb Classic Crest Cardstock 8.5 X 11″ to 4-3/4 x 4-3/4″. For the background panel, I used the Sprinkles on my Donut Die set Sprinkles die to create a stencil from acetate. Then used Catherine Pooler Designs Over Coffee Ink to stencil the background sprinkles.

Next I die cut the circle shape from Stampin’ Up! Chocolate Chip 8-1/2 x 11″ Cardstock (retired – any brown cardstock will do here) using theHello friends. Here is a very easy card for Valentine’s Day featuring new Trinity Stamps Circle Shaped Card Die Set. I cut off one side of the card, leaving me with a circle shape. Using the same die set, I cut out the frosting from Simon Says Stamp 8-1/2 x 11″ 100lb Cotton Candy Cardstock. I used Stampin’ Up! Early Espresso Ink to add dimension to the cookie base and Catherine Pooler Designs Cotton Candy Ink for the frosting. Lastly I added sprinkles die cut from Stampin’ Up! Poppy Parade 8-1/2″ X 11″ Cardstock and Neenah 100lb Classic Crest Cardstock 8.5 X 11″.

I stamped the sentiment from the Sprinkles on my Donut 3×3 Stamp Set onto Neenah 100lb Classic Crest Cardstock 8.5 X 11″ with Catherine Pooler Designs Over Coffee Ink and die cut it with the coordinating die. I popped it up using 3M Foam Tape.

On the inside of the card, I added a strip of pattern paper (same as on front of card) measuring 1 x 5″ and stamped a sentiment from the A-GLAZE-ing 4×8 Stamp Set with Catherine Pooler Designs Cotton Candy Ink. I also die cut a mini donut from the Stampin’ Up! Chocolate Chip 8-1/2 x 11″ Cardstock and Simon Says Stamp 8-1/2 x 11″ 100lb Cotton Candy Cardstock using the Tiny Donut Dipper Die Set.

Dimensions


Supplies

https://linkdeli.com/widget.js?id=f5e8378456858c916708

Thanks for reading this post. I hope Iโ€™ve inspired you to give this cute Valentine’s Day card a try for yourself. Leave comments or questions below or feel free to email.

Cards, Distress Ink Techniques, Love & Friendship, Valentine's Day, Window Cards

Donut Valentine’s Day Card featuring Trinity Stamps

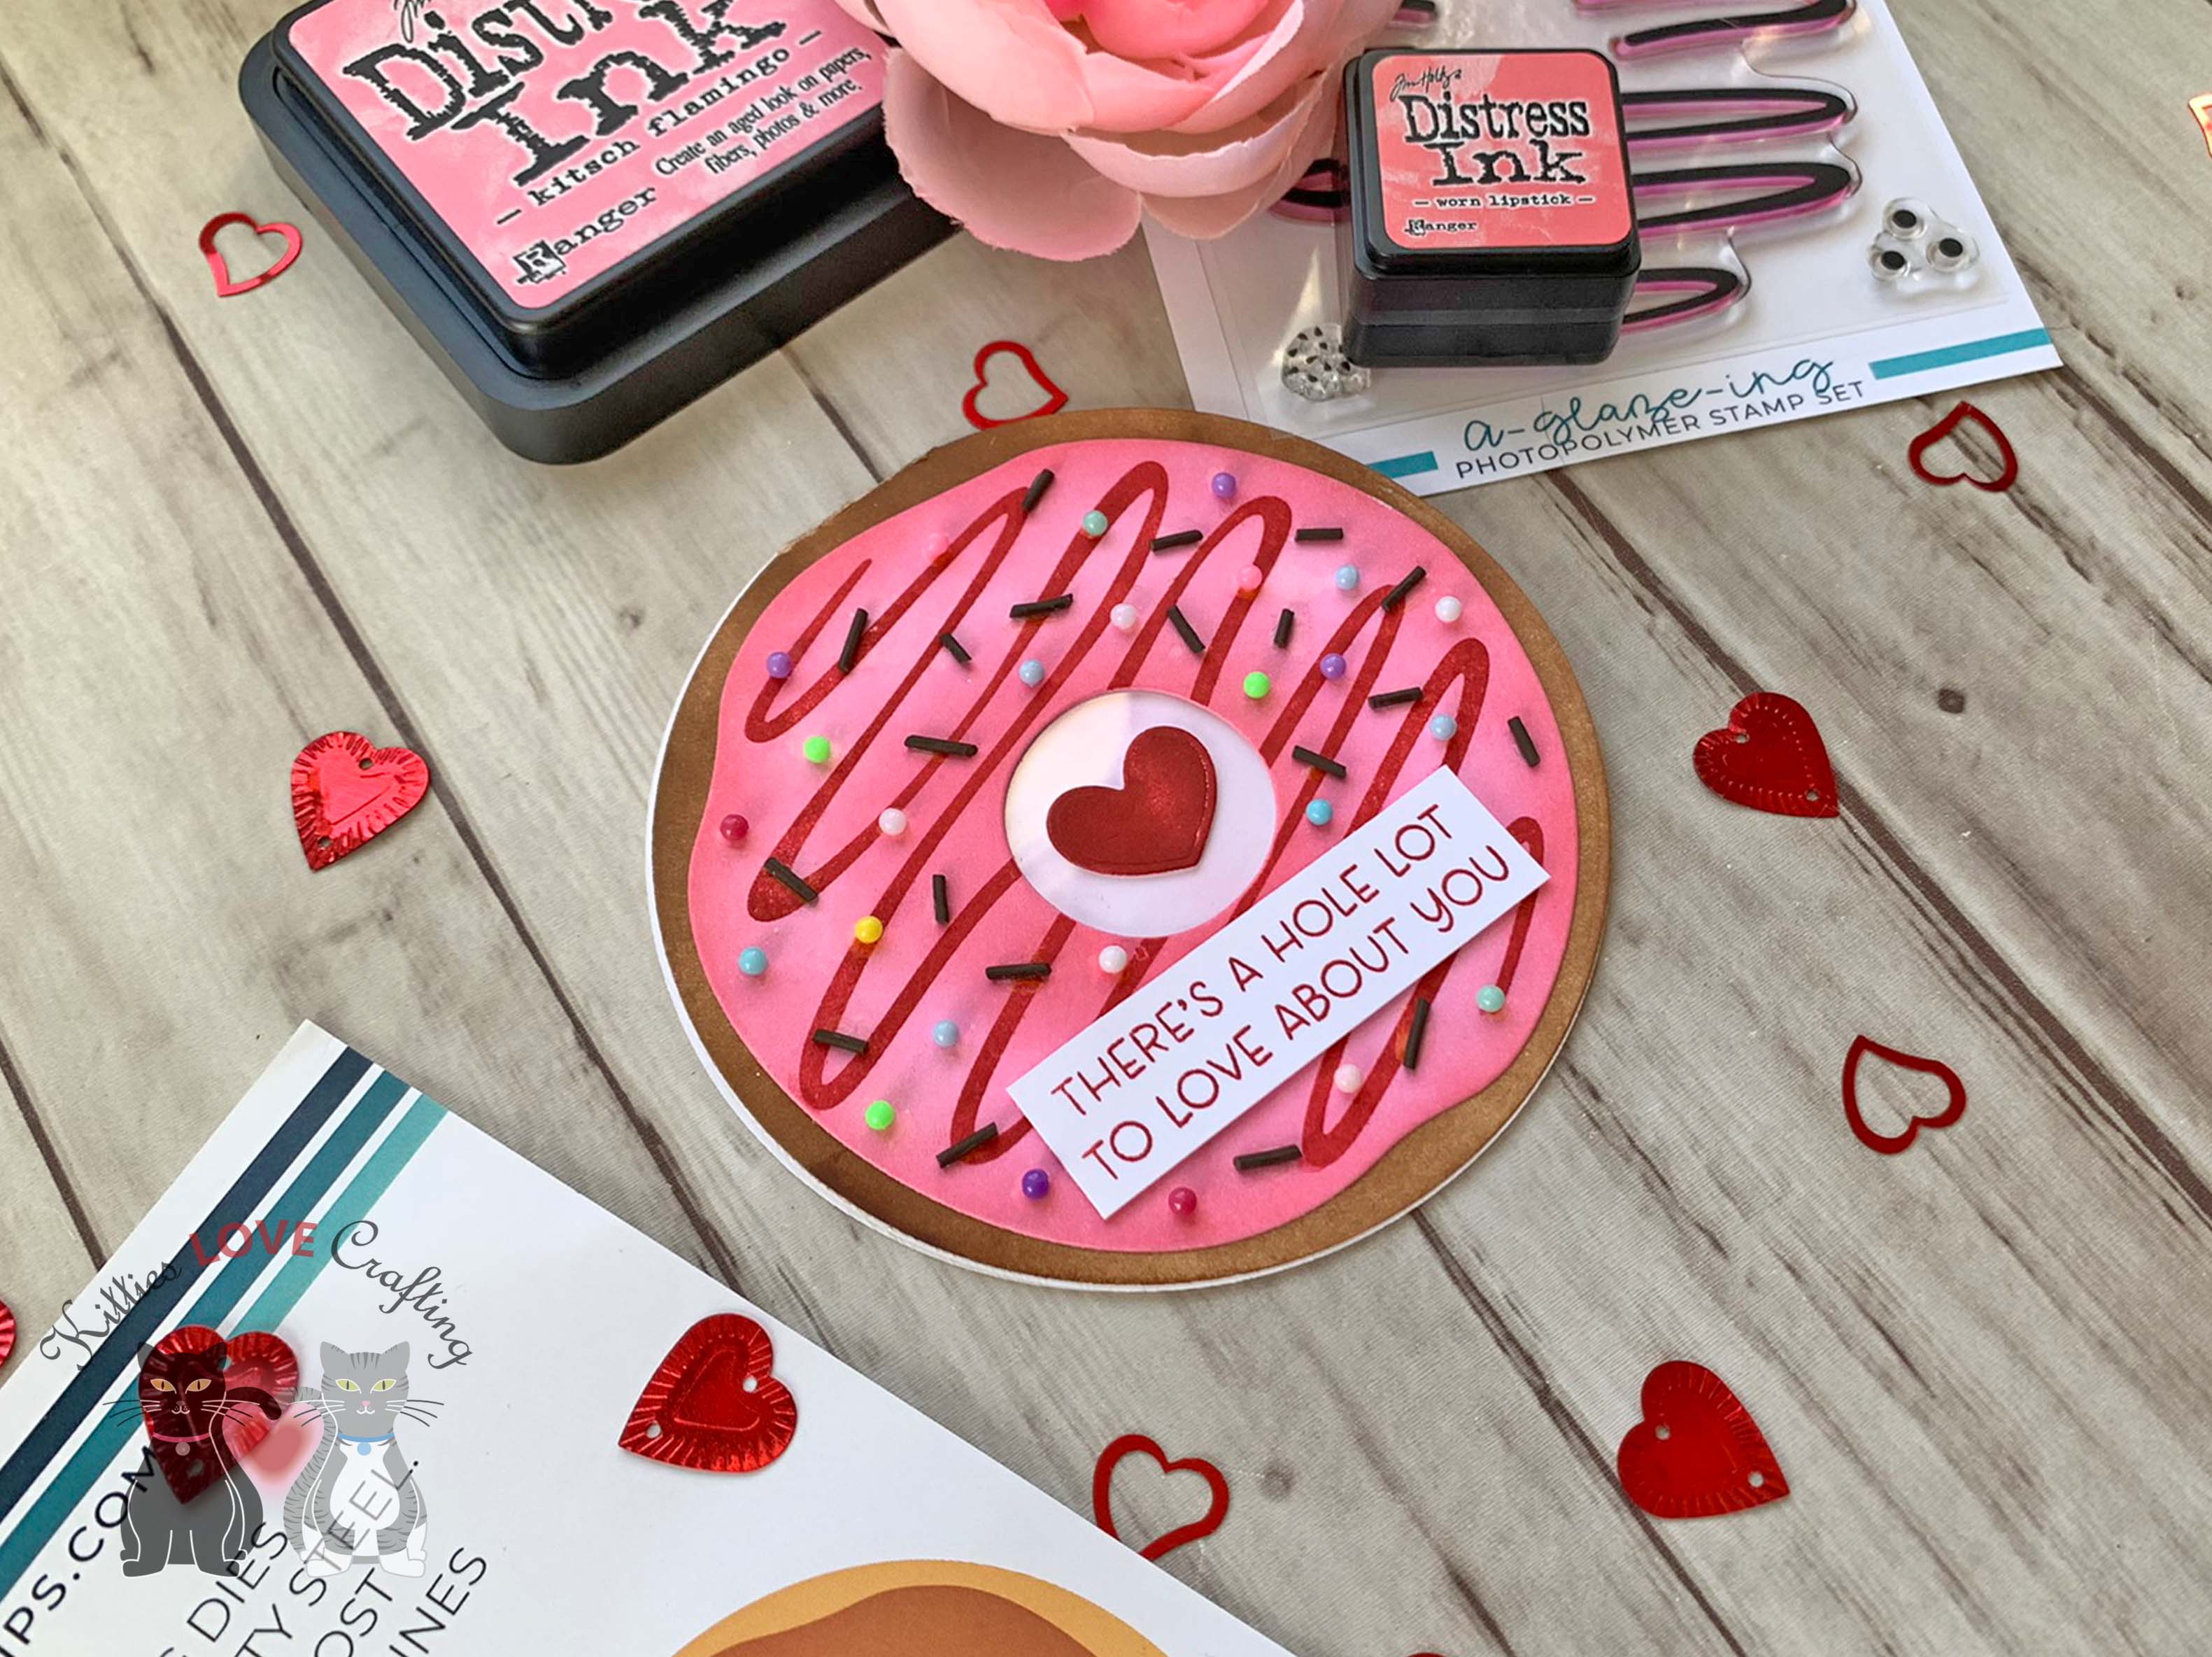
Hello friends. For this post I decided to CASE Brenda Noelke’s card from the Trinity Stamps’ design team. I used distress ink to color all the pieces of the donut, however. I was surprised how quickly you can make a card with these dies! Look for more posts featuring Trinity Stamps new dies.

For this card, I die cut a piece of Neenah 100lb Classic Crest Cardstock 8.5 X 11″ using the Trinity Stamps Circle Shaped Card Die Set create a card base and another piece which I cut in half and use one circle to cover the acetate I will add in the center hole later. I also die cut the frosting and the heart from Neenah 100lb Classic Crest Cardstock 8.5 X 11″.

I used Ranger Tim Holtz Walnut Stain Distress Ink for the donut base; Worn Lipstick and Kitsch Flamingo Distress Inks for the frosting; and Catherine Pooler Designs Rockin’ Red Ink for the heart. I stamped the glaze from the Trinity Stamps A-GLAZE-ing 4×8 Stamp Set with Catherine Pooler Designs Rockin’ Red Ink.

I added a piece of acetate to the center of the donut and the added the heart on top and the other white piece of the circle card which I added to the back of the front panel.

I stamped a sentiment from the Trinity Stamps A-GLAZE-ing 4×8 Stamp Set onto Neenah 100lb Classic Crest Cardstock 8.5 X 11″ with Catherine Pooler Designs Rockin’ Red Ink adn trimmed it down. Lastly I added some Sugared Surprise Sprinkles Embellishment Mix.

On the inside of the card, I stamped just added another frosting piece, colored with Worn Lipstick and Kitsch Flamingo Distress Inks.

Dimensions


Supplies

https://linkdeli.com/widget.js?id=f5e8378456858c916708

Thanks for reading this post. I hope Iโ€™ve inspired you to give this cute donut Valentine’s Day card a try for yourself. Leave comments or questions below or feel free to email.

Celebrations, Hello, Just Because, Love & Friendship

Stretching Your Background Dies featuring Honey Bee Stamps Dies

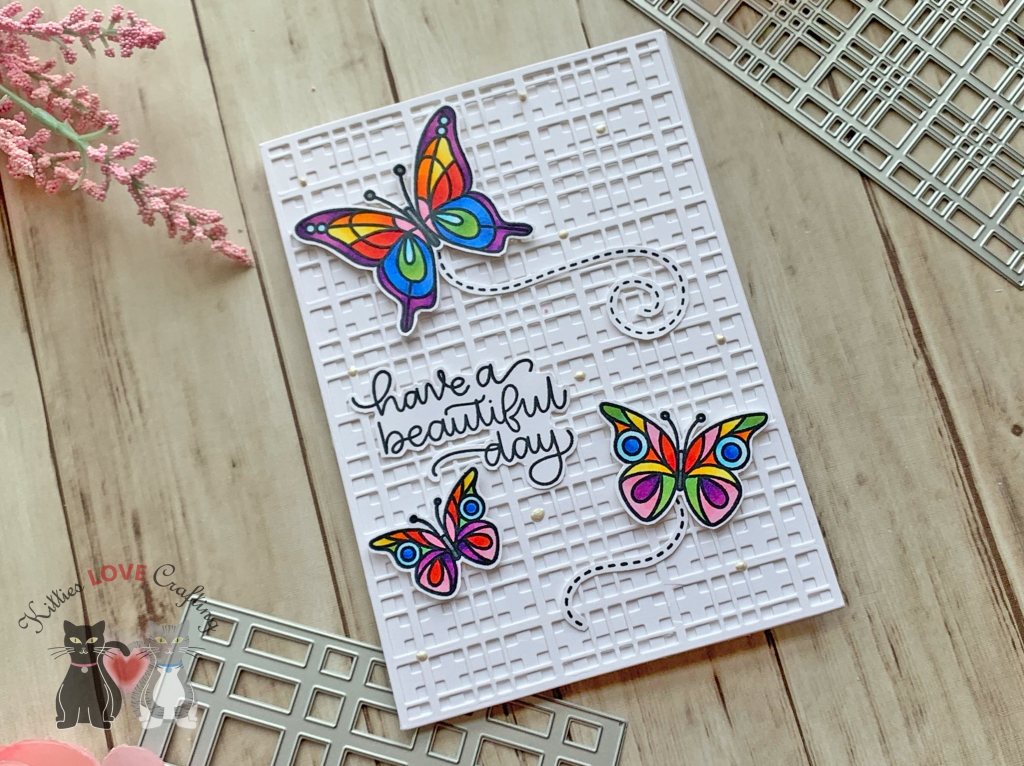
Hello crafty people. I decided to challenge myself to see how many different ways I can use one background die. I chose the Honey Bee Stamps Plaid A7 Base Cover Plate and Plaid A7 Cover Top Plate which I bought during the holidays but only got to use once. I used it as it was intended for one card, a focal image and an embellishment.

For the first card, I started by cutting a piece of Neenah 110lb Classic Crest Cardstock to 7 x 10″ and scored at 5″ to create the card base. I also diecut the Honey Bee Stamps Plaid A7 Base Cover Plate and Plaid A7 Cover Top Plate and adhered them to the card base.

I stamped the butterflies, sentiment and trails from the Simon Says Stamp Beautiful Day stampset (Unfortunately no longer available but any butterfly stamps will do). I colored the images with Copic Markers. I used R17 + R27, R81 + R83, YR09 + YR16, Y13 + Y18, YG17 + YG45, BG000 + B01, V06 + V09, and B24 + B26.

I don’t have the dies for this stampset so I fussycut the images and sentiment. I adhered the sentiment to the card using Tombow Mono Multi Glue and the butterflies with Stampin’ Dimensionals.

I finished it off by adding Nuvo Drops in Ivory Seashell. I left the inside blank. It was a super easy card to create. The only slightly time consuming thing was coloring the images but that didn’t take that long either. I love how the rainbow butterflies look against the white background!

Dimensions


For the second card, I started by again cutting a piece of Neenah 110lb Classic Crest Cardstock to 7 x 10″ and scored at 5″ to create the card base. I cut a piece of pattern paper from Doodlebug Designs 12 x 12 Milk and Cookies Paper (unavailable) and adhered it to the card base.

I diecut two 2-1/4″ circles from Neenah 110lb Classic Crest Cardstock and one from Vellum. I ran the two white circles through my diecut machine with the Honey Bee Stamps Plaid A7 Base Cover Plate and Plaid A7 Cover Top Plate and adhered all three circles together.

I used Stampin’ Up!’s Coffee Cafe Stamp & Die Bundle (retired) and Stampin’ Up!’s Fruit Basket stampset (retired) and Itty BItty Fruit Punch Pack (retired). I diecut the cup, the cupcake wrapper, two whipped creams and label from Neenah 110lb Classic Crest Cardstock, the lid from Vellum and the straw from pattern paper (Echo Park Spring Dots andSTRIPES 6 x 6 Paper Pad-discontinued).

I inked the cup with Tim Holtz SPUN SUGAR and PICKED RASPBERRY Distress Ink and the cupcake wrapper with GROUND ESPRESSO Distress Ink and I added some colore around the edges of the cupckae label with Catherine Pooler Lime Rickey Ink. I added shading to whipped cream with Copic Marker C1 + 0 and R81 and 0 and some sprinkles with the Ground Espresso Distress Marker.

I stamped the ince cubes from the Stampin’ Up! Coffee Cafe Stampset with Memento Tuxedo Black Ink onto Neenah 110lb Classic Crest Cardstock, colored with R81, BG000 + 0 Copic Markers and cut with the coodinating dies. I stamped the strawberries from Stampin’ Up!’s Fruit Basket stampset (retired) with Catherine Pooler Lime Rickey Ink and Catherine Pooler Samba Ink onto Neenah 110lb Classic Crest Cardstock and Itty BItty Fruit Punch Pack (retired) to punch them out.

I stamped the sentiment from Honey Bee Shake-It-Off Stamp Set (unavailable) onto Neenah 110lb Classic Crest Cardstock with Catherine Pooler Lime Rickey Ink and fussycut it out.

I finished it off by adding Ranger GLOSSY ACCENTS Glue Dimensional Adhesive to the ice cubes. I left the inside blank.

Dimensions


For the third card, I used the Honey Bee Stamps Donut Card Die (retired) with Catherine Pooler Sand Dunes 8-1/2 x 11″ Cardstock (unavailable) to create the card base. I used Lawn Fawn Guava 8-1/2 x 11″ Cardstock to diecut the icing and then diecut a another donut piece with Neenah 110lb Classic Crest Cardstock 8.5 X 11″ then used the Honey Bee Stamps Plaid A7 Base Cover to turn that donut shape into the donut glaze. I inked the edges of all the donut pieces using Tim Holtz Vintage Photo Distress Ink and adhered them.

I diecut the sentiment from Stampin’ Up!’s Early Espresso 8-1/2″ X 11″ Cardstock using Honey Bee Stamps Donut Worry Dies (recently retired). You can also use the Donut Worry 4×4 Stamp Set (retiring soon). I diecut the sentiment shadow from Catherine Pooler Sand Dunes 8-1/2 x 11″ Cardstock (unavailable) added Tim Holtz Vintage Photo Distress Ink and adhered them to the card.

On the inside of the card, I diecut another sentiment using the Honey Bee Stamps Donut Worry Dies (recently retired) from Neenah 110lb Classic Crest Cardstock 8.5 X 11″ and adhered it to the card.


Supplies

https://linkdeli.com/widget.js?id=f5e8378456858c916708

Thanks for reading this post. I hope you enjoyed and Iโ€™ve inspired you to take a look at your background dies/coverplates and use them in other ways. If you want to share you creations with me tag me on instagram @kittieslovecrafting. Leave comments or questions below or feel free to email me.