Hello friends. Want to make a fun card for St. Patrick’s Day but short on time?!? This flat shaker card was super quick to make! I used the Flat Acetate Shaker Pouches from Trinity Stamps which made it so much easier.
I used a Trinity Stamps A-2 Card Flat Acetate Shaker Pouches with double-sided tape to adhere to the back panel. I adhered 3 sides then filled it with different shaker bits. Then closed the fourth side and adhered it to the card base.
Thanks for reading this post. I hope I’ve inspired you to give this cute flat shaker card a try for yourself. Leave comments or questions below or feel free to email.
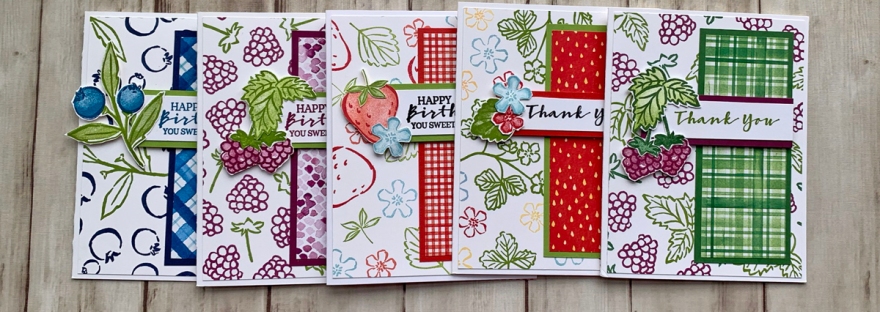
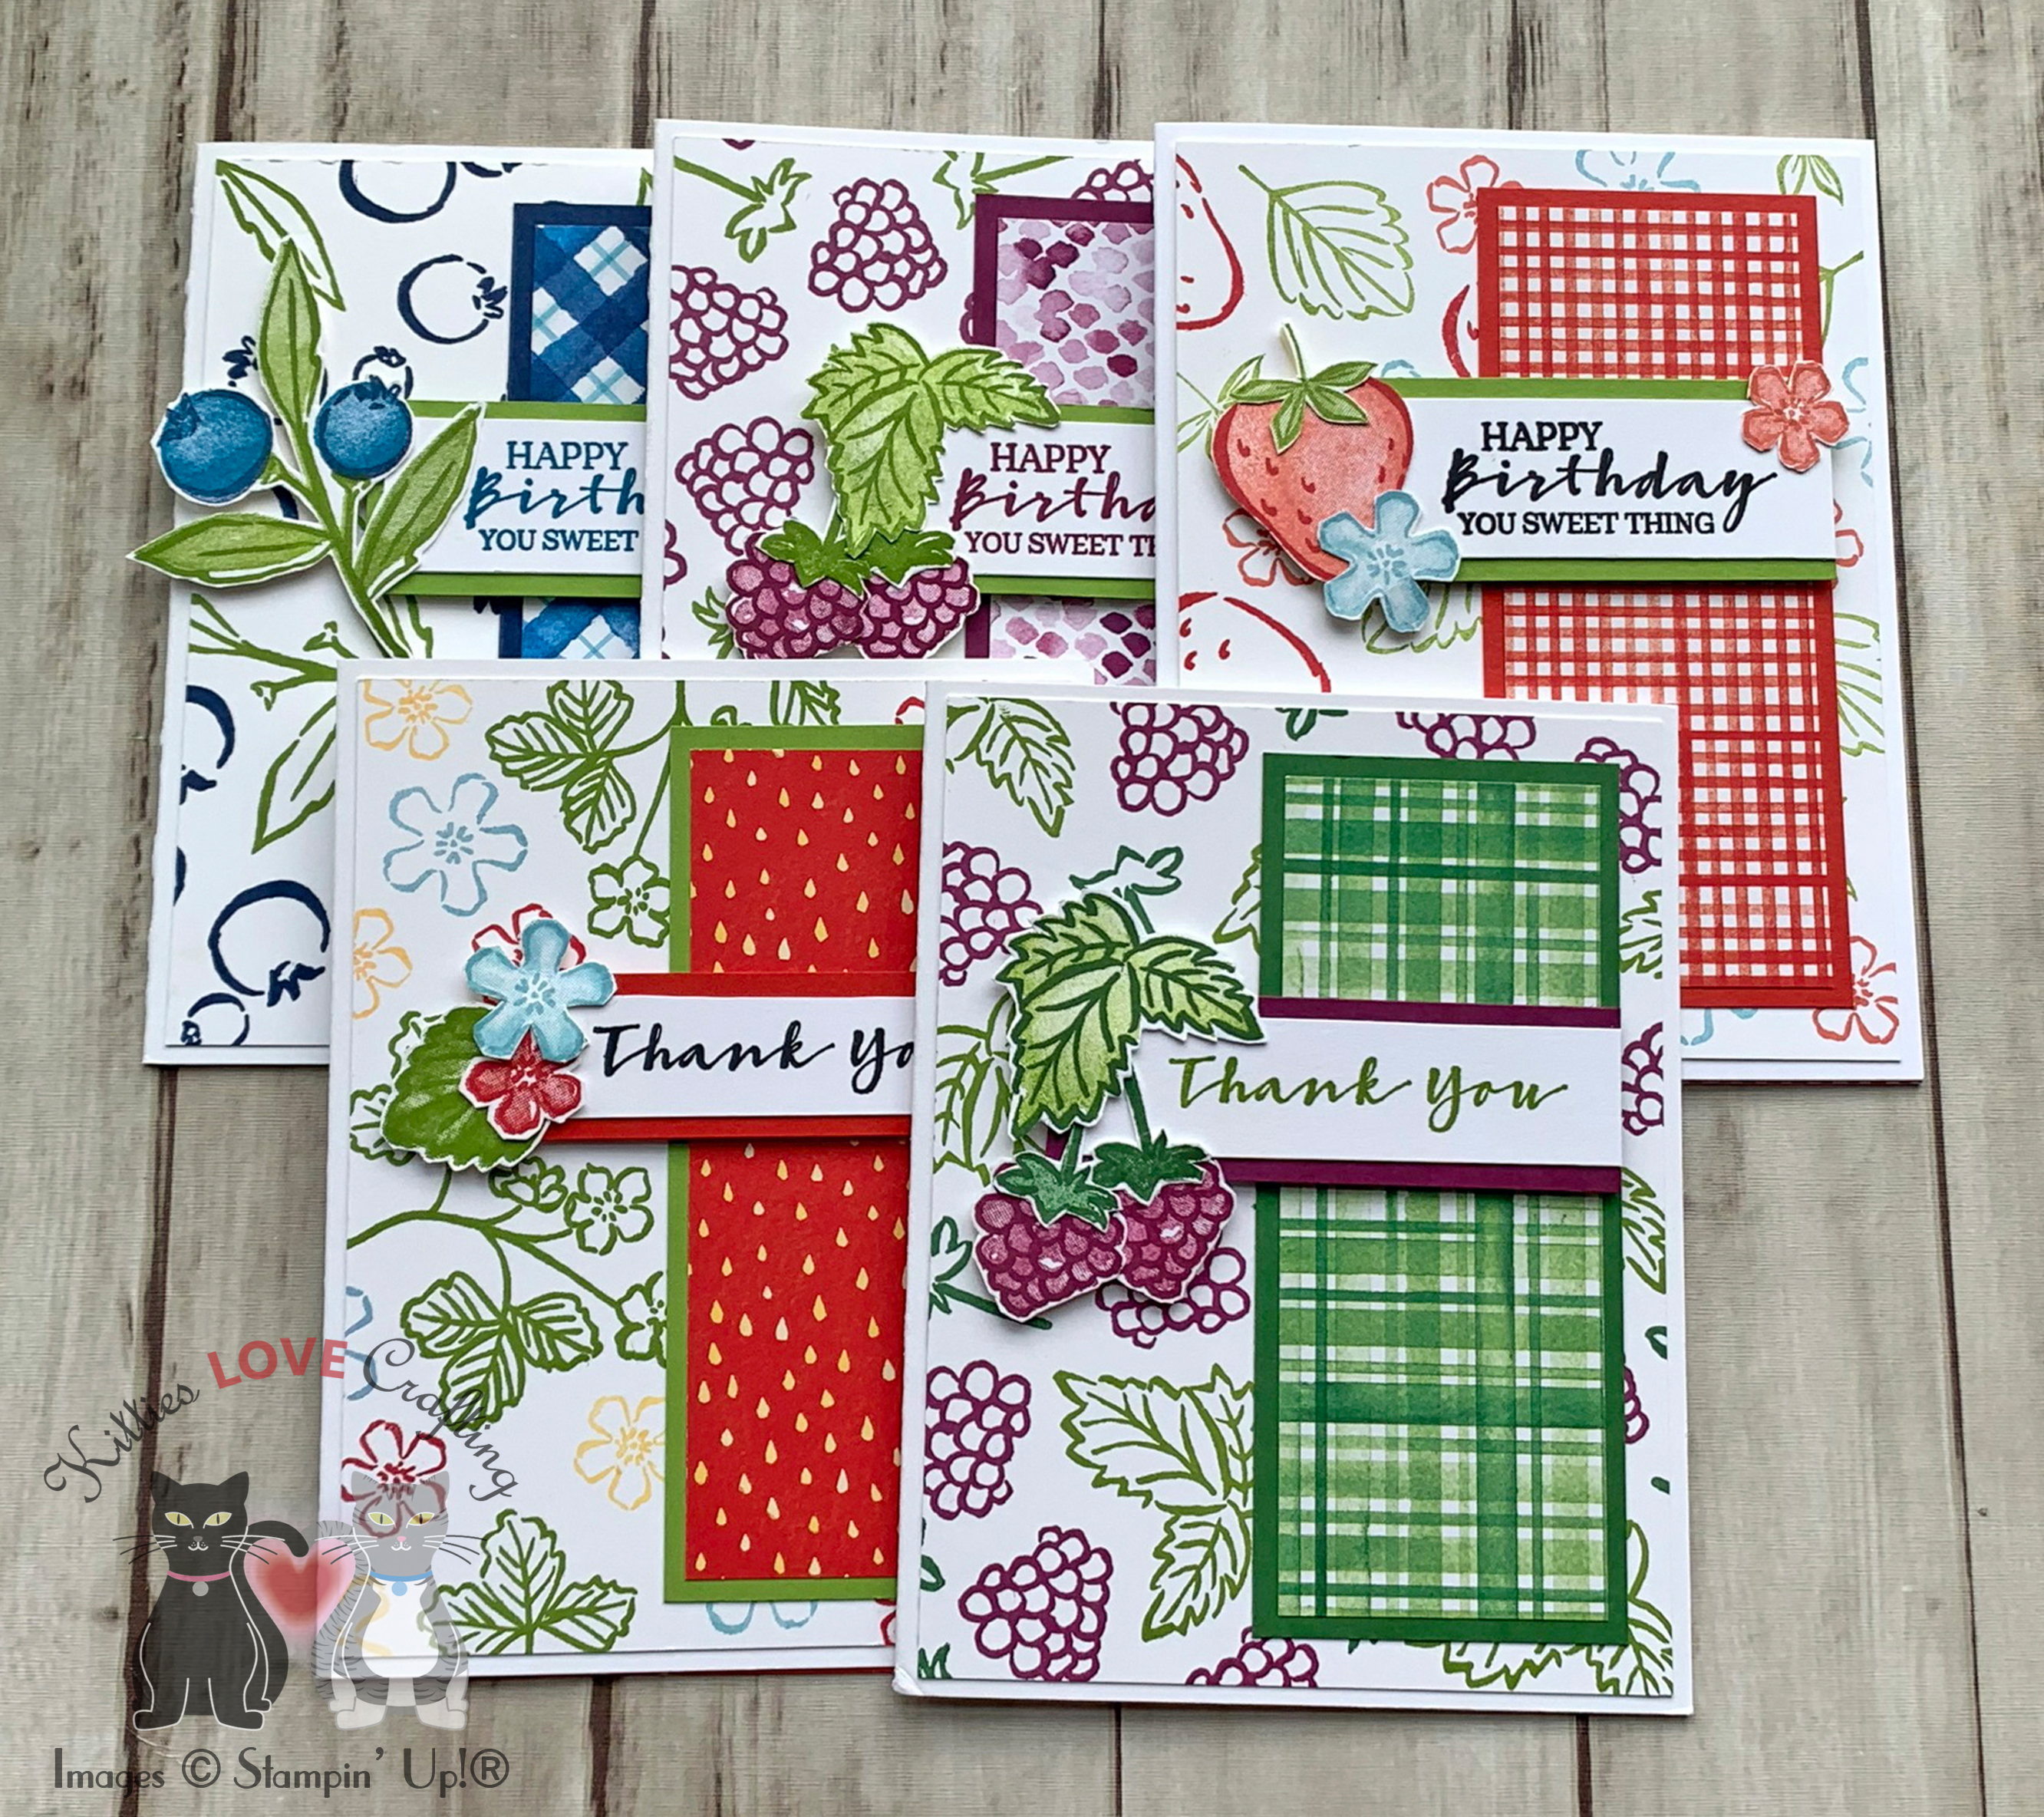
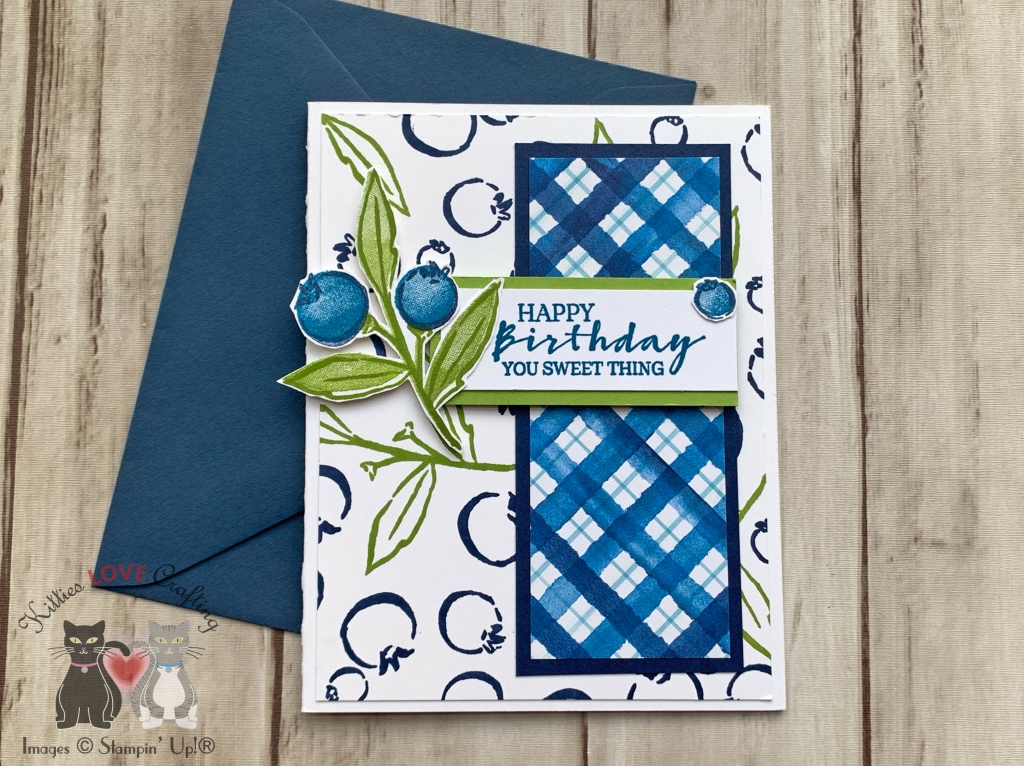
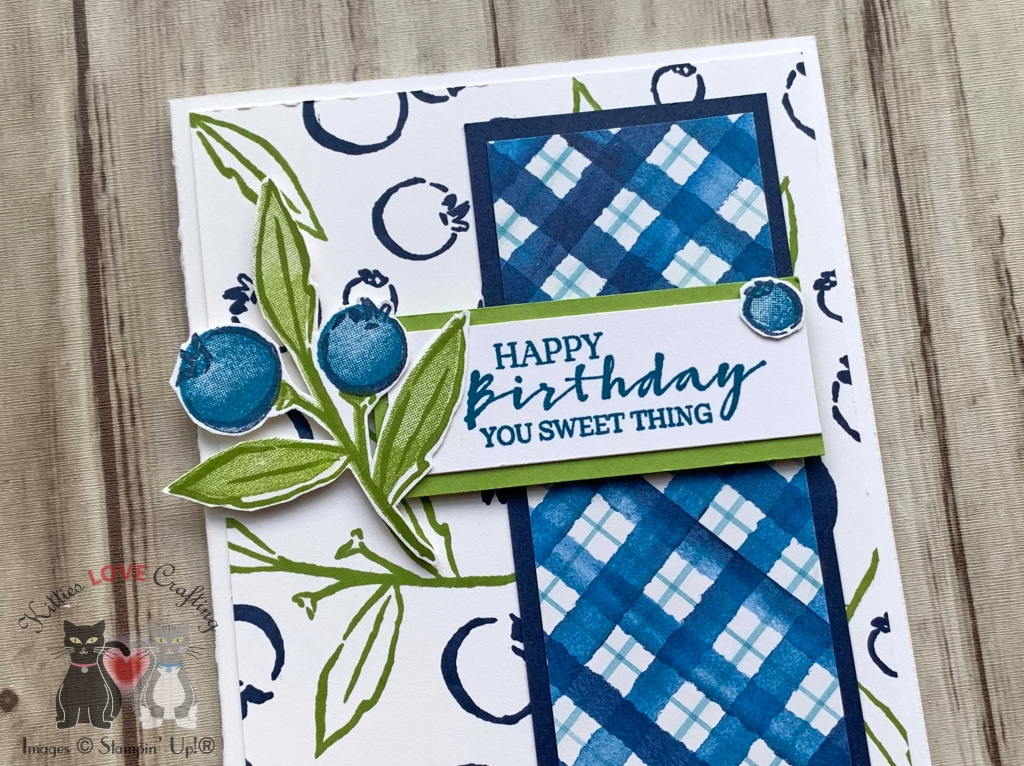
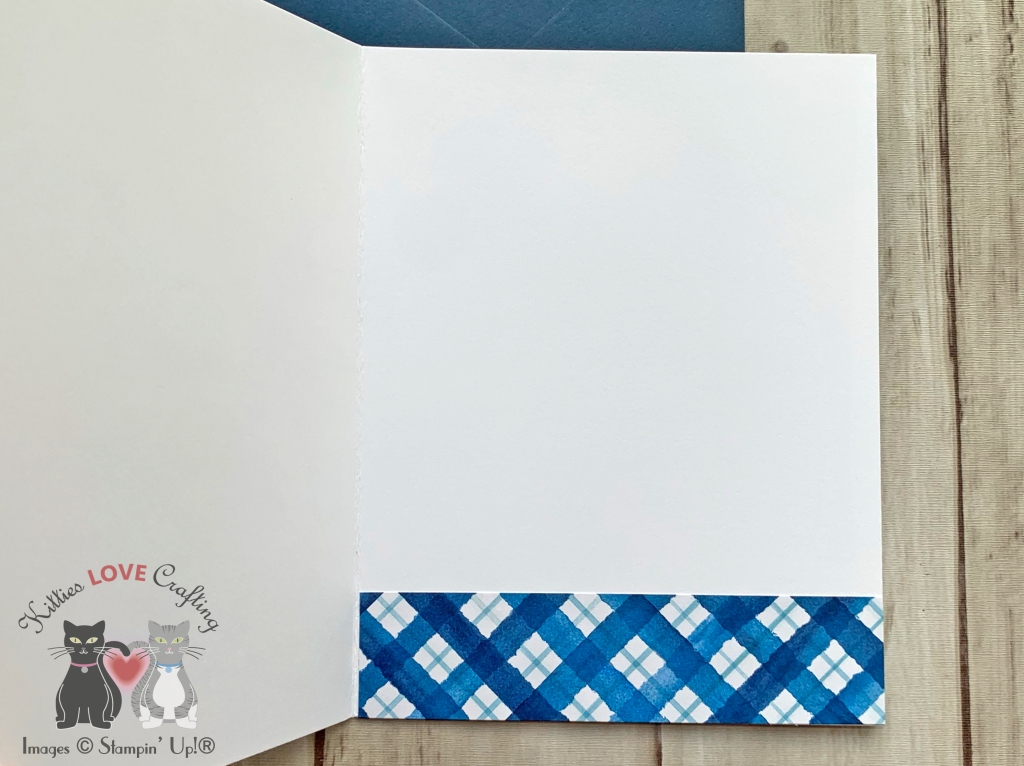
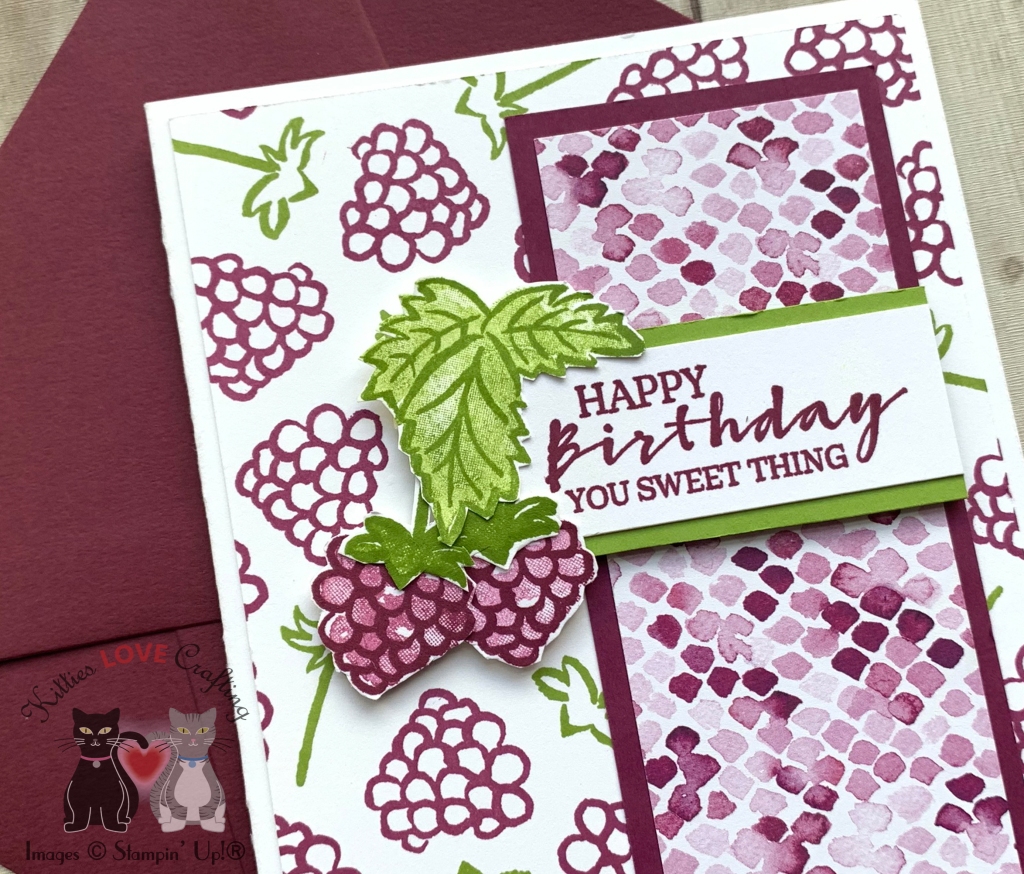
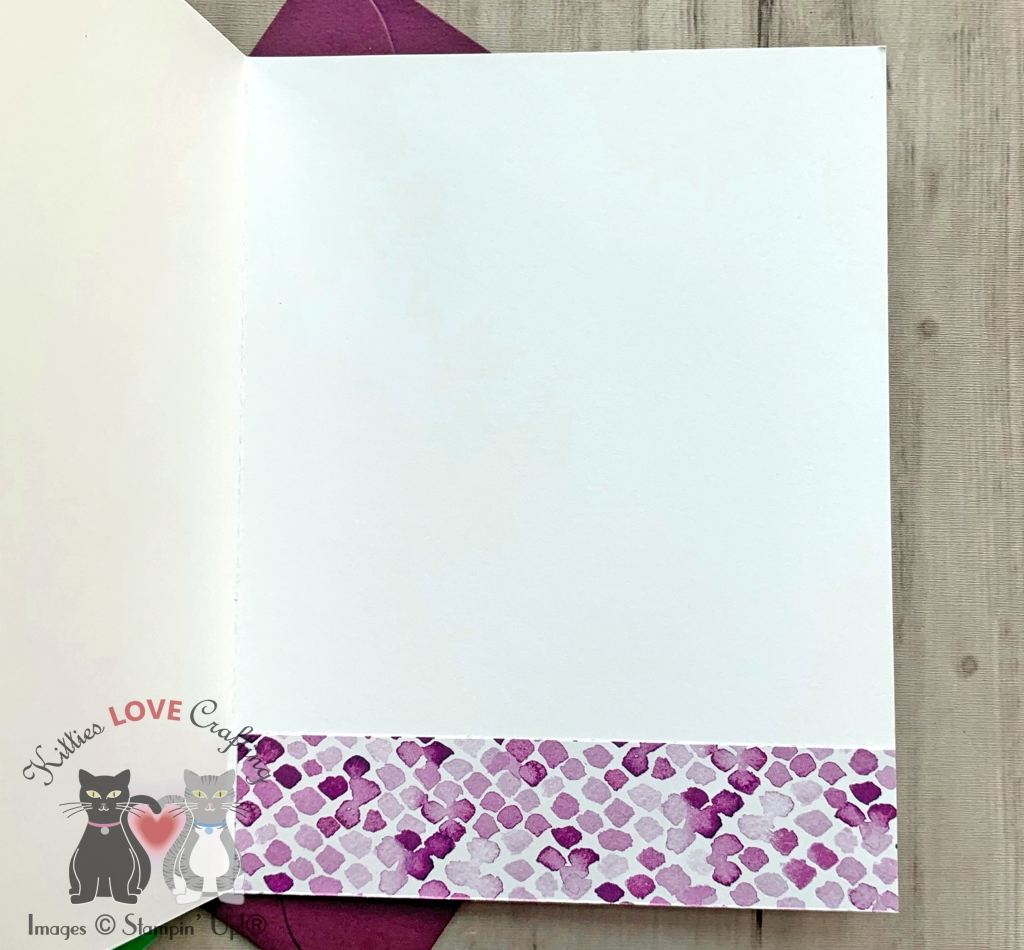
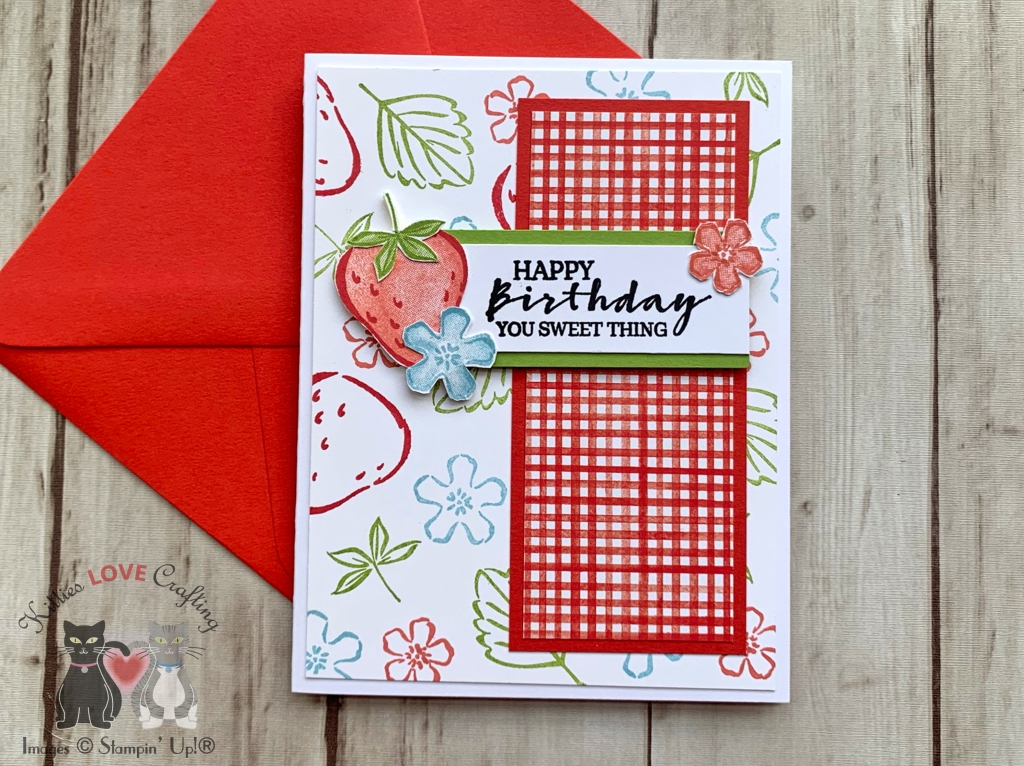
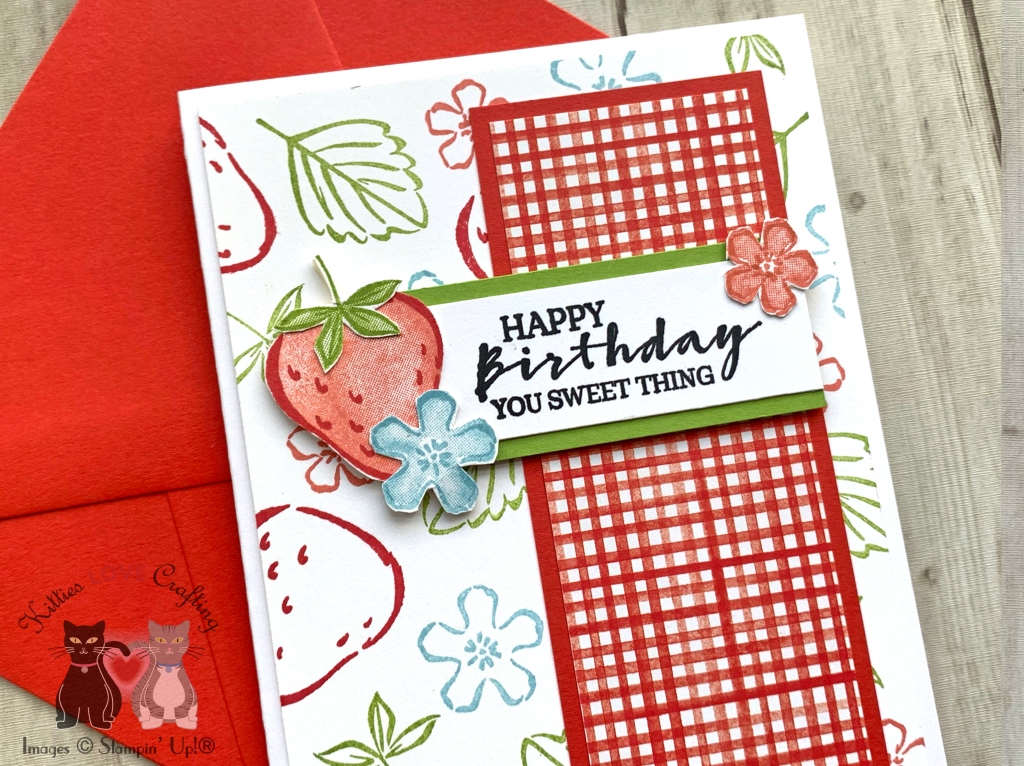
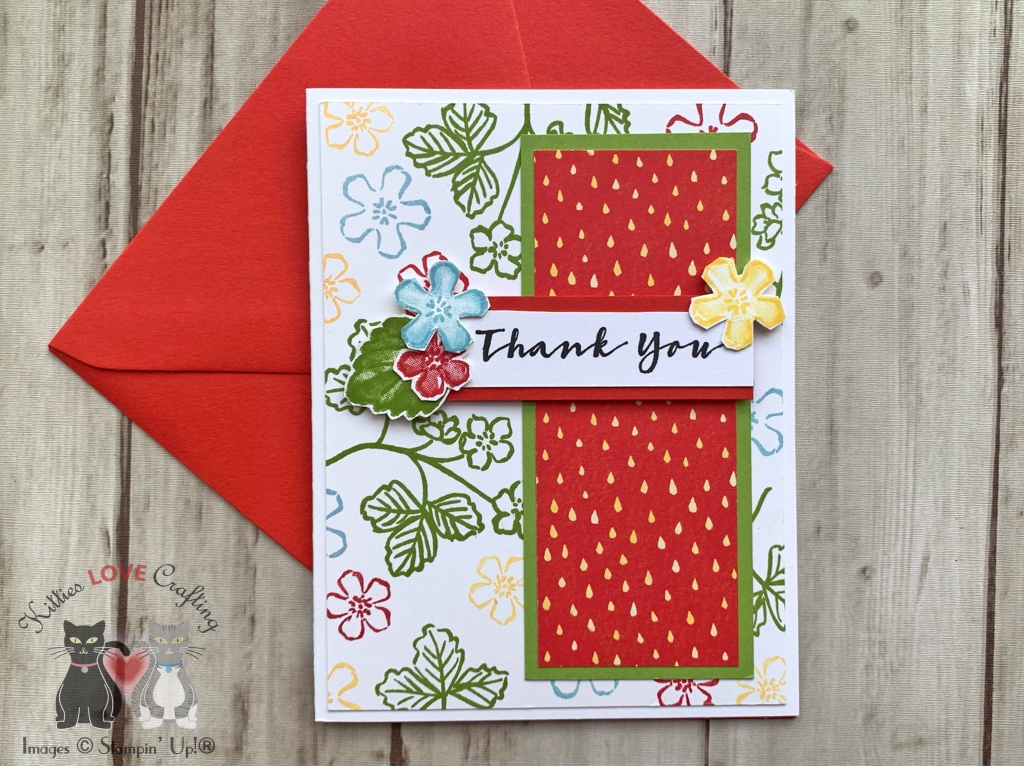
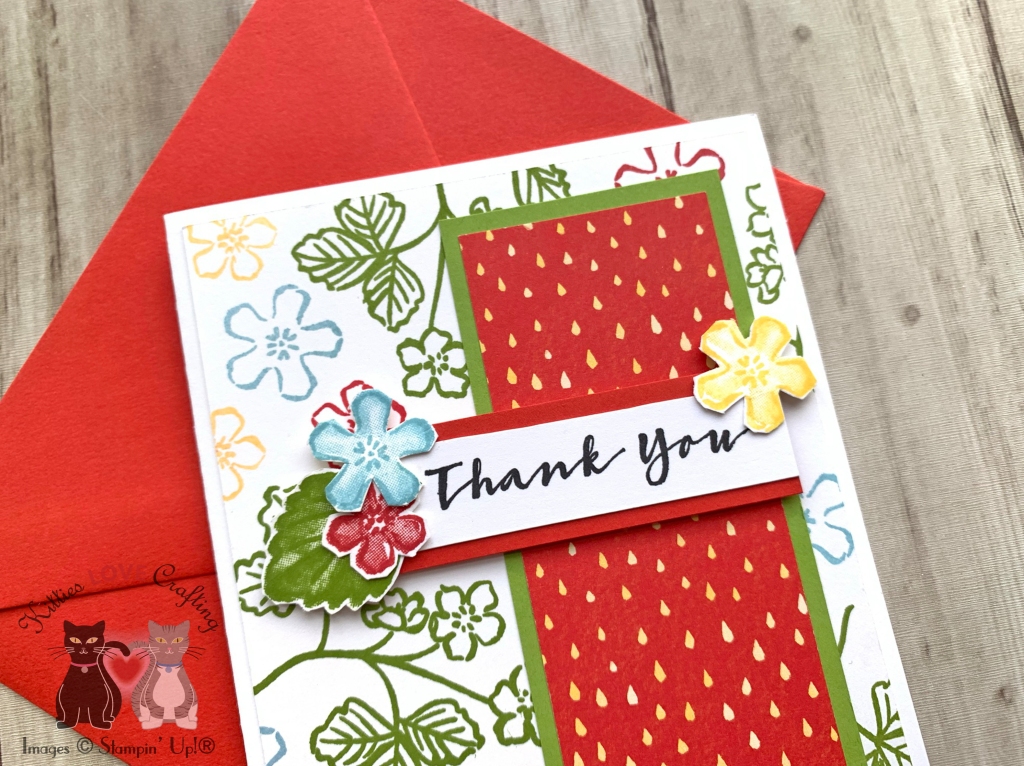
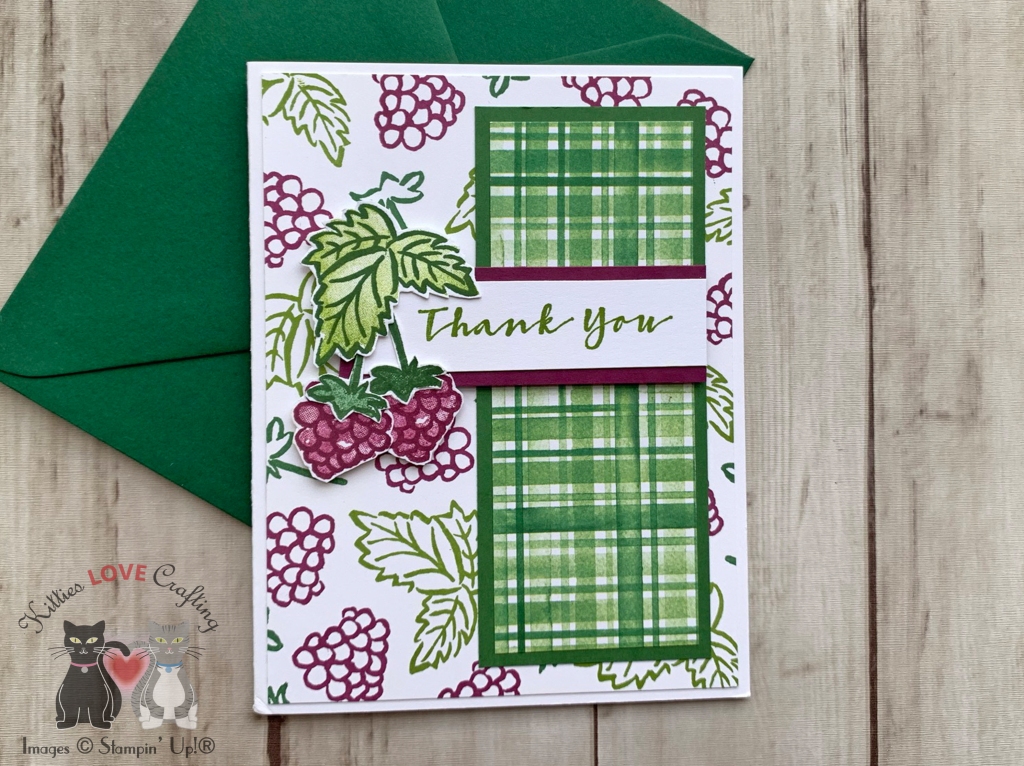
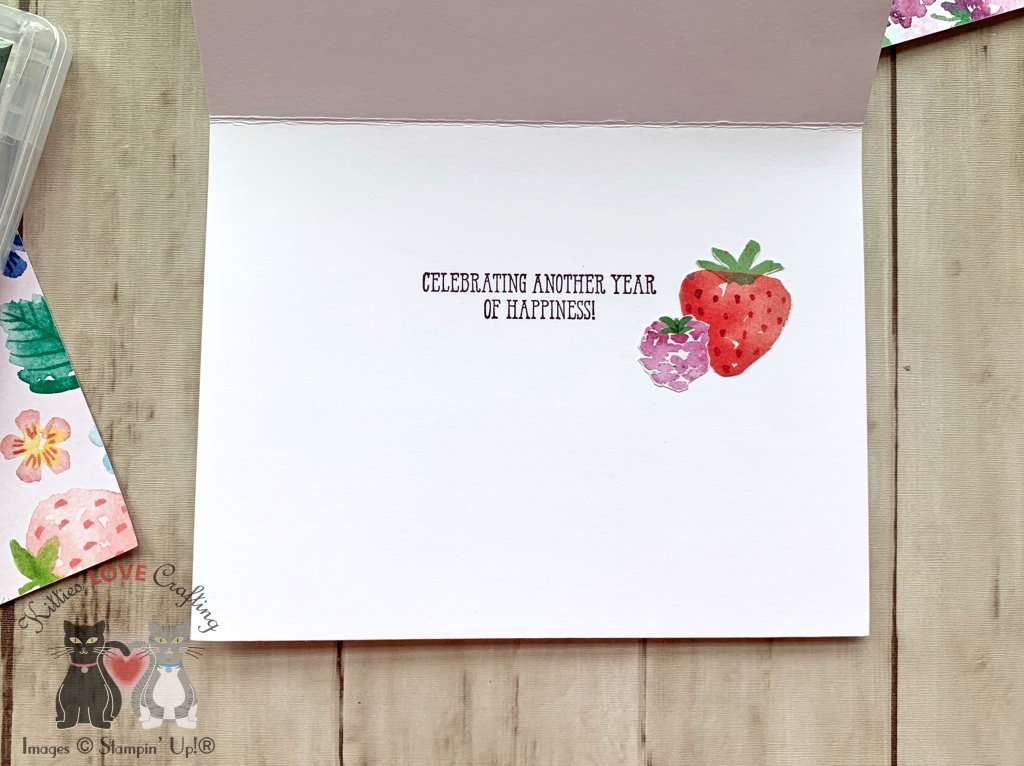
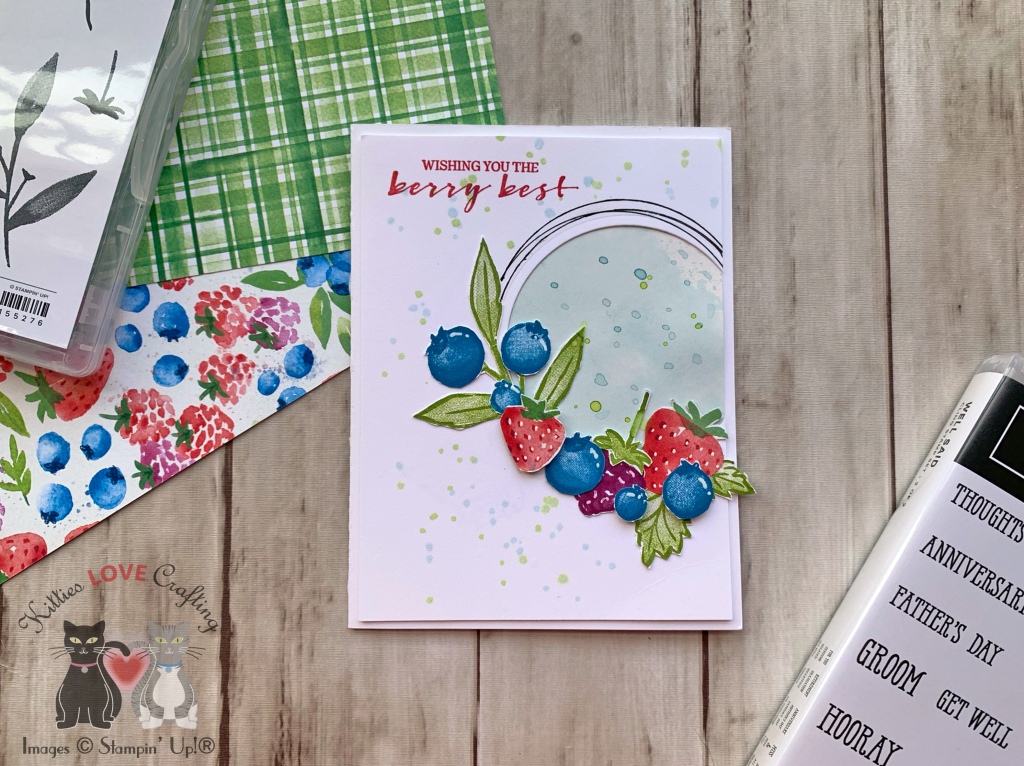
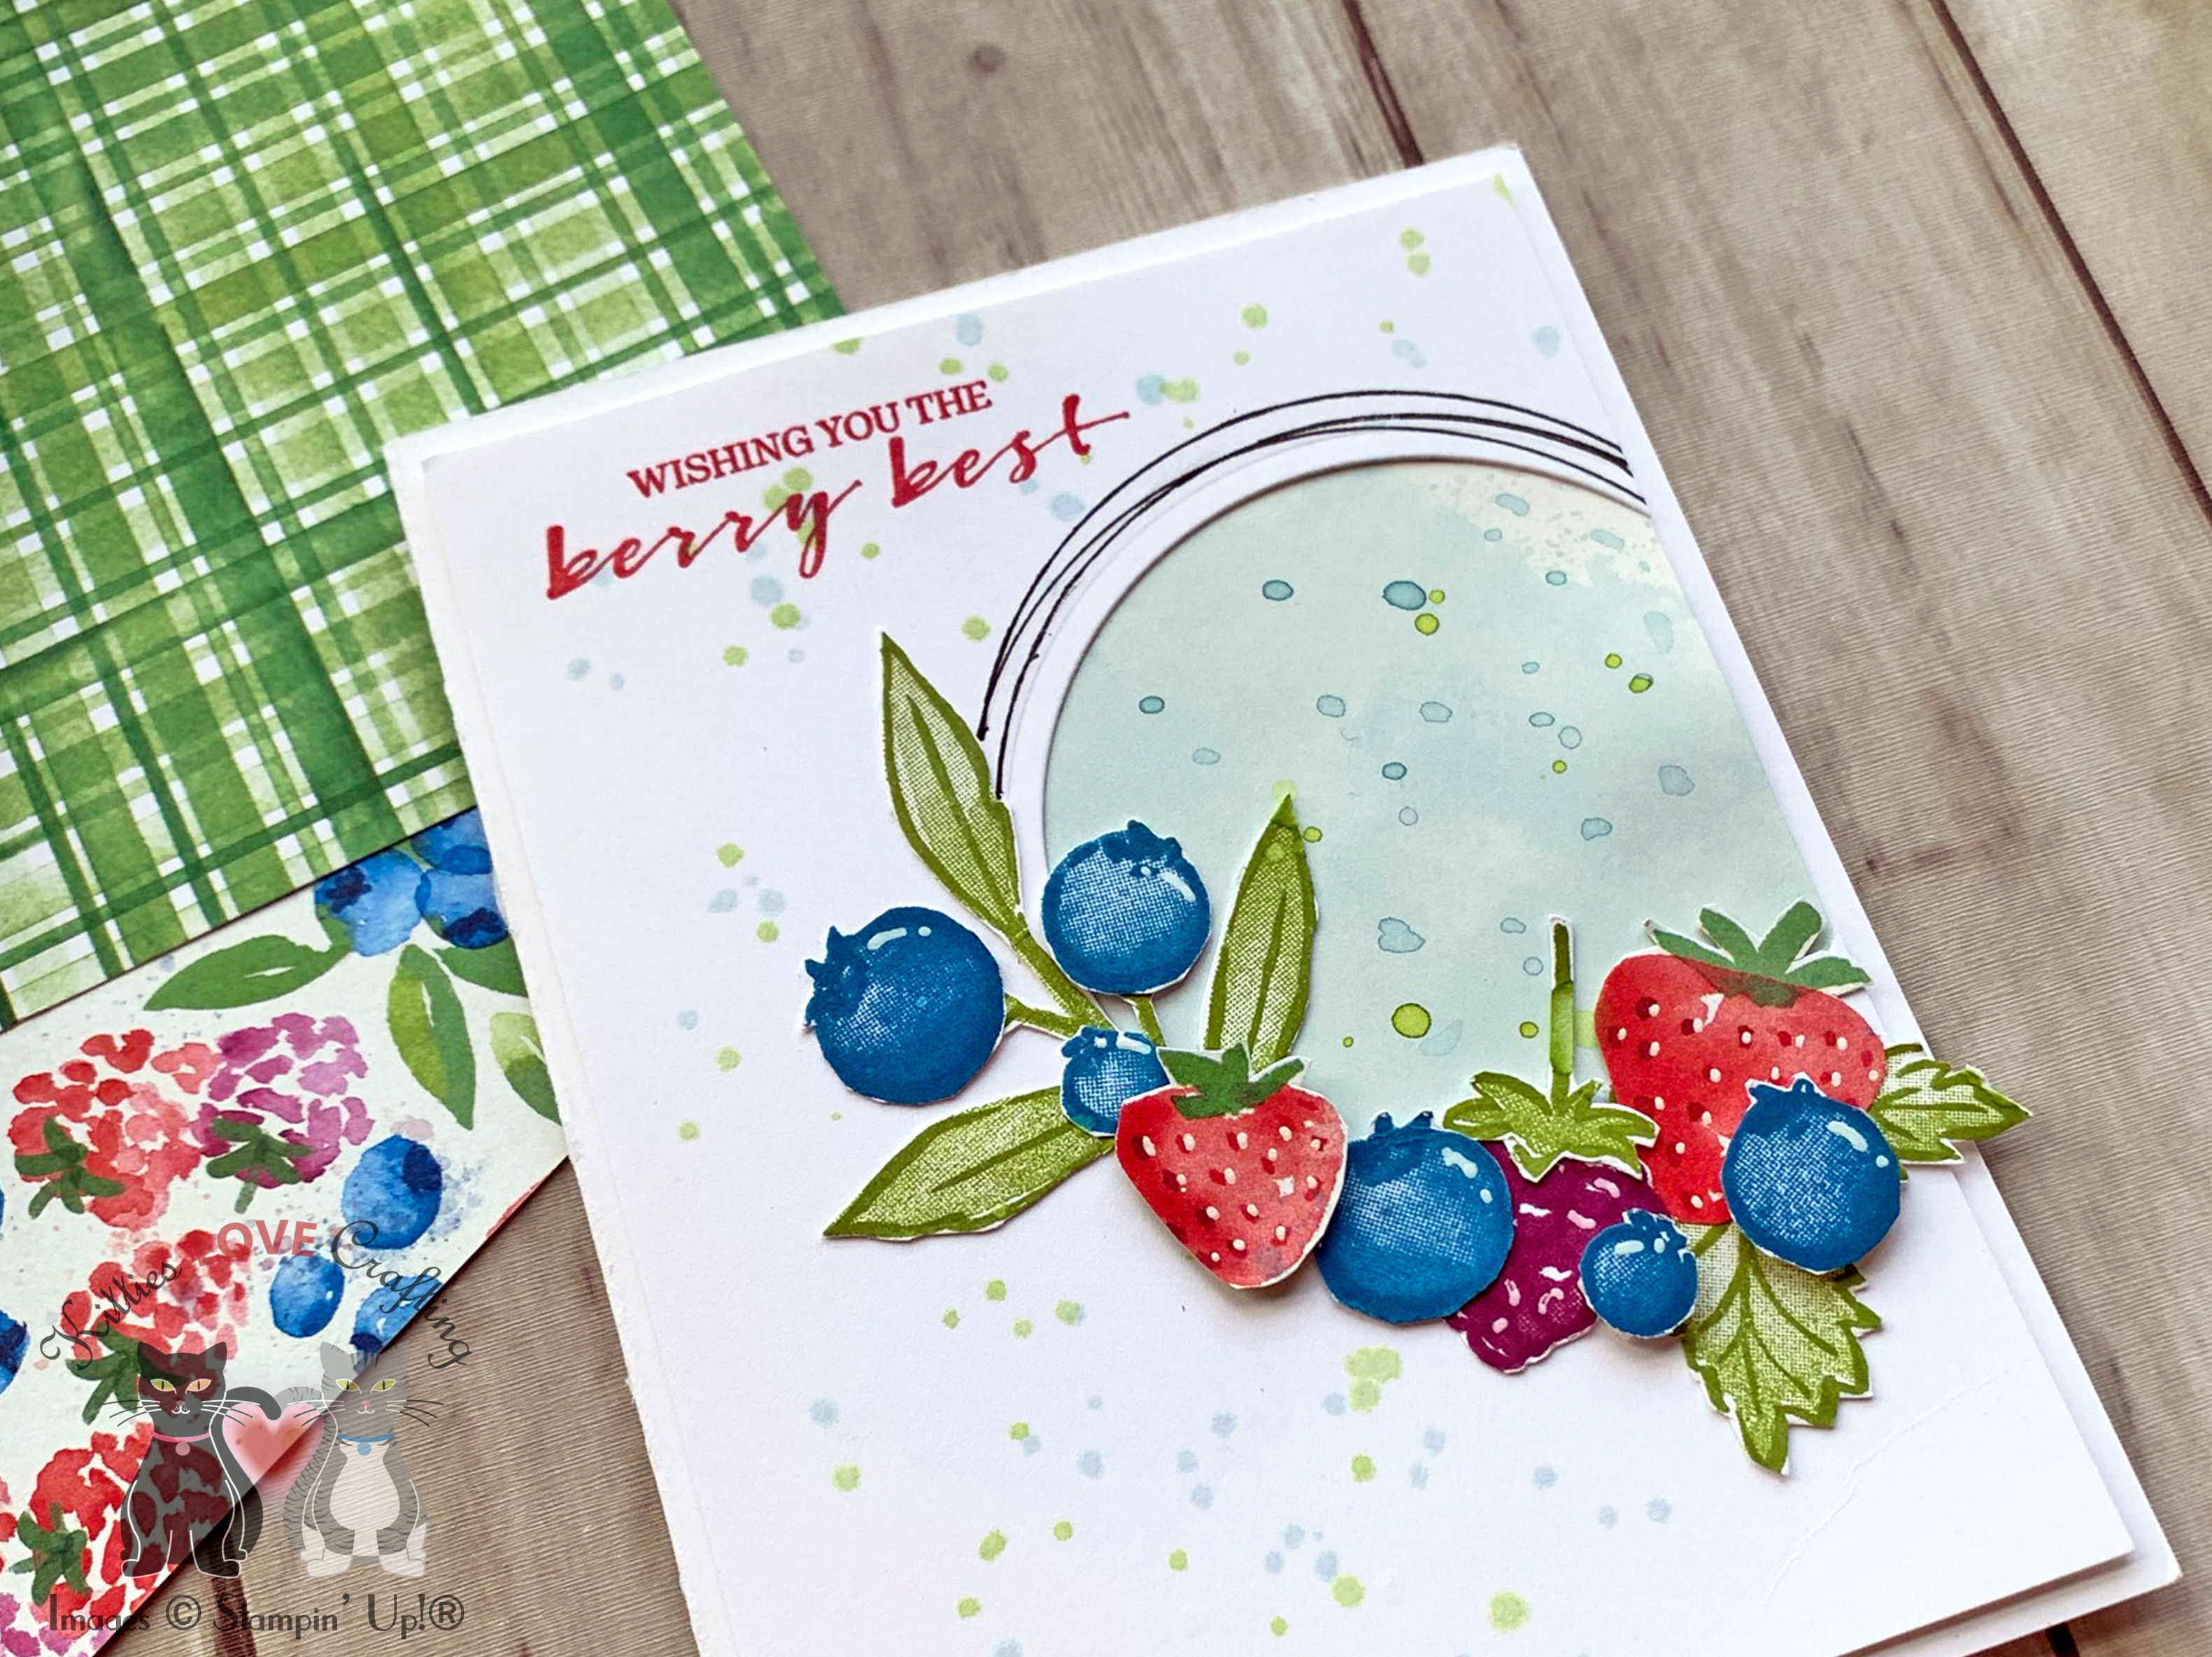
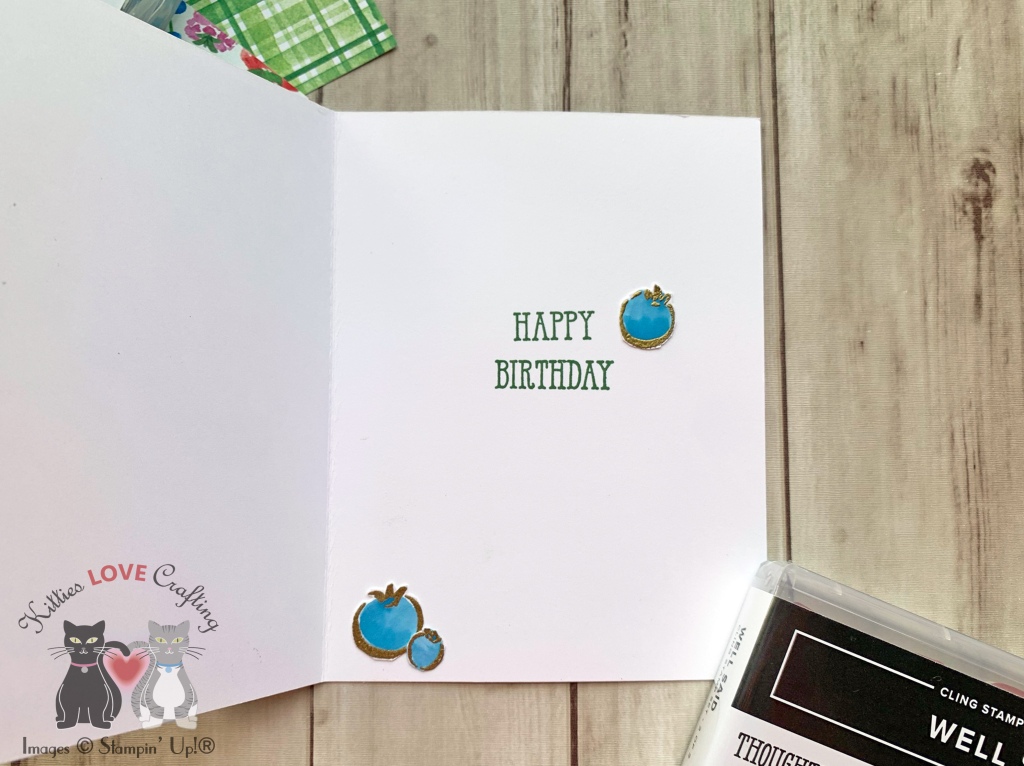
For the all the cards, I started by cutting a piece of Whisper White 8-1/2″ X 11″ Thick Cardstock to 5-1/2 x 8-1/2″ and scored at 4-1/4″ to make a card base and a panel to 4 x 5-1/4″.I stamped the outline images from the Berry Blessings Stampset and Sweet Strawberry Stampset to create the background and adhered it to the card base. Then cut a piece of Berry Delightful 12 x 12 DSP to 1-7/8 x 4-1/2″ and a piece of a Stampin’ Up! colored cardstock to x 1-3/4 x 4-3/4″ and adhered them together. I stamped and fussycut all focal point images using both the outlines and solid stamps. I then stamped all the sentiments onto a piece of Whisper White 8-1/2″ X 11″ Thick Cardstock, Cut them down and added colored cardstock behind them. I adhered the sentiment and images with 3M Foam Tape and Stampin’ Dimensionals.
Thanks for reading this post. I hope you enjoyed and I’ve inspired you to try these easy birthday cards using this stampset and paper for yourself! Leave comments or questions below or feel free to email me. If you want to share you creations with me tag me on instagram @kittieslovecrafting.
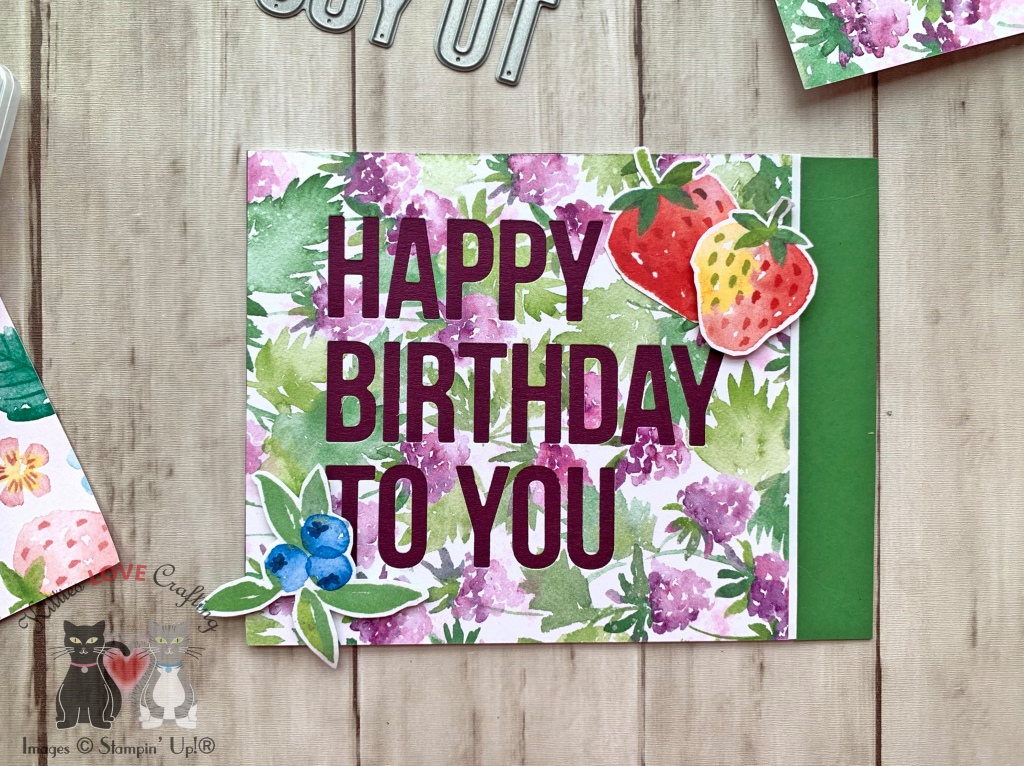
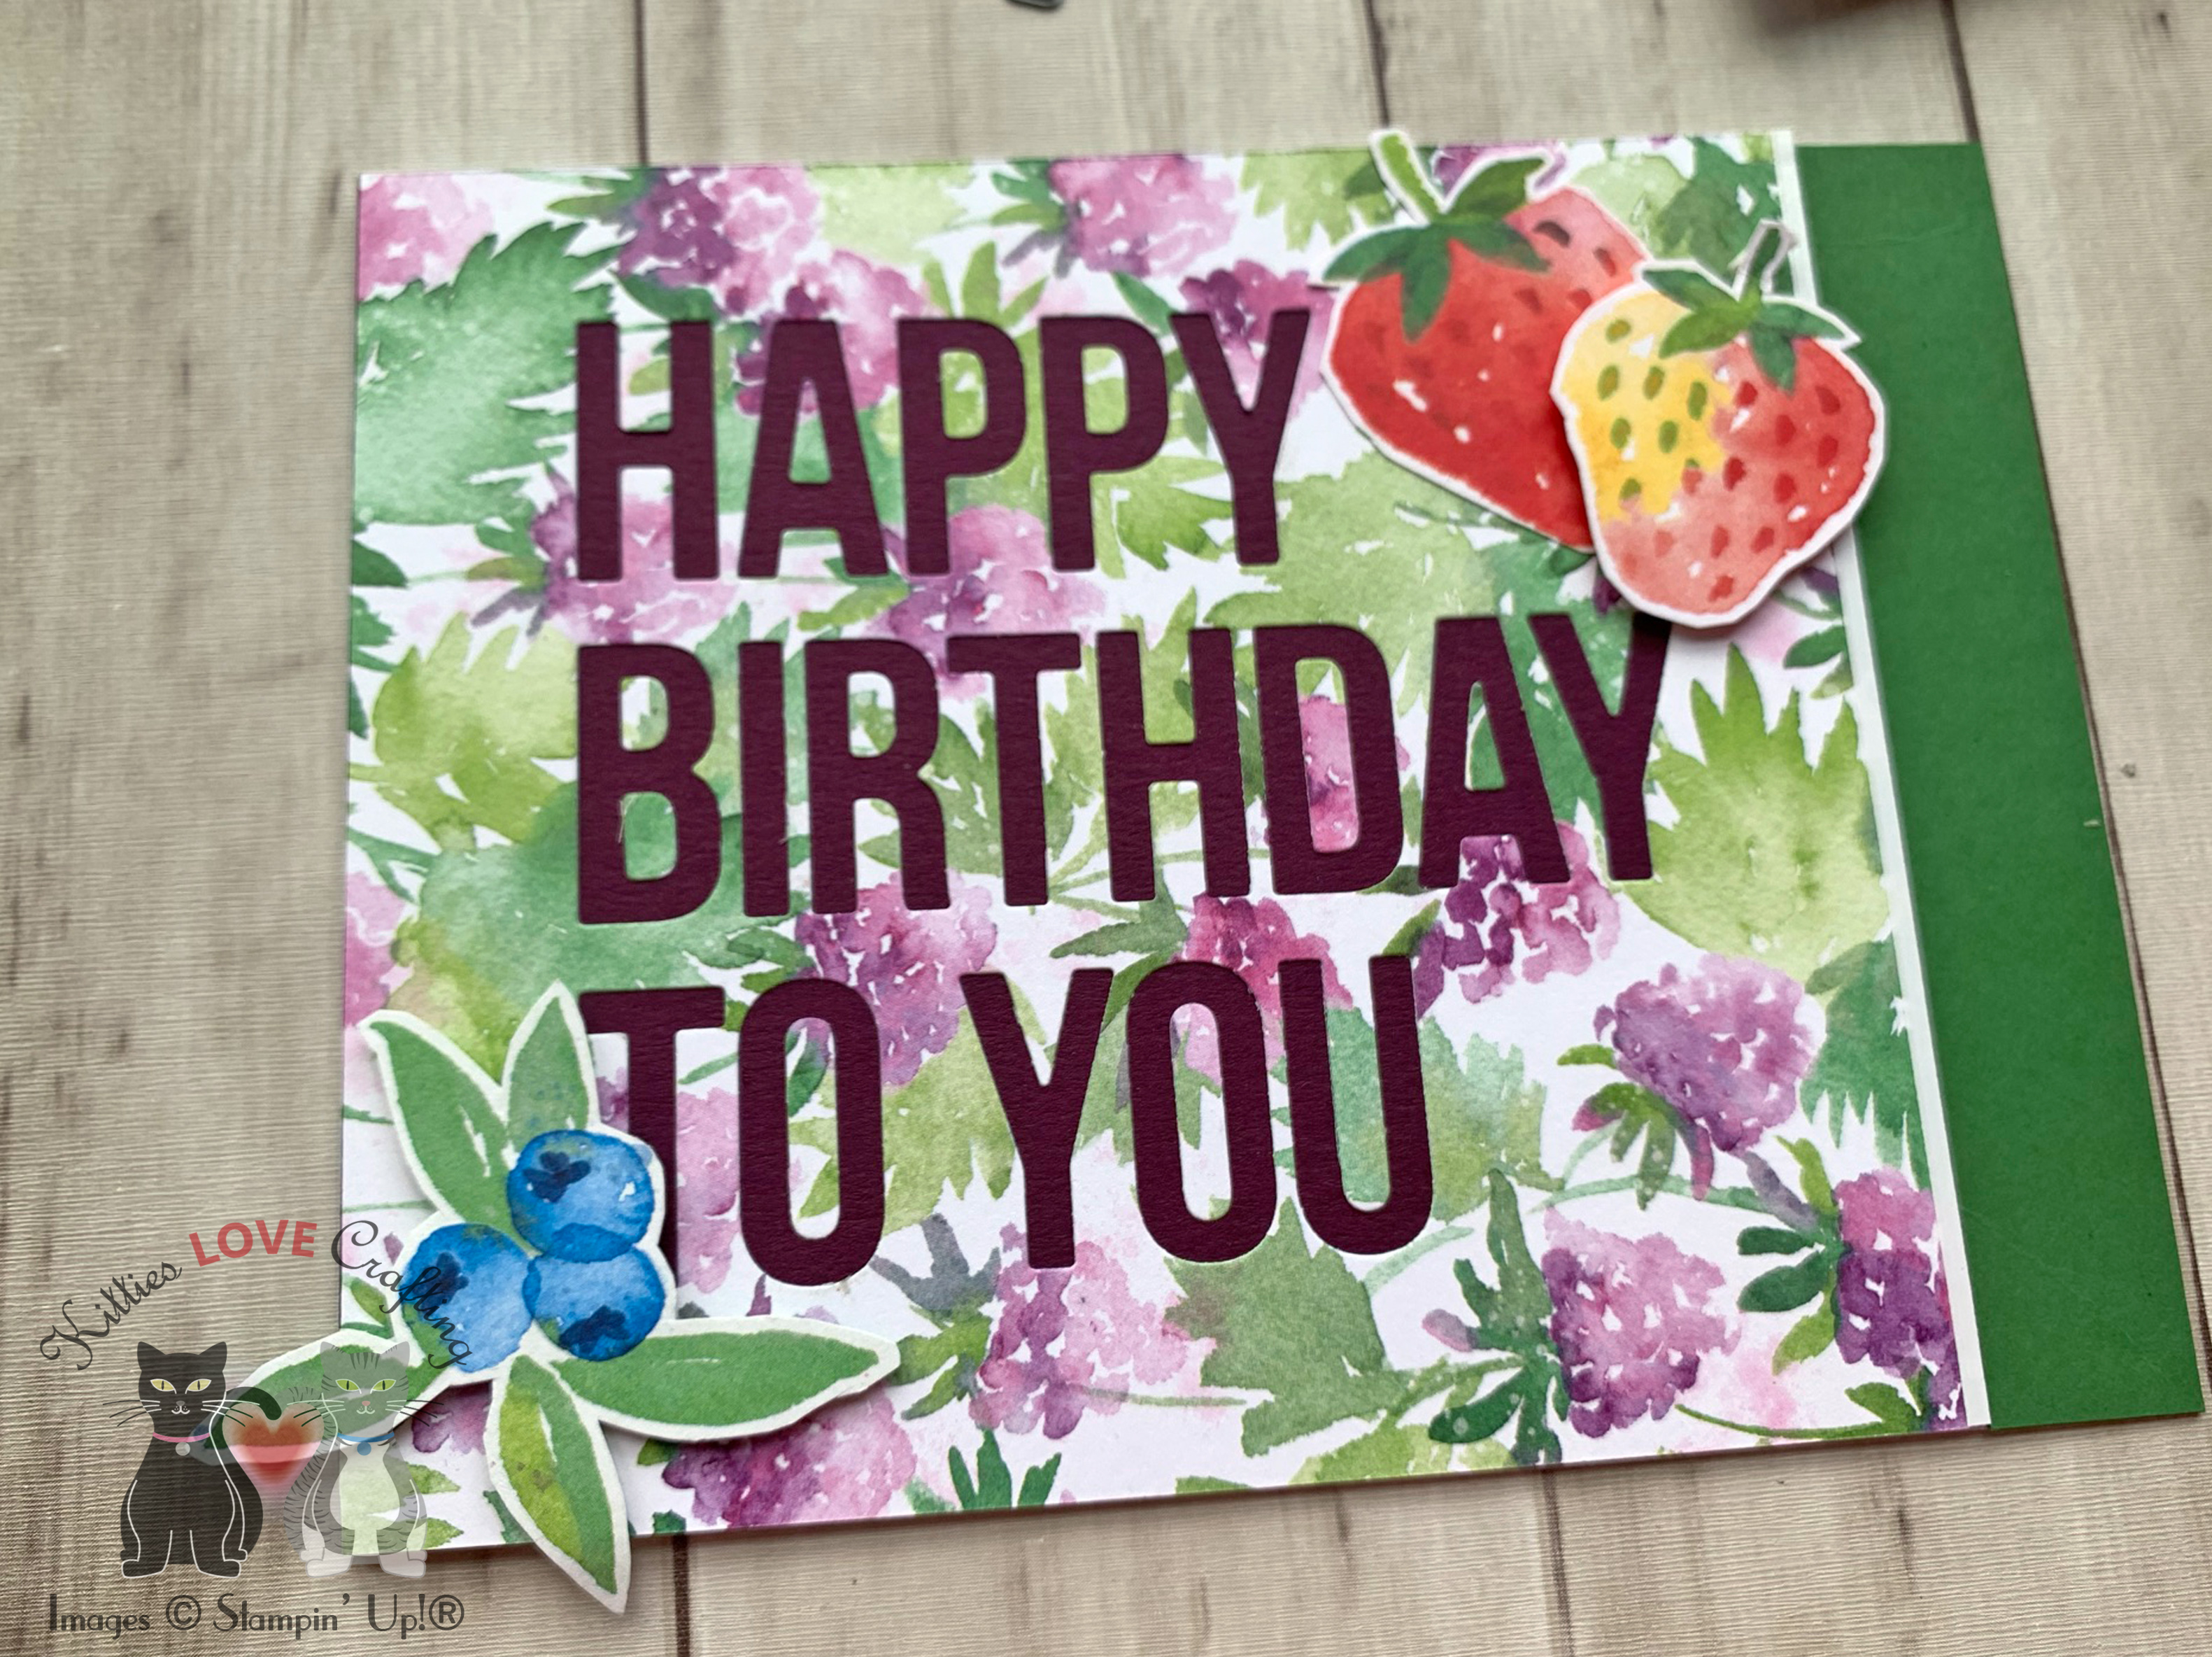
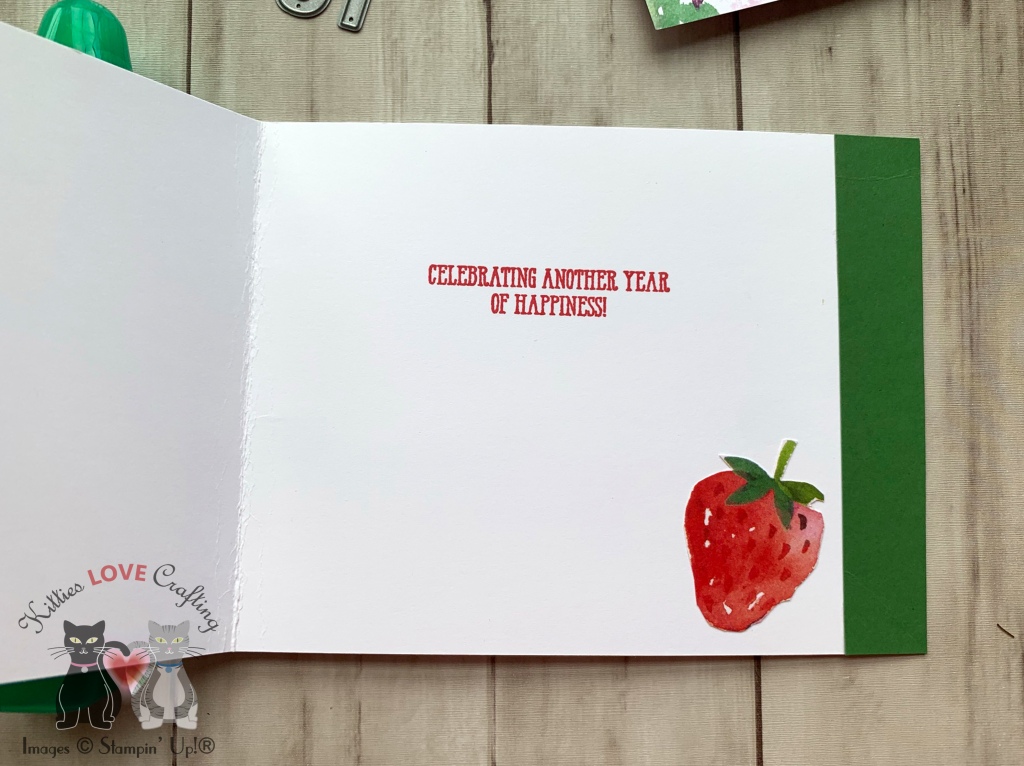
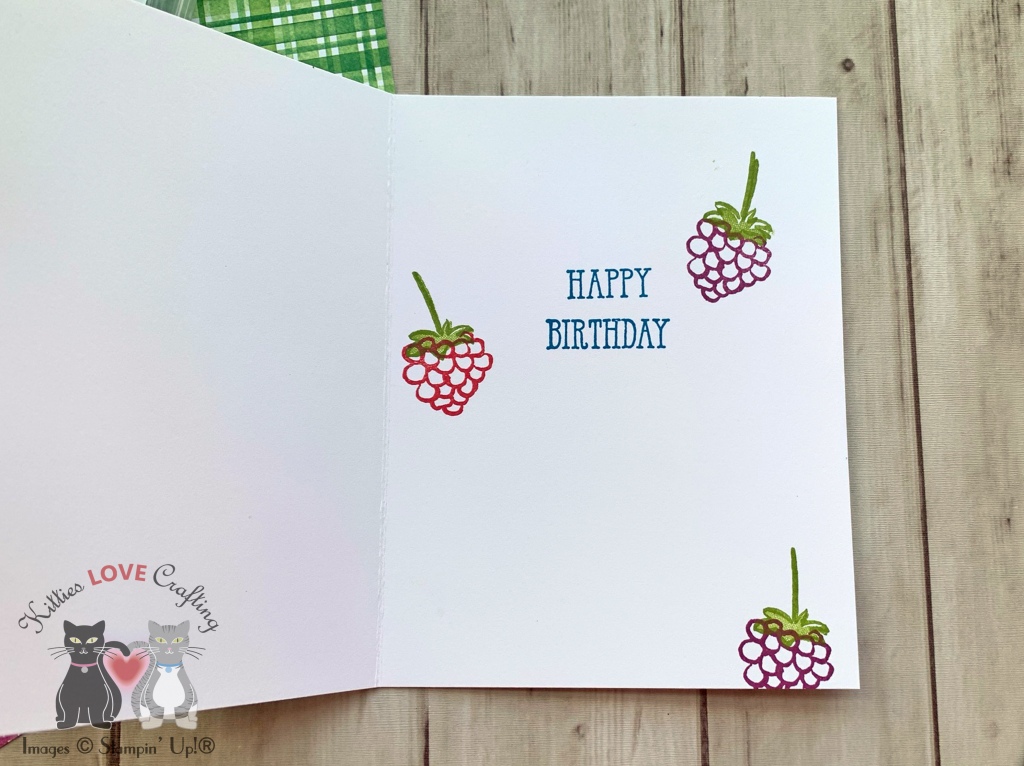
Hi everyone! I made some fruity birthday cards using the positive and negative created using the Happy Birthday To You Die from My Favorite Things (discontinued). This is a great way to make multiple cards with minimal supplies and not waste anything. This paper I uses can be found on page 14 of the new Sale-A-Bration Catalog.
For the first card, I started by cutting a piece of Whisper White 8-1/2″ X 11″ Thick Cardstock to 5-1/2 x 8-1/2″ and scored at 4-1/4″ to make a card base. I adhered the letters for the sentiment to the card with Tombow Mono Multipurpose Glue. Tip: To easily aand perfectly dhere the sentiment, cut a scrap piece of the sentiment and tape it down to the card suing low-tack tape. Then adhere your letters in the negative space. You won’t need to try to space out or align the letters.
Thanks for reading this post. I hope you enjoyed and I’ve inspired you to try these easy birthday cards using this stampset and paper for yourself! Leave comments or questions below or feel free to email me. If you want to share you creations with me tag me on instagram @kittieslovecrafting.
Happy New Year everyone! New year, time for some new posts! I want to start the year by introducing you to this cute watercolor berry stampset (Berry Blessings Stampset) and paper featured on page 14 of the new Sale-A-Bration Catalog. Yes, it is time for Sale-A-Bration people!!! It’s time to get free items with your purchases and who doesn’t like free goodies?!? I get very excited about gift-with-purchase promotions. 🙂
I kept these simple, letting the stamps and paper to do the hard work for me. For the first card, I started by cutting a piece of Whisper White 8-1/2″ X 11″ Thick Cardstock to 5-1/2 x 8-1/2″ and scored at 4-1/4″ to make a card base and a panel to 4 x 5-1/4″.Then diecut a circle with a 2-5/8 circle die from the Stampin’ Up! Circle Layering Dies.
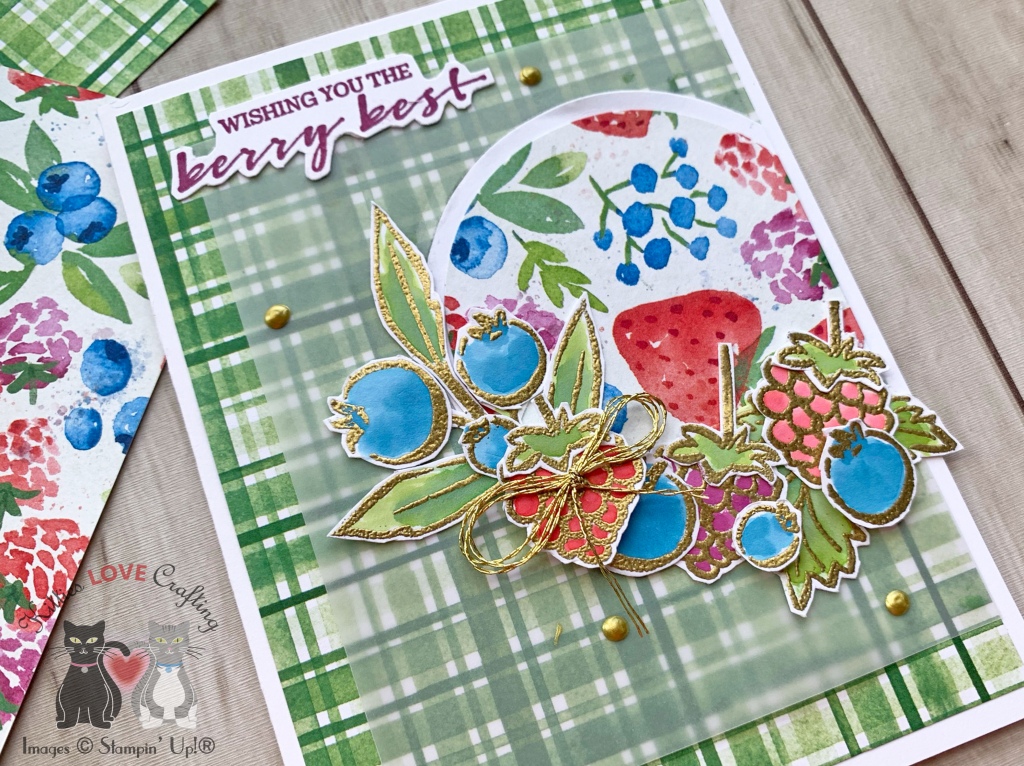
For the second card, I made an stepped up version. I started by cutting a piece of Whisper White 8-1/2″ X 11″ Thick Cardstock to 5-1/2 x 8-1/2″ and scored at 4-1/4″ to make a card base and a panel of Berry Delightful 12 x 12 DSP to 4 x 5-1/4″ and a piece of Vellum to 3-5/8″ x 4-1/2″ and adhered them to the card base.
Thanks for reading this post. I hope you enjoyed and I’ve inspired you to try these easy birthday cards using this stampset and paper for yourself! Leave comments or questions below or feel free to email me. If you want to share you creations with me tag me on instagram @kittieslovecrafting. If you would like a Stampin’ Up! catalog, please email me as well. All current catalogs can be found on the right side of this post and the Stampin’ Up! page. All news and fun stuff happening at Stampin’ Up! are listed there!
These two card backgrounds were created using the stamps in the Tree Angle Stampset by Stampin’ Up which can be found on page 22 of the new Aug-Dec Mini Catalog. You can make lots of quick backgrounds with these stamps. This stampset coordinates with the Stitched Triangles Dies (pg 179 of the Annual Catalog).
I stamped all the tree patterns except the poinsettias from the Tree Angle Stampset onto all over the Garden Green panel with Stampin’ Up! Garden Green Ink, creating a geometric pattern and adhered the panel to the card base.
Thanks for reading this post. I hope you enjoyed and I’ve inspired you to try these easy holiday cards using this stampset for yourself! Leave comments or questions below or feel free to email me. If you want to share you creations with me tag me on instagram @kittieslovecrafting. If you would like a Stampin’ Up! catalog, please email me as well. All current catalogs can be found on the right side of this post and the Stampin’ Up! page. All news and fun stuff happening at Stampin’ Up! are listed there!


 https://linkdeli.com/widget.js?id=f5e8378456858c916708