Hello friends. Here’s an easy way to make a shaker card. Just use word dies to cut out the shaker window! This one was created using Catherine Pooler Designs Festive Joy Word Die.
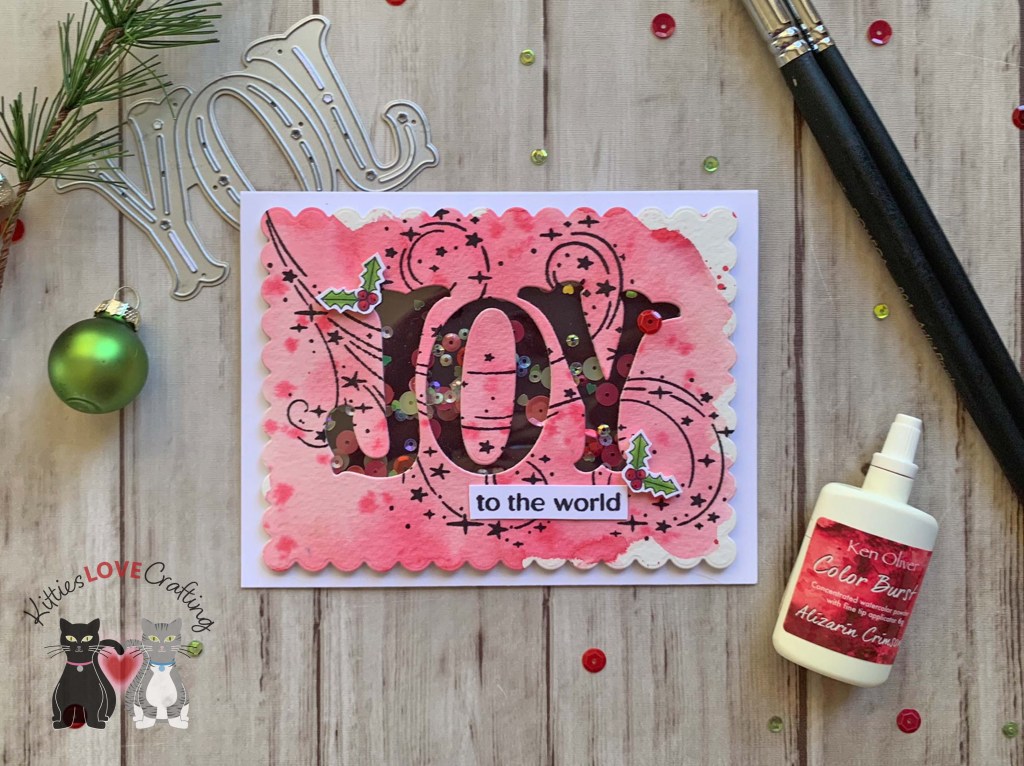
For this card, I cut a piece of Neenah 100lb Classic Crest Cardstock 8.5 X 11″ to 5-1/2 x 8-1/2″ and scored at 4-1/4″ as well as a piece of watercolor paper to 4-1/4 x 5-1/2″ for the background.
For the back panel I used Color Burst Powder (Brights) to add watercolor. Then die cut it using the CP Dots & Scallops Dies. I stamped swirl from the CP It’s Magic Background Stamp with CP Midnight Ink.
I die cut the shaker window using the CP Festive Joy Word Die, added some acetate behind it as well as some foam tape. I added sequins in pinks, reds, greens and white iridescent to the shaker. And backed it with a piece of Simon Says Stamp Cardstock 100lb Black Cardstock.

I stamped a sentiment from the Catherine Pooler Holiday Joy Sentiments Stamp Set onto Neenah 100lb Classic Crest Cardstock 8.5 X 11″ with CP Midnight Ink and fuzzycut it. I also stamped the holly from the same set and colored using Copic markers. I used R59 & R27, YG17 & YG25.
On the inside of the card, I added the positive of the word joy I previously cut out and added another holly. And for the sentiment, I stamped a sentiment from the Catherine Pooler Holiday Joy Sentiments Stamp Set onto Neenah 100lb Classic Crest Cardstock 8.5 X 11″ with CP Midnight Ink and fuzzycut it.

Dimensions
- Card Base = 5-1/2 x 8-1/2″ and scored at 4-1/4″ Neenah 100lb Classic Crest Cardstock 8.5 X 11″
- Background Panel = 4-1/4 x 5-1/2″ Watercolor Paper
Supplies
 https://linkdeli.com/widget.js?id=f5e8378456858c916708
Thanks for reading this post. I hope I’ve inspired you to make this fun shaker using your own word dies! Leave comments or questions below or feel free to email.