Cards, Love & Friendship, Valentine's Day

A Berry Sweet Valentine featuring Lawn Fawn’s Sweet Strawberry and Scripty Love Dies

Hello friends. If you need a quick and simple card for this Valentine’s Day, check out this card! I combined the Lawn Fawn’s Sweet Strawberry and Scripty Love Dies to create this sweet card. Even with the coloring it didn’t take long to make.

For this card, I cut a piece of Neenah 100lb Classic Crest Cardstock 8.5 X 11″ to 5-1/2 x 8-1/2″ and scored at 4-1/4″ to create an A2 card base. Then die cut the backdrop from Martha Stewart Holidays (Valentine’s Themed) 12 x 12 Cardstock (no longer available) with the Catherine Pooler Designs Dots & Scallops Dies, which measures 3-15/16 x 5-1/4″.

I die cut the doily from some pink cardstock (Scrapbook.com 6 x 8 Glossy Cardstock Paper Pad – Pastel & Rainbow). I stamped three strawberries (saved one for later) from the Lawn Fawn Sweet Strawberry stampset onto Neenah 100lb Classic Crest Cardstock 8.5 X 11″ with Memento Tuxedo Ink. I used Copic Markers to color the images. I used R81, R85 and R29, E25, E29 and E49, and YG01 and YG17. I added highlights with a white gel pen.

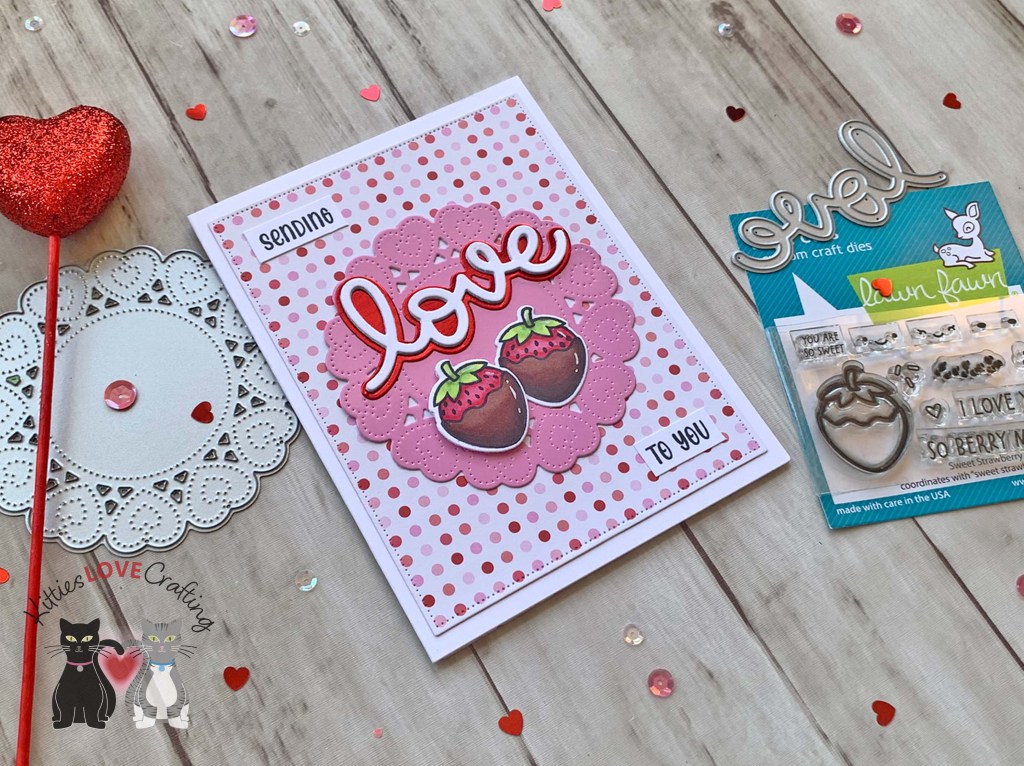
For the sentiment I stamped part of it from Lawn Fawn Henry’s Build-A-Sentiment: Love onto Neenah 100lb Classic Crest Cardstock 8.5 X 11″ with Memento Tuxedo Ink. And then die cut the word ‘love’ from Neenah 100lb Classic Crest Cardstock 8.5 X 11″ using the Lawn Fawn Scripty Love and the shadow/outline from red metallic cardstock from Tim Holtz idea-ology 8 x 8 Paper Stash Metallic Jewels Kraft Stock using the Lawn Fawn Scripty Love Outline Add-on die.

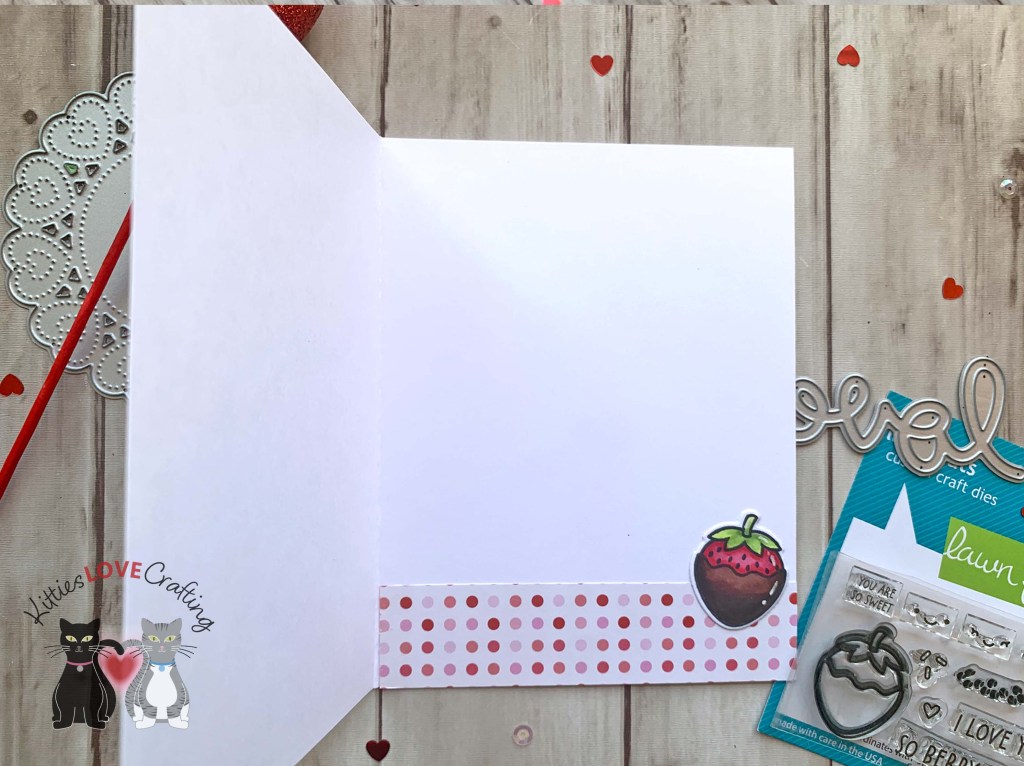
On the inside of the card blank, I cut a strip of cardstock (same as the front panel) to 1 x 4-1/4″ and added the third strawberry I had colored.

Dimensions

  • Card Base = 5-1/2 x 11″ and scored at 5-1/2″ Neenah 100lb Classic Crest Cardstock 8.5 X 11″
  • Background Panel = 3-15/16 x 5-1/4″ Martha Stewart Holidays (Valentine’s Themed) 12 x 12 Cardstock (no longer available)
  • Inside Strip = 1 x 4-1/4″ Martha Stewart Holidays (Valentine’s Themed) 12 x 12 Cardstock (no longer available)
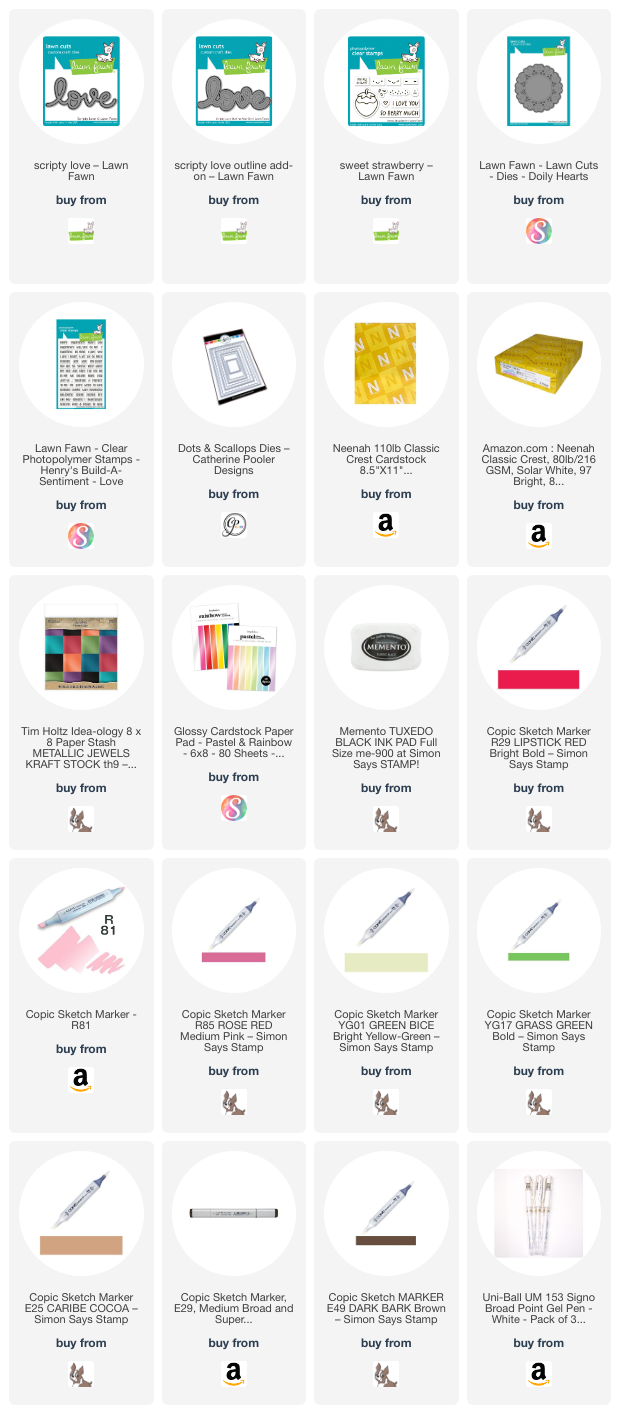
Supplies

https://linkdeli.com/widget.js?id=f5e8378456858c916708

Thanks for reading this post. I hope Iโ€™ve inspired you to give this sweet Valentine’s Day card a try for yourself. Leave comments or questions below or feel free to email.

Cards, Halloween

Quick and Easy Halloween Card feat. Simply Made Crafts

Hello friends. Today I am bringing you a card featuring Simply Made Crafts Happy Haunting collection products. This one is a quick and easy card to make.

For this card, I cut a piece of Simon Says Stamp 100lb Black Cardstock to 5-1/2 x 8-1/2″ and scored at 4-1/4″ to create an A2 card base, another piece of pattern paper from the Simply Made Crafts Happy Haunting Digital Papers to 4-1/4 x 5-1/2 and a piece of Scrapbook Customs 12 x 12 Halloween Paper Pack to 4 x 5-1/4″.

I die cut the small tombstone from the Simply Made Crafts Happy Haunting Spell Book Elements Die Set using the Happy Haunting Digital Papers and stamped a sentiment from the Simply Made Crafts Stamp & Die Set Happy Haunting Sentiments with Memento Tuxedo Black Ink.

I stamped the bat, spider, cat and hand from the Simply Made Crafts Stamp & Die Set Happy Haunting Sentiments onto some Neenah 100lb Classic Crest Cardstock 8.5 X 11″ with Memento Tuxedo Black Ink and Catherine Pooler Designs Grape Crush Ink. I colored the hand with Copic Markers. I used YG13, Y17, R14, and E23. I die cut the spider web from the Simply Made Crafts Happy Haunting Spell Book Elements Die Set from some Neenah 100lb Classic Crest Cardstock 8.5 X 11″.

I finished off the card by adding some Nuvo Crushed Grapes Gloss Drops.

On the inside of the card, I cut a piece of Neenah 100lb Classic Crest Cardstock 8.5 X 11″ to 4 x 5-1/4″, and a strip of Simply Made Crafts Happy Haunting Digital Papers to 1 x 4-1/4″. I stamped a sentiment from the Simply Made Crafts Stamp & Die Set Happy Haunting Sentiments with Catherine Pooler Designs Orange Peel Ink and added a witch hat.

Dimensions


Supplies

https://linkdeli.com/widget.js?id=f5e8378456858c916708

Thanks for reading this post. I hope Iโ€™ve inspired you to give this technique a try! Leave comments or questions below or feel free to email.

Fourth of July, Stenciled Background, Summer

A Clean and Simple Card Elevated By Stencils feat. Scrapbook.com

Hi friends. While I am not one to make a clean and simple card very often (I like to complicate my life. LOL), I decided to make one using the Fireworks Stencil from Scrapbook.com. This card can easily be made for any occasion — just change the background stencil and sentiment!

I cut a piece of Neenah 110lb Classic Crest Cardstock to 5-1/2 x 8-1/2″ and scored at 4-1/4″ to create the card base. I also die cut another piece using the largest dot die from Catherine Pooler Designs Scallops & Dots which measures 4-1/2″ x 3-1/4″. Then using the Scrapbook.com Fireworks 6×8 Stencil combined with Tim Holtz Chipped Sapphire and Candied Apple Distress Oxides Ink I stenciled the background.

I die cut a strip of Neenah 110lb Classic Crest Cardstock using the Queen and Company Foundations 17 dies. I used the rectangle that measures 1 x 6-1/4″. It has stitched edges which adds a nice element to the card. I adhered that to my card base and added some Love from Lizi Pin Stripe Peel-offs in Red Mirror and Blue Mirror along the edge of that strip.

I added some 3M Foam Tape behind the front panel and adhered it. I die cut the sentiment from Simon Says Stamp Red Glitter Cardstock as well as Stampin’ Up! Night of Navy 8-1/2 x 11″ Cardstock (for the shadow)

I finished off the card by adding red, white, and blue sequins. I don’t think the mix I used is still available but I have linked to a simliar one. But if you have the three colors separately that will do just fine as well here.

On the inside of the card, I stamped “Happy 4th of July” from and old sentiment stamp I have. I will try to link it below if I find it.s

Dimensions


Supplies

https://linkdeli.com/widget.js?id=f5e8378456858c916708

Thanks for reading this post! I hope you enjoyed and Iโ€™ve inspired you to make this cute card yourself! If you want to share you creations with me tag me on instagram @kittieslovecrafting. Leave comments or questions below or feel free to email me.

Fourth of July, Stenciled Background, Summer

Creating a Very Dimensional, But Quick and Easy Background feat. Scrapbook.com and Lawn Fawn

Hi friends. Here’s another cute card for Independence Day. This one is a little more involved than my previous card but was lots of fun to make. I haven’t used this Lawn Fawn Build-A-House Die in a while and it was time!

For this card, I cut a piece of Neenah 110lb Classic Crest Cardstock to 5-1/2 x 8-1/2″ and scored at 4-1/4″ to create the card base. I also cut another piece to 4-1/4 x 5-1/2″ for the background.

I used Tim Holtz Salty Ocean, Faded Jeans, and Chipped Sapphire Distress Oxides Inks to create a gradient background. Then used a mixture of Modelling Paste and Nuvo Glimmer Paste Moonstone with Scrapbook.com Fireworks 6×8 Stencil.

While that dried, I cut a piece of Neenah 110lb Classic Crest Cardstock to 2 x 5-1/4″ and diecut it with Lawn Fawn Grassy Border and colored it with Copic Markers. I used YG25, and G07. I die cut all the pieces for the house from Neenah 110lb Classic Crest Cardstock bwith the Lawn Fawn Build-A-House, Build-A-House Christmas Add-on Dies as well as the fence from the Honey Bee Stamps House Builder Card Base.

I colored all the pieces with Copic Markers as well. I used C00 for the house; C5, C7 & C9 for the roof; C3 & C5, Y13 & Y18 for the windows; R14, R17 & R29 for the door; C5, C7 & C9 for the stairs; B34, B37 & B39 for the awning; R29, Y18 & B37 for the window box flowers; C3 & 0 for the window box; R29 & B37 for the wreath and bow; and C00 & 0 for the fence.

I stamped the sentiment onto Neenah 110lb Classic Crest Cardstock with Catherine Pooler Designs Midnight Ink, added some Clear Embossing Powder and heat set it. I fussycut it and added it to the card with Stampinโ€™ Dimensionals.

I finished off the card by adding Tonic Fresh Snowfall Nuvo Glitter Drops to the door knob and the wreath bow.

I left the inside of the card blank.

Dimensions


Supplies

https://linkdeli.com/widget.js?id=f5e8378456858c916708

Thanks for reading this post! I hope you enjoyed and Iโ€™ve inspired you to make this cute card yourself! If you want to share you creations with me tag me on instagram @kittieslovecrafting. Leave comments or questions below or feel free to email me.

Fourth of July, Fourth of July, Stenciled Background, Summer

Partial Stenciling Technique: Patriotic Card

Hi friends. Independence Day is approaching and if you like making cards to send to friends and family like I do, here’s a simple one to get started. I saw a video from Gina K Designs on partial stenciling so I decided to give it a try.

For this card, I cut a piece of Neenah 110lb Classic Crest Cardstock to 7 x 10″ and scored at 5″ to create the card base. I taped off the area I wanted to stencil with Low Tack Tape and made sure to cover the rest of the areas so as not to add unwanted ink in those areas. I used Tim Holtz Candied Apple and Chipped Sapphire Distress Oxide Inks to create a gradient.

For the sentiment I diecut the letters for “fourth” from Tim Holtz Idea-ology 8 x 8 Paper Stash Metallic Kraft Stock and two from Simon Says Stamp Cardstock 100# Slate Gray using Honey Bee Tailgate Alphabet Dies. I also die cut silver stars using Queen & Company Foundation Dies #2.

I didn’t have any suitable stamps for the “Happy” and “of July” part of the sentiment so I printed some out from my computer. YOu can use a program like Microsoft Powerpoint or Word or Adobe Illustrator or any other program that allows you to create text and print it.

I left the inside of the card blank.

Dimensions


Supplies

https://linkdeli.com/widget.js?id=f5e8378456858c916708

Thanks for reading this post! I hope you enjoyed and Iโ€™ve inspired you to make this cute card yourself! If you want to share you creations with me tag me on instagram @kittieslovecrafting. Leave comments or questions below or feel free to email me.

Holidays 2022, St. Patrick's Day, St. Patrick's Day, Stenciled Background, Valentine's Day, Watercolor techniques

Stenciled Background St. Patrick’s Day Card

Simon Says Stamp and Scrapbook.com

Hello friends. Here’s a quick but very cute St. Patrick’s Day card featuring Simon Says Stamp’s Wooly Lucky Stampset (this came out last year I believe). It’s a very simple card with a subtle stenciled background. I love using stencils for backgrounds because it makes it so quick. And who’s got time to make complicated backgrounds these days?!? Not me.

For this card, I cut a piece of Neenah 110lb Classic Crest Cardstock 8.5 X 11″ to 5-1/2 x 8-1/2″ and scored at 4-1/4″ to create the card base and a piece from Neenah 80lb Classic Crest Cardstock 8.5 X 11″ to 4-1/4 x 5-1/2″. I used the Scrapbook.com Shamrocks 6 x 8″ Stencil with Catherine Pooler Garden Party Ink to create the background. I die cut it with the largest dot die from Catherine Pooler’s Scallops & Dots Dies which measures 3 1/4″ x 4 1/2″.

I stamped the llama and two rainbows from the Simon Says Stamp’s Wooly Lucky Stampset onto some Neenah 110lb Classic Crest Cardstock 8.5 X 11″ with Memento Tuxedo Black.

I colored the images with Copic colors. I used W0, W1 & 0, R20, & C7 for the llama; G07 & G09, C7 & C9, Y15 & Y17 for the hat and bow; YG03 for the shamrocks; YG03, YG17, G07, Y15 & Y17 for the blanket; R17 & R27, YR04 & YR07, YG17 & G07, B02 & B04, BV08 & BV17 for the rainbow; and BG000 & 0 for the clouds. I fussy cut all the images.

I stamped the sentiment from the from Lawn Fawn Hats Off to You Clear Stamps onto the card panel with Memento Tuxedo Black Ink, then using my MISTI stamped over it with Versamark Ink, heat embossed it with Ranger CLEAR Embossing Powder.

Before adhereing the images to the card panel, I cut a piece of Tim Holtz Idea-ology 8 x 8 Paper Stash Metallic Jewels Kraft to 3-1/2 x 4-3/4″. I used Stampin’ Dimensionals to adhere the llama.

I finished the card by adding Nuvo Crystal Drops – Metallic Bright Gold.

I left the inside of the card blank and just added two images I had previously stamped from the same stamp set.

Dimensions


Supplies

https://linkdeli.com/widget.js?id=f5e8378456858c916708

Thanks for reading this post. I hope you enjoyed and Iโ€™ve inspired you to give this card a try for yourself. Leave comments or questions below or feel free to email.