Fall, Fall

Fall House Card and How to Make It Into A Box featuring Honey Bee Stamps

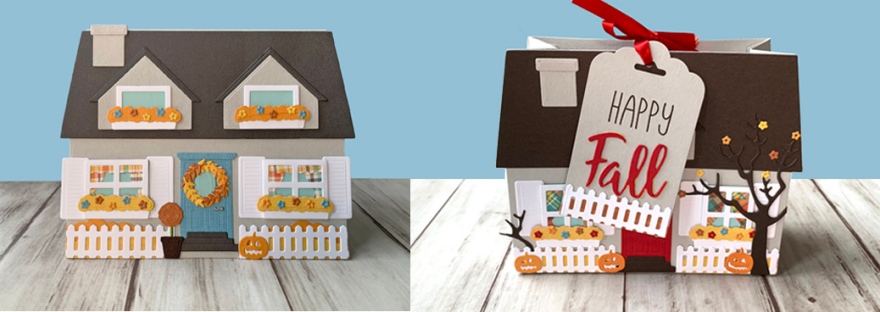
Ok, let’s talk about how much I love the House Builder Card Base Dies from Honey Bee Stamps!!! It is sooo much fun making houses and decorating them. There are probably a million combinations you can use with these dies. The add-on dies also allow you to expand you creativity; more on those later.

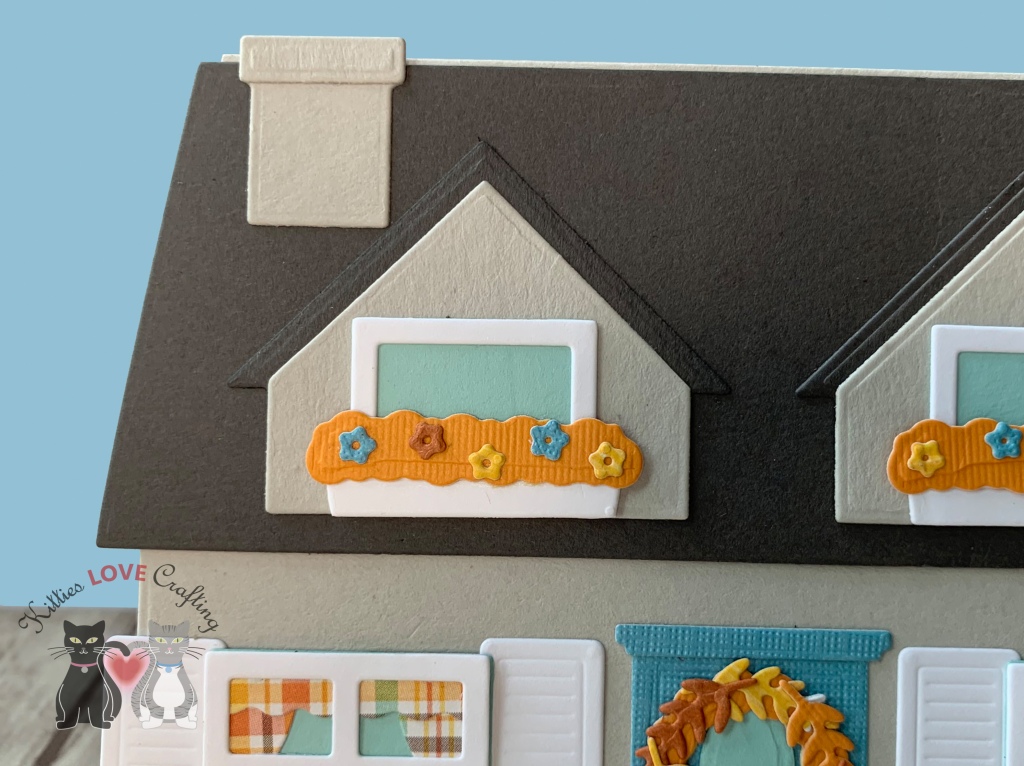
For the first card, I started by diecutting the house card base 2x, chimney, and 2 gables from Simon Says Stamp Fog 8-1/2″ X 11″ Cardstock and the roof, gable roof and stairs from Simon Says Stamp Slate 8-1/2″ X 11″ Cardstock. I adhered the two houses with the pre-scored strip that comes in the dieset to create the card base. Be sure to use double-sided tape or something very strong so they don’t come apart.

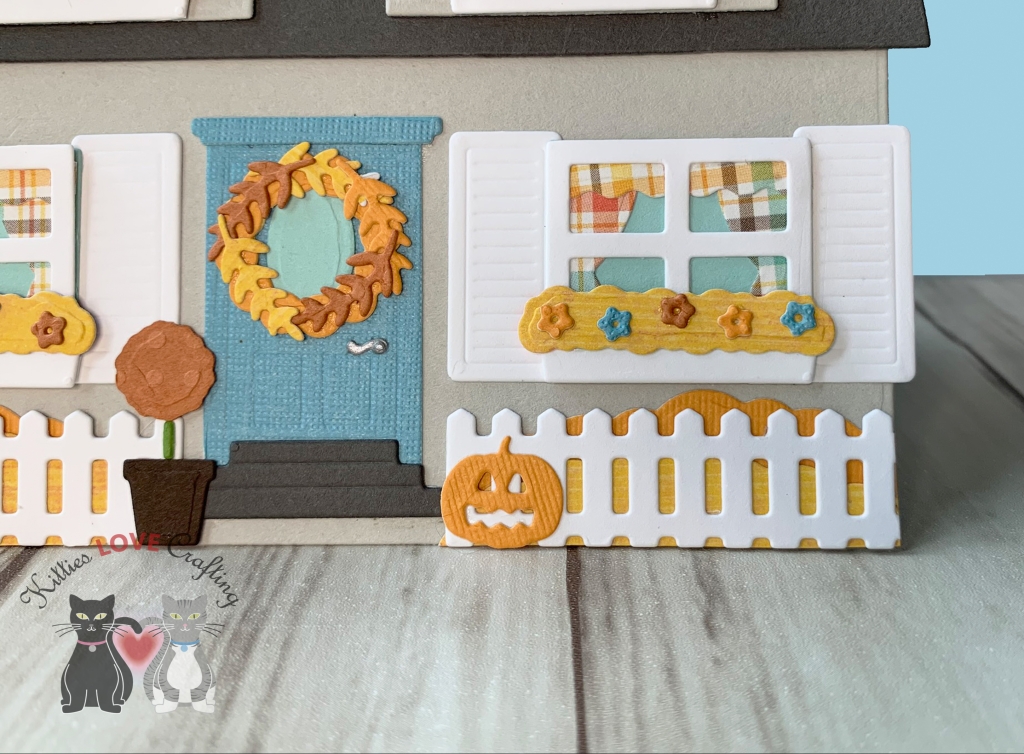
I diecut all the window frames, window boxes, shutters (from the Gingerbread House add-on) and fence from Neenah Classic Crest, 80lb Solar White. I used aqua cardstock from my stash for the door and a silver cardstock for the door handle, yellows and oranges for all the bushes and dark orange, yellow, orange and aqua for the flowers in the flower pots. I backed all the windows with a light aqua cardstock and used Lawn Fawn 6×6 Perfectly Plaid Fall Petite Paper Pack to diecut curtains for the bottom windows. I created the wreath by diecutting several of the leaf vine and stacking them on top of the wreath from the Gingerbread House add-on. I also diecut a pumpkin from the Haunted House Add-on.

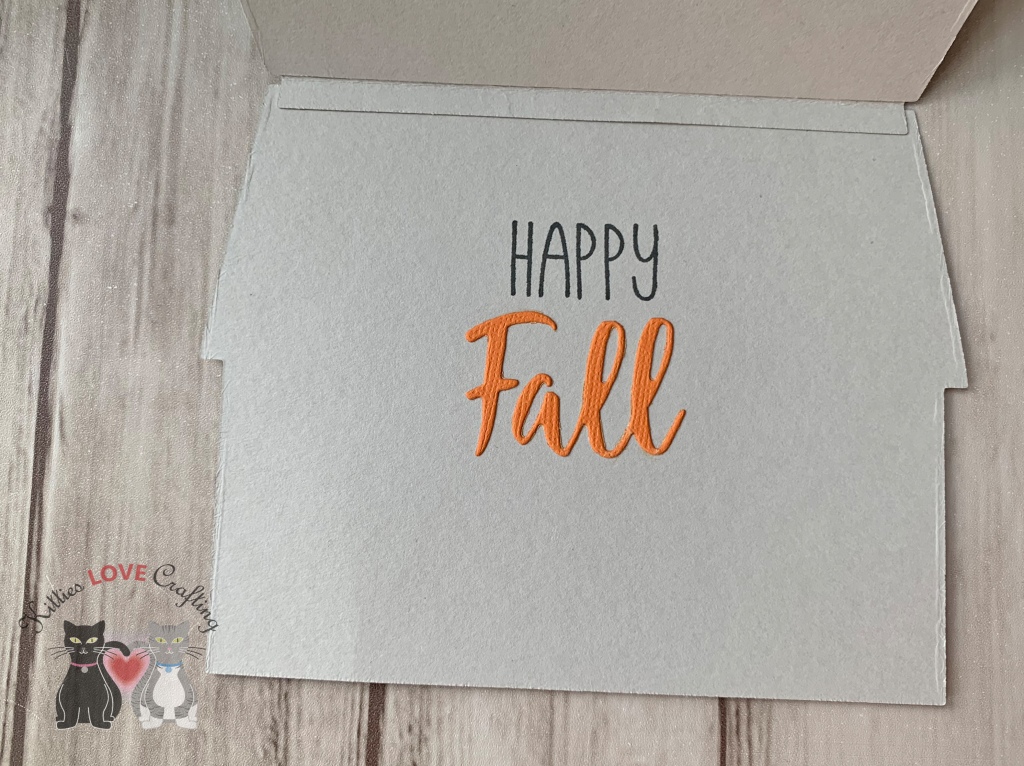
On the inside of the card, I stamped the “Happy” sentiment from the Honey Bee Stamps Happy Fall Y’all 4×6 Stamp Set with Catherine Pooler Black Jack Ink and diecut the “Fall” from Happy Fall Y’all Honey Cuts with orange cardstock from my stash and adhered it under the “Happy”. Love this card!


Next, I wanted to see if I could turn this card into a box easily because it could house some fun gifts for the holidays or just anytime really. And it turns out you can. I’m sure there are some other ways to do this but I chose the simplest with the least amount of cutting. The process is exactly the same as the card except, you need to decorate 2x and add the sides and bottom piece.

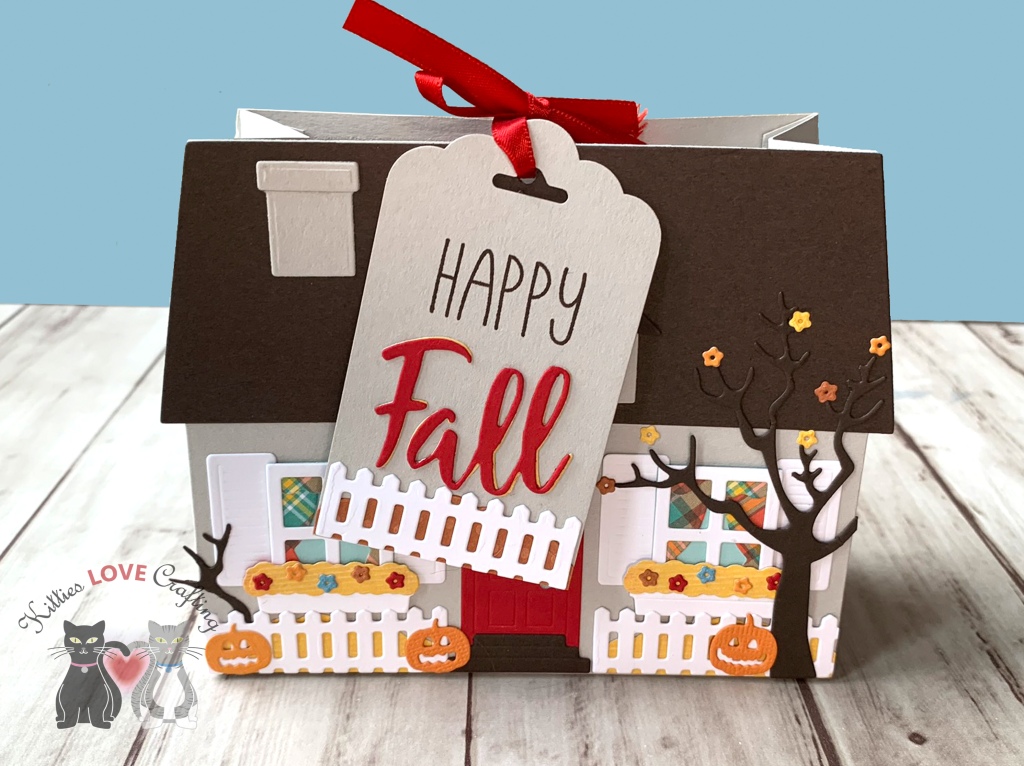
I started by diecutting the house card base 2x again, 2 chimneys, and 2 gables from Simon Says Stamp Fog 8-1/2″ X 11″ Cardstock and 2 roofs, 2 gable roofs and 2 stairs from Stampin’ Up! Early Espresso 8-1/2″ X 11″ Cardstock. I decorated the two houses before I adhered them to the side pieces for the box. This one was decorated much like the previous card, with the following exceptions: I used a red cardstock for the door, a different pattern for the curtains from Lawn Fawn’s 6×6 Perfectly Plaid Fall Petite Paper Pack, diecut the tree from the Haunted House Add-on with Stampin’ Up! Early Espresso 8-1/2″ X 11″ Cardstock and added several pumpkins, diecut from the same set. I did the same thing to both houses.

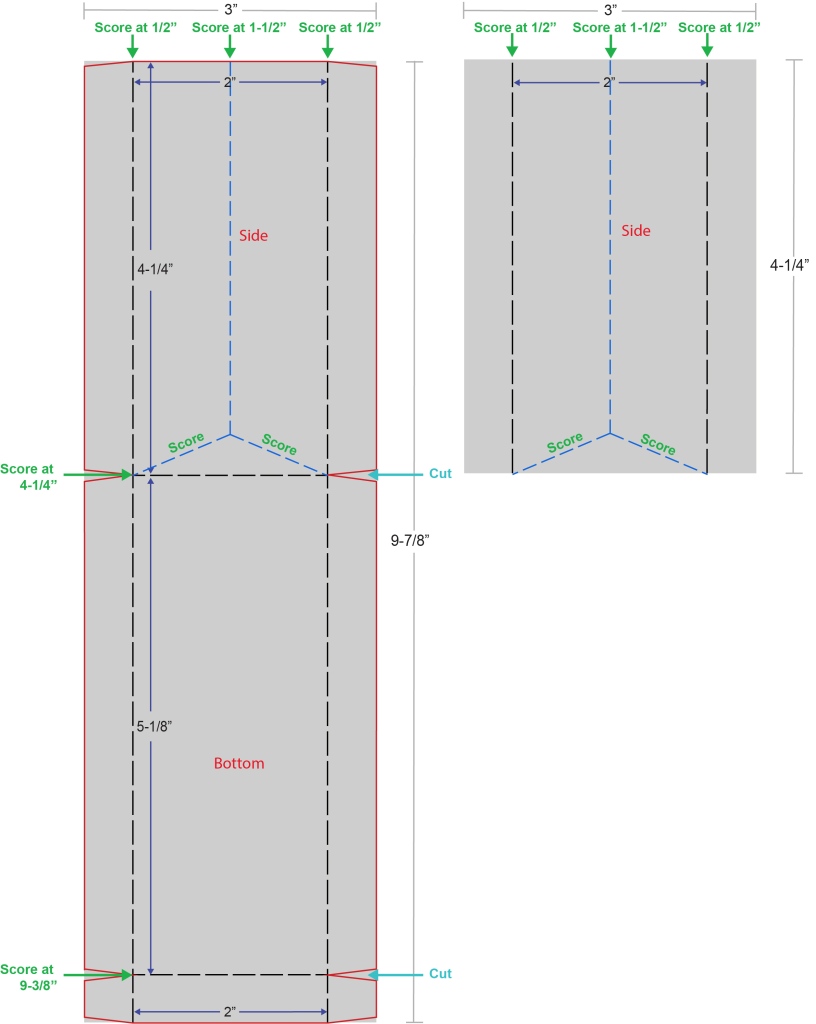
Ok, let’s turn these into a box! This will require just one piece of letter or A4 cardstock. First, I cut a piece of Simon Says Stamp Fog 8-1/2″ X 11″ Cardstock (same as the houses) to 3 x 9-7/8″and one to 3 x 4-1/4″. Then scored both pieces 1/2″ in from each side on the short side (holding your paper vertically) and 1-1/2″ (only scored the first section of the longer piece) and diagonal score lines from the 1-1/2″ score line to the left and right corners (see diagram below). I turned the longer (9-7/8″ long) piece 90 degrees and scored at 4-1/4″, and 9-3/8″. Folded and burnished all the scorelines and to make it easier to assemble, making sure to fold the center and diagonal score lines in both directions. This will allow the box to fold in on each side like an accordian.

I cut a little triangle 1/2″ in on the flaps where the score lines fall and the end flaps as well but only on the longer piece. I’ve included a PDF of the below diagram that you can download and print.

I used double-sided tape to adhere the sides and bottom of the box together and to the cards. I folded up all the tabs and adhered the two pieces together. You will want to adhere the second side piece to the side of the longer piece that has a 1/2″ tab (labeled bottom on diagram) then adhere your houses on either side of the box (you can see on the first of four images below how it sits against the side piece. Once the box was assembled, I used an 1/8″ punch to punch a hole in the top center of the two sides of the box and tied it with some 1/4″ red satin ribbon.

I also made a cute tag to go with it. I cut a piece of Simon Says Stamp Fog 8-1/2″ X 11″ Cardstock to 2 x 3-1/2″ and use the Stampin’ Up! Scalloped Tag Topper Punch on one end. I diecut a fence and one bush from House Builder Card Base Dies and adhered it to the tag. I stamped the “Happy” sentiment from the Honey Bee Stamps Happy Fall Y’all 4×6 Stamp Set with Catherine Pooler Black Jack Ink and diecut the “Fall” from Happy Fall Y’all Honey Cuts with red cardstock from my stash and adhered it under the “Happy”. I love how this came out!
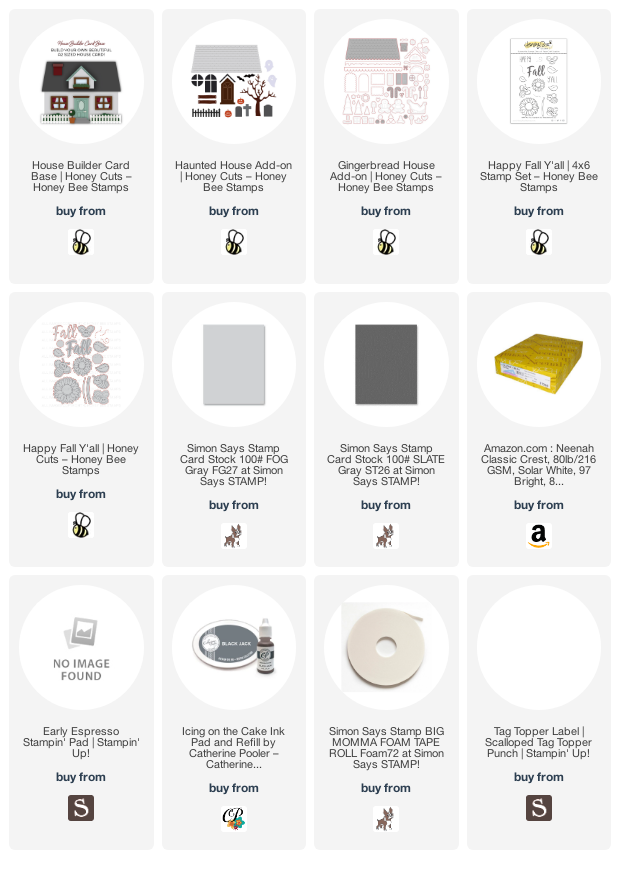
Supplies

https://linkdeli.com/widget.js?id=f5e8378456858c916708

Thanks for reading this post. I hope you enjoyed and Iโ€™ve inspired you to try out these adorable House Builder dies and make some fun cards and gift boxes! Leave comments or questions below or feel free to email me.

Christmas, Christmas, Seasons, Winter

Using Sketches and Ephemera to Create Quick Christmas / Winter Cards

While I don’t often use sketches, I had these two packs of winter ephemera from Echo Park laying around for months and decided to finally make some cards with them. I also bought coordinating 6 x 6 and 12 x 12 paper pads. I used some pre-designed card sketches to take some guesswork out of the process. These cards will also be available in my shop on November 10th.

For the first card, I used Sunday Sketches SS023. For the card base, I cut a piece of Stampin’ Up! Night Of Navy 8-1/2″ X 11″ Cardstock to 5-1/2 x 8-1/2″and scored at 4 1/4″. Then cut all the pieces of pattern paper for the background from the Echo Park – Celebrate Winter Collection 6 x 6 Paper Pad as per the sketch measurements. I matted all the pattern layers with Night Of Navy 8-1/2″ X 11″ Cardstock; I made those layers 1/8-inch larger.

I adhered the largest panel (4 x 5-1/4″) to the card base and then the other two pieces of pattern paper. I trimmed those with some Love From Lizi Pin Stripe Peel-Off Stickers in Red Mirror. I used a large snowman gift tag from the Echo Park’s A Perfect Winter Frames & Tags Ephemera. I matted that with the same Stampin’ Up! Night Of Navy 8-1/2″ X 11″ Cardstock. I added a Lawn Fawn’s Peppermint Twine to the tag and added it to the card with 3M Foam Tape to pop it up. I finished it off with some Nuvo Crystal Drops in Autumn Red.

On the inside of the card, I cut a piece of Neenah 110lb Classic Crest Cardstock 8.5″X11″ to 4 x 5-1/4″ and added a strip of the blue plaid pattern paper measuring 1-1/2 x 5-1/4″. I stamped a greeting from Lawn Fawn’s Merry Messages in Stampin’ Up! Real Red Ink.

Dimensions


For the second card, I used Queen & Company’s sketch for inspiration. I did a portrait version and altered it a bit. For the card base, I cut a piece of Neenah 110lb Classic Crest Cardstock 8.5″X11″ to 5-1/2 x 8-1/2″and scored at 4 1/4″. Then cut the two pieces of pattern paper for the background from the Echo Park – Celebrate Winter Collection 6 x 6 Paper Pad as per the sketch measurements. I added Love From Lizi Pin Stripe Peel-Off Stickers in Red Mirror to the strip in the background. I rounded the corners on all the pieces and adhered them to the card.

I matted the tag with the little girl with some Stampin’ Up!’s Real Red 8-1/2″ X 11″ Cardstock and the sentiment block from Echo Park’s I Love Winter Ephemera Die Cuts with a plaid pattern paper from the Echo Park – Celebrate Winter Collection 6 x 6 Paper Pad. I adhered both to the card flat and added a bow with 1/4″ satin red ribbon. I finished it off with some WHITE BLIZZARD Nuvo Glitter Drops.

On the inside of the card, I added a strip of the mitten pattern paper measuring 1 x 5-1/2″ to the right side of the card. I stamped a greeting from Lawn Fawn’s Merry Messages in Stampin’ Up! Real Red Ink.

Dimensions


For the third card, I used paper Play Sketch 53. For the card base, I cut a piece of Neenah 110lb Classic Crest Cardstock 8.5″X11″ to 5-1/2 x 8-1/2″and scored at 4 1/4″. I cut a piece of Crafter’s Companion Shimmering Cardstock, 6 by 6-Inch, White Pearl to 4 x 5-1/4″. Then cut two pieces of pattern paper from the Echo Park – Celebrate Winter Collection 6 x 6 Paper Pad to 3/4 x 4″ and 1/2 x 4″. I adhered the two pattern pieces together, leaving about 1/4″ of the blue plaid paper exposed. I trimmed those off with Love From Lizi Pin Stripe Peel-Off Stickers in Red Glitter.

I adhered the Snow banner from Echo Park’s I Love Winter Ephemera Die Cuts to the card towards the bottom and then adhered the two strips above that. I trimmed down the sentiment block from one of the cut-apart pages of the Echo Park – Celebrate Winter Collection 6 x 6 Paper Pad and adhered it on an angle to the right side of the card. Trimmed the excess off the edge. I fussycut the snowman from one of the tags from Echo Park’s A Perfect Winter Frames & Tags Ephemera and popped him onto the card using Stampin’ Dimensionals. I finished off the card by adding some WHITE BLIZZARD Nuvo Glitter Drops.

On the inside of the card, I added a strip of the striped pattern paper measuring 3/4 x 4-1/4″ to the right side of the card. I stamped a greeting from Lawn Fawn’s Merry Messages in Stampin’ Up! Real Red Ink.

Dimensions


For the fourth card, I used Queen & Company’s sketch for inspiration. For the card base, I cut a piece of Neenah 110lb Classic Crest Cardstock 8.5″X11″ to 5-1/2 x 8-1/2″and scored at 4 1/4″. I cut a piece of Echo Park – Celebrate Winter Collection 6 x 6 Paper Pad to 4 x 5-1/4″ and a strip in another pattern to to 1 x 5-1/4″. I adhered the two pattern pieces to the card and added some Love From Lizi Sway Peel-Off Stickers in Silver Mirror.

I took the little white bear tag from Echo Park’s A Perfect Winter Frames & Tags Ephemera and adhered him to a piece of Stampin’ Up!’s Real Red 8-1/2″ X 11″ Cardstock which I diecut using a scallop rectangle from the Queen & Company’s Foundation Dies #2. I adhered that to the card and matted the sentiment strip from the same ephemera pack with Neenah 110lb Classic Crest Cardstock 8.5″X11″. I popped up the sentiment using some 3M Foam Tape.

I stamped and diecut 4 snowflakes from the Catherine Pooler Joyful Flakes Stamp Set , 2 using Stampin’ Up!’s Night Of Navy Classic Ink and 2 using Versamark Ink and Simon Says Stamp Silver Embossing Ink onto Neenah 110lb Classic Crest Cardstock 8.5″X11″. I layered two of them together and adhered all the snowflakes to the card, popping up two of them using Stampin’ Dimensionals. I finished off the card with some Nuvo Glitter Drops in Silver Moondust.

On the inside of the card, I stamped 3 snowflakes from Catherine Pooler Joyful Flakes Stamp Set with Stampin’ Up!’s Night Of Navy Classic Ink and a greeting from Lawn Fawn’s Merry Messages in Stampin’ Up! Real Red Ink.

Dimensions


For the fifth card, I used Sunday Sketches SS022. For the card base, I cut a piece of Neenah 110lb Classic Crest Cardstock 8.5″X11″ to 5-1/2 x 8-1/2″and scored at 4 1/4″. I cut a piece of snowman paper from Echo Park – Celebrate Winter Collection 6 x 6 Paper Pad to 3 x 5-1/4″ and matted it with Stampin’ Up! Crumb Cake 8-1/2″ X 11″ Cardstock and another piece of beige fabric weave texture pattern paper to 2 x 4″, matted it with Stampin’ Up! Crumb Cake 8-1/2″ X 11″ Cardstock and adhered both to the card front.

I cut a banner from Stampin’ Up! Real Red 8-1/2″ X 11″ Cardstock to 1/2 x 3-1/2″. I added the banner and circle sentiment diecut from the Echo Park’s A Perfect Winter Frames & Tags Ephemera to the card. I popped up the circle using Stampin’ Dimensionals and fussycut two of the little snowman from the pattern paper and pooped them up as well. I finished off the card with some clear, red and aqua sequins.

On the inside of the card, I cut a strip of the beige fabric weave texture pattern paper to 1″ x 4-1/4″ and the snowman paper 3/4 x 4-1/4″ and adhered them to the bottom of the inside of the card. I stamped a greeting from Lawn Fawn’s Merry Messages in Stampin’ Up! Real Red Ink.

Dimensions


For the sixth card, I cut a piece of Neenah 110lb Classic Crest Cardstock 8.5″X11″ to 5-1/2 x 8-1/2″and scored at 4 1/4″. I cut a piece of blue plaid paper from Echo Park – Celebrate Winter Collection 6 x 6 Paper Pad to 3 x 5-1/4″, a piece of the red tree pattern paper to 2-1/4 x 4″, and a piece of the stripe paper to 3/4 x 4″ and matted that strip with Neenah 110lb Classic Crest Cardstock 8.5″X11″. I added some Love From Lizi Pin Stripe Peel-Off Stickers in Red Glitter to the striped paper and adhered all the pattern paper to the front of the card.

I chose a snowman tag from Echo Park’s A Perfect Winter Frames & Tags Ephemera and Echo Park – I Love Winter Ephemera Die Cuts, matted them with Neenah 110lb Classic Crest Cardstock 8.5″X11″ and adhered them to the card. I found some chipboard snowflakes in my stash and heat embossed them with Versamark Ink and Wow Opaque Bright White Embossing Powder and adhered them to the card. I finished off the card by adding Nuvo – Jewel Drops – Sea Breeze and Nuvo Crystal Drops in Autumn Red

On the inside of the card, I cut a strip of the blue plaid pattern paper to 1″ x 4-1/4″ and adhered them to the bottom of the inside of the card. I stamped a greeting from Lawn Fawn’s Merry Messages in Stampin’ Up! Real Red Ink.

Dimensions


https://linkdeli.com/widget.js?1559654439292

Thanks for reading this post and I hope Iโ€™ve inspired you to give these cards a try on your own. Leave comments or questions below or feel free to email me.